Appendix:HeartGold and SoulSilver walkthrough/Section 13: Difference between revisions
(→6F: Added directions) |
(→8F: Updated directions) |
||
| Line 184: | Line 184: | ||
====8F==== | ====8F==== | ||
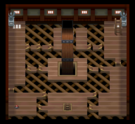
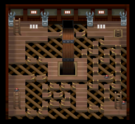
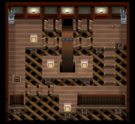
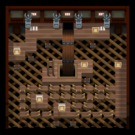
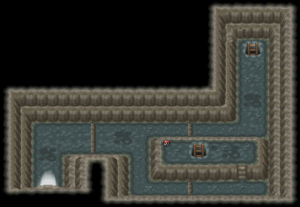
The next warp takes you to the north side of 9F where you can find an {{DL|Vitamin|HP Up}} | The next warp takes you to the north side of 9F where you can find an {{DL|Vitamin|HP Up}}. Continue west and take the second warp tile on 9F, which brings you back to the east side of 8F. Pick up the {{DL|Potion|Full Restore}} to the northwest and take one last warp to the center of 9F. | ||
[[File:Bell Tower 9F HGSS.png|thumb|135px|left|Bell Tower, 9F]] | [[File:Bell Tower 9F HGSS.png|thumb|135px|left|Bell Tower, 9F]] | ||
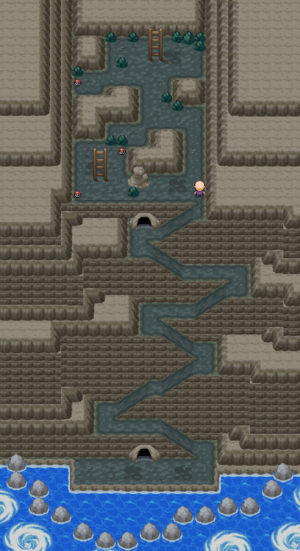
[[File:Bell Tower Summit HGSS.png|thumb|135px|Bell Tower, Rooftop]] | [[File:Bell Tower Summit HGSS.png|thumb|135px|Bell Tower, Rooftop]] | ||
====9F==== | ====9F==== | ||
Climb the stairs to reach the rooftop. | Climb the stairs to reach the rooftop. | ||
Revision as of 01:43, 29 August 2017
These pages follow the remade Nintendo DS iteration, not Pokémon Gold and Silver. The guide for those games can be found here.
New Bark Town
Elm's Lab
Inside Elm's Lab, Lyra/Ethan impressed that you have already earned eight badges. Elm tells you that his research is going great, thanks to you. To show his appreciation, he hands out the Master Ball, a Poké Ball guaranteed to catch any Pokémon, which is normally given only to noted Pokémon researchers. He also mentions that a group of Kimono Girls was looking for you. The group is waiting at the Ecruteak Dance Theater.
Ecruteak City
Ecruteak Dance Theater
As you arrive, Silver is just leaving, still agonizing over his defeat by the Kimono Girls. Inside, you are welcomed by Zuki, the Kimono Girl you met in Violet City. She claims that in order to persuade Ho-OhHG / LugiaSS to return, they needed to find someone who had the right bond with Pokémon. She reveals that it was they who gave the Mystery Egg to Mr. Pokémon, in the hopes that he would give it to someone who showed "true potential". However, that alone is not enough to face the legendary Pokémon, and Zuki presents an opportunity for you to prove yourself by defeating the five sisters in quick succession.
First up is Zuki, from Violet City, and her Umbreon. Second is Naoko, from Ilex Forest, and her Espeon. Third is Miki, from the Dance Theater, and her Flareon. Fourth is Sayo, from Ice Path, and her Jolteon. The final sister is Kuni, from Goldenrod Tunnel, and her Vaporeon.
When all five sisters are defeated, Zuki gives you the Clear BellHG or Tidal BellSS. When combined with the Rainbow WingHG or Silver WingSS, the two items can be used to summon the two legendary birds.
Ho-Oh Descends to the Bell TowerHG
Suddenly, their younger sister enters the building and claims that she just saw the shadow of a big Pokémon over the Bell Tower. The sisters run off, leaving you to follow. Ho-Oh will not let itself be caught easily, so be sure to stock up on your favorite type of Poké Ball. Repels, Escape Ropes, and Pokémon with status-inflicting moves, like Spore or Thunder Wave, are also recommended. Head north from the Dance Theater to reach the Barrier Station. Flash the Fog Badge to reach Bellchime Trail, and step inside the tower.
Bell Tower
As you approach the back of the first floor, the Rainbow Wing suddenly floats up into the air. Seeing the shimmering rainbow feather, the monk finally moves from the ladder.
| Available Pokémon | |||||||||||||||||||||||||||||||||||||||||||||||||||||||||||||||||||||||||||||||||||||||||||||||||||||||||||
|---|---|---|---|---|---|---|---|---|---|---|---|---|---|---|---|---|---|---|---|---|---|---|---|---|---|---|---|---|---|---|---|---|---|---|---|---|---|---|---|---|---|---|---|---|---|---|---|---|---|---|---|---|---|---|---|---|---|---|---|---|---|---|---|---|---|---|---|---|---|---|---|---|---|---|---|---|---|---|---|---|---|---|---|---|---|---|---|---|---|---|---|---|---|---|---|---|---|---|---|---|---|---|---|---|---|---|---|
| |||||||||||||||||||||||||||||||||||||||||||||||||||||||||||||||||||||||||||||||||||||||||||||||||||||||||||
| Items | |||||||||||||||||||||||||||||||||||||||||||||||||||||||||||||||||||||||||||||||||||||||||||||||||||||||||||||||||||||||||||||||||||||||||||||||||||||||||||||||||
|---|---|---|---|---|---|---|---|---|---|---|---|---|---|---|---|---|---|---|---|---|---|---|---|---|---|---|---|---|---|---|---|---|---|---|---|---|---|---|---|---|---|---|---|---|---|---|---|---|---|---|---|---|---|---|---|---|---|---|---|---|---|---|---|---|---|---|---|---|---|---|---|---|---|---|---|---|---|---|---|---|---|---|---|---|---|---|---|---|---|---|---|---|---|---|---|---|---|---|---|---|---|---|---|---|---|---|---|---|---|---|---|---|---|---|---|---|---|---|---|---|---|---|---|---|---|---|---|---|---|---|---|---|---|---|---|---|---|---|---|---|---|---|---|---|---|---|---|---|---|---|---|---|---|---|---|---|---|---|---|---|---|
| |||||||||||||||||||||||||||||||||||||||||||||||||||||||||||||||||||||||||||||||||||||||||||||||||||||||||||||||||||||||||||||||||||||||||||||||||||||||||||||||||
2F
Go south around the column and climb the ladder.
3F
Go west to reach a Full Heal. Move around in an S-shape to reach the northeast stairs.
4F
Jump south, then west and follow the path to find an Ultra Ball. Continue following the path to get a PP Up. Grab the Escape Rope in the southwest, then climb the northwest stairs.
5F
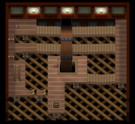
Work your way to the pillar for a Rare Candy. The ramps here keep you from advancing, so take the southeast stairs and backtrack through 4F. As you emerge from the stairs, jump east twice before taking the first ramp south. Next, take the first ramp west and then south. You'll come to a fork with two paths. Take the eastern ramps (closest to the pillar) to reach stairs in the south.
6F
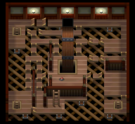
6F has a simple layout that serves as a transition between the ramps on the lower floors and what lies above. The next three floors use a series of warp tiles for quick navigation. First grab the Max Potion, then circle around to the northwest corner to get the Full Heal. Jump the two ramps south and take the stairs up to 7F.
7F
Step on the nearest warp tile to reach the pillar, and take the next to reach the east wall of 9F. There are two warp tiles to the south; the right one leads to the center of 8F and a Max Elixir, while the left one leads to the south side of 8F and a Nugget. Backtrack to the first warp on 7F, grab the Max Revive to the northeast, and go south to take the next warp to the west side of 8F.
8F
The next warp takes you to the north side of 9F where you can find an HP Up. Continue west and take the second warp tile on 9F, which brings you back to the east side of 8F. Pick up the Full Restore to the northwest and take one last warp to the center of 9F.
9F
Climb the stairs to reach the rooftop.
Rooftop
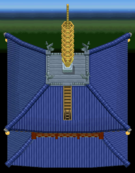
Climb the golden stairway to reach the tower's rooftop, where the Kimono Girls are waiting for you. Zuki tells you that once their mystical dance combines with the sound of the Clear Bell, Ho-Oh will return from the great arch of the sky once more. The Clear Bell floats up above you, and the sisters begin their dance. The four other bells, each hanging from a different corner of the roof, also activate. As if drawn by the peal of the bells, Ho-Oh appears and descends to the tower.
SoulSilver players are unable to challenge Ho-Oh until after obtaining the Rainbow Wing in Pewter City. The Clear Bell is not required.
Ho-Oh
Start off by using status-inflicting moves, like Spore or Thunder Wave, to wear it down. Follow up with Water- or Electric-type attacks to inflict double the damage. Use caution with Rock-type attacks, as Ho-Oh takes four times the normal damage from such moves. Then slowly chip away at its remaining health with Fire-, Grass-, Fighting-, Bug-, or Steel-type attacks, as moves of these types only inflict half- or quarter-damage. If you happen to knock it out, it will reappear once you have entered the Hall of Fame.
| ||||||||||||||||||||||||||||||||||||
Lugia Emerges from the Waterfall BasinSS
Suddenly, their younger sister enters the building and claims that she just saw the shadow of a big Pokémon in the Whirl Islands' waters. The sisters run off, leaving you to follow. Lugia will not let itself be caught easily, so be sure to stock up on your favorite type of Poké Ball. Repels, Escape Ropes, and Pokémon with status-inflicting moves, like Spore or Thunder Wave, are also recommended. Fly back to Olivine or Cianwood and sail out into the ocean. Surf and Whirlpool are required to fully explore the islands' underwater cave network; Strength and Flash are helpful, but not necessary.
Whirl Islands
There are many items to be found throughout the caves, but if you are only looking for Lugia, start with the northeast island.
| Available Pokémon | |||||||||||||||||||||||||||||||||||||||||||||||||||||||||||||||||||||||||||||||||||||||||||||||||||||||||||||||||||||||||||||||||||||||||||||||||||||||||||||||||||||||||||||||||||||||||||||||||||||||||||||||||||||||||||||||||||||||||||||||||||||||||||||||||||||||||||||||||||||||||||||||||||||||||||||||||||||||||||||||||||||||||||||||||||||||||||||||||||||||||||||||||||||||||||||||||||||||||||||||||||||||||||||||||||||||||||||||||||||||||||||||||||||||||||||||||||||||||||||||||||||||||||||||||||||||||||||||||||||||||||||||||||||||||||||||||||||||||||||||||||||||||||||||||||||||||||||||||||
|---|---|---|---|---|---|---|---|---|---|---|---|---|---|---|---|---|---|---|---|---|---|---|---|---|---|---|---|---|---|---|---|---|---|---|---|---|---|---|---|---|---|---|---|---|---|---|---|---|---|---|---|---|---|---|---|---|---|---|---|---|---|---|---|---|---|---|---|---|---|---|---|---|---|---|---|---|---|---|---|---|---|---|---|---|---|---|---|---|---|---|---|---|---|---|---|---|---|---|---|---|---|---|---|---|---|---|---|---|---|---|---|---|---|---|---|---|---|---|---|---|---|---|---|---|---|---|---|---|---|---|---|---|---|---|---|---|---|---|---|---|---|---|---|---|---|---|---|---|---|---|---|---|---|---|---|---|---|---|---|---|---|---|---|---|---|---|---|---|---|---|---|---|---|---|---|---|---|---|---|---|---|---|---|---|---|---|---|---|---|---|---|---|---|---|---|---|---|---|---|---|---|---|---|---|---|---|---|---|---|---|---|---|---|---|---|---|---|---|---|---|---|---|---|---|---|---|---|---|---|---|---|---|---|---|---|---|---|---|---|---|---|---|---|---|---|---|---|---|---|---|---|---|---|---|---|---|---|---|---|---|---|---|---|---|---|---|---|---|---|---|---|---|---|---|---|---|---|---|---|---|---|---|---|---|---|---|---|---|---|---|---|---|---|---|---|---|---|---|---|---|---|---|---|---|---|---|---|---|---|---|---|---|---|---|---|---|---|---|---|---|---|---|---|---|---|---|---|---|---|---|---|---|---|---|---|---|---|---|---|---|---|---|---|---|---|---|---|---|---|---|---|---|---|---|---|---|---|---|---|---|---|---|---|---|---|---|---|---|---|---|---|---|---|---|---|---|---|---|---|---|---|---|---|---|---|---|---|---|---|---|---|---|---|---|---|---|---|---|---|---|---|---|---|---|---|---|---|---|---|---|---|---|---|---|---|---|---|---|---|---|---|---|---|---|---|---|---|---|---|---|---|---|---|---|---|---|---|---|---|---|---|---|---|---|---|---|---|---|---|---|---|---|---|---|---|---|---|---|---|---|---|---|---|---|---|---|---|---|---|---|---|---|---|---|---|---|---|---|---|---|---|---|---|---|---|---|---|---|---|---|---|---|---|---|---|---|---|---|---|---|---|---|---|---|---|---|---|---|---|---|---|---|---|---|---|---|---|---|---|---|---|---|---|---|---|---|---|---|---|---|---|---|---|---|---|---|---|---|---|---|---|---|---|---|---|---|---|---|---|---|---|---|---|---|---|---|---|---|---|---|---|---|---|---|---|---|---|---|---|---|---|---|---|---|---|---|---|---|---|---|---|---|---|---|---|---|---|---|---|---|---|---|---|---|---|
| |||||||||||||||||||||||||||||||||||||||||||||||||||||||||||||||||||||||||||||||||||||||||||||||||||||||||||||||||||||||||||||||||||||||||||||||||||||||||||||||||||||||||||||||||||||||||||||||||||||||||||||||||||||||||||||||||||||||||||||||||||||||||||||||||||||||||||||||||||||||||||||||||||||||||||||||||||||||||||||||||||||||||||||||||||||||||||||||||||||||||||||||||||||||||||||||||||||||||||||||||||||||||||||||||||||||||||||||||||||||||||||||||||||||||||||||||||||||||||||||||||||||||||||||||||||||||||||||||||||||||||||||||||||||||||||||||||||||||||||||||||||||||||||||||||||||||||||||||||
| Items | |||||||||||||||||||||||||||||||||||||||||||||||||||||||||||||||||||||||||||||||||||||||||||||||||||||||||||||||||||||||||||||||||||||||||||||||||||||||
|---|---|---|---|---|---|---|---|---|---|---|---|---|---|---|---|---|---|---|---|---|---|---|---|---|---|---|---|---|---|---|---|---|---|---|---|---|---|---|---|---|---|---|---|---|---|---|---|---|---|---|---|---|---|---|---|---|---|---|---|---|---|---|---|---|---|---|---|---|---|---|---|---|---|---|---|---|---|---|---|---|---|---|---|---|---|---|---|---|---|---|---|---|---|---|---|---|---|---|---|---|---|---|---|---|---|---|---|---|---|---|---|---|---|---|---|---|---|---|---|---|---|---|---|---|---|---|---|---|---|---|---|---|---|---|---|---|---|---|---|---|---|---|---|---|---|---|---|---|---|---|---|
| |||||||||||||||||||||||||||||||||||||||||||||||||||||||||||||||||||||||||||||||||||||||||||||||||||||||||||||||||||||||||||||||||||||||||||||||||||||||
Northwest Island
Step inside the cave, and take the ladder to the floor below.
Walk down the stairway to reach a hidden Pearl to the northeast, and a Full Restore to the south. Jump the ledge and climb the stairway to the east in order to reach a Nugget and a hidden Super Repel. Head east and jump the two ledges to reach a ladder; this leads to a dead-end with an Ultra Ball. Go south, jump another ledge, and backtrack to the first ladder in the northwest corner. Head south along the upper level to reach a Carbos, and climb down the ladder to the southeast.
Grab the Max Elixir and Full Restore from this dead-end area, then use an Escape Rope to exit the cave.
Northeast Island
Walk east, jump the ledge, and take the northern path to reach the next part of the main cavern.
Follow the rock platform southward, collect the hidden Revive, and climb down the ladder to B2F.
Inspect the north wall for a hidden Full Restore, then grab the Max Revive to the west. Speak with the monk, and the Silver Wing suddenly floats up into the air. When he sees the shimmering silver feather, the monk allows you to pass. Step through the archway just south of him to reach a Rare Candy. Continue the climb down the cliffside to reach another archway, where your lead Pokémon retreats into its Poké Ball.
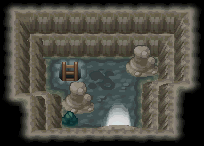
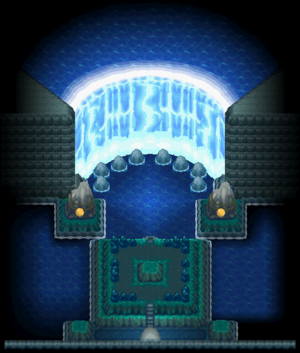
Step inside the waterfall chamber and climb onto the platform, where you find the Kimono Girls waiting for you. Zuki tells you that once their mystical dance combines with the sound of the Tidal Bell, Lugia will emerge from the waterfall basin once more. The Tidal Bell floats up above you, and the sisters begin their dance. The two other bells, fastened on either side of the waterfall, also activate. As if drawn by the peal of the bells, Lugia emerges from behind the waterfall.
HeartGold players are unable to challenge Lugia until after obtaining the Silver Wing in Pewter City. The Tidal Bell is not required.
Lugia
Start off by using status-inflicting moves, like Spore or Thunder Wave, to wear it down. Follow up with Rock-, Ghost-, Electric-, Ice-, or Dark-type attacks to inflict double the damage. Then slowly chip away at its remaining health with Fighting-, Grass-, or Psychic-type attacks, as moves of these types inflict only half- or quarter-damage. If you happen to knock it out, it will reappear once you have entered the Hall of Fame.
| ||||||||||||||||||||||||||||||||||||
Southeast Island
Check the northwest corner for a hidden Rare Candy, then take the ladder down to the main cavern.
Head north along the rock ledge to find a Calcium. Go down the stairway and loop around to the west. Search near the south-central ladder for a hidden Ultra Ball, then move the nearby boulder northward. Head west to reach an Escape Rope, then climb the southwest ladder.
Detour across the pool of water to the east to collect another Ultra Ball, then take the exit to emerge on the southwest island.
Southwest Island
The only items accessible from the southwest island are the Escape Rope and the Calcium, both of which would have been collected already.
|
HeartGold and SoulSilver walkthrough |
|

|
This article is part of Project Walkthroughs, a Bulbapedia project that aims to write comprehensive step-by-step guides on each Pokémon game. |


