Jubilife Village: Difference between revisions
m (→Folk shrine: adding colour names) |
Storm Aurora (talk | contribs) m (→Pokémon: field is not a valid color template) |
||
| (42 intermediate revisions by 15 users not shown) | |||
| Line 12: | Line 12: | ||
|mapsize=250px | |mapsize=250px | ||
}} | }} | ||
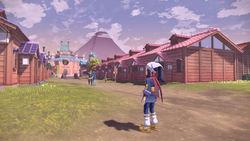
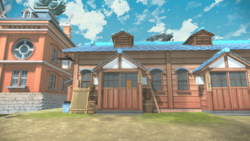
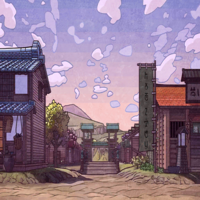
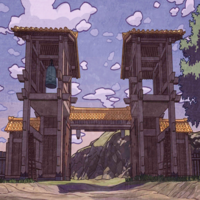
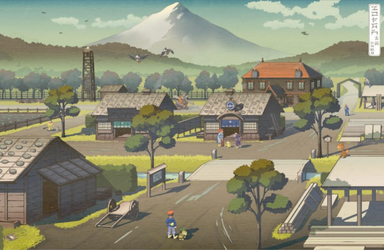
'''Jubilife Village''' (Japanese: '''コトブキムラ''' ''Kotobuki Village'') is a village in the [[Hisui]] [[region]] that was constructed by the [[Galaxy Team|Galaxy Expedition Team]]. It lies to the west of the [[Obsidian Fieldlands]] and the [[Cobalt Coastlands]] on a section of Hisui's western shore. At the time of the arrival of the [[Player character|strange visitor]], the village had only been established for two years | '''Jubilife Village''' (Japanese: '''コトブキムラ''' ''Kotobuki Village'') is a village in the [[Hisui]] [[region]] that was constructed by the [[Galaxy Team|Galaxy Expedition Team]]. It lies to the west of the [[Obsidian Fieldlands]] and the [[Cobalt Coastlands]] on a section of Hisui's western shore. At the time of the arrival of the [[Player character|strange visitor]], the village had only been established for two years. | ||
In the present day, it has grown to be one of the largest cities in [[Sinnoh]], known now as [[Jubilife City]]. | In the present day, it has grown to be one of the largest cities in [[Sinnoh]], known now as [[Jubilife City]]. | ||
All {{p|Burmy}} that {{pkmn|battle}} here will turn into their Plant Cloak [[List of Pokémon with form differences#Burmy and Wormadam|form]]. | |||
==Sublocations== | ==Sublocations== | ||
===Prelude Beach=== | ===Prelude Beach=== | ||
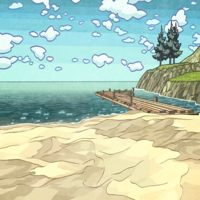
Prelude Beach is a small beach southwest of the seaside gate. The area consists of a small | Prelude Beach is a small beach southwest of the seaside gate of Jubilife Village. The area consists of a small shoreline, with an old pier that has a wooden boat docked. There is an inaccessible hut with two barrels to its side. Prelude Beach is where visitors from other [[region]]s are dropped off to start their new life in Jubilife Village, as witnessed during [[Task#Missions|Mission]] 9: "A New Mission". | ||
The player wakes up here at the start of the game, having fallen from a [[space-time distortion|space-time rift]], after which they meet [[Professor Laventon]]. The player's cell phone, which has transformed into the [[Arc Phone]] by {{ | The player wakes up here at the start of the game, having fallen from a [[space-time distortion|space-time rift]], after which they meet [[Professor Laventon]]. The player's cell phone, which has transformed into the [[Arc Phone]] by {{ga|Arceus}}, is found lying on the ground here after meeting Laventon. | ||
The player returns here during Mission 25: "The Plate of Prelude Beach" to fight against Commander [[Kamado]] and receive the [[Fist Plate]]. | The player returns here during Mission 25: "The Plate of Prelude Beach" to fight against Commander [[Kamado]] and receive the [[Fist Plate]] if victorious. | ||
===Practice field=== | ===Practice field=== | ||
The practice field is a small field southeast of the seaside gate that connects to Prelude Beach. After meeting Professor Laventon, his three [[ | The practice field is a small field southeast of the seaside gate that connects to Prelude Beach. After meeting Professor Laventon, his three [[first partner Pokémon]] run away and disperse throughout the practice field. | ||
Professor Laventon asks the player to help him catch the escaped Pokémon, giving them 50 | Professor Laventon asks the player to help him catch the escaped Pokémon, giving them 50 {{hi|Poké Ball}}s to do so; if they run out, he gives them 10 more. This event functions as a catching tutorial, where the player has to catch all three of the first partner Pokémon. The first two Pokémon are automatically caught with the first successful throw, while the last one will break out from the first ball that hits it; the third Pokémon will be automatically caught with the second throw. The player does not get to keep the Poké Balls or caught Pokémon at the end of the tutorial. | ||
====Balloon minigame==== | ====Balloon minigame==== | ||
{{incomplete|section|Bonus points and reward thresholds}} | {{incomplete|section|Bonus points and reward thresholds}} | ||
[[Task#Requests|Request]] 26: "Aim for the Big Leagues!" unlocks a minigame on | [[Task#Requests|Request]] 26: "Aim for the Big Leagues!" unlocks a minigame on the practice field, hosted by Taggart. The player is given one minute and unlimited Poké Balls to pop as many {{p|Drifloon}} balloons as they can. Purple balloons give 100 points, while yellow balloons give 200 points; multiple pops per throw give bonus points. | ||
Players earn one of the following rewards for earning points in a minigame: [[Ball of Mud]], [[Nugget]], {{hi|Great Ball}}, {{hi|Ultra Ball}}, [[Wing Ball]], [[Leaden Ball]], [[Scatter Bang]], [[Smoke Bomb]], [[Sticky Glob]]. | |||
===Canala Avenue=== | ===Canala Avenue=== | ||
[[File:Jubilife Village LA.png|thumb|250px|Canala Avenue]] | [[File:Jubilife Village LA.png|thumb|250px|Canala Avenue]] | ||
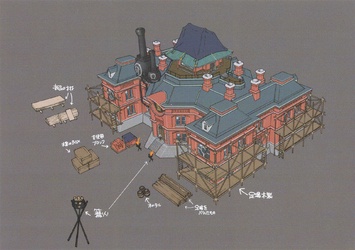
Canala Avenue, named after Canala of the [[Galaxy Team]]'s Construction Corps, is a major road running north-to-south through the middle of town from the seaside gate to Canala Bridge. It is a residential street, lined with houses on both sides. Crossing the | Canala Avenue, named after Canala of the [[Galaxy Team]]'s Construction Corps, is a major road running north-to-south through the middle of town from the seaside gate to Canala Bridge. It is a residential street, lined with houses on both sides. Crossing the Milkiwa River via Canala Bridge leads to Floaro Main Street, right across from [[Galaxy Hall]]. | ||
===Pastures=== | ===Pastures=== | ||
{{main|Pastures}} | {{main|Pastures}} | ||
The village pastures are located on the east side of town. They are run by Marie. The pastures' services become available to the player once they complete Mission 2: "The Galaxy Team's Entry Trial". | The village pastures are located on the east side of town. They are run by Marie. The pastures' services become available to the player once they complete [[Task#Missions|Mission]] 2: "The Galaxy Team's Entry Trial". | ||
The pastures | The pastures store the player's Pokémon that are not in their [[party]], the equivalent of the [[Pokémon Storage System]] in other Pokémon games. 8 pastures are available at first, each containing 30 slots for Pokémon, and as many as 32 pastures in total can be unlocked as pastures completely fill up and story events are completed. | ||
===Farm=== | ===Farm=== | ||
The farm is located on the western side of the village. It is managed by [[Colza]], with the fields tilled by Miller and tended by Leif. The farm's services become available to the player once they complete [[Task#Missions|Mission]] 2: "The Galaxy Team's Entry Trial". | |||
The farm is located on the western side of | |||
At the farm, the player can pay for one of several harvests. The harvest will | At the farm, the player can pay for one of several harvests. The harvest will develop as the player catches Pokémon on an expedition, and the number of Pokémon to catch for the harvest to fully develop depends on the type of harvest chosen. More types of harvests become available after certain requests are completed. The yields for a harvest are determined immediately after selecting and paying for one. Occasionally, a harvest will yield extra items than usual, which are termed "bumper crops". | ||
{| class="roundy sortable" style=" | {| class="roundy sortable" style="background: #{{hisui color}}; border: 3px solid #{{hisui color dark}}; text-align:center" | ||
! Harvest | |- style="background-color:#{{hisui color light}}" | ||
! Cost | ! style="{{roundytl|5px}}" rowspan=2 | Harvest | ||
! Possible Rewards | ! rowspan=2 | Cost | ||
! | ! colspan=2 | Possible Rewards | ||
! | ! style="{{roundytr|5px}}" colspan=2 | Requirements | ||
|- style="background-color:#{{hisui color light}}" | |||
! Regular Crops | |||
! Bumper Crops | |||
! Request Completed | |||
! Pokémon Caught | |||
|- style="background:#fff" | |- style="background:#fff" | ||
| Apricorn | | Apricorn | ||
| {{PDollar}}500 | | {{PDollar}}500 | ||
| {{Bag/s|Apricorn|LA}} {{i|Apricorn}} ×32-33 | | {{Bag/s|Apricorn|LA|Apricorn (item)}} {{i|Apricorn}} ×32-33 | ||
| {{Bag/s|Spoiled Apricorn|LA}} [[Spoiled Apricorn]] ×0-13 | |||
| Available from beginning | | Available from beginning | ||
| 8 | | 8 | ||
|- style="background:#fff" | |- style="background:#fff" | ||
| Medicinal | | Medicinal | ||
| {{PDollar}}1,000 | | {{PDollar}}1,000 | ||
| {{Bag/s|Pep-Up Plant|LA}} [[Pep-Up Plant]] ×0-2<br>{{Bag/s|Bugwort|LA}} [[Bugwort]] ×4-8<br>{{Bag/s|Vivichoke|LA}} [[Vivichoke]] ×2-12<br>{{Bag/s|Medicinal Leek|LA}} [[Medicinal Leek]] ×0-4 | | {{Bag/s|Pep-Up Plant|LA}} [[Pep-Up Plant]] ×0-2<br>{{Bag/s|Bugwort|LA}} [[Bugwort]] ×4-8<br>{{Bag/s|Vivichoke|LA}} [[Vivichoke]] ×2-12<br>{{Bag/s|Medicinal Leek|LA}} [[Medicinal Leek]] ×0-4 | ||
| {{Bag/s|King's Leaf|LA}} [[King's Leaf]] ×0-4 | |||
| Available from beginning | | Available from beginning | ||
| 8 | | 8 | ||
|- style="background:#fff" | |- style="background:#fff" | ||
| Vegetable | | Vegetable | ||
| {{PDollar}}1,500 | | {{PDollar}}1,500 | ||
| {{Bag/s|Caster Fern|LA}} [[Caster Fern]] ×2-4<br>{{Bag/s|Sootfoot Root|LA}} [[Sootfoot Root]] ×2-8<br>{{Bag/s|Plump Beans|LA}} [[Plump Beans]] ×0-8<br>{{Bag/s|Hearty Grains|LA}} [[Hearty Grains]] ×0-4<br>{{Bag/s|Sand Radish|LA}} [[Sand Radish]] ×0-4 | | {{Bag/s|Caster Fern|LA}} [[Caster Fern]] ×2-4<br>{{Bag/s|Sootfoot Root|LA}} [[Sootfoot Root]] ×2-8<br>{{Bag/s|Plump Beans|LA}} [[Plump Beans]] ×0-8<br>{{Bag/s|Hearty Grains|LA}} [[Hearty Grains]] ×0-4<br>{{Bag/s|Sand Radish|LA}} [[Sand Radish]] ×0-4 | ||
| | | | ||
| Request 27: "Help Wanted: Plowing the Fields" | |||
| 11 | | 11 | ||
|- style="background:#fff" | |- style="background:#fff" | ||
| Mushroom | | Mushroom | ||
| {{PDollar}}2,000 | | {{PDollar}}2,000 | ||
| {{Bag/s|Doppel Bonnets|LA}} [[Doppel Bonnets]] ×0-4<br>{{Bag/s|Candy Truffle|LA}} [[Candy Truffle]] ×0-8<br>{{Bag/s|Springy Mushroom|LA}} [[Springy Mushroom]] ×0-8<br>{{Bag/s|Direshroom|LA}} [[Direshroom]] ×0-4<br>{{Bag/s|Swordcap|LA}} [[Swordcap]] ×0-4<br>{{Bag/s|Iron Barktongue|LA}} [[Iron Barktongue]] ×0-8 | | {{Bag/s|Doppel Bonnets|LA}} [[Doppel Bonnets]] ×0-4<br>{{Bag/s|Candy Truffle|LA}} [[Candy Truffle]] ×0-8<br>{{Bag/s|Springy Mushroom|LA}} [[Springy Mushroom]] ×0-8<br>{{Bag/s|Direshroom|LA}} [[Direshroom]] ×0-4<br>{{Bag/s|Swordcap|LA}} [[Swordcap]] ×0-4<br>{{Bag/s|Iron Barktongue|LA}} [[Iron Barktongue]] ×0-8 | ||
| | | | ||
| Request 27: "Help Wanted: Plowing the Fields" | |||
| 11 | | 11 | ||
|- style="background:#fff" | |- style="background:#fff" | ||
| | | Berry (usual) | ||
| {{PDollar}}3,000 | | {{PDollar}}3,000 | ||
| {{Bag/s|Hopo Berry|LA}} [[Hopo Berry]] ×0-2<br>{{Bag/s|Pinap Berry|LA}} [[Pinap Berry]] ×0-6<br>{{Bag/s|Nanab Berry|LA}} [[Nanab Berry]] ×0-4<br>{{Bag/s|Razz Berry|LA}} [[Razz Berry]] ×2-4<br>{{Bag/s|Leppa Berry|LA}} [[Leppa Berry]] ×0-2 | | {{Bag/s|Oran Berry|LA}} [[Oran Berry]] ×0-2<br>{{Bag/s|Hopo Berry|LA}} [[Hopo Berry]] ×0-2<br>{{Bag/s|Pinap Berry|LA}} [[Pinap Berry]] ×0-6<br>{{Bag/s|Nanab Berry|LA}} [[Nanab Berry]] ×0-4<br>{{Bag/s|Razz Berry|LA}} [[Razz Berry]] ×2-4<br>{{Bag/s|Leppa Berry|LA}} [[Leppa Berry]] ×0-2 | ||
| | | {{Bag/s|Lum Berry|LA}} [[Lum Berry]] ×0-4<br>{{Bag/s|Sitrus Berry|LA}} [[Sitrus Berry]] ×0-2 | ||
| Request 42: "Help Wanted: Watering the Fields" | |||
| 14 | | 14 | ||
|- style="background:#fff" | |- style="background:#fff" | ||
| | | Berry (special)<!--Up to 12 if the harvest is generous (in which case, only 2 types of berries are harvested)--> | ||
| {{PDollar}}20,000 | | {{PDollar}}20,000 | ||
| {{Bag/s|Figy Berry|LA}} [[Figy Berry]] ×0-12<br>{{Bag/s|Mago Berry|LA}} [[Mago Berry]] ×0-12<br>{{Bag/s|Iapapa Berry|LA}} [[Iapapa Berry]] ×0-12<br>{{Bag/s|Wiki Berry|LA}} [[Wiki Berry]] ×0-12 | | {{Bag/s|Figy Berry|LA}} [[Figy Berry]] ×0-12<br>{{Bag/s|Mago Berry|LA}} [[Mago Berry]] ×0-12<br>{{Bag/s|Iapapa Berry|LA}} [[Iapapa Berry]] ×0-12<br>{{Bag/s|Wiki Berry|LA}} [[Wiki Berry]] ×0-12 | ||
| | | {{Bag/s|Aguav Berry|LA}} [[Aguav Berry]] ×0-12 | ||
| Request 102: "Daybreak" | |||
| 14 | | 14 | ||
|- style="background:#fff" | |- style="background:#fff" | ||
| Mint | | style="{{roundybl|5px}}" | Mint | ||
| {{PDollar}}10,000 | | {{PDollar}}10,000 | ||
| {{Bag/s|Timid Mint|LA}} Any [[Mint]] ×3-6 | | {{Bag/s|Timid Mint|LA}} Any [[Mint]] ×3-6 | ||
| | | | ||
| | | Request 60: "Help Wanted: Rock Smashing in the Fields" | ||
| style="{{roundybr|5px}}" | 20 | |||
|} | |} | ||
===Floaro Main Street=== | ===Floaro Main Street=== | ||
Floaro Main Street, named after Floaro of the Construction Corps, is a major road running east-to-west at the north end of Jubilife Village. It contains a wide variety of merchants, as well as | Floaro Main Street, named after Floaro of the Construction Corps, is a major road running east-to-west at the north end of Jubilife Village. It contains a wide variety of merchants, as well as Galaxy Hall. This is also the street where the {{player}}'s housing is located. | ||
====Galaxy Hall==== | ====Galaxy Hall==== | ||
{{main|Galaxy Hall}} | {{main|Galaxy Hall}} | ||
Galaxy Hall is a three-story building that serves as the headquarters of the [[Galaxy Team]]. It contains offices of the Galaxy Team's Supply Corps, Medical Corps, Construction Corps, Security Corps, and Agriculture Corps, as well as of Commander [[Kamado]]. [[Professor Laventon]]'s office is also found here, containing the [[Task#Requests|request]] board. This is where the player chooses their [[ | Galaxy Hall is a three-story building that serves as the headquarters of the [[Galaxy Team]]. It contains offices of the Galaxy Team's Supply Corps, Medical Corps, Construction Corps, Security Corps, and Agriculture Corps, as well as of Commander [[Kamado]]. [[Professor Laventon]]'s office is also found here, containing the [[Task#Requests|request]] board. This is where the player chooses their [[first partner Pokémon]], during [[Task#Missions|Mission]] 2: "The Galaxy Team's Entry Trial". | ||
====Candy | ====Candy stand==== | ||
The candy stand is run by Bonn. He sets up shop in front of Galaxy Hall. He sells different types of Exp. Candy. | The candy stand is run by Bonn. He sets up shop in front of Galaxy Hall. He sells different types of [[Exp. Candy]]. | ||
{{shop|Candy Shop}} | {{shop|Candy Shop}} | ||
| Line 115: | Line 130: | ||
====Trading post==== | ====Trading post==== | ||
The trading post is run by Simona. It becomes available to the player once they attain the [[Rank (Galaxy Team)|First Star]] | The trading post is run by Simona. It becomes available to the player once they attain the [[Rank (Galaxy Team)|First Star rank]]. The trading post allows the player to exchange [[Merit Point]]s for [[item]]s, and allows players to [[trade]] Pokémon with other players. | ||
{{shop|Merit Point exchange}} | {{shop|Merit Point exchange}} | ||
| Line 133: | Line 148: | ||
====Craftworks==== | ====Craftworks==== | ||
The | The craftworks is run by Anvin. It becomes available to the player once they complete [[Task#Missions|Mission]] 3: "The Basics of Crafting". A [[crafting]] bench is located here for the player to use. Anvin sells crafting materials and recipes, and newer merchandise becomes available after making progress in the main story. | ||
{{shop|Crafting materials}} | {{shop|Crafting materials}} | ||
| Line 157: | Line 172: | ||
====The Wallflower==== | ====The Wallflower==== | ||
The '''Wallflower''' | The '''Wallflower''' (Japanese: '''イモヅル亭''' ''Imozuru Restaurant'') is the Galaxy Expedition Team's canteen run by [[Beni]]. It is well-known for its potato {{wp|mochi}}. The {{player}}, {{ga|Rei}} (if the player is female) or {{ga|Akari}} (if the player is male), and [[Professor Laventon]] meet here after missions to eat. Beni is usually seen standing in front, ready to buy [[Sootfoot Root]]s from the player for {{pdollar}}100 each. | ||
====General store==== | ====General store==== | ||
The general store is run by [[Choy]]. It becomes available to the player once they complete Mission 2: "The Galaxy Team's Entry Trial". At the beginning, the store has little to offer, but Choy expands its inventory as the player completes a series of side quests that involve collecting various items for [[Tao Hua]], the captain of the Supply Corps. The same items available at the general store can also be purchased at [[base camp]]s. | The general store is run by [[Choy]]. It becomes available to the player once they complete [[Task#Missions|Mission]] 2: "The Galaxy Team's Entry Trial". At the beginning, the store has little to offer, but Choy expands its inventory as the player completes a series of side quests that involve collecting various items for [[Tao Hua]], the captain of the Supply Corps. The same items available at the general store can also be purchased at [[base camp]]s. | ||
After completing all of Choy's requests, the shop | After completing all of Choy's requests, the shop is labeled on the map as the First-Rate General Store. | ||
{{shop|General Store}} | {{shop|General Store}} | ||
| Line 189: | Line 204: | ||
====Ginkgo Guild cart==== | ====Ginkgo Guild cart==== | ||
The [[Ginkgo Guild]] cart is run by Ginkgo Guild members [[Ginter]] and [[Tuli]]. They arrive in Jubilife Village and set up shop between the Galaxy Hall and the player's quarters after the player completes [[Task#Missions|Mission]] 7: "The Frenzy of the Lord of the Woods". More [[item]]s are added to the stock as the player completes more missions. | |||
The Ginkgo Guild cart is run by [[Ginter]] and [[Tuli]]. They | |||
=====Ginter===== | =====Ginter===== | ||
Ginter behaves differently from most shopkeepers. Ginter will not buy items from the player, and will only offer a random assortment of items through a dialogue menu instead of a store menu. He | {{incomplete|section|needs=Missing conditions for items, chances to appear, etc. See [https://docs.google.com/spreadsheets/d/e/2PACX-1vRC_ayQbcHtEmTrgqeZ5lUIxA2_recVmqUAKxVqMaHoJWW0Pm6IxnjiMJbdo-mQzSH8uBxsZgpUoeCS/pubhtml this] document for details}} | ||
[[Ginter]] behaves differently from most shopkeepers.<ref>https://docs.google.com/spreadsheets/d/e/2PACX-1vRC_ayQbcHtEmTrgqeZ5lUIxA2_recVmqUAKxVqMaHoJWW0Pm6IxnjiMJbdo-mQzSH8uBxsZgpUoeCS/pubhtml</ref> Ginter will not buy items from the player, and will only offer a random assortment of items through a dialogue menu instead of a store menu. He often sells items in sets with a bulk discount compared to normal shopkeepers. He will also offer the player items that cannot be bought from anyone else, although he will not tell the player explicitly what the item is and will instead give it a vague description. Eventually, Ginter will also offer unique items that can only be purchased once. Ginter will change his offerings every time the player catches 20 Pokémon. Once an item is purchased from Ginter, he will not sell that product again until his store refreshes. Ginter will offer the player up to three different items (only a single ware before version 1.1.0). | |||
{| | |||
{| class="roundy" style="background: #{{ | | | ||
! Item | {| class="roundy" style="background: #{{hisui color}}; border: 3px solid #{{hisui color dark}}" | ||
|+ '''Item Sets''' | |||
|- style="background-color:#{{hisui color light}}" | |||
! style="{{roundytl|5px}}" | Item | |||
! Quantity | ! Quantity | ||
! Cost | ! style="{{roundytr|5px}}" | Cost | ||
|- style="background:#fff" | |- style="background:#fff" | ||
| {{Bag/s|Stealth Spray|LA}} [[Stealth Spray]] | | {{Bag/s|Stealth Spray|LA}} [[Stealth Spray]] | ||
| Line 289: | Line 307: | ||
| {{PDollar}}2,000 | | {{PDollar}}2,000 | ||
|- style="background:#fff" | |- style="background:#fff" | ||
| {{Bag/s|Scatter Bang|LA}} [[Scatter Bang]] | | style="{{roundybl|5px}}" | {{Bag/s|Scatter Bang|LA}} [[Scatter Bang]] | ||
| 10 | | 10 | ||
| {{PDollar}}2,500 | | style="{{roundybr|5px}}" | {{PDollar}}2,500 | ||
|} | |} | ||
| | |||
{| class="roundy" style="background: #{{hisui color}}; border: 3px solid #{{hisui color dark}}" | |||
|+ '''Evolution Items''' | |||
{| class="roundy" style="background: #{{ | |- style="background-color:#{{hisui color light}}" | ||
! Item | ! style="{{roundytl|5px}}" | Item | ||
! Quantity | ! Quantity | ||
! Cost | ! style="{{roundytr|5px}}" | Cost | ||
|- style="background:#fff" | |- style="background:#fff" | ||
| {{Bag/s|Oval Stone|LA}} [[Oval Stone|'''Oval Stone''' "Egg-Like Rock"]] | | {{Bag/s|Oval Stone|LA}} [[Oval Stone|'''Oval Stone''' "Egg-Like Rock"]] | ||
| Line 389: | Line 407: | ||
| {{PDollar}}10,000 | | {{PDollar}}10,000 | ||
|- style="background:#fff" | |- style="background:#fff" | ||
| {{Bag/s|Peat Block|LA}} [[Peat Block|'''Peat Block''' "Hunk of Coal"]] | | style="{{roundybl|5px}}" | {{Bag/s|Peat Block|LA}} [[Peat Block|'''Peat Block''' "Hunk of Coal"]] | ||
| 1 | | 1 | ||
| {{PDollar}}10,000 | | style="{{roundybr|5px}}" | {{PDollar}}10,000 | ||
|} | |||
|} | |} | ||
======Single Time Purchases====== | ======Single-Time Purchases====== | ||
Single-time purchase items are sent to the | Single-time purchase items are sent to the player's home. They do not appear in Ginter's item rotation once bought. The five mechanical items sold by Ginter are used to change {{p|Rotom}} into one of its many {{form|Rotom|forms}}. They may be sold to the player in any order, starting from {{PDollar}}20,000, and increasing by {{PDollar}}20,000 each time until capping at {{PDollar}}100,000. | ||
{| class="roundy" style="background: #{{ | |||
|- | {| class="roundy" style="background: #{{hisui color}}; border: 3px solid #{{hisui color dark}}" | ||
! Name !! Item !! Item Type/Use !! Price | |- style="background-color:#{{hisui color light}}" | ||
! style="{{roundytl|5px}}" | Name !! Item !! Item Type/Use !! style="{{roundytr|5px}}" | Price | |||
|- style="background:#fff" | |- style="background:#fff" | ||
| Mechanical Circular Saw || Lawn Mower || Turns [[Rotom]] into Mow Rotom || {{PDollar}}20,000-{{PDollar}}100,000 | | Mechanical Circular Saw || Lawn Mower || Turns [[Rotom]] into Mow Rotom || {{PDollar}}20,000-{{PDollar}}100,000 | ||
| Line 410: | Line 430: | ||
| Mechanical Pinwheel || Electric Fan || Turns [[Rotom]] into Fan Rotom || {{PDollar}}20,000-{{PDollar}}100,000 | | Mechanical Pinwheel || Electric Fan || Turns [[Rotom]] into Fan Rotom || {{PDollar}}20,000-{{PDollar}}100,000 | ||
|- style="background:#fff" | |- style="background:#fff" | ||
| Unusual Shoes || Slippers || Clothing (Shoes) ||{{PDollar}}5,000 | | style="{{roundybl|5px}}" | Unusual Shoes || Slippers || Clothing (Shoes) || style="{{roundybr|5px}}" | {{PDollar}}5,000 | ||
|} | |} | ||
===== | =====Tuli===== | ||
[[File:Legends Arceus Tuli.png|thumb|150px|Tuli]] | [[File:Legends Arceus Tuli.png|thumb|150px|Tuli]] | ||
Tuli will sell the player {{Berries}}, as well as plants that can be used as crafting materials. The shop becomes available after starting [[Task#Missions|Mission]] 8: "Arezu's Predicament". The stock will be limited at first, with new items becoming available after starting [[Task#Missions|Missions]] 10, 11, and 12. | [[Tuli]] will sell the player {{Berries}}, as well as plants that can be used as crafting materials. The shop becomes available after starting [[Task#Missions|Mission]] 8: "Arezu's Predicament". The stock will be limited at first, with new items becoming available after starting [[Task#Missions|Missions]] 10, 11, and 12. | ||
{{shop|Tuli}} | {{shop|Tuli}} | ||
| Line 433: | Line 453: | ||
====Hairdresser==== | ====Hairdresser==== | ||
The hairdresser is located between the clothing store and the general store. It is initially run by an old woman named Edith, but [[Arezu]] takes over after completing Mission 8: "Arezu's Predicament". The service is available to the player once they complete Mission 2: "The Galaxy Team's Entry Trial". | The hairdresser is located between the clothing store and the general store. It is initially run by an old woman named Edith, but [[Arezu]] takes over after completing Mission 8: "Arezu's Predicament". The service is available to the player once they complete Mission 2: "The Galaxy Team's Entry Trial". | ||
The player can pay {{PDollar}}500 in exchange for customizing their hairstyle, hair color, and eyebrow color. After styling their hair, Edith or Arezu gives the player the option to wear their hat or not, if the new hairstyle allows for the use of hats. Players can complete requests given to them by Arezu to obtain more hair style and color options. | The player can pay {{PDollar}}500 in exchange for customizing their hairstyle, hair color, and eyebrow color. After styling their hair, Edith or Arezu gives the player the option to wear their hat or not, if the new hairstyle allows for the use of hats. Players can complete requests given to them by Arezu to obtain more hair style and color options. | ||
After completing all of Arezu's requests, the hairdresser | After completing all of Arezu's requests, the hairdresser is labeled on the map as the First-Rate Hairdresser. | ||
{| class="roundy sortable" style="background: #{{hisui color}}; border: 3px solid #{{hisui color dark}}" | |||
{| class="roundy sortable" style=" | |- style="background-color:#{{hisui color light}}" | ||
! Option | ! style="{{roundytl|5px}}" | Option | ||
! Choices | ! Choices | ||
! Requirement | ! style="{{roundytr|5px}}" | Requirement | ||
|- style="background:#fff" | |- style="background:#fff" | ||
| rowspan=5 | Hairstyle | | rowspan=5 | Hairstyle | ||
| Short, Messy ponytail, Shorn, Curled, Braids | | Short, Messy ponytail{{male}}, Long{{female}}, Survey Corps style{{female}}, Shorn, Curled, Braids | ||
| Available from beginning | | Available from the beginning | ||
|- style="background:#fff" | |- style="background:#fff" | ||
| Middle part, Side part | | Middle part, Side part, Twin tails{{female}} | ||
| | | Complete Mission 8: "Arezu's Predicament" | ||
|- style="background:#fff" | |- style="background:#fff" | ||
| Tied back, Modern bowl cut, Sideswept, Fancy | | Tied back, Modern bowl cut{{male}}, Modern bob{{female}}, Sideswept, Fancy | ||
| | | Complete Request 59: "Misdreavus the Hairstyle Muse" | ||
|- style="background:#fff" | |- style="background:#fff" | ||
| Topknot, Modern short | | Topknot{{male}}, Formal updo{{female}}, Modern short | ||
| | | Complete Request 75: "Kirlia the Hairstyle Muse" | ||
|- style="background:#fff" | |- style="background:#fff" | ||
| Sinnoh style | | Sinnoh style | ||
| | | Complete Mission 27: "The Deified Pokémon" | ||
|- style="background:#fff" | |- style="background:#fff" | ||
| rowspan=4 | Color | | rowspan=4 | Color | ||
| Chestnut, Slate, Gold, Black, White | | Chestnut, Slate, Gold, Black, White | ||
| Available from beginning | | Available from the beginning | ||
|- style="background:#fff" | |- style="background:#fff" | ||
| Crimson, Blue, Peach pink | | Crimson, Blue, Peach pink | ||
| | | Complete Mission 8: "Arezu's Predicament" | ||
|- style="background:#fff" | |- style="background:#fff" | ||
| Turquoise, Violet, Clementine | | Turquoise, Violet, Clementine | ||
| | | Complete Request 59: "Misdreavus the Hairstyle Muse" | ||
|- style="background:#fff" | |- style="background:#fff" | ||
| Ash blond, Periwinkle, Ash brown, Flax | | Ash blond, Periwinkle, Ash brown, Flax | ||
| | | Complete Request 75: "Kirlia the Hairstyle Muse" | ||
|- style="background:#fff" | |- style="background:#fff" | ||
| rowspan=4 | Eyebrow color | | style="{{roundybl|5px}}" rowspan=4 | Eyebrow color | ||
| Chestnut, Slate, Gold, Black, White | | Chestnut, Slate, Gold, Black, White | ||
| Available from beginning | | Available from the beginning | ||
|- style="background:#fff" | |- style="background:#fff" | ||
| Crimson, Blue, Peach pink | | Crimson, Blue, Peach pink | ||
| | | Complete Mission 8: "Arezu's Predicament" | ||
|- style="background:#fff" | |- style="background:#fff" | ||
| Turquoise, Violet, Clementine | | Turquoise, Violet, Clementine | ||
| | | Complete Request 59: "Misdreavus the Hairstyle Muse" | ||
|- style="background:#fff" | |- style="background:#fff" | ||
| Ash blond, Periwinkle, Ash brown, Flax | | Ash blond, Periwinkle, Ash brown, Flax | ||
| | | style="{{roundybr|5px}}" |Complete Request 75: "Kirlia the Hairstyle Muse" | ||
|} | |} | ||
====Clothier==== | ====Clothier==== | ||
{{ | {{main|List of clothing (Legends: Arceus)}} | ||
The clothier is located | The clothier is located by the hairdresser, near the front gate. It is run by [[Anthe]]. The player can purchase clothing or change their outfit here. Additional clothing options become available as the player completes story missions and by completing specific requests for Anthe. | ||
After completing all of Anthe's requests, the shop | After completing all of Anthe's requests, the shop is labeled on the map as the First-Rate Clothier. | ||
The player can receive special clothing items if they have [[save data bonus|save data]] from other Pokémon games on their [[Nintendo Switch]] system. | |||
The player can receive special clothing items if they have save data from other Pokémon games on their [[Nintendo Switch]] system. | |||
====Photography studio==== | ====Photography studio==== | ||
The photography studio is run by Dagero, and is located at the east end of Floaro Main Street by the front gate. It becomes available to the player once they complete Mission 2: "The Galaxy Team's Entry Trial". | The photography studio is run by Dagero, and is located at the east end of Floaro Main Street by the front gate. It becomes available to the player once they complete [[Task#Missions|Mission]] 2: "The Galaxy Team's Entry Trial". | ||
The player can take pictures either alone or with one of their Pokémon. Characters also may visit the studio at random and ask to take photos with the player, after completing Request 102: "Daybreak". The player's pose and expression, lens filters, background, and the Pokémon's action may be freely changed by the player. The characters who visit and their partner Pokémon have preset poses and actions that cannot be changed. The pictures are taken with the screenshot function of the Nintendo Switch and are stored in the system memory. After completing requests for Dagero, the player gets an expanded pool of lens filters to use. | The player can take [[photography|pictures]] either alone or with one of their Pokémon. Characters also may visit the studio at random and ask to take photos with the player, after completing Request 102: "Daybreak". The player's pose and expression, lens filters, background, and the Pokémon's action may be freely changed by the player. The characters who visit and their partner Pokémon have preset poses and actions that cannot be changed. The pictures are taken with the screenshot function of the Nintendo Switch and are stored in the system memory. After completing requests for Dagero, the player gets an expanded pool of lens filters to use. | ||
Despite being unable to view [[ | Despite being unable to view [[Ribbon]]s in the [[summary]] within Legends: Arceus, taking a photo with a Pokémon at Dagero's studio invisibly grants that Pokémon the [[List of Ribbons in the games#Memorial Ribbons|Hisui Ribbon]] (called the Pioneer Ribbon in the game's internal code); this Ribbon cannot be viewed in [[Generation VIII]], only appearing once the Pokémon is transferred to [[Generation IX]]. | ||
After completing all of Dagero's requests, the studio will be labeled on the map as the First-Rate Photography Studio. | After completing all of Dagero's requests, the studio will be labeled on the map as the First-Rate Photography Studio. | ||
{| class="roundy sortable" style=" | {| class="roundy sortable" style="background: #{{hisui color}}; border: 3px solid #{{hisui color dark}}" | ||
! Option | |- style="background-color:#{{hisui color light}}" | ||
! style="{{roundytl|5px}}" | Option | |||
! Choices | ! Choices | ||
! Requirement | ! style="{{roundytr|5px}}" | Requirement | ||
|- style="background:#fff" | |- style="background:#fff" | ||
| rowspan=2 | Background screen | | rowspan=2 | Background screen | ||
| Line 586: | Line 536: | ||
|- style="background:#fff" | |- style="background:#fff" | ||
| Galaxy Team logo | | Galaxy Team logo | ||
| | | Complete Mission 18: "The Counterpart" | ||
|- style="background:#fff" | |- style="background:#fff" | ||
| rowspan=4 | Lens filter | | rowspan=4 | Lens filter | ||
| Line 593: | Line 543: | ||
|- style="background:#fff" | |- style="background:#fff" | ||
| Monochromatic | | Monochromatic | ||
| | | Complete Request 25: "The Pokémon in the Woodland Photo" | ||
|- style="background:#fff" | |- style="background:#fff" | ||
| Dreamy | | Dreamy | ||
| | | Complete Request 44: "The Pokémon in the Nighttime Photo" | ||
|- style="background:#fff" | |- style="background:#fff" | ||
| Sunset | | Sunset | ||
| | | Complete Request 62: "The Pokémon in the River Photo" | ||
|- style="background:#fff" | |- style="background:#fff" | ||
| rowspan=3 | Pose | | rowspan=3 | Pose | ||
| Line 606: | Line 556: | ||
|- style="background:#fff" | |- style="background:#fff" | ||
| Ingo's pose | | Ingo's pose | ||
| | | Complete Mission 11: "Scaling Perilous Heights" | ||
|- style="background:#fff" | |- style="background:#fff" | ||
| Bandit pose | | Bandit pose | ||
| | | Defeat all of the [[Miss Fortunes]] in a [[rematch]] | ||
|- style="background:#fff" | |- style="background:#fff" | ||
| rowspan=2 | Expression | | style="{{roundybl|5px}}" rowspan=2 | Expression | ||
| Neutral, Delighted, Smiling, Surprised, Troubled, Angry, Vacant, Thinking | | Neutral, Delighted, Smiling, Surprised, Troubled, Angry, Vacant, Thinking | ||
| Available from beginning | | Available from beginning | ||
|- style="background:#fff" | |- style="background:#fff" | ||
| Serious | | Serious | ||
| | | style="{{roundybr|5px}}" | Complete Mission 11: "Scaling Perilous Heights" | ||
|} | |} | ||
====Front gate==== | ====Front gate==== | ||
The front gate is located at the east end of Floaro Main Street. It is guarded by Ress of the Security Corps. After completing Mission 3: "The Basics of Crafting", the player can set out on expeditions to [[base camp]]s in other parts of Hisui from this gate. Ress will inform the player if a [[mass outbreak]] and/or [[Mass outbreak#Pokémon Legends: Arceus|massive mass outbreak]] is occurring at a location, whenever those phenomena become available. | The front gate is located at the east end of Floaro Main Street. It is guarded by [[Ress]] of the Security Corps. After completing [[Task#Missions|Mission]] 3: "The Basics of Crafting", the player can set out on expeditions to [[base camp]]s in other parts of [[Hisui]] from this gate. Ress will inform the player if a [[mass outbreak]] and/or [[Mass outbreak#Pokémon Legends: Arceus|massive mass outbreak]] is occurring at a location, whenever those phenomena become available. | ||
====Your quarters==== | ====Your quarters==== | ||
[[File:Player Quarters exterior LA.png|thumb|250px|Your Quarters]] | |||
{{main|Player's house#Hisui|Player's house → Hisui}} | |||
Your quarters is a small house located just east of Galaxy Hall, on Floaro Main Street. | Your quarters is a small house located just east of Galaxy Hall, on Floaro Main Street. | ||
After completing Mission 5: "A Request from Mai",<!--check if it's actually earlier--> the player can choose to sleep in their bed until specific times to change the [[time]] in Jubilife Village. The day/night cycle will not advance in Jubilife Village unless the player rests. Changing the time is necessary for some | After completing [[Task#Missions|Mission]] 5: "A Request from Mai",<!--check if it's actually earlier--> the player can choose to sleep in their bed until specific times to change the [[time]] in Jubilife Village. The day/night cycle will not advance in Jubilife Village unless the player rests. Changing the time is necessary for some requests, such as [[Task#Requests|Request]] 7: "Playing with Drifloon". The player can access the [[Eternal Battle Reverie]] from sleeping in their bed after unlocking it. It also has a chest that the player can use to store items. | ||
Whenever the player buys a {{p|Rotom}} appliance from Ginter, it is automatically sent to your quarters and placed on a predesignated spot here. | Whenever the player buys a {{p|Rotom}} appliance from Ginter, it is automatically sent to your quarters and placed on a predesignated spot here. | ||
| Line 631: | Line 583: | ||
===Training grounds=== | ===Training grounds=== | ||
{{main|Training grounds}} | {{main|Training grounds}} | ||
The training grounds are located in the northwestern portion of town, at the west end of Floaro Main Street. It consists of a large building with a Pokémon battlefield in front of it, all surrounded by a wooden fence. [[Zisu]] helps the player's Pokémon learn new | The training grounds are located in the northwestern portion of town, at the west end of Floaro Main Street. It consists of a large building with a Pokémon battlefield in front of it, all surrounded by a wooden fence. [[Zisu]] helps the player's Pokémon learn new [[move]]s here, as well as master them. Various battles take place here throughout the story. The [[Path of Tenacity]] and [[Path of Solitude]] are conducted here once unlocked. | ||
===Folk shrine=== | ===Folk shrine=== | ||
The folk shrine is located in the northwest portion of the village between the training grounds and Galaxy Hall. | The folk shrine is located in the northwest portion of the village between the training grounds and Galaxy Hall. | ||
Charm Lady Lucille can be found praying to the shrine guardian here. Lucille sells the player three types of protective charms that aid them on expeditions. Charms come in one of five different colors (Red Blue, Pink, Teal, Yellow), with each color indicated in the item's name with a letter (R, B, P, T, Y). The cost of the charm depends on the number of charms of the same type that the player already has in their satchel. The charm received is always the first charm of that type in color order that is not already in either the player's satchel or item storage; if the player already has all 5 colors of a charm, Lucille refuses to sell that charm. | Charm Lady Lucille can be found praying to the shrine guardian here. Lucille sells the player three types of protective charms that aid them on expeditions. Charms come in one of five different colors (Red, Blue, Pink, Teal, Yellow), with each color indicated in the item's name with a letter (R, B, P, T, Y). The cost of the charm depends on the number of charms of the same type that the player already has in their [[satchel]]. The charm received is always the first charm of that type in color order that is not already in either the player's satchel or item storage; if the player already has all 5 colors of a charm, Lucille refuses to sell that charm. | ||
In the satchel, charm quantities (which are always 1) display with yellow text, but this does not occur in the item storage or on the screen that displays lost items when the player blacks out. | |||
{| class="roundy" style="background: #{{ | {| class="roundy" style="background: #{{hisui color}}; border: 3px solid #{{hisui color dark}}" | ||
! rowspan=2 | Wish | |- style="background-color:#{{hisui color light}}" | ||
! style="{{roundytl|5px}}" rowspan=2 | Wish | |||
! rowspan=2 | Charm | ! rowspan=2 | Charm | ||
! colspan=5 | Costs | ! style="{{roundytr|5px}}" colspan=5 | Costs | ||
|- | |- style="background-color:#{{hisui color light}}" | ||
! First | ! First | ||
! Second | ! Second | ||
| Line 665: | Line 620: | ||
| {{PDollar}}40,000 | | {{PDollar}}40,000 | ||
|- style="background:#fff" | |- style="background:#fff" | ||
| Stay in good health | | style="{{roundybl|5px}}" | Stay in good health | ||
| [[Warding Charm]] | | [[Warding Charm]] | ||
| {{PDollar}}500 | | {{PDollar}}500 | ||
| Line 671: | Line 626: | ||
| {{PDollar}}700 | | {{PDollar}}700 | ||
| {{PDollar}}800 | | {{PDollar}}800 | ||
| {{PDollar}}900 | | style="{{roundybr|5px}}" | {{PDollar}}900 | ||
|} | |} | ||
| Line 683: | Line 638: | ||
==Items== | ==Items== | ||
{{itlisth| | {{itlisth|land}} | ||
{{Itemlist|Poké Ball LA|size=32px|Practice field; from [[Professor Laventon]] after catching up to him in the clearing|LA=yes|display={{hi|Poké Ball}} ×50}} | {{Itemlist|Poké Ball LA|size=32px|Practice field; from [[Professor Laventon]] after catching up to him in the clearing|LA=yes|display={{hi|Poké Ball}} ×50}} | ||
{{Itemlist|Poké Ball LA|size=32px|Practice field; from [[Professor Laventon]] if the player runs out of Poké Balls while catching the | {{Itemlist|Poké Ball LA|size=32px|Practice field; from [[Professor Laventon]] if the player runs out of Poké Balls while catching the first partner Pokémon|LA=yes|display={{hi|Poké Ball}} ×10}} | ||
{{Itemlist|Potion LA|size=32px|Front gate; from Volo after defeating him|LA=yes|display=[[Potion]] ×5}} | {{Itemlist|Potion LA|size=32px|Front gate; from Volo after defeating him|LA=yes|display=[[Potion]] ×5}} | ||
{{Itemlist|None|Outside Galaxy Hall; from [[Anthe]] after completing {{DL|Task|Missions|Mission}} 2: "The Galaxy Team's Entry Trial"|LA=yes|display=Everyday Kimono}} | {{Itemlist|None|Outside Galaxy Hall; from [[Anthe]] after completing {{DL|Task|Missions|Mission}} 2: "The Galaxy Team's Entry Trial"|LA=yes|display=Everyday Kimono}} | ||
{{Itemlist|None|Outside Galaxy Hall; from [[Anthe]] after completing Mission 2: "The Galaxy Team's Entry Trial"|LA=yes|display=Everyday Trousers}} | {{Itemlist|None|Outside Galaxy Hall; from [[Anthe]] after completing Mission 2: "The Galaxy Team's Entry Trial"|LA=yes|display=Everyday Trousers}} | ||
{{Itemlist|None|sprite=Hisui Ribbon IX|Photography studio; given to a Pokémon after taking a photo of it, after completing Mission 2: "The Galaxy Team's Entry Trial"|LA=yes|display={{DL|List of Ribbons in the games|Hisui Ribbon}}}} | |||
{{Itemlist|Apricorn LA|size=32px|Craftworks; from {{ga|Akari}}/{{ga|Rei}} so the player can complete Mission 3: "The Basics of Crafting"|LA=yes|display={{i|Apricorn}} ×20}} | {{Itemlist|Apricorn LA|size=32px|Craftworks; from {{ga|Akari}}/{{ga|Rei}} so the player can complete Mission 3: "The Basics of Crafting"|LA=yes|display={{i|Apricorn}} ×20}} | ||
{{Itemlist|Tumblestone LA|size=32px|Craftworks; from {{ga|Akari}}/{{ga|Rei}} so the player can complete Mission 3: "The Basics of Crafting"|LA=yes|display=[[Tumblestone]] ×20}} | {{Itemlist|Tumblestone LA|size=32px|Craftworks; from {{ga|Akari}}/{{ga|Rei}} so the player can complete Mission 3: "The Basics of Crafting"|LA=yes|display=[[Tumblestone]] ×20}} | ||
| Line 715: | Line 671: | ||
{{Itemlist|Exp. Candy XL LA|size=32px|Reward from Vessa for finding 90 [[wisp]]s|LA=yes|display=[[Exp. Candy XL]] ×2}} | {{Itemlist|Exp. Candy XL LA|size=32px|Reward from Vessa for finding 90 [[wisp]]s|LA=yes|display=[[Exp. Candy XL]] ×2}} | ||
{{Itemlist|Grit Rock LA|size=32px|Reward from Vessa for finding 100 [[wisp]]s|LA=yes|display=[[Grit Rock]] ×3}} | {{Itemlist|Grit Rock LA|size=32px|Reward from Vessa for finding 100 [[wisp]]s|LA=yes|display=[[Grit Rock]] ×3}} | ||
{{itlistfoot| | {{itlistfoot|land}} | ||
===Wisps=== | ===Wisps=== | ||
| Line 730: | Line 686: | ||
==Pokémon== | ==Pokémon== | ||
{{Catch/header/la|land|clear=yes|sun=no|cloudy=no|rain=no|thunderstorm=no|snow=no|blizzard=no|fog=no}} | |||
{{catch/div|land|{{color2|000|Unown Research Notes}}}} | |||
{{Catch/entryla|201H|Unown|25||all=✔|||||✔|type1=psychic|note=After visiting [[Solaceon Ruins]] and the Unown Research Notes are added to the [[Pokédex]], on the sign above the gateway to Prelude Beach}} | |||
{{Catch/entryla|201W|Unown|25||all=✔|||||✔|type1=psychic|note=After visiting Solaceon Ruins and the Unown Research Notes are added to the Pokédex, on the left eye of the western Magikarp statue atop [[Galaxy Hall]]}} | |||
{{Catch/entryla|201QU|Unown|25||all=✔|||||✔|type1=psychic|note=After visiting Solaceon Ruins and the Unown Research Notes are added to the Pokédex, on the clothesline behind your quarters}} | |||
{{Catch/footer/la|land}} | |||
| | |||
| | |||
| | |||
==Trainers== | ==Trainers== | ||
| Line 756: | Line 699: | ||
|color={{gold color}} | |color={{gold color}} | ||
|headcolor={{gold color light}} | |headcolor={{gold color light}} | ||
|bordercolor={{ | |bordercolor={{black color}} | ||
|sprite=VSKamado.png | |sprite=VSKamado.png | ||
|size=150px | |size=150px | ||
| Line 826: | Line 769: | ||
====Mission 2: "The Galaxy Team's Entry Trial"==== | ====Mission 2: "The Galaxy Team's Entry Trial"==== | ||
{{Party/Single | {{Party/Single | ||
|color={{ | |color={{gold color light}} | ||
|headcolor={{ | |headcolor={{alpha sapphire color light}} | ||
|bordercolor={{ | |bordercolor={{gold color dark}} | ||
|sprite=VSVolo.png | |sprite=VSVolo.png | ||
|size=150px | |size=150px | ||
| Line 858: | Line 801: | ||
|prize=none | |prize=none | ||
|class=The Survey Corps' | |class=The Survey Corps' | ||
|classlink= | |classlink=Rei (game) | ||
|name={{color2|000|Rei (game)|Rei}} | |name={{color2|000|Rei (game)|Rei}} | ||
|game=LA | |game=LA | ||
| Line 895: | Line 838: | ||
|prize=none | |prize=none | ||
|class=The Survey Corps' | |class=The Survey Corps' | ||
|classlink= | |classlink=Akari (game) | ||
|name={{color2|000|Akari (game)|Akari}} | |name={{color2|000|Akari (game)|Akari}} | ||
|game=LA | |game=LA | ||
| Line 965: | Line 908: | ||
|prize=none | |prize=none | ||
|class=The Survey Corps' | |class=The Survey Corps' | ||
|classlink= | |classlink=Rei (game) | ||
|name={{color2|000|Rei (game)|Rei}} | |name={{color2|000|Rei (game)|Rei}} | ||
|game=LA | |game=LA | ||
| Line 1,013: | Line 956: | ||
|prize=none | |prize=none | ||
|class=The Survey Corps' | |class=The Survey Corps' | ||
|classlink= | |classlink=Akari (game) | ||
|name={{color2|000|Akari (game)|Akari}} | |name={{color2|000|Akari (game)|Akari}} | ||
|game=LA | |game=LA | ||
| Line 1,055: | Line 998: | ||
====Request 104: "Battling the Security Corps' Secret Weapon"==== | ====Request 104: "Battling the Security Corps' Secret Weapon"==== | ||
{{Party/Single | {{Party/Single | ||
|color={{ | |color={{Omega Ruby color}} | ||
|headcolor={{ | |headcolor={{Omega Ruby color light}} | ||
|bordercolor={{ | |bordercolor={{HeartGold color dark}} | ||
|sprite=VSSecurity Corps M.png | |sprite=VSSecurity Corps M.png | ||
|size=150px | |size=150px | ||
| Line 1,063: | Line 1,006: | ||
|class=The Security Corps' | |class=The Security Corps' | ||
|classlink=Security Corps' (Trainer class) | |classlink=Security Corps' (Trainer class) | ||
|name=Ress | |name={{color2|000|Ress}} | ||
|game=LA | |game=LA | ||
|location=Jubilife Village | |location=Jubilife Village | ||
| Line 1,104: | Line 1,047: | ||
==Gallery== | ==Gallery== | ||
==In the spin-off games== | ==In the spin-off games== | ||
===[[Pokémon Masters EX]]=== | ===[[Pokémon Masters EX]]=== | ||
Artwork depicting Jubilife Village is seen in {{mas|Adaman}} and {{mas| | Artwork depicting Jubilife Village is seen in {{mas|Adaman}}, {{mas|Rei}}, and {{mas|Volo}}'s mindscapes. | ||
{| style="background: #7B30B2; {{roundy}}; border: #7B30B2;" | {| style="background: #7B30B2; {{roundy}}; border: #7B30B2;" | ||
| | | | ||
| Line 1,126: | Line 1,064: | ||
{| style="background: #{{fighting color light}}; {{roundy}}; border: #{{fighting color light}}; padding: 0px 5px 5px 5px" | {| style="background: #{{fighting color light}}; {{roundy}}; border: #{{fighting color light}}; padding: 0px 5px 5px 5px" | ||
|- | |- | ||
|<big>'''{{color2|000|Rei (Masters)#Decidueye (Hisuian | |<big>'''{{color2|000|Rei (Masters)#Decidueye (Hisuian Form)|Rei & Decidueye}}'''</big> | ||
|- | |- | ||
| [[File:Rei Mindscape.png|200px]] | | [[File:Rei Mindscape.png|200px]] | ||
|} | |||
| | |||
{| style="background: #{{fairy color light}}; {{roundy}}; border: #{{fairy color light}}; padding: 0px 5px 5px 5px" | |||
|- | |||
|<big>'''{{color2|000|Volo (Masters)#Togepi|Volo & Togepi}}'''</big> | |||
|- | |||
| [[File:Volo Mindscape.png|200px]] | |||
|} | |} | ||
|} | |} | ||
| Line 1,143: | Line 1,088: | ||
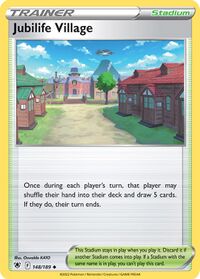
'''Jubilife Village''' was introduced as a {{TCG|Stadium card}} in the [[Pokémon Trading Card Game]] during the English Sword & Shield Series (the Japanese Sword & Shield Era). It was first released in the Japanese {{TCG|Battle Region}} subset and the English {{TCG|Astral Radiance}} expansion, with artwork by [[Oswaldo KATO]]. It was also released as a {{TCG|Secret card}} in the same Japanese and English expansions, with artwork by the same artist. It allows the players to shuffle their hand into their deck and draw five cards once per turn. Then their turn ends. | '''Jubilife Village''' was introduced as a {{TCG|Stadium card}} in the [[Pokémon Trading Card Game]] during the English Sword & Shield Series (the Japanese Sword & Shield Era). It was first released in the Japanese {{TCG|Battle Region}} subset and the English {{TCG|Astral Radiance}} expansion, with artwork by [[Oswaldo KATO]]. It was also released as a {{TCG|Secret card}} in the same Japanese and English expansions, with artwork by the same artist. It allows the players to shuffle their hand into their deck and draw five cards once per turn. Then their turn ends. | ||
{{-}} | {{-}} | ||
==Gallery== | |||
{|style="margin:auto; text-align:center; border:3px solid #{{hisui color dark}}; background:#{{hisui color}}; font-size:80%; border-radius: 10px" | |||
|- | |||
| style="{{roundy|20px}} border:2px solid #{{hisui color dark}}; background:#{{hisui color light}}; overflow:hidden" | [[File:LegendsJubilifeVillageCEDEC.png|x250px]] | |||
| style="{{roundy|20px}} border:2px solid #{{hisui color dark}}; background:#{{hisui color light}}; overflow:hidden" | [[File:Galaxy HQ-1 LA Concept Art.png|x250px]] | |||
| style="{{roundy|20px}} border:2px solid #{{hisui color dark}}; background:#{{hisui color light}}; overflow:hidden" | [[File:Galaxy HQ-1 LA Concept Art.png|x250px]] | |||
|- | |||
| colspan="3" style="color:white" | '''{{GameIcon|LA}}''' <br> Concept art | |||
|} | |||
==Trivia== | ==Trivia== | ||
| Line 1,149: | Line 1,104: | ||
** Sevii Kitchen, which is a building constructed near the front gate during the story, bears the same name as the [[Sevii Islands]]. | ** Sevii Kitchen, which is a building constructed near the front gate during the story, bears the same name as the [[Sevii Islands]]. | ||
* Tsumugi, who is beside the item storage chest at the front gate, remarks on how [[Zisu]] wants to set up a dojo to teach everyone how to battle Pokémon. This is a reference to the {{si|Trainers' School}} in Jubilife City. | * Tsumugi, who is beside the item storage chest at the front gate, remarks on how [[Zisu]] wants to set up a dojo to teach everyone how to battle Pokémon. This is a reference to the {{si|Trainers' School}} in Jubilife City. | ||
* The music in Jubilife Village is dynamic. Initially beginning as a short loop track, upon speaking to Commander [[Kamado]] at Prelude Beach after defeating the {{pkmn2|noble}} {{p|Lilligant}}, the theme is extended to include additional composition. Finally, after the end credits have rolled, the theme will play in its entirety. | |||
** Additionally, depending on the player's location within the village, the instrument that plays the melody line changes: | |||
*** If the player is within the village walls, a bamboo key flute plays the melody. | |||
*** If the player is inside their living quarters, a violin plays the melody. | |||
*** If the player is inside any other building, an oboe plays the melody. | |||
** Factoring the three possible lengths of the theme, and the three possible instruments that will play the melody, Jubilife Village's theme has a total of nine different versions. However, in the [[Pokémon LEGENDS Arceus Super Music Collection]], only the variants of the Jubilife Village theme that play when the player is within the village walls are provided. | |||
* In {{g|Scarlet and Violet}}, Jubilife Village's theme can be unlocked as a possible background music track for the [[League Club Room]]. The version of the theme that plays is the full version of the variant that plays when the player is within the village walls, listed as "コトブキムラ:3 / Jubilife Village: 3" in the Pokémon LEGENDS Arceus Super Music Collection. | |||
===Origin=== | ===Origin=== | ||
| Line 1,162: | Line 1,124: | ||
| Japanese | | Japanese | ||
| コトブキムラ ''Kotobuki Mura'' | | コトブキムラ ''Kotobuki Mura'' | ||
| From 寿 ''kotobuki'' ( | | From 寿 ''kotobuki'' (felicitation) | ||
|- | |- | ||
| English | | English | ||
| Line 1,178: | Line 1,140: | ||
| French | | French | ||
| Rusti-Cité | | Rusti-Cité | ||
| From ''rusticité'' (hardiness) | | From ''rusticité'' (hardiness), ''cité'' (city), and ''Féli-Cité'' (Jubilife City) | ||
|- | |- | ||
| Italian | | Italian | ||
Revision as of 08:59, 17 April 2024
| |||
| |||
| |||
Location 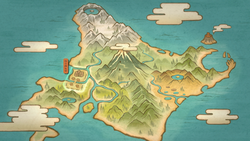 Location of Jubilife Village in Hisui. | |||
Jubilife Village (Japanese: コトブキムラ Kotobuki Village) is a village in the Hisui region that was constructed by the Galaxy Expedition Team. It lies to the west of the Obsidian Fieldlands and the Cobalt Coastlands on a section of Hisui's western shore. At the time of the arrival of the strange visitor, the village had only been established for two years.
In the present day, it has grown to be one of the largest cities in Sinnoh, known now as Jubilife City.
All Burmy that battle here will turn into their Plant Cloak form.
Sublocations
Prelude Beach
Prelude Beach is a small beach southwest of the seaside gate of Jubilife Village. The area consists of a small shoreline, with an old pier that has a wooden boat docked. There is an inaccessible hut with two barrels to its side. Prelude Beach is where visitors from other regions are dropped off to start their new life in Jubilife Village, as witnessed during Mission 9: "A New Mission".
The player wakes up here at the start of the game, having fallen from a space-time rift, after which they meet Professor Laventon. The player's cell phone, which has transformed into the Arc Phone by Arceus, is found lying on the ground here after meeting Laventon.
The player returns here during Mission 25: "The Plate of Prelude Beach" to fight against Commander Kamado and receive the Fist Plate if victorious.
Practice field
The practice field is a small field southeast of the seaside gate that connects to Prelude Beach. After meeting Professor Laventon, his three first partner Pokémon run away and disperse throughout the practice field.
Professor Laventon asks the player to help him catch the escaped Pokémon, giving them 50 Poké Balls to do so; if they run out, he gives them 10 more. This event functions as a catching tutorial, where the player has to catch all three of the first partner Pokémon. The first two Pokémon are automatically caught with the first successful throw, while the last one will break out from the first ball that hits it; the third Pokémon will be automatically caught with the second throw. The player does not get to keep the Poké Balls or caught Pokémon at the end of the tutorial.
Balloon minigame

|
This section is incomplete. Please feel free to edit this section to add missing information and complete it. Reason: Bonus points and reward thresholds |
Request 26: "Aim for the Big Leagues!" unlocks a minigame on the practice field, hosted by Taggart. The player is given one minute and unlimited Poké Balls to pop as many Drifloon balloons as they can. Purple balloons give 100 points, while yellow balloons give 200 points; multiple pops per throw give bonus points.
Players earn one of the following rewards for earning points in a minigame: Ball of Mud, Nugget, Great Ball, Ultra Ball, Wing Ball, Leaden Ball, Scatter Bang, Smoke Bomb, Sticky Glob.
Canala Avenue
Canala Avenue, named after Canala of the Galaxy Team's Construction Corps, is a major road running north-to-south through the middle of town from the seaside gate to Canala Bridge. It is a residential street, lined with houses on both sides. Crossing the Milkiwa River via Canala Bridge leads to Floaro Main Street, right across from Galaxy Hall.
Pastures
- Main article: Pastures
The village pastures are located on the east side of town. They are run by Marie. The pastures' services become available to the player once they complete Mission 2: "The Galaxy Team's Entry Trial".
The pastures store the player's Pokémon that are not in their party, the equivalent of the Pokémon Storage System in other Pokémon games. 8 pastures are available at first, each containing 30 slots for Pokémon, and as many as 32 pastures in total can be unlocked as pastures completely fill up and story events are completed.
Farm
The farm is located on the western side of the village. It is managed by Colza, with the fields tilled by Miller and tended by Leif. The farm's services become available to the player once they complete Mission 2: "The Galaxy Team's Entry Trial".
At the farm, the player can pay for one of several harvests. The harvest will develop as the player catches Pokémon on an expedition, and the number of Pokémon to catch for the harvest to fully develop depends on the type of harvest chosen. More types of harvests become available after certain requests are completed. The yields for a harvest are determined immediately after selecting and paying for one. Occasionally, a harvest will yield extra items than usual, which are termed "bumper crops".
| Harvest | Cost | Possible Rewards | Requirements | ||
|---|---|---|---|---|---|
| Regular Crops | Bumper Crops | Request Completed | Pokémon Caught | ||
| Apricorn | $500 | Available from beginning | 8 | ||
| Medicinal | $1,000 | Available from beginning | 8 | ||
| Vegetable | $1,500 | Request 27: "Help Wanted: Plowing the Fields" | 11 | ||
| Mushroom | $2,000 | Request 27: "Help Wanted: Plowing the Fields" | 11 | ||
| Berry (usual) | $3,000 | Request 42: "Help Wanted: Watering the Fields" | 14 | ||
| Berry (special) | $20,000 | Request 102: "Daybreak" | 14 | ||
| Mint | $10,000 | Request 60: "Help Wanted: Rock Smashing in the Fields" | 20 | ||
Floaro Main Street
Floaro Main Street, named after Floaro of the Construction Corps, is a major road running east-to-west at the north end of Jubilife Village. It contains a wide variety of merchants, as well as Galaxy Hall. This is also the street where the player's housing is located.
Galaxy Hall
- Main article: Galaxy Hall
Galaxy Hall is a three-story building that serves as the headquarters of the Galaxy Team. It contains offices of the Galaxy Team's Supply Corps, Medical Corps, Construction Corps, Security Corps, and Agriculture Corps, as well as of Commander Kamado. Professor Laventon's office is also found here, containing the request board. This is where the player chooses their first partner Pokémon, during Mission 2: "The Galaxy Team's Entry Trial".
Candy stand
The candy stand is run by Bonn. He sets up shop in front of Galaxy Hall. He sells different types of Exp. Candy.
| Candy Shop | |||||||
|---|---|---|---|---|---|---|---|
|
| ||||||
|
| ||||||
Trading post
The trading post is run by Simona. It becomes available to the player once they attain the First Star rank. The trading post allows the player to exchange Merit Points for items, and allows players to trade Pokémon with other players.
| Merit Point exchange | |||||||
|---|---|---|---|---|---|---|---|
|
| ||||||
|
| ||||||
|
| ||||||
|
| ||||||
|
| ||||||
|
| ||||||
|
| ||||||
|
| ||||||
|
| ||||||
|
| ||||||
|
| ||||||
|
|||||||
Craftworks
The craftworks is run by Anvin. It becomes available to the player once they complete Mission 3: "The Basics of Crafting". A crafting bench is located here for the player to use. Anvin sells crafting materials and recipes, and newer merchandise becomes available after making progress in the main story.
| Crafting materials | |||||||
|---|---|---|---|---|---|---|---|
|
| ||||||
|
| ||||||
|
| ||||||
|
| ||||||
|
| ||||||
|
| ||||||
|
| ||||||
| Crafting recipes | |||||||
|---|---|---|---|---|---|---|---|
|
| ||||||
|
| ||||||
|
| ||||||
|
| ||||||
|
| ||||||
|
| ||||||
|
| ||||||
|
| ||||||
|
| ||||||
The Wallflower
The Wallflower (Japanese: イモヅル亭 Imozuru Restaurant) is the Galaxy Expedition Team's canteen run by Beni. It is well-known for its potato mochi. The player, Rei (if the player is female) or Akari (if the player is male), and Professor Laventon meet here after missions to eat. Beni is usually seen standing in front, ready to buy Sootfoot Roots from the player for $100 each.
General store
The general store is run by Choy. It becomes available to the player once they complete Mission 2: "The Galaxy Team's Entry Trial". At the beginning, the store has little to offer, but Choy expands its inventory as the player completes a series of side quests that involve collecting various items for Tao Hua, the captain of the Supply Corps. The same items available at the general store can also be purchased at base camps.
After completing all of Choy's requests, the shop is labeled on the map as the First-Rate General Store.
| General Store | |||||||
|---|---|---|---|---|---|---|---|
|
| ||||||
|
| ||||||
| After completing Request 23 | |||||||
|
| ||||||
|
| ||||||
|
| ||||||
| After completing Request 43 | |||||||
|
| ||||||
|
| ||||||
|
| ||||||
| After completing Request 61 | |||||||
|
| ||||||
|
| ||||||
| After completing Request 71 | |||||||
|
| ||||||
|
| ||||||
|
|||||||
Ginkgo Guild cart
The Ginkgo Guild cart is run by Ginkgo Guild members Ginter and Tuli. They arrive in Jubilife Village and set up shop between the Galaxy Hall and the player's quarters after the player completes Mission 7: "The Frenzy of the Lord of the Woods". More items are added to the stock as the player completes more missions.
Ginter

|
This section is incomplete. Please feel free to edit this section to add missing information and complete it. Reason: Missing conditions for items, chances to appear, etc. See this document for details |
Ginter behaves differently from most shopkeepers.[1] Ginter will not buy items from the player, and will only offer a random assortment of items through a dialogue menu instead of a store menu. He often sells items in sets with a bulk discount compared to normal shopkeepers. He will also offer the player items that cannot be bought from anyone else, although he will not tell the player explicitly what the item is and will instead give it a vague description. Eventually, Ginter will also offer unique items that can only be purchased once. Ginter will change his offerings every time the player catches 20 Pokémon. Once an item is purchased from Ginter, he will not sell that product again until his store refreshes. Ginter will offer the player up to three different items (only a single ware before version 1.1.0).
Single-Time Purchases
Single-time purchase items are sent to the player's home. They do not appear in Ginter's item rotation once bought. The five mechanical items sold by Ginter are used to change Rotom into one of its many forms. They may be sold to the player in any order, starting from $20,000, and increasing by $20,000 each time until capping at $100,000.
| Name | Item | Item Type/Use | Price |
|---|---|---|---|
| Mechanical Circular Saw | Lawn Mower | Turns Rotom into Mow Rotom | $20,000-$100,000 |
| Mechanical Tub | Washing Machine | Turns Rotom into Wash Rotom | $20,000-$100,000 |
| Mechanical Box | Microwave Oven | Turns Rotom into Heat Rotom | $20,000-$100,000 |
| Mechanical Cabinet | Refrigerator | Turns Rotom into Frost Rotom | $20,000-$100,000 |
| Mechanical Pinwheel | Electric Fan | Turns Rotom into Fan Rotom | $20,000-$100,000 |
| Unusual Shoes | Slippers | Clothing (Shoes) | $5,000 |
Tuli
Tuli will sell the player Berries, as well as plants that can be used as crafting materials. The shop becomes available after starting Mission 8: "Arezu's Predicament". The stock will be limited at first, with new items becoming available after starting Missions 10, 11, and 12.
| Tuli | |||||||
|---|---|---|---|---|---|---|---|
|
| ||||||
|
| ||||||
|
| ||||||
|
| ||||||
|
| ||||||
|
| ||||||
|
| ||||||
|
| ||||||
|
| ||||||
|
| ||||||
|
| ||||||
|
|||||||
Hairdresser
The hairdresser is located between the clothing store and the general store. It is initially run by an old woman named Edith, but Arezu takes over after completing Mission 8: "Arezu's Predicament". The service is available to the player once they complete Mission 2: "The Galaxy Team's Entry Trial".
The player can pay $500 in exchange for customizing their hairstyle, hair color, and eyebrow color. After styling their hair, Edith or Arezu gives the player the option to wear their hat or not, if the new hairstyle allows for the use of hats. Players can complete requests given to them by Arezu to obtain more hair style and color options.
After completing all of Arezu's requests, the hairdresser is labeled on the map as the First-Rate Hairdresser.
| Option | Choices | Requirement |
|---|---|---|
| Hairstyle | Short, Messy ponytail♂, Long♀, Survey Corps style♀, Shorn, Curled, Braids | Available from the beginning |
| Middle part, Side part, Twin tails♀ | Complete Mission 8: "Arezu's Predicament" | |
| Tied back, Modern bowl cut♂, Modern bob♀, Sideswept, Fancy | Complete Request 59: "Misdreavus the Hairstyle Muse" | |
| Topknot♂, Formal updo♀, Modern short | Complete Request 75: "Kirlia the Hairstyle Muse" | |
| Sinnoh style | Complete Mission 27: "The Deified Pokémon" | |
| Color | Chestnut, Slate, Gold, Black, White | Available from the beginning |
| Crimson, Blue, Peach pink | Complete Mission 8: "Arezu's Predicament" | |
| Turquoise, Violet, Clementine | Complete Request 59: "Misdreavus the Hairstyle Muse" | |
| Ash blond, Periwinkle, Ash brown, Flax | Complete Request 75: "Kirlia the Hairstyle Muse" | |
| Eyebrow color | Chestnut, Slate, Gold, Black, White | Available from the beginning |
| Crimson, Blue, Peach pink | Complete Mission 8: "Arezu's Predicament" | |
| Turquoise, Violet, Clementine | Complete Request 59: "Misdreavus the Hairstyle Muse" | |
| Ash blond, Periwinkle, Ash brown, Flax | Complete Request 75: "Kirlia the Hairstyle Muse" |
Clothier
- Main article: List of clothing (Legends: Arceus)
The clothier is located by the hairdresser, near the front gate. It is run by Anthe. The player can purchase clothing or change their outfit here. Additional clothing options become available as the player completes story missions and by completing specific requests for Anthe.
After completing all of Anthe's requests, the shop is labeled on the map as the First-Rate Clothier.
The player can receive special clothing items if they have save data from other Pokémon games on their Nintendo Switch system.
Photography studio
The photography studio is run by Dagero, and is located at the east end of Floaro Main Street by the front gate. It becomes available to the player once they complete Mission 2: "The Galaxy Team's Entry Trial".
The player can take pictures either alone or with one of their Pokémon. Characters also may visit the studio at random and ask to take photos with the player, after completing Request 102: "Daybreak". The player's pose and expression, lens filters, background, and the Pokémon's action may be freely changed by the player. The characters who visit and their partner Pokémon have preset poses and actions that cannot be changed. The pictures are taken with the screenshot function of the Nintendo Switch and are stored in the system memory. After completing requests for Dagero, the player gets an expanded pool of lens filters to use.
Despite being unable to view Ribbons in the summary within Legends: Arceus, taking a photo with a Pokémon at Dagero's studio invisibly grants that Pokémon the Hisui Ribbon (called the Pioneer Ribbon in the game's internal code); this Ribbon cannot be viewed in Generation VIII, only appearing once the Pokémon is transferred to Generation IX.
After completing all of Dagero's requests, the studio will be labeled on the map as the First-Rate Photography Studio.
| Option | Choices | Requirement |
|---|---|---|
| Background screen | Red, Yellow, Pink, Blue, Light-green, Black, Purple, White, Light-blue, Gray, Green, Orange | Available from beginning |
| Galaxy Team logo | Complete Mission 18: "The Counterpart" | |
| Lens filter | Plain, Nostalgic | Available from beginning |
| Monochromatic | Complete Request 25: "The Pokémon in the Woodland Photo" | |
| Dreamy | Complete Request 44: "The Pokémon in the Nighttime Photo" | |
| Sunset | Complete Request 62: "The Pokémon in the River Photo" | |
| Pose | Arms folded, Hands behind back, One arm out, Arms open high, Arms open low, Confident pose, Thumbs up, At the ready, Braced for battle, Over the shoulder, Hero pose, Sitting plainly, Sitting confidently | Available from beginning |
| Ingo's pose | Complete Mission 11: "Scaling Perilous Heights" | |
| Bandit pose | Defeat all of the Miss Fortunes in a rematch | |
| Expression | Neutral, Delighted, Smiling, Surprised, Troubled, Angry, Vacant, Thinking | Available from beginning |
| Serious | Complete Mission 11: "Scaling Perilous Heights" |
Front gate
The front gate is located at the east end of Floaro Main Street. It is guarded by Ress of the Security Corps. After completing Mission 3: "The Basics of Crafting", the player can set out on expeditions to base camps in other parts of Hisui from this gate. Ress will inform the player if a mass outbreak and/or massive mass outbreak is occurring at a location, whenever those phenomena become available.
Your quarters
- Main article: Player's house → Hisui
Your quarters is a small house located just east of Galaxy Hall, on Floaro Main Street.
After completing Mission 5: "A Request from Mai", the player can choose to sleep in their bed until specific times to change the time in Jubilife Village. The day/night cycle will not advance in Jubilife Village unless the player rests. Changing the time is necessary for some requests, such as Request 7: "Playing with Drifloon". The player can access the Eternal Battle Reverie from sleeping in their bed after unlocking it. It also has a chest that the player can use to store items.
Whenever the player buys a Rotom appliance from Ginter, it is automatically sent to your quarters and placed on a predesignated spot here.
Training grounds
- Main article: Training grounds
The training grounds are located in the northwestern portion of town, at the west end of Floaro Main Street. It consists of a large building with a Pokémon battlefield in front of it, all surrounded by a wooden fence. Zisu helps the player's Pokémon learn new moves here, as well as master them. Various battles take place here throughout the story. The Path of Tenacity and Path of Solitude are conducted here once unlocked.
Folk shrine
The folk shrine is located in the northwest portion of the village between the training grounds and Galaxy Hall.
Charm Lady Lucille can be found praying to the shrine guardian here. Lucille sells the player three types of protective charms that aid them on expeditions. Charms come in one of five different colors (Red, Blue, Pink, Teal, Yellow), with each color indicated in the item's name with a letter (R, B, P, T, Y). The cost of the charm depends on the number of charms of the same type that the player already has in their satchel. The charm received is always the first charm of that type in color order that is not already in either the player's satchel or item storage; if the player already has all 5 colors of a charm, Lucille refuses to sell that charm.
In the satchel, charm quantities (which are always 1) display with yellow text, but this does not occur in the item storage or on the screen that displays lost items when the player blacks out.
| Wish | Charm | Costs | ||||
|---|---|---|---|---|---|---|
| First | Second | Third | Fourth | Fifth | ||
| Lose fewer items | Tempting Charm | $3,000 | $4,000 | $5,000 | $6,000 | $7,000 |
| Faint less frequently | Survival Charm | $3,000 | $8,000 | $15,000 | $25,000 | $40,000 |
| Stay in good health | Warding Charm | $500 | $600 | $700 | $800 | $900 |
Tasks
- Main article: Task → Requests
The player can accept a variety of missions and requests throughout the town. Certain requests become available after completing story requirements, such as quelling nobles or obtaining Ride Pokémon.
Demographics
Pokémon Legends: Arceus
The population of Jubilife Village grows as the village expands throughout the main story. By the end of the main story, the population of Jubilife Village is 102.
Items
| Item | Location | Games | |
|---|---|---|---|
| Poké Ball ×50 | Practice field; from Professor Laventon after catching up to him in the clearing | LA | |
| Poké Ball ×10 | Practice field; from Professor Laventon if the player runs out of Poké Balls while catching the first partner Pokémon | LA | |
| Potion ×5 | Front gate; from Volo after defeating him | LA | |
| Everyday Kimono | Outside Galaxy Hall; from Anthe after completing Mission 2: "The Galaxy Team's Entry Trial" | LA | |
| Everyday Trousers | Outside Galaxy Hall; from Anthe after completing Mission 2: "The Galaxy Team's Entry Trial" | LA | |
| Hisui Ribbon | Photography studio; given to a Pokémon after taking a photo of it, after completing Mission 2: "The Galaxy Team's Entry Trial" | LA | |
| Apricorn ×20 | Craftworks; from Akari/Rei so the player can complete Mission 3: "The Basics of Crafting" | LA | |
| Tumblestone ×20 | Craftworks; from Akari/Rei so the player can complete Mission 3: "The Basics of Crafting" | LA | |
| Pokédex | Craftworks; from Professor Laventon after completing Mission 3: "The Basics of Crafting" | LA | |
| Recipe: Pokéshi Doll | Craftworks; from Anvin upon starting Request 18: "Please! Make Me a Pokéshi Doll!" | LA | |
| Super Potion ×3 | Front gate; from Volo after talking to Cyllene during Mission 7: "The Frenzy of the Lord of the Woods" | LA | |
| Recipe: Smoke Bomb | Wallflower; from Akari/Rei after completing Mission 7: "The Frenzy of the Lord of the Woods" | LA | |
| Odd Keystone | Pastures; from Vessa after completing Mission 7: "The Frenzy of the Lord of the Woods" | LA | |
| Recipe: Stealth Spray | Front gate; from Akari/Rei before going to the Crimson Mirelands for Mission 8: "Arezu's Predicament" | LA | |
| Recipe: Scatter Bang | Wallflower; from Akari/Rei after completing Mission 8: "Arezu's Predicament" | LA | |
| Grit Pebble ×2 | Front gate; from Lian before heading to the Cobalt Coastlands for Mission 10: "The Lordless Island" | LA | |
| Grit Gravel ×3 | Front gate; from Lian before heading to the Cobalt Coastlands for Mission 10: "The Lordless Island" | LA | |
| Max Revive | Front gate; from a child before going to the Temple of Sinnoh during Mission 17: "Atop Mount Coronet" | LA | |
| Fist Plate | Prelude Beach; from Kamado after defeating him during Mission 25: "The Plate of Prelude Beach" | LA | |
| Sticky Glob ×30 | Front gate; from Gaeric during Request 98: "Massive Mass Outbreak in the Coastlands" | LA | |
| Full Restore | Seaside gate; from a man outside of the gate after completing the main story | LA | |
| Oval Stone | Reward from Vessa for finding 5 wisps | LA | |
| Rare Candy | Reward from Vessa for finding 10 wisps | LA | |
| Seed of Mastery | Reward from Vessa for finding 20 wisps | LA | |
| Dusk Stone | Reward from Vessa for finding 30 wisps | LA | |
| Exp. Candy L | Reward from Vessa for finding 40 wisps | LA | |
| Linking Cord | Reward from Vessa for finding 50 wisps | LA | |
| Grit Pebble ×5 | Reward from Vessa for finding 60 wisps | LA | |
| Reaper Cloth | Reward from Vessa for finding 70 wisps | LA | |
| Seed of Mastery ×3 | Reward from Vessa for finding 80 wisps | LA | |
| Exp. Candy XL ×2 | Reward from Vessa for finding 90 wisps | LA | |
| Grit Rock ×3 | Reward from Vessa for finding 100 wisps | LA | |
Wisps
Wisps begin appearing across Jubilife Village after accepting Request 22: "Eerie Apparitions in the Night".
| Item | Location | Games | |
|---|---|---|---|
| Wisp | Under the second tree from the left, on the south bank of the river | LA | |
| Wisp | Next to the boulder near the hut on Prelude Beach, before the docks | LA | |
| Wisp | In between the two rows of buildings on the west side of Canala Avenue | LA | |
| Wisp | Behind the shed at the farm | LA | |
| Wisp | Behind the craftworks, next to the westernmost water wheel | LA | |
| Wisp | Behind the dojo building in the training grounds | LA | |
| Wisp | Behind Galaxy Hall, in its northeastern corner | LA | |
Pokémon
| Pokémon | Levels | Alpha Levels |
Time of day | Weather | |||||||||||
|---|---|---|---|---|---|---|---|---|---|---|---|---|---|---|---|
| Unown Research Notes | |||||||||||||||
| 25 | ✔ | ✔ | |||||||||||||
| 25 | ✔ | ✔ | |||||||||||||
| 25 | ✔ | ✔ | |||||||||||||
| Non-fixed alpha Pokémon do not spawn until the player quelled the frenzy of the subregion's noble. Some of the Pokémon marked with (‡) may only spawn near the area's borders. | |||||||||||||||
- ↑ After visiting Solaceon Ruins and the Unown Research Notes are added to the Pokédex, on the sign above the gateway to Prelude Beach
- ↑ After visiting Solaceon Ruins and the Unown Research Notes are added to the Pokédex, on the left eye of the western Magikarp statue atop Galaxy Hall
- ↑ After visiting Solaceon Ruins and the Unown Research Notes are added to the Pokédex, on the clothesline behind your quarters
Trainers
Prelude Beach
Mission 26: "The Plate of Prelude Beach"
|
|||||||||||||||||||||||||||||||||||||||||||||||||||||||||||||||||||||||||||||||||||||||||||||||||||||||||||||||||||||||||||||||||||||||||||||||||||||||||
| |||||||||||||||||||||||||||||||||||||||||||||||||||||||||||||||||||||||||||||||||||||||||||||||||||||||||||||||||||||||||||||||||||||||||||||||||||||||||
Jubilife Village proper
Mission 2: "The Galaxy Team's Entry Trial"
|
|||||||||||||||||||||||||||||||||
| |||||||||||||||||||||||||||||||||
Mission 8: "Arezu's Predicament"
Pikachu has effort level 1 in all its stats.
|
|||||||||||||||||||||||||||||||||||||||||||||||||||||||||||||||
| |||||||||||||||||||||||||||||||||||||||||||||||||||||||||||||||
|
|||||||||||||||||||||||||||||||||||||||||||||||||||||||||||||||
| |||||||||||||||||||||||||||||||||||||||||||||||||||||||||||||||
Mission 11: "Scaling Perilous Heights"
|
||||||||||||||||||||||||||||||||||||||||||||||||||||||||||||||
| ||||||||||||||||||||||||||||||||||||||||||||||||||||||||||||||
Mission 12: "The Slumbering Lord of the Tundra"
Pikachu has effort level 1 in all its stats.
|
||||||||||||||||||||||||||||||||||||||||||||||||||||||||||||||||||||||||||||||||||||||||||||||
| ||||||||||||||||||||||||||||||||||||||||||||||||||||||||||||||||||||||||||||||||||||||||||||||
|
||||||||||||||||||||||||||||||||||||||||||||||||||||||||||||||||||||||||||||||||||||||||||||||
| ||||||||||||||||||||||||||||||||||||||||||||||||||||||||||||||||||||||||||||||||||||||||||||||
Request 104: "Battling the Security Corps' Secret Weapon"
|
||||||||||||||||||||||||||||||||||||||||||||||||||||||||||||||||||||||||||||||||||||||||||
| ||||||||||||||||||||||||||||||||||||||||||||||||||||||||||||||||||||||||||||||||||||||||||
Gallery
In the spin-off games
Pokémon Masters EX
Artwork depicting Jubilife Village is seen in Adaman, Rei, and Volo's mindscapes.
|
In the anime

Jubilife Village briefly appeared at the end of The Arceus Chronicles (Part 4), where Rei was seen arriving at his home and crafting a Poké Ball before heading out to the wilderness.
In the TCG
- Main article: Jubilife Village (Astral Radiance 148)
Jubilife Village was introduced as a Stadium card in the Pokémon Trading Card Game during the English Sword & Shield Series (the Japanese Sword & Shield Era). It was first released in the Japanese Battle Region subset and the English Astral Radiance expansion, with artwork by Oswaldo KATO. It was also released as a Secret card in the same Japanese and English expansions, with artwork by the same artist. It allows the players to shuffle their hand into their deck and draw five cards once per turn. Then their turn ends.
Gallery
| LA Concept art |
Trivia
- There are several locations in Jubilife Village that reference locations from older games.
- The names of Floaro Main Street and Canala Avenue reference Floaroma Town and Canalave City, respectively. Both settlements are close to the present-day Jubilife City. In-universe, they appear to be named after Floaro and Canala, members of the Construction Corps. Floaro Gardens, a location in the Obsidian Fieldlands, also appears to be named after Floaro.
- Sevii Kitchen, which is a building constructed near the front gate during the story, bears the same name as the Sevii Islands.
- Tsumugi, who is beside the item storage chest at the front gate, remarks on how Zisu wants to set up a dojo to teach everyone how to battle Pokémon. This is a reference to the Trainers' School in Jubilife City.
- The music in Jubilife Village is dynamic. Initially beginning as a short loop track, upon speaking to Commander Kamado at Prelude Beach after defeating the noble Lilligant, the theme is extended to include additional composition. Finally, after the end credits have rolled, the theme will play in its entirety.
- Additionally, depending on the player's location within the village, the instrument that plays the melody line changes:
- If the player is within the village walls, a bamboo key flute plays the melody.
- If the player is inside their living quarters, a violin plays the melody.
- If the player is inside any other building, an oboe plays the melody.
- Factoring the three possible lengths of the theme, and the three possible instruments that will play the melody, Jubilife Village's theme has a total of nine different versions. However, in the Pokémon LEGENDS Arceus Super Music Collection, only the variants of the Jubilife Village theme that play when the player is within the village walls are provided.
- Additionally, depending on the player's location within the village, the instrument that plays the melody line changes:
- In Pokémon Scarlet and Violet, Jubilife Village's theme can be unlocked as a possible background music track for the League Club Room. The version of the theme that plays is the full version of the variant that plays when the player is within the village walls, listed as "コトブキムラ:3 / Jubilife Village: 3" in the Pokémon LEGENDS Arceus Super Music Collection.
Origin
- Main article: Pokémon world in relation to the real world → Hisui
Jubilife Village appears to allude to Sapporo, the capital city of Hokkaidō. The design of Galaxy Hall appears to be based on the Former Hokkaidō Government Office.
Name origin
| Language | Name | Origin |
|---|---|---|
| Japanese | コトブキムラ Kotobuki Mura | From 寿 kotobuki (felicitation) |
| English | Jubilife Village | From jubilant and life |
| German | Jubeldorf | From Jubel (jubilation) and Dorf (village) |
| Spanish | Villa Jubileo | From jubileo (jubilee) |
| French | Rusti-Cité | From rusticité (hardiness), cité (city), and Féli-Cité (Jubilife City) |
| Italian | Villaggio Giubilo | From giubilo (rejoicing) |
| Korean | 축복마을 Chukbok Maeul | From 축복 (祝福) chukbok (blessing) |
| Chinese (Mandarin) | 祝慶村 / 祝庆村 Zhùqìng Cūn | From 慶祝 / 庆祝 qìngzhù / hingjūk (to celebrate) |
| Chinese (Cantonese) | 祝慶村 Jūkhing Chyūn | |
| Brazilian Portuguese | Vilarejo de Jubilife | From its English name |
| Russian | Деревня Джубилайф Derevnya Dzhubilayf | Transcription of its English name |
References
| |||||||||||||||||||||||
| Hisui | |||||||
|---|---|---|---|---|---|---|---|
|
| |||||||
|

|
This article is part of Project Cities and Towns, a Bulbapedia project that aims to write comprehensive articles on every city and town in the Pokémon world. |


