Scorching Desert: Difference between revisions
mNo edit summary |
m (adding link to Mysteriosity page) |
||
| (34 intermediate revisions by 18 users not shown) | |||
| Line 1: | Line 1: | ||
{{DungeonPrevNext|Holehills| | {{DungeonPrevNext|Holehills|Tyrian Maze|5}} | ||
{{Dungeon infobox | {{Dungeon infobox | ||
|colorscheme=Rock | |colorscheme=Rock | ||
|bordercolorscheme=Water | |bordercolorscheme=Water | ||
|name=Scorching Desert | |name=Scorching Desert | ||
|jname= | |jname=カエン{{tt|砂漠|さばく}} | ||
|jtrans=Blazing Desert | |jtrans=Blazing Desert | ||
|image= | |image=Scorching Desert PMDGTI.png | ||
|recruitable= | |recruitable=Yes | ||
|floors=10 | |floors=10 | ||
|rest=No | |rest=No | ||
|traps=Yes | |traps=Yes | ||
|items= | |monsterhouses=Yes | ||
|items=Current | |||
|money=Allowed | |money=Allowed | ||
|teamsize=4 | |teamsize=4 | ||
|startlevel=Current | |startlevel=Current | ||
|maintype= | |maintype=None | ||
|boss= | |boss=None | ||
}} | }} | ||
'''Scorching Desert''' (Japanese: ''' | '''Scorching Desert''' (Japanese: '''カエン{{tt|砂漠|さばく}}''' ''Blazing Desert'') is a playable dungeon the {{player}} goes through in [[Pokémon Mystery Dungeon: Gates to Infinity]]. It has 10 floors and no boss. This dungeon is accessible after completing the [[Holehills]] dungeon. After the main storyline, this dungeon can be used to enter [[Glacier Palace|Glacier Palace Mirage]] at a high [[mysteriosity]] level. This dungeon is relatively short compared to the previous dungeons, but it features prominent [[Weather#Weather in Pokémon Mystery Dungeon|Sandstorms]]. When the player visits floors seven and ten during a job from from the request board, they can access a detour that requires a {{type|Water}} Pokémon to pass through. Sparkling Floor tiles and Gold Floor tiles are unusually common in this dungeon. | ||
==Pokémon encountered== | ==Pokémon encountered== | ||
===Scorching Desert=== | |||
{{mdloc/h|Rock}} | {{mdloc/h|Rock}} | ||
{{mdloc|136|Flareon| | {{mdloc|136|Flareon|1F-10F|28|?}} | ||
{{mdloc|408|Cranidos| | {{mdloc|408|Cranidos|1F-10F|28|?}} | ||
{{mdloc|524|Roggenrola| | {{mdloc|524|Roggenrola|1F-10F|24|?}} | ||
{{mdloc|569|Garbodor| | {{mdloc|569|Garbodor|1F-10F|36|?}} | ||
{{mdloc|596|Galvantula| | {{mdloc|596|Galvantula|1F-10F|36|?}} | ||
{{mdloc|600|Klang| | {{mdloc|600|Klang|1F-10F|38|?}} | ||
{{mdloc| | {{mdloc|636|Larvesta|1F-10F|27|?}} | ||
{{mdloc| | {{mdloc|622|Golett|6F-10F|30|?}} | ||
{{mdloc/f|Rock}} | {{mdloc/f|Rock}} | ||
== | ====Unnumbered floors==== | ||
Players can be warped to unnumbered floors of Scorching Desert, with an increased chance with higher [[mysteriosity]] ratings. | |||
{{mdloc/h|Rock}} | {{mdloc/h|Rock}} | ||
{{mdloc|136|Flareon|N/A|?|0}} | {{mdloc|136|Flareon|N/A|?|0}} | ||
| Line 43: | Line 46: | ||
{{mdloc|636|Larvesta|N/A|?|0}} | {{mdloc|636|Larvesta|N/A|?|0}} | ||
{{mdloc/f|Rock}} | {{mdloc/f|Rock}} | ||
===Gilded Hall=== | |||
{{mdloc/h|Rock}} | |||
{{mdloc|279|Pelipper|2F-5F|?|?}} | |||
{{mdloc|373|Salamence|2F-5F|?|?}} | |||
{{mdloc|547|Whimsicott|2F-5F|?|?}} | |||
{{mdloc|567|Archeops|2F-5F|?|?}} | |||
{{mdloc/f|Rock}} | |||
==Party== | |||
On the first visit, Hydreigon is on the {{player}}'s team. Its stats (minus HP), Exp. Points, and "To next level" sections of the Status screen are all shown as "---". | |||
{{Pokémon/5 | |||
|ndex=635 | |||
|pokemon=Hydreigon | |||
|gender= | |||
|level=64 | |||
|type1=Dark|type2=Dragon | |||
|ability=Levitate | |||
|move1=DragonBreath|move1type=Dragon|move1cat=Special | |||
|move2=Crunch|move2type=Dark|move2cat=Physical | |||
|move3=Tri Attack|move3type=Normal|move3cat=Special | |||
|move4=Roar|move4type=Normal|move4cat=Status}} | |||
==Items== | ==Items== | ||
{{DungeonItem/h|rock}} | {{DungeonItem/h|rock}} | ||
{{DungeonItem|Poké|4=70- | {{DungeonItem|Poké|4=70-290|sprite=Poké currency V|3=1F-10}} | ||
{{DungeonItem|Chesto Berry|3= | {{DungeonItem|Chesto Berry|sprite=MDBag Chesto Berry V Sprite|3=1F-10}} | ||
{{DungeonItem|Oran Berry|3= | {{DungeonItem|Oran Berry|sprite=MDBag Oran Berry V Sprite|3=1F-10}} | ||
{{DungeonItem|Health Orb|Wonder Orb|3= | {{DungeonItem|Pecha Berry|sprite=MDBag Pecha Berry V Sprite|3=1F-10}} | ||
{{DungeonItem|Rollcall Orb|Wonder Orb|3= | {{DungeonItem|All Dodge Orb|Wonder Orb|sprite=MDBag Wonder Orb V Sprite|3=1F-10}} | ||
{{DungeonItem|Sleep Seed|Seed|3= | {{DungeonItem|All Power-Up Orb|Wonder Orb|sprite=MDBag Wonder Orb V Sprite|3=1F-10}} | ||
{{DungeonItem| | {{DungeonItem|Escape Orb|Wonder Orb|sprite=MDBag Wonder Orb V Sprite|3=1F-10}} | ||
{{DungeonItem| | {{DungeonItem|Health Orb|Wonder Orb|sprite=MDBag Wonder Orb V Sprite|3=1F-10}} | ||
{{DungeonItem| | {{DungeonItem|Rollcall Orb|Wonder Orb|sprite=MDBag Wonder Orb V Sprite|3=1F-10}} | ||
{{DungeonItem|Reunion Cape|Scarf (Mystery Dungeon)|3= | {{DungeonItem|Slumber Orb|Wonder Orb|sprite=MDBag Wonder Orb V Sprite|3=1F-10}} | ||
{{DungeonItem|Max Elixir|Health drink|sprite=MDBag | {{DungeonItem|Totter Orb|Wonder Orb|sprite=MDBag Wonder Orb V Sprite|3=1F-10}} | ||
{{DungeonItem|Blast Seed|Seed|sprite=MDBag Seed V Sprite|3=1F-10}} | |||
{{DungeonItem|Reviver Seed|Seed|sprite=MDBag Seed V Sprite|3=1F-10}} | |||
{{DungeonItem|Sleep Seed|Seed|sprite=MDBag Seed V Sprite|3=1F-10}} | |||
{{DungeonItem|Totter Seed|Seed|sprite=MDBag Seed V Sprite|3=1F-10}} | |||
{{DungeonItem|Training Seed|Seed|sprite=MDBag Seed V Sprite|3=1F-10}} | |||
{{DungeonItem|Vile Seed|Seed|sprite=MDBag Seed V Sprite|3=1F-10}} | |||
{{DungeonItem|Warp Seed|Seed|sprite=MDBag Seed V Sprite|3=1F-10}} | |||
{{DungeonItem|Fickle Ribbon|Scarf (Mystery Dungeon)|3=1F-10|sprite=MDBag Scarf V Sprite}} | |||
{{DungeonItem|Reunion Cape|Scarf (Mystery Dungeon)|3=1F-10|sprite=MDBag Scarf V Sprite}} | |||
{{DungeonItem|Max Elixir|Health drink|sprite=MDBag Max Elixir V Sprite|3=1F-10}} | |||
{{DungeonItem/f|rock}} | |||
==Traps encountered== | |||
{| class="roundy" style="background: #{{rock color}}; border: 3px solid #{{water color dark}}; text-align:center" | |||
! style="background:#{{rock color light}}; {{roundytl|5px}}"| Image | |||
! style="background:#{{rock color light}}" | Trap | |||
! style="background:#{{rock color light}}; {{roundytr|5px}}"| Floors | |||
|- style="background: #FFF" | |||
| [[File:SpikyTrapGTI.png]] | |||
| Spiky Trap | |||
| 7F | |||
|- | |||
| style="background: #FFF; {{roundybl|5px}}"| [[File:WarpTrapGTI.png]] | |||
| style="background: #FFF"| Warp Trap | |||
| style="background: #FFF; {{roundybr|5px}}"| 2F, 4F, 6F | |||
|} | |} | ||
==Gallery== | ==Gallery== | ||
<gallery> | <gallery> | ||
File: | File:Scorching Desert Kyurem appears PMDGTI.png|Kyurem suddenly appears | ||
File: | File:Scorching Desert Kyurem attacks PMDGTI.png|Kyurem attacks Hydreigon | ||
File: | File:Scorching Desert Hydreigon frozen PMDGTI.png|Hydreigon frozen from Kyurem's attack | ||
File: | File:Scorching Desert Hydreigon disappears PMDGTI.png|Hydreigon disappears after Kyurem crushes it | ||
File: | File:Scorching Desert Kyurem stomps PMDGTI.png|Kyurem begins to crush the playable Pokémon | ||
File: | File:Scorching Desert Pikachu terrified PMDGTI.png|Partner Pokémon terrified, as Kyurem goes to crush it as well | ||
File: | File:Scorching Desert saving Snivy PMDGTI.png|Pikachu protecting Snivy from Kyurem's attack | ||
</gallery> | </gallery> | ||
==In other languages== | |||
{{langtable|color={{rock color}}|bordercolor={{water color dark}} | |||
|fr=Désert Brûlant | |||
|de=Glutwüste | |||
|it=Deserto Rovente | |||
|es=Desierto Chamusca | |||
}} | |||
{{-}} | {{-}} | ||
{{PMD GTI locations}} | |||
{{DoubleProjectTag|Locations|Sidegames}} | {{DoubleProjectTag|Locations|Sidegames}} | ||
[[Category:Pokémon Mystery Dungeon: Gates to Infinity locations]] | [[Category:Pokémon Mystery Dungeon: Gates to Infinity locations]] | ||
[[Category:Deserts]] | [[Category:Deserts]] | ||
[[de:Glutwüste]] | |||
[[es:Desierto Chamusca]] | |||
[[fr:Désert Brûlant]] | |||
[[it:Deserto Rovente]] | |||
[[ja:カエン砂漠]] | |||
[[zh:火焰沙漠]] | |||
Latest revision as of 03:53, 21 September 2022
|
|
|
| ||||||||||||||||||||||||||||||||||||||||||
| ||||||||||||||||||||||||||||||||||||||||||
| ||||||||||||||||||||||||||||||||||||||||||

Scorching Desert (Japanese: カエン砂漠 Blazing Desert) is a playable dungeon the player goes through in Pokémon Mystery Dungeon: Gates to Infinity. It has 10 floors and no boss. This dungeon is accessible after completing the Holehills dungeon. After the main storyline, this dungeon can be used to enter Glacier Palace Mirage at a high mysteriosity level. This dungeon is relatively short compared to the previous dungeons, but it features prominent Sandstorms. When the player visits floors seven and ten during a job from from the request board, they can access a detour that requires a Water-type Pokémon to pass through. Sparkling Floor tiles and Gold Floor tiles are unusually common in this dungeon.
Pokémon encountered
Scorching Desert
| Pokémon | Floors | Levels | Recruit Rate | |
|---|---|---|---|---|
| Flareon | 1F-10F | 28 | ?% | |
| Cranidos | 1F-10F | 28 | ?% | |
| Roggenrola | 1F-10F | 24 | ?% | |
| Garbodor | 1F-10F | 36 | ?% | |
| Galvantula | 1F-10F | 36 | ?% | |
| Klang | 1F-10F | 38 | ?% | |
| Larvesta | 1F-10F | 27 | ?% | |
| Golett | 6F-10F | 30 | ?% | |
Unnumbered floors
Players can be warped to unnumbered floors of Scorching Desert, with an increased chance with higher mysteriosity ratings.
| Pokémon | Floors | Levels | Recruit Rate | |
|---|---|---|---|---|
| Flareon | N/A | ? | Unrecruitable | |
| Cranidos | N/A | ? | Unrecruitable | |
| Roggenrola | N/A | ? | Unrecruitable | |
| Garbodor | N/A | ? | Unrecruitable | |
| Galvantula | N/A | ? | Unrecruitable | |
| Klang | N/A | ? | Unrecruitable | |
| Golett | N/A | ? | Unrecruitable | |
| Larvesta | N/A | ? | Unrecruitable | |
Gilded Hall
| Pokémon | Floors | Levels | Recruit Rate | |
|---|---|---|---|---|
| Pelipper | 2F-5F | ? | ?% | |
| Salamence | 2F-5F | ? | ?% | |
| Whimsicott | 2F-5F | ? | ?% | |
| Archeops | 2F-5F | ? | ?% | |
Party
On the first visit, Hydreigon is on the player's team. Its stats (minus HP), Exp. Points, and "To next level" sections of the Status screen are all shown as "---".
|
| ||||||||||||||||||||
| Hydreigon Lv.64 | |||||||||||||||||||||
| |||||||||||||||||||||

Items
| Item | Floors | |||||||
|---|---|---|---|---|---|---|---|---|
| 70-290 Poké | 1F-10F | |||||||
| Chesto Berry | 1F-10F | |||||||
| Oran Berry | 1F-10F | |||||||
| Pecha Berry | 1F-10F | |||||||
| All Dodge Orb | 1F-10F | |||||||
| All Power-Up Orb | 1F-10F | |||||||
| Escape Orb | 1F-10F | |||||||
| Health Orb | 1F-10F | |||||||
| Rollcall Orb | 1F-10F | |||||||
| Slumber Orb | 1F-10F | |||||||
| Totter Orb | 1F-10F | |||||||
| Blast Seed | 1F-10F | |||||||
| Reviver Seed | 1F-10F | |||||||
| Sleep Seed | 1F-10F | |||||||
| Totter Seed | 1F-10F | |||||||
| Training Seed | 1F-10F | |||||||
| Vile Seed | 1F-10F | |||||||
| Warp Seed | 1F-10F | |||||||
| Fickle Ribbon | 1F-10F | |||||||
| Reunion Cape | 1F-10F | |||||||
| Max Elixir | 1F-10F | |||||||
Traps encountered
| Image | Trap | Floors |
|---|---|---|

|
Spiky Trap | 7F |

|
Warp Trap | 2F, 4F, 6F |
Gallery

Kyurem suddenly appears
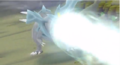
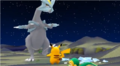
Kyurem attacks Hydreigon
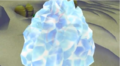
Hydreigon frozen from Kyurem's attack

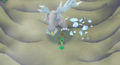
Hydreigon disappears after Kyurem crushes it
Kyurem begins to crush the playable Pokémon
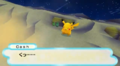
Partner Pokémon terrified, as Kyurem goes to crush it as well
Pikachu protecting Snivy from Kyurem's attack


In other languages
| ||||||||||||||||||
| This article is part of both Project Locations and Project Sidegames, Bulbapedia projects that, together, aim to write comprehensive articles on the Pokémon Locations and Sidegames, respectively. |