Glacier Palace Western Spire: Difference between revisions
m (→Items) |
(Undo revision 3643406 by DJBrightxx (talk) Numbers higher than ten are written in numerals) Tag: Undo |
||
| (48 intermediate revisions by 23 users not shown) | |||
| Line 1: | Line 1: | ||
{{DungeonPrevNext|Glacier Palace | {{DungeonPrevNext|Glacier Palace Eastern Spire|Glacier Palace Great Spire|5}} | ||
{{Dungeon infobox | {{Dungeon infobox | ||
|colorscheme=Rock | |colorscheme=Rock | ||
|bordercolorscheme=Water | |bordercolorscheme=Water | ||
|name=Glacier Palace | |name=Glacier Palace Western Spire | ||
|jname= | |jname=グレッシャーパレス {{tt|西|にし}}の{{tt|塔|とう}} | ||
|jtrans=Glacier Palace | |jtrans=Glacier Palace West Tower | ||
|image=Glacier Palace | |image=Glacier Palace Western Spire PMDGTI.png | ||
|recruitable=Yes | |recruitable=Yes | ||
|floors=12 | |floors=12 | ||
|rest=Yes | |rest=Yes | ||
|traps=Yes | |traps=Yes | ||
|items= | |monsterhouses=Yes | ||
|items=Current | |||
|money=Allowed | |money=Allowed | ||
|teamsize=4 | |teamsize=4 | ||
|startlevel=Current | |startlevel=Current | ||
|maintype= | |maintype=None | ||
|boss= | |boss={{p|Toxicroak}} and {{p|Munna}} | ||
}} | }} | ||
(Japanese: ''' | '''Glacier Palace Western Spire''' (Japanese: '''グレッシャーパレス {{tt|西|にし}}の{{tt|塔|とう}}''' ''Glacier Palace West Tower'') is a playable dungeon the {{player}} goes through in [[Pokémon Mystery Dungeon: Gates to Infinity]]. It has 13 floors and seven bosses. This dungeon is accessible after the player completes [[Glacier Palace Eastern Spire]]. Recruited Pokémon automatically get sent back to [[Pokémon Paradise]] instead of staying with the group. | ||
After the main storyline, this dungeon can be entered randomly as '''Glacier Palace Western Mirage''' (Japanese: '''グレッシャーパレス {{tt|東|ひがし}}の{{tt|幻影|げんえい}}''' ''Glacier Palace West Phantom'') from [[Stony Cave]] and [[Crags of Lament]] by wandering from high [[mysteriosity]]. | |||
==Pokémon encountered== | ==Pokémon encountered== | ||
===Glacier Palace Western Spire=== | |||
{{mdloc/h|Rock}} | |||
{{mdloc|471|Glaceon|1F-12F|36|?}} | |||
{{mdloc|508|Stoutland|1F-12F|32|?}} | |||
{{mdloc|516|Simipour|1F-12F|36|?}} | |||
{{mdloc|525|Boldore|1F-12F|27|?}} | |||
{{mdloc|544|Whirlipede|1F-12F|35|?}} | |||
{{mdloc|558|Crustle|1F-12F|34|?}} | |||
{{mdloc|571|Zoroark|1F-12F|34|?}} | |||
{{mdloc|576|Gothitelle|1F-12F|41|?}} | |||
{{mdloc|601|Klinklang|1F-12F|49|?}} | |||
{{mdloc|614|Beartic|1F-12F|37|?}} | |||
{{mdloc|620|Mienshao|1F-12F|50|?}} | |||
{{mdloc|623|Golurk|1F-12F|43|?}} | |||
{{mdloc|630|Mandibuzz|1F-12F|54|?}} | |||
{{mdloc|637|Volcarona|1F-12F|59|?}} | |||
{{mdloc|454|Toxicroak|13F|30|0|boss=yes}} | |||
{{mdloc|517|Munna|13F|35|0|boss=yes}} | |||
{{mdloc|526|Gigalith|13F|30|0|boss=yes|pnote=×4}} | |||
{{mdloc|609|Chandelure|13F|30|0|boss=yes}} | |||
{{mdloc/f|Rock}} | |||
===Glacier Palace Western Mirage=== | |||
{{mdloc/h|Rock}} | {{mdloc/h|Rock}} | ||
{{mdloc|471|Glaceon| | {{mdloc|471|Glaceon|1F-12F|36|?}} | ||
{{mdloc|508|Stoutland| | {{mdloc|508|Stoutland|1F-12F|32|?}} | ||
{{mdloc|516|Simipour| | {{mdloc|516|Simipour|1F-12F|36|?}} | ||
{{mdloc|525|Boldore| | {{mdloc|525|Boldore|1F-12F|27|?}} | ||
{{mdloc|544|Whirlipede| | {{mdloc|544|Whirlipede|1F-12F|35|?}} | ||
{{mdloc|558|Crustle| | {{mdloc|558|Crustle|1F-12F|34|?}} | ||
{{mdloc|571|Zoroark| | {{mdloc|571|Zoroark|1F-12F|34|?}} | ||
{{mdloc|576|Gothitelle| | {{mdloc|576|Gothitelle|1F-12F|41|?}} | ||
{{mdloc| | {{mdloc|601|Klinklang|1F-12F|49|?}} | ||
{{mdloc| | {{mdloc|614|Beartic|1F-12F|37|?}} | ||
{{mdloc|620|Mienshao| | {{mdloc|620|Mienshao|1F-12F|50|?}} | ||
{{mdloc|623|Golurk| | {{mdloc|623|Golurk|1F-12F|43|?}} | ||
{{mdloc|630|Mandibuzz| | {{mdloc|630|Mandibuzz|1F-12F|54|?}} | ||
{{mdloc|637|Volcarona| | {{mdloc|637|Volcarona|1F-12F|59|?}} | ||
{{mdloc/f|Rock}} | {{mdloc/f|Rock}} | ||
==Items== | ==Items== | ||
{{DungeonItem/h|rock}} | {{DungeonItem/h|rock}} | ||
{{DungeonItem|Poké|4= | {{DungeonItem|Poké|4=63-290|sprite=Poké currency V|3=1F-12}} | ||
{{DungeonItem|Oran Berry|3= | {{DungeonItem|Chesto Berry|sprite=MDBag Chesto Berry V Sprite|3=1F-12}} | ||
{{DungeonItem| | {{DungeonItem|Oran Berry|sprite=MDBag Oran Berry V Sprite|3=1F-12}} | ||
{{DungeonItem|Rawst Berry|sprite=MDBag Rawst Berry Sprite|3= | {{DungeonItem|Pecha Berry|sprite=MDBag Pecha Berry V Sprite|3=1F-12}} | ||
{{DungeonItem|Escape Orb|Wonder Orb|3 | {{DungeonItem|Rawst Berry|sprite=MDBag Rawst Berry V Sprite|3=1F-12}} | ||
{{DungeonItem| | {{DungeonItem|Gravelerock|4=5|Throwing item|sprite=MDBag Gravelerock V Sprite|3=1F-12}} | ||
{{DungeonItem| | {{DungeonItem|All Power-Up Orb|sprite=MDBag Wonder Orb V Sprite|3=1F-12}} | ||
{{DungeonItem| | {{DungeonItem|Escape Orb|sprite=MDBag Wonder Orb V Sprite|3=1F-12}} | ||
{{DungeonItem| | {{DungeonItem|Foe-Hold Orb|sprite=MDBag Wonder Orb V Sprite|3=1F-12}} | ||
{{DungeonItem|Blinker Seed|Seed| | {{DungeonItem|Health Orb|sprite=MDBag Wonder Orb V Sprite|3=1F-12}} | ||
{{DungeonItem|Pure Seed|Seed|3}} | {{DungeonItem|Petrify Orb|sprite=MDBag Wonder Orb V Sprite|3=1F-12}} | ||
{{DungeonItem| | {{DungeonItem|Rollcall Orb|sprite=MDBag Wonder Orb V Sprite|3=1F-12}} | ||
{{DungeonItem| | {{DungeonItem|Slumber Orb|sprite=MDBag Wonder Orb V Sprite|3=1F-12}} | ||
{{DungeonItem| | {{DungeonItem|Blast Seed|Seed|sprite=MDBag Seed V Sprite|3=1F-12}} | ||
{{DungeonItem|Defense Scarf|Scarf (Mystery Dungeon)|3 | {{DungeonItem|Blinker Seed|Seed|sprite=MDBag Seed V Sprite|3=1F-12}} | ||
{{DungeonItem| | {{DungeonItem|Encourage Seed|Seed|sprite=MDBag Seed V Sprite|3=1F-12}} | ||
{{DungeonItem| | {{DungeonItem|Pure Seed|Seed|sprite=MDBag Seed V Sprite|3=1F-12}} | ||
{{DungeonItem| | {{DungeonItem|Reviver Seed|Seed|sprite=MDBag Seed V Sprite|3=1F-12}} | ||
{{DungeonItem| | {{DungeonItem|Stun Seed|Seed|sprite=MDBag Seed V Sprite|3=1F-12}} | ||
{{DungeonItem| | {{DungeonItem|Totter Seed|Seed|sprite=MDBag Seed V Sprite|3=1F-12}} | ||
{{DungeonItem|Training Seed|Seed|sprite=MDBag Seed V Sprite|3=1F-12}} | |||
{{DungeonItem|Vile Seed|Seed|sprite=MDBag Seed V Sprite|3=1F-12}} | |||
{{DungeonItem|Violent Seed|Seed|sprite=MDBag Seed V Sprite|3=1F-12}} | |||
{{DungeonItem|Defense Scarf|Scarf (Mystery Dungeon)|3=1F-12|sprite=MDBag Scarf V Sprite}} | |||
{{DungeonItem|Joy Ribbon|Scarf (Mystery Dungeon)|3=1F-12|sprite=MDBag Scarf V Sprite}} | |||
{{DungeonItem|Power Band|Scarf (Mystery Dungeon)|3=1F-12|sprite=MDBag Scarf V Sprite}} | |||
{{DungeonItem|Special Band|Scarf (Mystery Dungeon)|3=1F-12|sprite=MDBag Scarf V Sprite}} | |||
{{DungeonItem|Zinc Band|Scarf (Mystery Dungeon)|3=1F-12|sprite=MDBag Scarf V Sprite}} | |||
{{DungeonItem|Max Elixir|Health drink|sprite=MDBag Max Elixir V Sprite|3=1F-12}} | |||
{{DungeonItem|Scope Lens|Glasses|3=1F-12|sprite=MDBag Glasses V Sprite}} | |||
{{DungeonItem/f|rock}} | |||
==Traps encountered== | |||
{| class="roundy" style="background: #{{rock color}}; border: 3px solid #{{water color dark}}; text-align:center" | |||
! style="background:#{{rock color light}}; {{roundytl|5px}}"| Image | |||
! style="background:#{{rock color light}}" | Trap | |||
! style="background:#{{rock color light}}; {{roundytr|5px}}"| Floors | |||
|- style="background: #FFF" | |||
| [[File:PoisonTrapGTI.png]] | |||
| Poison Trap | |||
| 8F, 10F | |||
|- style="background: #FFF" | |||
| [[File:SlumberTrapGTI.png]] | |||
| Slumber Trap | |||
| 5F, 7F, 9F | |||
|- style="background: #FFF" | |||
| [[File:SpikyTrapGTI.png]] | |||
| Spiky Trap | |||
| 12F | |||
|- | |||
| style="background: #FFF; {{roundybl|5px}}"| [[File:SpinTrapGTI.png]] | |||
| style="background: #FFF"| Spin Trap | |||
| style="background: #FFF; {{roundybr|5px}}"| 10F | |||
|} | |} | ||
==Gallery== | ==Gallery== | ||
<gallery> | <gallery> | ||
File:Glacier Palace | File:Glacier Palace Western Spire entrance PMDGTI.png|Entrance | ||
File:Glacier Palace | File:Glacier Palace Western Spire blue ice PMDGTI.png|Blue ice obstacle blocking the way to Keldeo | ||
File:Glacier Palace | File:Glacier Palace Western Spire injured Keldeo PMDGTI.png|Injured Keldeo and Entercards | ||
File:Glacier Palace | File:Glacier Palace Western Spire boss battle PMDGTI.png|Boss battle | ||
File:Glacier Palace | File:Glacier Palace Western Spire rescue PMDGTI.png|Espeon, Umbreon, and Keldeo appear through the portal | ||
File:Glacier Palace | File:Glacier Palace Western Spire broken apart PMDGTI.png|Dungeon breaks apart | ||
</gallery> | </gallery> | ||
==In other languages== | |||
{{langtable|color={{rock color}}|bordercolor={{water color dark}} | |||
|fr=Palais de Glace Tour Ouest | |||
|de=Eispalast - Westturm | |||
|it=Palazzo di Ghiaccio - Torre Ovest | |||
|es=Palacio Glacial (Torre Oeste) | |||
}} | |||
''Glacier Palace Western Mirage'' | |||
{{langtable|color={{rock color}}|bordercolor={{water color dark}} | |||
|fr=Palais de Glace Mirage de l'Ouest | |||
|de=Eispalast - Trugbild West | |||
|it=Palazzo di Ghiaccio - Miraggio Ovest | |||
|es=Palacio Glacial (Espejismo Oeste) | |||
}} | |||
{{-}} | {{-}} | ||
{{PMD GTI locations}} | |||
{{DoubleProjectTag|Locations|Sidegames}} | {{DoubleProjectTag|Locations|Sidegames}} | ||
[[Category:Pokémon Mystery Dungeon: Gates to Infinity locations]] | [[Category:Pokémon Mystery Dungeon: Gates to Infinity locations]] | ||
[[Category: | [[Category:Towers]] | ||
[[de:Eispalast – Westturm]] | |||
[[es:Palacio Glacial - Torre Oeste]] | |||
[[fr:Palais de Glace - Tour Ouest]] | |||
[[it:Palazzo di Ghiaccio - Torre Ovest]] | |||
[[ja:グレッシャーパレス 西の塔]] | |||
[[zh:冰河宮殿 西之塔]] | |||
Latest revision as of 22:37, 25 January 2023
|
|
|
| ||||||||||||||||||||||||||||||||||||||||||
| ||||||||||||||||||||||||||||||||||||||||||
| ||||||||||||||||||||||||||||||||||||||||||

Glacier Palace Western Spire (Japanese: グレッシャーパレス 西の塔 Glacier Palace West Tower) is a playable dungeon the player goes through in Pokémon Mystery Dungeon: Gates to Infinity. It has 13 floors and seven bosses. This dungeon is accessible after the player completes Glacier Palace Eastern Spire. Recruited Pokémon automatically get sent back to Pokémon Paradise instead of staying with the group.
After the main storyline, this dungeon can be entered randomly as Glacier Palace Western Mirage (Japanese: グレッシャーパレス 東の幻影 Glacier Palace West Phantom) from Stony Cave and Crags of Lament by wandering from high mysteriosity.
Pokémon encountered
Glacier Palace Western Spire
| Pokémon | Floors | Levels | Recruit Rate | |
|---|---|---|---|---|
| Glaceon | 1F-12F | 36 | ?% | |
| Stoutland | 1F-12F | 32 | ?% | |
| Simipour | 1F-12F | 36 | ?% | |
| Boldore | 1F-12F | 27 | ?% | |
| Whirlipede | 1F-12F | 35 | ?% | |
| Crustle | 1F-12F | 34 | ?% | |
| Zoroark | 1F-12F | 34 | ?% | |
| Gothitelle | 1F-12F | 41 | ?% | |
| Klinklang | 1F-12F | 49 | ?% | |
| Beartic | 1F-12F | 37 | ?% | |
| Mienshao | 1F-12F | 50 | ?% | |
| Golurk | 1F-12F | 43 | ?% | |
| Mandibuzz | 1F-12F | 54 | ?% | |
| Volcarona | 1F-12F | 59 | ?% | |
| Toxicroak | 13F | 30 | Unrecruitable Boss | |
| Munna | 13F | 35 | Unrecruitable Boss | |
| Gigalith ×4 | 13F | 30 | Unrecruitable Boss | |
| Chandelure | 13F | 30 | Unrecruitable Boss | |
Glacier Palace Western Mirage
| Pokémon | Floors | Levels | Recruit Rate | |
|---|---|---|---|---|
| Glaceon | 1F-12F | 36 | ?% | |
| Stoutland | 1F-12F | 32 | ?% | |
| Simipour | 1F-12F | 36 | ?% | |
| Boldore | 1F-12F | 27 | ?% | |
| Whirlipede | 1F-12F | 35 | ?% | |
| Crustle | 1F-12F | 34 | ?% | |
| Zoroark | 1F-12F | 34 | ?% | |
| Gothitelle | 1F-12F | 41 | ?% | |
| Klinklang | 1F-12F | 49 | ?% | |
| Beartic | 1F-12F | 37 | ?% | |
| Mienshao | 1F-12F | 50 | ?% | |
| Golurk | 1F-12F | 43 | ?% | |
| Mandibuzz | 1F-12F | 54 | ?% | |
| Volcarona | 1F-12F | 59 | ?% | |
Items
| Item | Floors | |||||||
|---|---|---|---|---|---|---|---|---|
| 63-290 Poké | 1F-12F | |||||||
| Chesto Berry | 1F-12F | |||||||
| Oran Berry | 1F-12F | |||||||
| Pecha Berry | 1F-12F | |||||||
| Rawst Berry | 1F-12F | |||||||
| 5 Gravelerock | 1F-12F | |||||||
| All Power-Up Orb | 1F-12F | |||||||
| Escape Orb | 1F-12F | |||||||
| Foe-Hold Orb | 1F-12F | |||||||
| Health Orb | 1F-12F | |||||||
| Petrify Orb | 1F-12F | |||||||
| Rollcall Orb | 1F-12F | |||||||
| Slumber Orb | 1F-12F | |||||||
| Blast Seed | 1F-12F | |||||||
| Blinker Seed | 1F-12F | |||||||
| Encourage Seed | 1F-12F | |||||||
| Pure Seed | 1F-12F | |||||||
| Reviver Seed | 1F-12F | |||||||
| Stun Seed | 1F-12F | |||||||
| Totter Seed | 1F-12F | |||||||
| Training Seed | 1F-12F | |||||||
| Vile Seed | 1F-12F | |||||||
| Violent Seed | 1F-12F | |||||||
| Defense Scarf | 1F-12F | |||||||
| Joy Ribbon | 1F-12F | |||||||
| Power Band | 1F-12F | |||||||
| Special Band | 1F-12F | |||||||
| Zinc Band | 1F-12F | |||||||
| Max Elixir | 1F-12F | |||||||
| Scope Lens | 1F-12F | |||||||
Traps encountered
| Image | Trap | Floors |
|---|---|---|

|
Poison Trap | 8F, 10F |

|
Slumber Trap | 5F, 7F, 9F |

|
Spiky Trap | 12F |

|
Spin Trap | 10F |
Gallery
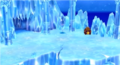
Entrance
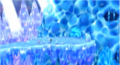
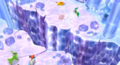
Blue ice obstacle blocking the way to Keldeo
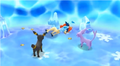
Injured Keldeo and Entercards
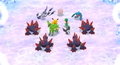
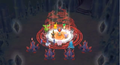
Boss battle
Espeon, Umbreon, and Keldeo appear through the portal
Dungeon breaks apart


In other languages
| ||||||||||||||||||
Glacier Palace Western Mirage
| ||||||||||||||||||
| This article is part of both Project Locations and Project Sidegames, Bulbapedia projects that, together, aim to write comprehensive articles on the Pokémon Locations and Sidegames, respectively. |