Appendix:Gold and Silver walkthrough/Section 2: Difference between revisions
mNo edit summary |
mNo edit summary |
||
| Line 3: | Line 3: | ||
----- | ----- | ||
== Cherrygrove City == | |||
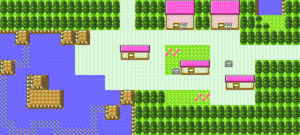
[[Image:Cherrygrove City GSC.png|thumb|300px|right|Cherrygrove City]] | |||
{{ci|Cherrygrove}} is the first city that you'll encounter in the region that has a [[Pokémon Center]] and a [[Pokémon Mart]]. Poké Centers are essentially hospitals where your creatures can be restored to perfect health. The PC at the rear wall is always available for Trainers to organize their Pokémon and items. Poké Marts offer a wide range of items for sale, from Potions to Poké Balls. | |||
== | {| class="expandable" align="center" style="background: #{{silver color light}}; {{roundy}}; border: 5px solid #{{gold color light}};" | ||
|- align="center" | |||
! Items | |||
|- | |||
| | |||
{{itlisth}} | |||
{{itlistbod|Town Map|From Guide Gent after his tour|GS|display={{DL|Pokégear|Map|Map Card}}}} | |||
{{catch/div|water|After getting {{HM|03|Surf}}}} | |||
{{itlistbod|Mystic Water|From the fisherman on the island|GS|display={{DL|Type-enhancing item|Mystic Water}}}} | |||
{{itlistfoot}} | |||
|} | |||
Talk to Guide Gent at the east entrance to get a {{DL|Cherrygrove City|City Tour|tour}} of the city. | Talk to Guide Gent at the east entrance to get a {{DL|Cherrygrove City|City Tour|tour}} of the city. After a quick jog through the city, he gives you the {{DL|Pokégear|Map|Map Card}} to add to your Pokégear. This acts as the [[Town Map]] from [[Generation I]]. To use it, press Start, select ''Pokégear'', and move the cursor to the map icon. | ||
=== Stock Up === | === Stock Up === | ||
After returning to Professor Elm from Mr. Pokémon's house, visit the Poké Mart to stock up on Poké Balls. These are essential for recruiting more monsters for your team! | After returning to Professor Elm from Mr. Pokémon's house, visit the Poké Mart to stock up on Poké Balls. These are essential for recruiting more monsters for your team! | ||
When your team is ready, head north to {{rt|30|Johto}}. | When your team is ready, head north to {{rt|30|Johto}}. | ||
== Route 30 == | == Route 30 == | ||
[[Image:Route 30.png|thumb|right|Route 30]] | [[Image:Route 30.png|thumb|right|Route 30]] | ||
{| class="expandable" align="center" style="background: #{{silver color light}}; | {| class="expandable" align="center" style="background: #{{silver color light}}; {{roundy}}; border: 5px solid #{{gold color light}};" | ||
|- align="center" | |- align="center" | ||
! Available Pokémon | ! Available Pokémon | ||
| Line 33: | Line 38: | ||
{{catch/header|land}} | {{catch/header|land}} | ||
{{catch/entry2|010|Caterpie|yes|no|no|Grass|3-4|50%|35%|0%|type1=bug}} | {{catch/entry2|010|Caterpie|yes|no|no|Grass|3-4|50%|35%|0%|type1=bug}} | ||
{{catch/entry2|011|Metapod|yes|no|no|Grass|4-5|10%|15%|0%|type1=bug}} | {{catch/entry2|011|Metapod|yes|no|no|Grass|4-5|10%|15%|0%|type1=bug}} | ||
{{catch/entry2|013|Weedle|no|yes|no|Grass|3-4|50%|35%|0%|type1=bug}} | {{catch/entry2|013|Weedle|no|yes|no|Grass|3-4|50%|35%|0%|type1=bug}} | ||
{{catch/entry2|014|Kakuna|no|yes|no|Grass|4|10%|15%|0%|type1=bug|type2=poison}} | {{catch/entry2|014|Kakuna|no|yes|no|Grass|4|10%|15%|0%|type1=bug|type2=poison}} | ||
{{catch/entry2|016|Pidgey|yes|no|no|Grass|2-4|40%|50%|0%|type2=flying}} | {{catch/entry2|016|Pidgey|yes|no|no|Grass|2-4|40%|50%|0%|type2=flying}} | ||
{{catch/entry2|016|Pidgey|no|yes|no|Grass|4|10%|50%|0%|type2=flying}} | {{catch/entry2|016|Pidgey|no|yes|no|Grass|4|10%|50%|0%|type2=flying}} | ||
{{catch/entry2|019|Rattata|yes|yes|no|Grass|3-4|0%|0%|40%}} | {{catch/entry2|019|Rattata|yes|yes|no|Grass|3-4|0%|0%|40%}} | ||
{{catch/entry2|163|Hoothoot|yes|no|no|Grass|4|0%|0%|30%|type2=flying}} | {{catch/entry2|163|Hoothoot|yes|no|no|Grass|4|0%|0%|30%|type2=flying}} | ||
{{catch/entry2|163|Hoothoot|no|yes|no|Grass|2-4|0%|0%|60%|type2=flying}} | {{catch/entry2|163|Hoothoot|no|yes|no|Grass|2-4|0%|0%|60%|type2=flying}} | ||
{{catch/entry2|165|Ledyba|no|yes|no|Grass|3|30%|0%|0%|type1=bug|type2=flying}} | |||
{{catch/entry2|165|Ledyba|no|yes| | {{catch/entry2|167|Spinarak|yes|no|no|Grass|3|0%|0%|30%|type1=bug|type2=poison}} | ||
{{catch/entry2|167|Spinarak|yes|no| | |||
{{catch/footer|land}} | {{catch/footer|land}} | ||
|} | |} | ||
{| class="expandable" align="center" style="background: #{{silver color light}}; | {| class="expandable" align="center" style="background: #{{silver color light}}; {{roundy}}; border: 5px solid #{{gold color light}};" | ||
|- align="center" | |- align="center" | ||
! Items | ! Items | ||
|- | |- | ||
|{{ | | | ||
{{ | {{itlisth}} | ||
{{ | {{itlistbod|none| | ||
{{ | * From a tree outside the southern house | ||
{{ | * From a man inside the southern house|GS|display=[[Berries (Generation II)|Berry]] ×2}} | ||
{{ | {{itlistbod|Potion|In the flowerbed southwest of Mr. Pokémon's house (hidden)|GS}} | ||
{{ | {{itlistbod|none|Outside Mr. Pokémon's house|GS|display={{DL|Berries (Generation II)|PSNCureBerry}}}} | ||
{{itlistbod|Mystery Egg|From Mr. Pokémon in the northern house|GS|display={{DL|List of key items in Generation IV|Mystery Egg}}}} | |||
{{itlistfoot}} | |||
|} | |} | ||
Revision as of 21:47, 27 February 2012
The guide for those can be found here.
Cherrygrove City
Cherrygrove is the first city that you'll encounter in the region that has a Pokémon Center and a Pokémon Mart. Poké Centers are essentially hospitals where your creatures can be restored to perfect health. The PC at the rear wall is always available for Trainers to organize their Pokémon and items. Poké Marts offer a wide range of items for sale, from Potions to Poké Balls.
| Items | |||||||||||||||||||||||
|---|---|---|---|---|---|---|---|---|---|---|---|---|---|---|---|---|---|---|---|---|---|---|---|
| |||||||||||||||||||||||
Talk to Guide Gent at the east entrance to get a tour of the city. After a quick jog through the city, he gives you the Map Card to add to your Pokégear. This acts as the Town Map from Generation I. To use it, press Start, select Pokégear, and move the cursor to the map icon.
Stock Up
After returning to Professor Elm from Mr. Pokémon's house, visit the Poké Mart to stock up on Poké Balls. These are essential for recruiting more monsters for your team!
When your team is ready, head north to Route 30.
Route 30
| Available Pokémon | |||||||||||||||||||||||||||||||||||||||||||||||||||||||||||||||||||||||||||||||||||||||||||||||||||||||||||||||||||||||||||||||||||||||||||||||||||||||||||||||||||||||||||||||||||||||||||||||||||||||||||||
|---|---|---|---|---|---|---|---|---|---|---|---|---|---|---|---|---|---|---|---|---|---|---|---|---|---|---|---|---|---|---|---|---|---|---|---|---|---|---|---|---|---|---|---|---|---|---|---|---|---|---|---|---|---|---|---|---|---|---|---|---|---|---|---|---|---|---|---|---|---|---|---|---|---|---|---|---|---|---|---|---|---|---|---|---|---|---|---|---|---|---|---|---|---|---|---|---|---|---|---|---|---|---|---|---|---|---|---|---|---|---|---|---|---|---|---|---|---|---|---|---|---|---|---|---|---|---|---|---|---|---|---|---|---|---|---|---|---|---|---|---|---|---|---|---|---|---|---|---|---|---|---|---|---|---|---|---|---|---|---|---|---|---|---|---|---|---|---|---|---|---|---|---|---|---|---|---|---|---|---|---|---|---|---|---|---|---|---|---|---|---|---|---|---|---|---|---|---|---|---|---|---|---|---|---|---|
| |||||||||||||||||||||||||||||||||||||||||||||||||||||||||||||||||||||||||||||||||||||||||||||||||||||||||||||||||||||||||||||||||||||||||||||||||||||||||||||||||||||||||||||||||||||||||||||||||||||||||||||
| Items | ||||||||
|---|---|---|---|---|---|---|---|---|
| ||||||||
On your way to Mr. Pokémon's house, a Pokémon battle will be blocking the main road, preventing anyone from reaching Violet City. After completing Elm's request, the path will be clear. In the southern house is a guy that knows about the healing properties of Berries and Berry trees, so stop in to get a free Berry. Check the tree outside for another Berry, and continue north. Cut through the tall grass and stay on the eastern half of the route to reach Mr. Pokémon's house. Check his tree for a PSNCureBerry, and head inside.
Mr. Pokémon's house
When you walk into his house, you'll see that he's not alone - Professor Oak from Kanto is visiting!
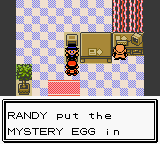
Mr. Pokémon gives you the Mystery Egg to take to Professor Elm, and Oak gives you a Pokédex. The professor rushes off, and Mr. Pokémon heals your Pokémon before you leave.
As soon as you step outside, Professor Elm calls you, obviously in a state of panic.
Hustle back to New Bark!
Cherrygrove City
Make sure your team is rested up, because as soon as you try to leave Cherrygrove, that mysterious guy that was spying on Elm's lab ambushes you, forcing you into a battle. It turns out that he swiped one of Elm's Pokémon from the lab. Whichever you chose, his Pokémon will always have a type advantage against yours, so having a few Potions isn't a bad idea.
 If the player chose Chikorita: If the player chose Chikorita:
|
 If the player chose Cyndaquil: If the player chose Cyndaquil:
|
 If the player chose Totodile: If the player chose Totodile:
| |||||||||||||||||||||||||||||||||||||||||||||||||||||||||||||||||||||||||||||||||||||||||||||||||||||||||||||||||||||||||||||||||
|---|---|---|---|---|---|---|---|---|---|---|---|---|---|---|---|---|---|---|---|---|---|---|---|---|---|---|---|---|---|---|---|---|---|---|---|---|---|---|---|---|---|---|---|---|---|---|---|---|---|---|---|---|---|---|---|---|---|---|---|---|---|---|---|---|---|---|---|---|---|---|---|---|---|---|---|---|---|---|---|---|---|---|---|---|---|---|---|---|---|---|---|---|---|---|---|---|---|---|---|---|---|---|---|---|---|---|---|---|---|---|---|---|---|---|---|---|---|---|---|---|---|---|---|---|---|---|---|---|---|---|---|
|
|
| |||||||||||||||||||||||||||||||||||||||||||||||||||||||||||||||||||||||||||||||||||||||||||||||||||||||||||||||||||||||||||||||||
Back in New Bark
Hurry to Elm's lab to see the professor talking to the police. After speaking with the officer (and naming your rival as the culprit), talk to Professor Elm to deliver the Mystery Egg. Elm is shocked to see the discovery, and promises to call you if he learns anything about the Egg. On your way out the door, his assistant hands you 5 Poké Balls to use on your journey. Now that you've got your first supply, you are free to buy them in most Poké Marts.
From the Bank of Mom
Stop by your house before you start your Pokémon Gym challenge. Talk to your Mom, and she'll offer to save your money for you. When all of your Pokémon faint during battle, you lose half of your money, but any money that Mom has is safe. She'll also buy a random item for you from your savings; sometimes an item like a Potion, or it could be a stuffed doll to decorate your room. You can change whether she saves your money or not by phone as well.
With Elm's errand complete, you can finally get to Violet City.
Get back to Cherrygrove and head north to Route 30 again.
|
Gold and Silver walkthrough |
|

|
This article is part of Project Walkthroughs, a Bulbapedia project that aims to write comprehensive step-by-step guides on each Pokémon game. |


