Appendix:Yellow walkthrough/Section 5: Difference between revisions
m (→Vermilion City) |
mNo edit summary |
||
| (33 intermediate revisions by 18 users not shown) | |||
| Line 1: | Line 1: | ||
== | {{WalkthroughNotice|Y}} | ||
[[ | ==Cerulean City== | ||
[[File:Cerulean City RBY.png|thumb|300px|Cerulean City]] | |||
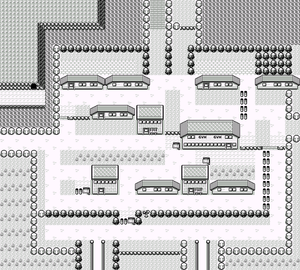
[[Cerulean City]] is a beautiful city with flowing water and blooming flowers. It is located between {{rt|4|Kanto}}, {{rt|24|Kanto}}, {{rt|9|Kanto}}, and {{rt|5|Kanto}}. | |||
{| class="expandable" align="center" style="background: # | {| class="expandable" align="center" style="background: #3F9BBC; {{roundy}}; border: 5px solid #7FBCD2;" | ||
|- align="center" | |- align="center" | ||
! | ! Available Pokémon | ||
|- | |- | ||
| | | | ||
{{ | {{Catch/header|lake|no}} | ||
{{Catch/div|lake|Gift Pokémon}} | |||
{{ | {{Catch/entry1|001|Bulbasaur|no|no|yes|Gift|10|{{tt|One|If Pikachu's friendship is 147 or higher.}}|type1=Grass|type2=Poison}} | ||
{{Catch/footer|lake}} | |||
{{ | |||
{{ | |||
{{ | |||
|} | |} | ||
{| class="expandable" align="center" style="background: # | {| class="expandable" align="center" style="background: #3F9BBC; {{roundy}}; border: 5px solid #7FBCD2;" | ||
|- align="center" | |- align="center" | ||
! | ! Items | ||
|- | |- | ||
| | | | ||
{{ | {{Itlisth|lake}} | ||
{{ | {{Itemlist|Rare Candy|In the backyard of the northwest house ''(hidden)''|Y=yes}} | ||
{{ | {{Itemlist|TM Water|From Misty, after defeating her|Y=yes|display={{TM|11|BubbleBeam}}}} | ||
{{catch/ | {{catch/div|lake|Later visit}} | ||
{{ | {{Itemlist|TM Ground|From the Team Rocket Grunt, after defeating him|Y=yes|display={{TM|28|Dig}}}} | ||
{{ | {{Itemlist|Bicycle|From the [[Miracle Cycle|Bike Shop]] owner, in exchange for a [[Bike Voucher]]|Y=yes}} | ||
{{ | {{Itlistfoot|lake}} | ||
|} | |} | ||
===A Rare Addition=== | |||
Visit the house next to the Pokémon Center to find [[Melanie|a girl]] who cares for injured and abandoned Pokémon. She has nursed a {{p|Bulbasaur}} back to health, but now it needs a caring Trainer to raise it properly. If your [[friendship]] with {{OBP|Pikachu|Yellow}} has {{DL|Friendship|Generation I|grown high enough}}, she asks if you would take care of the young Pokémon. | |||
{| align="center" | ===Gym Badges, Explained=== | ||
| | The northwest house belongs to a man who offers to explains the effects of the eight {{DL|Badge|Indigo League|Gym Badges}}. Half of them give a slight power boost to a respective stat, while the other half ensure a Pokémon's [[obedience]] during battle. The first five unlock the use of field moves. | ||
{{ | |||
{{ | {| style="margin: auto; background: #3F9BBC; {{roundy}}; border: 2px solid #007BA7;" cellspacing="2" cellpadding="4" | ||
{{ | |- | ||
{{ | ! colspan="2" style="background: #7FBCD2; {{roundytl|5px}};" | Badge | ||
{{ | ! style="background: #7FBCD2;" | Effect | ||
{{ | ! colspan="2" style="background: #7FBCD2;" | Badge | ||
! style="background: #7FBCD2; {{roundytr|5px}};" | Effect | |||
|- align="center" style="background: #FFF;" | |||
| [[File:Boulder Badge.png|20px|Boulder Badge]] | |||
| {{badge|Boulder}} | |||
| Increases {{stat|Attack}},<br>Allows {{m|Flash}} in the field | |||
| [[File:Cascade Badge.png|20px|Cascade Badge]] | |||
| {{badge|Cascade}} | |||
| Ensures obedience up to level 30,<br>Allows {{m|Cut}} in the field | |||
|- align="center" style="background: #FFF;" | |||
| [[File:Thunder Badge.png|20px|Thunder Badge]] | |||
| {{badge|Thunder}} | |||
| Increases {{stat|Defense}},<br>Allows {{m|Fly}} in the field | |||
| [[File:Rainbow Badge.png|20px|Rainbow Badge]] | |||
| {{badge|Rainbow}} | |||
| Ensures obedience up to level 50,<br>Allows {{m|Strength}} in the field | |||
|- align="center" style="background: #FFF;" | |||
| [[File:Soul Badge.png|20px|Soul Badge]] | |||
| {{badge|Soul}} | |||
| Increases {{stat|Speed}},<br>Allows {{m|Surf}} in the field | |||
| [[File:Marsh Badge.png|20px|Marsh Badge]] | |||
| {{badge|Marsh}} | |||
| Ensures obedience up to level 70 | |||
|- align="center" style="background: #FFF;" | |||
| [[File:Volcano Badge.png|20px|Volcano Badge]] | |||
| {{badge|Volcano}} | |||
| Increases {{stat|Special}} | |||
| [[File:Earth Badge.png|20px|Earth Badge]] | |||
| {{badge|Earth}} | |||
| Ensures obedience up to level 100 | |||
|- | |||
| colspan="6" style="background: #7FBCD2; {{roundybottom|5px}};" | | |||
|} | |} | ||
===Bike Shop=== | |||
It would be great to get a [[Bicycle]] from the [[Miracle Cycle|Bike Shop]] in the southwest part of town, but they cost a whopping {{pdollar}}1,000,000! It is not possible to carry that much money, so it looks like you are stuck traveling on foot for now. | |||
===Breaking, Entering=== | |||
The house in the northeast is currently blocked off by a police officer. It seems that [[Team Rocket]] has broken into the home and stolen [[TM28|a valuable item]] from its residents. Nothing can be done to remedy this at the moment, so set your sights on the Gym instead. | |||
===Cerulean Gym=== | |||
[[File:Cerulean Gym RBY.png|thumb|Cerulean Gym]] | |||
{{sign|RBY|header}} | |||
{{sign|RBY|title|CERULEAN CITY POKéMON GYM<br>LEADER: MISTY}} | |||
{{sign|RBY|The Tomboyish Mermaid!}} | |||
{{sign|RBY|footer}} | |||
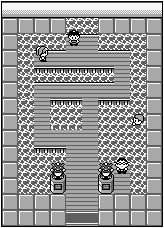
The [[Cerulean Gym]] specializes in {{type|Water}} Pokémon. Water-type moves are super effective against {{t|Fire}}-, {{t|Ground}}-, and {{type|Rock}} Pokémon, while Water-type Pokémon are weak to {{t|Electric}}- and {{type|Grass}} moves. With {{OBP|Pikachu|Yellow}} and {{p|Bulbasaur}} in tow, beating the Cerulean Gym should be easier than beating the previous one. Other Grass Pokémon—{{p|Oddish}} and {{p|Bellsprout}}—can be found on the nearby {{rt|24|Kanto}}, as well. | |||
The | |||
Take out [[Misty]]'s {{p|Staryu}} quickly to move on to her {{p|Starmie}}. Her second Pokémon is both {{stat|Special|stronger}} and {{stat|Speed|faster}} than Staryu, making its {{m|Bubble Beam|BubbleBeam}} especially painful to vulnerable Pokémon. Use Pikachu's {{m|ThunderShock}}, or Grass moves like {{m|Vine Whip}} and {{m|Absorb}}, to deal serious damage and make quick work of it. | |||
{| | {| align="center" | ||
|- align="center" | |- align="center" valign="top" | ||
| | | | ||
{| | {| align="center" style="background: #{{water color}}; {{roundy}}; border: 5px solid #{{water color light}};" | ||
|- align="center" | |- align="center" | ||
! | ! Cerulean Gym<br>[[File:Cascade Badge.png|35px|Cascade Badge]]<br><br> | ||
|- | |- | ||
| | | | ||
{ | {| align="center" class="expandable" style="background: #{{water color}}; {{roundy}}; border: 5px solid #{{water color light}};" | ||
|- align="center" | |- align="center" | ||
! | ! Trainers | ||
|- | |- | ||
| | | | ||
{{ | {{Trainerheader|Water}} | ||
{{ | {{Trainerentry|Spr Y Swimmer.png|Swimmer||game=1|80|2|116|Horsea||16|None|090|Shellder||16|None}} | ||
{{ | {{Trainerdiv|Water}} | ||
{{ | {{Trainerentry|Spr Y Jr Trainer F.png|Jr. Trainer♀||game=1|380|1|118|Goldeen||19|None}} | ||
{{ | {{Trainerfooter|Water|1|Inside}} | ||
|} | |} | ||
{| | |||
| | |||
{| style="margin: auto;" | |||
| | |||
{{Party/Single | |||
{{ | |color={{water color}} | ||
|bordercolor={{water color dark}} | |||
{{ | |headcolor={{water color light}} | ||
|sprite=Spr Y Misty.png | |||
{{ | |prize={{pdollar}}2079 | ||
|name={{color2|000|Misty}} | |||
{{ | |game=Y | ||
|location=Cerulean Gym | |||
{{ | |pokemon=2}} | ||
|{{Pokémon/1 | |||
|ndex=120 | |||
|pokemon=Staryu | |||
|game=Yellow | |||
|type1=Water|level=18 | |||
|move1=Tackle|move1type=Normal | |||
|move2=Water Gun|move2type=Water}} | |||
|{{Pokémon/1 | |||
|ndex=121 | |||
|pokemon=Starmie | |||
|game=Yellow | |||
|type1=Water|type2=Psychic | |||
|level=21 | |||
|move1=Tackle|move1type=Normal | |||
|move2=Water Gun|move2type=Water | |||
|move3=Harden|move3type=Normal | |||
|move4=BubbleBeam|move4type=Water}} | |||
{{Party/Footer}} | |||
|} | |} | ||
|} | |} | ||
|} | |} | ||
After the battle, [[Misty]] awards you the {{badge|Cascade}}, which ensures obedience from all Pokémon up to level 30 and enables the use of {{m|Cut}} in the field. She also gives you {{TM|11|BubbleBeam}} as a prize. | |||
===Rival Battle 3=== | |||
When you head toward {{rt|24|Kanto}}, {{ga|Blue}} appears and taunts you as usual before drawing you into another battle. He leads with his {{p|Spearow}}, so start off with {{t|Electric}}- and {{type|Rock}} attacks. His {{p|Sandshrew}}, a {{type|Ground}} Pokémon, takes no damage from {{OBP|Pikachu|Yellow}}'s {{t|Electric}} attacks. Luckily, it has no Ground moves to worry about. {{p|Rattata}}'s {{m|Quick Attack}} lets it move first regardless of its {{stat|Speed}} and {{m|Hyper Fang}} can inflict a good bit of damage, so try to take it out quickly. Aside from having grown a few levels, his {{p|Eevee}} is much the same as it was in the previous battle. | |||
{| style="margin: auto;" | |||
{| | |||
| | | | ||
{{Party | {{Party/Single | ||
|color={{ | |color={{blue color}} | ||
|headcolor={{blue color light}} | |headcolor={{blue color light}} | ||
|bordercolor={{ | |bordercolor={{green color dark}} | ||
|sprite=Spr Y Blue 1.png | |sprite=Spr Y Blue 1.png | ||
|prize={{ | |prize={{Pdollar}}595 | ||
|name=Blue | |name=Blue | ||
|game=Y | |game=Y | ||
|location= | |location=Cerulean City | ||
|pokemon=4 | |pokemon=4 | ||
| | }} | ||
|{{Pokémon/1 | |||
|game=Yellow | |||
|ndex=021 | |ndex=021 | ||
|pokemon=Spearow | |pokemon=Spearow | ||
|level= | |level=18 | ||
|type1=Normal|type2=Flying | |type1=Normal | ||
|move1=Peck|move1type=Flying | |type2=Flying | ||
|move2=Growl|move2type=Normal | |move1=Peck | ||
|move3=Leer|move3type=Normal | |move1type=Flying | ||
|move4=Fury Attack|move4type=Normal}} | |move2=Growl | ||
| | |move2type=Normal | ||
|move3=Leer | |||
|move3type=Normal | |||
|move4=Fury Attack | |||
|move4type=Normal}} | |||
|{{Pokémon/1 | |||
|game=Yellow | |||
|ndex=027 | |ndex=027 | ||
|pokemon=Sandshrew | |pokemon=Sandshrew | ||
|level= | |level=15 | ||
|type1=Ground | |type1=Ground | ||
|move1=Scratch|move1type=Normal | |move1=Scratch | ||
|move2=Sand-Attack|move2type=Normal | |move1type=Normal | ||
| | |move2=Sand-Attack | ||
| | |move2type=Normal}} | ||
{{Party/Div|color={{blue color}}}} | |||
|{{Pokémon/1 | |||
|game=Yellow | |||
|ndex=019 | |ndex=019 | ||
|pokemon=Rattata | |pokemon=Rattata | ||
|level= | |level=15 | ||
|type1=Normal | |type1=Normal | ||
|move1=Tackle|move1type=Normal | |move1=Tackle | ||
|move2=Tail Whip|move2type=Normal | |move1type=Normal | ||
|move3=Quick Attack|move3type=Normal | |move2=Tail Whip | ||
|move4=Hyper Fang|move4type=Normal}} | |move2type=Normal | ||
| | |move3=Quick Attack | ||
|move3type=Normal | |||
|move4=Hyper Fang | |||
|move4type=Normal}} | |||
|{{Pokémon/1 | |||
|game=Yellow | |||
|ndex=133 | |ndex=133 | ||
|pokemon=Eevee | |pokemon=Eevee | ||
|level=17 | |level=17 | ||
|type1=Normal | |type1=Normal | ||
|move1=Tackle|move1type=Normal | |move1=Tackle | ||
|move2=Tail Whip|move2type=Normal | |move1type=Normal | ||
|move3=Sand-Attack|move3type | |move2=Tail Whip | ||
|move2type=Normal | |||
}} | |move3=Sand-Attack | ||
|move3type=Normal}} | |||
{{Party/Footer}} | |||
|} | |} | ||
==Route 24== | |||
[[File:Kanto Route 24 RBY.png|thumb|100px|Route 24]] | |||
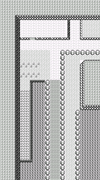
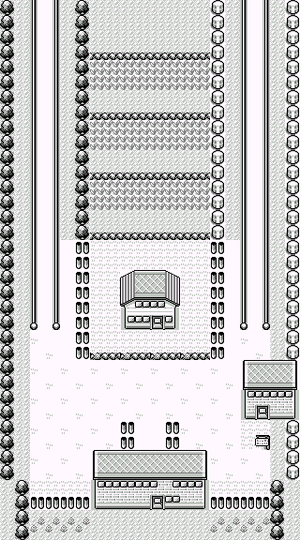
{{rt|24|Kanto}} stretches north from [[Cerulean City]] to {{rt|25|Kanto}}. Most of the area is occupied by a river and the Nugget Bridge that crosses it. | |||
{| class="expandable" align="center" style="background: #{{locationcolor/med|land}}; {{roundy}}; border: 5px solid #{{locationcolor/light|land}};" | |||
|- align="center" | |||
! Trainers | |||
|- | |||
| | |||
{{Trainerheader}} | |||
{{catch/div|land|Nugget Bridge}} | |||
{{Trainerentry|Spr Y Bug Catcher.png|game=1|Bug Catcher||140|2|010|Caterpie||14||013|Weedle||14||}} | |||
{{Trainerdiv}} | |||
{{Trainerentry|Spr Y Lass.png|game=1|Lass||210|2|016|Pidgey||14||029|Nidoran♀||14||}} | |||
{{Trainerdiv}} | |||
{{Trainerentry|Spr Y Youngster.png|game=1|Youngster||210|3|019|Rattata||14||023|Ekans||14||041|Zubat||14||}} | |||
{{Trainerdiv}} | |||
{{Trainerentry|Spr Y Lass.png|game=1|Lass||240|2|016|Pidgey||16||029|Nidoran♀||16||}} | |||
{{Trainerdiv}} | |||
{{Trainerentry|Spr Y Jr Trainer M.png|game=1|Jr. Trainer♂||360|1|056|Mankey||18||}} | |||
{{Trainerdiv}} | |||
{{Trainerentry|Spr Y Rocket.png|game=1|Rocket||450|2|023|Ekans||15||041|Zubat||15||}} | |||
{{catch/div|land|Grassy area}} | |||
{{Trainerentry|Spr Y Jr Trainer M.png|game=1|Jr. Trainer♂||280|2|019|Rattata||14||023|Ekans||14||}} | |||
{{Trainerfooter|land|I}} | |||
|} | |||
{| class="expandable" align="center" style="background: #{{locationcolor/med|land}}; {{roundy}}; border: 5px solid #{{locationcolor/light|land}};" | |||
|- align="center" | |||
! Available Pokémon | |||
|- | |||
| | |||
{{Catch/header|land|no}} | |||
{{Catch/entry1|043|Oddish|no|no|yes|Grass|12, 14|35%|type1=Grass|type2=Poison}} | |||
{{Catch/entry1|016|Pidgey|no|no|yes|Grass|13, 15, 17|29%|type1=Normal|type2=Flying}} | |||
{{Catch/entry1|069|Bellsprout|no|no|yes|Grass|12, 14|25%|type1=Grass|type2=Poison}} | |||
{{Catch/entry1|048|Venonat|no|no|yes|Grass|13, 16|10%|type1=Bug|type2=Poison}} | |||
{{Catch/entry1|017|Pidgeotto|no|no|yes|Grass|17|1%|type1=Normal|type2=Flying}} | |||
{{catch/div|land|Gift Pokémon}} | |||
{{Catch/entry1|004|Charmander|no|no|yes|Gift|10|One|type1=Fire}} | |||
{{Catch/footer|land}} | |||
|} | |||
{| class="expandable" align="center" style="background: #{{locationcolor/med|land}}; {{roundy}}; border: 5px solid #{{locationcolor/light|land}};" | |||
|- align="center" | |||
! Items | |||
|- | |||
| | |||
{{itlisth|land}} | |||
{{itemlist|Nugget|From the Team Rocket Grunt, after defeating the Trainers on Nugget Bridge|Y=yes}} | |||
{{itemlist|TM Electric|On the northwest hill|Y=yes|display={{TM|45|Thunder Wave}}}} | |||
{{itlistfoot|land}} | |||
|} | |||
== | ===Nugget Bridge=== | ||
[[ | There are five Trainers to be fought on the famous Nugget Bridge. When all five are defeated, a man at the bridge's north end will reward you with a [[Nugget]], a bit of gold that can be sold for a high price. The man then reveals himself as a [[Team Rocket]] Grunt and tries to persuade you to join the group, and draws you into battle when you refuse. | ||
===A Rare Addition=== | |||
Speak to [[Damian|the boy]] on the northwest hill. He has been thinking that he should release his {{p|Charmander}} because he is no good at raising Pokémon. If you promise to care for it, he gives the Pokémon to you, instead. | |||
{{ | |||
==Route 25== | |||
[[File:Kanto Route 25 RBY.png|thumb|400px|Route 25]] | |||
[[File:Sea Cottage interior RBY.png|thumb|Inside Bill's house]] | |||
[[ | {{rt|25|Kanto}} leads eastward from {{rt|24|Kanto}}. The path winds its way through a forest before it ends overlooking the sea. The [[Sea Cottage]] is located on the east side. | ||
{| align="center" | {| class="expandable" align="center" style="background: #{{locationcolor/med|land}}; {{roundy}}; border: 5px solid #{{locationcolor/light|land}};" | ||
|- align="center" | |- align="center" | ||
! Trainers | |||
|- | |||
| | | | ||
{| align="center" style="background: #{{ | {{Trainerheader|land}} | ||
{{Trainerentry|Spr Y Hiker.png|Hiker||game=1|525|2|066|Machop||15||074|Geodude||15||}} | |||
{{Trainerdiv}} | |||
{{Trainerentry|Spr Y Hiker.png|Hiker||game=1|595|1|095|Onix||17||}} | |||
{{Trainerdiv}} | |||
{{Trainerentry|Spr Y Youngster.png|Youngster||game=1|225|2|019|Rattata||15||021|Spearow||15||}} | |||
{{Trainerdiv}} | |||
{{Trainerentry|Spr Y Youngster.png|Youngster||game=1|255|1|079|Slowpoke||17||}} | |||
{{Trainerdiv}} | |||
{{Trainerentry|Spr Y Lass.png|Lass||game=1|225|2|032|Nidoran♂||15||029|Nidoran♀||15||}} | |||
{{Trainerdiv}} | |||
{{Trainerentry|Spr Y Hiker.png|Hiker||game=1|455|4|074|Geodude||13||074|Geodude||13||066|Machop||13||074|Geodude||13||}} | |||
{{Trainerdiv}} | |||
{{Trainerentry|Spr Y Jr Trainer M.png|Jr. Trainer♂||game=1|280|2|019|Rattata||14||023|Ekans||14||}} | |||
{{Trainerdiv}} | |||
{{Trainerentry|Spr Y Youngster.png|Youngster||game=1|210|2|023|Ekans||14||027|Sandshrew||14||}} | |||
{{Trainerdiv}} | |||
{{Trainerentry|Spr Y Lass.png|Lass||game=1|195|3|043|Oddish||13||016|Pidgey||13||043|Oddish||13||}} | |||
{{Trainerfooter|land|I}} | |||
|} | |||
{| class="expandable" align="center" style="background: #{{locationcolor/med|land}}; {{roundy}}; border: 5px solid #{{locationcolor/light|land}};" | |||
|- align="center" | |- align="center" | ||
! | ! Available Pokémon | ||
|- | |- | ||
| | | | ||
{| align="center" class="expandable" style="background: #{{ | {{Catch/header|land|no}} | ||
{{Catch/entry1|043|Oddish|no|no|yes|Grass|12, 14|35%|type1=Grass|type2=Poison}} | |||
{{Catch/entry1|016|Pidgey|no|no|yes|Grass|13, 15, 17|29%|type1=Normal|type2=Flying}} | |||
{{Catch/entry1|069|Bellsprout|no|no|yes|Grass|12, 14|25%|type1=Grass|type2=Poison}} | |||
{{Catch/entry1|048|Venonat|no|no|yes|Grass|13, 16|10%|type1=Bug|type2=Poison}} | |||
{{Catch/entry1|017|Pidgeotto|no|no|yes|Grass|17|1%|type1=Normal|type2=Flying}} | |||
{{Catch/footer|land}} | |||
|} | |||
{| class="expandable" align="center" style="background: #{{locationcolor/med|land}}; {{roundy}}; border: 5px solid #{{locationcolor/light|land}};" | |||
|- align="center" | |||
! Items | |||
|- | |||
| | |||
{{itlisth|land}} | |||
{{itemlist|Elixir|Northwest part of the maze, near the Hiker ''(hidden)''|Y=yes|display=[[Elixir|Elixer]]}} | |||
{{itemlist|TM Fighting|Northeast part of the maze (requires defeating Jr. Trainer♂ or {{m|Cut}})|Y=yes|display={{TM|19|Seismic Toss}}}} | |||
{{itemlist|Ether|On the fence next to the Sea Cottage, one step east of the Lass ''(hidden)''|Y=yes}} | |||
{{itemlist|S.S. Ticket|From Bill, after helping him undo his experiment|Y=yes}} | |||
{{itlistfoot|land}} | |||
|} | |||
===Sea Cottage=== | |||
====An Unfortunate Turn==== | |||
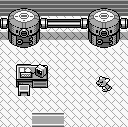
The [[Sea Cottage]] belongs to [[Bill]], a famous Pokémon researcher. When you step inside, it seems like Bill must be away, until you speak to the Pokémon inside. His latest experiment has gone awry and combined his DNA with that of a Pokémon! He needs your help, so once he has stepped into the machine, inspect his PC to activate a program to undo the change and return him to normal. As a token of gratitude, he gives you an [[S.S. Ticket]], which grants access to the [[S.S. Anne|luxury cruise ship]] currently docked in [[Vermilion City]] to the south. | |||
====Bill's Favorite Pokémon==== | |||
Before leaving the cape, you can exit and re-enter the cottage and inspect Bill's PC to view some of [[Eeveelution|his favorite Pokémon]]. This adds {{p|Vaporeon|three}} {{p|Jolteon|new}} {{p|Flareon|pages}} to your Pokédex. | |||
==Cerulean City== | |||
===Justice, Served=== | |||
Once you return to [[Cerulean City]], the officer blocking the burgled house has stepped aside, allowing you to enter. Inside are obvious signs of a break-in, like muddy footprints and overturned planters. There is even a large hole in the wall! Step out through the hole to find and confront the thief. | |||
{| class="expandable" align="center" style="background: #{{locationcolor/med|land}}; {{roundy}}; border: 5px solid #{{locationcolor/light|land}};" | |||
|- align="center" | |- align="center" | ||
! Trainers | ! Trainers | ||
|- | |||
| | |||
{{Trainerheader|land}} | |||
{{Trainerentry|Spr Y Rocket.png|Rocket||game=1|510|2|066|Machop||17|None|096|Drowzee||17|None}} | |||
{{Trainerfooter|land|1|Inside}} | |||
|} | |||
When he is defeated, the Rocket Grunt gives up the stolen {{TM|28|Dig}} before fleeing the scene. When used inside a cave, Dig instantly returns you to the most recently visited [[Pokémon Center]]. It is useful in a pinch when you need to heal your Pokémon. | |||
==Route 5== | |||
[[File:Kanto Route 5 RBY.png|thumb|Route 5]] | |||
{{rt|5|Kanto}} is a scenic road that runs downhill from [[Cerulean City]] to [[Saffron City]]. The [[Underground Path (Kanto Routes 5-6)|first]] of the region's two Underground Paths begins here and runs southward underneath Saffron City to re-emerge on {{rt|6|Kanto}}. | |||
{| class="expandable" align="center" style="background: #{{locationcolor/med|land}}; {{roundy}}; border: 5px solid #{{locationcolor/light|land}};" | |||
|- align="center" | |||
! Available Pokémon | |||
|- | |- | ||
| | | | ||
{{ | {{Catch/header|land|no}} | ||
{{ | {{Catch/entry1|016|Pidgey|no|no|yes|Grass|15-17|40%|type1=Normal|type2=Flying}} | ||
{{ | {{Catch/entry1|019|Rattata|no|no|yes|Grass|14, 16|30%|type1=Normal}} | ||
{{ | {{Catch/entry1|063|Abra|no|no|yes|Grass|7|15%|type1=Psychic}} | ||
{{Catch/entry1|039|Jigglypuff|no|no|yes|Grass|3, 5, 7|10%|type1=Normal}} | |||
{{ | {{Catch/entry1|017|Pidgeotto|no|no|yes|Grass|17|5%|type1=Normal|type2=Flying}} | ||
{{ | {{Catch/footer|land}} | ||
|} | |} | ||
===Pokémon Day Care=== | |||
The house on the hill is the [[Pokémon Day Care]]. The old man inside will raise one Pokémon at a time while you are away. A Pokémon left here will gain one [[Experience|experience point]] for every step taken. If you bought the {{p|Magikarp}} near [[Mt. Moon]], this is a good way to raise it. The downside is that he will make every decision, so he may end up deleting a move you would like to keep. He charges {{pdollar}}100, plus another {{pdollar}}100 for every new level, to return a Pokémon. | |||
===Underground Path=== | |||
It is impossible to reach [[Saffron City]] at the moment, so enter the [[Underground Path (Kanto Routes 5-6)|Underground Path]] and follow the tunnel to {{rt|6|Kanto}}. | |||
{ | {| class="expandable" align="center" style="background: #{{locationcolor/med|building}}; {{roundy}}; border: 5px solid #{{locationcolor/light|building}};" | ||
| | |- align="center" | ||
! Available Pokémon | |||
| | |- | ||
| | | | ||
| | {{Catch/header|building|no}} | ||
| | {{Catch/div|building|Gift Pokémon}} | ||
| | {{Catch/entry1|067|Machoke|no|no|yes|Trade|tradenum=104|tradename=Cubone|The same as the traded Pokémon|{{tt|One|Evolves into Machamp immediately upon trade. Registers both Machoke and Machamp into the Pokédex.}}|type1=Fighting}} | ||
{{Catch/footer|building}} | |||
| | |||
| | |||
| | |||
| | |||
| | |||
}} | |||
|} | |} | ||
{| class="expandable" align="center" style="background: #{{locationcolor/med|building}}; {{roundy}}; border: 5px solid #{{locationcolor/light|building}};" | |||
|- align="center" | |||
! Items | |||
|- | |||
| | |||
{{itlisth|building}} | |||
{{Itemlist|Full Restore|Underground Path; two steps west of the northern stairs ''(hidden)''|Y=yes}} | |||
{{Itemlist|X Special|Underground Path; two steps east and seven steps north of the southern stairs ''(hidden)''|Y=yes|display=[[X Sp. Atk|X Special]]|sprite=Bag X Sp. Atk Sprite}} | |||
{{itlistfoot|building}} | |||
|} | |} | ||
====Time for a Trade==== | |||
A girl in the north gate is looking to [[trade]]. She is willing to part with her {{p|Machoke}} in exchange for a {{p|Cubone}}. Machoke can only evolve when traded, and immediately becomes a {{p|Machamp}}. | |||
| Line 272: | Line 421: | ||
|game=Yellow | |game=Yellow | ||
|gamename=Yellow | |gamename=Yellow | ||
|prevsection=4 | |prevsection=4 | ||
|prevname= | |prevname=Route 3, Mt. Moon, Route 4 | ||
|nextsection=6 | |nextsection=6 | ||
|nextname=Route | |nextname=Route 6, Vermilion City, S.S. Anne, Vermilion Gym | ||
}} | }} | ||
Latest revision as of 15:03, 22 May 2024
These pages follow the original Game Boy iteration, not Pokémon: Let's Go, Pikachu! and Let's Go, Eevee!. The guide for those games can be found here.
Cerulean City
Cerulean City is a beautiful city with flowing water and blooming flowers. It is located between Route 4, Route 24, Route 9, and Route 5.
| Available Pokémon | |||||||||||||||||||||||||||||||||||||||||||||||||||||||||
|---|---|---|---|---|---|---|---|---|---|---|---|---|---|---|---|---|---|---|---|---|---|---|---|---|---|---|---|---|---|---|---|---|---|---|---|---|---|---|---|---|---|---|---|---|---|---|---|---|---|---|---|---|---|---|---|---|---|
| |||||||||||||||||||||||||||||||||||||||||||||||||||||||||
| Items | |||||||||||||||||||||||||||||||||||||||
|---|---|---|---|---|---|---|---|---|---|---|---|---|---|---|---|---|---|---|---|---|---|---|---|---|---|---|---|---|---|---|---|---|---|---|---|---|---|---|---|
| |||||||||||||||||||||||||||||||||||||||
A Rare Addition
Visit the house next to the Pokémon Center to find a girl who cares for injured and abandoned Pokémon. She has nursed a Bulbasaur back to health, but now it needs a caring Trainer to raise it properly. If your friendship with Pikachu has grown high enough, she asks if you would take care of the young Pokémon.
Gym Badges, Explained
The northwest house belongs to a man who offers to explains the effects of the eight Gym Badges. Half of them give a slight power boost to a respective stat, while the other half ensure a Pokémon's obedience during battle. The first five unlock the use of field moves.
| Badge | Effect | Badge | Effect | ||
|---|---|---|---|---|---|
| Boulder Badge | Increases Attack, Allows Flash in the field |
Cascade Badge | Ensures obedience up to level 30, Allows Cut in the field | ||
| Thunder Badge | Increases Defense, Allows Fly in the field |
Rainbow Badge | Ensures obedience up to level 50, Allows Strength in the field | ||
| Soul Badge | Increases Speed, Allows Surf in the field |
Marsh Badge | Ensures obedience up to level 70 | ||
| Volcano Badge | Increases Special | Earth Badge | Ensures obedience up to level 100 | ||
Bike Shop
It would be great to get a Bicycle from the Bike Shop in the southwest part of town, but they cost a whopping $1,000,000! It is not possible to carry that much money, so it looks like you are stuck traveling on foot for now.
Breaking, Entering
The house in the northeast is currently blocked off by a police officer. It seems that Team Rocket has broken into the home and stolen a valuable item from its residents. Nothing can be done to remedy this at the moment, so set your sights on the Gym instead.
Cerulean Gym
CERULEAN CITY POKéMON GYM
LEADER: MISTY
The Tomboyish Mermaid!
The Cerulean Gym specializes in Water-type Pokémon. Water-type moves are super effective against Fire-, Ground-, and Rock-type Pokémon, while Water-type Pokémon are weak to Electric- and Grass-type moves. With Pikachu and Bulbasaur in tow, beating the Cerulean Gym should be easier than beating the previous one. Other Grass Pokémon—Oddish and Bellsprout—can be found on the nearby Route 24, as well.
Take out Misty's Staryu quickly to move on to her Starmie. Her second Pokémon is both stronger and faster than Staryu, making its BubbleBeam especially painful to vulnerable Pokémon. Use Pikachu's ThunderShock, or Grass moves like Vine Whip and Absorb, to deal serious damage and make quick work of it.
| ||||||||||||||||||||||||||||||||||||||||||||||||||||||||||||||||||||||||||||||||||||||||||||||||||
After the battle, Misty awards you the Cascade Badge, which ensures obedience from all Pokémon up to level 30 and enables the use of Cut in the field. She also gives you TM11 (BubbleBeam) as a prize.
Rival Battle 3
When you head toward Route 24, Blue appears and taunts you as usual before drawing you into another battle. He leads with his Spearow, so start off with Electric- and Rock-type attacks. His Sandshrew, a Ground-type Pokémon, takes no damage from Pikachu's Electric attacks. Luckily, it has no Ground moves to worry about. Rattata's Quick Attack lets it move first regardless of its Speed and Hyper Fang can inflict a good bit of damage, so try to take it out quickly. Aside from having grown a few levels, his Eevee is much the same as it was in the previous battle.
| ||||||||||||||||||||||||||||||||||||||||||||||||||||||||||||||||||||||||||||||||||||||||||||||||||||||||||
Route 24
Route 24 stretches north from Cerulean City to Route 25. Most of the area is occupied by a river and the Nugget Bridge that crosses it.
| Trainers | |||||||||||||||||||||||||||||||||||||||||||||||||||||||||||||||||||||||||||||||||||||||||||||||||||||||||||||||||||||||||||||||||||||||||||||||||||||
|---|---|---|---|---|---|---|---|---|---|---|---|---|---|---|---|---|---|---|---|---|---|---|---|---|---|---|---|---|---|---|---|---|---|---|---|---|---|---|---|---|---|---|---|---|---|---|---|---|---|---|---|---|---|---|---|---|---|---|---|---|---|---|---|---|---|---|---|---|---|---|---|---|---|---|---|---|---|---|---|---|---|---|---|---|---|---|---|---|---|---|---|---|---|---|---|---|---|---|---|---|---|---|---|---|---|---|---|---|---|---|---|---|---|---|---|---|---|---|---|---|---|---|---|---|---|---|---|---|---|---|---|---|---|---|---|---|---|---|---|---|---|---|---|---|---|---|---|---|---|
| |||||||||||||||||||||||||||||||||||||||||||||||||||||||||||||||||||||||||||||||||||||||||||||||||||||||||||||||||||||||||||||||||||||||||||||||||||||
| Available Pokémon | |||||||||||||||||||||||||||||||||||||||||||||||||||||||||||||||||||||||||||||||||||||||||||||||||||||||||||||||||||||||||||||||||||||||||
|---|---|---|---|---|---|---|---|---|---|---|---|---|---|---|---|---|---|---|---|---|---|---|---|---|---|---|---|---|---|---|---|---|---|---|---|---|---|---|---|---|---|---|---|---|---|---|---|---|---|---|---|---|---|---|---|---|---|---|---|---|---|---|---|---|---|---|---|---|---|---|---|---|---|---|---|---|---|---|---|---|---|---|---|---|---|---|---|---|---|---|---|---|---|---|---|---|---|---|---|---|---|---|---|---|---|---|---|---|---|---|---|---|---|---|---|---|---|---|---|---|---|---|---|---|---|---|---|---|---|---|---|---|---|---|---|---|---|
| |||||||||||||||||||||||||||||||||||||||||||||||||||||||||||||||||||||||||||||||||||||||||||||||||||||||||||||||||||||||||||||||||||||||||
| Items | ||||||||||||||||
|---|---|---|---|---|---|---|---|---|---|---|---|---|---|---|---|---|
| ||||||||||||||||
Nugget Bridge
There are five Trainers to be fought on the famous Nugget Bridge. When all five are defeated, a man at the bridge's north end will reward you with a Nugget, a bit of gold that can be sold for a high price. The man then reveals himself as a Team Rocket Grunt and tries to persuade you to join the group, and draws you into battle when you refuse.
A Rare Addition
Speak to the boy on the northwest hill. He has been thinking that he should release his Charmander because he is no good at raising Pokémon. If you promise to care for it, he gives the Pokémon to you, instead.
Route 25
Route 25 leads eastward from Route 24. The path winds its way through a forest before it ends overlooking the sea. The Sea Cottage is located on the east side.
| Trainers | |||||||||||||||||||||||||||||||||||||||||||||||||||||||||||||||||||||||||||||||||||||||||||||||||||||||||||||||||||||||||||||||||||||||||||||||||||||||||||||||
|---|---|---|---|---|---|---|---|---|---|---|---|---|---|---|---|---|---|---|---|---|---|---|---|---|---|---|---|---|---|---|---|---|---|---|---|---|---|---|---|---|---|---|---|---|---|---|---|---|---|---|---|---|---|---|---|---|---|---|---|---|---|---|---|---|---|---|---|---|---|---|---|---|---|---|---|---|---|---|---|---|---|---|---|---|---|---|---|---|---|---|---|---|---|---|---|---|---|---|---|---|---|---|---|---|---|---|---|---|---|---|---|---|---|---|---|---|---|---|---|---|---|---|---|---|---|---|---|---|---|---|---|---|---|---|---|---|---|---|---|---|---|---|---|---|---|---|---|---|---|---|---|---|---|---|---|---|---|---|---|
| |||||||||||||||||||||||||||||||||||||||||||||||||||||||||||||||||||||||||||||||||||||||||||||||||||||||||||||||||||||||||||||||||||||||||||||||||||||||||||||||
| Available Pokémon | ||||||||||||||||||||||||||||||||||||||||||||||||||||||||||||||||||||||||||||||||||||||||||||||||||||||||||
|---|---|---|---|---|---|---|---|---|---|---|---|---|---|---|---|---|---|---|---|---|---|---|---|---|---|---|---|---|---|---|---|---|---|---|---|---|---|---|---|---|---|---|---|---|---|---|---|---|---|---|---|---|---|---|---|---|---|---|---|---|---|---|---|---|---|---|---|---|---|---|---|---|---|---|---|---|---|---|---|---|---|---|---|---|---|---|---|---|---|---|---|---|---|---|---|---|---|---|---|---|---|---|---|---|---|---|
| ||||||||||||||||||||||||||||||||||||||||||||||||||||||||||||||||||||||||||||||||||||||||||||||||||||||||||
| Items | ||||||||||||||||||||||||
|---|---|---|---|---|---|---|---|---|---|---|---|---|---|---|---|---|---|---|---|---|---|---|---|---|
| ||||||||||||||||||||||||
Sea Cottage
An Unfortunate Turn
The Sea Cottage belongs to Bill, a famous Pokémon researcher. When you step inside, it seems like Bill must be away, until you speak to the Pokémon inside. His latest experiment has gone awry and combined his DNA with that of a Pokémon! He needs your help, so once he has stepped into the machine, inspect his PC to activate a program to undo the change and return him to normal. As a token of gratitude, he gives you an S.S. Ticket, which grants access to the luxury cruise ship currently docked in Vermilion City to the south.
Bill's Favorite Pokémon
Before leaving the cape, you can exit and re-enter the cottage and inspect Bill's PC to view some of his favorite Pokémon. This adds three new pages to your Pokédex.
Cerulean City
Justice, Served
Once you return to Cerulean City, the officer blocking the burgled house has stepped aside, allowing you to enter. Inside are obvious signs of a break-in, like muddy footprints and overturned planters. There is even a large hole in the wall! Step out through the hole to find and confront the thief.
| Trainers | |||||||||||||||||||
|---|---|---|---|---|---|---|---|---|---|---|---|---|---|---|---|---|---|---|---|
| |||||||||||||||||||
When he is defeated, the Rocket Grunt gives up the stolen TM28 (Dig) before fleeing the scene. When used inside a cave, Dig instantly returns you to the most recently visited Pokémon Center. It is useful in a pinch when you need to heal your Pokémon.
Route 5
Route 5 is a scenic road that runs downhill from Cerulean City to Saffron City. The first of the region's two Underground Paths begins here and runs southward underneath Saffron City to re-emerge on Route 6.
| Available Pokémon | ||||||||||||||||||||||||||||||||||||||||||||||||||||||||||||||||||||||||||||||||||||||||||||||||||||||||||
|---|---|---|---|---|---|---|---|---|---|---|---|---|---|---|---|---|---|---|---|---|---|---|---|---|---|---|---|---|---|---|---|---|---|---|---|---|---|---|---|---|---|---|---|---|---|---|---|---|---|---|---|---|---|---|---|---|---|---|---|---|---|---|---|---|---|---|---|---|---|---|---|---|---|---|---|---|---|---|---|---|---|---|---|---|---|---|---|---|---|---|---|---|---|---|---|---|---|---|---|---|---|---|---|---|---|---|
| ||||||||||||||||||||||||||||||||||||||||||||||||||||||||||||||||||||||||||||||||||||||||||||||||||||||||||
Pokémon Day Care
The house on the hill is the Pokémon Day Care. The old man inside will raise one Pokémon at a time while you are away. A Pokémon left here will gain one experience point for every step taken. If you bought the Magikarp near Mt. Moon, this is a good way to raise it. The downside is that he will make every decision, so he may end up deleting a move you would like to keep. He charges $100, plus another $100 for every new level, to return a Pokémon.
Underground Path
It is impossible to reach Saffron City at the moment, so enter the Underground Path and follow the tunnel to Route 6.
| Available Pokémon | |||||||||||||||||||||||||||||||||||||||||||||||||||||||||
|---|---|---|---|---|---|---|---|---|---|---|---|---|---|---|---|---|---|---|---|---|---|---|---|---|---|---|---|---|---|---|---|---|---|---|---|---|---|---|---|---|---|---|---|---|---|---|---|---|---|---|---|---|---|---|---|---|---|
| |||||||||||||||||||||||||||||||||||||||||||||||||||||||||
| Items | ||||||||||||||||
|---|---|---|---|---|---|---|---|---|---|---|---|---|---|---|---|---|
| ||||||||||||||||
Time for a Trade
A girl in the north gate is looking to trade. She is willing to part with her Machoke in exchange for a Cubone. Machoke can only evolve when traded, and immediately becomes a Machamp.
|
Yellow walkthrough |
|

|
This article is part of Project Walkthroughs, a Bulbapedia project that aims to write comprehensive step-by-step guides on each Pokémon game. |
