Glacier Palace: Difference between revisions
No edit summary |
m (add Chinese version) |
||
| (25 intermediate revisions by 17 users not shown) | |||
| Line 1: | Line 1: | ||
{{DungeonPrevNext| | {{DungeonPrevNext|Glacial Underpass|Redland Reaches|5}} | ||
{{Dungeon infobox | {{Dungeon infobox | ||
|colorscheme=Rock | |colorscheme=Rock | ||
| Line 11: | Line 11: | ||
|rest=Yes | |rest=Yes | ||
|traps=Yes | |traps=Yes | ||
|monsterhouses=No | |||
|items=48 | |items=48 | ||
|money=Allowed | |money=Allowed | ||
| Line 18: | Line 19: | ||
|boss=Yes | |boss=Yes | ||
}} | }} | ||
'''Glacier Palace''' (Japanese: '''グレッシャーパレス''' ''Glacier Palace'') is a playable dungeon the player goes through in [[Pokémon Mystery Dungeon: Gates to Infinity]]. It has 13 floors and three bosses. This dungeon is accessible immediately after finishing the [[Glacial Underpass]] dungeon. Recruited Pokémon automatically get sent back to Pokémon Paradise instead of staying with the group. This dungeon has both outer and inner areas. {{OBP|Kyurem|Gates to Infinity}} is encountered in this dungeon. After the main story-line, this dungeon can be entered from the [[Stony Cave]], [[Desolate Canyon]] and [[Holehills]] dungeons with a high mysteriosity level. | |||
Like in the previous Dungeons, the player can only have two of the following: {{OBP|Umbreon and Espeon|Gates to Infinity|Umbreon, Espeon}}, {{OBP|Virizion|Gates to Infinity}}, or {{OBP|Dunsparce|Gates to Infinity}} with them, and their partner. | |||
==Pokémon encountered== | ==Pokémon encountered== | ||
===Main story=== | |||
{{mdloc/h|Rock}} | {{mdloc/h|Rock}} | ||
{{mdloc|221|Piloswine|1-13|?|?}} | {{mdloc|221|Piloswine|1-13|?|?}} | ||
| Line 32: | Line 35: | ||
{{mdloc/f|Rock}} | {{mdloc/f|Rock}} | ||
==Postgame Illusion== | ===Postgame Illusion=== | ||
{{mdloc/h|Rock}} | {{mdloc/h|Rock}} | ||
{{mdloc|536|Palpitoad|2-4|?|?}} | {{mdloc|536|Palpitoad|2-4|?|?}} | ||
| Line 42: | Line 45: | ||
{{DungeonItem/h|rock}} | {{DungeonItem/h|rock}} | ||
{{DungeonItem|Poké|4=55-123|sprite=Poké currency|3=1-13}} | {{DungeonItem|Poké|4=55-123|sprite=Poké currency|3=1-13}} | ||
{{DungeonItem|Oran Berry|3= | {{DungeonItem|Oran Berry|sprite=MDBag Oran Berry V Sprite|3=1-13}} | ||
{{DungeonItem|Cheri Berry|3= | {{DungeonItem|Cheri Berry|sprite=MDBag Cheri Berry V Sprite|3=1-13}} | ||
{{DungeonItem|Rawst Berry|sprite=MDBag Rawst Berry | {{DungeonItem|Rawst Berry|sprite=MDBag Rawst Berry V Sprite|3=1-13}} | ||
{{DungeonItem|Rollcall Orb|Wonder Orb|3= | {{DungeonItem|Rollcall Orb|Wonder Orb|3=1-13}} | ||
{{DungeonItem| | {{DungeonItem|All Power-Up Orb|Wonder Orb|3=1-13}} | ||
{{DungeonItem|Health Orb|Wonder Orb|3= | {{DungeonItem|Health Orb|Wonder Orb|3=1-13}} | ||
{{DungeonItem|Slumber Orb|Wonder Orb|3= | {{DungeonItem|Slumber Orb|Wonder Orb|3=1-13}} | ||
{{DungeonItem|Slow Orb|Wonder Orb|3= | {{DungeonItem|Slow Orb|Wonder Orb|3=1-13}} | ||
{{DungeonItem|Petrify Orb|Wonder Orb|3= | {{DungeonItem|Petrify Orb|Wonder Orb|3=1-13}} | ||
{{DungeonItem|Vile Seed|Seed|3= | {{DungeonItem|Vile Seed|Seed|3=1-13}} | ||
{{DungeonItem|Warp Seed|Seed|3= | {{DungeonItem|Warp Seed|Seed|3=1-13}} | ||
{{DungeonItem| | {{DungeonItem|Joy Ribbon|Scarf (Mystery Dungeon)|3=1-13|sprite=MDBag Scarf V Sprite}} | ||
{{DungeonItem| | {{DungeonItem|Max Elixir|Health drink|sprite=MDBag Health drink Sprite|3=1-13}} | ||
|} | |} | ||
==Gallery== | ==Gallery== | ||
<gallery> | <gallery> | ||
File:Cliffside PMDGTI.png| | File:Cliffside PMDGTI.png|Cliffside | ||
File:Glacier Palace 1F PMDGTI.png|1F exterior | File:Glacier Palace 1F PMDGTI.png|1F exterior | ||
File:Glacier Palace 2F interior PMDGTI.png|2F interior | File:Glacier Palace 2F interior PMDGTI.png|2F interior | ||
File:Glacier Palace 6F PMDGTI.png|6F exterior | File:Glacier Palace 6F PMDGTI.png|6F exterior | ||
File:Glacier Palace | File:Glacier Palace frisms PMDGTI.png|Frisms | ||
File:Glacier Palace | File:Glacier Palace frism voice PMDGTI.png|Frism with a voice inside of it | ||
File:Glacier Palace boss area PMDGTI.png|Glacier Palace boss area | File:Glacier Palace boss area PMDGTI.png|Glacier Palace boss area | ||
File:Glacier Palace Kyurem PMDGTI.png|Glacier Palace, area where the player meets Kyurem | File:Glacier Palace Kyurem PMDGTI.png|Glacier Palace, area where the player meets Kyurem | ||
File:Kyurem PMDGTI.png|Kyurem | File:Kyurem PMDGTI.png|Kyurem | ||
File:Glacier Palace treasure chest PMDGTI.png| | File:Glacier Palace treasure chest PMDGTI.png|Treasure chest left by Kyurem | ||
</gallery> | </gallery> | ||
==Trivia== | ==Trivia== | ||
After the main story-line, Glacier Palace looks exactly like [[Glacier Palace - | * After the main story-line, Glacier Palace looks exactly like [[Glacier Palace - Eastern Spire]] instead when entered from [[Stony Cave]], [[Desolate Canyon]] and [[Holehills]]. | ||
{{-}} | {{-}} | ||
{{PMD GTI locations}} | |||
{{DoubleProjectTag|Locations|Sidegames}} | {{DoubleProjectTag|Locations|Sidegames}} | ||
[[Category:Pokémon Mystery Dungeon: Gates to Infinity locations]] | [[Category:Pokémon Mystery Dungeon: Gates to Infinity locations]] | ||
[[Category:Mountains]] | [[Category:Mountains]] | ||
[[de:Eispalast]] | |||
[[ja:グレッシャーパレス]] | |||
[[zh:冰河宮殿]] | |||
Revision as of 03:23, 10 August 2017
|
|
|
| ||||||||||||||||||||||||||||||||||||||||||
| ||||||||||||||||||||||||||||||||||||||||||
| ||||||||||||||||||||||||||||||||||||||||||

Glacier Palace (Japanese: グレッシャーパレス Glacier Palace) is a playable dungeon the player goes through in Pokémon Mystery Dungeon: Gates to Infinity. It has 13 floors and three bosses. This dungeon is accessible immediately after finishing the Glacial Underpass dungeon. Recruited Pokémon automatically get sent back to Pokémon Paradise instead of staying with the group. This dungeon has both outer and inner areas. Kyurem is encountered in this dungeon. After the main story-line, this dungeon can be entered from the Stony Cave, Desolate Canyon and Holehills dungeons with a high mysteriosity level.
Like in the previous Dungeons, the player can only have two of the following: Umbreon, Espeon, Virizion, or Dunsparce with them, and their partner.
Pokémon encountered
Main story
| Pokémon | Floors | Levels | Recruit Rate | |
|---|---|---|---|---|
| Piloswine | 1-13 | ? | ?% | |
| Palpitoad | 1-13 | 25 | ?% | |
| Tirtouga | 1-13 | 24 | ?% | |
| Zorua | 1-13 | 26 | ?% | |
| Pawniard | 1-13 | 26 | ?% | |
| Cryogonal | Icy room | ? | ?% Boss | |
| Golurk | Icy room | ? | ?% Boss | |
Postgame Illusion
| Pokémon | Floors | Levels | Recruit Rate | |
|---|---|---|---|---|
| Palpitoad | 2-4 | ? | ?% | |
| Tirtouga | 2-4 | 24 | ?% | |
| Pawniard | 2-4 | 26 | ?% | |
Items
| Item | Floors | |
|---|---|---|
| 55-123 Poké | 1-13F | |
| Oran Berry | 1-13F | |
| Cheri Berry | 1-13F | |
| Rawst Berry | 1-13F | |
| Rollcall Orb | 1-13F | |
| All Power-Up Orb | 1-13F | |
| Health Orb | 1-13F | |
| Slumber Orb | 1-13F | |
| Slow Orb | 1-13F | |
| Petrify Orb | 1-13F | |
| Vile Seed | 1-13F | |
| Warp Seed | 1-13F | |
| Joy Ribbon | 1-13F | |
| Max Elixir | 1-13F | |
Gallery
Cliffside
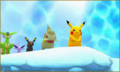
1F exterior
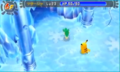
2F interior
6F exterior
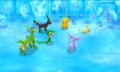
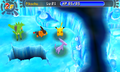
Frisms
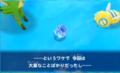
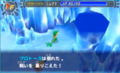
Frism with a voice inside of it

Glacier Palace boss area
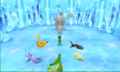
Glacier Palace, area where the player meets Kyurem
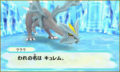
Kyurem

Treasure chest left by Kyurem


Trivia
- After the main story-line, Glacier Palace looks exactly like Glacier Palace - Eastern Spire instead when entered from Stony Cave, Desolate Canyon and Holehills.
| This article is part of both Project Locations and Project Sidegames, Bulbapedia projects that, together, aim to write comprehensive articles on the Pokémon Locations and Sidegames, respectively. |