Wild Area: Difference between revisions
m (→Weather: Small visual fix I forgot to make to the table) |
(→Locations: Reformatted list of locations into subsections with tables; added notable features for each subarea; updated image size) |
||
| Line 7: | Line 7: | ||
==Locations== | ==Locations== | ||
[[File:Galar Wild Area SwSh.png|thumb| | [[File:Galar Wild Area SwSh.png|thumb|300px|An overview of the entire Wild Area]] | ||
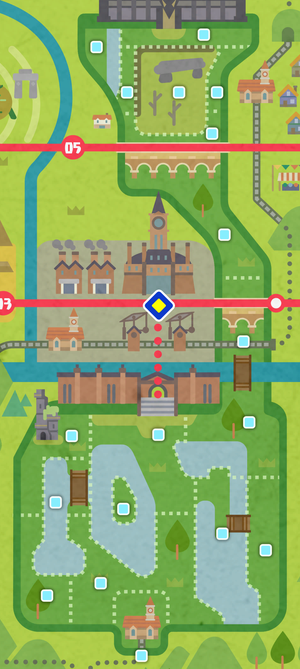
The Wild Area is composed of | The Wild Area is composed of 18 subareas, which are grouped into two groups: The roughly rectangular South Wild Area has 10 subareas; and the long, roughly Y-shaped North Wild Area has 8 subareas. These groups are divided by the river that runs from west to east through the southern part of [[Motostoke]], though a bridge allows passage between the south and north. The [[Town Map]] shows the rough layout of the Wild Area and relation of the subareas to one another, though the borders shown between them may diverge from in-game borders. | ||
Players first enter the Wild Area at its southernmost point, arriving at the Wild Area Station via train from [[Wedgehurst|Wedgehurst Station]]. Thereafter, players can return to the Wild Area via the Wild Area Station as well as a number of [[Flying Taxi]] destinations. | |||
; | ===South Wild Area=== | ||
* [[Lake of | The South Wild Area consists of 10 subareas with a mix of environments. The 2 largest lakes in the Wild Area, Lake Axewell and Lake Miloch, are in this southern half. Prior to becoming {{pkmn|Champion}}, the Pokémon in the South Wild Area are encountered at a lower level than those in the North Wild Area. | ||
These 10 subareas are in the South Wild area, listed in roughly clockwise order from the south. | |||
* [[ | {| class="roundy" style="background: #{{galar color}}; border: 5px solid {{galar color}}" | ||
|- style="background: #{{galar color}}; color: #fff" | |||
! style="{{roundytl|10px}}" width=100px | Subarea | |||
! width=400px | Location | |||
* [[ | ! style="{{roundytr|10px}}" width=400px | Notable features | ||
|- style="background: #fff" | |||
| style="background: #{{galar color light}}; text-align: center" | [[Meetup Spot]] | |||
| The southernmost point of the Wild Area | |||
| | |||
* The Wild Area Station is in this subarea and is a [[Flying Taxi]] destination. | |||
* Unlike other subareas, no [[wild Pokémon]] can be encountered in this area. | |||
|- style="background: #fff" | |||
| style="background: #{{galar color light}}; text-align: center" | [[Rolling Fields]] | |||
| A large area just north of the Meetup Spot. It stretches from the western edge of Lake Miloch to the inner bend of Lake Axewell | |||
| | |||
* An Ingredients Seller stands near Lake Miloch in this subarea. | |||
|- style="background: #fff" | |||
| style="background: #{{galar color light}}; text-align: center" | [[Dappled Grove]] | |||
| A forested area in the southwestern corner of the Wild Area | |||
| | |||
* A [[Watt Trader]] is located near a Berry tree in the east. | |||
|- style="background: #fff" | |||
| style="background: #{{galar color light}}; text-align: center" | [[West Lake Axewell]] | |||
| The western half of Lake Axewell, plus the bridge across its narrowest point and the land north of the bridge | |||
| | |||
* Despite the depiction on the Town Map, it also extends north of the footbridge to [[Motostoke]]'s wall. | |||
|- style="background: #fff" | |||
| style="background: #{{galar color light}}; text-align: center" | [[Watchtower Ruins]] | |||
| A bluff area in the northwestern corner of the South Wild Area | |||
| | |||
* At the crest of the hill sits a ruined tower housing the [[Watchtower Lair]]. | |||
|- style="background: #fff" | |||
| style="background: #{{galar color light}}; text-align: center" | [[East Lake Axewell]] | |||
| The eastern half of Lake Axewell, plus the wide land area north of Lake Axewell & south of Motostoke | |||
| | |||
* Standing just east of the entrance to Motostoke are a Watt Trader and the Camping King. | |||
* There is a [[Flying Taxi]] destination in this subarea, just outside the entrance to Motostoke. | |||
|- style="background: #fff" | |||
| style="background: #{{galar color light}}; text-align: center" | [[Axew's Eye]] | |||
| An island in the middle of Lake Axewell's eastern half | |||
| | |||
* This subarea is the only part of the South Wild Area that is inaccessible prior to obtaining the [[Rotom Bike]]. | |||
* {{tc|Pokémon Breeder}} Chloe can appear on this island. | |||
|- style="background: #fff" | |||
| style="background: #{{galar color light}}; text-align: center" | [[North Lake Miloch]] | |||
| The northern portion of Lake Miloch, plus the land area north of the lake and south of the river | |||
| | |||
* {{tc|Hiker}}s and {{tc|Fisher}}s may appear throughout this subarea, offering a random item for 100 [[Watt]]s. | |||
|- style="background: #fff" | |||
| style="background: #{{galar color light}}; text-align: center" | [[Giant's Seat]] | |||
| A long strip of land along the eastern edge of the South Wild Area | |||
| | |||
* Standing just east of the entrance to Motostoke are a Watt Trader and the Camping King. | |||
|- style="background: #fff" | |||
| style="background: #{{galar color light}}; {{roundybl|10px}}; text-align: center" | [[South Lake Miloch]] | |||
| The southern, and larger, portion of Lake Miloch, plus the small land area connecting East Lake Axewell to the Giant's Seat | |||
| style="{{roundybr|10px}}" | | |||
* Hikers and Fishers may appear throughout this subarea, offering a random item for 100 [[Watt]]s. | |||
|} | |||
===North Wild Area=== | |||
The North Wild Area consists of 8 subareas with a mix of environments. Bridges run from west to east across the North Wild Area and allow the railroad, {{rt|3|Galar}}, and {{rt|5|Galar}} to cross it. While this part of the Wild Area has only one lake, the Lake of Outrage, many of its subareas have significant ponds. Prior to becoming {{pkmn|Champion}}, the Pokémon in the North Wild Area are encountered at a higher level than those in the North Wild Area. | |||
These 8 subareas are in the North Wild area, listed in order first from south to north, then from west to east. | |||
{| class="roundy" style="background: #{{galar color}}; border: 5px solid {{galar color}}" | |||
|- style="background: #{{galar color}}; color: #fff" | |||
! style="{{roundytl|10px}}" width=100px | Subarea | |||
! width=400px | Location | |||
! style="{{roundytr|10px}}" width=400px | Notable features | |||
|- style="background: #fff" | |||
| style="background: #{{galar color light}}; text-align: center" | [[Motostoke Riverbank]] | |||
| The southernmost point of the North Wild Area, across the bridge from the South Wild Area and north of the river | |||
| | |||
* {{tc|Hiker}}s and {{tc|Fisher}}s may appear throughout this subarea, offering a random item for 100 [[Watt]]s. | |||
|- style="background: #fff" | |||
| style="background: #{{galar color light}}; text-align: center" | [[Bridge Field]] | |||
| A long stretch of hills and ponds that encompasses most of the area between the [[Motostoke Outskirts]] and {{rt|5|Galar}} bridges | |||
| | |||
* One of Galar's two [[Pokémon Nursery|Pokémon Nurseries]] is in this subarea, at roughly its midpoint along its eastern edge. | |||
* That Pokémon Nursery is also a [[Flying Taxi]] destination. | |||
* The Digging Duo stands near the Pokémon Nursery. | |||
|- style="background: #fff" | |||
| style="background: #{{galar color light}}; text-align: center" | [[Stony Wilderness]] | |||
| A stone-strewn area just north of the Route 5 bridge | |||
| | |||
* Hikers may appear throughout this subarea, offering a random item for 100 [[Watt]]s. | |||
|- style="background: #fff" | |||
| style="background: #{{galar color light}}; text-align: center" | [[Giant's Cap]] | |||
| An inclined area that stretches along the eastern shore of the Lake of Outrage, including a large pond | |||
| | |||
* Hikers may appear throughout this subarea, offering a random item for 100 [[Watt]]s. | |||
|- style="background: #fff" | |||
| style="background: #{{galar color light}}; text-align: center" | [[Dusty Bowl]] | |||
| A dust-filled hollow in the center of the area north of the Route 5 bridge | |||
| | |||
* [[Regional form|Galarian]] {{p|Yamask}} can be evolved at the stone arch. | |||
* Hikers and Fishers may appear throughout this subarea, offering a random item for 100 [[Watt]]s. | |||
|- style="background: #fff" | |||
| style="background: #{{galar color light}}; text-align: center" | [[Giant's Mirror]] | |||
| An inclined area that stretches along the eastern edge of the North Wild Area | |||
| | |||
* Hikers and Fisher may appear throughout this subarea, offering a random item for 100 [[Watt]]s. | |||
|- style="background: #fff" | |||
| style="background: #{{galar color light}}; text-align: center" | [[Lake of Outrage]] | |||
| A small lake that isolates a large bluff and a small cove from the rest of the Wild Area | |||
| | |||
* This subarea is the only part of the North Wild Area that is inaccessible prior to obtaining the [[Rotom Bike]]. | |||
* A {{wp|stone circle}} sits on the bluff on the western edge of the North Wild Area, where various [[Evolution stones]] appear each day. | |||
|- style="background: #fff" | |||
| style="background: #{{galar color light}}; {{roundybl|10px}}; text-align: center" | [[Hammerlocke Hills]] | |||
| A bluff along the southern wall of [[Hammerlocke]], overlooking the rest of the North Wild Area | |||
| style="{{roundybr|10px}}" | | |||
* Standing just east of the entrance to Hammerlocke are a Watt Trader and an Ingredients Seller. | |||
* There is a [[Flying Taxi]] destination in this subarea, just outside the entrance to Hammerlocke. | |||
|} | |||
==Weather== | ==Weather== | ||
Revision as of 00:21, 1 December 2021
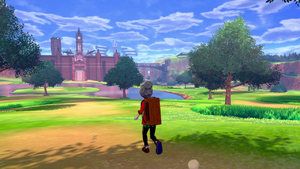
The Wild Area (Japanese: ワイルドエリア Wild Area) is an extensive area in the Galar region. It adjoins several towns in the region.
The Pokémon found in the Wild Area vary depending on the weather, which can vary wildly between the different subareas. Pokémon with higher levels also wander outside of the normal tall grass in many places. The areas north of the Motostoke River are home to Pokémon with higher levels overall. Once the player has started the Darkest Day or captured Eternatus, Pokémon found throughout the Wild Area will generally have higher levels.
Unlike in most other areas in the game (which use a fixed perspective), in the Wild Area the player can control the camera using the right control stick. These mechanics, as well as the weather and wild Pokémon mechanics, carry over to the Isle of Armor and Crown Tundra.
Locations
The Wild Area is composed of 18 subareas, which are grouped into two groups: The roughly rectangular South Wild Area has 10 subareas; and the long, roughly Y-shaped North Wild Area has 8 subareas. These groups are divided by the river that runs from west to east through the southern part of Motostoke, though a bridge allows passage between the south and north. The Town Map shows the rough layout of the Wild Area and relation of the subareas to one another, though the borders shown between them may diverge from in-game borders.
Players first enter the Wild Area at its southernmost point, arriving at the Wild Area Station via train from Wedgehurst Station. Thereafter, players can return to the Wild Area via the Wild Area Station as well as a number of Flying Taxi destinations.
South Wild Area
The South Wild Area consists of 10 subareas with a mix of environments. The 2 largest lakes in the Wild Area, Lake Axewell and Lake Miloch, are in this southern half. Prior to becoming Champion, the Pokémon in the South Wild Area are encountered at a lower level than those in the North Wild Area.
These 10 subareas are in the South Wild area, listed in roughly clockwise order from the south.
| Subarea | Location | Notable features |
|---|---|---|
| Meetup Spot | The southernmost point of the Wild Area |
|
| Rolling Fields | A large area just north of the Meetup Spot. It stretches from the western edge of Lake Miloch to the inner bend of Lake Axewell |
|
| Dappled Grove | A forested area in the southwestern corner of the Wild Area |
|
| West Lake Axewell | The western half of Lake Axewell, plus the bridge across its narrowest point and the land north of the bridge |
|
| Watchtower Ruins | A bluff area in the northwestern corner of the South Wild Area |
|
| East Lake Axewell | The eastern half of Lake Axewell, plus the wide land area north of Lake Axewell & south of Motostoke |
|
| Axew's Eye | An island in the middle of Lake Axewell's eastern half |
|
| North Lake Miloch | The northern portion of Lake Miloch, plus the land area north of the lake and south of the river | |
| Giant's Seat | A long strip of land along the eastern edge of the South Wild Area |
|
| South Lake Miloch | The southern, and larger, portion of Lake Miloch, plus the small land area connecting East Lake Axewell to the Giant's Seat |
|
North Wild Area
The North Wild Area consists of 8 subareas with a mix of environments. Bridges run from west to east across the North Wild Area and allow the railroad, Route 3, and Route 5 to cross it. While this part of the Wild Area has only one lake, the Lake of Outrage, many of its subareas have significant ponds. Prior to becoming Champion, the Pokémon in the North Wild Area are encountered at a higher level than those in the North Wild Area.
These 8 subareas are in the North Wild area, listed in order first from south to north, then from west to east.
| Subarea | Location | Notable features |
|---|---|---|
| Motostoke Riverbank | The southernmost point of the North Wild Area, across the bridge from the South Wild Area and north of the river | |
| Bridge Field | A long stretch of hills and ponds that encompasses most of the area between the Motostoke Outskirts and Route 5 bridges |
|
| Stony Wilderness | A stone-strewn area just north of the Route 5 bridge |
|
| Giant's Cap | An inclined area that stretches along the eastern shore of the Lake of Outrage, including a large pond |
|
| Dusty Bowl | A dust-filled hollow in the center of the area north of the Route 5 bridge | |
| Giant's Mirror | An inclined area that stretches along the eastern edge of the North Wild Area |
|
| Lake of Outrage | A small lake that isolates a large bluff and a small cove from the rest of the Wild Area |
|
| Hammerlocke Hills | A bluff along the southern wall of Hammerlocke, overlooking the rest of the North Wild Area |
|
Weather
The weather in the Wild Area determines which wild Pokémon can appear and, in some cases, which weather conditions and terrain appear in battle. The weather varies between subareas, and while neighboring subeareas can share the same weather, the weather in each is independently determined. However, since symbol encounters and wanderers spawn based on the weather currently experienced by players, it is possible for the weather of one subarea to affect these spawns in another subarea if players are near the border between them. The weather across the entire Wild Area changes each day at midnight, based on the console's clock.
Common weather conditions include Clear, Cloudy, and Rain. If any subareas on a given day have one of the rarer weather conditions (such as Thunderstorm, Blizzard, Sandstorm, or Fog), the X menu will announce that these conditions are present. On certain special dates, the whole Wild Area will have the same weather. These dates are typically the first of a month.
| Icon | Weather | Common Pokémon | Effect in battle | Prerequisite | Special dates |
|---|---|---|---|---|---|
| Clear (はれ) | Normal, Grass, Flying | — | — | May 1 | |
| Cloudy (くもり) | Fighting, Poison, Dark | — | — | March 1 | |
| Rain (あめ) | Water, Bug | Rain | — | October 1 | |
| Thunderstorm (豪雨) | Water, Electric, Dragon | Rain, Electric Terrain | — | November 1 | |
| Snow (ゆき) | Ice | Hail | — | December 1 December 25 | |
| Blizzard (吹雪) | Ice, Steel | Hail | Visit Hammerlocke | February 1 | |
| Harsh sunlight (ひでり) | Fire, Ground | Harsh sunlight | — | July 1 August 1 | |
| Sandstorm (砂嵐) | Ground, Rock | Sandstorm | Visit Hammerlocke | April 1 | |
| Fog (霧) | Psychic, Ghost, Fairy | Misty Terrain | Become Champion | February 29 June 1 |
Prerequisites
Some weather conditions will only begin to appear in the Wild Area after players have reached certain milestones in the game. Before players have unlocked these weather conditions, subareas that would have had them instead have a specific replacement weather condition. These replacement conditions are changed to the original condition immediately after players reach the appropriate milestone, even if the weather would not yet have reset otherwise.
- Sandstorm: Unlocks after visiting Hammerlocke and is replaced by Harsh sunlight
- Blizzard: Unlocks after visiting Hammerlocke and is replaced by Snow
- Fog: Unlocks after becoming Champion and is replaced by Clear
The restrictions for Fog are not present in the Isle of Armor or the Crown Tundra.
Features
The Wild Area has a number of features that appear in many different areas:
- The Wild Area is populated with 99 Pokémon Dens, where the player can participate in Max Raid Battles.
- There are a large number of hidden items throughout the Wild Area. These items respawn daily, and each specific spot may yield different items on different days.
- Watt Traders allow the player to trade Watts for items, participate in the Rotom Rally, change the color of their outfit, and upgrade their Rotom Bike.
Items
Hidden items
There are a large number of hidden items throughout the Wild Area. These hidden items regenerate each day, even if the player has not obtained them.
Each spot has one or more possible items that it can yield, with the possible items depending on the spot. Every item that regenerates daily can also rarely regenerate as a Wishing Piece (at approximately a 1% chance) instead of the items in its standard pool.
100-Watt gifts
Hikers and Fishers may appear in different parts of the Wild Area to offer the player an unspecified item for 100 Watts. The player does not know what the item is until they agree to purchase it.
Fisher
| Item | Location | Games | |
|---|---|---|---|
| Pearl ×3 | Common | Sw Sh | |
| Big Pearl | Common | Sw Sh | |
| Big Pearl ×2 | Average | Sw Sh | |
| Big Pearl ×3 | Average | Sw Sh | |
| Pearl String | Average | Sw Sh | |
| Pearl String ×2 | Rare | Sw Sh | |
| Wishing Piece | Rare | Sw Sh | |
Hiker
A Hiker's possible items depend on the player's progress, changing when the player gains their second Badge and when they become Champion.
| Item | Rate | ||
|---|---|---|---|
| 0-1 Badge | 2-8 Badges | Champion | |
| Common | |||
| Common | |||
| Common | |||
| Average | |||
| Common | |||
| Rare | Common | Common | |
| Common | Common | ||
| Rare | |||
| Rare | Common | ||
| Uncommon | |||
| Rare | |||
| Rare | Rare | Rare | |
| Very Rare | Very Rare | Very Rare | |
Trainers
Pokémon Breeder Chloe can appear in many different Wild Area zones. If the player loses, their Pokémon will be fully healed. She can be challenged more than once per day, but every time she is defeated, she will relocate.
She can appear in the following Wild Area zones:
| Trainer | Pokémon | |||||||||||
|---|---|---|---|---|---|---|---|---|---|---|---|---|
| Before earning the Fire Badge | ||||||||||||
|
| |||||||||||
| ||||||||||||
| ||||||||||||
| After earning the Fire Badge | ||||||||||||
|
| |||||||||||
| ||||||||||||
| ||||||||||||
| After becoming Champion | ||||||||||||
|
| |||||||||||
| ||||||||||||
| ||||||||||||
In the anime
Main series
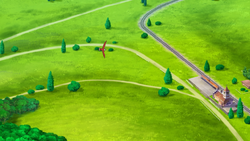
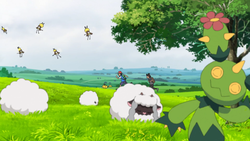
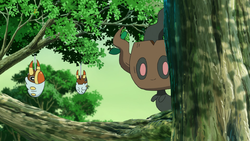
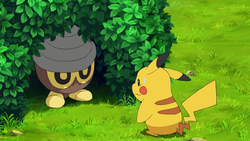
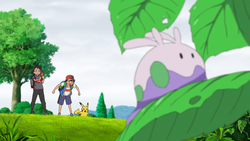
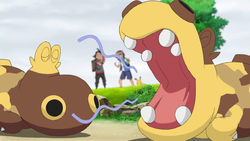
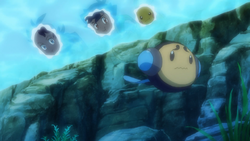
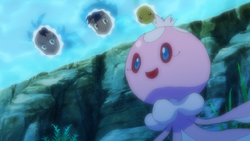
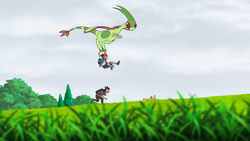
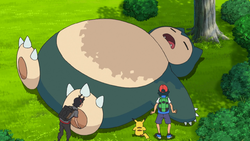
The Wild Area first appeared in Mind-Boggling Dynamax!, where Ash and Goh explored it after their arrival in Galar. They witnessed a Snorlax Gigantamaxing, but it blocked a railway line in the process, threatening to cause an accident. However, Ash and Goh were able to make Snorlax move off the tracks, saving the train. Afterwards, in the same area, Goh caught the Scorbunny that had followed him from Wyndon.
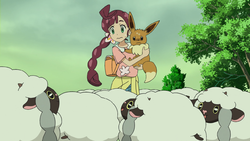
In A Pinch of This, a Pinch of That!, Ash and Goh revisited the Wild Area, this time accompanied by Chloe, to dig up Fossils that could be found there. They met two bumbling Fossil diggers named Cara Liss and Bray Zenn, whom they helped dig up Fossils they intended to restore into an Arctovish and a Dracozolt. However, their Fossil pieces got mixed up as they started the restoration process, resulting in them being restored as Dracovish and Arctozolt instead. After some interactions with the Fossil Pokémon, Cara Liss and Bray Zenn were satisfied with the data they had gotten and let Ash and Goh take care of them. As such, Ash then proceeded to catch Dracovish, while Goh caught Arctozolt.
Pokémon found in the Wild Area
 Braviary |
 Maractus |
 Wooloo |
 Ribombee |
 Grubbin |
 Phantump |
 Seedot |
 Goomy |
 Hippopotas |
 Tympole |
 Frillish |
 Flygon |
 Snorlax ↔ Gigantamax Snorlax |
 Rookidee |
 Budew |
 Butterfree |
 Joltik |
 Ditto |
Caught Pokémon
 Scorbunny |
 Boldore |
 Dracovish |
 Arctozolt |
Pokémon: Twilight Wings

The Wild Area first appeared during a montage at the end of Letter, where Bea was shown confronting a wild Rhydon. Bea's visit to the Wild Area was shown in full in Training, where she took a Flying Taxi there to train with her Machop, Machoke, and Machamp following her loss against Leon in a battle.
In the manga

Pokémon Adventures
Sword & Shield arc
The Wild Area first appeared in Zap!! A Rising Beam of Light, where Henry, Casey, Professor Magnolia, and Marvin went there to investigate the Pokémon Dens in the Rolling Fields, encountering Team Yell in the process.
In PASS12, the group traveled through the Wild Area again in order to reach Hammerlocke.
Trivia
- The theme used for the northern parts of the Wild Area, including Bridge Field onward, is shortened for Routes 6, 7, 8, and 9.
- The Wild Area is based on the Lake District.[1]
In other languages
| |||||||||||||||||||||||||||||||||||||||||||
References

|
This article is part of Project Locations, a Bulbapedia project that aims to write comprehensive articles on every location in the Pokémon world. |
