Appendix:FireRed and LeafGreen walkthrough/Section 1: Difference between revisions
Randomguy77 (talk | contribs) |
(starter → first partner) |
||
| (17 intermediate revisions by 8 users not shown) | |||
| Line 1: | Line 1: | ||
{{WalkthroughNotice|FRLG}} | {{WalkthroughNotice|FRLG}} | ||
==Introduction== | |||
After a brief cutscene, press the A Button or <sc>Start</sc> on the title screen. The player is presented with a list of controls in order of importance, then with a mission statement from the games' developers. Afterward, the resident researcher of the [[Kanto]] region, [[Professor Oak]], appears and introduces new Trainers to the Pokémon world. | |||
First, the player is prompted to select their avatar's gender and name, which may be up to seven characters long. Use the Control Pad to move the cursor and the <sc>Select</sc> Button to cycle through three pages of upper-case letters, lower-case letters, and other characters. On this screen, pressing the A Button will select a letter while pressing the B Button will delete the previous one. When ready, press <sc>Start</sc> or select ''OK'' in the bottom-right corner. | |||
Next, [[Professor Oak]] introduces {{ga|Blue|his grandson}}, who happens to be your [[rival]]. The professor is having trouble remembering the boy's name, and asks if you might know. Choose his name from a list of preset names, or select a new one. With that done, the player is transported into the world of Pokémon to begin their adventure! | |||
[[ | |||
{| style="margin: auto; background: #D9D9D9; {{roundy}}; border: 2px solid #CCCCCC;" | |||
|- | |||
! colspan="2" style="background: #E6E6E6; {{roundytop|5px}}; padding 5px;" | Default Names | |||
|- | |||
! style="background: #E6E6E6; {{roundybl|5px}}; padding: 5px;" | Rival | |||
| style="background: #FFF; {{roundybr|5px}}; padding: 5px;" | Green, Gary, Kaz, Toru | |||
|} | |||
{| class="expandable" align="center" style="background: #{{ | |||
==Pallet Town== | |||
[[File:Pallet Town FRLG.png|thumb|Pallet Town]] | |||
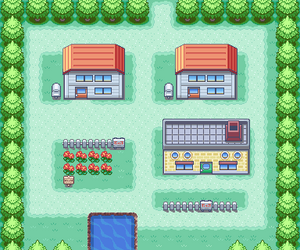
The journey begins in [[Pallet Town]], in the southwest part of the [[Kanto]] region. It is a rather small, sleepy town with only three buildings. The western house belongs to you and {{ka|Mom}}, while the eastern one is home to {{ga|Blue|your rival}} and his sister. The large building to the south is [[Professor Oak]]'s [[Oak's Lab|Laboratory]]. The north part of town leads to the [[tall grass]]es of {{rt|1|Kanto}}, and the waters to the south open up to {{rt|21|Kanto}}. | |||
{| class="expandable" align="center" style="background: #BDBDBD; {{roundy}}; border: 5px solid #D3D3D3;" | |||
|- align="center" | |||
! Available Pokémon | |||
|- | |||
| | |||
{{Catch/header|road|no}} | |||
{{Catch/div|road|Gift Pokémon}} | |||
{{Catch/entryfl|001|Bulbasaur|yes|yes|First partner|5|One|type1=Grass|type2=Poison}} | |||
{{Catch/entryfl|004|Charmander|yes|yes|First partner|5|One|type1=Fire}} | |||
{{Catch/entryfl|007|Squirtle|yes|yes|First partner|5|One|type1=Water}} | |||
{{Catch/footer|road|2}} | |||
|} | |||
{| class="expandable" align="center" style="background: #BDBDBD; {{roundy}}; border: 5px solid #D3D3D3;" | |||
|- align="center" | |- align="center" | ||
! Items | ! Items | ||
|- | |- | ||
| | | | ||
{{itlisth|road}} | {{itlisth|road}} | ||
{{itemlist|Potion| | {{itemlist|Potion|Home; retrievable from the player's PC|FR=yes|LG=yes}} | ||
{{catch/div|road|Later visit}} | |||
{{itemlist|Pokédex|Oak's Lab; from Professor Oak, after he receives [[Parcel|his parcel]]|FR=yes|LG=yes|display=[[Pokédex]]|sprite=Kanto Pokédex III OD}} | |||
{{itemlist|Poké Ball|Oak's Lab; from Professor Oak, after obtaining the Pokédex|FR=yes|LG=yes|display={{i|Poké Ball}} ×5}} | |||
{{itemlist|Town Map III|Blue's house; from Daisy, after obtaining the Pokédex|FR=yes|LG=yes|display=[[Town Map]]}} | |||
{{itlistfoot|road}} | {{itlistfoot|road}} | ||
|} | |} | ||
{| | |||
|- | |||
===Home=== | |||
====2F==== | |||
The journey begins in your bedroom, with you standing in front of your [[Super Nintendo Entertainment System]]. Now that you can control your character, the various buttons and their effects are as follows: | |||
{{ | |||
{{ | {| style="margin: auto; background: #D9D9D9; {{roundy}}; border: 2px solid #CCCCCC;" | ||
|- | |||
! style="background: #E6E6E6; {{roundytl|5px}}; padding: 3px;" | Input | |||
! style="background: #E6E6E6; {{roundytr|5px}}; padding: 3px;" | Effect(s) | |||
|- | |||
| style="background: #FFF; padding: 3px;" | +Control Pad | |||
| style="background: #FFF; padding: 3px;" | Moves character; moves cursor in a menu | |||
|- | |||
| style="background: #FFF; padding: 3px;" | A Button | |||
| style="background: #FFF; padding: 3px;" | Interact with people and the environment; select menu options | |||
|- | |||
| style="background: #FFF; padding: 3px;" | B Button | |||
| style="background: #FFF; padding: 3px;" | Cancel a selection; exit a menu | |||
|- | |||
| style="background: #FFF; padding: 3px;" | <sc>Start</sc> | |||
| style="background: #FFF; padding: 3px;" | Opens the [[Menu|main menu]] | |||
|- | |||
| style="background: #FFF; padding: 3px;" | <sc>Select</sc> | |||
| style="background: #FFF; padding: 3px;" | Sort items; use a registered item | |||
|- | |||
| style="background: #FFF; {{roundybl|5px}}; padding: 3px;" | L Button, R Button | |||
| style="background: #FFF; padding: 3px;" | Activates the [[Help System]] | |||
|} | |} | ||
Oak is nowhere to be found, so head | The [[PC]] in the corner acts as both your {{DL|PC|Item Storage System|item storage}} and Mailbox. | ||
* The [[Bag]] has three pockets: one for Items, one for [[Key Item]]s, and one for [[Poké Ball]]s. Each pocket can hold up to 42 different [[item]]s and up to 999 of each item. If a pocket becomes full, it would be necessary to use or discard some items before obtaining anything new. The PC can hold up to 30 different items from the Items pocket. ''Deposit Item'' and ''Withdraw Item'' allow for moving items between inventory and storage. It seems as though there is already an item in storage, so select ''Withdraw Item'' and choose the [[Potion]] to add it to your Bag. Press the B Button to close the menus and return to your bedroom. To save the game, press <sc>Start</sc> to open the main menu, select ''Save'', and then ''Yes''. When the menu disappears, your progress is saved and it is safe to exit the game. | |||
* [[Mail]] is a type of [[held item]]. A Trainer may leave a note on each piece of Mail when giving one to a Pokémon. This message can be sent to other Trainers by trading Pokémon. When taking a piece of Mail from a Pokémon, a Trainer may choose to place it in their Bag or send it to their Mailbox. Storing it in the Mailbox preserves the original message. | |||
To go downstairs, step on the stairs in the northeast corner of the room. | |||
====1F==== | |||
{{ka|Mom}} is sitting at the table, and tells you that [[Professor Oak]] has been looking for you. To leave the house, step on the floor mat along the south wall and press down on the +Control Pad. | |||
===Oak Appears!=== | |||
[[Pallet Town]] has only a few places to explore, and [[Professor Oak]] is nowhere to be found. There is nothing else to do around here right now, so head for the [[tall grass]] on the north side of town. Suddenly, the professor appears! He scolds you for trying to venture off on your own, as it can be dangerous without a Pokémon of your own for defense against [[wild Pokémon]]. | |||
=== Professor Oak's | ===Professor Oak's Lab=== | ||
Oak | Oak leads you back to his lab where {{ga|Blue}} is already waiting, and gives you the choice of your [[First partner Pokémon|very first Pokémon]]. Each has its advantages and disadvantages, so simply choose the one that you like the best. | ||
{| | {| style="margin: auto; background: #{{kanto color dark}}; text-align: center; font-size: 85%; {{roundy}}; border: 5px solid #{{kanto color}};" | ||
|- | |- | ||
! colspan="2" style="width: 80px; background: #{{kanto color light}}; {{roundytl|5px}};" | [[File:0001Bulbasaur.png|100px]]<br>'''{{pcolor|Bulbasaur|{{kanto color dark}}}}'''<br> | |||
! colspan="2" style="width: 80px; background: #{{kanto color light}};" | [[File:0004Charmander.png|100px]]<br>'''{{pcolor|Charmander|{{kanto color dark}}}}'''<br> | |||
! colspan="2" style="width: 80px; background: #{{kanto color light}}; {{roundytr|5px}};" | [[File:0007Squirtle.png|100px]]<br>'''{{pcolor|Squirtle|{{kanto color dark}}}}''' | |||
|- | |- | ||
| style="background: #{{grass color}};" | {{ | | style="background: #{{grass color}};" | {{color2|FFF|Grass (type)|Grass}} | ||
| style="background: #{{poison color}};" | {{ | | style="background: #{{poison color}};" | {{color2|FFF|Poison (type)|Poison}} | ||
| colspan="2" style="background: #{{fire color}};" | {{ | | colspan="2" style="background: #{{fire color}};" | {{color2|FFF|Fire (type)|Fire}} | ||
| colspan="2" style="background: #{{water color}};" | {{ | | colspan="2" style="background: #{{water color}};" | {{color2|FFF|Water (type)|Water}} | ||
|- | |- style="background: #{{kanto color light}};" | ||
| {{MSP|002|Ivysaur}} | | {{MSP/6|002|Ivysaur}} | ||
| {{pcolor|Ivysaur|{{kanto color dark}}}} | | {{pcolor|Ivysaur|{{kanto color dark}}}} | ||
| {{MSP|005|Charmeleon}} | | {{MSP/6|005|Charmeleon}} | ||
| {{pcolor|Charmeleon|{{kanto color dark}}}} | | {{pcolor|Charmeleon|{{kanto color dark}}}} | ||
| {{MSP|008|Wartortle}} | | {{MSP/6|008|Wartortle}} | ||
| {{pcolor|Wartortle|{{kanto color dark}}}} | | {{pcolor|Wartortle|{{kanto color dark}}}} | ||
|- | |- | ||
| style="background: #{{grass color}};" | {{ | | style="background: #{{grass color}};" | {{color2|FFF|Grass (type)|Grass}} | ||
| style="background: #{{poison color}};" | {{ | | style="background: #{{poison color}};" | {{color2|FFF|Poison (type)|Poison}} | ||
| colspan="2" style="background: #{{fire color}};" | {{ | | colspan="2" style="background: #{{fire color}};" | {{color2|FFF|Fire (type)|Fire}} | ||
| colspan="2" style="background: #{{water color}};" | {{ | | colspan="2" style="background: #{{water color}};" | {{color2|FFF|Water (type)|Water}} | ||
|- | |- style="background: #{{kanto color light}};" | ||
| {{MSP|003|Venusaur}} | | {{MSP/6|003|Venusaur}} | ||
| {{pcolor|Venusaur|{{kanto color dark}}}} | | {{pcolor|Venusaur|{{kanto color dark}}}} | ||
| {{MSP|006|Charizard}} | | {{MSP/6|006|Charizard}} | ||
| {{pcolor|Charizard|{{kanto color dark}}}} | | {{pcolor|Charizard|{{kanto color dark}}}} | ||
| {{MSP|009|Blastoise}} | | {{MSP/6|009|Blastoise}} | ||
| {{pcolor|Blastoise|{{kanto color dark}}}} | | {{pcolor|Blastoise|{{kanto color dark}}}} | ||
|- | |- | ||
| style="background: #{{grass color}}; {{roundybl|5px}};" | {{ | | style="background: #{{grass color}}; {{roundybl|5px}};" | {{color2|FFF|Grass (type)|Grass}} | ||
| style="background: #{{poison color}};" | {{ | | style="background: #{{poison color}};" | {{color2|FFF|Poison (type)|Poison}} | ||
| style="background: #{{fire color}};" | {{ | | style="background: #{{fire color}};" | {{color2|FFF|Fire (type)|Fire}} | ||
| style="background: #{{flying color}};" | {{ | | style="background: #{{flying color}};" | {{color2|FFF|Flying (type)|Flying}} | ||
| colspan="2" style="background: #{{water color}}; {{roundybr|5px}};" | {{ | | colspan="2" style="background: #{{water color}}; {{roundybr|5px}};" | {{color2|FFF|Water (type)|Water}} | ||
|} | |} | ||
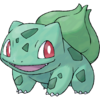
* The {{2t|Grass|Poison}}-type {{p|Bulbasaur}} has the most weaknesses of the trio, with four: {{t|Fire}}-, {{t|Flying}}-, {{t|Psychic}}-, and {{type|Ice}} attacks. Its Grass moves are strong against {{t|Water}}-, {{t|Rock}}-, and {{type|Ground}} Pokémon. Bulbasaur's typing gives it an easier time in the early part of the game, making it a good choice for less experienced Trainers. | |||
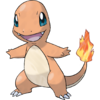
* The {{type|Fire}} {{p|Charmander}} is great when battling {{t|Grass}}-, {{t|Bug}}-, {{t|Ice}}-, and {{type|Steel}} Pokémon, but is vulnerable to {{t|Water}}-, {{t|Rock}}-, and {{type|Ground}} moves. Its final form, {{p|Charizard}}, gains a secondary {{t|Flying}} type. Charmander may struggle early on, so it is a good choice for those looking for a challenge. | |||
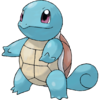
* The {{type|Water}} {{p|Squirtle}} has an advantage when facing {{t|Fire}}-, {{t|Rock}}-, and {{type|Ground}} Pokémon, but may struggle against {{t|Grass}}- and {{type|Electric}} attacks. It is the most well-rounded of the trio. | |||
Once you have chosen a Pokémon, you are given the chance to [[nickname]] it. Next, it's your rival's turn. He will always choose the Pokémon that has a type advantage against your own. When you turn to leave, he will challenge you to your first [[Pokémon battle]]! | |||
====Rival Battle 1==== | |||
As you and {{ga|Blue}} face off, [[Professor Oak]] explains the basics. When battling, each Trainer sends out at least one Pokémon at a time; both of these Pokémon are on [[Level]] 5, indicated by the ''Lv5'' aside each Pokémon. Below that is the health bar, which shows the Pokémon's remaining {{stat|HP}}. A battle is won or lost when either side has no remaining Pokémon with the strength to continue. Beneath the health bar is a gauge that shows the amount of [[Experience|Experience Points]] needed for the Pokémon to grow to the next level. | |||
| | |||
|{{Party/Single | Choosing ''Fight'' will allow you to launch an attack against the target. Each of [[First partner Pokémon|the professor's Pokémon]] have two moves. The first will damage the opponent, and the other will lower one of its stats. If your Pokémon's HP runs low, be sure to use that Potion from your PC. Go to ''Item'' to select the medicine and apply it to the Pokémon. | ||
====={{MSP/6|001|Bulbasaur}} If the player chose {{p|Bulbasaur}}:===== | |||
{| style="margin: auto;" | |||
| | |||
{{Party/Single | |||
|color={{blue color}} | |color={{blue color}} | ||
|headcolor={{blue color light}} | |headcolor={{blue color light}} | ||
| Line 112: | Line 167: | ||
|move2=Growl|move2type=Normal}} | |move2=Growl|move2type=Normal}} | ||
{{Party/Footer}} | {{Party/Footer}} | ||
|} | |||
|{{Party/Single | ====={{MSP/6|004|Charmander}} If the player chose {{p|Charmander}}:===== | ||
{| style="margin: auto;" | |||
| | |||
{{Party/Single | |||
|color={{blue color}} | |color={{blue color}} | ||
|headcolor={{blue color light}} | |headcolor={{blue color light}} | ||
| Line 136: | Line 196: | ||
|move2=Tail Whip|move2type=Normal}} | |move2=Tail Whip|move2type=Normal}} | ||
{{Party/Footer}} | {{Party/Footer}} | ||
|} | |||
|{{Party/Single | ====={{MSP/6|007|Squirtle}} If the player chose {{p|Squirtle}}:===== | ||
{| style="margin: auto;" | |||
| | |||
{{Party/Single | |||
|color={{blue color}} | |color={{blue color}} | ||
|headcolor={{blue color light}} | |headcolor={{blue color light}} | ||
| Line 162: | Line 227: | ||
|} | |} | ||
Once you have defeated {{ga|Blue}}, you earn a cash reward of {{PDollar}}80, and he will leave. The encounter earns your Pokémon enough [[Experience|Experience Points]] to grow to Level 6. Leave the laboratory and head north to {{rt|1|Kanto}}. | |||
{{ | |||
{{ | |||
{{rt| | |||
{{WalkthroughPrevNext | {{WalkthroughPrevNext | ||
|game=FireRed | |game=FireRed|game2=LeafGreen | ||
|game2=LeafGreen | |||
|gamename=FireRed and LeafGreen | |gamename=FireRed and LeafGreen | ||
|prev=no | |prev=no | ||
|nextsection=2 | |nextsection=2 | ||
|nextname= | |nextname=Route 1, Viridian City, Oak's Lab, Route 2 | ||
}} | }} | ||
<br | <br> | ||
{{Project Walkthroughs notice}} | {{Project Walkthroughs notice}} | ||
[[Category:FireRed and LeafGreen walkthrough|F01]] | [[Category:FireRed and LeafGreen walkthrough|F01]] | ||
Latest revision as of 01:50, 19 March 2024
These pages follow the remade Game Boy Advance iteration, not Pokémon Red and Blue. The guide for those games can be found here.
Introduction
After a brief cutscene, press the A Button or Start on the title screen. The player is presented with a list of controls in order of importance, then with a mission statement from the games' developers. Afterward, the resident researcher of the Kanto region, Professor Oak, appears and introduces new Trainers to the Pokémon world.
First, the player is prompted to select their avatar's gender and name, which may be up to seven characters long. Use the Control Pad to move the cursor and the Select Button to cycle through three pages of upper-case letters, lower-case letters, and other characters. On this screen, pressing the A Button will select a letter while pressing the B Button will delete the previous one. When ready, press Start or select OK in the bottom-right corner.
Next, Professor Oak introduces his grandson, who happens to be your rival. The professor is having trouble remembering the boy's name, and asks if you might know. Choose his name from a list of preset names, or select a new one. With that done, the player is transported into the world of Pokémon to begin their adventure!
| Default Names | |
|---|---|
| Rival | Green, Gary, Kaz, Toru |
Pallet Town
The journey begins in Pallet Town, in the southwest part of the Kanto region. It is a rather small, sleepy town with only three buildings. The western house belongs to you and Mom, while the eastern one is home to your rival and his sister. The large building to the south is Professor Oak's Laboratory. The north part of town leads to the tall grasses of Route 1, and the waters to the south open up to Route 21.
| Available Pokémon | |||||||||||||||||||||||||||||||||||||||||||||||||||||||||||||||||||||||||||||||||||||||||
|---|---|---|---|---|---|---|---|---|---|---|---|---|---|---|---|---|---|---|---|---|---|---|---|---|---|---|---|---|---|---|---|---|---|---|---|---|---|---|---|---|---|---|---|---|---|---|---|---|---|---|---|---|---|---|---|---|---|---|---|---|---|---|---|---|---|---|---|---|---|---|---|---|---|---|---|---|---|---|---|---|---|---|---|---|---|---|---|---|---|
| |||||||||||||||||||||||||||||||||||||||||||||||||||||||||||||||||||||||||||||||||||||||||
| Items | |||||||||||||||||||||||||||||||||||||||
|---|---|---|---|---|---|---|---|---|---|---|---|---|---|---|---|---|---|---|---|---|---|---|---|---|---|---|---|---|---|---|---|---|---|---|---|---|---|---|---|
| |||||||||||||||||||||||||||||||||||||||
Home
2F
The journey begins in your bedroom, with you standing in front of your Super Nintendo Entertainment System. Now that you can control your character, the various buttons and their effects are as follows:
| Input | Effect(s) |
|---|---|
| +Control Pad | Moves character; moves cursor in a menu |
| A Button | Interact with people and the environment; select menu options |
| B Button | Cancel a selection; exit a menu |
| Start | Opens the main menu |
| Select | Sort items; use a registered item |
| L Button, R Button | Activates the Help System |
The PC in the corner acts as both your item storage and Mailbox.
- The Bag has three pockets: one for Items, one for Key Items, and one for Poké Balls. Each pocket can hold up to 42 different items and up to 999 of each item. If a pocket becomes full, it would be necessary to use or discard some items before obtaining anything new. The PC can hold up to 30 different items from the Items pocket. Deposit Item and Withdraw Item allow for moving items between inventory and storage. It seems as though there is already an item in storage, so select Withdraw Item and choose the Potion to add it to your Bag. Press the B Button to close the menus and return to your bedroom. To save the game, press Start to open the main menu, select Save, and then Yes. When the menu disappears, your progress is saved and it is safe to exit the game.
- Mail is a type of held item. A Trainer may leave a note on each piece of Mail when giving one to a Pokémon. This message can be sent to other Trainers by trading Pokémon. When taking a piece of Mail from a Pokémon, a Trainer may choose to place it in their Bag or send it to their Mailbox. Storing it in the Mailbox preserves the original message.
To go downstairs, step on the stairs in the northeast corner of the room.
1F
Mom is sitting at the table, and tells you that Professor Oak has been looking for you. To leave the house, step on the floor mat along the south wall and press down on the +Control Pad.
Oak Appears!
Pallet Town has only a few places to explore, and Professor Oak is nowhere to be found. There is nothing else to do around here right now, so head for the tall grass on the north side of town. Suddenly, the professor appears! He scolds you for trying to venture off on your own, as it can be dangerous without a Pokémon of your own for defense against wild Pokémon.
Professor Oak's Lab
Oak leads you back to his lab where Blue is already waiting, and gives you the choice of your very first Pokémon. Each has its advantages and disadvantages, so simply choose the one that you like the best.
 Bulbasaur |
 Charmander |
 Squirtle | |||
|---|---|---|---|---|---|
| Grass | Poison | Fire | Water | ||
| Ivysaur | Charmeleon | Wartortle | |||
| Grass | Poison | Fire | Water | ||
| Venusaur | Charizard | Blastoise | |||
| Grass | Poison | Fire | Flying | Water | |
- The Grass/Poison-type Bulbasaur has the most weaknesses of the trio, with four: Fire-, Flying-, Psychic-, and Ice-type attacks. Its Grass moves are strong against Water-, Rock-, and Ground-type Pokémon. Bulbasaur's typing gives it an easier time in the early part of the game, making it a good choice for less experienced Trainers.
- The Fire-type Charmander is great when battling Grass-, Bug-, Ice-, and Steel-type Pokémon, but is vulnerable to Water-, Rock-, and Ground-type moves. Its final form, Charizard, gains a secondary Flying type. Charmander may struggle early on, so it is a good choice for those looking for a challenge.
- The Water-type Squirtle has an advantage when facing Fire-, Rock-, and Ground-type Pokémon, but may struggle against Grass- and Electric-type attacks. It is the most well-rounded of the trio.
Once you have chosen a Pokémon, you are given the chance to nickname it. Next, it's your rival's turn. He will always choose the Pokémon that has a type advantage against your own. When you turn to leave, he will challenge you to your first Pokémon battle!
Rival Battle 1
As you and Blue face off, Professor Oak explains the basics. When battling, each Trainer sends out at least one Pokémon at a time; both of these Pokémon are on Level 5, indicated by the Lv5 aside each Pokémon. Below that is the health bar, which shows the Pokémon's remaining HP. A battle is won or lost when either side has no remaining Pokémon with the strength to continue. Beneath the health bar is a gauge that shows the amount of Experience Points needed for the Pokémon to grow to the next level.
Choosing Fight will allow you to launch an attack against the target. Each of the professor's Pokémon have two moves. The first will damage the opponent, and the other will lower one of its stats. If your Pokémon's HP runs low, be sure to use that Potion from your PC. Go to Item to select the medicine and apply it to the Pokémon.
 If the player chose Bulbasaur:
| |||||||||||||||||||||||||||||||||||||||||||
 If the player chose Charmander:
| |||||||||||||||||||||||||||||||||||||||||||
 If the player chose Squirtle:
| |||||||||||||||||||||||||||||||||||||||||||||
Once you have defeated Blue, you earn a cash reward of $80, and he will leave. The encounter earns your Pokémon enough Experience Points to grow to Level 6. Leave the laboratory and head north to Route 1.
| FireRed and LeafGreen walkthrough |
|

|
This article is part of Project Walkthroughs, a Bulbapedia project that aims to write comprehensive step-by-step guides on each Pokémon game. |


