List of Pokémon Dream World mini-games: Difference between revisions
| (102 intermediate revisions by 33 users not shown) | |||
| Line 1: | Line 1: | ||
{{incomplete|2=First table}} | |||
In the [[Pokémon Dream World]], players are given an option to participate in '''mini-games''' in order to befriend found Pokémon. The type of game depends on the Pokémon species encountered. Getting certain amounts of points in a game allows players to obtain Pokémon with moves not normally obtained by leveling up. | In the [[Pokémon Dream World]], players are given an option to participate in '''mini-games''' in order to befriend found Pokémon. The type of game depends on the Pokémon species encountered. Getting certain amounts of points in a game allows players to obtain Pokémon with moves not normally obtained by leveling up. | ||
| Line 6: | Line 7: | ||
__toc__ | __toc__ | ||
| width="100%" valign="top" align="right" | | | width="100%" valign="top" align="right" | | ||
<!--[[User:bluesun]] will endeavor to fill in/increase accuracy of the missing parts of this table as soon he has enough reliable data.-->{| | <!--[[User:bluesun]] will endeavor to fill in/increase accuracy of the missing parts of this table as soon he has enough reliable data.-->{| style="margin:auto; width:auto; background: #{{dream color}}; border: 3px solid #{{dream color dark}}; {{roundy}}" | ||
|- | |- | ||
! colspan=" | ! colspan="10" style="background:#{{dream color light}}; {{roundytop|5px}}" | Score Ranks | ||
! colspan="3" style="{{roundytop|5px}}" | Chance of | ! colspan="3" style="background:#{{dream color light}}; {{roundytop|5px}}" | Chance of move | ||
|- style="background:# | |- style="background:#{{dream color light}}" | ||
! Seek | ! Seek | ||
! Scoop | ! Scoop | ||
! Sky | ! Sky | ||
! Spout | ! Spout | ||
! | ! Bistro | ||
! | ! Treasure | ||
! Candle | ! Candle | ||
! Gems | |||
! Treat | |||
! Lake | |||
! A | ! A | ||
! B | ! B | ||
! C | ! C | ||
|- | |- style="text-align:center; background:#fff" | ||
| 50000+ || 30000+ || 55000+ || 60000+ || 54000+ || 80000+ || ??? || 0% || 50% || 50% | | 50000+ || 30000+ || 55000+ || 60000+ || 54000+ || 80000+ || ??? || ??? || ??? || ??? || 0% || 50% || 50% | ||
|- | |- style="text-align:center; background:#fff" | ||
| 45000+ || 25000+ || 50000+ || 50000+ || 45000+ || 60000+ || ??? || ?<!--25+-6%--> || ? || ? | | 45000+ || 25000+ || 50000+ || 50000+ || 45000+ || 60000+ || ??? || ??? || ??? || ??? || ?<!--25+-6%--> || ? || ? | ||
|- | |- style="text-align:center; background:#fff" | ||
| 40000+ || 20000+ || 45000+ || 45000+ || 30000+ || 50000+ || ??? || ? || ? || ? | | 40000+ || 20000+ || 45000+ || 45000+ || 30000+ || 50000+ || ??? || ??? || ??? || ??? || ? || ? || ? | ||
|- | |- style="text-align:center; background:#fff" | ||
| 30000+ || 10000+ || 30000+ || 30000+ || 15000+ || 45000+ || ??? || ?<!--65+-7%--> || ? || ? | | 30000+ || 10000+ || 30000+ || 30000+ || 15000+ || 45000+ || ??? || ??? || ??? || ??? || ?<!--65+-7%--> || ? || ? | ||
|- | |- style="text-align:center" | ||
| style="{{roundybl|5px}}" | 0+ || 0+ || 0+ || 0+ || 0+ || 0+ || ??? || 70% || 20% || style="{{roundybr|5px}}" | 10% | | style="background:#fff; {{roundybl|5px}}" | 0+ || style="background:#fff" | 0+ || style="background:#fff" | 0+ || style="background:#fff" | 0+ || style="background:#fff" | 0+ || style="background:#fff" | 0+ || style="background:#fff" | ??? || style="background:#fff" | ??? || style="background:#fff" | ??? || style="background:#fff; {{roundybr|5px}}" | ??? || style="background:#fff; {{roundybl|5px}}" | 70% || style="background:#fff" | 20% || style="background:#fff; {{roundybr|5px}}" | 10% | ||
|} | |} | ||
|} | |} | ||
| Line 39: | Line 43: | ||
In '''Pokémon Seek''' (Japanese: '''まいごさがし''' ''Seek the Lost Child''), players must find a certain Pokémon within the time limit by navigating through the map. They may see a bush, cloud, rock, or many other objects rustling, or they may click the objects themselves. Up to two different places per area of the map are clickable. If a hiding place rustles, clicking on it will reveal a Pokémon hiding there. Upon entering an area, rustling can happen either immediately or after a second passes if a Pokémon is present, and, most often than not, it is not the Pokémon sought after. When encountering the wrong Pokémon, the timer temporarily pauses as to not penalize the player. The game automatically ends when the Pokémon is found. | In '''Pokémon Seek''' (Japanese: '''まいごさがし''' ''Seek the Lost Child''), players must find a certain Pokémon within the time limit by navigating through the map. They may see a bush, cloud, rock, or many other objects rustling, or they may click the objects themselves. Up to two different places per area of the map are clickable. If a hiding place rustles, clicking on it will reveal a Pokémon hiding there. Upon entering an area, rustling can happen either immediately or after a second passes if a Pokémon is present, and, most often than not, it is not the Pokémon sought after. When encountering the wrong Pokémon, the timer temporarily pauses as to not penalize the player. The game automatically ends when the Pokémon is found. | ||
Players may click "Listen carefully" to hear if the Pokémon sought after is within a three block radius from the player; the timer does not pause when players choose to use it. Players may also find an item lost by the Pokémon by clicking on some | Players may click "Listen carefully" to hear if the Pokémon sought after is within a three block radius from the player; the timer does not pause when players choose to use it. Players may also find an item lost by the Pokémon by clicking on some sparkles—an item that will be given to the Pokémon, allowing players to gain 5,000 bonus points. The Pokémon to be found is always within a two-block radius from the item. | ||
===Text when listening=== | |||
{| style="margin:auto; width:auto; text-align:center; background: #{{dream color}}; border: 3px solid #{{dream color dark}}; {{roundy}}" | |||
|- | |||
! style="background:#{{dream color light}}; {{roundytl|5px}}" | Text | |||
! style="background:#{{dream color light}}; {{roundytr|5px}}" | Spaces away | |||
|- style="background:#fff" | |||
| You can't hear the voice of <Pokémon>. | |||
| At least three | |||
|- style="background:#fff" | |||
| The voice is faint. <Pokémon> is not far from here! | |||
| Two | |||
|- style="background:#fff" | |||
| You can hear the voice! <Pokémon> is near here! | |||
| One | |||
|- | |||
| style="background:#fff; {{roundybl|5px}}" | The voice is very close! <Pokémon> must be here! | |||
| style="background:#fff; {{roundybr|5px}}" | Zero | |||
|} | |||
The following are Pokémon that players may be asked to find in this game: {{p|Bonsly}}, {{p|Budew}}, {{p|Pichu}}, {{p|Munchlax}}, {{p|Cleffa}}, {{p|Luvdisc}}, {{p|Finneon}}, {{p|Chinchou}}, {{p|Wooper}}, {{p|Horsea}}, {{p|Corsola}}, {{p|Drifloon}}, {{p|Wingull}}, {{p|Swablu}}, {{p|Chatot}}, {{p|Starly}}, {{p|Taillow}}, and {{p| | ===Search=== | ||
The following are Pokémon that players may be asked to find in this game, dependent on the area the search is located in: {{p|Bonsly}}, {{p|Budew}}, {{p|Pichu}}, {{p|Munchlax}}, {{p|Cleffa}}, {{p|Luvdisc}}, {{p|Finneon}}, {{p|Chinchou}}, {{p|Wooper}}, {{p|Horsea}}, {{p|Corsola}}, {{p|Drifloon}}, {{p|Wingull}}, {{p|Swablu}}, {{p|Chatot}}, {{p|Starly}}, {{p|Taillow}}, {{p|Smoochum}}, {{p|Chimecho}}, {{p|Ralts}}, {{p|Spoink}}, {{p|Wynaut}}, {{p|Magnemite}}, {{p|Teddiursa}}, {{p|Phanpy}}, {{p|Spinda}}, and {{p|Burmy}} (Sandy Cloak). | |||
The following are possible | The following are possible Berries of a lost Pokémon that may be found: [[Sitrus Berry]], [[Figy Berry]], [[Wiki Berry]], [[Mago Berry]], [[Aguav Berry]], and [[Iapapa Berry]]. | ||
* | ===Scoring=== | ||
*Found the Pokémon: +5000 | |||
*Remaining time: seconds × 500 | |||
*The Pokémon's lost item: +5000 | |||
{{-}} | {{-}} | ||
| Line 59: | Line 84: | ||
When playing in a language other than English, the units used are {{wp|centimeter}}s rather than {{wp|inch}}es; however, they are considered equal for the purposes of the mini-game. | When playing in a language other than English, the units used are {{wp|centimeter}}s rather than {{wp|inch}}es; however, they are considered equal for the purposes of the mini-game. | ||
===Scoring=== | |||
*Height | |||
*Flavors | |||
*Bite-size scoops | |||
{| | ===Flavors=== | ||
{| style="margin:auto; width:auto; text-align:center; background: #{{dream color}}; border: 3px solid #{{dream color dark}}; {{roundy}}" | |||
|- | |- | ||
! rowspan="2" colspan="2" style="background:# | ! rowspan="2" colspan="2" style="background:#{{dream color light}}; {{roundytl|5px}}" | {{color2|000|Berry}} | ||
! colspan="3" style="background:# | ! colspan="3" style="background:#{{dream color light}}" | Scoop/Stickiness | ||
|- style="background:# | ! rowspan="2" colspan="2" style="background:#{{dream color light}}" | {{color2|000|Berry}} | ||
! colspan="3" style="background:#{{dream color light}}; {{roundytr|5px}}" | Scoop/Stickiness | |||
|- style="background:#{{dream color light}}" | |||
! Flavor 1 | |||
! Flavor 2 | |||
! Flavor 3 | |||
! Flavor 1 | ! Flavor 1 | ||
! Flavor 2 | ! Flavor 2 | ||
! Flavor 3 | ! Flavor 3 | ||
|- | |- style="background:#fff" | ||
| | | [[File:Dream Cheri Berry Sprite.png|24x24px]] || [[Cheri Berry]] || 1/3 || 2/4 || 3/5 || [[File:Dream Chesto Berry Sprite.png|24x24px]] || [[Chesto Berry]] || 1/3 || 3/5 || 2/4 | ||
| | |- style="background:#fff" | ||
| [[File:Dream Pecha Berry Sprite.png|24x24px]] || [[Pecha Berry]] || 2/4 || 1/3 || 3/5 || [[File:Dream Rawst Berry Sprite.png|24x24px]] || [[Rawst Berry]] || 2/4 || 3/5 || 1/3 | |||
|- | |- style="background:#fff" | ||
| | | [[File:Dream Aspear Berry Sprite.png|24x24px]] || [[Aspear Berry]] || 3/5 || 1/3 || 2/4 || [[File:Dream Leppa Berry Sprite.png|24x24px]] || [[Leppa Berry]] || 2/4 || 3/5 || 5/1 | ||
| | |- style="background:#fff" | ||
| [[File:Dream Oran Berry Sprite.png|24x24px]] || [[Oran Berry]] || 2/1 || 3/2 || 4/3 || [[File:Dream Persim Berry Sprite.png|24x24px]] || [[Persim Berry]] || 2/2 || 3/3 || 4/4 | |||
|- | |- style="background:#fff" | ||
| | | [[File:Dream Lum Berry Sprite.png|24x24px]] || [[Lum Berry]] || 2/3 || 3/4 || 4/5 || [[File:Dream Sitrus Berry Sprite.png|24x24px]] || [[Sitrus Berry]] || 1/4 || 2/5 || 4/1 | ||
| | |- style="background:#fff" | ||
| [[File:Dream Figy Berry Sprite.png|24x24px]] || [[Figy Berry]] || 1/5 || 3/1 || 4/2 || [[File:Dream Wiki Berry Sprite.png|24x24px]] || [[Wiki Berry]] || 1/5 || 4/2 || 3/1 | |||
|- | |- style="background:#fff" | ||
| | | [[File:Dream Mago Berry Sprite.png|24x24px]] || [[Mago Berry]] || 3/1 || 1/5 || 4/2 || [[File:Dream Aguav Berry Sprite.png|24x24px]] || [[Aguav Berry]] || 3/1 || 4/2 || 1/5 | ||
| | |- style="background:#fff" | ||
| [[File:Dream Iapapa Berry Sprite.png|24x24px]] || [[Iapapa Berry]] || 4/2 || 1/5 || 3/1 || [[File:Dream Razz Berry Sprite.png|24x24px]] || [[Razz Berry]] || 1/1 || 2/2 || 3/3 | |||
|- | |- style="background:#fff" | ||
| | | [[File:Dream Bluk Berry Sprite.png|24x24px]] || [[Bluk Berry]] || 1/1 || 3/3 || 2/2 || [[File:Dream Nanab Berry Sprite.png|24x24px]] || [[Nanab Berry]] || 2/2 || 1/1 || 3/3 | ||
| | |- style="background:#fff" | ||
| [[File:Dream Wepear Berry Sprite.png|24x24px]] || [[Wepear Berry]] || 2/2 || 3/3 || 1/1 || [[File:Dream Pinap Berry Sprite.png|24x24px]] || [[Pinap Berry]] || 3/3 || 1/1 || 2/2 | |||
|- | |- style="background:#fff" | ||
| | | [[File:Dream Pomeg Berry Sprite.png|24x24px]] || [[Pomeg Berry]] || 2/5 || 4/1 || 5/2 || [[File:Dream Kelpsy Berry Sprite.png|24x24px]] || [[Kelpsy Berry]] || 2/5 || 5/2 || 4/1 | ||
| | |- style="background:#fff" | ||
| | | [[File:Dream Qualot Berry Sprite.png|24x24px]] || [[Qualot Berry]] || 4/1 || 2/5 || 5/2 || [[File:Dream Hondew Berry Sprite.png|24x24px]] || [[Hondew Berry]] || 4/1 || 5/2 || 2/5 | ||
|- | |- style="background:#fff" | ||
| | | [[File:Dream Grepa Berry Sprite.png|24x24px]] || [[Grepa Berry]] || 5/2 || 2/5 || 4/1 || [[File:Dream Tamato Berry Sprite.png|24x24px]] || [[Tamato Berry]] || 5/2 || 4/1 || 2/5 | ||
| | |- style="background:#fff" | ||
| | | [[File:Dream Cornn Berry Sprite.png|24x24px]] || [[Cornn Berry]] || 3/3 || 2/2 || 1/1 || [[File:Dream Magost Berry Sprite.png|24x24px]] || [[Magost Berry]] || 1/1 || 2/2 || 3/3 | ||
|- | |- style="background:#fff" | ||
| | | [[File:Dream Rabuta Berry Sprite.png|24x24px]] || [[Rabuta Berry]] || 1/1 || 3/3 || 2/2 || [[File:Dream Nomel Berry Sprite.png|24x24px]] || [[Nomel Berry]] || 2/2 || 1/1 || 3/3 | ||
| | |- style="background:#fff" | ||
| | | [[File:Dream Spelon Berry Sprite.png|24x24px]] || [[Spelon Berry]] || 1/2 || 2/3 || 3/4 || [[File:Dream Pamtre Berry Sprite.png|24x24px]] || [[Pamtre Berry]] || 1/2 || 3/4 || 2/3 | ||
|- | |- style="background:#fff" | ||
| | | [[File:Dream Watmel Berry Sprite.png|24x24px]] || [[Watmel Berry]] || 2/3 || 1/2 || 3/4 || [[File:Dream Durin Berry Sprite.png|24x24px]] || [[Durin Berry]] || 2/3 || 3/4 || 1/2 | ||
|- style="background:#fff" | |||
| [[File:Dream Belue Berry Sprite.png|24x24px]] || [[Belue Berry]] || 3/4 || 1/2 || 2/3 || [[File:Dream Occa Berry Sprite.png|24x24px]] || [[Occa Berry]] || 3/1 || 4/2 || 5/3 | |||
|- | |- style="background:#fff" | ||
| | | [[File:Dream Passho Berry Sprite.png|24x24px]] || [[Passho Berry]] || 3/1 || 5/3 || 4/2 || [[File:Dream Wacan Berry Sprite.png|24x24px]] || [[Wacan Berry]] || 4/2 || 3/1 || 5/3 | ||
| | |- style="background:#fff" | ||
| [[File:Dream Rindo Berry Sprite.png|24x24px]] || [[Rindo Berry]] || 4/2 || 5/3 || 3/1 || [[File:Dream Yache Berry Sprite.png|24x24px]] || [[Yache Berry]] || 5/3 || 3/1 || 4/2 | |||
|- | |- style="background:#fff" | ||
| | | [[File:Dream Chople Berry Sprite.png|24x24px]] || [[Chople Berry]] || 5/3 || 4/2 || 3/1 || [[File:Dream Kebia Berry Sprite.png|24x24px]] || [[Kebia Berry]] || 3/1 || 4/2 || 5/3 | ||
| | |- style="background:#fff" | ||
| [[File:Dream Shuca Berry Sprite.png|24x24px]] || [[Shuca Berry]] || 3/1 || 5/3 || 4/2 || [[File:Dream Coba Berry Sprite.png|24x24px]] || [[Coba Berry]] || 4/2 || 3/1 || 5/3 | |||
|- | |- style="background:#fff" | ||
| | | [[File:Dream Payapa Berry Sprite.png|24x24px]] || [[Payapa Berry]] || 4/2 || 5/3 || 3/1 || [[File:Dream Tanga Berry Sprite.png|24x24px]] || [[Tanga Berry]] || 5/3 || 3/1 || 4/2 | ||
| | |- style="background:#fff" | ||
| [[File:Dream Charti Berry Sprite.png|24x24px]] || [[Charti Berry]] || 5/3 || 4/2 || 3/1 || [[File:Dream Kasib Berry Sprite.png|24x24px]] || [[Kasib Berry]] || 3/1 || 4/2 || 5/3 | |||
|- | |- style="background:#fff" | ||
| | | [[File:Dream Haban Berry Sprite.png|24x24px]] || [[Haban Berry]] || 3/1 || 5/3 || 4/2 || [[File:Dream Colbur Berry Sprite.png|24x24px]] || [[Colbur Berry]] || 4/2 || 3/1 || 5/3 | ||
| | |- style="background:#fff" | ||
| [[File:Dream Babiri Berry Sprite.png|24x24px]] || [[Babiri Berry]] || 4/2 || 5/3 || 3/1 || [[File:Dream Chilan Berry Sprite.png|24x24px]] || [[Chilan Berry]] || 5/3 || 3/1 || 4/2 | |||
|- | |- style="background:#fff" | ||
| | | [[File:Dream Liechi Berry Sprite.png|24x24px]] || [[Liechi Berry]] || 3/2 || 4/3 || 5/4 || [[File:Dream Ganlon Berry Sprite.png|24x24px]] || [[Ganlon Berry]] || 3/2 || 5/4 || 4/3 | ||
| | |- style="background:#fff" | ||
| [[File:Dream Salac Berry Sprite.png|24x24px]] || [[Salac Berry]] || 4/3 || 3/2 || 5/4 || [[File:Dream Petaya Berry Sprite.png|24x24px]] || [[Petaya Berry]] || 4/3 || 5/4 || 3/2 | |||
|- | |- style="background:#fff" | ||
| | | [[File:Dream Apicot Berry Sprite.png|24x24px]] || [[Apicot Berry]] || 5/4 || 3/2 || 4/3 || [[File:Dream Lansat Berry Sprite.png|24x24px]] || [[Lansat Berry]] || 3/4 || 4/5 || 5/3 | ||
| | |- style="background:#fff" | ||
| [[File:Dream Starf Berry Sprite.png|24x24px]] || [[Starf Berry]] || 3/4 || 5/3 || 4/5 || [[File:Dream Enigma Berry Sprite.png|24x24px]] || [[Enigma Berry]] || 3/3 || 4/4 || 5/5 | |||
|- | |- style="background:#fff" | ||
| | | [[File:Dream Micle Berry Sprite.png|24x24px]] || [[Micle Berry]] || 4/3 || 3/5 || 5/4 || [[File:Dream Custap Berry Sprite.png|24x24px]] || [[Custap Berry]] || 4/3 || 5/4 || 3/5 | ||
| | |- | ||
| style="background:#fff; {{roundybl|5px}}" | [[File:Dream Jaboca Berry Sprite.png|24x24px]] || style="background:#fff" | [[Jaboca Berry]] || style="background:#fff" | 3/5 || style="background:#fff" | 4/3 || style="background:#fff" | 5/4 || style="background:#fff" | [[File:Dream Rowap Berry Sprite.png|24x24px]] || style="background:#fff" | [[Rowap Berry]] || style="background:#fff" | 3/5 || style="background:#fff" | 5/4 || style="background:#fff; {{roundybr|5px}}" | 4/3 | |||
|- | |||
| | |||
| | |||
|- | |||
| | |||
| | |||
|- | |||
| | |||
| | |||
|- | |||
| | |||
| | |||
|- | |||
| | |||
| | |||
|- | |||
| | |||
| | |||
|- | |||
| | |||
| | |||
|- | |||
| | |||
| | |||
|- | |||
| | |||
| | |||
|- | |||
| | |||
| | |||
|- | |||
| | |||
| | |||
|- | |||
| | |||
| | |||
|- | |||
| | |||
| | |||
|- | |||
| | |||
| | |||
|- | |||
| | |||
| | |||
|- | |||
| | |||
| style=" | |||
|} | |} | ||
| Line 207: | Line 174: | ||
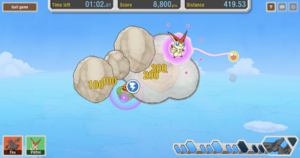
In the '''Sky Race''' (Japanese: '''ひこうレース''' ''Flying Race''), players must guide {{p|Pelipper}} using hand flags—the player's cursor—to finish a 1,000 meter race. The space bar, on the other hand, as well as a button on the screen, allows players to pause the game. The game ends when Pelipper reaches the goal. The first 140 meters (860 m) are the same at the start of every race. After that, various sections are randomly spliced together to make up the course. Each section change is denoted by an abnormally empty patch of sky, and the same section can be in one race multiple times. Each 200 meters reached are announced by a flag in the lower left-hand corner of the screen. | In the '''Sky Race''' (Japanese: '''ひこうレース''' ''Flying Race''), players must guide {{p|Pelipper}} using hand flags—the player's cursor—to finish a 1,000 meter race. The space bar, on the other hand, as well as a button on the screen, allows players to pause the game. The game ends when Pelipper reaches the goal. The first 140 meters (860 m) are the same at the start of every race. After that, various sections are randomly spliced together to make up the course. Each section change is denoted by an abnormally empty patch of sky, and the same section can be in one race multiple times. Each 200 meters reached are announced by a flag in the lower left-hand corner of the screen. | ||
There are certain things that will help finish the race sooner or even later. Naturally, Pelipper will climb in speed to three-fifths the max of the speed gauge (the blue-green-yellow sections) without assistance. Collecting Boost Energy, in the form of a bubble with a water drop (symbolizing the {{ | There are certain things that will help finish the race sooner or even later. Naturally, Pelipper will climb in speed to three-fifths the max of the speed gauge (the blue-green-yellow sections) without assistance. Collecting Boost Energy, in the form of a bubble with a water drop (symbolizing the {{t|Water}} type), will earn points. Hitting three Boost Energy will make Pelipper fly faster (a speed-up). Clouds, however, will reduce Pelipper's max speed, which must be regained through Boost Energy if not below half the maximum speed. Delay Energy, in the form of a bubble with a lightning bolt (symbolizing the {{t|Electric|type}} Pelipper is weakest to), will slow down or stop Pelipper. This will also make Pelipper lose the Boost Energy it has earned. | ||
For every Boost Energy collected, the player is awarded 300 points. For every speed-up, the player is awarded an additional 1000 points on top of the 300. Once maximum speed is achieved, the points become 450 for each Boost Energy, and once collecting three Boost Energy does not result in a speed-up, the point bonus become 1500. If the speed falls by cloud or Delay Energy even a little, the bonus points return to default. | For every Boost Energy collected, the player is awarded 300 points. For every speed-up, the player is awarded an additional 1000 points on top of the 300. Once maximum speed is achieved, the points become 450 for each Boost Energy, and once collecting three Boost Energy does not result in a speed-up, the point bonus become 1500. If the speed falls by cloud or Delay Energy even a little, the bonus points return to default. | ||
===Scoring=== | |||
*Score | |||
*Time bonus | |||
*Speed-up bonus | |||
==Wailord's Water Spout== | ==Wailord's Water Spout== | ||
| Line 225: | Line 192: | ||
If the player reaches the end of the game with none of the Pokémon falling into the water, they receive a 10,000 point bonus. | If the player reaches the end of the game with none of the Pokémon falling into the water, they receive a 10,000 point bonus. | ||
===Scoring=== | |||
*Score | |||
*Ball counter × 500 | |||
*Combo bonus × 100 | |||
*Perfect clear bonus × 10000 | |||
*Number of balls (N balls × 1.N) | |||
{{-}} | {{-}} | ||
== | ==Pokémon Bistro== | ||
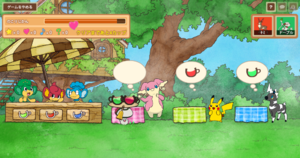
{{DWGame| | {{DWGame|Pokémon Bistro|ドリンクはこび|Drink Carrying|image=DW Drink Carrying.png|1:30|It looks like <Pokémon> is thirsty.|Pokémon Café Forest}} | ||
'''Pokémon Bistro''' (Japanese: '''ドリンクはこび''' ''Drink Carrying'') is a mini-game originally available in the {{dwa|Pokémon Café Forest}}, but later became used in the Island of Dreams as of the October 2012 update. Players must ring a bell to guide a {{p|Foongus}} to serve drinks to various Pokémon. They receive more points if they serve the correctly-colored drinks, and if the drinks are in a Special Cup. If the player tries to move the Foongus too fast, however, it will sweat and may spill or drop drinks. The waiting Pokémon may leave if not served in time. The Foongus can carry up to three drinks at once; however, more drinks increase the chance of dropping them. | |||
(Japanese: '''ドリンクはこび''' ''Drink Carrying'') is a | |||
To win, players must serve at least four drinks. For every drink given to a Pokémon, a certain icon will be given, with each icon representing a certain amount of points. The icons are given priority in reverse order as they are listed. For example, a spilled Special Cup will yield a music note instead of a star while a wrong spilled drink will give a question mark. | To win, players must serve at least four drinks. For every drink given to a Pokémon, a certain icon will be given, with each icon representing a certain amount of points. The icons are given priority in reverse order as they are listed. For example, a spilled Special Cup will yield a music note instead of a star while a wrong spilled drink will give a question mark. | ||
===Scoring=== | |||
{| style="margin:auto; width:auto; text-align:center; background: #{{dream color}}; border: 3px solid #{{dream color dark}}; {{roundy}}" | |||
{| | |- | ||
|- style="background:# | ! style="background:#{{dream color light}}; {{roundytl|5px}}" | Icon | ||
! style="{{ | ! style="background:#{{dream color light}}" | How to Obtain | ||
! style="background:#{{dream color light}}; {{roundytr|5px}}" | Points | |||
! style="{{roundytr|5px}}" | Points | |- style="background:#fff" | ||
|- | |||
| [[File:DW Drink Star Icon.png]] | | [[File:DW Drink Star Icon.png]] | ||
| Serve a Special Cup | | Serve a Special Cup | ||
| 4300 | | 4300 | ||
|- | |- style="background:#fff" | ||
| [[File:DW Drink Heart Icon.png]] | | [[File:DW Drink Heart Icon.png]] | ||
| Serve the right drink | | Serve the right drink | ||
| 2450 | | 2450 | ||
|- | |- style="background:#fff" | ||
| [[File:DW Drink Music Note Icon.png]] | | [[File:DW Drink Music Note Icon.png]] | ||
| Serve a spilled drink | | Serve a spilled drink | ||
| 750 | | 750 | ||
|- | |- | ||
| style="background:#fff; {{roundybl|5px}}" | [[File:DW Drink Question Icon.png]] | |||
| Serve the wrong drink | | style="background:#fff" | Serve the wrong drink | ||
| style="{{roundybr|5px}}" | 120 | | style="background:#fff; {{roundybr|5px}}" | 120 | ||
|} | |} | ||
==Treasure Box | ==Open the Treasure Box== | ||
{{DWGame|Treasure Box | {{DWGame|Open the Treasure Box|宝箱開け|Treasure Box Opening|image=DW Open the Treasure Box.png|2:00|<Pokémon> is interested in the treasure box.|Pokémon Movie|List of Pokémon Global Link promotions/Dream World#Special homes}} | ||
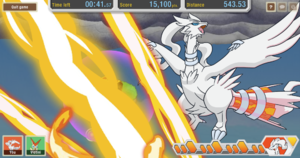
'''Open the Treasure Box''' (Japanese: '''宝箱開け''' ''Treasure Box Opening'') is a game that was originally available by accessing an area where {{p|Victini}} awaits on the Island of Dreams from the Pokémon Movie special home, after tucking in the {{p|Reshiram}} or {{p|Zekrom}} obtained from [[event Pokémon|distributions]] for the promotion of the [[M14|fourteenth movie]]. It was later re-released for the {{DL|Pokémon Dream World|Island of Dreams}}, where it is played using a {{p|Charizard}} and is called '''Charizard and the Treasure Box''' (Japanese: '''リザードンとたからばこ''' ''Lizardon and the Treasure Box''). | |||
In this game, players must destroy a barrier preventing their Pokémon (Victini or Charizard) from accessing a treasure chest. Scattered throughout the area are Energy symbols matching the Pokémon tucked in ({{t|Fire}} for Reshiram and Charizard, {{t|Electric}} for Zekrom); each time players obtain three such symbols, Reshiram, Zekrom, or Charizard will execute a special attack to destroy part of the barrier around the treasure chest, with each attack increasing in power. By obtaining twelve of these symbols, the Pokémon will use another special attack to finish off the barrier, allowing the player to claim the treasure inside. Also scattered around the area are powerups (macarons for Victini, or Charizard emblems) that enable the player to smash through rocks, earning points and acquiring Energy symbols that may be surrounded by (or buried inside of) them. | |||
[[File:DW Open the Treasure {{#switch: {{#expr: {{#time: U}} mod 3}}|0|1=Reshiram|2=Zekrom}}.png|thumb|left|300px|{{#switch: {{#expr: {{#time: U}} mod 3}}|0|1=Reshiram|2=Zekrom}}'s final special attack]] | |||
<!--images of stars in this game are just special effects for when Victini hits a macaron--> | |||
Completing the promotional version of the game once allows the player to obtain a C-Gear skin featuring the [[legendary Pokémon]] they tucked in (it is possible to get both C-Gear skins if the player tucks in both Reshiram and Zekrom on separate days). Victini disappears from the island after completing the game, but players may leave and return to play the game again. | |||
{{-}} | {{-}} | ||
===Scoring=== | |||
*Distance × 22 | |||
*Special attack (1,500 each{{tt|*|3,000 in the original}}) | |||
*Time bonus × 380 | |||
*Score | |||
{| style="margin:auto; width:auto; text-align:center; background: #{{dream color}}; border: 3px solid #{{dream color dark}}; {{roundy}}" | |||
|- | |||
! style="background:#{{dream color light}}; {{roundytl|5px}}" | Source | |||
! style="background:#{{dream color light}}; {{roundytr|5px}}" | Points | |||
|- style="background:#fff" | |||
| [[File:DW Open the Treasure Box Rock.png|30px]] | |||
| 100, 200 or 300 | |||
|- style="background:#fff" | |||
| [[File:DW Open the Treasure Box Fire.png|30px]][[File:DW Open the Treasure Box Electric.png|30px]] | |||
| 100 | |||
|- | |||
| style="background:#fff; {{roundybl|5px}}" | [[File:DW Open the Treasure Box Macaron.png|30px]][[File:DW Open the Treasure Box Charizard Emblem.png|30px]] | |||
| style="background:#fff; {{roundybr|5px}}" | 1000 | |||
|} | |||
==Blow Out Candles== | ==Blow Out Candles== | ||
{{DWGame|Blow Out Candles|ろうそく消し|Candle Erasing|image=DW Blow Out Candles.png|1:30|It looks like <Pokémon> wants to test its courage.|Spooky Manor}} | {{DWGame|Blow Out Candles|ろうそく消し|Candle Erasing|image=DW Blow Out Candles.png|1:30|It looks like <Pokémon> wants to test its courage.|Spooky Manor}} | ||
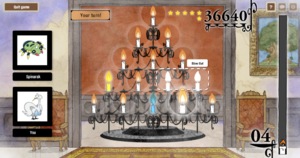
'''Blow Out Candles''' (Japanese: '''ろうそく消し''' ''Candle Erasing'') is a mini-game which made its debut September 28, 2011 and | '''Blow Out Candles''' (Japanese: '''ろうそく消し''' ''Candle Erasing'') is a mini-game which made its debut September 28, 2011 and was initially exclusive to the {{dwa|Spooky Manor}} area of the Island of Dreams, but was later used in other areas after the October 2012 update. Players alternate turns with the Pokémon being befriended choosing which candle or candles on a large candelabra to blow out. Players may blow out as many adjacent candles within a row as they want to (candles with extinguished candles between them cannot be extinguished together), and the goal is to force the opponent to blow out the last candle on the set. | ||
Play proceeds in rounds, with the candelabra reset after the last candle is extinguished (win or lose) and a different arrangement of candles. The candelabra may be larger (with more candles to start from), or some candles may already be extinguished. New types of candles are also introduced: yellow candles are worth bonus points, while blue candles will incur a point penalty. Candles with larger flames are worth the same point value as smaller candles, but need to be blown two times to extinguish. | |||
To win the mini-game, players must attain an overall score of at least 5000 points (requiring the player to win at least one round) within the time limit. The timer, which is depicted as a large burning candle on the right side of the screen, only elapses during the player's turn. | |||
{| | Starting from the second turn in each round, if the player makes no move for a few seconds the game will suggest a move in the player's favor (always following these moves will result in winning the round). | ||
|- style="background:# | |||
===Scoring=== | |||
! style="{{roundytr|5px}}" | Points | {| style="margin:auto; width:auto; text-align:center; background: #{{dream color}}; border: 3px solid #{{dream color dark}}; {{roundy}}" | ||
|- | |- | ||
! style="background:#{{dream color light}}; {{roundytl|5px}}" | Source | |||
! style="background:#{{dream color light}}; {{roundytr|5px}}" | Points | |||
|- style="background:#fff" | |||
| Wins | | Wins | ||
| 5000 | | 5000 | ||
|- | |- style="background:#fff" | ||
| [[File:DW Normal Candle Icon.png|30px]] | | [[File:DW Normal Candle Icon.png|30px]] | ||
| 60 | | 60 | ||
|- | |- style="background:#fff" | ||
| [[File:DW Bright Candle Icon.png|30px]] | | [[File:DW Bright Candle Icon.png|30px]] | ||
| 1500 | | 1500 | ||
|- | |- | ||
| style="background:#fff; {{roundybl|5px}}" | [[File:DW Dark Candle Icon.png|30px]] | |||
| style="{{roundybr|5px}}" | -2500 | | style="background:#fff; {{roundybr|5px}}" | -2500 | ||
|} | |} | ||
==Collect Gems== | |||
{{DWGame|Collect Gems|宝石あつめ|Collect Gems|image=DW Collect Gems.png|1:50|It looks like <Pokémon> wants to collect gems.|Rugged Mountain}} | |||
'''Collect Gems''' (Japanese: '''宝石あつめ''' ''Collect Gems'') is a mini-game which made its debut November 16, 2011 and was initially exclusive to the {{dwa|Rugged Mountain}} area of the Island of Dreams, but was later used in other areas after the October 2012 update. Players guide a cart-riding {{p|Sableye}} as it rides down the mountain and collects gems for it to eat, so the amount of gems gained are tallied at the end and correspond to a certain number of points depending on the shape. However, hitting plants will make the cart sway, possibly causing gems to fall out. This affects only the time and the gem bonus at the end of the game, not the current score. By drawing lines to go to a certain rail, Sableye may evade plants and reach gems on higher rails. Some rails might lead to a cave entrance referred to officially as "hidden areas." These contain a higher number of gems than normal areas and lack plants. | |||
===Lines=== | |||
{| style="margin:auto; width:auto; text-align:center; background: #{{dream color}}; border: 3px solid #{{dream color dark}}; {{roundy}}" | |||
|- | |||
! colspan="4" style="background:#{{dream color light}}; {{roundytop|5px}}" | Lines | |||
|- | |||
| style="background:#fff; {{roundybl|5px}}" | [[File:DW Collect Gems Line1.png|50px]] | |||
| style="background:#fff" | [[File:DW Collect Gems Line2.png|50px]] | |||
| style="background:#fff" | [[File:DW Collect Gems Line3.png|50px]] | |||
| style="background:#fff; {{roundybr|5px}}" | [[File:DW Collect Gems Line4.png|50px]] | |||
|} | |||
===Scoring=== | |||
*Time spent | |||
*Score (see table) | |||
*Time bonus | |||
*Gem bonus: | |||
{| style="margin:auto; width:auto; text-align:center; background: #{{dream color}}; border: 3px solid #{{dream color dark}}; {{roundy}}" | |||
|- | |||
! style="background:#{{dream color light}}; {{roundytl|5px}}" | Gem | |||
! style="background:#{{dream color light}}" | Score | |||
! style="background:#{{dream color light}}; {{roundytr|5px}}" | Bonus | |||
|- style="background:#fff" | |||
| [[File:DW Gem Octagon icon.png]] | |||
| 1000 | |||
| 500 | |||
|- | |||
| style="background:#fff; {{roundybl|5px}}" | [[File:DW Gem Star icon.png]] | |||
| style="background:#fff" | 1000 | |||
| style="background:#fff; {{roundybr|5px}}" | 1000 | |||
|} | |||
==Frozen Treat Sweep== | |||
{{incomplete|section}} | |||
{{DWGame|Frozen Treat Sweep|ひんやりスイーツキャッチ|Chilly Sweet Catch|image=DW Frozen Treat Sweep.png|1:00|It looks like <Pokémon> wants to play on the ice.|Icy Cave}} | |||
'''Frozen Treat Sweep''' (Japanese: '''ひんやりスイーツキャッチ''' Chilly Sweet Catch) is a mini-game which made its debut June 22, 2012 and was initially exclusive to the {{dwa|Icy Cave}} area of the Island of Dreams, but was later used in other areas after the October 2012 update. Players play as {{p|Mime Jr.}}, {{p|Scraggy}}, {{p|Pichu}}, or {{p|Oshawott}}, and move around ice tiles to collect dessert items. There are four types, each with different point distributions. The player competes against two other Pokémon consisting of any of the following: {{p|Minccino}}, {{p|Riolu}}, {{p|Panpour}}, {{p|Smoochum}}, {{p|Spheal}}, {{p|Kirlia}}, {{p|Marill}}, {{p|Mudkip}}, {{p|Swinub}}, {{p|Buneary}}, {{p|Snorunt}}, {{p|Shinx}}. The ice tiles are designed such that it can hold the weight of a Pokémon up to three times before breaking. If a Pokémon falls in, time is lost. | |||
Initially, the player can collect candy and cookies. Additional desserts are added via the attending Pokémon from the sideline and from the air via a {{p|Chatot}} and {{p|Drifblim}}. When there are less than 30 seconds left on the timer, a mini-explosion of desserts falls to the ice tiles. When there are less than 10 seconds left, another mini-explosion of desserts falls on to the ice tiles and the number of cakes appearing increases. | |||
To win the mini-game and befriend the Pokémon, players must attain an overall score of at least 15,000 points within the time limit. The timer is displayed as a vertical bar on the right side of the screen. | |||
===Scoring=== | |||
*Winning bonus: 5000 | |||
*Score (see table) | |||
{| style="margin:auto; width:auto; text-align:center; background: #{{dream color}}; border: 3px solid #{{dream color dark}}; {{roundy}}" | |||
|- | |||
! style="background:#{{dream color light}}; {{roundytl|5px}}" | Dessert | |||
! style="background:#{{dream color light}}; {{roundytr|5px}}" | Score | |||
|- style="background:#fff" | |||
| [[File:DW Candy icon.png]] | |||
| 500 | |||
|- style="background:#fff" | |||
| [[File:DW Cookie icon.png]] | |||
| 1000 | |||
|- style="background:#fff" | |||
| [[File:DW Donut icon.png]] | |||
| 2000 | |||
|- | |||
| style="background:#fff; {{roundybl|5px}}" | [[File:DW Cake icon.png]] | |||
| style="background:#fff; {{roundybr|5px}}" | 5000 | |||
|} | |||
==Skip Across the Lake== | |||
{{incomplete|section}} | |||
{{DWGame|Skip Across the Lake|ボード遊び|Board Game|image=DW Lake Skip.png|-:--|It looks like <Pokémon> wants to play on the lake.|Dream Park}} | |||
'''Skip Across the Lake''' (Japanese: '''ボード遊び''' ''Board Game'') is a mini-game which made its debut November 20, 2012 and is exclusive to the {{dwa|Dream Park}} area of the Island of Dreams. Players start by choosing one of three boards: one that focuses on speed, one that focuses on flying, and another that focuses on skipping across water. After choosing a board, the player may make up to three attempts to go as far as possible; to win the game and befriend the Pokémon, the player must reach a distance of 1500 meters. | |||
The player starts at the top of a hill, where a speed meter is shown and the player clicks to determine the speed of their launch. After sliding down the hill to the lake's edge, an angle meter is displayed and the player clicks a second time to decide their launch angle. (Failure to decide on a speed or angle within a certain amount of time causes the Pokémon to launch with the minimum value on the meter.) When in the air, the player adjusts the glider by moving the mouse up and down until the glider is aligned with the wind current, which can give their jump an additional speed boost as they descend. Right before touching down on the lake, the player clicks in time with the water to skip and make an additional jump; if the player happens to land on a trampoline, these skips will receive an additional boost. Scattered throughout the whole area are various objects (balloons, clouds, stars) that the player collects points for touching, as well as various Pokémon the player may spot while flying by. | |||
===Scoring=== | |||
* Speed: from 100 to 1200 at start of game | |||
* Distance: 3 points per meter | |||
* Pokémon sighted: 1000 each (first five Pokémon only) | |||
* Skips: 200 to 400 points per skip across water | |||
* Trampolines hit: 500 points each | |||
* Items collected: | |||
{| style="margin:auto; width:auto; text-align:center; background: #{{dream color}}; border: 3px solid #{{dream color dark}}; {{roundy}}" | |||
|- | |||
! style="background:#{{dream color light}}; {{roundytl|5px}}" | Item | |||
! style="background:#{{dream color light}}; {{roundytr|5px}}" | Score | |||
|- style="background:#fff" | |||
| Balloons | |||
| 200 | |||
|- style="background:#fff" | |||
| Heart cloud | |||
| 300 | |||
|- style="background:#fff" | |||
| Star | |||
| 400 | |||
|- | |||
| style="background:#fff; {{roundybl|5px}}" | Falling Star | |||
| style="background:#fff; {{roundybr|5px}}" | 500 | |||
|} | |||
{{-}} | {{-}} | ||
{{Project Games notice}} | {{Project Games notice}} | ||
| Line 309: | Line 399: | ||
[[Category:Pokémon Dream World]] | [[Category:Pokémon Dream World]] | ||
[[Category:Minigames]] | [[Category:Minigames]] | ||
[[de:Minispiele in der Pokémon Dream World]] | |||
[[zh:梦境世界小游戏列表]] | |||
Latest revision as of 00:37, 19 December 2018

|
This article is incomplete. Please feel free to edit this article to add missing information and complete it. Reason: First table |
In the Pokémon Dream World, players are given an option to participate in mini-games in order to befriend found Pokémon. The type of game depends on the Pokémon species encountered. Getting certain amounts of points in a game allows players to obtain Pokémon with moves not normally obtained by leveling up.
| ||||||||||||||||||||||||||||||||||||||||||||||||||||||||||||||||||||||||||||||||||||||||||||
Pokémon Seek
| ||||
| ||||
| Duration | ||||
|---|---|---|---|---|
| 1:30 | ||||
| ||||
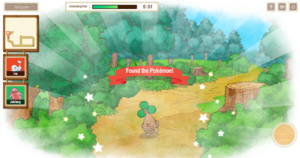
In Pokémon Seek (Japanese: まいごさがし Seek the Lost Child), players must find a certain Pokémon within the time limit by navigating through the map. They may see a bush, cloud, rock, or many other objects rustling, or they may click the objects themselves. Up to two different places per area of the map are clickable. If a hiding place rustles, clicking on it will reveal a Pokémon hiding there. Upon entering an area, rustling can happen either immediately or after a second passes if a Pokémon is present, and, most often than not, it is not the Pokémon sought after. When encountering the wrong Pokémon, the timer temporarily pauses as to not penalize the player. The game automatically ends when the Pokémon is found.
Players may click "Listen carefully" to hear if the Pokémon sought after is within a three block radius from the player; the timer does not pause when players choose to use it. Players may also find an item lost by the Pokémon by clicking on some sparkles—an item that will be given to the Pokémon, allowing players to gain 5,000 bonus points. The Pokémon to be found is always within a two-block radius from the item.
Text when listening
| Text | Spaces away |
|---|---|
| You can't hear the voice of <Pokémon>. | At least three |
| The voice is faint. <Pokémon> is not far from here! | Two |
| You can hear the voice! <Pokémon> is near here! | One |
| The voice is very close! <Pokémon> must be here! | Zero |
Search
The following are Pokémon that players may be asked to find in this game, dependent on the area the search is located in: Bonsly, Budew, Pichu, Munchlax, Cleffa, Luvdisc, Finneon, Chinchou, Wooper, Horsea, Corsola, Drifloon, Wingull, Swablu, Chatot, Starly, Taillow, Smoochum, Chimecho, Ralts, Spoink, Wynaut, Magnemite, Teddiursa, Phanpy, Spinda, and Burmy (Sandy Cloak).
The following are possible Berries of a lost Pokémon that may be found: Sitrus Berry, Figy Berry, Wiki Berry, Mago Berry, Aguav Berry, and Iapapa Berry.
Scoring
- Found the Pokémon: +5000
- Remaining time: seconds × 500
- The Pokémon's lost item: +5000
Ice Cream Scoop
| ||||
| ||||
| Duration | ||||
|---|---|---|---|---|
| 1:30 | ||||
| ||||
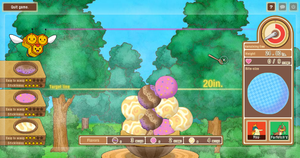
In Ice Cream Scoop (Japanese: アイスクリームづくり Ice Cream Making), players must choose a Berry in their treasure chests to use in the game, each providing three different kinds of ice cream to utilize. The type of ice creams available will depend on the Berry. Certain Berries will bring ice cream that can be scooped more easily or stickier ice cream; the opposite is also true. Players must stack ice cream scoops on top of each other and at least reach the minimal goal of twenty inches to win the game.
The score will be higher if the player balances three kinds of ice cream and/or if bite-size scoops are made, as well as if their stack is tall. The size of bite-size scoops varies every time the game is played, depending on the Pokémon. However, if a scoop does not stick, there poses the possibility that part of the stack might collapse if the falling scoop hits and dislodges any of the scoops that may be below it. A Combee oversees the player's progress. If a scoop falls, it will become irate. If a bite-size scoop sticks, the Combee will give off hearts. Every twenty inches that is reached, Combee will mark it off with a line.
When playing in a language other than English, the units used are centimeters rather than inches; however, they are considered equal for the purposes of the mini-game.
Scoring
- Height
- Flavors
- Bite-size scoops
Flavors
| Berry | Scoop/Stickiness | Berry | Scoop/Stickiness | ||||||
|---|---|---|---|---|---|---|---|---|---|
| Flavor 1 | Flavor 2 | Flavor 3 | Flavor 1 | Flavor 2 | Flavor 3 | ||||
| Cheri Berry | 1/3 | 2/4 | 3/5 | Chesto Berry | 1/3 | 3/5 | 2/4 | ||
| Pecha Berry | 2/4 | 1/3 | 3/5 | Rawst Berry | 2/4 | 3/5 | 1/3 | ||
| Aspear Berry | 3/5 | 1/3 | 2/4 | Leppa Berry | 2/4 | 3/5 | 5/1 | ||
| Oran Berry | 2/1 | 3/2 | 4/3 | Persim Berry | 2/2 | 3/3 | 4/4 | ||
| Lum Berry | 2/3 | 3/4 | 4/5 | Sitrus Berry | 1/4 | 2/5 | 4/1 | ||
| Figy Berry | 1/5 | 3/1 | 4/2 | Wiki Berry | 1/5 | 4/2 | 3/1 | ||
| Mago Berry | 3/1 | 1/5 | 4/2 | Aguav Berry | 3/1 | 4/2 | 1/5 | ||
| Iapapa Berry | 4/2 | 1/5 | 3/1 | Razz Berry | 1/1 | 2/2 | 3/3 | ||
| Bluk Berry | 1/1 | 3/3 | 2/2 | Nanab Berry | 2/2 | 1/1 | 3/3 | ||
| Wepear Berry | 2/2 | 3/3 | 1/1 | Pinap Berry | 3/3 | 1/1 | 2/2 | ||
| Pomeg Berry | 2/5 | 4/1 | 5/2 | Kelpsy Berry | 2/5 | 5/2 | 4/1 | ||
| Qualot Berry | 4/1 | 2/5 | 5/2 | Hondew Berry | 4/1 | 5/2 | 2/5 | ||
| Grepa Berry | 5/2 | 2/5 | 4/1 | Tamato Berry | 5/2 | 4/1 | 2/5 | ||
| Cornn Berry | 3/3 | 2/2 | 1/1 | Magost Berry | 1/1 | 2/2 | 3/3 | ||
| Rabuta Berry | 1/1 | 3/3 | 2/2 | Nomel Berry | 2/2 | 1/1 | 3/3 | ||
| Spelon Berry | 1/2 | 2/3 | 3/4 | Pamtre Berry | 1/2 | 3/4 | 2/3 | ||
| Watmel Berry | 2/3 | 1/2 | 3/4 | Durin Berry | 2/3 | 3/4 | 1/2 | ||
| Belue Berry | 3/4 | 1/2 | 2/3 | Occa Berry | 3/1 | 4/2 | 5/3 | ||
| Passho Berry | 3/1 | 5/3 | 4/2 | Wacan Berry | 4/2 | 3/1 | 5/3 | ||
| Rindo Berry | 4/2 | 5/3 | 3/1 | Yache Berry | 5/3 | 3/1 | 4/2 | ||
| Chople Berry | 5/3 | 4/2 | 3/1 | Kebia Berry | 3/1 | 4/2 | 5/3 | ||
| Shuca Berry | 3/1 | 5/3 | 4/2 | Coba Berry | 4/2 | 3/1 | 5/3 | ||
| Payapa Berry | 4/2 | 5/3 | 3/1 | Tanga Berry | 5/3 | 3/1 | 4/2 | ||
| Charti Berry | 5/3 | 4/2 | 3/1 | Kasib Berry | 3/1 | 4/2 | 5/3 | ||
| Haban Berry | 3/1 | 5/3 | 4/2 | Colbur Berry | 4/2 | 3/1 | 5/3 | ||
| Babiri Berry | 4/2 | 5/3 | 3/1 | Chilan Berry | 5/3 | 3/1 | 4/2 | ||
| Liechi Berry | 3/2 | 4/3 | 5/4 | Ganlon Berry | 3/2 | 5/4 | 4/3 | ||
| Salac Berry | 4/3 | 3/2 | 5/4 | Petaya Berry | 4/3 | 5/4 | 3/2 | ||
| Apicot Berry | 5/4 | 3/2 | 4/3 | Lansat Berry | 3/4 | 4/5 | 5/3 | ||
| Starf Berry | 3/4 | 5/3 | 4/5 | Enigma Berry | 3/3 | 4/4 | 5/5 | ||
| Micle Berry | 4/3 | 3/5 | 5/4 | Custap Berry | 4/3 | 5/4 | 3/5 | ||
| Jaboca Berry | 3/5 | 4/3 | 5/4 | Rowap Berry | 3/5 | 5/4 | 4/3 | ||
Sky Race
| ||||
| ||||
| Duration | ||||
|---|---|---|---|---|
| 2:00 | ||||
| ||||
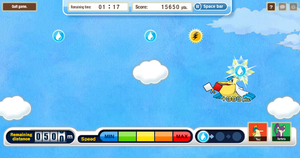
In the Sky Race (Japanese: ひこうレース Flying Race), players must guide Pelipper using hand flags—the player's cursor—to finish a 1,000 meter race. The space bar, on the other hand, as well as a button on the screen, allows players to pause the game. The game ends when Pelipper reaches the goal. The first 140 meters (860 m) are the same at the start of every race. After that, various sections are randomly spliced together to make up the course. Each section change is denoted by an abnormally empty patch of sky, and the same section can be in one race multiple times. Each 200 meters reached are announced by a flag in the lower left-hand corner of the screen.
There are certain things that will help finish the race sooner or even later. Naturally, Pelipper will climb in speed to three-fifths the max of the speed gauge (the blue-green-yellow sections) without assistance. Collecting Boost Energy, in the form of a bubble with a water drop (symbolizing the Water type), will earn points. Hitting three Boost Energy will make Pelipper fly faster (a speed-up). Clouds, however, will reduce Pelipper's max speed, which must be regained through Boost Energy if not below half the maximum speed. Delay Energy, in the form of a bubble with a lightning bolt (symbolizing the type Pelipper is weakest to), will slow down or stop Pelipper. This will also make Pelipper lose the Boost Energy it has earned.
For every Boost Energy collected, the player is awarded 300 points. For every speed-up, the player is awarded an additional 1000 points on top of the 300. Once maximum speed is achieved, the points become 450 for each Boost Energy, and once collecting three Boost Energy does not result in a speed-up, the point bonus become 1500. If the speed falls by cloud or Delay Energy even a little, the bonus points return to default.
Scoring
- Score
- Time bonus
- Speed-up bonus
Wailord's Water Spout
| ||||
| ||||
| Duration | ||||
|---|---|---|---|---|
| 1:30 | ||||
| ||||
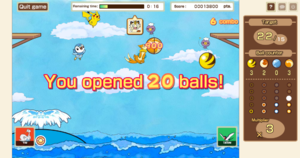
In Wailord's Water Spout (Japanese: ホエルオーの背中で遊ぶ Playing on Whaloh's Back), players must guide Wailord and its spout to make four Pokémon—Pikachu, Meowth, Piplup, and Buizel—launch into the air and hit balls that match the Pokémon's color scheme to make the balls open. The player begins with only one Pokémon. As time goes on, more join in the game, until all four are in play. At five seconds in (1:25), the second Pokémon joins. The third joins at thirty seconds in (1:00) and the fourth joins after a minute has passed (0:30).
To win, players must open at least fifteen balls. When a ball is hit (regardless if it opens or not), lamps to the right side of the screen light up and 300 ×N points are awarded, and when any five light up, the score multiplier increases (the max is ×10). The multiplier goes back to the base value (×1) when a Pokémon falls into the water. When five of a specific row light up, it counts as one ball counter and the row resets.
If the player reaches the end of the game with none of the Pokémon falling into the water, they receive a 10,000 point bonus.
Scoring
- Score
- Ball counter × 500
- Combo bonus × 100
- Perfect clear bonus × 10000
- Number of balls (N balls × 1.N)
Pokémon Bistro
| ||||
| ||||
| Location | Duration | |||
|---|---|---|---|---|
| Pokémon Café Forest | 1:30 | |||
| ||||
Pokémon Bistro (Japanese: ドリンクはこび Drink Carrying) is a mini-game originally available in the Pokémon Café Forest, but later became used in the Island of Dreams as of the October 2012 update. Players must ring a bell to guide a Foongus to serve drinks to various Pokémon. They receive more points if they serve the correctly-colored drinks, and if the drinks are in a Special Cup. If the player tries to move the Foongus too fast, however, it will sweat and may spill or drop drinks. The waiting Pokémon may leave if not served in time. The Foongus can carry up to three drinks at once; however, more drinks increase the chance of dropping them.
To win, players must serve at least four drinks. For every drink given to a Pokémon, a certain icon will be given, with each icon representing a certain amount of points. The icons are given priority in reverse order as they are listed. For example, a spilled Special Cup will yield a music note instead of a star while a wrong spilled drink will give a question mark.
Scoring
| Icon | How to Obtain | Points |
|---|---|---|
| Serve a Special Cup | 4300 | |
| Serve the right drink | 2450 | |
| Serve a spilled drink | 750 | |
| Serve the wrong drink | 120 |
Open the Treasure Box
| ||||
| ||||
| Location | Duration | |||
|---|---|---|---|---|
| Pokémon Movie | 2:00 | |||
| ||||
Open the Treasure Box (Japanese: 宝箱開け Treasure Box Opening) is a game that was originally available by accessing an area where Victini awaits on the Island of Dreams from the Pokémon Movie special home, after tucking in the Reshiram or Zekrom obtained from distributions for the promotion of the fourteenth movie. It was later re-released for the Island of Dreams, where it is played using a Charizard and is called Charizard and the Treasure Box (Japanese: リザードンとたからばこ Lizardon and the Treasure Box).
In this game, players must destroy a barrier preventing their Pokémon (Victini or Charizard) from accessing a treasure chest. Scattered throughout the area are Energy symbols matching the Pokémon tucked in (Fire for Reshiram and Charizard, Electric for Zekrom); each time players obtain three such symbols, Reshiram, Zekrom, or Charizard will execute a special attack to destroy part of the barrier around the treasure chest, with each attack increasing in power. By obtaining twelve of these symbols, the Pokémon will use another special attack to finish off the barrier, allowing the player to claim the treasure inside. Also scattered around the area are powerups (macarons for Victini, or Charizard emblems) that enable the player to smash through rocks, earning points and acquiring Energy symbols that may be surrounded by (or buried inside of) them.
Completing the promotional version of the game once allows the player to obtain a C-Gear skin featuring the legendary Pokémon they tucked in (it is possible to get both C-Gear skins if the player tucks in both Reshiram and Zekrom on separate days). Victini disappears from the island after completing the game, but players may leave and return to play the game again.
Scoring
- Distance × 22
- Special attack (1,500 each*)
- Time bonus × 380
- Score
| Source | Points |
|---|---|
| 100, 200 or 300 | |
| 100 | |
| 1000 |
Blow Out Candles
| ||||
| ||||
| Location | Duration | |||
|---|---|---|---|---|
| Spooky Manor | 1:30 | |||
| ||||
Blow Out Candles (Japanese: ろうそく消し Candle Erasing) is a mini-game which made its debut September 28, 2011 and was initially exclusive to the Spooky Manor area of the Island of Dreams, but was later used in other areas after the October 2012 update. Players alternate turns with the Pokémon being befriended choosing which candle or candles on a large candelabra to blow out. Players may blow out as many adjacent candles within a row as they want to (candles with extinguished candles between them cannot be extinguished together), and the goal is to force the opponent to blow out the last candle on the set.
Play proceeds in rounds, with the candelabra reset after the last candle is extinguished (win or lose) and a different arrangement of candles. The candelabra may be larger (with more candles to start from), or some candles may already be extinguished. New types of candles are also introduced: yellow candles are worth bonus points, while blue candles will incur a point penalty. Candles with larger flames are worth the same point value as smaller candles, but need to be blown two times to extinguish.
To win the mini-game, players must attain an overall score of at least 5000 points (requiring the player to win at least one round) within the time limit. The timer, which is depicted as a large burning candle on the right side of the screen, only elapses during the player's turn.
Starting from the second turn in each round, if the player makes no move for a few seconds the game will suggest a move in the player's favor (always following these moves will result in winning the round).
Scoring
| Source | Points |
|---|---|
| Wins | 5000 |
| 60 | |
| 1500 | |
| -2500 |
Collect Gems
| ||||
| ||||
| Location | Duration | |||
|---|---|---|---|---|
| Rugged Mountain | 1:50 | |||
| ||||
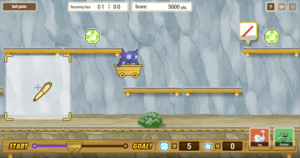
Collect Gems (Japanese: 宝石あつめ Collect Gems) is a mini-game which made its debut November 16, 2011 and was initially exclusive to the Rugged Mountain area of the Island of Dreams, but was later used in other areas after the October 2012 update. Players guide a cart-riding Sableye as it rides down the mountain and collects gems for it to eat, so the amount of gems gained are tallied at the end and correspond to a certain number of points depending on the shape. However, hitting plants will make the cart sway, possibly causing gems to fall out. This affects only the time and the gem bonus at the end of the game, not the current score. By drawing lines to go to a certain rail, Sableye may evade plants and reach gems on higher rails. Some rails might lead to a cave entrance referred to officially as "hidden areas." These contain a higher number of gems than normal areas and lack plants.
Lines
| Lines | |||
|---|---|---|---|

|

|

| |
Scoring
- Time spent
- Score (see table)
- Time bonus
- Gem bonus:
| Gem | Score | Bonus |
|---|---|---|
| 1000 | 500 | |
| 1000 | 1000 |
Frozen Treat Sweep

|
This section is incomplete. Please feel free to edit this section to add missing information and complete it. |
| ||||
| ||||
| Location | Duration | |||
|---|---|---|---|---|
| Icy Cave | 1:00 | |||
| ||||
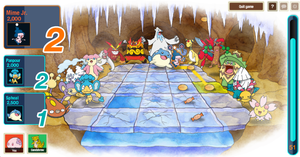
Frozen Treat Sweep (Japanese: ひんやりスイーツキャッチ Chilly Sweet Catch) is a mini-game which made its debut June 22, 2012 and was initially exclusive to the Icy Cave area of the Island of Dreams, but was later used in other areas after the October 2012 update. Players play as Mime Jr., Scraggy, Pichu, or Oshawott, and move around ice tiles to collect dessert items. There are four types, each with different point distributions. The player competes against two other Pokémon consisting of any of the following: Minccino, Riolu, Panpour, Smoochum, Spheal, Kirlia, Marill, Mudkip, Swinub, Buneary, Snorunt, Shinx. The ice tiles are designed such that it can hold the weight of a Pokémon up to three times before breaking. If a Pokémon falls in, time is lost.
Initially, the player can collect candy and cookies. Additional desserts are added via the attending Pokémon from the sideline and from the air via a Chatot and Drifblim. When there are less than 30 seconds left on the timer, a mini-explosion of desserts falls to the ice tiles. When there are less than 10 seconds left, another mini-explosion of desserts falls on to the ice tiles and the number of cakes appearing increases.
To win the mini-game and befriend the Pokémon, players must attain an overall score of at least 15,000 points within the time limit. The timer is displayed as a vertical bar on the right side of the screen.
Scoring
- Winning bonus: 5000
- Score (see table)
| Dessert | Score |
|---|---|
| 500 | |
| 1000 | |
| 2000 | |
| 5000 |
Skip Across the Lake

|
This section is incomplete. Please feel free to edit this section to add missing information and complete it. |
| ||||
| ||||
| Location | Duration | |||
|---|---|---|---|---|
| Dream Park | -:-- | |||
| ||||
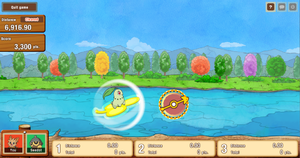
Skip Across the Lake (Japanese: ボード遊び Board Game) is a mini-game which made its debut November 20, 2012 and is exclusive to the Dream Park area of the Island of Dreams. Players start by choosing one of three boards: one that focuses on speed, one that focuses on flying, and another that focuses on skipping across water. After choosing a board, the player may make up to three attempts to go as far as possible; to win the game and befriend the Pokémon, the player must reach a distance of 1500 meters.
The player starts at the top of a hill, where a speed meter is shown and the player clicks to determine the speed of their launch. After sliding down the hill to the lake's edge, an angle meter is displayed and the player clicks a second time to decide their launch angle. (Failure to decide on a speed or angle within a certain amount of time causes the Pokémon to launch with the minimum value on the meter.) When in the air, the player adjusts the glider by moving the mouse up and down until the glider is aligned with the wind current, which can give their jump an additional speed boost as they descend. Right before touching down on the lake, the player clicks in time with the water to skip and make an additional jump; if the player happens to land on a trampoline, these skips will receive an additional boost. Scattered throughout the whole area are various objects (balloons, clouds, stars) that the player collects points for touching, as well as various Pokémon the player may spot while flying by.
Scoring
- Speed: from 100 to 1200 at start of game
- Distance: 3 points per meter
- Pokémon sighted: 1000 each (first five Pokémon only)
- Skips: 200 to 400 points per skip across water
- Trampolines hit: 500 points each
- Items collected:
| Item | Score |
|---|---|
| Balloons | 200 |
| Heart cloud | 300 |
| Star | 400 |
| Falling Star | 500 |

|
This game-related article is part of Project Games, a Bulbapedia project that aims to write comprehensive articles on the Pokémon games. |
