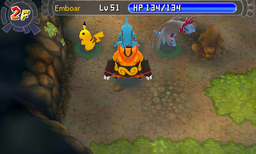
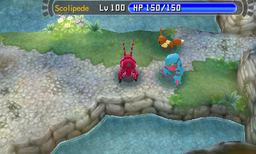
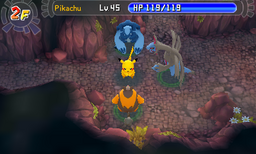
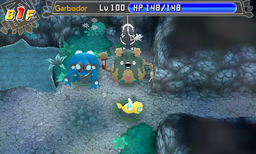
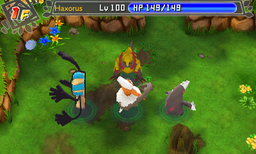
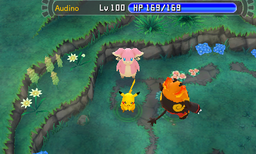
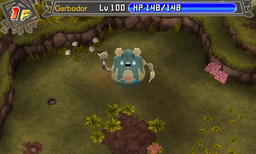
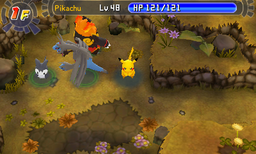
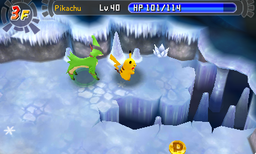
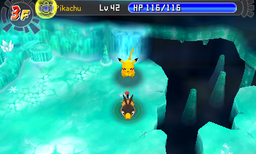
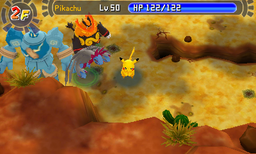
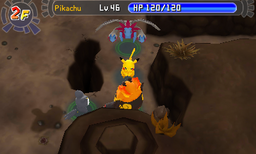
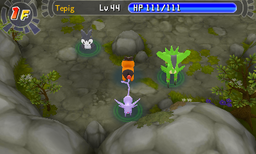
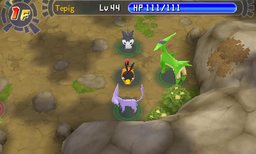
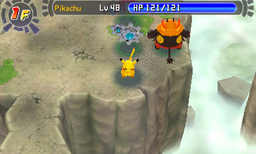
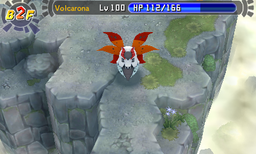
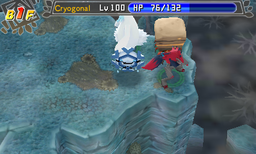
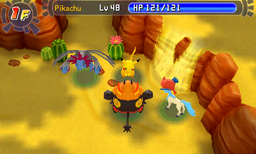
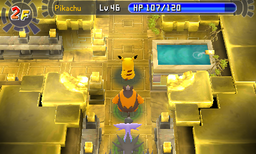
List of environments (Gates to Infinity): Difference between revisions
From Bulbapedia, the community-driven Pokémon encyclopedia.
Jump to navigationJump to search
(Table adjustments + capitalization) Tag: Reverted |
(Undo revision 3959277 by FolksCallMeHilbert (talk) This breaks rounded corners on Firefox) Tag: Undo |
||
| Line 1: | Line 1: | ||
This is a list of the [[environment]]s in [[Pokémon Mystery Dungeon: Gates to Infinity]]. | This is a list of the [[environment]]s in [[Pokémon Mystery Dungeon: Gates to Infinity]]. | ||
==List of environments== | ==List of environments== | ||
{| class="roundy mw-collapsible mw-collapsed" style="margin:auto; background: #{{Pokémon color dark}}; border: 3px solid #{{Pokémon color}}" | {| class="roundy mw-collapsible mw-collapsed" style="margin:auto; background: #{{Pokémon color dark}}; border: 3px solid #{{Pokémon color}}" | ||
! style="background:#{{Pokémon color light}}; {{roundytl|5px}}" | ID | |||
! style="{{ | ! style="background:#{{Pokémon color light}}" | Locations | ||
! style="background:#{{Pokémon color light}}" | {{mcolor|Secret Power|000}} | |||
! {{mcolor|Secret Power|000}} | ! style="background:#{{Pokémon color light}}; {{roundytr|5px}}" | Picture | ||
! style="{{roundytr|5px}}" | Picture | |||
|- | |- | ||
! colspan=4 style="background:#{{locationcolor/med|special}}" | Special areas | ! colspan=4 style="background:#{{locationcolor/med|special}}" | Special areas | ||
| Line 14: | Line 12: | ||
| ? | | ? | ||
| [[Ragged Mountain]] (outside) | | [[Ragged Mountain]] (outside) | ||
| | | causes {{status|sleep}} | ||
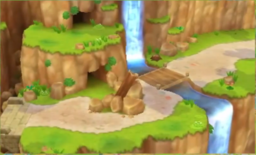
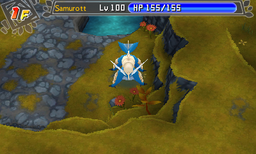
| [[File:Ragged Mountain PMDGTI.png|256px]] | | [[File:Ragged Mountain PMDGTI.png|256px]] | ||
|- style="background:#FFF" | |- style="background:#FFF" | ||
| ? | | ? | ||
| [[Hazy Pass]] (outside) | | [[Hazy Pass]] (outside) | ||
| | | lowers {{stat|accuracy}} one stage | ||
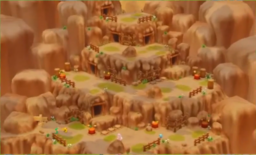
| [[File:Hazy Pass PMDGTI.png|256px]] | | [[File:Hazy Pass PMDGTI.png|256px]] | ||
|- style="background:#FFF" | |- style="background:#FFF" | ||
| ? | | ? | ||
| [[Stompstump Peak]] (outside) | | [[Stompstump Peak]] (outside) | ||
| | | causes {{status|sleep}} | ||
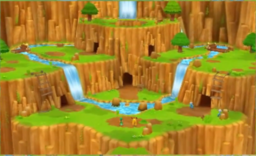
| [[File:Stompstump Peak PMDGTI.png|256px]] | | [[File:Stompstump Peak PMDGTI.png|256px]] | ||
|- style="background:#FFF" | |- style="background:#FFF" | ||
| ? | | ? | ||
| [[Inflora Forest]] (outside) | | [[Inflora Forest]] (outside) | ||
| | | causes {{status|sleep}} | ||
| | | | ||
|- style="background:#FFF" | |- style="background:#FFF" | ||
| ? | | ? | ||
| [[Ochre Quarry]] (outside) | | [[Ochre Quarry]] (outside) | ||
| | | lowers {{stat|accuracy}} one stage | ||
| | | | ||
|- style="background:#FFF" | |- style="background:#FFF" | ||
| ? | | ? | ||
| [[Holehills]] (outside) | | [[Holehills]] (outside) | ||
| | | lowers {{stat|accuracy}} one stage | ||
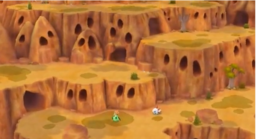
| [[File:Holehills outside floors PMDGTI.png|256px]] | | [[File:Holehills outside floors PMDGTI.png|256px]] | ||
|- style="background:#FFF" | |- style="background:#FFF" | ||
| ? | | ? | ||
| [[Buried Ruins]] | | [[Buried Ruins]] | ||
| | | causes {{status|paralysis}} | ||
| [[File:Buried Ruins PMD GTI.png|256px]] | | [[File:Buried Ruins PMD GTI.png|256px]] | ||
|- style="background:#FFF" | |- style="background:#FFF" | ||
| ? | | ? | ||
| [[Eternal Ruins]] | | [[Eternal Ruins]] | ||
| | | causes {{status|sleep}} | ||
| [[File:Eternal Ruins PMDGTI.png|256px]] | | [[File:Eternal Ruins PMDGTI.png|256px]] | ||
|- | |- | ||
| Line 56: | Line 54: | ||
| 27 | | 27 | ||
| [[Dreamy Island]] 1-25F<br/>[[Scalchop Beach]] 1-14F | | [[Dreamy Island]] 1-25F<br/>[[Scalchop Beach]] 1-14F | ||
| | | lowers {{stat|Attack}} one stage | ||
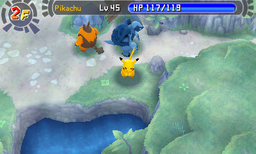
| [[File:Dreamy Island PMDGTI.png|256px]] | | [[File:Dreamy Island PMDGTI.png|256px]] | ||
|- style="background:#FFF" | |- style="background:#FFF" | ||
| 29 | | 29 | ||
| [[Windy Shoreline]] | | [[Windy Shoreline]] | ||
| | | lowers {{stat|Attack}} one stage | ||
| [[File:Windy Shoreline PMDGTI.png|256px]] | | [[File:Windy Shoreline PMDGTI.png|256px]] | ||
|- style="background:#FFF" | |- style="background:#FFF" | ||
| 30 | | 30 | ||
| [[Cape at the Edge]] 16-23F<br/>[[Uncharted Road]] ([[Silent Tundra]] and [[Dreamy Island]]) | | [[Cape at the Edge]] 16-23F<br/>[[Uncharted Road]] ([[Silent Tundra]] and [[Dreamy Island]]) | ||
| | | lowers {{stat|Attack}} one stage | ||
| [[File:Uncharted Road PMDGTI 2.png|256px]] | | [[File:Uncharted Road PMDGTI 2.png|256px]] | ||
|- | |- | ||
| Line 73: | Line 71: | ||
| 1 | | 1 | ||
| [[Ragged Mountain]] (inside)<br/>Debug dungeon{{tt|*|9 floor one}} | | [[Ragged Mountain]] (inside)<br/>Debug dungeon{{tt|*|9 floor one}} | ||
| | | causes {{status|cringe}} | ||
| [[File:Ragged Mountain interior PMDGTI.png|256px]] | | [[File:Ragged Mountain interior PMDGTI.png|256px]] | ||
|- style="background:#FFF" | |- style="background:#FFF" | ||
| 2 | | 2 | ||
| [[Stompstump Peak]] (inside)<br/>[[Strongest Trail]] 10-19F | | [[Stompstump Peak]] (inside)<br/>[[Strongest Trail]] 10-19F | ||
| | | causes {{status|cringe}} | ||
| [[File:Stompstump Peak interior PMDGTI.png|256px]] | | [[File:Stompstump Peak interior PMDGTI.png|256px]] | ||
|- style="background:#FFF" | |- style="background:#FFF" | ||
| 3 | | 3 | ||
| [[Hazy Pass]] (inside) | | [[Hazy Pass]] (inside) | ||
| | | causes {{status|cringe}} | ||
| [[File:Hazy Pass interior PMDGTI.png|256px]] | | [[File:Hazy Pass interior PMDGTI.png|256px]] | ||
|- style="background:#FFF" | |- style="background:#FFF" | ||
| 4 | | 4 | ||
| [[Stony Cave]] | | [[Stony Cave]] | ||
| | | causes {{status|cringe}} | ||
| [[File:Stony Cave PMDGTI.png|256px]] | | [[File:Stony Cave PMDGTI.png|256px]] | ||
|- style="background:#FFF" | |- style="background:#FFF" | ||
| 5 | | 5 | ||
| [[Holehills]] (inside)<br/>[[Ultimate Wilds]] 25-46F | | [[Holehills]] (inside)<br/>[[Ultimate Wilds]] 25-46F | ||
| | | causes {{status|cringe}} | ||
| [[File:Holehills PMDGTI.png|256px]] | | [[File:Holehills PMDGTI.png|256px]] | ||
|- style="background:#FFF" | |- style="background:#FFF" | ||
| 6 | | 6 | ||
| [[Forest Grotto]]<br/>[[Treasure Trove]] (Fertile Forest) | | [[Forest Grotto]]<br/>[[Treasure Trove]] (Fertile Forest) | ||
| | | causes {{status|cringe}} | ||
| [[File:Forest Grotto PMDGTI.png|256px]] | | [[File:Forest Grotto PMDGTI.png|256px]] | ||
|- style="background:#FFF" | |- style="background:#FFF" | ||
| 7 | | 7 | ||
| [[Path of No Return]] 20-27F | | [[Path of No Return]] 20-27F | ||
| | | causes {{status|cringe}} | ||
| | | | ||
|- style="background:#FFF" | |- style="background:#FFF" | ||
| 8 | | 8 | ||
| [[Tempting Path]] | | [[Tempting Path]] | ||
| | | causes {{status|cringe}} | ||
| [[File:Tempting Path PMDGTI.png|256px]] | | [[File:Tempting Path PMDGTI.png|256px]] | ||
|- style="background:#FFF" | |- style="background:#FFF" | ||
| 31 | | 31 | ||
| [[Tyrian Maze]]<br/>[[Treasure Trove]] (Pleasant Plain) | | [[Tyrian Maze]]<br/>[[Treasure Trove]] (Pleasant Plain) | ||
| | | causes {{status|cringe}} | ||
| [[File:Tyrian Maze PMDGTI.png|256px]] | | [[File:Tyrian Maze PMDGTI.png|256px]] | ||
|- style="background:#FFF" | |- style="background:#FFF" | ||
| 32 | | 32 | ||
| [[Kilionea Road]] | | [[Kilionea Road]] | ||
| | | causes {{status|cringe}} | ||
| [[File:Kilionea Road PMDGTI.png|256px]] | | [[File:Kilionea Road PMDGTI.png|256px]] | ||
|- style="background:#FFF" | |- style="background:#FFF" | ||
| 33 | | 33 | ||
| [[Telluric Path]]<br/>[[Strongest Trail]] 40-49F | | [[Telluric Path]]<br/>[[Strongest Trail]] 40-49F | ||
| | | causes {{status|cringe}} | ||
| [[File:Telluric Path PMDGTI.png|256px]] | | [[File:Telluric Path PMDGTI.png|256px]] | ||
|- style="background:#FFF" | |- style="background:#FFF" | ||
| 34 | | 34 | ||
| [[Glacial Underpass]]<br/>[[Cape at the Edge]] 24-29F<br/>[[Treasure Trove]] (Cool Creekside) | | [[Glacial Underpass]]<br/>[[Cape at the Edge]] 24-29F<br/>[[Treasure Trove]] (Cool Creekside) | ||
| | | causes {{status|cringe}} | ||
| [[File:Glacial Underpass interior PMDGTI.png|256px]] | | [[File:Glacial Underpass interior PMDGTI.png|256px]] | ||
|- style="background:#FFF" | |- style="background:#FFF" | ||
| 58 | | 58 | ||
| [[Smoking Mountain]] 1-23F | | [[Smoking Mountain]] 1-23F | ||
| | | causes {{status|cringe}} | ||
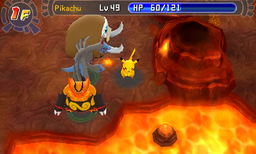
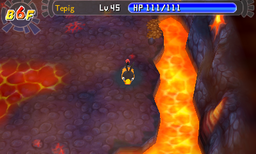
| [[File:Smoking Mountain PMDGTI.png|256px]] | | [[File:Smoking Mountain PMDGTI.png|256px]] | ||
|- style="background:#FFF" | |- style="background:#FFF" | ||
| 59 | | 59 | ||
| [[Path of No Return]] 50-54F<br/>[[Uncharted Road]] ([[Jaws of the Abyss]] and [[Smoking Mountain]])<br/>[[Skill Treasury]] | | [[Path of No Return]] 50-54F<br/>[[Uncharted Road]] ([[Jaws of the Abyss]] and [[Smoking Mountain]])<br/>[[Skill Treasury]] | ||
| | | causes {{status|cringe}} | ||
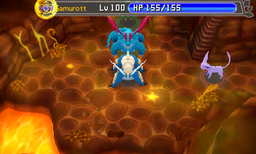
| [[File:Uncharted Road PMDGTI.png|256px]] | | [[File:Uncharted Road PMDGTI.png|256px]] | ||
|- style="background:#FFF" | |- style="background:#FFF" | ||
| 61 | | 61 | ||
| [[Worldcore]] | | [[Worldcore]] | ||
| | | causes {{status|cringe}} | ||
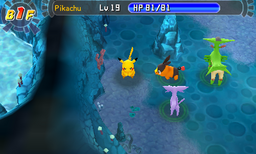
| [[File:Worldcore PMDGTI.png|256px]] | | [[File:Worldcore PMDGTI.png|256px]] | ||
|- style="background:#FFF" | |- style="background:#FFF" | ||
| ???<br/>60? | | ???<br/>60? | ||
| Unused{{tt|*|DLC data; bright greenpalette swap of Inflora Forest tileset; has the 15F treasure room like rest}} | | Unused{{tt|*|DLC data; bright greenpalette swap of Inflora Forest tileset; has the 15F treasure room like rest}} | ||
| | | causes {{status|cringe}} | ||
| | | | ||
|- | |- | ||
| Line 155: | Line 153: | ||
| 17 | | 17 | ||
| [[Breezy Meadow]]<br/>[[Path of No Return]] 13-19F<br/>[[Ivy Park]] 1-14F | | [[Breezy Meadow]]<br/>[[Path of No Return]] 13-19F<br/>[[Ivy Park]] 1-14F | ||
| | | causes {{status|sleep}} | ||
| [[File:Breezy Meadow PMDGTI.png|256px]] | | [[File:Breezy Meadow PMDGTI.png|256px]] | ||
|- style="background:#FFF" | |- style="background:#FFF" | ||
| 18 | | 18 | ||
| [[Uncharted Road]] ([[Moonlit Forest]] and [[Rusty Mountain]]) | | [[Uncharted Road]] ([[Moonlit Forest]] and [[Rusty Mountain]]) | ||
| | | causes {{status|sleep}} | ||
| [[File:Uncharted Road PMDGTI 3.png|256px]] | | [[File:Uncharted Road PMDGTI 3.png|256px]] | ||
|- style="background:#FFF" | |- style="background:#FFF" | ||
| 19 | | 19 | ||
| [[Eastern Savanna]] | | [[Eastern Savanna]] | ||
| | | causes {{status|sleep}} | ||
| [[File:Eastern Savanna PMDGTI.png|256px]] | | [[File:Eastern Savanna PMDGTI.png|256px]] | ||
|- style="background:#FFF" | |- style="background:#FFF" | ||
| 20 | | 20 | ||
| [[Withered Savanna]] | | [[Withered Savanna]] | ||
| | | causes {{status|sleep}} | ||
| [[File:Withered Savanna PMDGTI.png|256px]] | | [[File:Withered Savanna PMDGTI.png|256px]] | ||
|- style="background:#FFF" | |- style="background:#FFF" | ||
| 22 | | 22 | ||
| [[Inflora Forest]] (interior)<br/>[[Pika Land]] 1-14F<br/>[[Treat Road]] 1-19F | | [[Inflora Forest]] (interior)<br/>[[Pika Land]] 1-14F<br/>[[Treat Road]] 1-19F | ||
| | | causes {{status|sleep}} | ||
| [[File:Pika Land PMDGTI.png|256px]] | | [[File:Pika Land PMDGTI.png|256px]] | ||
|- style="background:#FFF" | |- style="background:#FFF" | ||
| 23 | | 23 | ||
| [[Grove of Whispers]]<br/>[[Poké Forest]] | | [[Grove of Whispers]]<br/>[[Poké Forest]] | ||
| | | causes {{status|sleep}} | ||
| [[File:Grove of Whispers PMDGTI.png|256px]] | | [[File:Grove of Whispers PMDGTI.png|256px]] | ||
|- style="background:#FFF" | |- style="background:#FFF" | ||
| 24 | | 24 | ||
| [[Moonlit Forest]] 1-28F | | [[Moonlit Forest]] 1-28F | ||
| | | causes {{status|sleep}} | ||
| [[File:Moonlit Forest PMDGTI.png|256px]] | | [[File:Moonlit Forest PMDGTI.png|256px]] | ||
|- style="background:#FFF" | |- style="background:#FFF" | ||
| 25 | | 25 | ||
| [[Forest of Shadows]]<br/>[[Path of No Return]] 33-39F | | [[Forest of Shadows]]<br/>[[Path of No Return]] 33-39F | ||
| | | causes {{status|sleep}} | ||
| [[File:Forest of Shadows PMDGTI.png|256px]] | | [[File:Forest of Shadows PMDGTI.png|256px]] | ||
|- style="background:#FFF" | |- style="background:#FFF" | ||
| 44 | | 44 | ||
| [[Kecleon Bazaar]]<br/>[[Strongest Trail]] 50-59F | | [[Kecleon Bazaar]]<br/>[[Strongest Trail]] 50-59F | ||
| | | causes {{status|sleep}} | ||
| [[File:Kecleon Bazaar PMDGTI.png|256px]] | | [[File:Kecleon Bazaar PMDGTI.png|256px]] | ||
|- style="background:#FFF" | |- style="background:#FFF" | ||
| 45 | | 45 | ||
| [[Rusty Mountain]] 1-24F | | [[Rusty Mountain]] 1-24F | ||
| | | causes {{status|sleep}} | ||
| [[File:Rusty Mountain PMDGTI.png|256px]] | | [[File:Rusty Mountain PMDGTI.png|256px]] | ||
|- style="background:#FFF" | |- style="background:#FFF" | ||
| 46 | | 46 | ||
| Unused? (canyon foot but greenery is normal green and 'path' is light green) | | Unused? (canyon foot but greenery is normal green and 'path' is light green) | ||
| | | causes {{status|sleep}} | ||
| | | | ||
|- style="background:#FFF" | |- style="background:#FFF" | ||
| 47 | | 47 | ||
| [[Canyon Foot]] | | [[Canyon Foot]] | ||
| | | causes {{status|sleep}} | ||
| [[File:Canyon Foot PMDGTI.png|256px]] | | [[File:Canyon Foot PMDGTI.png|256px]] | ||
|- style="background:#FFF" | |- style="background:#FFF" | ||
| 48 | | 48 | ||
| [[Daybreak Ridge]]<br/>[[Path of No Return]] 60-67F | | [[Daybreak Ridge]]<br/>[[Path of No Return]] 60-67F | ||
| | | causes {{status|sleep}} | ||
| [[File:Daybreak Ridge PMDGTI.png|256px]] | | [[File:Daybreak Ridge PMDGTI.png|256px]] | ||
|- | |- | ||
| Line 222: | Line 220: | ||
| 35 | | 35 | ||
| [[Great Glacier]] | | [[Great Glacier]] | ||
| | | causes {{status|freeze}} | ||
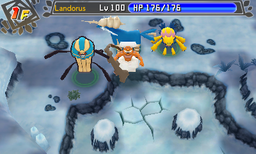
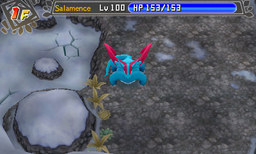
| [[File:Great Glacier interior PMDGTI.png|256px]] | | [[File:Great Glacier interior PMDGTI.png|256px]] | ||
|- style="background:#FFF" | |- style="background:#FFF" | ||
| 36 | | 36 | ||
| [[Freezing Pillar]] | | [[Freezing Pillar]] | ||
| | | causes {{status|freeze}} | ||
| [[File:Freezing Pillar PMDGTI.png|256px]] | | [[File:Freezing Pillar PMDGTI.png|256px]] | ||
|- style="background:#FFF" | |- style="background:#FFF" | ||
| 37 | | 37 | ||
| [[Silent Tundra]] 1-26F<br/>[[Path of No Return]] 73-79F | | [[Silent Tundra]] 1-26F<br/>[[Path of No Return]] 73-79F | ||
| | | causes {{status|freeze}} | ||
| [[File:Silent Tundra PMDGTI.png|256px]] | | [[File:Silent Tundra PMDGTI.png|256px]] | ||
|- style="background:#FFF" | |- style="background:#FFF" | ||
| 38 | | 38 | ||
| [[Strongest Trail]] 1-9F | | [[Strongest Trail]] 1-9F | ||
| | | causes {{status|freeze}} | ||
| [[File:Strongest Trail B1F PMDGTI.png|256px]] | | [[File:Strongest Trail B1F PMDGTI.png|256px]] | ||
|- style="background:#FFF" | |- style="background:#FFF" | ||
| 39 | | 39 | ||
| [[Glacier Palace]] | | [[Glacier Palace]] | ||
| | | causes {{status|freeze}} | ||
| [[File:Glacier Palace 2F interior PMDGTI.png|256px]] | | [[File:Glacier Palace 2F interior PMDGTI.png|256px]] | ||
|- style="background:#FFF" | |- style="background:#FFF" | ||
| 40 | | 40 | ||
| [[Glacier Palace Eastern Spire]]<br/>[[Slumbering Cave]] 1-98F | | [[Glacier Palace Eastern Spire]]<br/>[[Slumbering Cave]] 1-98F | ||
| | | causes {{status|freeze}} | ||
| [[File:Slumbering Cave PMDGTI.png|256px]] | | [[File:Slumbering Cave PMDGTI.png|256px]] | ||
|- style="background:#FFF" | |- style="background:#FFF" | ||
| 41 | | 41 | ||
| [[Glacier Palace Western Spire]] | | [[Glacier Palace Western Spire]] | ||
| | | causes {{status|freeze}} | ||
| [[File:Glacier Palace Western Spire PMDGTI.png|256px]] | | [[File:Glacier Palace Western Spire PMDGTI.png|256px]] | ||
|- style="background:#FFF" | |- style="background:#FFF" | ||
| 42 | | 42 | ||
| [[Path of No Return]] 80-89F | | [[Path of No Return]] 80-89F | ||
| | | causes {{status|freeze}} | ||
| | | | ||
|- style="background:#FFF" | |- style="background:#FFF" | ||
| 43 | | 43 | ||
| [[Glacier Palace Great Spire]] | | [[Glacier Palace Great Spire]] | ||
| | | causes {{status|freeze}} | ||
| [[File:Glacier Palace Great Spire PMDGTI.png|256px]] | | [[File:Glacier Palace Great Spire PMDGTI.png|256px]] | ||
|- | |- | ||
| Line 269: | Line 267: | ||
| 9 | | 9 | ||
| [[Ochre Quarry]] (inside)<br/>[[Mount Tepid]] 1-14F<br/>[[Ultimate Wilds]] 4-24F | | [[Ochre Quarry]] (inside)<br/>[[Mount Tepid]] 1-14F<br/>[[Ultimate Wilds]] 4-24F | ||
| | | lowers {{stat|accuracy}} one stage | ||
| [[File:Ochre Quarry PMDGTI.png|256px]] | | [[File:Ochre Quarry PMDGTI.png|256px]] | ||
|- style="background:#FFF" | |- style="background:#FFF" | ||
| 10 | | 10 | ||
| [[Ultimate Wilds]] 47-67F | | [[Ultimate Wilds]] 47-67F | ||
| | | lowers {{stat|accuracy}} one stage | ||
| | | | ||
|- style="background:#FFF" | |- style="background:#FFF" | ||
| 11 | | 11 | ||
| [[Redland Reaches]]<br/>[[Ultimate Wilds]] 90-98F | | [[Redland Reaches]]<br/>[[Ultimate Wilds]] 90-98F | ||
| | | lowers {{stat|accuracy}} one stage | ||
| [[File:Redland Reaches PMDGTI.png|256px]] | | [[File:Redland Reaches PMDGTI.png|256px]] | ||
|- style="background:#FFF" | |- style="background:#FFF" | ||
| 13 | | 13 | ||
| [[Desolate Canyon]] | | [[Desolate Canyon]] | ||
| | | lowers {{stat|accuracy}} one stage | ||
| [[File:Desolate Canyon PMDGTI.png|256px]] | | [[File:Desolate Canyon PMDGTI.png|256px]] | ||
|- style="background:#FFF" | |- style="background:#FFF" | ||
| 14 | | 14 | ||
| [[Mountain Pass]]<br/>[[Cape at the Edge]] 8-15F<br/>[[Path of No Return]] 1-7F | | [[Mountain Pass]]<br/>[[Cape at the Edge]] 8-15F<br/>[[Path of No Return]] 1-7F | ||
| | | lowers {{stat|accuracy}} one stage | ||
| [[File:Mountain Pass PMDGTI.png|256px]] | | [[File:Mountain Pass PMDGTI.png|256px]] | ||
|- style="background:#FFF" | |- style="background:#FFF" | ||
| 15 | | 15 | ||
| [[Strongest Trail]] 30-39F | | [[Strongest Trail]] 30-39F | ||
| | | lowers {{stat|accuracy}} one stage | ||
| | | | ||
|- style="background:#FFF" | |- style="background:#FFF" | ||
| 16 | | 16 | ||
| [[Path of No Return]] 40-49F<br/>[[Ultimate Wilds]] 68-89F | | [[Path of No Return]] 40-49F<br/>[[Ultimate Wilds]] 68-89F | ||
| | | lowers {{stat|accuracy}} one stage | ||
| | | | ||
|- style="background:#FFF" | |- style="background:#FFF" | ||
| 49 | | 49 | ||
| [[Crags of Lament]]<br/>[[Axe Rock]] 1-14F<br/>[[Treasure Trove]] (Rough Rockery) | | [[Crags of Lament]]<br/>[[Axe Rock]] 1-14F<br/>[[Treasure Trove]] (Rough Rockery) | ||
| | | lowers {{stat|accuracy}} one stage | ||
| [[File:Crags of Lament PMDGTI.png|256px]] | | [[File:Crags of Lament PMDGTI.png|256px]] | ||
|- style="background:#FFF" | |- style="background:#FFF" | ||
| 50 | | 50 | ||
| [[Cape at the Edge]] 1-7F<br/>[[Strongest Trail]] 20-29F | | [[Cape at the Edge]] 1-7F<br/>[[Strongest Trail]] 20-29F | ||
| | | lowers {{stat|accuracy}} one stage | ||
| [[File:Cape at the Edge PMDGTI.png|256px]] | | [[File:Cape at the Edge PMDGTI.png|256px]] | ||
|- style="background:#FFF" | |- style="background:#FFF" | ||
| 52 | | 52 | ||
| [[Jaws of the Abyss]] 1-28F<br/>{{OBP|Mt. Travail|Gates to Infinity}} | | [[Jaws of the Abyss]] 1-28F<br/>{{OBP|Mt. Travail|Gates to Infinity}} | ||
| | | lowers {{stat|accuracy}} one stage | ||
| [[File:Jaws of the Abyss PMDGTI.png|256px]] | | [[File:Jaws of the Abyss PMDGTI.png|256px]] | ||
|- style="background:#FFF" | |- style="background:#FFF" | ||
| 54 | | 54 | ||
| [[Scorching Desert]] | | [[Scorching Desert]] | ||
| | | lowers {{stat|accuracy}} one stage | ||
| [[File:Scorching Desert PMDGTI.png|256px]] | | [[File:Scorching Desert PMDGTI.png|256px]] | ||
|- style="background:#FFF" | |- style="background:#FFF" | ||
| 55 | | 55 | ||
| [[Path of No Return]] 8-12F, 28-32F, 55-59F, 68-72F | | [[Path of No Return]] 8-12F, 28-32F, 55-59F, 68-72F | ||
| | | lowers {{stat|accuracy}} one stage | ||
| | | | ||
|- style="background:#FFF" | |- style="background:#FFF" | ||
| 56 | | 56 | ||
| [[Miragesands]] 1-28F<br/>[[Ultimate Wilds]] 1-3F | | [[Miragesands]] 1-28F<br/>[[Ultimate Wilds]] 1-3F | ||
| | | lowers {{stat|accuracy}} one stage | ||
| [[File:Miragesands PMDGTI.png|256px]] | | [[File:Miragesands PMDGTI.png|256px]] | ||
|- style="background:#FFF" | |- style="background:#FFF" | ||
| 57 | | 57 | ||
| Magnagate dungeons (white sand) | | Magnagate dungeons (white sand) | ||
| | | lowers {{stat|accuracy}} one stage | ||
| | | | ||
|- | |- | ||
| Line 341: | Line 339: | ||
| 62 | | 62 | ||
| Unused? (green-ish, including floor unlike 64) | | Unused? (green-ish, including floor unlike 64) | ||
| | | causes {{status|paralysis}} | ||
| | | | ||
|- style="background:#FFF" | |- style="background:#FFF" | ||
| 63 | | 63 | ||
| Unused? (brownish-red) | | Unused? (brownish-red) | ||
| | | causes {{status|paralysis}} | ||
| | | | ||
|- style="background:#FFF" | |- style="background:#FFF" | ||
| 64 | | 64 | ||
| [[Path of No Return]] 90-98F<br/>[[Ivy Park]] 15F<br/>[[Scalchop Beach]] 15F<br/>[[Pika Land]] 15F<br/>[[Axe Rock]] 15F<br/>[[Mount Tepid]] 15F<br/>[[Treat Road]] 20F | | [[Path of No Return]] 90-98F<br/>[[Ivy Park]] 15F<br/>[[Scalchop Beach]] 15F<br/>[[Pika Land]] 15F<br/>[[Axe Rock]] 15F<br/>[[Mount Tepid]] 15F<br/>[[Treat Road]] 20F | ||
| | | causes {{status|paralysis}} | ||
| | | | ||
|- style="background:#FFF" | |- style="background:#FFF" | ||
| 65 | | 65 | ||
| [[Miragesands]] 29F<br/>[[Silent Tundra]] 27F<br/>[[Dreamy Island]] 26F<br/>[[Moonlit Forest]] 29F<br/>[[Rusty Mountain]] 25F<br/>[[Jaws of the Abyss]] 29F<br/>[[Smoking Mountain]] 24F<br/>[[Cape at the Edge]] 30F<br/>[[Slumbering Cave]] 99F<br/>[[Path of No Return]] 99F<br/>[[Strongest Trail]] 60F<br/>[[Ultimate Wilds]] 99F<br/>Debug dungeon{{tt|*|20 floor one; has treasure room at the end}} | | [[Miragesands]] 29F<br/>[[Silent Tundra]] 27F<br/>[[Dreamy Island]] 26F<br/>[[Moonlit Forest]] 29F<br/>[[Rusty Mountain]] 25F<br/>[[Jaws of the Abyss]] 29F<br/>[[Smoking Mountain]] 24F<br/>[[Cape at the Edge]] 30F<br/>[[Slumbering Cave]] 99F<br/>[[Path of No Return]] 99F<br/>[[Strongest Trail]] 60F<br/>[[Ultimate Wilds]] 99F<br/>Debug dungeon{{tt|*|20 floor one; has treasure room at the end}} | ||
| | | causes {{status|paralysis}} | ||
| | | | ||
|- style="background:#FFF" | |- style="background:#FFF" | ||
| 67?<br/>68? | |||
| [[Gilded Hall]] | | [[Gilded Hall]] | ||
| | | causes {{status|paralysis}} | ||
| [[File:Gilded Hall GTI.png|256px]] | |||
|} | |} | ||
<!-- | <!-- | ||
| Line 375: | Line 373: | ||
*Magnagate dungeon specifics | *Magnagate dungeon specifics | ||
Tilesets 0, 12, 28, 51, 53 and 66 have no textures. 21, 26 and 60 seem to not work at all.--> | Tilesets 0, 12, 28, 51, 53 and 66 have no textures. 21, 26 and 60 seem to not work at all.--> | ||
{{-}} | {{-}} | ||
{{Project Sidegames notice}} | {{Project Sidegames notice}} | ||
[[Category:Lists of environments]] | [[Category:Lists of environments]] | ||
Revision as of 02:48, 20 March 2024
This is a list of the environments in Pokémon Mystery Dungeon: Gates to Infinity.
List of environments

|
This article is part of Project Sidegames, a Bulbapedia project that aims to write comprehensive articles on the Pokémon Sidegames. |
