Kingdom location: Difference between revisions
m (Correct multiplication signs, replaced: x2 → ×2 (20)) |
(roundtable class, make sorting arrows visible) |
||
| (One intermediate revision by the same user not shown) | |||
| Line 7: | Line 7: | ||
===Bank=== | ===Bank=== | ||
[[File:Conquest background Bank.png|right|thumb|Bank]] | |||
[[File:Bank.png]] "''Invest gold to upgrade locations.''" | [[File:Bank.png]] "''Invest gold to upgrade locations.''" | ||
| Line 14: | Line 15: | ||
Bank locations can be found in all of [[Ransei]]'s 17 kingdoms, always operated by a Shopkeeper. | Bank locations can be found in all of [[Ransei]]'s 17 kingdoms, always operated by a Shopkeeper. | ||
{{-}} | |||
===Mystery Springs=== | ===Mystery Springs=== | ||
[[File:Conquest background Mystery Springs.png|right|thumb|Mystery Springs]] | |||
[[File:Mystery Springs.png]] "''Change your Pokémon's Abilities using the power of the Mystery Springs.''" | [[File:Mystery Springs.png]] "''Change your Pokémon's Abilities using the power of the Mystery Springs.''" | ||
| Line 23: | Line 26: | ||
Mystery Springs locations can be found in the following kingdoms, always operated by a Shopkeeper: | Mystery Springs locations can be found in the following kingdoms, always operated by a Shopkeeper: | ||
* [[Ignis]] | * [[Ignis]] | ||
* [[Valora]] | * [[Valora]] | ||
{{-}} | |||
===Ponigiri Shop=== | ===Ponigiri Shop=== | ||
| Line 34: | Line 38: | ||
Up to six Warriors can be sent at a time. The selection increases with the level (1-3) of the location: | Up to six Warriors can be sent at a time. The selection increases with the level (1-3) of the location: | ||
{|class=" | {|class="roundtable" style="background:#cdbc6c; border:2px solid #807544; {{roundy|10px}}" | ||
|- style="background: #f9e586;" | |||
! | ! style={{roundytl|10px}}" | Ponigiri | ||
! | ! Cost | ||
! style= | ! Energy increase | ||
! style={{roundytr|10px}}" | Ponigiri Shop Level | |||
|- style="background:#FFF" | |- style="background:#FFF" | ||
| Ponigiri | | Ponigiri | ||
| Line 104: | Line 109: | ||
====Alchemist==== | ====Alchemist==== | ||
[[File:Conquest background Alchemist.png|right|thumb|Alchemist]] | |||
[[File:Alchemist level 1.png]][[File:Alchemist level 2.png]][[File:Alchemist level 3.png]] "''Combine two items to form a new item.''" | [[File:Alchemist level 1.png]][[File:Alchemist level 2.png]][[File:Alchemist level 3.png]] "''Combine two items to form a new item.''" | ||
| Line 113: | Line 119: | ||
Available Item Recipes: | Available Item Recipes: | ||
{|class="sortable" style="background:#cdbc6c; border:2px solid #807544; {{roundy|10px}}" | {|class="roundtable sortable" style="background:#cdbc6c; border:2px solid #807544; {{roundy|10px}}" | ||
|- style="background: #f9e586;" | |||
! | ! style={{roundytl|10px}}" | Item Created | ||
! | ! Ingredient 1 | ||
! style= | ! Ingredient 2 | ||
! style={{roundytr|10px}}" | Alchemist Level | |||
|- style="background:#FFF" | |- style="background:#FFF" | ||
| [[File:Conquest Single Use.png]] Super Potion | | [[File:Conquest Single Use.png]] Super Potion | ||
| Line 228: | Line 235: | ||
====Blacksmith==== | ====Blacksmith==== | ||
[[File:Conquest background Blacksmith.png|right|thumb|Blacksmith]] | |||
[[File:Blacksmith level 1.png]][[File:Blacksmith level 2.png]][[File:Blacksmith level 3.png]] "''Combine two items to form a new item.''" | [[File:Blacksmith level 1.png]][[File:Blacksmith level 2.png]][[File:Blacksmith level 3.png]] "''Combine two items to form a new item.''" | ||
| Line 237: | Line 245: | ||
Available Item Recipes: | Available Item Recipes: | ||
{|class="sortable" style="background:#cdbc6c; border:2px solid #807544; {{roundy|10px}}" | {|class="roundtable sortable" style="background:#cdbc6c; border:2px solid #807544; {{roundy|10px}}" | ||
|- style="background: #f9e586;" | |||
! | ! style={{roundytl|10px}}" | Item Created | ||
! | ! Ingredient 1 | ||
! style= | ! Ingredient 2 | ||
! style={{roundytr|10px}}" | Blacksmith Level | |||
|- style="background:#FFF" | |- style="background:#FFF" | ||
| [[File:Conquest Equipment.png]] Dumbbell | | [[File:Conquest Equipment.png]] Dumbbell | ||
| Line 382: | Line 391: | ||
===Gold-generation locations=== | ===Gold-generation locations=== | ||
[[File:Conquest background Mine.png|right|thumb|Mining locations]] | |||
At a gold-generation location, gold is obtained. | At a gold-generation location, gold is obtained. | ||
| Line 432: | Line 442: | ||
===Energy-improvement locations=== | ===Energy-improvement locations=== | ||
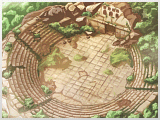
[[File:Conquest background arena.png|right|thumb|Arena locations]] | |||
At an Energy-improvement location, the {{DL|Statistic|Energy}} of visiting [[Warrior]]s' partner Pokémon is improved. | At an Energy-improvement location, the {{DL|Statistic|Energy}} of visiting [[Warrior]]s' partner Pokémon is improved. | ||
| Line 458: | Line 469: | ||
The Hermitage location is found only in [[Cragspur]], where it is operated by a Teacher. | The Hermitage location is found only in [[Cragspur]], where it is operated by a Teacher. | ||
{{-}} | |||
===Stat-improvement locations=== | ===Stat-improvement locations=== | ||
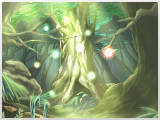
[[File:Conquest background Woodlands.png|right|thumb|Woodland locations]] | |||
At a stat-improvement location, the stats of visiting [[Warrior]]s are temporarily improved. | At a stat-improvement location, the stats of visiting [[Warrior]]s are temporarily improved. | ||
| Line 481: | Line 494: | ||
The Woodlands location is found only in [[Greenleaf]], where it is operated by a Mysterious Girl. | The Woodlands location is found only in [[Greenleaf]], where it is operated by a Mysterious Girl. | ||
{{-}} | |||
===Pokémon-summoning locations=== | ===Pokémon-summoning locations=== | ||
| Line 618: | Line 632: | ||
===Infinite Tower=== | ===Infinite Tower=== | ||
[[File:Conquest background Infinite Tower gate.png|right|thumb|200px|Infinite Tower entrance]] | |||
[[File:Infinite Tower.png]] | [[File:Infinite Tower.png]] | ||
The '''{{DL|Dragnor|Infinite Tower}}''' location temporarily appears in [[Dragnor]] as a venue for facing {{p|Rayquaza}} or (in the case of the game's initial story, {{DL|List of Pokémon Conquest stories|The Legend of Ransei}}) {{p|Arceus}} when certain conditions are met. | The '''{{DL|Dragnor|Infinite Tower}}''' location temporarily appears in [[Dragnor]] as a venue for facing {{p|Rayquaza}} or (in the case of the game's initial story, {{DL|List of Pokémon Conquest stories|The Legend of Ransei}}) {{p|Arceus}} when certain conditions are met. | ||
{{-}} | |||
===Sacred Ruins=== | ===Sacred Ruins=== | ||
Latest revision as of 07:21, 14 April 2024
Kingdom locations are facilities found within Ransei's kingdoms, featured in Pokémon Conquest. They can be visited by Warriors, who may enjoy one kingdom location service per month.
Clerk-operated kingdom locations
Clerk-operated locations do not feature combat, but instead provide some service, either for free or at the cost of some gold. One-to-six Warriors can be assigned to visit a clerk-operated location (limit depends on location). Additionally, the links between the visiting Warriors and their currently-equipped partner Pokémon will improve slightly after a visit.
For some locations, the Power, Charisma, or Wisdom stat of the visiting Warriors will affect the quality of the service - which stat is used (if any) will depend on the location.
Bank
![]() "Invest gold to upgrade locations."
"Invest gold to upgrade locations."
At a Bank location, the player may invest 500, 1000, or 2000 gold in one of the kingdom's other locations, developing it in order to increase its level.
Up to six Warriors can be sent at a time, and the accumulated value of their Wisdom stats determines, along with the value of the investment, the degree of development. Unlike most locations, Bank locations do not have levels.
Bank locations can be found in all of Ransei's 17 kingdoms, always operated by a Shopkeeper.
Mystery Springs
![]() "Change your Pokémon's Abilities using the power of the Mystery Springs."
"Change your Pokémon's Abilities using the power of the Mystery Springs."
At a Mystery Springs location, the Ability of a visiting Warriors partner Pokémon can be changed for a price of 3000 gold, or if the third Ability of the species is selected, 10000 gold.
Only one Warrior can be sent at a time. Unlike most locations, Mystery Springs locations do not have levels.
Mystery Springs locations can be found in the following kingdoms, always operated by a Shopkeeper:
Ponigiri Shop
![]()
![]()
![]() "Increase Pokémon's Energy by feeding them ponigiri."
"Increase Pokémon's Energy by feeding them ponigiri."
At a Ponigiri Shop location, the Energy of visiting Warriors' partner Pokémon is improved by ordering one of three Ponigiri services: Ponigiri, Red Ponigiri, or Blue Ponigiri.
Up to six Warriors can be sent at a time. The selection increases with the level (1-3) of the location:
| Ponigiri | Cost | Energy increase | Ponigiri Shop Level |
|---|---|---|---|
| Ponigiri | +1 Energy level | 1 | |
| Red Ponigiri | +2 Energy levels | 2 | |
| Blue Ponigiri | +3 Energy levels | 3 | |
After the Ponigiri is eaten, the Shopkeeper may offer more Ponigiri for consumption. If successful, the Pokémon's Energy will increase again, however if unsuccessful, the Pokémon's Energy will decrease to a minimum.
Note that, while Ponigiri, Red Ponigiri, and Blue Ponigiri all exist as single-use held items, their item form cannot be purchased here - any Ponigiri purchased at a Ponigiri Shop is consumed immediately.
Ponigiri Shop locations can be found in the following kingdoms, always operated by a Shopkeeper:
Shop
At a Shop location, items can be purchased.
Only one Warrior can be sent at a time, and their Charisma stat determines the price discount offered. The selection increases with the level (1-3) of the location, and the overall selection of a shop also varies by kingdom.
Shop locations can be found in the following kingdoms, always operated by a Merchant:
- Aurora
- Fontaine
- Ignis
- Violight
- Pugilis
- Chrysalia
- Terrera
- Cragspur
- Yaksha
- Viperia
- Avia
- Nixtorm
- Dragnor
Item-crafting locations
At an item-crafting location, players may select an item from a list, and attempt to create it by providing specifically requested items. If the combination fails, the player will instead obtain a pile of worthless junk. There is no limit to the amount of items that can be (attempted to be) combined per session.
Up to six Warriors can be sent at a time, and the accumulated value of their Charisma stats determines the success rate. The selection of items increases with the level (1-3) of the location.
Alchemist
![]()
![]()
![]() "Combine two items to form a new item."
"Combine two items to form a new item."
The items craftable at Alchemist locations are primarily single-use items.
Alchemist locations can be found in the following kingdoms:
Available Item Recipes:
Blacksmith
![]()
![]()
![]() "Combine two items to form a new item."
"Combine two items to form a new item."
The items craftable at Blacksmith locations are primarily equipment.
Blacksmith locations can be found in the following kingdoms:
Available Item Recipes:
Gold-generation locations
At a gold-generation location, gold is obtained.
Up to six Warriors can be sent at a time, and the accumulated value of their Power stats affects the amount of gold obtained. The amount of gold obtained also increases with the level (1-3) of the location.
An NPC may then ask the player whether they want to use one of three tools in the mining process. The names of the tools will vary by location, but generally the more-intense tools will increase the amount of gold more than the less-intense tools. However, the tool may break, resulting in no gold being obtained.
If a visiting Warrior has a Meowth as their partner Pokémon, the amount of gold is also multiplied by 1.5. Similarly, if a visiting Warrior has a Lucky Coin equipped, the amount of gold is multiplied by 1.2. These two effects can be stacked with each other, but not with multiple Meowth or multiple Lucky Coins.
- However, the abilities Bonanza and Fortune do NOT affect the amount of gold obtained.
Gold-generation locations are always operated by a Miner.
Gold Mine
At a Gold Mine location, an Adventurer may ask the player whether they want to use a tool in the mining process. Using gloves, a shovel or a hammer will increase the amount of gold obtained by 1.5, 2 and 3 times respectively, if successful.
Gold Mine locations can be found in the following kingdoms:
Open-Pit Mine
At an Open-Pit Mine location, an Adventurer may ask the player whether they want to use a tool in the mining process. Using a spade, a pickaxe or a drill will increase the amount of gold obtained by 1.5, 2 and 3 times respectively, if successful.
The Open-Pit Mine location is found only in Terrera.
River of Gold
![]()
![]()
![]() "Go panning in the River of Gold."
"Go panning in the River of Gold."
At a River of Gold location, an Explorer may ask the player whether they want to use a tool in the mining process. Using goggles, a sieve or a pump will increase the amount of gold obtained by 1.5, 2 and 3 times respectively, if successful.
The River of Gold location is found only in Fontaine.
Underground Mine
At an Underground Mine location, a Landowner may ask the player whether they want to use a tool in the mining process. Using a spade, a pickaxe or a drill will increase the amount of gold obtained by 1.5, 2 and 3 times respectively, if successful.
The Underground Mine location is found only in Yaksha.
Energy-improvement locations
At an Energy-improvement location, the Energy of visiting Warriors' partner Pokémon is improved.
Up to six Warriors can be sent at a time. The degree of Energy improvement increases with the level (1-3) of the location.
After this, the Warriors may be offered a second training session (name varies by location) so their Pokémon's Energy can remain increased for a longer time. However if this fails, the Energy of the Pokémon will decrease.
Arena
![]()
![]()
![]() "Train together with your Pokémon in order to raise their Energy."
"Train together with your Pokémon in order to raise their Energy."
At an Arena location, the second training session is called a "special training session".
The Arena location is found only in Pugilis, where it is operated by a Martial Artist.
Dragon Chamber
![]()
![]()
![]() "Train together with your Pokémon in order to raise their Energy."
"Train together with your Pokémon in order to raise their Energy."
At a Dragon Chamber location, the second training session is called a "top-level training session".
The Dragon Chamber location is found only in Dragnor, where it is operated by a Guide.
Hermitage
![]()
![]()
![]() "Train together with your Pokémon in order to raise their Energy."
"Train together with your Pokémon in order to raise their Energy."
At a Hermitage location, the second training session is called an "additional training session".
The Hermitage location is found only in Cragspur, where it is operated by a Teacher.
Stat-improvement locations
At a stat-improvement location, the stats of visiting Warriors are temporarily improved.
Up to six Warriors can be sent at a time, and the accumulated value of their Wisdom stats determine the degree of improvement. The degree of improvement also increases with the level (1-3) of the location, as does the duration of the stat increase.
After this, the Warriors may be given the option of visiting one of three additional spots (names vary by location) to further increase their Power, Wisdom, or Charisma.
Power Spot
![]()
![]()
![]() "Absorb a mysterious energy to temporarily improve Warriors' stats."
"Absorb a mysterious energy to temporarily improve Warriors' stats."
At a Power Spot location, the Warriors may be given the option of visiting a Glade of Power, Glade of Wisdom, or Glade of Charisma to further increase their Power, Wisdom, or Charisma stat respectively.
Power Spot locations can be found in the following kingdoms:
Woodlands
![]()
![]()
![]() "Relax in the forest to temporarily improve Warriors' stats."
"Relax in the forest to temporarily improve Warriors' stats."
At a Woodlands location, the Warriors may be given the option of visiting a Power Tree, Wisdom Tree, or Charisma Tree to further increase their Power, Wisdom, or Charisma stat respectively.
The Woodlands location is found only in Greenleaf, where it is operated by a Mysterious Girl.
Pokémon-summoning locations
At a Pokémon-summoning location, the amount of wild Pokémon gathering at the kingdom's wild Pokémon locations can be increased for the month.
Up to six Warriors can be sent at a time, and the accumulated value of their Wisdom stats affect the gathered amount.
The operating NPC will ask the visiting Warriors to perform a task, which will allow wild Pokémon to gather in the kingdom. They may also offer the Warriors an upgraded option which will increase the number of Pokémon gathered. However this option may fail, resulting in the location having no effect.
If the Warriors were successful at the location, 2-3 additional wild Pokémon will appear during battle at a kingdom's wild Pokémon location on the first turn. If the upgraded option was successful, 2-3 wild Pokémon will appear every turn for the first five turns instead.
Unlike most locations, Pokémon-summoning locations cannot be visited every month, as they will have to recharge.
Power Plant
![]()
![]()
![]() "Summon Pokémon using a mysterious electrical power."
"Summon Pokémon using a mysterious electrical power."
At a Power Plant location, the operating Plant Owner will ask the visiting Warriors to push a button, which will allow wild Pokémon to gather in the kingdom.
The Power Plant location is found only in Violight, where it is operated by a Plant Owner.
Windmill
![]()
![]()
![]() "Summon Pokémon using a mysterious electrical power."
"Summon Pokémon using a mysterious electrical power."
At a Windmill location, the operating Guard will ask the visiting Warriors to work the Windmill, which will allow wild Pokémon to gather in the kingdom.
The Windmill location is found only in Avia, where it is operated by a Guard.
Wild Pokémon kingdom locations
At a wild Pokémon location, visiting Warriors will engage in battle against every wild Pokémon and/or free Warrior currently there.
Up to six Warriors can be sent at a time. The variety of wild Pokémon that can be encountered increases with the level (1-3) of the location. Locations with the same name but in different kingdoms may have different species of Pokémon available.
Each level of each location type will have its own battle map layout.
Cave
At a Cave location, poison pools, magma pools, and boulders appear as obstacles.
Listed below is every Cave location in Ransei:
Farm
At a Farm location, trees and buildings appear as obstacles.
Listed below is every Farm location in Ransei:
Floating Rock
At a Floating Rock location, high cliffs and portals appear as obstacles.
Listed below is every Floating Rock location in Ransei:
- Ignis Floating Rock
- Violight Floating Rock
- Illusio Floating Rock
- Yaksha Floating Rock
- Spectra Floating Rock
Park
At a Park location, pitfall traps, stacked blocks, and pools of water appear as obstacles.
Listed below is every Park location in Ransei:
Ravine
At a Ravine location, waterfalls and large pools of water appear as obstacles.
Listed below is every Ravine location in Ransei:
Sky Garden
At a Sky Garden location, several gaps in the floor appear as obstacles.
Listed below is every Sky Garden location in Ransei:
Snowy Mountain
At a Snowy Mountain location, snowy or icy ground as well as steeply-sloped terrain appear as obstacles.
Listed below is every Snowy Mountain location in Ransei:
Event kingdom locations
Ancient Cave
The Ancient Cave location temporarily appears in Terrera as a venue for facing Groudon when certain conditions are met. The Ancient Cave uses the same battle map as the level 3 cave.
Icy Peak
The Icy Peak location temporarily appears in Nixtorm as a venue for facing Articuno when certain conditions are met. The Icy Peak uses the same battle map as the level 3 snowy mountain.
Idyllic Skies
The Idyllic Skies location temporarily appears in Violight as a venue for facing Zekrom when certain conditions are met. The Idyllic Skies uses the same battle map as the level 3 sky garden.
Infinite Tower
The Infinite Tower location temporarily appears in Dragnor as a venue for facing Rayquaza or (in the case of the game's initial story, The Legend of Ransei) Arceus when certain conditions are met.
Sacred Ruins
The Sacred Ruins location temporarily appears in Aurora as a venue for facing Arceus when certain conditions are met.
Mystery Rock
The Mystery Rock location temporarily appears in Illusio as a venue for facing Mewtwo when certain conditions are met. The Mystery Rock uses the same battle map as the level 3 floating rock.
Shrine of Resolve
The Shrine of Resolve location temporarily appears in Valora as a venue for facing Registeel when certain conditions are met. The Shrine of Resolve uses the same battle map as the level 3 cave.
Shrine of Truth
The Shrine of Truth location temporarily appears in Ignis as a venue for facing Reshiram when certain conditions are met. The Shrine of Truth uses the same battle map as the level 3 cave.
See also

|
This article is part of Project Sidegames, a Bulbapedia project that aims to write comprehensive articles on the Pokémon Sidegames. |


