Victory Road (Kanto): Difference between revisions
(→3F) |
Galarian Guy (talk | contribs) (→Layout) |
||
| (81 intermediate revisions by 30 users not shown) | |||
| Line 1: | Line 1: | ||
{{Infobox location | {{Infobox location | ||
|image= | |image=Victory Road PE.png | ||
|type=cave | |type=cave | ||
|mapdesc=A tunnel situated on <sc>Route</sc> 23. It earned its name because it must be traveled by all <sc>Trainers</sc> aiming for the top.{{sup/3|FRLG}}<br/>A road that tests Trainers aiming at the Pokémon League.{{sup/4|HGSS}} | |mapdesc=A tunnel situated on <sc>Route</sc> 23. It earned its name because it must be traveled by all <sc>Trainers</sc> aiming for the top.{{sup/3|FRLG}}<br/>A road that tests Trainers aiming at the Pokémon League.{{sup/4|HGSS}}<br>A cave that tests Trainers aiming to reach the Pokémon League at the summit.{{sup/7|PE}} | ||
|location_name=Victory Road | |location_name=Victory Road | ||
|japanese_name=チャンピオンロード | |japanese_name=チャンピオンロード | ||
|translated_name=Champion Road | |translated_name=Champion Road | ||
|location={{rt|23|Kanto}} ( | |location={{rt|23|Kanto}} (Generations {{Gen|I}}, {{Gen|III}}, and {{Gen|VII}})<br>Between [[Pokémon League Reception Gate]] and {{rt|23|Kanto}} ([[Generation II]])<br>Between [[Pokémon League Reception Gate]] and [[Indigo Plateau]] ([[Generation IV]]) | ||
|region=Kanto | |region=Kanto | ||
|generation={{Gen|I}}, {{Gen|II}}, {{Gen|III}}, {{Gen|IV}} | |generation={{Gen|I}}, {{Gen|II}}, {{Gen|III}}, {{Gen|IV}}, {{Gen|VII}} | ||
|map=Kanto Victory Road Map.png | |map=Kanto Victory Road Map.png | ||
}} | }} | ||
'''Victory Road''' (Japanese: '''チャンピオンロード''' ''Champion Road'') is a tunnel situated on {{rt|23|Kanto}}. It earned its name because it must be traveled by all {{pkmn|Trainer}}s aiming for the top. Its other end opens up in [[Indigo Plateau]] and the [[Pokémon League]]. Only Trainers with the eight [[Kanto]] or [[Johto]] [[Badge]]s are allowed to enter it. | '''Victory Road''' (Japanese: '''チャンピオンロード''' ''Champion Road'') is a tunnel situated on {{rt|23|Kanto}}. It earned its name because it must be traveled by all {{pkmn|Trainer}}s aiming for the top. Its other end opens up in [[Indigo Plateau]] and the [[Pokémon League]]. Only Trainers with the eight [[Kanto]] or [[Johto]] [[Badge]]s are allowed to enter it. | ||
== | ==Role== | ||
Victory Road has three floors. To reach the other end of the tunnel in Generations I, III and | Victory Road has three floors. To reach the other end of the tunnel in [[Generation I|Generations I]], {{gen|III}}, {{gen|IV}}, and {{gen|VII}}, a series of puzzles which involve using {{m|Strength}}{{sup/1}}{{sup/3|FRLG}}{{sup/4|HGSS}} or [[Secret Technique|Strong Push]]{{sup/7|PE}} to move [[Movable boulder|boulders]] need to be solved. | ||
In [[ | In Generation I and [[Pokémon: Let's Go, Pikachu! and Let's Go, Eevee!]], Victory Road is where the [[Legendary Pokémon]] {{p|Moltres}} can be found. In {{game|FireRed and LeafGreen|s}}, it is instead found at [[One Island]]'s [[Mt. Ember]] and is found in [[Mt. Silver Cave]] in {{game|HeartGold and SoulSilver|s}}. | ||
A [[Move Tutor]] at the very end of Victory Road in Pokémon FireRed and LeafGreen offers to teach a Pokémon the [[move]] {{m|Double-Edge}}. | A [[Move Tutor]] at the very end of Victory Road in Pokémon FireRed and LeafGreen offers to teach a Pokémon the [[move]] {{m|Double-Edge}}. | ||
In Pokémon: Let's Go, Pikachu! and Let's Go, Eevee!, an [[Officer Jenny]] is present of 2F, healing the {{player}}'s Pokémon if talked to. | |||
In some promotional artwork for [[Generation II]], Victory Road is depicted as being part of Mt. Silver, but this is not confirmed. | In some promotional artwork for [[Generation II]], Victory Road is depicted as being part of Mt. Silver, but this is not confirmed. | ||
According to {{ga|Silver}} in Pokémon HeartGold and SoulSilver, the reason for | In Generations II and {{gen|IV}}, there are no Trainers in Victory Road. According to {{ga|Silver}} in Pokémon HeartGold and SoulSilver, the reason for this is because he defeated them all. | ||
In Pokémon HeartGold and SoulSilver, after | In Pokémon HeartGold and SoulSilver, after entering the [[Hall of Fame]] and boarding the [[S.S. Aqua]], the {{pkmn|battle}} music in Victory Road (as well as in the [[Tohjo Falls]], {{rt|26|Kanto|Routes 26}}, {{rtn|27|Kanto}}, and {{rtn|28|Kanto}}) changes from the Johto style to the Kanto style. This change was not present in Generation II. | ||
==Items== | |||
====1F==== | |||
{{Itlisth|cave}} | {{Itlisth|cave}} | ||
{{Itemlist|Ultra Ball|On a rock near the center of the floor ''(hidden)''|FR=yes|LG=yes|display={{ | {{Itemlist|Ultra Ball|On a rock near the center of the floor ''(hidden)''|FR=yes|LG=yes}} | ||
{{Itemlist|Candy Yellow|Reward for defeating {{tc|Coach Trainer}} Alemana|LP=yes|display={{DL|Candy|Pikachu Candy}} ×10}} | |||
{{Itemlist|Candy Brown|Reward for defeating {{tc|Coach Trainer}} Alemana|LE=yes|display={{DL|Candy|Eevee Candy}} ×10}} | |||
{{Itemlist|Rare Candy|In the north area of the floor|R=yes|B=yes|Y=yes|FR=yes|LG=yes}} | {{Itemlist|Rare Candy|In the north area of the floor|R=yes|B=yes|Y=yes|FR=yes|LG=yes}} | ||
{{Itemlist|Leaf Stone|In the north area of the floor|LP=yes|LE=yes}} | |||
{{Itemlist|TM Flying|In the north area of the floor|R=yes|B=yes|Y=yes|display={{TM|43|Sky Attack}}}} | {{Itemlist|TM Flying|In the north area of the floor|R=yes|B=yes|Y=yes|display={{TM|43|Sky Attack}}}} | ||
{{Itemlist|TM Dragon|In the north area of the floor|FR=yes|LG=yes|display={{TM|02|Dragon Claw}}}} | {{Itemlist|TM Dragon|In the north area of the floor|FR=yes|LG=yes|display={{TM|02|Dragon Claw}}}} | ||
{{Itemlist|TM Rock VI|In the north area of the floor|LP=yes|LE=yes|display={{TM|56|Stealth Rock}}}} | |||
{{Itemlist|Full Restore|On the rock two squares east of [[TM02]] ''(hidden)''|FR=yes|LG=yes}} | {{Itemlist|Full Restore|On the rock two squares east of [[TM02]] ''(hidden)''|FR=yes|LG=yes}} | ||
{{Itemlist|Ultra Ball|In the northwest corner of the floor|LP=yes|LE=yes|display=[[Ultra Ball]] ×3}} | |||
{{Itemlist/6|Health Candy|Mighty Candy|Tough Candy|Smart Candy|Courage Candy|Quick Candy|On a rock in the middle of the floor ''(hidden)'' (daily) (item determined randomly)|LP=yes|LE=yes}} | |||
{{Itemlist|Full Heal| | {{Itemlist|Full Heal| | ||
* On a rock west of the entrance ''(hidden)'' | * On a rock west of the entrance ''(hidden)'' | ||
| Line 40: | Line 47: | ||
{{Itemlist|Max Revive|In the northeast corner|G=yes|S=yes|C=yes}} | {{Itemlist|Max Revive|In the northeast corner|G=yes|S=yes|C=yes}} | ||
{{Itemlist|Potion|North of the ledge north of the entrance|HG=yes|SS=yes}} | {{Itemlist|Potion|North of the ledge north of the entrance|HG=yes|SS=yes}} | ||
{{Itemlist|Full Heal|On the L-shaped raised section west of the Potion ''(hidden)'' | {{Itemlist|Full Heal| | ||
* On the L-shaped raised section west of the Potion ''(hidden)'' | |||
* Underneath the bridge|HG=yes|SS=yes|display=[[Full Heal]] ×2}} | |||
{{Itemlist|Max Potion|West of the L-shaped raised section ''(hidden)''|HG=yes|SS=yes}} | {{Itemlist|Max Potion|West of the L-shaped raised section ''(hidden)''|HG=yes|SS=yes}} | ||
{{Itemlist|Max Revive|Amid the jumble of rocks at the northern end|HG=yes|SS=yes}} | {{Itemlist|Max Revive|Amid the jumble of rocks at the northern end|HG=yes|SS=yes}} | ||
{{Itlistfoot|cave}} | {{Itlistfoot|cave}} | ||
====2F==== | |||
{{Itlisth|cave}} | {{Itlisth|cave}} | ||
{{Itemlist|TM Normal| | {{Itemlist|TM Normal|Southwest of the {{tc|Black Belt}}|R=yes|B=yes|Y=yes|display={{TM|05|Mega Kick}}}} | ||
{{Itemlist|TM Ground| | {{Itemlist|TM Ground|Southwest of {{tc|Black Belt}} Daisuke|FR=yes|LG=yes|display={{TM|37|Sandstorm}}}} | ||
{{Itemlist|TM Grass VI|Southwest of {{tc|Black Belt}} Daisuke|LP=yes|LE=yes|display={{TM|45|Solar Beam}}}} | |||
{{Itemlist|Full Heal|Southwest of the {{tc|Tamer}}|R=yes|B=yes|Y=yes|FR=yes|LG=yes}} | {{Itemlist|Full Heal|Southwest of the {{tc|Tamer}}|R=yes|B=yes|Y=yes|FR=yes|LG=yes}} | ||
{{Itemlist|TM Fighting|In the northeast area of the floor|R=yes|B=yes|Y=yes|display={{TM|17|Submission}}}} | {{Itemlist|TM Fighting|In the northeast area of the floor|R=yes|B=yes|Y=yes|display={{TM|17|Submission}}}} | ||
{{Itemlist|TM Ice| | {{Itemlist|TM Ice|In the northeast area of the floor|FR=yes|LG=yes|display={{TM|07|Hail}}}} | ||
{{Itemlist|TM Fighting VI|In the northeast area of the floor|LP=yes|LE=yes|display={{TM|49|Superpower}}}} | |||
{{Itemlist|Guard Spec.|In the northwest area of the floor|R=yes|B=yes|Y=yes|FR=yes|LG=yes}} | {{Itemlist|Guard Spec.|In the northwest area of the floor|R=yes|B=yes|Y=yes|FR=yes|LG=yes}} | ||
{{Itemlist|Ultra Ball|One square | {{Itemlist|PP Max|In the northwest area of the floor, south of {{p|Moltres}}|LP=yes|LE=yes}} | ||
{{Itemlist|Pretty Wing| On the stone pillar west of Moltres ''(hidden)'' (daily)|LP=yes|LE=yes}} | |||
{{Itemlist/6|Health Candy|Mighty Candy|Tough Candy|Smart Candy|Courage Candy|Quick Candy|On a torch by the exit ''(hidden)'' (daily)|LP=yes|LE=yes}} | |||
{{Itemlist|Ultra Ball|One square east of the {{tc|Poké Maniac}}, on a rock ''(hidden)''|R=yes|B=yes|Y=yes}} | |||
{{Itemlist|Full Restore|One square west of the ladder west of the exit, on a rock ''(hidden)''|R=yes|B=yes|Y=yes}} | {{Itemlist|Full Restore|One square west of the ladder west of the exit, on a rock ''(hidden)''|R=yes|B=yes|Y=yes}} | ||
{{Itemlist|Full Restore|On the northeast ledge|G=yes|S=yes|C=yes}} | {{Itemlist|Full Restore|On the northeast ledge|G=yes|S=yes|C=yes}} | ||
| Line 62: | Line 75: | ||
{{Itemlist|HP Up|On the south ledge|C=yes}} | {{Itemlist|HP Up|On the south ledge|C=yes}} | ||
{{Itemlist|Max Revive|On a stalagmite east of the ladder from 1F ''(hidden)''|HG=yes|SS=yes}} | {{Itemlist|Max Revive|On a stalagmite east of the ladder from 1F ''(hidden)''|HG=yes|SS=yes}} | ||
{{Itemlist|Ultra Ball|On landing spot beneath first hole ''(hidden)''|HG=yes|SS=yes | {{Itemlist|Ultra Ball|On landing spot beneath first hole ''(hidden)''|HG=yes|SS=yes}} | ||
{{Itemlist|Full Restore|West of second ladder|HG=yes|SS=yes}} | {{Itemlist|Full Restore|West of second ladder|HG=yes|SS=yes}} | ||
{{Itemlist|PP Up|On landing spot beneath the fourth hole ''(hidden)''|HG=yes|SS=yes}} | {{Itemlist|PP Up|On landing spot beneath the fourth hole ''(hidden)''|HG=yes|SS=yes}} | ||
| Line 69: | Line 82: | ||
{{Itlistfoot|cave}} | {{Itlistfoot|cave}} | ||
====3F==== | |||
{{Itlisth|cave}} | {{Itlisth|cave}} | ||
{{Itemlist|Max Revive|In the northeast area of the floor|R=yes|B=yes|Y=yes|FR=yes|LG=yes}} | {{Itemlist|Max Revive|In the northeast area of the floor|R=yes|B=yes|Y=yes|FR=yes|LG=yes}} | ||
| Line 75: | Line 88: | ||
{{Itemlist|TM Fire|In the northwest area of the floor|FR=yes|LG=yes|display={{TM|50|Overheat}}}} | {{Itemlist|TM Fire|In the northwest area of the floor|FR=yes|LG=yes|display={{TM|50|Overheat}}}} | ||
{{Itemlist|TM Ice VI|In the northwest area of the floor|LP=yes|LE=yes|display={{TM|51|Blizzard}}}} | {{Itemlist|TM Ice VI|In the northwest area of the floor|LP=yes|LE=yes|display={{TM|51|Blizzard}}}} | ||
{{Itemlist| | {{Itemlist|Fresh Water|Northeast of [[Officer Jenny]], in the dripping water on the north wall ''(hidden)''|LP=yes|LE=yes}} | ||
{{Itemlist|Hyper Potion|On a stalagmite | {{Itemlist|Max Potion|Southeast of Officer Jenny, on the plateau|LP=yes|LE=yes}} | ||
{{Itemlist|Ultra Ball|West of second ladder|HG=yes|SS=yes | {{Itemlist|Full Restore|Near the southeast corner of the floor|LP=yes|LE=yes}} | ||
{{Itemlist|Zinc|Behind a | {{Itemlist|Golden Nanab Berry|In the southern area, northeast of the pair of {{tc|Ace Trainer}}s|LP=yes|LE=yes|display=[[Golden Nanab Berry]] ×5}} | ||
{{Itemlist/6|Health Candy|Mighty Candy|Tough Candy|Smart Candy|Courage Candy|Quick Candy|On a rock near the centre of the floor, southeast of Ace Trainer Alexa ''(hidden)'' (daily)|LP=yes|LE=yes}} | |||
{{Itemlist|TM Dragon VI|Reward for defeating {{tc|Coach Trainer}} Ryan|LP=yes|LE=yes|display={{TM|39|Outrage}}}} | |||
{{Itemlist|Hyper Potion|On a stalagmite northeast of the first hole ''(hidden)''|HG=yes|SS=yes}} | |||
{{Itemlist|Ultra Ball|West of second ladder|HG=yes|SS=yes}} | |||
{{Itemlist|Zinc|Behind a [[breakable rock]] west of the Ultra Ball ''(hidden)''|HG=yes|SS=yes}} | |||
{{Itemlist|Rare Candy|Northeast of the last hole|HG=yes|SS=yes}} | {{Itemlist|Rare Candy|Northeast of the last hole|HG=yes|SS=yes}} | ||
{{Itemlist|TM Dark|Behind three | {{Itemlist|TM Dark|Behind three breakable rocks south of the exit (requires {{m|Rock Smash}})|HG=yes|SS=yes|display={{TM|79|Dark Pulse}}}} | ||
{{Itlistfoot|cave}} | {{Itlistfoot|cave}} | ||
====Rock==== | |||
{{Itlisth|cave}} | {{Itlisth|cave}} | ||
{{Itemlist| | {{Itemlist/3|Tiny Mushroom|Big Mushroom|Fire Stone| | ||
*1F, Sometimes found by the {{player}}'s {{pkmn2|walking}} {{type|Rock}} Pokémon from a crevice in a rock in the northeast corner (Item determined randomly) | |||
*3F, Sometimes found by the player's walking Rock-type Pokémon from a crevice in a rock in along the north wall (Item determined randomly)|LP=yes|LE=yes}} | |||
{{ | |||
{{Itlistfoot|cave}} | {{Itlistfoot|cave}} | ||
=== | ====Rock Smash==== | ||
====Generation I | If the rock contains an item, the game will pick one of the following: | ||
{{Itlisth|cave}} | |||
{{Itemlist|Max Ether|Found by smashing [[breakable rock]]s (25%)|HG=yes|SS=yes}} | |||
{{Itemlist|Revive|Found by smashing [[breakable rock]]s (20%)|HG=yes|SS=yes}} | |||
{{Itemlist/5|Red Shard|Blue Shard|Yellow Shard|Green Shard|Heart Scale|Found by smashing [[breakable rock]]s (10% each)|HG=yes|SS=yes}} | |||
{{Itemlist|Star Piece|Found by smashing [[breakable rock]]s (5%)|HG=yes|SS=yes}} | |||
{{Itlistfoot|cave}} | |||
==Pokémon== | |||
===Generation I=== | |||
====1F==== | |||
{{catch/header|cave|no}} | {{catch/header|cave|no}} | ||
{{catch/entry1|041|Zubat|yes|yes|no|Cave|22|15%|type1=Poison|type2=Flying}} | {{catch/entry1|041|Zubat|yes|yes|no|Cave|22|15%|type1=Poison|type2=Flying}} | ||
| Line 113: | Line 135: | ||
{{catch/footer|cave}} | {{catch/footer|cave}} | ||
====2F==== | |||
{{catch/header|cave|no}} | {{catch/header|cave|no}} | ||
{{catch/entry1|041|Zubat|yes|yes|no|Cave|26|15%|type1=Poison|type2=Flying}} | {{catch/entry1|041|Zubat|yes|yes|no|Cave|26|15%|type1=Poison|type2=Flying}} | ||
| Line 129: | Line 151: | ||
{{catch/entry1|095|Onix|no|no|yes|Cave|45, 47|10%|type1=Rock|type2=Ground}} | {{catch/entry1|095|Onix|no|no|yes|Cave|45, 47|10%|type1=Rock|type2=Ground}} | ||
{{catch/entry1|105|Marowak|yes|yes|no|Cave|40|4%|type1=Ground}} | {{catch/entry1|105|Marowak|yes|yes|no|Cave|40|4%|type1=Ground}} | ||
{{catch/footer|cave}} | {{catch/footer|cave}} | ||
====3F==== | |||
{{catch/header|cave|no}} | {{catch/header|cave|no}} | ||
{{catch/entry1|041|Zubat|yes|yes|no|Cave|22|15%|type1=Poison|type2=Flying}} | {{catch/entry1|041|Zubat|yes|yes|no|Cave|22|15%|type1=Poison|type2=Flying}} | ||
| Line 150: | Line 170: | ||
{{catch/footer|cave}} | {{catch/footer|cave}} | ||
===Generation II=== | |||
''In the Japanese and Korean games, {{p|Ursaring}} appears only in Silver, while {{p|Donphan}} appears only in Gold.'' | ''In the Japanese and Korean games, {{p|Ursaring}} appears only in Silver, while {{p|Donphan}} appears only in Gold.'' | ||
{{catch/header|cave|yes}} | {{catch/header|cave|yes}} | ||
| Line 169: | Line 189: | ||
{{catch/footer|cave}} | {{catch/footer|cave}} | ||
===Generation III=== | |||
====1F and 3F==== | |||
{{catch/header|cave|no}} | {{catch/header|cave|no}} | ||
{{catch/entryfl|024|Arbok|yes|no|Cave|44|5%|type1=Poison}} | {{catch/entryfl|024|Arbok|yes|no|Cave|44|5%|type1=Poison}} | ||
| Line 183: | Line 203: | ||
{{catch/footer|cave}} | {{catch/footer|cave}} | ||
====2F==== | |||
{{catch/header|cave|no}} | {{catch/header|cave|no}} | ||
{{catch/entryfl|024|Arbok|yes|no|Cave|46|5%|type1=Poison}} | {{catch/entryfl|024|Arbok|yes|no|Cave|46|5%|type1=Poison}} | ||
| Line 197: | Line 217: | ||
{{catch/footer|cave}} | {{catch/footer|cave}} | ||
===Generation IV=== | |||
{{catch/header|cave|4}} | {{catch/header|cave|4}} | ||
{{catch/entryhs|042|Golbat|yes|yes|Cave|32|all=30%|type1=Poison|type2=Flying}} | {{catch/entryhs|042|Golbat|yes|yes|Cave|32|all=30%|type1=Poison|type2=Flying}} | ||
| Line 203: | Line 223: | ||
{{catch/entryhs|232|Donphan|yes|no|Cave|33|all=20%|type1=Ground}} | {{catch/entryhs|232|Donphan|yes|no|Cave|33|all=20%|type1=Ground}} | ||
{{catch/entryhs|217|Ursaring|no|yes|Cave|33|all=20%|type1=Normal}} | {{catch/entryhs|217|Ursaring|no|yes|Cave|33|all=20%|type1=Normal}} | ||
{{catch/entryhs|095|Onix|yes|yes|Cave|34 | {{catch/entryhs|095|Onix|yes|yes|Cave|34, 36|all=15%|type1=Rock|type2=Ground}} | ||
{{catch/entryhs|111|Rhyhorn|yes|yes|Cave|35|all=5%|type1=Ground|type2=Rock}} | {{catch/entryhs|111|Rhyhorn|yes|yes|Cave|35|all=5%|type1=Ground|type2=Rock}} | ||
{{catch/div|cave|Rock Smash}} | {{catch/div|cave|Rock Smash}} | ||
{{catch/entryhs|074|Geodude|yes|yes|Rock Smash|24-32|all= | {{catch/entryhs|074|Geodude|yes|yes|Rock Smash|24-32|all=80%|type1=Rock|type2=Ground}} | ||
{{catch/entryhs|075|Graveler|yes|yes|Rock Smash|30-33|all= | {{catch/entryhs|075|Graveler|yes|yes|Rock Smash|30-33|all=20%|type1=Rock|type2=Ground}} | ||
{{catch/div|cave|Special}} | {{catch/div|cave|Special}} | ||
{{catch/entryhs|296|Makuhita|yes|yes|Hoenn|33|all=20%|type1=Fighting}} | {{catch/entryhs|296|Makuhita|yes|yes|Hoenn|33|all=20%|type1=Fighting}} | ||
| Line 215: | Line 235: | ||
{{catch/footer|cave}} | {{catch/footer|cave}} | ||
=== | ===Generation VII=== | ||
====Generation I==== | ====1F==== | ||
{{catch/header|cave|no}} | |||
{{catch/entrype|041|Zubat|yes|yes|Cave|41-46|10%|type1=Poison|type2=Flying}} | |||
{{catch/entrype|042|Golbat|yes|yes|Cave|41-46|15%|type1=Poison|type2=Flying}} | |||
{{catch/entrype|066|Machop|yes|yes|Cave|41-46|10%|type1=Fighting}} | |||
{{catch/entrype|067|Machoke|yes|yes|Cave|41-46|15%|type1=Fighting}} | |||
{{catch/entrype|074|Geodude|yes|yes|Cave|41-46|10%|type1=Rock|type2=Ground}} | |||
{{catch/entrype|075|Graveler|yes|yes|Cave|41-46|15%|type1=Rock|type2=Ground}} | |||
{{catch/entrype|095|Onix|yes|yes|Cave|41-46|10%|type1=Rock|type2=Ground}} | |||
{{catch/entrype|111|Rhyhorn|yes|yes|Cave|41-46|10%|type2=Rock|type1=Ground}} | |||
{{catch/entrype|112|Rhydon|yes|yes|Cave|41-46|5%|type2=Rock|type1=Ground}} | |||
{{catch/div|cave|Rare Spawns}} | |||
{{Catch/entrype|113|Chansey|yes|yes|Cave|41-46|-}} | |||
{{catch/footer|cave}} | |||
====2F==== | |||
{{catch/header|cave|no}} | |||
{{catch/entrype|041|Zubat|yes|yes|Cave|41-46|10%|type1=Poison|type2=Flying}} | |||
{{catch/entrype|042|Golbat|yes|yes|Cave|41-46|15%|type1=Poison|type2=Flying}} | |||
{{catch/entrype|066|Machop|yes|yes|Cave|41-46|10%|type1=Fighting}} | |||
{{catch/entrype|067|Machoke|yes|yes|Cave|41-46|15%|type1=Fighting}} | |||
{{catch/entrype|074|Geodude|yes|yes|Cave|41-46|10%|type1=Rock|type2=Ground}} | |||
{{catch/entrype|075|Graveler|yes|yes|Cave|41-46|15%|type1=Rock|type2=Ground}} | |||
{{catch/entrype|095|Onix|yes|yes|Cave|41-46|10%|type1=Rock|type2=Ground}} | |||
{{catch/entrype|111|Rhyhorn|yes|yes|Cave|41-46|10%|type2=Rock|type1=Ground}} | |||
{{catch/entrype|112|Rhydon|yes|yes|Cave|41-46|5%|type2=Rock|type1=Ground}} | |||
{{catch/div|cave|Rare Spawns}} | |||
{{Catch/entrype|106|Hitmonlee|yes|yes|Cave|41-46|-|type1=Fighting}} | |||
{{catch/footer|cave}} | |||
====3F==== | |||
{{catch/header|cave|no}} | |||
{{catch/entrype|041|Zubat|yes|yes|Cave|41-46|10%|type1=Poison|type2=Flying}} | |||
{{catch/entrype|042|Golbat|yes|yes|Cave|41-46|15%|type1=Poison|type2=Flying}} | |||
{{catch/entrype|066|Machop|yes|yes|Cave|41-46|10%|type1=Fighting}} | |||
{{catch/entrype|067|Machoke|yes|yes|Cave|41-46|15%|type1=Fighting}} | |||
{{catch/entrype|074|Geodude|yes|yes|Cave|41-46|10%|type1=Rock|type2=Ground}} | |||
{{catch/entrype|075|Graveler|yes|yes|Cave|41-46|15%|type1=Rock|type2=Ground}} | |||
{{catch/entrype|095|Onix|yes|yes|Cave|41-46|10%|type1=Rock|type2=Ground}} | |||
{{catch/entrype|111|Rhyhorn|yes|yes|Cave|41-46|10%|type2=Rock|type1=Ground}} | |||
{{catch/entrype|112|Rhydon|yes|yes|Cave|41-46|5%|type2=Rock|type1=Ground}} | |||
{{catch/div|cave|Rare Spawns}} | |||
{{Catch/entrype|107|Hitmonchan|yes|yes|Cave|41-46|-|type1=Fighting}} | |||
{{catch/footer|cave}} | |||
==Special encounters== | |||
===Generation I=== | |||
A {{p|Moltres}} appears on 2F on the first visit. | |||
{| | |||
|- style="vertical-align:top" | |||
|{{Pokémon/1 | |||
|game=Blue | |||
|ndex=146 | |||
|pokemon=Moltres | |||
|type1=Fire | |||
|type2=Flying | |||
|level=50 | |||
|move1=Peck|move1type=Flying | |||
|move2=Fire Spin|move2type=Fire}} | |||
|} | |||
===Generation VII=== | |||
A {{p|Moltres}} appears on 2F on the first visit. If run from, it respawns after entering the [[Hall of Fame]]. | |||
{| | |||
|- style="vertical-align:top" | |||
|{{Pokémon/7/LG | |||
|ndex=146 | |||
|pokemon=Moltres | |||
|type1=Fire | |||
|type2=Flying | |||
|level=50 | |||
|move1=Air Slash|move1type=Flying|move1cat=Special | |||
|move2=Flamethrower|move2type=Fire|move2cat=Special | |||
|move3=Agility|move3type=Psychic|move3cat=Status | |||
|move4=Heat Wave|move4type=Fire|move4cat=Special}} | |||
|} | |||
==Trainers== | |||
===Generation I=== | |||
{{Trainerheader|cave}} | {{Trainerheader|cave}} | ||
{{Trainerentry|Spr RG Cooltrainer F.png|Cooltrainer||1540|2|053|Persian||44||038|Ninetales||44|||}} | {{Trainerentry|Spr RG Cooltrainer F.png|game=1|Cooltrainer||1540|2|053|Persian||44||038|Ninetales||44|||}} | ||
{{Trainerdiv|cave}} | {{Trainerdiv|cave}} | ||
{{Trainerentry|Spr RG Cooltrainer M.png|Cooltrainer||1470|4|002|Ivysaur||42||008|Wartortle||42||005|Charmeleon||42||006|Charizard||42|||}} | {{Trainerentry|Spr RG Cooltrainer M.png|game=1|Cooltrainer||1470|4|002|Ivysaur||42||008|Wartortle||42||005|Charmeleon||42||006|Charizard||42|||}} | ||
{{Trainerdiv|cave}} | {{Trainerdiv|cave}} | ||
{{Trainerentry|Spr RG Blackbelt.png|Blackbelt||1075|3|067|Machoke||43||066|Machop||43||067|Machoke||43|||}} | {{Trainerentry|Spr RG Blackbelt.png|game=1|Blackbelt||1075|3|067|Machoke||43||066|Machop||43||067|Machoke||43|||}} | ||
{{Trainerdiv|cave}} | {{Trainerdiv|cave}} | ||
{{Trainerentry|Spr RG Juggler.png|Juggler||1435|4|096|Drowzee||41||097|Hypno||41||064|Kadabra||41||064|Kadabra||41|||}} | {{Trainerentry|Spr RG Juggler.png|game=1|Juggler||1435|4|096|Drowzee||41||097|Hypno||41||064|Kadabra||41||064|Kadabra||41|||}} | ||
{{Trainerdiv|cave}} | {{Trainerdiv|cave}} | ||
{{Trainerentry|Spr RG Tamer.png|Tamer||1760|2|053|Persian||44||055|Golduck||44|||}} | {{Trainerentry|Spr RG Tamer.png|game=1|Tamer||1760|2|053|Persian||44||055|Golduck||44|||}} | ||
{{Trainerdiv|cave}} | {{Trainerdiv|cave}} | ||
{{Trainerentry|Spr RG Juggler.png|Juggler||1680|1|122|Mr. Mime||48|||}} | {{Trainerentry|Spr RG Juggler.png|game=1|Juggler||1680|1|122|Mr. Mime||48|||}} | ||
{{Trainerdiv|cave}} | {{Trainerdiv|cave}} | ||
{{Trainerentry|Spr RG PokéManiac.png|PokéManiac||2000|3|005|Charmeleon||40||131|Lapras||40||108|Lickitung||40|||}} | {{Trainerentry|Spr RG PokéManiac.png|game=1|PokéManiac||2000|3|005|Charmeleon||40||131|Lapras||40||108|Lickitung||40|||}} | ||
{{Trainerdiv|cave}} | {{Trainerdiv|cave}} | ||
{{Trainerentry|Spr RG Cooltrainer M.png|Cooltrainer||1505|3|103|Exeggutor||43||091|Cloyster||43||059|Arcanine||43|||}} | {{Trainerentry|Spr RG Cooltrainer M.png|game=1|Cooltrainer||1505|3|103|Exeggutor||43||091|Cloyster||43||059|Arcanine||43|||}} | ||
{{Trainerdiv|cave}} | {{Trainerdiv|cave}} | ||
{{Trainerentry|Spr RG Cooltrainer F.png|Cooltrainer||1505|3|047|Parasect||43||087|Dewgong||43||113|Chansey||43|||}} | {{Trainerentry|Spr RG Cooltrainer F.png|game=1|Cooltrainer||1505|3|047|Parasect||43||087|Dewgong||43||113|Chansey||43|||}} | ||
{{Trainerdiv|cave}} | {{Trainerdiv|cave}} | ||
{{Trainerentry|Spr RG Cooltrainer M.png|Cooltrainer||1505|3|099|Kingler||43||073|Tentacruel||43||009|Blastoise||43|||}} | {{Trainerentry|Spr RG Cooltrainer M.png|game=1|Cooltrainer||1505|3|099|Kingler||43||073|Tentacruel||43||009|Blastoise||43|||}} | ||
{{Trainerdiv|cave}} | {{Trainerdiv|cave}} | ||
{{Trainerentry|Spr RG Cooltrainer F.png|Cooltrainer||1505|3|069|Bellsprout||43||070|Weepinbell||43||071|Victreebel||43|||}} | {{Trainerentry|Spr RG Cooltrainer F.png|game=1|Cooltrainer||1505|3|069|Bellsprout||43||070|Weepinbell||43||071|Victreebel||43|||}} | ||
{{trainerfooter|cave|I}} | {{trainerfooter|cave|I}} | ||
===Generation II=== | |||
{{MSP|152|Chikorita}} If the {{player}} chose {{p|Chikorita}}: | {{MSP/3|152|Chikorita}} If the {{player}} chose {{p|Chikorita}}: | ||
{{Party/Single | {{Party/Single | ||
|color={{silver color}} | |color={{silver color}} | ||
| Line 321: | Line 419: | ||
{{Party/Footer}} | {{Party/Footer}} | ||
{{MSP|155|Cyndaquil}} If the {{player}} chose {{p|Cyndaquil}}: | {{MSP/3|155|Cyndaquil}} If the {{player}} chose {{p|Cyndaquil}}: | ||
{{Party/Single | {{Party/Single | ||
|color={{silver color}} | |color={{silver color}} | ||
| Line 359: | Line 457: | ||
|ndex=082 | |ndex=082 | ||
|pokemon=Magneton | |pokemon=Magneton | ||
|level= | |level=34|type1=Electric|type2=Steel | ||
|move1=SonicBoom|move1type=Normal | |move1=SonicBoom|move1type=Normal | ||
|move2=Thunder Wave|move2type=Electric | |move2=Thunder Wave|move2type=Electric | ||
| Line 400: | Line 498: | ||
{{Party/Footer}} | {{Party/Footer}} | ||
{{MSP|158|Totodile}} If the {{player}} chose {{p|Totodile}}: | {{MSP/3|158|Totodile}} If the {{player}} chose {{p|Totodile}}: | ||
{{Party/Single | {{Party/Single | ||
|color={{silver color}} | |color={{silver color}} | ||
| Line 479: | Line 577: | ||
{{Party/Footer}} | {{Party/Footer}} | ||
===Generation III=== | |||
{{trainerheader|cave}} | {{trainerheader|cave}} | ||
{{Trainerentry|Spr FRLG Cooltrainer F.png|Cooltrainer|Naomi|1512|5|053|Persian|♀|42|None|077|Ponyta|♀|42|None|078|Rapidash|♀|42|None|037|Vulpix|♀|42|None|038|Ninetales|♀|42|None|36=カナコ|37=Kanako}} | {{Trainerentry|Spr FRLG Cooltrainer F.png|Cooltrainer|Naomi|1512|5|053|Persian|♀|42|None|077|Ponyta|♀|42|None|078|Rapidash|♀|42|None|037|Vulpix|♀|42|None|038|Ninetales|♀|42|None|36=カナコ|37=Kanako}} | ||
| Line 493: | Line 591: | ||
{{Trainerentry|Spr FRLG Juggler.png|Juggler|Gregory|1920|1|122|Mr. Mime|♂|48|None|36=コリン|37=Collin}} | {{Trainerentry|Spr FRLG Juggler.png|Juggler|Gregory|1920|1|122|Mr. Mime|♂|48|None|36=コリン|37=Collin}} | ||
{{trainerdiv|cave}} | {{trainerdiv|cave}} | ||
{{Trainerentry|Spr FRLG Cooltrainer M.png|Cooltrainer|George|1512|5|103|Exeggutor|♂|42|None|028|Sandslash|♂|42|None|091|Cloyster|♂|42|None|101|Electrode||42|None|059|Arcanine|♂|42| | {{Trainerentry|Spr FRLG Cooltrainer M.png|Cooltrainer|George|1512|5|103|Exeggutor|♂|42|None|028|Sandslash|♂|42|None|091|Cloyster|♂|42|None|101|Electrode||42|None|059|Arcanine|♂|42|None|36=カズマ|37=Kazuma}} | ||
{{trainerdiv|cave}} | {{trainerdiv|cave}} | ||
{{Trainerentry|Spr FRLG PokéManiac.png|PokéManiac|Dawson|1920|3|005|Charmeleon|♂|40|None|131|Lapras|♂|40|None|108|Lickitung|♂|40|None|36=ノゾム|37=Nozomu}} | {{Trainerentry|Spr FRLG PokéManiac.png|PokéManiac|Dawson|1920|3|005|Charmeleon|♂|40|None|131|Lapras|♂|40|None|108|Lickitung|♂|40|None|36=ノゾム|37=Nozomu}} | ||
{{trainerdiv|cave}} | {{trainerdiv|cave}} | ||
{{Trainerentry|Spr FRLG Cooltrainer F.png|Cooltrainer|Alexa|1512|5|035|Clefairy|♀|42|None|039|Jigglypuff|♀|42|None|053|Persian|♀|42|None|087|Dewgong|♀|42|None|113|Chansey|♀|42| | {{Trainerentry|Spr FRLG Cooltrainer F.png|Cooltrainer|Alexa|1512|5|035|Clefairy|♀|42|None|039|Jigglypuff|♀|42|None|053|Persian|♀|42|None|087|Dewgong|♀|42|None|113|Chansey|♀|42|None|36=サヤカ|37=Sayaka}} | ||
{{trainerdiv|cave}} | {{trainerdiv|cave}} | ||
{{Trainerentry|Spr FRLG Cooltrainer M.png|Cooltrainer|Colby|1548|5|099|Kingler|♂|41|None|061|Poliwhirl|♂|42|None|073|Tentacruel|♂|42|None|117|Seadra|♂|42|None|009|Blastoise|♂|43| | {{Trainerentry|Spr FRLG Cooltrainer M.png|Cooltrainer|Colby|1548|5|099|Kingler|♂|41|None|061|Poliwhirl|♂|42|None|073|Tentacruel|♂|42|None|117|Seadra|♂|42|None|009|Blastoise|♂|43|None|36=シュウ|37=Shū}} | ||
{{trainerdiv|cave}} | {{trainerdiv|cave}} | ||
{{Trainerentry|Spr FRLG Cooltrainer F.png|Cooltrainer|Caroline|1512|5|069|Bellsprout|♀|42|None|070|Weepinbell|♀|42|None|071|Victreebel|♀|42|None|046|Paras|♀|42|None|047|Parasect|♀|42| | {{Trainerentry|Spr FRLG Cooltrainer F.png|Cooltrainer|Caroline|1512|5|069|Bellsprout|♀|42|None|070|Weepinbell|♀|42|None|071|Victreebel|♀|42|None|046|Paras|♀|42|None|047|Parasect|♀|42|None|36=コトミ|37=Kotomi}} | ||
{{trainerdiv|cave}} | {{trainerdiv|cave}} | ||
{{Trainerentry|Spr FRLG Cool Couple.png|Cool Couple|Ray & Tyra|2160|2|034|Nidoking|♂|45|None|031|Nidoqueen|♀|45|None|36=シンとカヨ|37=Shin and Kayo}} | {{Trainerentry|Spr FRLG Cool Couple.png|Cool Couple|Ray & Tyra|2160|2|034|Nidoking|♂|45|None|031|Nidoqueen|♀|45|None|36=シンとカヨ|37=Shin and Kayo}} | ||
{{trainerfooter|cave}} | {{trainerfooter|cave}} | ||
===Generation IV=== | |||
{{MSP|152|Chikorita}} If the {{player}} chose {{p|Chikorita}}: | {{MSP/3|152|Chikorita}} If the {{player}} chose {{p|Chikorita}}: | ||
{{Party/Single | {{Party/Single | ||
|color={{silver color}} | |color={{silver color}} | ||
| Line 560: | Line 658: | ||
{{Party/Footer}} | {{Party/Footer}} | ||
{{MSP|155|Cyndaquil}} If the {{player}} chose {{p|Cyndaquil}}: | {{MSP/3|155|Cyndaquil}} If the {{player}} chose {{p|Cyndaquil}}: | ||
{{Party/Single | {{Party/Single | ||
|color={{silver color}} | |color={{silver color}} | ||
| Line 613: | Line 711: | ||
{{Party/Footer}} | {{Party/Footer}} | ||
{{MSP|158|Totodile}} If the {{player}} chose {{p|Totodile}}: | {{MSP/3|158|Totodile}} If the {{player}} chose {{p|Totodile}}: | ||
{{Party/Single | {{Party/Single | ||
|color={{silver color}} | |color={{silver color}} | ||
| Line 666: | Line 764: | ||
{{Party/Footer}} | {{Party/Footer}} | ||
===Layout=== | ===Generation VII=== | ||
{| class="roundy" style="margin:auto; background: #000; border: | {{trainerheader|cave}} | ||
{{Trainerentry|VSCoach Trainer M PE.png{{!}}90px|game=PE|Coach Trainer|Alemana|4,900|1|132|Ditto||49|None|36=タノタノ|37=Tanotano}} | |||
{{trainerdiv|cave}} | |||
{{Trainerentry|VSAce Trainer F PE.png{{!}}90px|game=PE|Ace Trainer|Naomi|4,800<br/>5 [[Ultra Ball]]s|2|115|Kangaskhan|♀|47|None|003|Venusaur|♀|48|None|36=カナコ|37=Kanako}} | |||
{{trainerdiv|cave}} | |||
{{Trainerentry|VSAce Trainer M PE.png{{!}}90px|game=PE|Ace Trainer|Rolando|4,800<br/>5 [[Ultra Ball]]s|3|078|Rapidash|♂|47|None|121|Starmie||47|None|071|Victreebel|♂|48|None|36=アサオ|37=Asao}} | |||
{{trainerdiv|cave}} | |||
{{Trainerentry|VSJuggler PE.png{{!}}90px|game=PE|Juggler|Nelson|1,840<br/>3 {{i|Poké Ball}}s|2|097|Hypno|♂|46|None|080|Slowbro|♂|46|None|36=ナミオ|37=Namio}} | |||
{{trainerdiv|cave}} | |||
{{Trainerentry|VSBlack Belt PE.png{{!}}90px|game=PE|Black Belt|Daisuke|1,316<br/>3 {{i|Poké Ball}}s|2|106|Hitmonlee|♂|47|None|062|Poliwrath|♂|47|None|36=タダシ|37=Tadashi}} | |||
{{trainerdiv|cave}} | |||
{{Trainerentry|VSTamer PE.png{{!}}90px|game=PE|Tamer|Vincent|2,820<br/>3 {{i|Poké Ball}}s|2|057|Primeape|♂|47|None|128|Tauros|♂|47|None|36=ユウト|37=Yūto}} | |||
{{trainerdiv|cave}} | |||
{{Trainerentry|VSJuggler PE.png{{!}}90px|Juggler|game=PE|Gregory|1,840<br/>3 {{i|Poké Ball}}s|2|122|Mr. Mime|♂|46|None|065|Alakazam|♂|46|None|36=コリン|37=Collin}} | |||
{{trainerdiv|cave}} | |||
{{Trainerentry|VSAce Trainer M PE.png{{!}}90px|game=PE|Ace Trainer|George|4,700<br/>5 [[Ultra Ball]]s|2|123|Scyther|♂|48|None|105|Marowak|♂|47|None|36=カズマ|37=Kazuma}} | |||
{{trainerdiv|cave}} | |||
{{Trainerentry|VSAce Trainer F PE.png{{!}}90px|game=PE|Ace Trainer|Alexa|4,800<br/>5 [[Ultra Ball]]s|3|148|Dragonair|♂|47|None|040|Wigglytuff|♀|47|None|107|Hitmonchan|♂|48|None|36=サヤカ|37=Sayaka}} | |||
{{trainerdiv|cave}} | |||
{{Trainerentry|VSAce Trainer M PE.png{{!}}90px|game=PE|Ace Trainer|Colby|4,800<br/>5 [[Ultra Ball]]s|4|101|Electrode||47|None|099|Kingler|♂|47|None|018|Pidgeot|♀|47|None|112|Rhydon|♂|48|None|36=シュウ|37=Shū}} | |||
{{trainerdiv|cave}} | |||
{{Trainerentry|VSAce Trainer F PE.png{{!}}90px|game=PE|Ace Trainer|Caroline|4,800<br/>5 [[Ultra Ball]]s|3|124|Jynx|♀|47|None|042|Golbat|♀|47|None|059|Arcanine|♂|48|None|36=コトミ|37=Kotomi}} | |||
{{trainerdiv|cave}} | |||
{{Trainerentry|VSPoké Maniac PE.png{{!}}90px|game=PE|Poké Maniac|Dawson|2,208<br/>3 {{i|Poké Ball}}s|3|108|Lickitung|♀|46|None|095|Onix|♂|46|None|009|Blastoise|♂|46|None|36=ノゾム|37=Nozomu}} | |||
{{trainerdiv|cave}} | |||
{{Trainerentry|VSCoach Trainer M PE.png{{!}}90px|game=PE|Coach Trainer|Ryan|4,900|4|057|Primeape|♂|48|None|130|Gyarados|♂|48|None|059|Arcanine|♀|48|None|128|Tauros|♂|49|None|36=トレサク|37=Toresaku}} | |||
{{trainerdiv|cave|After becoming Champion}} | |||
{{Trainerentry/master|VSHiker Master PE.png{{!}}90px|Hiker|Dillan|075|Graveler|♂|70|Fire|Fire Blast|Ground|Sand Attack|Normal|Defense Curl|36=トクリ|37=Tokuri}} | |||
{{trainerdiv|cave}} | |||
{{Trainerentry/master|VSScientist Master PE.png{{!}}90px|Scientist|Keaton|042|Golbat|♂|75|Flying|Fly|Ghost|Confuse Ray|Flying|Roost|36=ノリマサ|37=Norimasa}} | |||
{{trainerfooter|cave|PE}} | |||
==Layout== | |||
===Interior=== | |||
{| class="roundy" style="margin:auto; background: #000; border: 3px solid #{{locationcolor/dark|cave}}" | |||
|- style="background:#{{locationcolor/light|cave}}" | |- style="background:#{{locationcolor/light|cave}}" | ||
! style="{{roundytl|5px}}" | Version | ! style="{{roundytl|5px}}" | Version | ||
| Line 675: | Line 807: | ||
|- style="background:#000" | |- style="background:#000" | ||
! style="background:#{{red color}}" | {{color2|000|Pokémon Red and Blue Versions|Red}} | ! style="background:#{{red color}}" | {{color2|000|Pokémon Red and Blue Versions|Red}} | ||
| rowspan="3" | [[File:Victory Road 1F RBY. | | rowspan="3" | [[File:Victory Road 1F RBY.png|180px]] | ||
| rowspan="3" | [[File:Victory Road 2F RBY. | | rowspan="3" | [[File:Victory Road 2F RBY.png|180px]] | ||
| rowspan="3" | [[File:Victory Road 3F RBY. | | rowspan="3" | [[File:Victory Road 3F RBY.png|180px]] | ||
|- | |- | ||
! style="background:#{{blue color}}" | {{color2| | ! style="background:#{{blue color}}" | {{color2|FFF|Pokémon Red and Blue Versions|Blue}} | ||
|- | |- | ||
! style="background:#{{yellow color}}" | {{color2|000|Pokémon Yellow Version|Yellow}} | ! style="background:#{{yellow color}}" | {{color2|000|Pokémon Yellow Version|Yellow}} | ||
| Line 685: | Line 817: | ||
! style="background:#{{gold color}}" | {{color2|000|Pokémon Gold and Silver Versions|Gold}} | ! style="background:#{{gold color}}" | {{color2|000|Pokémon Gold and Silver Versions|Gold}} | ||
| rowspan="3" | [[File:Victory Road 1F GSC.png|180px]] | | rowspan="3" | [[File:Victory Road 1F GSC.png|180px]] | ||
| rowspan="3" | [[File:Victory Road 2F GSC. | | rowspan="3" | [[File:Victory Road 2F GSC.png|180px]] | ||
| rowspan="3" | [[File:Victory Road 3F GSC. | | rowspan="3" | [[File:Victory Road 3F GSC.png|180px]] | ||
|- | |- | ||
! style="background:#{{silver color}}" | {{color2|000|Pokémon Gold and Silver Versions|Silver}} | ! style="background:#{{silver color}}" | {{color2|000|Pokémon Gold and Silver Versions|Silver}} | ||
| Line 705: | Line 837: | ||
|- | |- | ||
! style="background:#{{soulsilver color}}" | {{color2|000|Pokémon HeartGold and SoulSilver Versions|SoulSilver}} | ! style="background:#{{soulsilver color}}" | {{color2|000|Pokémon HeartGold and SoulSilver Versions|SoulSilver}} | ||
|- | |||
! style="background:#{{Let's Go Pikachu color}}" | {{color2|000|Pokémon Let's Go, Pikachu! and Let's Go, Eevee!|Let's Go, Pikachu!}} | |||
| rowspan="2" | [[File:Victory Road 1F LGPE.png|180px]] | |||
| rowspan="2" | [[File:Victory Road 2F LGPE.png|180px]] | |||
| rowspan="2" | [[File:Victory Road 3F LGPE.png|180px]] | |||
|- | |||
! style="background:#{{Let's Go Eevee color}}" | {{color2|000|Pokémon Let's Go, Pikachu! and Let's Go, Eevee!|Let's Go, Eevee!}} | |||
|- | |- | ||
| colspan="4" style="background:#{{locationcolor/light|cave}}; {{roundybottom|5px}}" | | | colspan="4" style="background:#{{locationcolor/light|cave}}; {{roundybottom|5px}}" | | ||
|} | |||
===Exterior=== | |||
{| class="roundy" style="margin:auto; background: #000; border: 3px solid #{{locationcolor/dark|cave}}" | |||
|- | |||
! style="background:#{{locationcolor/light|cave}}; {{roundytl|5px}}" | Version | |||
! style="background:#{{locationcolor/light|cave}}" | Reception Gate side | |||
! style="background:#{{locationcolor/light|cave}}" | Indigo Plateau side | |||
|- | |||
! style="background:#{{Let's Go Pikachu color}}" | {{color2|000|Pokémon Let's Go, Pikachu! and Let's Go, Eevee!|Let's Go, Pikachu!}} | |||
| rowspan="2" | [[File:Victory Road Exterior Reception Gate Side LGPE.png|250px]] | |||
| rowspan="2" | [[File:Victory Road Exterior Indigo Plateau Side LGPE.png|250px]] | |||
|- | |||
! style="background:#{{Let's Go Eevee color}}" | {{color2|000|Pokémon Let's Go, Pikachu! and Let's Go, Eevee!|Let's Go, Eevee!}} | |||
|- | |||
| colspan="5" style="background:#{{locationcolor/light|cave}}; {{roundybottom|5px}}" | | |||
|} | |} | ||
| Line 716: | Line 871: | ||
File:HGSS Victory Road-Night.png|HGSS Night (Golbat) | File:HGSS Victory Road-Night.png|HGSS Night (Golbat) | ||
</gallery> | </gallery> | ||
==In the spin-off games== | |||
===[[Pokémon Masters EX]]=== | |||
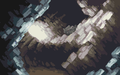
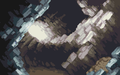
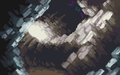
Artwork of various depictions of the Victory Road is seen in [[Sygna suit|Sygna Suit]] {{mas|Leaf}} and {{mas|Silver}}'s mindscapes. | |||
{| style="background: #7B30B2; {{roundy}}; border: #7B30B2;" | |||
| | |||
{| style="background: #AB60E2; {{roundy}}; border: #AB60E2;" | |||
|- style="text-align:center" | |||
| | |||
{| style="background: #{{normal color light}}; {{roundy}}; border: #{{normal color light}}; padding: 0px 5px 5px 5px" | |||
|- | |||
|<big>'''{{color2|000|Leaf (Masters)#Venusaur|Sygna Suit Leaf & Venusaur}}'''</big> | |||
|- | |||
| [[File:Leaf Mindscape 2.png|200px]] | |||
|} | |||
| | |||
{| style="background: #{{fire color light}}; {{roundy}}; border: #{{fire color light}}; padding: 0px 5px 5px 5px" | |||
|- | |||
|<big>'''{{color2|000|Silver (Masters)#Ho-Oh|Silver & Ho-Oh}}'''</big> | |||
|- | |||
| [[File:Silver Mindscape.png|200px]] | |||
|} | |||
|} | |||
|} | |||
==In the anime== | ==In the anime== | ||
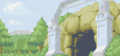
[[File:Victory Road PO.png|250px|thumb|Victory Road in [[Pokémon Origins]]]] | [[File:Victory Road PO.png|250px|thumb|Victory Road in [[Pokémon Origins]]]] | ||
[[File:Red Charizard Moltres Flamethrower PO.png|250px|thumb|left|Moltres's nest in Pokémon Origins]] | [[File:Red Charizard Moltres Flamethrower PO.png|250px|thumb|left|Moltres's nest in Pokémon Origins]] | ||
=== | ===Pokémon Origins=== | ||
Victory Road appeared briefly in ''[[PO04|File 4: Charizard]]'', as {{OBP|Red|Origins}} was shown exiting it on his way to the [[Indigo Plateau]]. Later in the episode, Red was shown battling {{p|Moltres}} at the Victory Road with his {{TP|Red|Charizard}}, catching the Legendary bird soon after off-screen. | Victory Road appeared briefly in ''[[PO04|File 4: Charizard]]'', as {{OBP|Red|Origins}} was shown exiting it on his way to the [[Indigo Plateau]]. Later in the episode, Red was shown battling {{p|Moltres}} at the Victory Road with his {{TP|Red|Charizard}}, catching the Legendary bird soon after off-screen. | ||
{{-}} | {{-}} | ||
==Trivia== | ==Trivia== | ||
* In [[Generation II|Generations II]] and {{gen|IV}}, Kanto Victory Road has the | * In [[Generation II|Generations II]] and {{gen|IV}}, Kanto Victory Road has the fewest Trainers of all Victory Roads, the only Trainer battle being against {{ga|Silver}}. In {{game|HeartGold and SoulSilver|s}}, this is implied to be because Silver beat every other Trainer here. | ||
* In [[Generation I]], if | * In [[Generation I]], if the player falls through the hole from 3F to 2F while riding their [[Bicycle|bike]], they will be forced off the bike in the transition, but the bike theme will keep playing. | ||
** In [[Generation III]], the bike theme does not override the usual background music. | |||
==In other languages== | ==In other languages== | ||
{{langtable|color={{locationcolor/med|cave}}|bordercolor={{locationcolor/dark|cave}} | {{langtable|color={{locationcolor/med|cave}}|bordercolor={{locationcolor/dark|cave}} | ||
|zh_yue=冠軍之路 ''{{tt|Gungwān-jī Louh|Champion Road}}'' | |||
|zh_cmn=冠軍之路 / 冠军之路 ''{{tt|Guànjūn-zhī Lù|Champion Road}}'' | |||
|fr=Route Victoire | |fr=Route Victoire | ||
|de=Siegesstraße | |de=Siegesstraße | ||
Latest revision as of 17:15, 12 April 2024
| ||||
| ||||
| Map description: | A tunnel situated on Route 23. It earned its name because it must be traveled by all Trainers aiming for the top.FRLG A road that tests Trainers aiming at the Pokémon League.HGSS A cave that tests Trainers aiming to reach the Pokémon League at the summit.PE | |||
|---|---|---|---|---|
| Location: | Route 23 (Generations I, III, and VII) Between Pokémon League Reception Gate and Route 23 (Generation II) Between Pokémon League Reception Gate and Indigo Plateau (Generation IV) | |||
| Region: | Kanto | |||
| Generations: | I, II, III, IV, VII | |||
 Location of Victory Road in Kanto. | ||||
| Pokémon world locations | ||||

Victory Road (Japanese: チャンピオンロード Champion Road) is a tunnel situated on Route 23. It earned its name because it must be traveled by all Trainers aiming for the top. Its other end opens up in Indigo Plateau and the Pokémon League. Only Trainers with the eight Kanto or Johto Badges are allowed to enter it.
Role
Victory Road has three floors. To reach the other end of the tunnel in Generations I, III, IV, and VII, a series of puzzles which involve using StrengthRBYFRLGHGSS or Strong PushPE to move boulders need to be solved.
In Generation I and Pokémon: Let's Go, Pikachu! and Let's Go, Eevee!, Victory Road is where the Legendary Pokémon Moltres can be found. In Pokémon FireRed and LeafGreen, it is instead found at One Island's Mt. Ember and is found in Mt. Silver Cave in Pokémon HeartGold and SoulSilver.
A Move Tutor at the very end of Victory Road in Pokémon FireRed and LeafGreen offers to teach a Pokémon the move Double-Edge.
In Pokémon: Let's Go, Pikachu! and Let's Go, Eevee!, an Officer Jenny is present of 2F, healing the player's Pokémon if talked to.
In some promotional artwork for Generation II, Victory Road is depicted as being part of Mt. Silver, but this is not confirmed.
In Generations II and IV, there are no Trainers in Victory Road. According to Silver in Pokémon HeartGold and SoulSilver, the reason for this is because he defeated them all.
In Pokémon HeartGold and SoulSilver, after entering the Hall of Fame and boarding the S.S. Aqua, the battle music in Victory Road (as well as in the Tohjo Falls, Routes 26, 27, and 28) changes from the Johto style to the Kanto style. This change was not present in Generation II.
Items
1F
| Item | Location | Games | |
|---|---|---|---|
| Ultra Ball | On a rock near the center of the floor (hidden) | FR LG | |
| Pikachu Candy ×10 | Reward for defeating Coach Trainer Alemana | P | |
| Eevee Candy ×10 | Reward for defeating Coach Trainer Alemana | E | |
| Rare Candy | In the north area of the floor | R B Y FR LG | |
| Leaf Stone | In the north area of the floor | P E | |
| TM43 (Sky Attack) | In the north area of the floor | R B Y | |
| TM02 (Dragon Claw) | In the north area of the floor | FR LG | |
| TM56 (Stealth Rock) | In the north area of the floor | P E | |
| Full Restore | On the rock two squares east of TM02 (hidden) | FR LG | |
| Ultra Ball ×3 | In the northwest corner of the floor | P E | |
| Health Candy | On a rock in the middle of the floor (hidden) (daily) (item determined randomly) | P E | |
| Mighty Candy | |||
| Tough Candy | |||
| Smart Candy | |||
| Courage Candy | |||
| Quick Candy | |||
| Full Heal ×2 |
|
G S C | |
| Max Revive | In the northeast corner | G S C | |
| Potion | North of the ledge north of the entrance | HG SS | |
| Full Heal ×2 |
|
HG SS | |
| Max Potion | West of the L-shaped raised section (hidden) | HG SS | |
| Max Revive | Amid the jumble of rocks at the northern end | HG SS | |
2F
| Item | Location | Games | |
|---|---|---|---|
| TM05 (Mega Kick) | Southwest of the Black Belt | R B Y | |
| TM37 (Sandstorm) | Southwest of Black Belt Daisuke | FR LG | |
| TM45 (Solar Beam) | Southwest of Black Belt Daisuke | P E | |
| Full Heal | Southwest of the Tamer | R B Y FR LG | |
| TM17 (Submission) | In the northeast area of the floor | R B Y | |
| TM07 (Hail) | In the northeast area of the floor | FR LG | |
| TM49 (Superpower) | In the northeast area of the floor | P E | |
| Guard Spec. | In the northwest area of the floor | R B Y FR LG | |
| PP Max | In the northwest area of the floor, south of Moltres | P E | |
| Pretty Wing | On the stone pillar west of Moltres (hidden) (daily) | P E | |
| Health Candy | On a torch by the exit (hidden) (daily) | P E | |
| Mighty Candy | |||
| Tough Candy | |||
| Smart Candy | |||
| Courage Candy | |||
| Quick Candy | |||
| Ultra Ball | One square east of the Poké Maniac, on a rock (hidden) | R B Y | |
| Full Restore | One square west of the ladder west of the exit, on a rock (hidden) | R B Y | |
| Full Restore | On the northeast ledge | G S C | |
| TM26 (Earthquake) | On the northwest ledge | G S C | |
| Max Potion | On the rock next to TM26 (hidden) | G S C | |
| X Special | On the south ledge | G S | |
| HP Up | On the south ledge | C | |
| Max Revive | On a stalagmite east of the ladder from 1F (hidden) | HG SS | |
| Ultra Ball | On landing spot beneath first hole (hidden) | HG SS | |
| Full Restore | West of second ladder | HG SS | |
| PP Up | On landing spot beneath the fourth hole (hidden) | HG SS | |
| HP Up | Northeast of the landing spot beneath the fourth hole | HG SS | |
| TM26 (Earthquake) | Reachable by going down the last hole on 3F | HG SS | |
3F
| Item | Location | Games | |
|---|---|---|---|
| Max Revive | In the northeast area of the floor | R B Y FR LG | |
| TM47 (Explosion) | In the northwest area of the floor | R B Y | |
| TM50 (Overheat) | In the northwest area of the floor | FR LG | |
| TM51 (Blizzard) | In the northwest area of the floor | P E | |
| Fresh Water | Northeast of Officer Jenny, in the dripping water on the north wall (hidden) | P E | |
| Max Potion | Southeast of Officer Jenny, on the plateau | P E | |
| Full Restore | Near the southeast corner of the floor | P E | |
| Golden Nanab Berry ×5 | In the southern area, northeast of the pair of Ace Trainers | P E | |
| Health Candy | On a rock near the centre of the floor, southeast of Ace Trainer Alexa (hidden) (daily) | P E | |
| Mighty Candy | |||
| Tough Candy | |||
| Smart Candy | |||
| Courage Candy | |||
| Quick Candy | |||
| TM39 (Outrage) | Reward for defeating Coach Trainer Ryan | P E | |
| Hyper Potion | On a stalagmite northeast of the first hole (hidden) | HG SS | |
| Ultra Ball | West of second ladder | HG SS | |
| Zinc | Behind a breakable rock west of the Ultra Ball (hidden) | HG SS | |
| Rare Candy | Northeast of the last hole | HG SS | |
| TM79 (Dark Pulse) | Behind three breakable rocks south of the exit (requires Rock Smash) | HG SS | |
Rock
| Item | Location | Games | |
|---|---|---|---|
| Tiny Mushroom | P E | ||
| Big Mushroom | |||
| Fire Stone | |||
Rock Smash
If the rock contains an item, the game will pick one of the following:
| Item | Location | Games | |
|---|---|---|---|
| Max Ether | Found by smashing breakable rocks (25%) | HG SS | |
| Revive | Found by smashing breakable rocks (20%) | HG SS | |
| Red Shard | Found by smashing breakable rocks (10% each) | HG SS | |
| Blue Shard | |||
| Yellow Shard | |||
| Green Shard | |||
| Heart Scale | |||
| Star Piece | Found by smashing breakable rocks (5%) | HG SS | |
Pokémon
Generation I
1F
| Pokémon | Games | Location | Levels | Rate | |||||||||||
|---|---|---|---|---|---|---|---|---|---|---|---|---|---|---|---|
|
R | B | Y |
|
22 | 15% | |||||||||
|
R | B | Y |
|
39, 44 | 20% | |||||||||
|
R | B | Y |
|
41 | 5% | |||||||||
|
R | B | Y |
|
24 | 25% | |||||||||
|
R | B | Y |
|
42 | 4% | |||||||||
|
R | B | Y |
|
26 | 15% | |||||||||
|
R | B | Y |
|
26, 31, 36, 41 | 65% | |||||||||
|
R | B | Y |
|
41 | 5% | |||||||||
|
R | B | Y |
|
41, 47 | 5% | |||||||||
|
R | B | Y |
|
36, 39, 42 | 30% | |||||||||
|
R | B | Y |
|
43, 45 | 10% | |||||||||
|
R | B | Y |
|
43 | 1% | |||||||||
| A colored background means that the Pokémon can be found in this location in the specified game. A white background with a colored letter means that the Pokémon cannot be found here. | |||||||||||||||
2F
| Pokémon | Games | Location | Levels | Rate | |||||||||||
|---|---|---|---|---|---|---|---|---|---|---|---|---|---|---|---|
|
R | B | Y |
|
26 | 15% | |||||||||
|
R | B | Y |
|
44 | 10% | |||||||||
|
R | B | Y |
|
40 | 5% | |||||||||
|
R | B | Y |
|
39 | 10% | |||||||||
|
R | B | Y |
|
22 | 25% | |||||||||
|
R | B | Y |
|
41 | 5% | |||||||||
|
R | B | Y |
|
39, 42 | 5% | |||||||||
|
R | B | Y |
|
24 | 15% | |||||||||
|
R | B | Y |
|
31, 36, 41 | 55% | |||||||||
|
R | B | Y |
|
43 | 1% | |||||||||
|
R | B | Y |
|
44 | 10% | |||||||||
|
R | B | Y |
|
36, 39, 42 | 30% | |||||||||
|
R | B | Y |
|
45, 47 | 10% | |||||||||
|
R | B | Y |
|
40 | 4% | |||||||||
| A colored background means that the Pokémon can be found in this location in the specified game. A white background with a colored letter means that the Pokémon cannot be found here. | |||||||||||||||
3F
| Pokémon | Games | Location | Levels | Rate | |||||||||||
|---|---|---|---|---|---|---|---|---|---|---|---|---|---|---|---|
|
R | B | Y |
|
22 | 15% | |||||||||
|
R | B | Y |
|
41 | 5% | |||||||||
|
R | B | Y |
|
44 | 15% | |||||||||
|
R | B | Y |
|
40 | 10% | |||||||||
|
R | B | Y |
|
24 | 25% | |||||||||
|
R | B | Y |
|
42, 45 | 5% | |||||||||
|
R | B | Y |
|
42, 45 | 10% | |||||||||
|
R | B | Y |
|
26 | 15% | |||||||||
|
R | B | Y |
|
36, 41, 46 | 50% | |||||||||
|
R | B | Y |
|
43 | 5% | |||||||||
|
R | B | Y |
|
41, 47 | 15% | |||||||||
|
R | B | Y |
|
42, 45 | 20% | |||||||||
|
R | B | Y |
|
49 | 10% | |||||||||
| A colored background means that the Pokémon can be found in this location in the specified game. A white background with a colored letter means that the Pokémon cannot be found here. | |||||||||||||||
Generation II
In the Japanese and Korean games, Ursaring appears only in Silver, while Donphan appears only in Gold.
| Pokémon | Games | Location | Levels | Rate | |||||||||||
|---|---|---|---|---|---|---|---|---|---|---|---|---|---|---|---|
|
G | S | C |
|
32 | 30% | |||||||||
|
G | S | C |
|
34 | 10% | 10% | 30% | |||||||
|
G | S | C |
|
32 | 30% | |||||||||
|
G | S | C |
|
34 | 30% | 30% | 0% | |||||||
|
G | S | C |
|
34-40 | 0% | 0% | 50% | |||||||
|
G | S | C |
|
33 | 20% | |||||||||
|
G | S | C |
|
33 | 20% | |||||||||
|
G | S | C |
|
34-36 | 15% | |||||||||
|
G | S | C |
|
33 | 20% | 20% | 0% | |||||||
|
G | S | C |
|
32 | 0% | 0% | 20% | |||||||
|
G | S | C |
|
35 | 5% | |||||||||
|
G | S | C |
|
32 | 30% | 30% | 0% | |||||||
|
G | S | C |
|
35 | 5% | 5% | 0% | |||||||
|
G | S | C |
|
35 | 5% | 5% | 0% | |||||||
| A colored background means that the Pokémon can be found in this location in the specified game. A white background with a colored letter means that the Pokémon cannot be found here. | |||||||||||||||
Generation III
1F and 3F
| Pokémon | Games | Location | Levels | Rate | |||||||||||
|---|---|---|---|---|---|---|---|---|---|---|---|---|---|---|---|
|
FR | LG |
|
44 | 5% | ||||||||||
|
FR | LG |
|
44 | 5% | ||||||||||
|
FR | LG |
|
32 | 10% | ||||||||||
|
FR | LG |
|
44 | 5% | ||||||||||
|
FR | LG |
|
32 | 20% | ||||||||||
|
FR | LG |
|
44, 46 | 5% | ||||||||||
|
FR | LG |
|
32 | 20% | ||||||||||
|
FR | LG |
|
40, 43, 46 | 30% | ||||||||||
|
FR | LG |
|
44, 46 | 5% | ||||||||||
| A colored background means that the Pokémon can be found in this location in the specified game. A white background with a colored letter means that the Pokémon cannot be found here. | |||||||||||||||
2F
| Pokémon | Games | Location | Levels | Rate | |||||||||||
|---|---|---|---|---|---|---|---|---|---|---|---|---|---|---|---|
|
FR | LG |
|
46 | 5% | ||||||||||
|
FR | LG |
|
46 | 5% | ||||||||||
|
FR | LG |
|
34 | 10% | ||||||||||
|
FR | LG |
|
46 | 5% | ||||||||||
|
FR | LG |
|
42 | 10% | ||||||||||
|
FR | LG |
|
34 | 20% | ||||||||||
|
FR | LG |
|
46, 48 | 5% | ||||||||||
|
FR | LG |
|
34 | 20% | ||||||||||
|
FR | LG |
|
45, 48 | 20% | ||||||||||
|
FR | LG |
|
46, 48 | 5% | ||||||||||
| A colored background means that the Pokémon can be found in this location in the specified game. A white background with a colored letter means that the Pokémon cannot be found here. | |||||||||||||||
Generation IV
| Pokémon | Games | Location | Levels | Rate | |||||||||||
|---|---|---|---|---|---|---|---|---|---|---|---|---|---|---|---|
|
HG | SS |
|
32 | 30% | ||||||||||
|
HG | SS |
|
32 | 30% | ||||||||||
|
HG | SS |
|
33 | 20% | ||||||||||
|
HG | SS |
|
33 | 20% | ||||||||||
|
HG | SS |
|
34, 36 | 15% | ||||||||||
|
HG | SS |
|
35 | 5% | ||||||||||
| Rock Smash | |||||||||||||||
|
HG | SS |
|
24-32 | 80% | ||||||||||
|
HG | SS |
|
30-33 | 20% | ||||||||||
| Special Pokémon | |||||||||||||||
|
HG | SS |
|
33 | 20% | ||||||||||
|
HG | SS |
|
32 | 20% | ||||||||||
|
HG | SS |
|
33 | 20% | ||||||||||
|
HG | SS |
|
32 | 20% | ||||||||||
| A colored background means that the Pokémon can be found in this location in the specified game. A white background with a colored letter means that the Pokémon cannot be found here. | |||||||||||||||
Generation VII
1F
| Pokémon | Games | Location | Levels | Rate | |||||||||||
|---|---|---|---|---|---|---|---|---|---|---|---|---|---|---|---|
|
P | E |
|
41-46 | 10% | ||||||||||
|
P | E |
|
41-46 | 15% | ||||||||||
|
P | E |
|
41-46 | 10% | ||||||||||
|
P | E |
|
41-46 | 15% | ||||||||||
|
P | E |
|
41-46 | 10% | ||||||||||
|
P | E |
|
41-46 | 15% | ||||||||||
|
P | E |
|
41-46 | 10% | ||||||||||
|
P | E |
|
41-46 | 10% | ||||||||||
|
P | E |
|
41-46 | 5% | ||||||||||
| Rare Spawns | |||||||||||||||
|
P | E |
|
41-46 | - | ||||||||||
| A colored background means that the Pokémon can be found in this location in the specified game. A white background with a colored letter means that the Pokémon cannot be found here. | |||||||||||||||


2F
| Pokémon | Games | Location | Levels | Rate | |||||||||||
|---|---|---|---|---|---|---|---|---|---|---|---|---|---|---|---|
|
P | E |
|
41-46 | 10% | ||||||||||
|
P | E |
|
41-46 | 15% | ||||||||||
|
P | E |
|
41-46 | 10% | ||||||||||
|
P | E |
|
41-46 | 15% | ||||||||||
|
P | E |
|
41-46 | 10% | ||||||||||
|
P | E |
|
41-46 | 15% | ||||||||||
|
P | E |
|
41-46 | 10% | ||||||||||
|
P | E |
|
41-46 | 10% | ||||||||||
|
P | E |
|
41-46 | 5% | ||||||||||
| Rare Spawns | |||||||||||||||
|
P | E |
|
41-46 | - | ||||||||||
| A colored background means that the Pokémon can be found in this location in the specified game. A white background with a colored letter means that the Pokémon cannot be found here. | |||||||||||||||

3F
| Pokémon | Games | Location | Levels | Rate | |||||||||||
|---|---|---|---|---|---|---|---|---|---|---|---|---|---|---|---|
|
P | E |
|
41-46 | 10% | ||||||||||
|
P | E |
|
41-46 | 15% | ||||||||||
|
P | E |
|
41-46 | 10% | ||||||||||
|
P | E |
|
41-46 | 15% | ||||||||||
|
P | E |
|
41-46 | 10% | ||||||||||
|
P | E |
|
41-46 | 15% | ||||||||||
|
P | E |
|
41-46 | 10% | ||||||||||
|
P | E |
|
41-46 | 10% | ||||||||||
|
P | E |
|
41-46 | 5% | ||||||||||
| Rare Spawns | |||||||||||||||
|
P | E |
|
41-46 | - | ||||||||||
| A colored background means that the Pokémon can be found in this location in the specified game. A white background with a colored letter means that the Pokémon cannot be found here. | |||||||||||||||

Special encounters
Generation I
A Moltres appears on 2F on the first visit.
| ||||||||||||||||||||||||||||

Generation VII
A Moltres appears on 2F on the first visit. If run from, it respawns after entering the Hall of Fame.
| ||||||||||||||||||||||||||||||

Trainers
Generation I
| Trainer | Pokémon | |||||||||
|---|---|---|---|---|---|---|---|---|---|---|
|
| |||||||||
| ||||||||||
|
| |||||||||
| ||||||||||
| ||||||||||
| ||||||||||
|
| |||||||||
| ||||||||||
| ||||||||||
|
| |||||||||
| ||||||||||
| ||||||||||
| ||||||||||
|
| |||||||||
| ||||||||||
|
| |||||||||
|
| |||||||||
| ||||||||||
| ||||||||||
|
| |||||||||
| ||||||||||
| ||||||||||
|
| |||||||||
| ||||||||||
| ||||||||||
|
| |||||||||
| ||||||||||
| ||||||||||
|
| |||||||||
| ||||||||||
| ||||||||||


Generation II
![]() If the player chose Chikorita:
If the player chose Chikorita:
|
|||||||||||||||||||||||||||||||||||||||||||||||||||||||||||||||||||||||||||||||||||||||||||||||||||||||||||||||||||||||||||||||||||||||||||||||||||
| |||||||||||||||||||||||||||||||||||||||||||||||||||||||||||||||||||||||||||||||||||||||||||||||||||||||||||||||||||||||||||||||||||||||||||||||||||


![]() If the player chose Cyndaquil:
If the player chose Cyndaquil:
|
|||||||||||||||||||||||||||||||||||||||||||||||||||||||||||||||||||||||||||||||||||||||||||||||||||||||||||||||||||||||||||||||||||||||||||||||||||
| |||||||||||||||||||||||||||||||||||||||||||||||||||||||||||||||||||||||||||||||||||||||||||||||||||||||||||||||||||||||||||||||||||||||||||||||||||

|
|||||||||||||||||||||||||||||||||||||||||||||||||||||||||||||||||||||||||||||||||||||||||||||||||||||||||||||||||||||||||||||||||||||||||||||||||||
| |||||||||||||||||||||||||||||||||||||||||||||||||||||||||||||||||||||||||||||||||||||||||||||||||||||||||||||||||||||||||||||||||||||||||||||||||||

Generation III
| Trainer | Pokémon | |||||||||||
|---|---|---|---|---|---|---|---|---|---|---|---|---|
|
| |||||||||||
| ||||||||||||
| ||||||||||||
| ||||||||||||
| ||||||||||||
|
| |||||||||||
| ||||||||||||
| ||||||||||||
| ||||||||||||
| ||||||||||||
|
| |||||||||||
| ||||||||||||
| ||||||||||||
|
| |||||||||||
| ||||||||||||
| ||||||||||||
| ||||||||||||
|
| |||||||||||
| ||||||||||||
|
| |||||||||||
|
| |||||||||||
| ||||||||||||
| ||||||||||||
| ||||||||||||
| ||||||||||||
|
| |||||||||||
| ||||||||||||
| ||||||||||||
|
| |||||||||||
| ||||||||||||
| ||||||||||||
| ||||||||||||
| ||||||||||||
|
| |||||||||||
| ||||||||||||
| ||||||||||||
| ||||||||||||
| ||||||||||||
|
| |||||||||||
| ||||||||||||
| ||||||||||||
| ||||||||||||
| ||||||||||||
|
| |||||||||||
| ||||||||||||
| Trainers with a Vs. Seeker by their names, when alerted for a rematch using the item, may use higher-level Pokémon. | ||||||||||||


Generation IV
![]() If the player chose Chikorita:
If the player chose Chikorita:


![]() If the player chose Cyndaquil:
If the player chose Cyndaquil:
|
|||||||||||||||||||||||||||||||||||||||||||||||||||||||||||||||||||||||||||||||||||||||||||||||||||||||||||||||||||||||||||||||||||||||||||||||||||||||||||||||||||||||||||||||||||||||||||||||||||||||||||||||
| |||||||||||||||||||||||||||||||||||||||||||||||||||||||||||||||||||||||||||||||||||||||||||||||||||||||||||||||||||||||||||||||||||||||||||||||||||||||||||||||||||||||||||||||||||||||||||||||||||||||||||||||

Generation VII
| Trainer | Pokémon | |||||||||||||||
|---|---|---|---|---|---|---|---|---|---|---|---|---|---|---|---|---|
|
| |||||||||||||||
|
| |||||||||||||||
| ||||||||||||||||
|
| |||||||||||||||
| ||||||||||||||||
| ||||||||||||||||
|
| |||||||||||||||
| ||||||||||||||||
|
| |||||||||||||||
| ||||||||||||||||
|
| |||||||||||||||
| ||||||||||||||||
|
| |||||||||||||||
| ||||||||||||||||
|
| |||||||||||||||
| ||||||||||||||||
|
| |||||||||||||||
| ||||||||||||||||
| ||||||||||||||||
|
| |||||||||||||||
| ||||||||||||||||
| ||||||||||||||||
| ||||||||||||||||
|
| |||||||||||||||
| ||||||||||||||||
| ||||||||||||||||
|
| |||||||||||||||
| ||||||||||||||||
| ||||||||||||||||
|
| |||||||||||||||
| ||||||||||||||||
| ||||||||||||||||
| ||||||||||||||||
| After becoming Champion | ||||||||||||||||
|
| |||||||||||||||
|
| |||||||||||||||


Layout
Interior
| Version | 1F | 2F | 3F |
|---|---|---|---|
| Red | 
|

|

|
| Blue | |||
| Yellow | |||
| Gold | 
|

|

|
| Silver | |||
| Crystal | |||
| FireRed | 
|

|

|
| LeafGreen | |||
| HeartGold | 
|

|

|
| SoulSilver | |||
| Let's Go, Pikachu! | 
|

|

|
| Let's Go, Eevee! | |||
Exterior
| Version | Reception Gate side | Indigo Plateau side | ||
|---|---|---|---|---|
| Let's Go, Pikachu! | 
|

| ||
| Let's Go, Eevee! | ||||
Preview
FRLG
HGSS Morning (Rhyhorn)
HGSS Day/Evening (Graveler)
HGSS Night (Golbat)


In the spin-off games
Pokémon Masters EX
Artwork of various depictions of the Victory Road is seen in Sygna Suit Leaf and Silver's mindscapes.
|


In the anime


Pokémon Origins
Victory Road appeared briefly in File 4: Charizard, as Red was shown exiting it on his way to the Indigo Plateau. Later in the episode, Red was shown battling Moltres at the Victory Road with his Charizard, catching the Legendary bird soon after off-screen.
Trivia
- In Generations II and IV, Kanto Victory Road has the fewest Trainers of all Victory Roads, the only Trainer battle being against Silver. In Pokémon HeartGold and SoulSilver, this is implied to be because Silver beat every other Trainer here.
- In Generation I, if the player falls through the hole from 3F to 2F while riding their bike, they will be forced off the bike in the transition, but the bike theme will keep playing.
- In Generation III, the bike theme does not override the usual background music.
In other languages
| |||||||||||||||||||||||||||||
| Victory Roads |
|---|
| Kanto • Hoenn • Sinnoh • Unova (BW) • Unova (B2W2) • Kalos • Alola |
| Kanto and Johto | ||||||||||||||||
|---|---|---|---|---|---|---|---|---|---|---|---|---|---|---|---|---|
|
| ||||||||||||||||
| ||||||||||||||||
| Game locations of Legendary and Mythical Pokémon | ||||||||||||||||||||||||||
|---|---|---|---|---|---|---|---|---|---|---|---|---|---|---|---|---|---|---|---|---|---|---|---|---|---|---|
| ||||||||||||||||||||||||||
| This article is part of Project Locations, a Bulbapedia project that aims to write comprehensive articles on every location in the Pokémon world. |