|
|
| (7 intermediate revisions by 5 users not shown) |
| Line 1: |
Line 1: |
| {{bad picture|2=Guidebook labels}} | | {{bad picture|2=Guidebook labels}} |
| {{incomplete|needs=Entrance}} | | {{incomplete|needs=Missing exterior image}} |
| {{Infobox location | | {{Infobox location |
| |image=Victory Road E.png | | |image=Victory Road E.png |
| Line 19: |
Line 19: |
|
| |
|
| Players will need {{m|Strength}}, {{m|Rock Smash}}, and {{m|Surf}} to make their way through the cave. {{m|Flash}} and {{m|Waterfall}}, while not required, make traversing the cave easier. | | Players will need {{m|Strength}}, {{m|Rock Smash}}, and {{m|Surf}} to make their way through the cave. {{m|Flash}} and {{m|Waterfall}}, while not required, make traversing the cave easier. |
|
| |
| Unlike the other Victory Roads, a Trainer does not require all eight Badges to enter, as the checkpoint is after it, in the Pokémon League building itself in Ever Grande City.
| |
|
| |
|
| In {{pkmn|Omega Ruby and Alpha Sapphire}}, Victory Road's B1F has two exits to Ever Grande City outside, one of which leads to an area where {{TM|29|Psychic}} can be found. Surf and Strength are required to access these exits. | | In {{pkmn|Omega Ruby and Alpha Sapphire}}, Victory Road's B1F has two exits to Ever Grande City outside, one of which leads to an area where {{TM|29|Psychic}} can be found. Surf and Strength are required to access these exits. |
| Line 26: |
Line 24: |
| ==Items== | | ==Items== |
| {{Itlisth|cave}} | | {{Itlisth|cave}} |
| {{Itemlist|Max Elixir|1F, above ledge in eastern part of the floor|Ru=yes|Sa=yes|E=yes|display={{DL|Ether|Max Elixir}}}} | | {{Itemlist|Max Elixir|1F, above ledge in eastern part of the floor|Ru=yes|Sa=yes|E=yes}} |
| {{Itemlist|PP Up|1F, in southeastern corner|Ru=yes|Sa=yes|E=yes|display={{DL|Vitamin|PP Up}}}} | | {{Itemlist|PP Up|1F, in southeastern corner|Ru=yes|Sa=yes|E=yes|display={{DL|Vitamin|PP Up}}}} |
| {{Itemlist|Ultra Ball|1F, at the end of the ledge in the southeast corner, left of the PP Up ''(hidden)''|Ru=yes|Sa=yes|E=yes|display={{ball|Ultra}}}} | | {{Itemlist|Ultra Ball|1F, at the end of the ledge in the southeast corner, left of the PP Up ''(hidden)''|Ru=yes|Sa=yes|E=yes|display={{ball|Ultra}}}} |
| Line 33: |
Line 31: |
| {{Itemlist|TM Psychic|B1F, in northeastern corner|Ru=yes|Sa=yes|E=yes|display={{TM|29|Psychic}}}} | | {{Itemlist|TM Psychic|B1F, in northeastern corner|Ru=yes|Sa=yes|E=yes|display={{TM|29|Psychic}}}} |
| {{Itemlist|Full Heal|B2F, near Cooltrainer Vito|Ru=yes|Sa=yes|E=yes|display={{DL|Status condition healing item|Full Heal}}}} | | {{Itemlist|Full Heal|B2F, near Cooltrainer Vito|Ru=yes|Sa=yes|E=yes|display={{DL|Status condition healing item|Full Heal}}}} |
| {{Itemlist|Elixir|B2F, in a small two-square nook to the right above the eastern waterfall ''(hidden)''|Ru=yes|Sa=yes|E=yes|display={{DL|Ether|Elixir}}}} | | {{Itemlist|Elixir|B2F, in a small two-square nook to the right above the eastern waterfall ''(hidden)''|Ru=yes|Sa=yes|E=yes}} |
| {{Itemlist|Full Heal|1F, across the bridge above {{tc|Ace Trainer}} Albert (requires {{m|Surf}})|OR=yes|AS=yes|display={{DL|Status condition healing item|Full Heal}}}} | | {{Itemlist|Full Heal|1F, across the bridge above {{tc|Ace Trainer}} Albert (requires {{m|Surf}})|OR=yes|AS=yes|display={{DL|Status condition healing item|Full Heal}}}} |
| {{Itemlist|Max Repel|1F, in a rock to the east of the staircase leading to {{tc|Ace Trainer}} Hope (requires {{m|Surf}}) ''(hidden)''|OR=yes|AS=yes|display={{DL|Repel|Max Repel}}}} | | {{Itemlist|Max Repel|1F, in a rock to the east of the staircase leading to {{tc|Ace Trainer}} Hope (requires {{m|Surf}}) ''(hidden)''|OR=yes|AS=yes|display={{DL|Repel|Max Repel}}}} |
| {{Itemlist|Ultra Ball|B1F, small rock, left of the ladder (requires {{m|Surf}}) ''(hidden)''|OR=yes|AS=yes|display={{ball|Ultra}}}} | | {{Itemlist|Ultra Ball|B1F, small rock, left of the ladder (requires {{m|Surf}}) ''(hidden)''|OR=yes|AS=yes|display={{ball|Ultra}}}} |
| {{Itemlist|PP Up|B1F, northeastern corner, behind the two boulders (requires {{m|Surf}} and {{m|Strength}})|OR=yes|AS=yes|display={{DL|Vitamin|PP Up}}}} | | {{Itemlist|PP Up|B1F, northeastern corner, behind the two boulders (requires {{m|Surf}} and {{m|Strength}})|OR=yes|AS=yes|display={{DL|Vitamin|PP Up}}}} |
| {{Itemlist|Elixir|1F, west of the northernmost bridge, on the empty tile next to a big rock and south of a small rock (requires {{m|Surf}}) ''(hidden)''|OR=yes|AS=yes|display={{DL|Ether|Elixir}}}} | | {{Itemlist|Elixir|1F, west of the northernmost bridge, on the empty tile next to a big rock and south of a small rock (requires {{m|Surf}}) ''(hidden)''|OR=yes|AS=yes}} |
| {{Itemlist|Max Elixir|B1F, southwest from the ladder north of {{tc|Street Thug}} Regan on 1F (requires {{m|Surf}})|OR=yes|AS=yes|display={{DL|Ether|Max Elixir}}}} | | {{Itemlist|Max Elixir|B1F, southwest from the ladder north of {{tc|Street Thug}} Regan on 1F (requires {{m|Surf}})|OR=yes|AS=yes}} |
| {{Itemlist|TM Psychic VI|B1F, down the water corridor south of {{tc|Ace Duo}} Jude & Rory, out the exit, and to the eastern end of the area (requires {{m|Surf}})|OR=yes|AS=yes|display={{TM|29|Psychic}}}}
| |
| {{Itemlist|TM Fire VI|B1F, north of {{tc|Expert}} Theodore, behind the two boulders (requires {{m|Strength}})|OR=yes|AS=yes|display={{TM|35|Flamethrower}}}} | | {{Itemlist|TM Fire VI|B1F, north of {{tc|Expert}} Theodore, behind the two boulders (requires {{m|Strength}})|OR=yes|AS=yes|display={{TM|35|Flamethrower}}}} |
| {{Itemlist|Full Restore|B1F, northwest of {{tc|Ace Trainer}} Vito|OR=yes|AS=yes|display={{DL|Potion|Full Restore}}}} | | {{Itemlist|Full Restore|B1F, northwest of {{tc|Ace Trainer}} Vito|OR=yes|AS=yes|display={{DL|Potion|Full Restore}}}} |
| {{Itemlist|Iron|2F, west of the southernmost bridge ''(hidden)''|OR=yes|AS=yes|display={{DL|Vitamin|Iron}}}} | | {{Itemlist|Iron|2F, west of the southernmost bridge ''(hidden)''|OR=yes|AS=yes|display={{DL|Vitamin|Iron}}}} |
| {{Itemlist|TM Bug VI|2F, atop the southern waterfall (requires {{m|Surf}} and {{m|Waterfall}})|OR=yes|AS=yes|display={{TM|81|X-Scissor}}}} | | {{Itemlist|TM Bug VI|2F, atop the southern waterfall (requires {{m|Surf}} and {{m|Waterfall}})|OR=yes|AS=yes|display={{TM|81|X-Scissor}}}} |
| {{Itemlist|Dawn Stone|2F, from [[Wally]] after defeating him (requires {{m|Surf}} and {{m|Strength}})|OR=yes|AS=yes|display={{evostone|Dawn Stone}}}} | | {{Itemlist|Dawn Stone|2F, from [[Wally]] after defeating him (requires {{m|Surf}} and {{m|Strength}})|OR=yes|AS=yes}} |
| {{Itemlist|PP Max|B1F, 5% chance of receiving one after a rematch with {{tc|Ace Duo}} Jude & Rory|OR=yes|AS=yes|display={{DL|Vitamin|PP Max}}}} | | {{Itemlist|PP Max|B1F, 5% chance of receiving one after a rematch with {{tc|Ace Duo}} Jude & Rory|OR=yes|AS=yes|display={{DL|Vitamin|PP Max}}}} |
| {{Itlistfoot|cave}} | | {{Itlistfoot|cave}} |
| Line 73: |
Line 70: |
| {{Catch/entry3|308|Medicham|yes|yes|no|Cave|40|10%|type1=Fighting|type2=Psychic}} | | {{Catch/entry3|308|Medicham|yes|yes|no|Cave|40|10%|type1=Fighting|type2=Psychic}} |
| {{Catch/div|cave|Rock Smash}} | | {{Catch/div|cave|Rock Smash}} |
| {{Catch/entry3|074|Geodude|yes|yes|yes|Rock Smash|30-40|70%|type1=Rock|type2=Ground}} | | {{Catch/entry3|074|Geodude|yes|yes|yes|Rock Smash|30-40|30%|type1=Rock|type2=Ground}} |
| {{Catch/entry3|075|Graveler|yes|yes|yes|Rock Smash|35-40|30%|type1=Rock|type2=Ground}} | | {{Catch/entry3|075|Graveler|yes|yes|yes|Rock Smash|30-40|70%|type1=Rock|type2=Ground}} |
| {{Catch/footer|cave}} | | {{Catch/footer|cave}} |
|
| |
|
| Line 349: |
Line 346: |
| ==={{g|Omega Ruby and Alpha Sapphire}}=== | | ==={{g|Omega Ruby and Alpha Sapphire}}=== |
| {{trainerheader|cave}} | | {{trainerheader|cave}} |
| {{trainerdiv|cave}} | | {{trainerdiv|cave|1F}} |
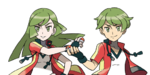
| {{trainerentry|VSAce Trainer M ORAS.png{{!}}150px|Ace Trainer|Albert|2,700|2|561|Sigilyph|♂|45||464|Rhyperior|♂|45|36=ショウ|37=Shō}} | | {{trainerentry|VSAce Trainer M ORAS.png{{!}}150px|Ace Trainer|Albert|2,700|2|561|Sigilyph|♂|45||464|Rhyperior|♂|45|36=ショウ|37=Shō}} |
| {{trainerdiv|cave}} | | {{trainerdiv|cave}} |
| {{trainerentry|VSAce Trainer F ORAS.png{{!}}150px|Ace Trainer|Hope|2,820|1|478|Froslass|♀|47|36=アヤナ|37=Ayana}} | | {{trainerentry|VSAce Trainer F ORAS.png{{!}}150px|Ace Trainer|Hope|2,820|1|478|Froslass|♀|47|36=アヤナ|37=Ayana}} |
| {{trainerdiv|cave}}
| |
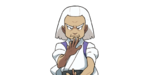
| {{trainerentry|VSExpert F.png{{!}}150px|Expert|Bryn|3,600|2|237|Hitmontop|♂|45||538|Throh|♂|45|36=タエ|37=Tae}}
| |
| {{trainerdiv|cave}} | | {{trainerdiv|cave}} |
| {{trainerentry|VSAce Trainer M ORAS.png{{!}}150px|Ace Trainer|Edgar|2,820|1|303|Mawile|♂|47|36=ノブヒコ|37=Nobuhiko}} | | {{trainerentry|VSAce Trainer M ORAS.png{{!}}150px|Ace Trainer|Edgar|2,820|1|303|Mawile|♂|47|36=ノブヒコ|37=Nobuhiko}} |
| {{trainerdiv|cave}} | | {{trainerdiv|cave}} |
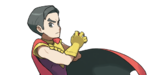
| {{trainerentry|VSStreet Thug.png{{!}}150px|Street Thug|Regan|1,376|2|229|Houndoom|♂|43||275|Shiftry|♂|43|36=マサテル|37=Masateru}} | | {{trainerentry|VSStreet Thug.png{{!}}150px|Street Thug|Regan|1,376|2|229|Houndoom|♂|43||275|Shiftry|♂|43|36=マサテル|37=Masateru}} |
| | {{trainerdiv|cave}} |
| | {{trainerentry|VSBrains & Brawn.png{{!}}150px|Brains & Brawn|Aden & Finn|3,008|2|518|Musharna|♂|47||057|Primeape|♂|47|36=デンとカネ|37=Den and Kane}} |
| | {{trainerdiv|cave|B1F}} |
| | {{trainerentry|VSExpert F.png{{!}}150px|Expert|Bryn|3,600|2|237|Hitmontop|♂|45||538|Throh|♂|45|36=タエ|37=Tae}} |
| {{trainerdiv|cave}} | | {{trainerdiv|cave}} |
| {{trainerentry|VSAce Duo ORAS.png{{!}}150px|Ace Duo|Jude & Rory|2,820|2|348|Armaldo|♂|47||346|Cradily|♂|47|36=トリとイマ|37=Tori and Ima|38=Nav}} | | {{trainerentry|VSAce Duo ORAS.png{{!}}150px|Ace Duo|Jude & Rory|2,820|2|348|Armaldo|♂|47||346|Cradily|♂|47|36=トリとイマ|37=Tori and Ima|38=Nav}} |
| Line 367: |
Line 366: |
| {{trainerdiv|cave}} | | {{trainerdiv|cave}} |
| {{trainerentry|VSDragon Tamer.png{{!}}150px|Dragon Tamer|Egon|2,820|1|230|Kingdra|♂|47|36=タツキ|37=Tatsuki}} | | {{trainerentry|VSDragon Tamer.png{{!}}150px|Dragon Tamer|Egon|2,820|1|230|Kingdra|♂|47|36=タツキ|37=Tatsuki}} |
| {{trainerdiv|cave}}
| |
| {{trainerentry|VSBrains & Brawn.png{{!}}150px|Brains & Brawn|Aden & Finn|3,008|2|518|Musharna|♂|47||057|Primeape|♂|47|36=デンとカネ|37=Den and Kane}}
| |
| {{trainerdiv|cave|Rematch}} | | {{trainerdiv|cave|Rematch}} |
| {{trainerentry|VSAce Duo ORAS.png{{!}}150px|Ace Duo|Jude & Rory|3,360<br><small>After entering the [[Hall of Fame]]</small>|2|348|Armaldo|♂|56||346|Cradily|♂|56||36=トリとイマ|37=Tori and Ima}} | | {{trainerentry|VSAce Duo ORAS.png{{!}}150px|Ace Duo|Jude & Rory|3,360<br><small>After entering the [[Hall of Fame]]</small>|2|348|Armaldo|♂|56||346|Cradily|♂|56||36=トリとイマ|37=Tori and Ima}} |
| Line 498: |
Line 495: |
| * Even though [[Wally]] challenges the player to a battle near the entrance in {{game|Emerald}}, the [[rematch]]es with him take place near the exit, the same place where he's battled in {{game|Ruby and Sapphire|s}}. | | * Even though [[Wally]] challenges the player to a battle near the entrance in {{game|Emerald}}, the [[rematch]]es with him take place near the exit, the same place where he's battled in {{game|Ruby and Sapphire|s}}. |
|
| |
|
| | ==In other languages== |
| | {{langtable|color={{locationcolor/light|cave}}|bordercolor={{locationcolor/dark|cave}} |
| | |fr=Route Victoire |
| | |de=Siegesstraße |
| | |it=Via Vittoria |
| | |ko=챔피언로드 ''Champion Road'' |
| | |es=Calle Victoria |
| | }} |
| | {{-}} |
| {{Hoenn}}<br/> | | {{Hoenn}}<br/> |
| {{Project Locations notice}} | | {{Project Locations notice}} |