Verdant Cavern: Difference between revisions
No edit summary |
m (Text replacement - "" to "") |
||
| (46 intermediate revisions by 20 users not shown) | |||
| Line 1: | Line 1: | ||
{{Infobox location | {{Infobox location | ||
|image=Verdant Cavern SM.png | |image=Verdant Cavern SM.png | ||
| Line 13: | Line 12: | ||
|mapsize=250px | |mapsize=250px | ||
}} | }} | ||
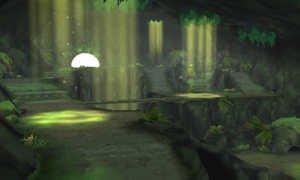
'''Verdant Cavern''' (Japanese: '''{{tt|茂|しげ}}みの{{tt|洞窟|どうくつ}}''' ''Verdant Cavern'') is a location on [[Melemele Island]] in [[Alola]], located | '''Verdant Cavern''' (Japanese: '''{{tt|茂|しげ}}みの{{tt|洞窟|どうくつ}}''' ''Verdant Cavern'') is a location on [[Melemele Island]] in [[Alola]], located in the northeastern portion of {{rt|2|Alola}}. It is the location of the trial of [[Ilima]]. | ||
==Trial== | ==Trial== | ||
The trial begins as soon as the player enters Verdant Cavern; however, they can leave at any time, although this will reset the trial. Once the trial guide has stepped aside to grant access to the Totem's Den, the player can leave at any time without resetting the trial. | The trial begins as soon as the {{player}} enters Verdant Cavern; however, they can leave at any time, although this will reset the trial. Once the trial guide has stepped aside to grant access to the Totem's Den, the player can leave at any time without resetting the trial. | ||
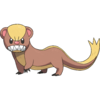
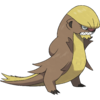
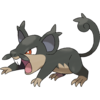
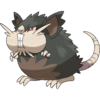
In this trial, the player must find and battle two {{p|Yungoos}}{{sup/7|S}}{{sup/7|US}}/{{ | In this trial, the player must find and battle two {{p|Yungoos}}{{sup/7|S}}{{sup/7|US}}/{{rf|Alolan}} {{p|Rattata}}{{sup/7|M}}{{sup/7|UM}} and a {{p|Gumshoos}}{{sup/7|S}}{{sup/7|US}}/an Alolan {{p|Raticate}}{{sup/7|M}}{{sup/7|UM}}. Along the way, the player will face two {{tc|Team Skull Grunt}}s and battle one of them; once defeated, the two grunts will unwittingly help the player finish the trial. Despite not officially being part of the trial, the grunts act as if they are, resetting when the trial is reset. | ||
After defeating the Totem Pokémon, the player will be greeted by Ilima for completing the trial and will receive a [[Normalium Z]] as a reward. After completing the trial, [[wild Pokémon]] will appear in Verdant Cavern as both ambush encounters and [[cave tile]] encounters. | After defeating the Totem Pokémon, the player will be greeted by Ilima for completing the trial and will receive a [[Normalium Z]] as a reward. After completing the trial, [[wild Pokémon]] will appear in Verdant Cavern as both ambush encounters and [[cave tile]] encounters. | ||
===Trial Pokémon and Trainers=== | ===Trial Pokémon and Trainers=== | ||
====Trial Site==== | ====Trial Site==== | ||
{| | {| | ||
| | ! colspan="3" | Sun and Ultra Sun | ||
|- | |- style="vertical-align:top" | ||
| | |{{Pokémon/7 | ||
{{Pokémon/7 | |||
|ndex=734 | |ndex=734 | ||
|pokemon=Yungoos | |pokemon=Yungoos | ||
| Line 41: | Line 36: | ||
|move2=Tackle|move2type=Normal|move2cat=Physical | |move2=Tackle|move2type=Normal|move2cat=Physical | ||
|move3=Hyper Fang|move3type=Normal|move3cat=Physical | |move3=Hyper Fang|move3type=Normal|move3cat=Physical | ||
|move4=Leer|move4type=Normal|move4cat=Status | |move4=Leer|move4type=Normal|move4cat=Status}} | ||
}} | |{{Pokémon/7 | ||
| | |||
{{Pokémon/7 | |||
|ndex=734 | |ndex=734 | ||
|pokemon=Yungoos | |pokemon=Yungoos | ||
| Line 54: | Line 47: | ||
|move2=Tackle|move2type=Normal|move2cat=Physical | |move2=Tackle|move2type=Normal|move2cat=Physical | ||
|move3=Super Fang|move3type=Normal|move3cat=Physical | |move3=Super Fang|move3type=Normal|move3cat=Physical | ||
|move4=Leer|move4type=Normal|move4cat=Status | |move4=Leer|move4type=Normal|move4cat=Status}} | ||
}} | |{{Pokémon/7 | ||
| | |||
{{Pokémon/7 | |||
|ndex=735 | |ndex=735 | ||
|pokemon=Gumshoos | |pokemon=Gumshoos | ||
| Line 67: | Line 58: | ||
|move2=Bite|move2type=Dark|move2cat=Physical | |move2=Bite|move2type=Dark|move2cat=Physical | ||
|move3=Super Fang|move3type=Normal|move3cat=Physical | |move3=Super Fang|move3type=Normal|move3cat=Physical | ||
|move4=Leer|move4type=Normal|move4cat=Status | |move4=Leer|move4type=Normal|move4cat=Status}} | ||
}} | |||
|- | |- | ||
! colspan=3 | | ! colspan=3 | Moon and Ultra Moon | ||
|- | |- style="vertical-align:top" | ||
| | |{{Pokémon/7 | ||
{{Pokémon/7 | |||
|ndex=019 | |ndex=019 | ||
|pokemon=Rattata | |pokemon=Rattata | ||
| Line 84: | Line 73: | ||
|move2=Tail Whip|move2type=Normal|move2cat=Status | |move2=Tail Whip|move2type=Normal|move2cat=Status | ||
|move3=Hyper Fang|move3type=Normal|move3cat=Physical | |move3=Hyper Fang|move3type=Normal|move3cat=Physical | ||
|move4=Tackle|move4type=Normal|move4cat=Physical | |move4=Tackle|move4type=Normal|move4cat=Physical}} | ||
}} | |{{Pokémon/7 | ||
| | |||
{{Pokémon/7 | |||
|ndex=019 | |ndex=019 | ||
|pokemon=Rattata | |pokemon=Rattata | ||
| Line 98: | Line 85: | ||
|move2=Tail Whip|move2type=Normal|move2cat=Status | |move2=Tail Whip|move2type=Normal|move2cat=Status | ||
|move3=Super Fang|move3type=Normal|move3cat=Physical | |move3=Super Fang|move3type=Normal|move3cat=Physical | ||
|move4=Tackle|move4type=Normal|move4cat=Physical | |move4=Tackle|move4type=Normal|move4cat=Physical}} | ||
}} | |{{Pokémon/7 | ||
| | |||
{{Pokémon/7 | |||
|ndex=020 | |ndex=020 | ||
|pokemon=Raticate | |pokemon=Raticate | ||
| Line 112: | Line 97: | ||
|move2=Tail Whip|move2type=Normal|move2cat=Status | |move2=Tail Whip|move2type=Normal|move2cat=Status | ||
|move3=Super Fang|move3type=Normal|move3cat=Physical | |move3=Super Fang|move3type=Normal|move3cat=Physical | ||
|move4=Tackle|move4type=Normal|move4cat=Physical | |move4=Tackle|move4type=Normal|move4cat=Physical}} | ||
}} | |||
|} | |} | ||
{{Party/Single | {{Party/Single | ||
|color={{black color light}} | |color={{black color light}} | ||
| Line 122: | Line 107: | ||
|size=150px | |size=150px | ||
|class=Team Skull | |class=Team Skull | ||
|name=Grunt | |classlink=Team Skull Grunt (Trainer class) | ||
|name={{tccolor|Team Skull Grunt|000|Grunt}} | |||
|prize={{PDollar}}352 | |prize={{PDollar}}352 | ||
|game=SMUSUM | |game=SMUSUM | ||
| Line 134: | Line 120: | ||
|ability=Insomnia | |ability=Insomnia | ||
|level=11 | |level=11 | ||
|move1=Pound|move1type=Normal|move1cat=Physical | |move1=Pound|move1type=Normal|move1cat=Physical}} | ||
}} | |||
{{Party/Footer}} | {{Party/Footer}} | ||
====Totem's Den==== | ====Totem's Den==== | ||
{| | The Totem Pokémon will call its ally on its first turn; once the ally is defeated, the Totem Pokémon cannot call it again. | ||
| | {| | ||
! colspan="2" | Sun | |||
! colspan="2" | Moon | |||
|- | |- | ||
! Totem Gumshoos | |||
! Ally Yungoos | |||
! Totem Raticate | |||
! Ally Rattata | |||
|- | |- | ||
| Aura: +1 {{stat|Defense}} | |||
| | |||
| Aura: +1 {{stat|Defense}} | |||
| | | | ||
{{Pokémon/7 | |- style="vertical-align:top" | ||
|{{Pokémon/7 | |||
|ndex=735 | |ndex=735 | ||
|pokemon=Gumshoos | |pokemon=Gumshoos | ||
| Line 157: | Line 150: | ||
|move2=Bite|move2type=Dark|move2cat=Physical | |move2=Bite|move2type=Dark|move2cat=Physical | ||
|move3=Leer|move3type=Normal|move3cat=Status | |move3=Leer|move3type=Normal|move3cat=Status | ||
|move4=Scary Face|move4type=Normal|move4cat=Status | |move4=Scary Face|move4type=Normal|move4cat=Status}} | ||
}} | |{{Pokémon/7 | ||
| | |||
{{Pokémon/7 | |||
|ndex=734 | |ndex=734 | ||
|pokemon=Yungoos | |pokemon=Yungoos | ||
| Line 170: | Line 161: | ||
|move2=Tackle|move2type=Normal|move2cat=Physical | |move2=Tackle|move2type=Normal|move2cat=Physical | ||
|move3=Pursuit|move3type=Dark|move3cat=Physical | |move3=Pursuit|move3type=Dark|move3cat=Physical | ||
|move4=Bide|move4type=Normal|move4cat=Physical | |move4=Bide|move4type=Normal|move4cat=Physical}} | ||
}} | |{{Pokémon/7 | ||
| | |||
{{Pokémon/7 | |||
|ndex=020 | |ndex=020 | ||
|pokemon=Raticate | |pokemon=Raticate | ||
| Line 194: | Line 175: | ||
|move3=Scary Face|move3type=Normal|move3cat=Status | |move3=Scary Face|move3type=Normal|move3cat=Status | ||
|move4=Tackle|move4type=Normal|move4cat=Physical}} | |move4=Tackle|move4type=Normal|move4cat=Physical}} | ||
| | |{{Pokémon/7 | ||
{{Pokémon/7 | |||
|ndex=019 | |ndex=019 | ||
|pokemon=Rattata | |pokemon=Rattata | ||
| Line 207: | Line 187: | ||
|move3=Quick Attack|move3type=Normal|move3cat=Physical | |move3=Quick Attack|move3type=Normal|move3cat=Physical | ||
|move4=Tail Whip|move4type=Normal|move4cat=Status}} | |move4=Tail Whip|move4type=Normal|move4cat=Status}} | ||
|- | |- | ||
| | ! colspan="2" | Ultra Sun | ||
! colspan="2" | Ultra Moon | |||
|- | |||
! Totem Gumshoos | |||
! Ally Yungoos | |||
! Totem Raticate | |||
! Ally Rattata | |||
|- | |- | ||
| Aura: +1 {{stat|Defense}} | |||
| | | | ||
{{Pokémon/7 | | Aura: +1 {{stat|Defense}} | ||
| | |||
|- | |||
|{{Pokémon/7 | |||
|ndex=735 | |ndex=735 | ||
|pokemon=Gumshoos | |pokemon=Gumshoos | ||
| Line 227: | Line 212: | ||
|move2=Bite|move2type=Dark|move2cat=Physical | |move2=Bite|move2type=Dark|move2cat=Physical | ||
|move3=Tackle|move3type=Normal|move3cat=Physical | |move3=Tackle|move3type=Normal|move3cat=Physical | ||
|move4=Scary Face|move4type=Normal|move4cat=Status | |move4=Scary Face|move4type=Normal|move4cat=Status}} | ||
}} | |{{Pokémon/7 | ||
| | |||
{{Pokémon/7 | |||
|ndex=734 | |ndex=734 | ||
|pokemon=Yungoos | |pokemon=Yungoos | ||
| Line 240: | Line 223: | ||
|move2=Tackle|move2type=Normal|move2cat=Physical | |move2=Tackle|move2type=Normal|move2cat=Physical | ||
|move3=Pursuit|move3type=Dark|move3cat=Physical | |move3=Pursuit|move3type=Dark|move3cat=Physical | ||
|move4=Odor Sleuth|move4type=Normal|move4cat=Status | |move4=Odor Sleuth|move4type=Normal|move4cat=Status}} | ||
}} | |{{Pokémon/7 | ||
| | |||
{{Pokémon/7 | |||
|ndex=020 | |ndex=020 | ||
|pokemon=Raticate | |pokemon=Raticate | ||
| Line 264: | Line 237: | ||
|move3=Fury Swipes|move3type=Normal|move3cat=Physical | |move3=Fury Swipes|move3type=Normal|move3cat=Physical | ||
|move4=Scary Face|move4type=Normal|move4cat=Status}} | |move4=Scary Face|move4type=Normal|move4cat=Status}} | ||
| | |{{Pokémon/7 | ||
{{Pokémon/7 | |||
|ndex=019 | |ndex=019 | ||
|pokemon=Rattata | |pokemon=Rattata | ||
| Line 273: | Line 245: | ||
|ability=Hustle | |ability=Hustle | ||
|level=10 | |level=10 | ||
|move1=Tackle|move1type=Normal|move1cat=Physical | |move1=Tackle|move1type=Normal|move1cat=Physical | ||
|move2=Tail Whip|move2type=Normal|move2cat=Status | |move2=Tail Whip|move2type=Normal|move2cat=Status | ||
|move3=Quick Attack|move3type=Normal|move3cat=Physical | |move3=Quick Attack|move3type=Normal|move3cat=Physical | ||
| Line 283: | Line 255: | ||
{{Itlisth|cave}} | {{Itlisth|cave}} | ||
{{Itemlist|Super Potion|Southeast corner, near the entrance|Su=yes|M=yes|US=yes|UM=yes}} | {{Itemlist|Super Potion|Southeast corner, near the entrance|Su=yes|M=yes|US=yes|UM=yes}} | ||
{{Itemlist|Revive| | {{Itemlist|Revive|South of the mossy rock in front of the second den ''(hidden)''|Su=yes|M=yes|US=yes|UM=yes}} | ||
{{Itemlist| | {{Itemlist|TM Fighting VI|At the top of the ledge northwest of the entrance|Su=yes|M=yes|US=yes|UM=yes|display={{TM|31|Brick Break}}}} | ||
{{Itemlist|Super Potion|Northeast corner, through the tunnel|Su=yes|M=yes|US=yes|UM=yes}} | {{Itemlist|Super Potion|Northeast corner, through the tunnel|Su=yes|M=yes|US=yes|UM=yes}} | ||
{{Itemlist| | {{Itemlist|X Defense|West side of the cavern, south of the western den|Su=yes|M=yes|US=yes|UM=yes}} | ||
{{Itlistfoot|cave}} | {{Itlistfoot|cave}} | ||
| Line 293: | Line 265: | ||
{{Itlisth|cave}} | {{Itlisth|cave}} | ||
{{Itemlist|Oran Berry|Sometimes dropped by Pokémon from dirt clouds|Su=yes|M=yes|US=yes|UM=yes}} | {{Itemlist|Oran Berry|Sometimes dropped by Pokémon from dirt clouds|Su=yes|M=yes|US=yes|UM=yes}} | ||
{{Itemlist|Sitrus Berry|Sometimes dropped by Pokémon from dirt clouds|Su=yes|M=yes}} | {{Itemlist|Sitrus Berry|Sometimes dropped by Pokémon from dirt clouds|Su=yes|M=yes|US=yes|UM=yes}} | ||
{{Itlistfoot|cave}} | {{Itlistfoot|cave}} | ||
| Line 304: | Line 276: | ||
{{Itlisth|cave}} | {{Itlisth|cave}} | ||
{{Itemlist|Normalium Z|Reward for completing the trial|Su=yes|M=yes|US=yes|UM=yes}} | {{Itemlist|Normalium Z|Reward for completing the trial|Su=yes|M=yes|US=yes|UM=yes}} | ||
{{Itemlist|Great Ball|From Ilima after completing the trial|Su=yes|M=yes|US=yes|UM=yes|display= | {{Itemlist|Great Ball|From Ilima after completing the trial|Su=yes|M=yes|US=yes|UM=yes|display=[[Great Ball]] ×10}} | ||
{{Itemlist|Energy Root|On the land jutting out over the edge (requires [[Poké Ride|Tauros Charge]]) ''(hidden)''|Su=yes|M=yes}} | {{Itemlist|Energy Root|On the land jutting out over the edge (requires [[Poké Ride|Tauros Charge]]) ''(hidden)''|Su=yes|M=yes|US=yes|UM=yes}} | ||
{{Itemlist|TM Dark VI|At the top of the ledge (requires [[Poké Ride|Tauros Charge]])|Su=yes|M=yes|display={{TM|46|Thief}}}} | {{Itemlist|TM Dark VI|At the top of the ledge (requires [[Poké Ride|Tauros Charge]])|Su=yes|M=yes|US=yes|UM=yes|display={{TM|46|Thief}}}} | ||
{{Itemlist|None|sprite=USUM Trial Guide {{#switch: {{#expr: {{#time: U}} mod 3}}|0=Tee m|1=Tee f|2=Cap f}}|size=40|From a {{tc|Trial Guide}} after defeating the [[Totem Pokémon]] in a [[rematch]]|US=yes|UM=yes|display=[[Fashion item|Trial Guide Cap and Tee]]}} | |||
{{Itlistfoot|cave}} | {{Itlistfoot|cave}} | ||
| Line 314: | Line 287: | ||
===Pokémon Sun and Moon=== | ===Pokémon Sun and Moon=== | ||
====Trial Site==== | ====Trial Site==== | ||
{{Catch/header/7|cave}} | {{Catch/header/7|cave}} | ||
{{Catch/entry7|041|Zubat|yes|yes|Cave|8-11|all=70%|type1=Poison|type2=Flying}} | {{Catch/entry7|041|Zubat|yes|yes|Cave|8-11|all=70%|type1=Poison|type2=Flying}} | ||
{{Catch/entry7|050A|Diglett|yes|yes|Cave|8-11|all=30%|type1=Ground|type2=Steel}} | {{Catch/entry7|050A|Diglett|yes|yes|Cave|8-11|all=30%|type1=Ground|type2=Steel|form=Alolan Form}} | ||
{{Catch/div|cave|Ambush encounters}} | {{Catch/div|cave|Ambush encounters}} | ||
{{Catch/entry7|019A|Rattata|no|yes|Dirt cloud|11|all=100%|type1=Dark|type2=Normal}} | {{Catch/entry7|019A|Rattata|no|yes|Dirt cloud|11|all=100%|type1=Dark|type2=Normal|form=Alolan Form}} | ||
{{Catch/entry7|734|Yungoos|yes|no|Dirt cloud|11|all=100%|type1=Normal}} | {{Catch/entry7|734|Yungoos|yes|no|Dirt cloud|11|all=100%|type1=Normal}} | ||
{{Catch/footer|cave}} | {{Catch/footer|cave}} | ||
| Line 330: | Line 299: | ||
{{Catch/header/7|cave}} | {{Catch/header/7|cave}} | ||
{{Catch/entryusum|041|Zubat|yes|yes|Cave|8-11|all=35%|type1=Poison|type2=Flying}} | {{Catch/entryusum|041|Zubat|yes|yes|Cave|8-11|all=35%|type1=Poison|type2=Flying}} | ||
{{Catch/entryusum|050A|Diglett|yes|yes|Cave|8-11|all=35%|type1=Ground|type2=Steel}} | {{Catch/entryusum|050A|Diglett|yes|yes|Cave|8-11|all=35%|type1=Ground|type2=Steel|form=Alolan Form}} | ||
{{Catch/entryusum|714|Noibat|yes|yes|Cave|8-11|all=30%|type1=Flying|type2=Dragon}} | {{Catch/entryusum|714|Noibat|yes|yes|Cave|8-11|all=30%|type1=Flying|type2=Dragon}} | ||
{{Catch/div|cave|Ambush encounters}} | {{Catch/div|cave|Ambush encounters}} | ||
{{Catch/entryusum|019A|Rattata|no|yes|Dirt cloud|10|all=100%|type1=Dark|type2=Normal}} | {{Catch/entryusum|019A|Rattata|no|yes|Dirt cloud|10|all=100%|type1=Dark|type2=Normal|form=Alolan Form}} | ||
{{Catch/entryusum|734|Yungoos|yes|no|Dirt cloud|10|all=100%|type1=Normal}} | {{Catch/entryusum|734|Yungoos|yes|no|Dirt cloud|10|all=100%|type1=Normal}} | ||
{{Catch/footer|cave}} | {{Catch/footer|cave}} | ||
==Special encounters== | |||
===Pokémon Moon=== | |||
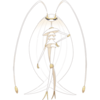
Four {{p|Pheromosa}} appear here during the second [[Ultra Beast]] mission. The Pheromosa respawn immediately if defeated or run from. Pheromosa is not registered as seen in the [[Pokédex]] and appears as ??? until the first one is caught. They are coded to never be {{Shiny}}. | |||
{| | |||
| Aura: +2 {{stat|Speed}} | |||
|- style="vertical-align:top" | |||
|{{Pokémon/7 | |||
|ndex=795 | |||
|pokemon=Pheromosa | |||
|type1=Bug | |||
|type2=Fighting | |||
|ability=Beast Boost | |||
|level=60 | |||
|move1=Triple Kick|move1type=Fighting|move1cat=Physical | |||
|move2=Lunge|move2type=Bug|move2cat=Physical | |||
|move3=Bug Buzz|move3type=Bug|move3cat=Special | |||
|move4=Me First|move4type=Normal|move4cat=Status}} | |||
|} | |||
===Pokémon Ultra Sun and Ultra Moon=== | |||
After receiving [[Ilima's Normalium Z]] in [[Hau'oli City]], the player can re-enter Totem's Den and interact with the pedestal to initiate a one-time [[rematch]] against the Totem Pokémon. | |||
The Totem Pokémon will continuously call more allies, regardless of how many the player has defeated. | |||
{| | |||
! colspan="2" | Ultra Sun | |||
! colspan="2" | Ultra Moon | |||
|- | |||
! Totem Gumshoos | |||
! Ally Yungoos | |||
! Totem Raticate | |||
! Ally Rattata | |||
|- | |||
| Aura: +2 {{stat|Attack|Atk}}, {{stat|Defense|Def}}, {{stat|Special Attack|Sp. Atk}}, {{stat|Special Defense|Sp. Def}}, {{stat|Speed}} | |||
| | |||
| Aura: +2 {{stat|Attack|Atk}}, {{stat|Defense|Def}}, {{stat|Special Attack|Sp. Atk}}, {{stat|Special Defense|Sp. Def}}, {{stat|Speed}} | |||
| | |||
|- style="vertical-align:top" | |||
|{{Pokémon/7 | |||
|ndex=735 | |||
|pokemon=Gumshoos | |||
|gender=male | |||
|type1=Normal | |||
|ability=Adaptability | |||
|held=Chople Berry | |||
|level=60 | |||
|move1=Hyper Fang|move1type=Normal|move1cat=Physical | |||
|move2=Ice Fang|move2type=Ice|move2cat=Physical | |||
|move3=Protect|move3type=Normal|move3cat=Status | |||
|move4=Crunch|move4type=Dark|move4cat=Physical}} | |||
|{{Pokémon/7 | |||
|ndex=734 | |||
|pokemon=Yungoos | |||
|gender=both | |||
|type1=Normal | |||
|ability=Stakeout | |||
|level=58 | |||
|move1=Yawn|move1type=Normal|move1cat=Status | |||
|move2=Mud-Slap|move2type=Ground|move2cat=Physical | |||
|move3=Torment|move3type=Dark|move3cat=Status | |||
|move4=Super Fang|move4type=Normal|move4cat=Physical}} | |||
|{{Pokémon/7 | |||
|ndex=020 | |||
|pokemon=Raticate | |||
|form=-Alola | |||
|gender=male | |||
|type1=Dark|type2=Normal | |||
|ability=Gluttony | |||
|held=Chople Berry | |||
|level=60 | |||
|move1=Hyper Fang|move1type=Normal|move1cat=Physical | |||
|move2=Throat Chop|move2type=Dark|move2cat=Physical | |||
|move3=Protect|move3type=Normal|move3cat=Status | |||
|move4=Double Team|move4type=Normal|move4cat=Status}} | |||
|{{Pokémon/7 | |||
|ndex=019 | |||
|pokemon=Rattata | |||
|form=-Alola | |||
|gender=both | |||
|type1=Dark|type2=Normal | |||
|ability=Hustle | |||
|level=58 | |||
|move1=Super Fang|move1type=Normal|move1cat=Physical | |||
|move2=Tail Whip|move2type=Normal|move2cat=Status | |||
|move3=Torment|move3type=Dark|move3cat=Status | |||
|move4=Crunch|move4type=Dark|move4cat=Physical}} | |||
|} | |||
==Layout== | |||
{| class="roundy" style="margin:auto; background: #000; border: 3px solid #{{Locationcolor/dark|cave}}" | |||
|- | |||
! style="background:#{{Locationcolor/light|cave}}; {{roundytl|5px}}" | Game | |||
! style="background:#{{Locationcolor/light|cave}}" | Cave | |||
! style="background:#{{Locationcolor/light|cave}}; {{roundytr|5px}}" | Totem's Den | |||
|- | |||
! style="background:#{{sun color}}" | {{color2|000|Pokémon Sun and Moon|Sun}} | |||
| rowspan="2" | | |||
| rowspan="2" | [[File:Verdant Cavern Totem's Den SM.png|250px]] | |||
|- | |||
! style="background:#{{moon color}}" | {{color2|000|Pokémon Sun and Moon|Moon}} | |||
|- | |||
! style="background:#{{Ultra sun color}}" | {{color2|000|Pokémon Ultra Sun and Ultra Moon|Ultra Sun}} | |||
| rowspan="2" | | |||
| rowspan="2" | [[File:Verdant Cavern Totem's Den USUM.png|250px]] | |||
|- | |||
! style="background:#{{Ultra moon color}}" | {{color2|000|Pokémon Ultra Sun and Ultra Moon|Ultra Moon}} | |||
|- | |||
| colspan=3 style="background:#{{Locationcolor/light|building}}; {{roundybottom|5px}}" | | |||
|} | |||
==In the anime== | ==In the anime== | ||
[[File:Verdant Cavern anime.png|thumb|250px|Verdant Cavern in the anime]] | [[File:Verdant Cavern anime.png|thumb|250px|Verdant Cavern in the {{pkmn|anime}}]] | ||
Verdant Cavern appeared in ''[[ | Verdant Cavern appeared in ''[[SM009|To Top a Totem!]]'', as the site of {{Ash}}'s first island trial. Wanting to ask {{p|Yungoos}} and {{p|Gumshoos}}'s help in dealing with a group of {{rf|Alolan}} {{p|Rattata}} and {{p|Raticate}} causing havoc around [[Melemele Island]], Ash was led to the Verdant Cavern by [[Hala]] to battle {{pkmn2|Totem}} Gumshoos and get it to help them. | ||
At first, Ash faced a Yungoos and Gumshoos, the Totem's ally Pokémon, which he defeated with the help of {{AP|Pikachu}} and {{AP|Rowlet}}. After this, Totem Gumshoos appeared, challenging Ash. It was able to defeat Rowlet, but was eventually taken down by Pikachu. As a reward for winning the battle, Totem Gumshoos gave Ash a [[Normalium Z]] and agreed to help in driving away the troublesome Rattata and Raticate. Unbeknownst to Ash and Hala, {{DL|Guardian deities (anime)|Tapu Koko}} secretly followed the trial as it took place. | |||
{{-}} | {{-}} | ||
==In the TCG== | |||
The following is a list is of cards mentioning or featuring Verdant Cavern in the [[Pokémon Trading Card Game]]. | |||
{{cardlist/header|Related cards|Supporter|char=yes}} | |||
{{cardlist/entry|cardname={{TCG ID|Sun & Moon|Ilima|121}}|type=Supporter|enset=Sun & Moon|enrarity=Uncommon|ennum=121/149|jpset=Collection Sun|jprarity=U|jpnum=058/060}} | |||
{{cardlist/footer|Supporter}} | |||
==Trivia== | ==Trivia== | ||
* In Pokémon Moon, when the {{pkmn2|Totem}} {{p|Raticate}} appears, {{p|Gumshoos}}'s [[cry]] is played instead of Raticate's. | * In Pokémon Moon and Pokémon Ultra Moon, when the {{pkmn2|Totem}} {{p|Raticate}} appears, {{p|Gumshoos}}'s [[cry]] is played instead of Raticate's. | ||
==In other languages== | ==In other languages== | ||
| Line 355: | Line 443: | ||
|ko=우거진 동굴 ''Ugeojin Donggul'' | |ko=우거진 동굴 ''Ugeojin Donggul'' | ||
|ru=Изумрудная Пещера ''Izumrudnaya Peshchera'' | |ru=Изумрудная Пещера ''Izumrudnaya Peshchera'' | ||
|es=Cueva Sotobosque | |es=Cueva Sotobosque | ||
}} | }} | ||
| Line 367: | Line 454: | ||
[[de:Vegetationshöhle]] | [[de:Vegetationshöhle]] | ||
[[es:Cueva Sotobosque]] | |||
[[fr:Grotte Verdoyante]] | [[fr:Grotte Verdoyante]] | ||
[[it:Grotta Sottobosco]] | [[it:Grotta Sottobosco]] | ||
[[ja:しげみのどうくつ]] | [[ja:しげみのどうくつ]] | ||
[[zh:蔥鬱洞窟]] | [[zh:蔥鬱洞窟]] | ||
Latest revision as of 12:03, 11 March 2024
| ||||
| ||||
| Map description: | A cave with a great variety of plants thriving inside it. The light shafting in from above makes for a breathtaking sight. | |||
|---|---|---|---|---|
| Location: | Route 2 | |||
| Region: | Alola | |||
| Generations: | VII | |||
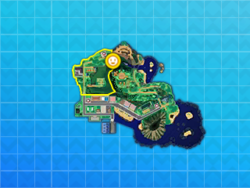 Location of Verdant Cavern in Alola. | ||||
| Pokémon world locations | ||||
Verdant Cavern (Japanese: 茂みの洞窟 Verdant Cavern) is a location on Melemele Island in Alola, located in the northeastern portion of Route 2. It is the location of the trial of Ilima.
Trial
The trial begins as soon as the player enters Verdant Cavern; however, they can leave at any time, although this will reset the trial. Once the trial guide has stepped aside to grant access to the Totem's Den, the player can leave at any time without resetting the trial.
In this trial, the player must find and battle two YungoosSUS/Alolan RattataMUM and a GumshoosSUS/an Alolan RaticateMUM. Along the way, the player will face two Team Skull Grunts and battle one of them; once defeated, the two grunts will unwittingly help the player finish the trial. Despite not officially being part of the trial, the grunts act as if they are, resetting when the trial is reset.
After defeating the Totem Pokémon, the player will be greeted by Ilima for completing the trial and will receive a Normalium Z as a reward. After completing the trial, wild Pokémon will appear in Verdant Cavern as both ambush encounters and cave tile encounters.
Trial Pokémon and Trainers
Trial Site
|
|||||||||||||||||||||||||||||||||||||
| |||||||||||||||||||||||||||||||||||||
Totem's Den
The Totem Pokémon will call its ally on its first turn; once the ally is defeated, the Totem Pokémon cannot call it again.
| Sun | Moon | ||||||||||||||||||||||||||||||||||||||||||||||||||||||||||||||||||||||||||||||||||||||||||||||||||||||||||||||||||||||||||||||||||||||
|---|---|---|---|---|---|---|---|---|---|---|---|---|---|---|---|---|---|---|---|---|---|---|---|---|---|---|---|---|---|---|---|---|---|---|---|---|---|---|---|---|---|---|---|---|---|---|---|---|---|---|---|---|---|---|---|---|---|---|---|---|---|---|---|---|---|---|---|---|---|---|---|---|---|---|---|---|---|---|---|---|---|---|---|---|---|---|---|---|---|---|---|---|---|---|---|---|---|---|---|---|---|---|---|---|---|---|---|---|---|---|---|---|---|---|---|---|---|---|---|---|---|---|---|---|---|---|---|---|---|---|---|---|---|---|---|
| Totem Gumshoos | Ally Yungoos | Totem Raticate | Ally Rattata | ||||||||||||||||||||||||||||||||||||||||||||||||||||||||||||||||||||||||||||||||||||||||||||||||||||||||||||||||||||||||||||||||||||
| Aura: +1 Defense | Aura: +1 Defense | ||||||||||||||||||||||||||||||||||||||||||||||||||||||||||||||||||||||||||||||||||||||||||||||||||||||||||||||||||||||||||||||||||||||
|
|
|
| ||||||||||||||||||||||||||||||||||||||||||||||||||||||||||||||||||||||||||||||||||||||||||||||||||||||||||||||||||||||||||||||||||||
| Ultra Sun | Ultra Moon | ||||||||||||||||||||||||||||||||||||||||||||||||||||||||||||||||||||||||||||||||||||||||||||||||||||||||||||||||||||||||||||||||||||||
| Totem Gumshoos | Ally Yungoos | Totem Raticate | Ally Rattata | ||||||||||||||||||||||||||||||||||||||||||||||||||||||||||||||||||||||||||||||||||||||||||||||||||||||||||||||||||||||||||||||||||||
| Aura: +1 Defense | Aura: +1 Defense | ||||||||||||||||||||||||||||||||||||||||||||||||||||||||||||||||||||||||||||||||||||||||||||||||||||||||||||||||||||||||||||||||||||||
|
|
|
| ||||||||||||||||||||||||||||||||||||||||||||||||||||||||||||||||||||||||||||||||||||||||||||||||||||||||||||||||||||||||||||||||||||
Items
Trial Site
| Item | Location | Games | |
|---|---|---|---|
| Super Potion | Southeast corner, near the entrance | S M US UM | |
| Revive | South of the mossy rock in front of the second den (hidden) | S M US UM | |
| TM31 (Brick Break) | At the top of the ledge northwest of the entrance | S M US UM | |
| Super Potion | Northeast corner, through the tunnel | S M US UM | |
| X Defense | West side of the cavern, south of the western den | S M US UM | |
Dropped after ambush encounters
Sometimes, after a Pokémon from a dirt cloud is defeated or caught, it will drop an item.
| Item | Location | Games | |
|---|---|---|---|
| Oran Berry | Sometimes dropped by Pokémon from dirt clouds | S M US UM | |
| Sitrus Berry | Sometimes dropped by Pokémon from dirt clouds | S M US UM | |
Zygarde Cube
| Item | Location | Games | |
|---|---|---|---|
| Zygarde Cell | Next to the northeastern den | S M | |
Totem's Den
| Item | Location | Games | |
|---|---|---|---|
| Normalium Z | Reward for completing the trial | S M US UM | |
| Great Ball ×10 | From Ilima after completing the trial | S M US UM | |
| Energy Root | On the land jutting out over the edge (requires Tauros Charge) (hidden) | S M US UM | |
| TM46 (Thief) | At the top of the ledge (requires Tauros Charge) | S M US UM | |
| Trial Guide Cap and Tee | From a Trial Guide after defeating the Totem Pokémon in a rematch | US UM | |
Pokémon
Prior to completing the trial, wild Pokémon do not appear in Verdant Cavern (except trial Pokémon).
Pokémon Sun and Moon
Trial Site
| Pokémon | Allies | Games | Location | Levels | Rate | ||||||||||
|---|---|---|---|---|---|---|---|---|---|---|---|---|---|---|---|
|
S | M |
|
8-11 | 70% | ||||||||||
|
S | M |
|
8-11 | 30% | ||||||||||
| Ambush encounters | |||||||||||||||
|
S | M |
|
11 | 100% | ||||||||||
|
S | M |
|
11 | 100% | ||||||||||
| A colored background means that the Pokémon can be found in this location in the specified game. A white background with a colored letter means that the Pokémon cannot be found here. | |||||||||||||||
Pokémon Ultra Sun and Ultra Moon
Trial Site
| Pokémon | Allies | Games | Location | Levels | Rate | ||||||||||
|---|---|---|---|---|---|---|---|---|---|---|---|---|---|---|---|
|
US | UM |
|
8-11 | 35% | ||||||||||
|
US | UM |
|
8-11 | 35% | ||||||||||
|
US | UM |
|
8-11 | 30% | ||||||||||
| Ambush encounters | |||||||||||||||
|
US | UM |
|
10 | 100% | ||||||||||
|
US | UM |
|
10 | 100% | ||||||||||
| A colored background means that the Pokémon can be found in this location in the specified game. A white background with a colored letter means that the Pokémon cannot be found here. | |||||||||||||||
Special encounters
Pokémon Moon
Four Pheromosa appear here during the second Ultra Beast mission. The Pheromosa respawn immediately if defeated or run from. Pheromosa is not registered as seen in the Pokédex and appears as ??? until the first one is caught. They are coded to never be Shiny.
| Aura: +2 Speed | ||||||||||||||||||||||||||||||||||
| ||||||||||||||||||||||||||||||||||
Pokémon Ultra Sun and Ultra Moon
After receiving Ilima's Normalium Z in Hau'oli City, the player can re-enter Totem's Den and interact with the pedestal to initiate a one-time rematch against the Totem Pokémon.
The Totem Pokémon will continuously call more allies, regardless of how many the player has defeated.
| Ultra Sun | Ultra Moon | ||||||||||||||||||||||||||||||||||||||||||||||||||||||||||||||||||||||||||||||||||||||||||||||||||||||||||||||||||||||||||||||||||||||
|---|---|---|---|---|---|---|---|---|---|---|---|---|---|---|---|---|---|---|---|---|---|---|---|---|---|---|---|---|---|---|---|---|---|---|---|---|---|---|---|---|---|---|---|---|---|---|---|---|---|---|---|---|---|---|---|---|---|---|---|---|---|---|---|---|---|---|---|---|---|---|---|---|---|---|---|---|---|---|---|---|---|---|---|---|---|---|---|---|---|---|---|---|---|---|---|---|---|---|---|---|---|---|---|---|---|---|---|---|---|---|---|---|---|---|---|---|---|---|---|---|---|---|---|---|---|---|---|---|---|---|---|---|---|---|---|
| Totem Gumshoos | Ally Yungoos | Totem Raticate | Ally Rattata | ||||||||||||||||||||||||||||||||||||||||||||||||||||||||||||||||||||||||||||||||||||||||||||||||||||||||||||||||||||||||||||||||||||
| Aura: +2 Atk, Def, Sp. Atk, Sp. Def, Speed | Aura: +2 Atk, Def, Sp. Atk, Sp. Def, Speed | ||||||||||||||||||||||||||||||||||||||||||||||||||||||||||||||||||||||||||||||||||||||||||||||||||||||||||||||||||||||||||||||||||||||
|
|
|
| ||||||||||||||||||||||||||||||||||||||||||||||||||||||||||||||||||||||||||||||||||||||||||||||||||||||||||||||||||||||||||||||||||||
Layout
| Game | Cave | Totem's Den |
|---|---|---|
| Sun | 
| |
| Moon | ||
| Ultra Sun | 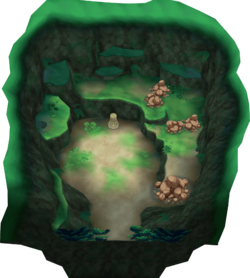
| |
| Ultra Moon | ||
In the anime

Verdant Cavern appeared in To Top a Totem!, as the site of Ash's first island trial. Wanting to ask Yungoos and Gumshoos's help in dealing with a group of Alolan Rattata and Raticate causing havoc around Melemele Island, Ash was led to the Verdant Cavern by Hala to battle Totem Gumshoos and get it to help them.
At first, Ash faced a Yungoos and Gumshoos, the Totem's ally Pokémon, which he defeated with the help of Pikachu and Rowlet. After this, Totem Gumshoos appeared, challenging Ash. It was able to defeat Rowlet, but was eventually taken down by Pikachu. As a reward for winning the battle, Totem Gumshoos gave Ash a Normalium Z and agreed to help in driving away the troublesome Rattata and Raticate. Unbeknownst to Ash and Hala, Tapu Koko secretly followed the trial as it took place.
In the TCG
The following is a list is of cards mentioning or featuring Verdant Cavern in the Pokémon Trading Card Game.
| Related cards Cards listed with a blue background are only legal to use in the current Expanded format. Cards listed with a green background are legal to use in both the current Standard and Expanded formats. | |||||||
|---|---|---|---|---|---|---|---|
| Card | Type | English Expansion |
Rarity | # | Japanese Expansion |
Rarity | # |
| Ilima | Su | Sun & Moon | 121/149 | Collection Sun | 058/060 | ||
Trivia
- In Pokémon Moon and Pokémon Ultra Moon, when the Totem Raticate appears, Gumshoos's cry is played instead of Raticate's.
In other languages
| ||||||||||||||||||||||||||||||||
| Alola | |||||
|---|---|---|---|---|---|
| |||||
|

|
This article is part of Project Locations, a Bulbapedia project that aims to write comprehensive articles on every location in the Pokémon world. |
