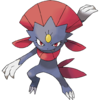
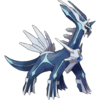
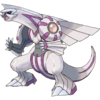
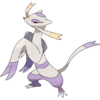
Team Rocket's Castle: Difference between revisions
m (→Trainers) |
|||
| (96 intermediate revisions by 26 users not shown) | |||
| Line 1: | Line 1: | ||
{{incomplete|2= | {{incomplete|2=Layout maps of the Entrance Room, Lusamine's Room, and Trophy Room}} | ||
{{Infobox location | {{Infobox location | ||
|image=Team Rocket's Castle USUM.png | |image=Team Rocket's Castle USUM.png | ||
| Line 8: | Line 8: | ||
|location=[[Aether Paradise]] | |location=[[Aether Paradise]] | ||
|region=Alola | |region=Alola | ||
|mapsize=250px | |||
|generation={{gen|VII}} | |generation={{gen|VII}} | ||
}} | }} | ||
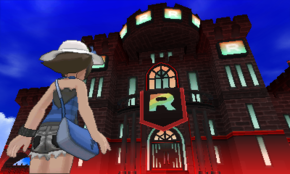
'''Team Rocket's Castle''' (Japanese: '''ロケット{{tt|団|だん}}の{{tt|城|しろ}}''' ''Team Rocket's Castle'') is a location on [[Aether Paradise]] in [[Alola]]. It is [[Team Rainbow Rocket]]'s base in the region, replacing [[Lusamine]]'s mansion during [[Episode RR]]. It only appears in {{g|Ultra Sun and Ultra Moon}}. | '''Team Rocket's Castle''' (Japanese: '''ロケット{{tt|団|だん}}の{{tt|城|しろ}}''' ''Team Rocket's Castle'') is a location on [[Aether Paradise]] in [[Alola]]. It is [[Team Rainbow Rocket]]'s base in the [[region]], temporarily replacing [[Lusamine]]'s mansion during [[Episode RR]]. It only appears in {{g|Ultra Sun and Ultra Moon}}. | ||
==Geography== | ==Geography== | ||
{{spoilers}} | |||
Team Rocket's Castle's entrance room and bedroom have identical layouts to the ones seen in Lusamine's mansion. When first entering the bedroom, [[Lillie]] will try to activate the [[warp tile]] to the center of the castle, but is unable to even open the mirror door leading to the tile. Upon exiting the bedroom, two {{tc|Team Rainbow Rocket Grunt}}s appear to stop the {{player}} and Lillie. However, [[Guzma]] also shows up and helps the player in defeating the two Grunts in a [[Multi Battle]]. After being defeated, the Grunts flee, opening the gates to the southern wings of the castle in the process. Lillie will then station herself in the bedroom, healing the player's Pokémon whenever she's talked to, while Guzma will stay in the entrance room. | |||
At the end of each of the castle's four wings lies a room guarded by a pair of Team Rainbow Rocket Grunts, who {{pkmn|battle}} the player consecutively before letting them through. Inside each of these rooms is a {{cat|villainous team leaders|villainous team leader}} from an {{pkmn|multiverse|alternate reality}}, in which they succeeded in their plans due to the lack of a player character to stop them. Each of them also wields a [[Legendary Pokémon]] from their native [[region]]. Once the player defeats a leader in battle, they will provide the player with a method to advance further into the castle, simultaneously activating a one-way warp tile back to the entrance room. | |||
Several [[item]] balls found here are actually {{p|Electrode}}, which will attack the player if interacted with. If they are not defeated or {{pkmn2|caught}}, they will remain on the floor. | |||
In the southwest wing, the player must navigate through a maze of warp tiles in order to reach the end. Some of these paths lead to a dead end. In one room, different rows of warp panels are separated by walls of Team Rainbow Rocket Grunts standing in rows across the room. The end of the wing has a room occupied by [[Team Aqua]] leader [[Archie]]. After he is defeated, he will allow the player to press a secret switch behind a painting. | |||
In the southeast wing, the player must solve three memory puzzles in order to advance through the three puzzle rooms. The player must first press the button in the middle of the room, causing the four colored panels on the floor to light up in a certain order. The player must then step on the tiles in the given order. If they step on a wrong tile, the puzzle will be reset. Each room has three possible puzzles to be generated. If the player presses the button again before stepping on any of the tiles, a new puzzle will be generated. The first puzzle requires memorizing the order of four panels, the second one requires six, and the third one requires eight. In the second puzzle room, a Team Rainbow Rocket Grunt will strike a pose in an attempt to distract the player in the middle of them trying to solve the puzzle, while in the third room, the player's attempt to solve the puzzle will be distrupted by a pair of Team Rainbow Rocket Grunts, who in turn challenge the player to a battle while they're solving the puzzle. If the third puzzle is reset after a Grunt has been defeated, said Grunt will not battle the player again. Once a puzzle is solved, a warp tile leading to the next room will be activated. At the end of the wing is a room housing [[Maxie]], the leader of [[Team Magma]]. Like Archie, Maxie will allow the player to press a secret switch behind a painting after being defeated. | |||
After the player has pressed both secret switches, the gates to the northern wings of the castle will open in the entrance room. Two Team Rainbow Rocket Grunts will emerge from the gates when they're opened and try to attack Guzma, only to be physically held back by him until all the evil team leaders have been defeated. Archie and Maxie will also appear in the entrance room, and, upon noticing each other, challenge each other to a battle to see which one of them gets to rule Alola. However, before they can even exit the building, they are warped away by an invisible force. | |||
In the northwest wing, the rooms are filled with [[spin tile]]s, similar to the original [[Team Rocket Hideout]] in [[Kanto]]. This wing's final room is occupied by [[Team Galactic]] leader [[Cyrus]]. Once he's defeated, he will hand the player the [[Galactic Key]], which they can use to activate a machine on the wall and remove one of the two last obstacles. | |||
In the northeast wing, the rooms are guarded by {{p|Meowth}} statues. If the player steps into a statue's line of sight, they will be warped back to the beginning of the room. By interacting with a Meowth statue from behind, the player can push a button to turn the statue into a direction marked by an arrow on the floor, allowing them to advance through the room unnoticed. If the player is warped back to the entrance, any rotated statues will be reset. The statues will also be reset when the player leaves the room. The room at the end of the wing houses [[Lysandre]], the leader of [[Team Flare]], who forces the player to make a choice between pressing one of two buttons, with the wrong choice leading to him activating the [[ultimate weapon]]. No matter which button the player chooses, the ultimate weapon will be activated, but once he's defeated, Lysandre will allow the player to press the other button as well, deactivating the weapon and removing one of the two last obstacles blocking access to the center of the castle. | |||
Once the player has beaten both Cyrus and Lysandre, the mirror door in the bedroom will have opened and the warp tile behind it has become active. However, once the player tries to step onto the warp tile, [[Team Plasma]] leader [[Ghetsis]] will appear through it, explaining to the player and Lillie that he's planning to make the leader of Team Rainbow Rocket his "king" to rule above all existence, similar to how he had previously made [[N]] the king of Team Plasma to rule [[Unova]], and challenges the player to a battle to keep them from foiling his plans. Upon being defeated, Ghetsis flies into a fit of rage and starts threatening Lillie's life. However, she's saved by the arrival of [[Colress]], who then proceeds to warp Ghetsis back to his own reality, allowing the player to move forward. | |||
In the Trophy Room at the center of the castle, the player will encounter [[Giovanni]], the leader of Team Rainbow Rocket, who tells the player about his plan to conquer all realities with an army of [[Ultra Beast]]s. He's also taken [[Lusamine]] hostage, planning to turn her into his loyal servant. To keep the player from interfering with his plans, Giovanni then challenges them to a battle. Once Giovanni is defeated, he declares that although he will step aside this time, Team Rainbow Rocket will never fall. As he warps away, the castle is restored back to its state as Lusamine's mansion by [[Colress Machine|one of Colress's inventions]]. | |||
==Items== | ==Items== | ||
Any items not obtained here before defeating [[Giovanni]] can be obtained from a {{tc|Janitor}} outside of Lusamine's mansion after [[Episode RR]] has ended. | |||
{{Itlisth|building}} | |||
{{Itemlist|Iron Ball|Southwest Wing, in side room 4|US=yes|UM=yes}} | |||
{{Itemlist|Guard Spec.|Southwest Wing, in side room 8|US=yes|UM=yes}} | |||
{{Itemlist|Max Potion|Southwest Wing, in side room 10|US=yes|UM=yes}} | |||
{{Itemlist|Rare Candy|Southwest Wing, in side room 12|US=yes|UM=yes}} | |||
{{Itemlist|Revive| | |||
* Southwest Wing, in side room 13 | |||
* Northwest Wing, in the second room|US=yes|UM=yes|display=[[Revive]] ×2}} | |||
{{Itemlist|Full Restore| | |||
* Southwest Wing, in the fifth room | |||
* Southeast Wing, in the fifth room|US=yes|UM=yes|display=[[Full Restore]] ×2}} | |||
{{Itemlist|Full Heal|Southeast Wing, in the third room|US=yes|UM=yes}} | |||
{{Itemlist|X Attack|Southeast Wing, in the side room|US=yes|UM=yes}} | |||
{{Itemlist|Zinc|Northwest Wing, in the third room|US=yes|UM=yes}} | |||
{{Itemlist|HP Up|Northwest Wing, in the fourth room|US=yes|UM=yes}} | |||
{{Itemlist|Hyper Potion|Northwest Wing, in the fifth room|US=yes|UM=yes}} | |||
{{Itemlist|Galactic Key|Northwest Wing, from [[Cyrus]] after defeating him|US=yes|UM=yes}} | |||
{{Itemlist|Calcium|Northeast Wing, in the second room|US=yes|UM=yes}} | |||
{{Itemlist|PP Up|Northeast Wing, in the third room|US=yes|UM=yes}} | |||
{{Itemlist|Cell Battery|Northeast Wing, in the fourth room|US=yes|UM=yes}} | |||
{{Itemlist|Max Revive|Northeast Wing, in the fifth room|US=yes|UM=yes}} | |||
{{Itlistfoot|building}} | |||
===Fake items=== | |||
The Electrode can no longer be found once Episode RR ends. | |||
{{itlisth|building}} | |||
{{Itemlist|None|sprite=101MS6| | |||
* Southwest Wing, in side room 2 | |||
* Southwest Wing, in side room 11 | |||
* Southeast Wing, in the side room|US=yes|UM=yes|display={{p|Electrode}} ×3}} | |||
{{itlistfoot|building}} | |||
== | ==Special encounters== | ||
{{ | Three Electrode appear here as {{DL|Item|fake items}}. They are coded to never be {{Shiny}}. | ||
{ | {| | ||
{{ | |- style="vertical-align:top" | ||
|{{Pokémon/7 | |||
|ndex=101 | |||
|pokemon=Electrode | |||
|type1=Electric | |||
|ability=Soundproof | |||
|level=60 | |||
|move1=Discharge|move1type=Electric|move1cat=Special | |||
|move2=Explosion|move2type=Normal|move2cat=Physical | |||
|move3=Gyro Ball|move3type=Steel|move3cat=Physical | |||
|move4=Mirror Coat|move4type=Psychic|move4cat=Special}} | |||
|} | |||
==Trainers== | ==Trainers== | ||
===Entrance=== | ===Entrance Room=== | ||
[[Guzma]] joins the {{player}} in a [[Multi Battle]] against two {{tc|Team Rainbow Rocket Grunt}}s. | |||
{{Party/Single | {{Party/Single | ||
|color={{bug color}} | |color={{bug color}} | ||
|headcolor={{bug color light}} | |headcolor={{bug color light}} | ||
|bordercolor={{bug color dark}} | |bordercolor={{bug color dark}} | ||
|sprite= | |sprite=Spr SM Guzma 2.png | ||
|size= | |size=80px | ||
|class=Pokémon Trainer | |class=Pokémon Trainer | ||
|classlink=Pokémon Trainer | |classlink=Pokémon Trainer | ||
|name=Guzma | |name={{color2|000|Guzma}} | ||
|prize= | |prize=none | ||
|game=USUM | |game=USUM | ||
|location=Team Rocket's Castle | |location=Team Rocket's Castle | ||
| Line 47: | Line 109: | ||
|ability=Emergency Exit | |ability=Emergency Exit | ||
|level=64 | |level=64 | ||
|move1=Brick Break| | |move1=Sucker Punch|move1type=Dark|move1cat=Physical | ||
|move2=Waterfall|move2type=Water|move2cat=Physical | |||
|move3=First Impression|move3type=Bug|move3cat=Physical | |||
|move4=Brick Break|move4type=Fighting|move4cat=Physical}} | |||
|{{Pokémon/7 | |{{Pokémon/7 | ||
|ndex=738 | |ndex=738 | ||
| Line 56: | Line 121: | ||
|ability=Levitate | |ability=Levitate | ||
|level=64 | |level=64 | ||
}} | |move1=Flash Cannon|move1type=Steel|move1cat=Special | ||
|move2=Thunderbolt|move2type=Electric|move2cat=Special | |||
|move3=Bug Buzz|move3type=Bug|move3cat=Special | |||
|move4=Energy Ball|move4type=Grass|move4cat=Special}} | |||
|{{Pokémon/7 | |{{Pokémon/7 | ||
|ndex=284 | |ndex=284 | ||
| Line 65: | Line 133: | ||
|ability=Intimidate | |ability=Intimidate | ||
|level=64 | |level=64 | ||
}} | |move1=Air Slash|move1type=Flying|move1cat=Special | ||
|move3=Ice Beam|move3type=Ice|move3cat=Special | |||
|move2=Bug Buzz|move2type=Bug|move2cat=Special | |||
|move4=Energy Ball|move4type=Grass|move4cat=Special}} | |||
{{Party/Div|color={{bug color}}}} | {{Party/Div|color={{bug color}}}} | ||
|style="margin:auto"|{{Pokémon/7 | |style="margin:auto"|{{Pokémon/7 | ||
| Line 74: | Line 145: | ||
|ability=Mold Breaker | |ability=Mold Breaker | ||
|level=64 | |level=64 | ||
}} | |move1=Throat Chop|move1type=Dark|move1cat=Physical | ||
|{{Pokémon/7 | |move2=Storm Throw|move2type=Fighting|move2cat=Physical | ||
|move3=X-Scissor|move3type=Bug|move3cat=Physical | |||
|move4=Stone Edge|move4type=Rock|move4cat=Physical}} | |||
|style="margin:auto"|{{Pokémon/7 | |||
|ndex=212 | |ndex=212 | ||
|pokemon=Scizor | |pokemon=Scizor | ||
| Line 82: | Line 156: | ||
|type2=Steel | |type2=Steel | ||
|ability=Technician | |ability=Technician | ||
|level=64 | |move1=X-Scissor|move1type=Bug|move1cat=Physical | ||
}} | |move2=Iron Head|move2cat=Physical|move2type=Steel | ||
|move3=Night Slash|move3cat=Physical|move3type=Dark | |||
|move4=Bullet Punch|move4cat=Physical|move4type=Steel | |||
|level=64}} | |||
{{Party/Footer}} | {{Party/Footer}} | ||
{{-}} | {{-}} | ||
{{trainerheader| | {{trainerheader|building}} | ||
{{trainerentry| | {{trainerentry|VSTeam Rainbow Rocket Grunt M USUM.png{{!}}150px|game=7|Team Rainbow Rocket Grunt||1,984<br><small>[[Double Battle]] with the following Grunt</small>|1|020|Raticate|♂|62}} | ||
{{trainerfooter| | {{trainerentry|VSTeam Rainbow Rocket Grunt F USUM.png{{!}}150px|game=7|Team Rainbow Rocket Grunt||1,984<br><small>[[Double Battle]] with the previous Grunt</small>|1|022|Fearow|♀|62|None}} | ||
{{trainerfooter|building|7}} | |||
=== | ===Southwest Wing=== | ||
==== | {{trainerheader|building}} | ||
{{ | {{trainerdiv|building|Second room}} | ||
{{trainerentry|Team Rainbow Rocket Grunt M USUM.png|Team Rainbow Rocket Grunt||1,984|1| | {{trainerentry|VSTeam Rainbow Rocket Grunt M USUM.png{{!}}150px|game=7|Team Rainbow Rocket Grunt||1,984|1|073|Tentacruel|♀|62|None}} | ||
{{trainerdiv|building|Side room 1}} | |||
{{trainerentry|VSTeam Rainbow Rocket Grunt F USUM.png{{!}}150px|game=7|Team Rainbow Rocket Grunt||1,984|1|024|Arbok|♀|62|None}} | |||
{{trainerdiv|building|Side room 2}} | |||
{{trainerentry|VSTeam Rainbow Rocket Grunt M USUM.png{{!}}150px|game=7|Team Rainbow Rocket Grunt||1,984|1|057|Primeape|♂|62|None}} | |||
{{trainerdiv|building|Side room 4}} | |||
{{trainerentry|VSTeam Rainbow Rocket Grunt F USUM.png{{!}}150px|game=7|Team Rainbow Rocket Grunt||1,984|1|097|Hypno|♀|62|None}} | |||
{{trainerdiv|building|Side room 5}} | |||
{{trainerentry|VSTeam Rainbow Rocket Grunt M USUM.png{{!}}150px|game=7|Team Rainbow Rocket Grunt||1,984|1|073|Tentacruel|♂|62|None}} | |||
{{trainerdiv|building|Side room 6}} | |||
{{trainerentry|VSTeam Rainbow Rocket Grunt F USUM.png{{!}}150px|game=7|Team Rainbow Rocket Grunt||1,984|1|020|Raticate|♀|62|None}} | |||
{{trainerdiv|building|Side room 7}} | |||
{{trainerentry|VSTeam Rainbow Rocket Grunt M USUM.png{{!}}150px|game=7|Team Rainbow Rocket Grunt||1,984|1|093|Haunter|♂|62|None}} | |||
{{trainerdiv|building|Side room 9}} | |||
{{trainerentry|VSTeam Rainbow Rocket Grunt F USUM.png{{!}}150px|game=7|Team Rainbow Rocket Grunt||1,984|1|053|Persian|♀|62|None}} | |||
{{trainerdiv|building|Side room 11}} | |||
{{trainerentry|VSTeam Rainbow Rocket Grunt F USUM.png{{!}}150px|game=7|Team Rainbow Rocket Grunt||1,984|1|042|Golbat|♀|62|None}} | |||
{{trainerdiv|building|Fourth room}} | |||
{{trainerentry|VSTeam Rainbow Rocket Grunt M USUM.png{{!}}150px|game=7|Team Rainbow Rocket Grunt||1,984|1|020|Raticate|♂|62|None}} | |||
{{trainerdiv|building|Side room 13}} | |||
{{trainerentry|VSTeam Rainbow Rocket Grunt M USUM.png{{!}}150px|game=7|Team Rainbow Rocket Grunt||1,984|2|097|Hypno|♂|62|None|057|Primeape|♂|62|None}} | |||
{{trainerdiv|building|Side room 14}} | |||
{{trainerentry|VSTeam Rainbow Rocket Grunt F USUM.png{{!}}150px|game=7|Team Rainbow Rocket Grunt||1,984|1|024|Arbok|♀|62|None}} | |||
{{trainerdiv|building|Fifth room}} | |||
{{trainerentry|VSTeam Rainbow Rocket Grunt M USUM.png{{!}}150px|game=7|Team Rainbow Rocket Grunt||1,984|1|022|Fearow|♂|62|None}} | |||
{{trainerdiv|building}} | |||
{{trainerentry|VSTeam Rainbow Rocket Grunt M USUM.png{{!}}150px|game=7|Team Rainbow Rocket Grunt||1,984|1|089|Muk|♂|62|None}} | |||
{{trainerfooter|steel|7}} | {{trainerfooter|steel|7}} | ||
{{Party/Single | |||
|color={{sapphire color light}} | |||
|bordercolor={{sapphire color}} | |||
|headcolor={{water color}} | |||
|sprite=VSArchie USUM.png | |||
{{Party/Single|color={{ | |||
|bordercolor={{ | |||
|headcolor={{ | |||
|sprite= | |||
|size=150px | |size=150px | ||
|prize={{pdollar}}18,480 | |prize={{pdollar}}18,480 | ||
|class= | |class=Team Aqua | ||
|classlink= | |classlink=Archie | ||
|name= | |name={{color2|000|Archie}} | ||
|game=USUM | |game=USUM | ||
|location=Team Rocket's Castle | |location=Team Rocket's Castle | ||
| Line 154: | Line 240: | ||
|{{Pokémon/7 | |{{Pokémon/7 | ||
|game=USUM | |game=USUM | ||
|ndex= | |ndex=089 | ||
|pokemon= | |pokemon=Muk | ||
|gender=male | |gender=male | ||
|level=64 | |level=64 | ||
|type1= | |type1=Poison | ||
|ability= | |ability=Poison Touch | ||
|move1=Gunk Shot|move1type=Poison|move1cat=Physical | |||
|move1= | |move2=Fire Punch|move2type=Fire|move2cat=Physical | ||
|move2= | |move3=Thunder Punch|move3type=Electric|move3cat=Physical | ||
|move3= | |move4=Ice Punch|move4type=Ice|move4cat=Physical}} | ||
|move4= | {{Party/Div|color={{sapphire color light}}}} | ||
{{Party/Div|color={{ | |||
|style="margin:auto"|{{Pokémon/7 | |style="margin:auto"|{{Pokémon/7 | ||
|game=USUM | |game=USUM | ||
|ndex= | |ndex=319 | ||
|pokemon= | |pokemon=Sharpedo | ||
|gender=male | |gender=male | ||
|level=64 | |level=64 | ||
|type1= | |type1=Water|type2=Dark | ||
|ability= | |ability=Rough Skin | ||
|move1= | |move1=Night Slash|move1type=Dark|move1cat=Physical | ||
|move2= | |move2=Liquidation|move2type=Water|move2cat=Physical | ||
|move3= | |move3=Ice Fang|move3type=Ice|move3cat=Physical | ||
|move4= | |move4=Poison Fang|move4type=Poison|move4cat=Physical}} | ||
|{{Pokémon/7 | |style="margin:auto"|{{Pokémon/7 | ||
|game=USUM | |game=USUM | ||
|ndex= | |ndex=382 | ||
|pokemon= | |pokemon=Kyogre | ||
|level=66 | |level=66 | ||
|type1= | |type1=Water | ||
|ability= | |ability=Drizzle | ||
|move1= | |move1=Hydro Pump|move1type=Water|move1cat=Special | ||
|move2= | |move2=Ice Beam|move2type=Ice|move2cat=Special | ||
|move3=Ancient Power|move3type=Rock|move3cat=Special | |move3=Ancient Power|move3type=Rock|move3cat=Special | ||
|move4= | |move4=Thunder|move4type=Electric|move4cat=Special}} | ||
{{Party/Footer}} | {{Party/Footer}} | ||
=== | ===Southeast Wing=== | ||
{{trainerheader|building}} | |||
{{ | {{trainerdiv|building|Second room}} | ||
{{trainerentry| | {{trainerentry|VSTeam Rainbow Rocket Grunt M USUM.png{{!}}150px|game=7|Team Rainbow Rocket Grunt||1,984|1|042|Golbat|♂|62|None}} | ||
{{ | {{trainerdiv|building|Fourth room}} | ||
{{trainerentry|VSTeam Rainbow Rocket Grunt M USUM.png{{!}}150px|game=7|Team Rainbow Rocket Grunt||1,984|1|057|Primeape|♂|62|None}} | |||
{{trainerdiv|building}} | |||
{{trainerentry|VSTeam Rainbow Rocket Grunt F USUM.png{{!}}150px|game=7|Team Rainbow Rocket Grunt||1,984|2|073|Tentacruel|♀|62|None|053|Persian|♀|62|None}} | |||
{{trainerentry| | {{trainerdiv|building|Side room}} | ||
{{ | {{trainerentry|VSTeam Rainbow Rocket Grunt F USUM.png{{!}}150px|game=7|Team Rainbow Rocket Grunt||1,984|1|089|Muk|♀|62|None}} | ||
{{trainerdiv|building|Fifth room}} | |||
{{trainerentry|VSTeam Rainbow Rocket Grunt M USUM.png{{!}}150px|game=7|Team Rainbow Rocket Grunt||1,984|1|093|Haunter|♂|62|None}} | |||
{{trainerdiv|building}} | |||
{{trainerentry| | {{trainerentry|VSTeam Rainbow Rocket Grunt F USUM.png{{!}}150px|game=7|Team Rainbow Rocket Grunt||1,984|1|097|Hypno|♀|62|None}} | ||
{{trainerfooter|building|7}} | |||
{{ | |||
{{trainerentry| | |||
{{ | |||
{{trainerentry| | |||
{{ | |||
{{trainerentry| | |||
{{ | |||
= | |||
{{trainerfooter| | |||
{{Party/Single | {{Party/Single | ||
|color={{ | |color={{ruby color light}} | ||
|bordercolor={{ | |bordercolor={{ruby color}} | ||
|headcolor={{ | |headcolor={{ground color}} | ||
|sprite= | |sprite=VSMaxie USUM.png | ||
|size=150px | |size=150px | ||
|prize={{pdollar}}18,480 | |prize={{pdollar}}18,480 | ||
|name= | |class=Team Magma | ||
|classlink=Maxie | |||
|name={{color2|000|Maxie}} | |||
|game=USUM | |game=USUM | ||
|location=Team Rocket's Castle | |location=Team Rocket's Castle | ||
| Line 281: | Line 331: | ||
|{{Pokémon/7 | |{{Pokémon/7 | ||
|game=USUM | |game=USUM | ||
|ndex= | |ndex=110 | ||
|pokemon= | |pokemon=Weezing | ||
|gender=male | |gender=male | ||
|level=64 | |level=64 | ||
|type1= | |type1=Poison | ||
|ability= | |ability=Levitate | ||
|move1=Sludge Bomb|move1type=Poison|move1cat=Special | |||
|move1= | |move2=Thunderbolt|move2type=Electric|move2cat=Special | ||
|move2= | |move3=Shadow Ball|move3type=Ghost|move3cat=Special | ||
|move3= | |move4=Pain Split|move4type=Normal|move4cat=Status}} | ||
|move4= | {{Party/Div|color={{ruby color light}}}} | ||
{{Party/Div|color={{ | |||
|style="margin:auto"|{{Pokémon/7 | |style="margin:auto"|{{Pokémon/7 | ||
|game=USUM | |game=USUM | ||
|ndex= | |ndex=323 | ||
|pokemon= | |pokemon=Camerupt | ||
|gender=male | |gender=male | ||
|level=64 | |level=64 | ||
|type1= | |type1=Fire|type2=Ground | ||
|ability= | |ability=Magma Armor | ||
|move1= | |move1=Earthquake|move1type=Ground|move1cat=Physical | ||
|move2= | |move2=Stone Edge|move2type=Rock|move2cat=Physical | ||
|move3= | |move3=Flamethrower|move3type=Fire|move3cat=Special | ||
|move4= | |move4=Flash Cannon|move4type=Steel|move4cat=Special}} | ||
|{{Pokémon/7 | |style="margin:auto"|{{Pokémon/7 | ||
|game=USUM | |game=USUM | ||
|ndex= | |ndex=383 | ||
|pokemon= | |pokemon=Groudon | ||
|level=66 | |level=66 | ||
|type1= | |type1=Ground | ||
|ability= | |ability=Drought | ||
|move1= | |move1=Earthquake|move1type=Ground|move1cat=Physical | ||
|move2= | |move2=Flamethrower|move2type=Fire|move2cat=Special | ||
|move3=Ancient Power|move3type=Rock|move3cat=Special | |move3=Ancient Power|move3type=Rock|move3cat=Special | ||
|move4= | |move4=Solar Beam|move4type=Grass|move4cat=Special}} | ||
{{Party/Footer}} | {{Party/Footer}} | ||
===Northwest Wing=== | ===Northwest Wing=== | ||
{{trainerheader|building}} | |||
{{trainerdiv|building|First room}} | |||
{{trainerentry|VSTeam Rainbow Rocket Grunt M USUM.png{{!}}150px|game=7|Team Rainbow Rocket Grunt||1,984|1|022|Fearow|♂|62|None}} | |||
{{trainerdiv|building|Second room}} | |||
{{trainerentry|VSTeam Rainbow Rocket Grunt M USUM.png{{!}}150px|game=7|Team Rainbow Rocket Grunt||1,984|1|093|Haunter|♂|62|None}} | |||
{{trainerdiv|building|Third room}} | |||
{{trainerentry|VSTeam Rainbow Rocket Grunt M USUM.png{{!}}150px|game=7|Team Rainbow Rocket Grunt||1,984|1|020|Raticate|♂|62|None}} | |||
{{trainerdiv|building|Fifth room}} | |||
{{trainerentry|VSTeam Rainbow Rocket Grunt M USUM.png{{!}}150px|game=7|Team Rainbow Rocket Grunt||1,984|1|097|Hypno|♂|62|None}} | |||
{{trainerdiv|building}} | |||
{{trainerentry|VSTeam Rainbow Rocket Grunt F USUM.png{{!}}150px|game=7|Team Rainbow Rocket Grunt||1,984|2|024|Arbok|♀|62|None|042|Golbat|♀|62|None}} | |||
{{trainerfooter|building|7}} | |||
= | ====Pokémon Ultra Sun==== | ||
===Pokémon Ultra Sun=== | |||
{{Party/Single | {{Party/Single | ||
|color={{silver color}} | |color={{silver color}} | ||
| Line 349: | Line 387: | ||
|bordercolor={{dark color}} | |bordercolor={{dark color}} | ||
|sprite=VSCyrus.png | |sprite=VSCyrus.png | ||
|size=150px | |||
|prize={{PDollar}}18,760 | |prize={{PDollar}}18,760 | ||
|class=Galactic | |class=Team Galactic | ||
|classlink=Cyrus | |classlink=Cyrus | ||
|name=Cyrus | |name={{color2|000|Cyrus}} | ||
|game=US | |game=US | ||
|location=Team Rocket's Castle | |location=Team Rocket's Castle | ||
|pokemon=5}} | |pokemon=5}} | ||
|{{Pokémon/7 | |{{Pokémon/7 | ||
|game= | |game=US | ||
|ndex=229 | |ndex=229 | ||
|pokemon=Houndoom | |pokemon=Houndoom | ||
|gender=male | |gender=male | ||
|level=65 | |level=65 | ||
|type1=Dark | |ability=Early Bird | ||
|type2=Fire | |type1=Dark|type2=Fire | ||
|move1=Fire Blast|move1type=Fire|move1cat=Special | |move1=Fire Blast|move1type=Fire|move1cat=Special | ||
|move2=Dark Pulse|move2type=Dark|move2cat=Special | |move2=Dark Pulse|move2type=Dark|move2cat=Special | ||
| Line 370: | Line 408: | ||
|move4=Shadow Ball|move4type=Ghost|move4cat=Special}} | |move4=Shadow Ball|move4type=Ghost|move4cat=Special}} | ||
|{{Pokémon/7 | |{{Pokémon/7 | ||
|game= | |game=US | ||
|ndex=430 | |ndex=430 | ||
|pokemon=Honchkrow | |pokemon=Honchkrow | ||
|gender=male | |gender=male | ||
|level=65 | |level=65 | ||
|ability=Insomnia | |||
|type1=Dark|type2=Flying | |type1=Dark|type2=Flying | ||
|move1=Night Slash|move1type=Dark|move1cat=Physical | |move1=Night Slash|move1type=Dark|move1cat=Physical | ||
|move2=Sky Attack|move2type=Flying|move2cat=Physical | |move2=Sky Attack|move2type=Flying|move2cat=Physical | ||
|move3=Heat Wave|move3type=Fire|move3cat=Special | |move3=Heat Wave|move3type=Fire|move3cat=Special | ||
|move4=Icy Wind|move4type=Ice|move4cat=Special}} | |move4=Icy Wind|move4type=Ice|move4cat=Special}} | ||
{{Party/Div|color={{silver color | |{{Pokémon/7 | ||
|style="margin:auto"|{{Pokémon/7 | |game=US | ||
|game= | |ndex=169 | ||
|pokemon=Crobat | |||
|gender=male | |||
|level=65 | |||
|ability=Inner Focus | |||
|type1=Poison|type2=Flying | |||
|move1=Cross Poison|move1type=Poison|move1cat=Physical | |||
|move2=Zen Headbutt|move2type=Psychic|move2cat=Physical | |||
|move3=X-Scissor|move3type=Bug|move3cat=Physical | |||
|move4=Super Fang|move4type=Normal|move4cat=Physical}} | |||
{{Party/Div|color={{silver color}}}} | |||
| style="margin:auto" |{{Pokémon/7 | |||
|game=US | |||
|ndex=461 | |ndex=461 | ||
|pokemon=Weavile | |pokemon=Weavile | ||
|gender=male | |gender=male | ||
|level=65 | |level=65 | ||
|ability=Pressure | |ability=Pressure | ||
|type1=Dark|type2=Ice | |||
|move1=Night Slash|move1type=Dark|move1cat=Physical | |move1=Night Slash|move1type=Dark|move1cat=Physical | ||
|move2=Quick Attack|move2type=Normal|move2cat=Physical | |move2=Quick Attack|move2type=Normal|move2cat=Physical | ||
|move3=Ice Punch|move3type=Ice|move3cat=Physical | |move3=Ice Punch|move3type=Ice|move3cat=Physical | ||
|move4=Brick Break|move4type=Fighting|move4cat=Physical}} | |move4=Brick Break|move4type=Fighting|move4cat=Physical}} | ||
|{{Pokémon/7 | | style="margin:auto" |{{Pokémon/7 | ||
|game= | |game=US | ||
|ndex=483 | |ndex=483 | ||
|pokemon=Dialga | |pokemon=Dialga | ||
|level=67 | |level=67 | ||
|ability=Pressure | |ability=Pressure | ||
|type1=Steel|type2=Dragon | |||
|move1=Roar of Time|move1type=Dragon|move1cat=Special | |move1=Roar of Time|move1type=Dragon|move1cat=Special | ||
|move2=Flash Cannon|move2type=Steel|move2cat=Special | |move2=Flash Cannon|move2type=Steel|move2cat=Special | ||
| Line 421: | Line 457: | ||
{{Party/Footer}} | {{Party/Footer}} | ||
====Pokémon Ultra Moon==== | |||
===Pokémon Ultra Moon=== | |||
{{Party/Single | {{Party/Single | ||
|color={{silver color}} | |color={{silver color}} | ||
| Line 429: | Line 463: | ||
|bordercolor={{dark color}} | |bordercolor={{dark color}} | ||
|sprite=VSCyrus.png | |sprite=VSCyrus.png | ||
|size=150px | |||
|prize={{PDollar}}18,760 | |prize={{PDollar}}18,760 | ||
|class=Galactic | |class=Team Galactic | ||
|classlink=Cyrus | |classlink=Cyrus | ||
|name=Cyrus | |name={{color2|000|Cyrus}} | ||
|game=UM | |game=UM | ||
|location=Team Rocket's Castle | |location=Team Rocket's Castle | ||
|pokemon=5}} | |pokemon=5}} | ||
|{{Pokémon/7 | |{{Pokémon/7 | ||
|game= | |game=UM | ||
|ndex=229 | |ndex=229 | ||
|pokemon=Houndoom | |pokemon=Houndoom | ||
|gender=male | |gender=male | ||
|level=65 | |level=65 | ||
|type1=Dark | |ability=Early Bird | ||
|type2=Fire | |type1=Dark|type2=Fire | ||
|move1=Fire Blast|move1type=Fire|move1cat=Special | |move1=Fire Blast|move1type=Fire|move1cat=Special | ||
|move2=Dark Pulse|move2type=Dark|move2cat=Special | |move2=Dark Pulse|move2type=Dark|move2cat=Special | ||
| Line 450: | Line 484: | ||
|move4=Shadow Ball|move4type=Ghost|move4cat=Special}} | |move4=Shadow Ball|move4type=Ghost|move4cat=Special}} | ||
|{{Pokémon/7 | |{{Pokémon/7 | ||
|game= | |game=UM | ||
|ndex=430 | |||
|pokemon=Honchkrow | |||
|gender=male | |||
|level=65 | |||
|ability=Insomnia | |||
|type1=Dark|type2=Flying | |||
|move1=Night Slash|move1type=Dark|move1cat=Physical | |||
|move2=Sky Attack|move2type=Flying|move2cat=Physical | |||
|move3=Heat Wave|move3type=Fire|move3cat=Special | |||
|move4=Icy Wind|move4type=Ice|move4cat=Special}} | |||
|{{Pokémon/7 | |||
|game=UM | |||
|ndex=169 | |ndex=169 | ||
|pokemon=Crobat | |pokemon=Crobat | ||
|gender=male | |gender=male | ||
|level= | |level=65 | ||
|ability=Inner Focus | |||
|type1=Poison|type2=Flying | |type1=Poison|type2=Flying | ||
|move1=Cross Poison|move1type=Poison|move1cat=Physical | |move1=Cross Poison|move1type=Poison|move1cat=Physical | ||
|move2=Zen Headbutt|move2type=Psychic|move2cat=Physical | |move2=Zen Headbutt|move2type=Psychic|move2cat=Physical | ||
|move3=X-Scissor|move3type=Bug|move3cat=Physical | |move3=X-Scissor|move3type=Bug|move3cat=Physical | ||
|move4=Super Fang|move4type=Normal|move4cat=Physical}} | |move4=Super Fang|move4type=Normal|move4cat=Physical}} | ||
{{Party/Div|color={{silver color}}}} | |||
| style="margin:auto" |{{Pokémon/7 | |||
|game=UM | |||
{{Party/Div|color={{silver color | |||
|style="margin:auto"|{{Pokémon/7 | |||
|game= | |||
|ndex=461 | |ndex=461 | ||
|pokemon=Weavile | |pokemon=Weavile | ||
|gender=male | |gender=male | ||
|level=65 | |level=65 | ||
|ability=Pressure | |ability=Pressure | ||
|type1=Dark|type2=Ice | |||
|move1=Night Slash|move1type=Dark|move1cat=Physical | |move1=Night Slash|move1type=Dark|move1cat=Physical | ||
|move2=Quick Attack|move2type=Normal|move2cat=Physical | |move2=Quick Attack|move2type=Normal|move2cat=Physical | ||
|move3=Ice Punch|move3type=Ice|move3cat=Physical | |move3=Ice Punch|move3type=Ice|move3cat=Physical | ||
|move4=Brick Break|move4type=Fighting|move4cat=Physical}} | |move4=Brick Break|move4type=Fighting|move4cat=Physical}} | ||
|{{Pokémon/7 | | style="margin:auto" |{{Pokémon/7 | ||
|game= | |game=UM | ||
|ndex=484 | |ndex=484 | ||
|pokemon=Palkia | |pokemon=Palkia | ||
|level= | |level=67 | ||
|type1=Water | |ability=Pressure | ||
|type2=Dragon | |type1=Water|type2=Dragon | ||
|move1=Spacial Rend|move1type=Dragon|move1cat=Special | |move1=Spacial Rend|move1type=Dragon|move1cat=Special | ||
|move2=Surf|move2type=Water|move2cat=Special | |move2=Surf|move2type=Water|move2cat=Special | ||
| Line 502: | Line 534: | ||
===Northeast Wing=== | ===Northeast Wing=== | ||
{{trainerheader|building}} | |||
{{trainerdiv|building|First room}} | |||
{{trainerentry|VSTeam Rainbow Rocket Grunt F USUM.png{{!}}150px|game=7|Team Rainbow Rocket Grunt||1,984|1|089|Muk|♀|62|None}} | |||
{{trainerdiv|building|Second room}} | |||
{{trainerentry|VSTeam Rainbow Rocket Grunt M USUM.png{{!}}150px|game=7|Team Rainbow Rocket Grunt||1,984|1|053|Persian|♂|62|None}} | |||
{{trainerdiv|building|Third room}} | |||
{{trainerentry|VSTeam Rainbow Rocket Grunt M USUM.png{{!}}150px|game=7|Team Rainbow Rocket Grunt||1,984|1|024|Arbok|♂|62|None}} | |||
{{trainerdiv|building|Fifth room}} | |||
{{trainerentry|VSTeam Rainbow Rocket Grunt M USUM.png{{!}}150px|game=7|Team Rainbow Rocket Grunt||1,984|2|089|Muk|♂|62|None|022|Fearow|♂|62|None}} | |||
{{trainerdiv|building}} | |||
{{trainerentry|VSTeam Rainbow Rocket Grunt F USUM.png{{!}}150px|game=7|Team Rainbow Rocket Grunt||1,984|1|073|Tentacruel|♀|62|None}} | |||
{{trainerfooter|building|7}} | |||
= | ====Pokémon Ultra Sun==== | ||
===Pokémon Ultra Sun=== | |||
{{Party/Single | {{Party/Single | ||
|color= | |color=eb8b51 | ||
|headcolor= | |headcolor=e36226 | ||
|bordercolor= | |bordercolor=ab3f26 | ||
|sprite=VSLysandre | |sprite=VSLysandre USUM.png | ||
|size=150px | |size=150px | ||
|prize={{pdollar}}18,760 | |prize={{pdollar}}18,760 | ||
|class=Team Flare | |class=Team Flare | ||
| | |name={{color2|000|Lysandre}} | ||
| | |||
|game=US | |game=US | ||
|location=Team Rocket's Castle | |location=Team Rocket's Castle | ||
| Line 546: | Line 567: | ||
|level=65 | |level=65 | ||
|type1=Fighting | |type1=Fighting | ||
|ability= | |ability=Inner Focus | ||
|move1=Fake Out|move1type=Normal|move1cat=Physical | |move1=Fake Out|move1type=Normal|move1cat=Physical | ||
|move2=Dual Chop|move2type=Dragon|move2cat=Physical | |move2=Dual Chop|move2type=Dragon|move2cat=Physical | ||
|move3=High Jump Kick|move3type=Fighting|move3cat=Physical | |move3=High Jump Kick|move3type=Fighting|move3cat=Physical | ||
|move4=U- | |move4=U-turn|move4type=Bug|move4cat=Physical}} | ||
|{{Pokémon/7 | |||
|game=USUM | |||
|ndex=430 | |||
|pokemon=Honchkrow | |||
|gender=male | |||
|level=65 | |||
|type1=Dark|type2=Flying | |||
|ability=Insomnia | |||
|move1=Dark Pulse|move1type=Dark|move1cat=Special | |||
|move2=Heat Wave|move2type=Fire|move2cat=Special | |||
|move3=Psychic|move3type=Psychic|move3cat=Special | |||
|move4=Shadow Ball|move4type=Ghost|move4cat=Special}} | |||
|{{Pokémon/7 | |{{Pokémon/7 | ||
|game=USUM | |game=USUM | ||
|ndex=668 | |ndex=668 | ||
|pokemon=Pyroar | |pokemon=Pyroar | ||
|spritegender=male | |||
|gender=male | |gender=male | ||
|level=65 | |level=65 | ||
|type1=Fire|type2=Normal | |type1=Fire|type2=Normal | ||
|ability= | |ability=Rivalry | ||
|move1=Flamethrower|move1type=Fire|move1cat=Special | |move1=Flamethrower|move1type=Fire|move1cat=Special | ||
|move2=Hyper Voice|move2type=Normal|move2cat=Special | |move2=Hyper Voice|move2type=Normal|move2cat=Special | ||
|move3=Snarl|move3type=Dark|move3cat=Special | |move3=Snarl|move3type=Dark|move3cat=Special | ||
|move4=Will-O-Wisp|move4type=Fire|move4cat=Status}} | |move4=Will-O-Wisp|move4type=Fire|move4cat=Status}} | ||
{{Party/Div|color=eb8b51}} | |||
{{Party/Div|color= | |||
|style="margin:auto"|{{Pokémon/7 | |style="margin:auto"|{{Pokémon/7 | ||
|game=USUM | |game=USUM | ||
| Line 590: | Line 612: | ||
|move3=Earthquake|move3type=Ground|move3cat=Physical | |move3=Earthquake|move3type=Ground|move3cat=Physical | ||
|move4=Stone Edge|move4type=Rock|move4cat=Physical}} | |move4=Stone Edge|move4type=Rock|move4cat=Physical}} | ||
|{{Pokémon/7 | |style="margin:auto"|{{Pokémon/7 | ||
|game=USUM | |game=USUM | ||
|ndex=716 | |ndex=716 | ||
| Line 603: | Line 625: | ||
{{Party/Footer}} | {{Party/Footer}} | ||
===Pokémon Ultra Moon=== | ====Pokémon Ultra Moon==== | ||
{{Party/Single | {{Party/Single | ||
|color= | |color=eb8b51 | ||
|headcolor= | |headcolor=e36226 | ||
|bordercolor= | |bordercolor=ab3f26 | ||
|sprite=VSLysandre | |sprite=VSLysandre USUM.png | ||
|size=150px | |size=150px | ||
|prize={{pdollar}}18,760 | |prize={{pdollar}}18,760 | ||
|class=Team Flare | |class=Team Flare | ||
| | |name={{color2|000|Lysandre}} | ||
| | |game=UM | ||
|game= | |||
|location=Team Rocket's Castle | |location=Team Rocket's Castle | ||
|pokemon= | |pokemon=5}} | ||
|{{Pokémon/7 | |{{Pokémon/7 | ||
|game=USUM | |game=USUM | ||
| Line 624: | Line 645: | ||
|level=65 | |level=65 | ||
|type1=Fighting | |type1=Fighting | ||
|ability= | |ability=Inner Focus | ||
|move1=Fake Out|move1type=Normal|move1cat=Physical | |move1=Fake Out|move1type=Normal|move1cat=Physical | ||
|move2=Dual Chop|move2type=Dragon|move2cat=Physical | |move2=Dual Chop|move2type=Dragon|move2cat=Physical | ||
|move3=High Jump Kick|move3type=Fighting|move3cat=Physical | |move3=High Jump Kick|move3type=Fighting|move3cat=Physical | ||
|move4=U- | |move4=U-turn|move4type=Bug|move4cat=Physical}} | ||
|{{Pokémon/7 | |||
|game=USUM | |||
|ndex=430 | |||
|pokemon=Honchkrow | |||
|gender=male | |||
|level=65 | |||
|type1=Dark|type2=Flying | |||
|ability=Insomnia | |||
|move1=Dark Pulse|move1type=Dark|move1cat=Special | |||
|move2=Heat Wave|move2type=Fire|move2cat=Special | |||
|move3=Psychic|move3type=Psychic|move3cat=Special | |||
|move4=Shadow Ball|move4type=Ghost|move4cat=Special}} | |||
|{{Pokémon/7 | |{{Pokémon/7 | ||
|game=USUM | |game=USUM | ||
|ndex=668 | |ndex=668 | ||
|pokemon=Pyroar | |pokemon=Pyroar | ||
|spritegender=male | |||
|gender=male | |gender=male | ||
|level=65 | |level=65 | ||
|type1=Fire|type2=Normal | |type1=Fire|type2=Normal | ||
|ability= | |ability=Rivalry | ||
|move1=Flamethrower|move1type=Fire|move1cat=Special | |move1=Flamethrower|move1type=Fire|move1cat=Special | ||
|move2=Hyper Voice|move2type=Normal|move2cat=Special | |move2=Hyper Voice|move2type=Normal|move2cat=Special | ||
|move3=Snarl|move3type=Dark|move3cat=Special | |move3=Snarl|move3type=Dark|move3cat=Special | ||
|move4=Will-O-Wisp|move4type=Fire|move4cat=Status}} | |move4=Will-O-Wisp|move4type=Fire|move4cat=Status}} | ||
{{Party/Div|color=eb8b51}} | |||
{{Party/Div|color= | |||
|style="margin:auto"|{{Pokémon/7 | |style="margin:auto"|{{Pokémon/7 | ||
|game=USUM | |game=USUM | ||
| Line 668: | Line 690: | ||
|move3=Earthquake|move3type=Ground|move3cat=Physical | |move3=Earthquake|move3type=Ground|move3cat=Physical | ||
|move4=Stone Edge|move4type=Rock|move4cat=Physical}} | |move4=Stone Edge|move4type=Rock|move4cat=Physical}} | ||
|{{Pokémon/7 | |style="margin:auto"|{{Pokémon/7 | ||
|game=USUM | |game=USUM | ||
|ndex=717 | |ndex=717 | ||
| Line 682: | Line 704: | ||
{{Party/Footer}} | {{Party/Footer}} | ||
=== | ===Lusamine's Room=== | ||
===Pokémon Ultra Sun=== | ====Pokémon Ultra Sun==== | ||
{{Party/Single | {{Party/Single | ||
|color={{white color light}} | |color={{white color light}} | ||
|bordercolor={{black color dark}} | |bordercolor={{black color dark}} | ||
|headcolor={{platinum color}} | |headcolor={{platinum color}} | ||
|sprite=VSGhetsis.png | |sprite=VSGhetsis USUM.png | ||
|size=150px | |||
|prize={{PDollar}}19,040 | |prize={{PDollar}}19,040 | ||
|class=Team Plasma | |class=Team Plasma | ||
|name=Ghetsis | |name={{color2|000|Ghetsis}} | ||
|game= | |game=US | ||
|location=Team Rocket's Castle | |location=Team Rocket's Castle | ||
|pokemon=5}} | |pokemon=5}} | ||
| Line 714: | Line 737: | ||
|level=66 | |level=66 | ||
|type1=Normal | |type1=Normal | ||
|ability=Reckless | |||
|move1=Head Charge|move1type=Normal|move1cat=Physical | |move1=Head Charge|move1type=Normal|move1cat=Physical | ||
|move2=Poison Jab|move2type=Poison|move2cat=Physical | |move2=Poison Jab|move2type=Poison|move2cat=Physical | ||
| Line 725: | Line 749: | ||
|level=66 | |level=66 | ||
|type1=Dark|type2=Steel | |type1=Dark|type2=Steel | ||
|ability= | |ability=Defiant | ||
|move1=Iron Head|move1type=Steel|move1cat=Physical | |move1=Iron Head|move1type=Steel|move1cat=Physical | ||
|move2=Night Slash|move2type=Dark|move2cat=Physical | |move2=Night Slash|move2type=Dark|move2cat=Physical | ||
|move3=Stone Edge|move3type=Rock|move3cat=Physical | |move3=Stone Edge|move3type=Rock|move3cat=Physical | ||
|move4=X-Scissor|move4type=Bug|move4cat=Physical}} | |move4=X-Scissor|move4type=Bug|move4cat=Physical}} | ||
{{Party/Div|color={{ | {{Party/Div|color={{white color light}}}} | ||
|style="margin:auto"|{{Pokémon/7 | |style="margin:auto"|{{Pokémon/7 | ||
|game=USUM | |game=USUM | ||
| Line 744: | Line 768: | ||
|move3=Dark Pulse|move3type=Dark|move3cat=Special | |move3=Dark Pulse|move3type=Dark|move3cat=Special | ||
|move4=Surf|move4type=Water|move4cat=Special}} | |move4=Surf|move4type=Water|move4cat=Special}} | ||
|{{Pokémon/7 | |style="margin:auto"|{{Pokémon/7 | ||
|game=USUM | |game=USUM | ||
|ndex=644 | |ndex=644 | ||
| Line 758: | Line 782: | ||
{{Party/Footer}} | {{Party/Footer}} | ||
===Pokémon Ultra Moon=== | ====Pokémon Ultra Moon==== | ||
{{Party/Single | {{Party/Single | ||
|color={{white color light}} | |color={{white color light}} | ||
|bordercolor={{black color dark}} | |bordercolor={{black color dark}} | ||
|headcolor={{platinum color}} | |headcolor={{platinum color}} | ||
|sprite=VSGhetsis.png | |sprite=VSGhetsis USUM.png | ||
|size=150px | |||
|prize={{PDollar}}19,040 | |prize={{PDollar}}19,040 | ||
|class=Team Plasma | |class=Team Plasma | ||
|name=Ghetsis | |name={{color2|000|Ghetsis}} | ||
|game= | |game=UM | ||
|location=Team Rocket's Castle | |location=Team Rocket's Castle | ||
|pokemon=5}} | |pokemon=5}} | ||
| Line 789: | Line 814: | ||
|level=66 | |level=66 | ||
|type1=Normal | |type1=Normal | ||
|ability=Reckless | |||
|move1=Head Charge|move1type=Normal|move1cat=Physical | |move1=Head Charge|move1type=Normal|move1cat=Physical | ||
|move2=Poison Jab|move2type=Poison|move2cat=Physical | |move2=Poison Jab|move2type=Poison|move2cat=Physical | ||
| Line 800: | Line 826: | ||
|level=66 | |level=66 | ||
|type1=Dark|type2=Steel | |type1=Dark|type2=Steel | ||
|ability= | |ability=Defiant | ||
|move1=Iron Head|move1type=Steel|move1cat=Physical | |move1=Iron Head|move1type=Steel|move1cat=Physical | ||
|move2=Night Slash|move2type=Dark|move2cat=Physical | |move2=Night Slash|move2type=Dark|move2cat=Physical | ||
|move3=Stone Edge|move3type=Rock|move3cat=Physical | |move3=Stone Edge|move3type=Rock|move3cat=Physical | ||
|move4=X-Scissor|move4type=Bug|move4cat=Physical}} | |move4=X-Scissor|move4type=Bug|move4cat=Physical}} | ||
{{Party/Div|color={{ | {{Party/Div|color={{white color light}}}} | ||
|style="margin:auto"|{{Pokémon/7 | |style="margin:auto"|{{Pokémon/7 | ||
|game=USUM | |game=USUM | ||
| Line 819: | Line 845: | ||
|move3=Dark Pulse|move3type=Dark|move3cat=Special | |move3=Dark Pulse|move3type=Dark|move3cat=Special | ||
|move4=Surf|move4type=Water|move4cat=Special}} | |move4=Surf|move4type=Water|move4cat=Special}} | ||
|{{Pokémon/7 | |style="margin:auto"|{{Pokémon/7 | ||
|game=USUM | |game=USUM | ||
|ndex=643 | |ndex=643 | ||
| Line 833: | Line 859: | ||
{{Party/Footer}} | {{Party/Footer}} | ||
=== | ===Trophy Room=== | ||
===Pokémon Ultra Sun=== | ====Pokémon Ultra Sun==== | ||
{{Party/Single | {{Party/Single | ||
|color= | |color=666 | ||
|bordercolor=CC0000 | |bordercolor=CC0000 | ||
|headcolor= | |headcolor=CCC | ||
|sprite=VSGiovanni.png | |sprite=VSGiovanni USUM.png | ||
|prize={{PDollar}} | |size=150px | ||
|class= | |prize={{PDollar}}22,400 | ||
|class=Team Rainbow Rocket | |||
|classlink=Giovanni | |classlink=Giovanni | ||
|name=Giovanni | |name={{color2|000|Giovanni}} | ||
|game= | |game=US | ||
|location=Team Rocket's Castle | |location=Team Rocket's Castle | ||
|pokemon=5}} | |pokemon=5}} | ||
| Line 855: | Line 882: | ||
|type1=Ground | |type1=Ground | ||
|ability=Sand Veil | |ability=Sand Veil | ||
|move1=Sandstorm|move1type= | |held=Smooth Rock | ||
|move1=Sandstorm|move1type=Rock|move1cat=Status | |||
|move2=Earthquake|move2type=Ground|move2cat=Physical | |move2=Earthquake|move2type=Ground|move2cat=Physical | ||
|move3=Sucker Punch|move3type= | |move3=Sucker Punch|move3type=Dark|move3cat=Physical | ||
|move4=Stealth Rock|move4type=Rock|move4cat=Status}} | |move4=Stealth Rock|move4type=Rock|move4cat=Status}} | ||
|{{Pokémon/7 | |||
|game=USUM | |||
|ndex=034 | |||
|pokemon=Nidoking | |||
|gender=male | |||
|level=68 | |||
|type1=Poison|type2=Ground | |||
|ability=Poison Point | |||
|move1=Earthquake|move1type=Ground|move1cat=Physical | |||
|move2=Poison Jab|move2type=Poison|move2cat=Physical | |||
|move3=Throat Chop|move3type=Dark|move3cat=Physical | |||
|move4=Aqua Tail|move4type=Water|move4cat=Physical}} | |||
|{{Pokémon/7 | |{{Pokémon/7 | ||
|game=USUM | |game=USUM | ||
| Line 872: | Line 912: | ||
|move3=Earth Power|move3type=Ground|move3cat=Special | |move3=Earth Power|move3type=Ground|move3cat=Special | ||
|move4=Flamethrower|move4type=Fire|move4cat=Special}} | |move4=Flamethrower|move4type=Fire|move4cat=Special}} | ||
{{Party/Div|color=666}} | |||
{{Party/Div|color= | |||
|style="margin:auto"|{{Pokémon/7 | |style="margin:auto"|{{Pokémon/7 | ||
|game=USUM | |game=USUM | ||
| Line 891: | Line 919: | ||
|gender=male | |gender=male | ||
|level=68 | |level=68 | ||
|type1=Ground | |type1=Ground|type2=Rock | ||
|type2=Rock | |ability=Lightning Rod | ||
|ability= | |||
|move1=Megahorn|move1type=Bug|move1cat=Physical | |move1=Megahorn|move1type=Bug|move1cat=Physical | ||
|move2=Earthquake|move2type=Ground|move2cat=Physical | |move2=Earthquake|move2type=Ground|move2cat=Physical | ||
|move3=Stone Edge|move3type=Rock|move3cat=Physical | |move3=Stone Edge|move3type=Rock|move3cat=Physical | ||
|move4=Thunder Punch|move4type=Electric|move4cat=Physical}} | |move4=Thunder Punch|move4type=Electric|move4cat=Physical}} | ||
|{{Pokémon/7 | |style="margin:auto"|{{Pokémon/7 | ||
|game=USUM | |game=USUM | ||
|ndex=150 | |ndex=150 | ||
|pokemon=Mewtwo | |pokemon=Mewtwo | ||
|level= | |level=70 | ||
|type1=Psychic | |type1=Psychic | ||
|ability=Pressure | |ability=Pressure | ||
| Line 912: | Line 939: | ||
{{Party/Footer}} | {{Party/Footer}} | ||
===Pokémon Ultra Moon=== | ====Pokémon Ultra Moon==== | ||
{{Party/Single | {{Party/Single | ||
|color= | |color=666 | ||
|bordercolor=CC0000 | |bordercolor=CC0000 | ||
|headcolor= | |headcolor=CCC | ||
|sprite=VSGiovanni.png | |sprite=VSGiovanni USUM.png | ||
|prize={{PDollar}} | |size=150px | ||
|class= | |prize={{PDollar}}22,400 | ||
|class=Team Rainbow Rocket | |||
|classlink=Giovanni | |classlink=Giovanni | ||
|name=Giovanni | |name={{color2|000|Giovanni}} | ||
|game= | |game=UM | ||
|location=Team Rocket's Castle | |location=Team Rocket's Castle | ||
|pokemon=5}} | |pokemon=5}} | ||
| Line 933: | Line 961: | ||
|type1=Ground | |type1=Ground | ||
|ability=Sand Veil | |ability=Sand Veil | ||
|move1=Sandstorm|move1type= | |held=Smooth Rock | ||
|move1=Sandstorm|move1type=Rock|move1cat=Status | |||
|move2=Earthquake|move2type=Ground|move2cat=Physical | |move2=Earthquake|move2type=Ground|move2cat=Physical | ||
|move3=Sucker Punch|move3type= | |move3=Sucker Punch|move3type=Dark|move3cat=Physical | ||
|move4=Stealth Rock|move4type=Rock|move4cat=Status}} | |move4=Stealth Rock|move4type=Rock|move4cat=Status}} | ||
|{{Pokémon/7 | |||
|game=USUM | |||
|ndex=034 | |||
|pokemon=Nidoking | |||
|gender=male | |||
|level=68 | |||
|type1=Poison|type2=Ground | |||
|ability=Poison Point | |||
|move1=Earthquake|move1type=Ground|move1cat=Physical | |||
|move2=Poison Jab|move2type=Poison|move2cat=Physical | |||
|move3=Throat Chop|move3type=Dark|move3cat=Physical | |||
|move4=Aqua Tail|move4type=Water|move4cat=Physical}} | |||
|{{Pokémon/7 | |{{Pokémon/7 | ||
|game=USUM | |game=USUM | ||
| Line 950: | Line 991: | ||
|move3=Earth Power|move3type=Ground|move3cat=Special | |move3=Earth Power|move3type=Ground|move3cat=Special | ||
|move4=Flamethrower|move4type=Fire|move4cat=Special}} | |move4=Flamethrower|move4type=Fire|move4cat=Special}} | ||
{{Party/Div|color=666}} | |||
{{Party/Div|color= | |||
|style="margin:auto"|{{Pokémon/7 | |style="margin:auto"|{{Pokémon/7 | ||
|game=USUM | |game=USUM | ||
| Line 969: | Line 998: | ||
|gender=male | |gender=male | ||
|level=68 | |level=68 | ||
|type1=Ground | |type1=Ground|type2=Rock | ||
|type2=Rock | |ability=Lightning Rod | ||
|ability= | |||
|move1=Megahorn|move1type=Bug|move1cat=Physical | |move1=Megahorn|move1type=Bug|move1cat=Physical | ||
|move2=Earthquake|move2type=Ground|move2cat=Physical | |move2=Earthquake|move2type=Ground|move2cat=Physical | ||
|move3=Stone Edge|move3type=Rock|move3cat=Physical | |move3=Stone Edge|move3type=Rock|move3cat=Physical | ||
|move4=Thunder Punch|move4type=Electric|move4cat=Physical}} | |move4=Thunder Punch|move4type=Electric|move4cat=Physical}} | ||
|{{Pokémon/7 | |style="margin:auto"|{{Pokémon/7 | ||
|game=USUM | |game=USUM | ||
|ndex=150 | |ndex=150 | ||
|pokemon=Mewtwo | |pokemon=Mewtwo | ||
|level= | |level=70 | ||
|type1=Psychic | |type1=Psychic | ||
|ability=Pressure | |ability=Pressure | ||
| Line 989: | Line 1,017: | ||
|move4=Ice Beam|move4type=Ice|move4cat=Special}} | |move4=Ice Beam|move4type=Ice|move4cat=Special}} | ||
{{Party/Footer}} | {{Party/Footer}} | ||
==Layout== | |||
===Southwest Wing=== | |||
{| class="roundy" style="margin:auto; background: #000; border: 3px solid #{{Locationcolor/dark|building}}" | |||
|- | |||
! style="background:#{{Locationcolor/light|building}}; {{roundytl|5px}}" | Game | |||
! style="background:#{{Locationcolor/light|building}}" | First room | |||
! style="background:#{{Locationcolor/light|building}}" | Second room | |||
! style="background:#{{Locationcolor/light|building}}" | Third room | |||
! style="background:#{{Locationcolor/light|building}}" | Fourth room | |||
! style="background:#{{Locationcolor/light|building}}" | Fifth room | |||
! style="background:#{{Locationcolor/light|building}}; {{roundytr|5px}}" | Archie's room | |||
|- | |||
! style="background:#{{Ultra sun color}}" | {{color2|000|Pokémon Ultra Sun and Ultra Moon|Ultra Sun}} | |||
| rowspan="2" | [[File:Team Rocket's Castle SW NW Wing Room 1 USUM.png|135px]] | |||
| rowspan="2" | [[File:Team Rocket's Castle SW Wing Room 2 USUM.png|165px]] | |||
| rowspan="2" | [[File:Team Rocket's Castle SW Wing Room 3 USUM.png|165px]] | |||
| rowspan="2" | [[File:Team Rocket's Castle SW Wing Room 4 USUM.png|165px]] | |||
| rowspan="2" | [[File:Team Rocket's Castle Room 5 USUM.png|135px]] | |||
| rowspan="2" | [[File:Team Rocket's Castle SW Wing Archie's Room USUM.png|165px]] | |||
|- | |||
! style="background:#{{Ultra moon color}}" | {{color2|000|Pokémon Ultra Sun and Ultra Moon|Ultra Moon}} | |||
|- | |||
| colspan=7 style="background:#{{Locationcolor/light|building}}; {{roundybottom|5px}}" | | |||
|} | |||
====Side rooms==== | |||
{| class="roundy" style="margin:auto; background: #000; border: 3px solid #{{Locationcolor/dark|building}}" | |||
|- | |||
! style="background:#{{Locationcolor/light|building}}; {{roundytl|5px}}" | Game | |||
! style="background:#{{Locationcolor/light|building}}" | Side room 1 | |||
! style="background:#{{Locationcolor/light|building}}" | Side room 2, 3, 7, and 8 | |||
! style="background:#{{Locationcolor/light|building}}" | Side room 4 and 9 | |||
! style="background:#{{Locationcolor/light|building}}" | Side room 5 and 13 | |||
! style="background:#{{Locationcolor/light|building}}" | Side room 6 | |||
! style="background:#{{Locationcolor/light|building}}" | Side room 10 | |||
! style="background:#{{Locationcolor/light|building}}" | Side room 11 | |||
! style="background:#{{Locationcolor/light|building}}" | Side room 12 | |||
! style="background:#{{Locationcolor/light|building}}; {{roundytr|5px}}" | Side room 14 | |||
|- | |||
! style="background:#{{Ultra sun color}}" | {{color2|000|Pokémon Ultra Sun and Ultra Moon|Ultra Sun}} | |||
| rowspan="2" | [[File:Team Rocket's Castle SW Wing Side Room 1 USUM.png|90px]] | |||
| rowspan="2" | [[File:Team Rocket's Castle SW Wing Side Room 2 3 8 USUM.png|90px]] | |||
| rowspan="2" | [[File:Team Rocket's Castle SW Wing Side Room 9 USUM.png|90px]] | |||
| rowspan="2" | [[File:Team Rocket's Castle SW Wing Side Room 5 13 USUM.png|90px]] | |||
| rowspan="2" | [[File:Team Rocket's Castle SW Wing Side Room 6 USUM.png|90px]] | |||
| rowspan="2" | [[File:Team Rocket's Castle SW Wing Side Room 4 10 USUM.png|90px]] | |||
| rowspan="2" | [[File:Team Rocket's Castle SW Wing Side Room 11 USUM.png|90px]] | |||
| rowspan="2" | [[File:Team Rocket's Castle SW Wing Side Room 12 USUM.png|90px]] | |||
| rowspan="2" | [[File:Team Rocket's Castle SW Wing Side Room 14 USUM.png|90px]] | |||
|- | |||
! style="background:#{{Ultra moon color}}" | {{color2|000|Pokémon Ultra Sun and Ultra Moon|Ultra Moon}} | |||
|- | |||
| colspan=11 style="background:#{{Locationcolor/light|building}}; {{roundybottom|5px}}" | | |||
|} | |||
===Southeast Wing=== | |||
{| class="roundy" style="margin:auto; background: #000; border: 3px solid #{{Locationcolor/dark|building}}" | |||
|- | |||
! style="background:#{{Locationcolor/light|building}}; {{roundytl|5px}}" | Game | |||
! style="background:#{{Locationcolor/light|building}}" | First room | |||
! style="background:#{{Locationcolor/light|building}}" | Second and third room | |||
! style="background:#{{Locationcolor/light|building}}" | Fourth room | |||
! style="background:#{{Locationcolor/light|building}}" | Side room | |||
! style="background:#{{Locationcolor/light|building}}" | Fifth room | |||
! style="background:#{{Locationcolor/light|building}}; {{roundytr|5px}}" | Maxie's room | |||
|- | |||
! style="background:#{{Ultra sun color}}" | {{color2|000|Pokémon Ultra Sun and Ultra Moon|Ultra Sun}} | |||
| rowspan="2" | [[File:Team Rocket's Castle SE NE Wing Room 1 USUM.png|135px]] | |||
| rowspan="2" | [[File:Team Rocket's Castle SE Wing Room 2 3 USUM.png|165px]] | |||
| rowspan="2" | [[File:Team Rocket's Castle SE Wing Room 4 USUM.png|165px]] | |||
| rowspan="2" | [[File:Team Rocket's Castle SE Wing Side Room 1 USUM.png|135px]] | |||
| rowspan="2" | [[File:Team Rocket's Castle Room 5 USUM.png|135px]] | |||
| rowspan="2" | [[File:Team Rocket's Castle SE Wing Maxie's Room USUM.png|165px]] | |||
|- | |||
! style="background:#{{Ultra moon color}}" | {{color2|000|Pokémon Ultra Sun and Ultra Moon|Ultra Moon}} | |||
|- | |||
| colspan=7 style="background:#{{Locationcolor/light|building}}; {{roundybottom|5px}}" | | |||
|} | |||
===Northwest Wing=== | |||
{| class="roundy" style="margin:auto; background: #000; border: 3px solid #{{Locationcolor/dark|building}}" | |||
|- | |||
! style="background:#{{Locationcolor/light|building}}; {{roundytl|5px}}" | Game | |||
! style="background:#{{Locationcolor/light|building}}" | First room | |||
! style="background:#{{Locationcolor/light|building}}" | Second room | |||
! style="background:#{{Locationcolor/light|building}}" | Third room | |||
! style="background:#{{Locationcolor/light|building}}" | Fourth room | |||
! style="background:#{{Locationcolor/light|building}}" | Fifth room | |||
! style="background:#{{Locationcolor/light|building}}; {{roundytr|5px}}" | Cyrus's room | |||
|- | |||
! style="background:#{{Ultra sun color}}" | {{color2|000|Pokémon Ultra Sun and Ultra Moon|Ultra Sun}} | |||
| rowspan="2" | [[File:Team Rocket's Castle SW NW Wing Room 1 USUM.png|135px]] | |||
| rowspan="2" | [[File:Team Rocket's Castle NW Wing Room 2 USUM.png|135px]] | |||
| rowspan="2" | [[File:Team Rocket's Castle NW Wing Room 3 USUM.png|135px]] | |||
| rowspan="2" | [[File:Team Rocket's Castle NW Wing Room 4 USUM.png|135px]] | |||
| rowspan="2" | [[File:Team Rocket's Castle Room 5 USUM.png|135px]] | |||
| rowspan="2" | [[File:Team Rocket's Castle NW Wing Cyrus's Room USUM.png|165px]] | |||
|- | |||
! style="background:#{{Ultra moon color}}" | {{color2|000|Pokémon Ultra Sun and Ultra Moon|Ultra Moon}} | |||
|- | |||
| colspan=7 style="background:#{{Locationcolor/light|building}}; {{roundybottom|5px}}" | | |||
|} | |||
===Northeast Wing=== | |||
{| class="roundy" style="margin:auto; background: #000; border: 3px solid #{{Locationcolor/dark|building}}" | |||
|- | |||
! style="background:#{{Locationcolor/light|building}}; {{roundytl|5px}}" | Game | |||
! style="background:#{{Locationcolor/light|building}}" | First room | |||
! style="background:#{{Locationcolor/light|building}}" | Second room | |||
! style="background:#{{Locationcolor/light|building}}" | Third room | |||
! style="background:#{{Locationcolor/light|building}}" | Fourth room | |||
! style="background:#{{Locationcolor/light|building}}" | Fifth room | |||
! style="background:#{{Locationcolor/light|building}}; {{roundytr|5px}}" | Lysandre's room | |||
|- | |||
! style="background:#{{Ultra sun color}}" | {{color2|000|Pokémon Ultra Sun and Ultra Moon|Ultra Sun}} | |||
| rowspan="2" | [[File:Team Rocket's Castle SE NE Wing Room 1 USUM.png|180px]] | |||
| rowspan="2" | [[File:Team Rocket's Castle NE Wing Room 2 USUM.png|135px]] | |||
| rowspan="2" | [[File:Team Rocket's Castle NE Wing Room 3 USUM.png|135px]] | |||
| rowspan="2" | [[File:Team Rocket's Castle NE Wing Room 4 USUM.png|135px]] | |||
| rowspan="2" | [[File:Team Rocket's Castle Room 5 USUM.png|135px]] | |||
| rowspan="2" | [[File:Team Rocket's Castle NE Wing Lysandre's Room USUM.png|165px]] | |||
|- | |||
! style="background:#{{Ultra moon color}}" | {{color2|000|Pokémon Ultra Sun and Ultra Moon|Ultra Moon}} | |||
|- | |||
| colspan=7 style="background:#{{Locationcolor/light|building}}; {{roundybottom|5px}}" | | |||
|} | |||
==In the spin-off games== | |||
===[[Pokémon Masters EX]]=== | |||
Artwork depicting Team Rocket's Castle is seen in {{mas|Giovanni}}'s mindscape. | |||
{| style="background: #7B30B2; {{roundy}}; border: #7B30B2;" | |||
| | |||
{| style="background: #AB60E2; {{roundy}}; border: #AB60E2;" | |||
|- style="text-align:center" | |||
| | |||
{| style="background: #{{psychic color light}}; {{roundy}}; border: #{{psychic color light}}; padding: 0px 5px 5px 5px" | |||
|- | |||
|<big>'''{{color2|000|Giovanni_(Masters)#Mewtwo|Giovanni & Mewtwo}}'''</big> | |||
|- | |||
| [[File:Giovanni Mindscape.png|200px]] | |||
|} | |||
|} | |||
|} | |||
==Trivia== | |||
* More [[core series]] [[villainous team]] {{cat|Villainous team leaders|leaders}} are encountered here than any other villainous team base, with eight. | |||
** [[N]] is the only core series villainous team leader introduced as of [[Generation VII]] to not be encountered here. | |||
==In other languages== | ==In other languages== | ||
{{langtable|color={{locationcolor/light|building}}|bordercolor={{locationcolor/dark|building}} | {{langtable|color={{locationcolor/light|building}}|bordercolor={{locationcolor/dark|building}} | ||
|zh_yue=火箭隊城堡 ''{{tt| | |zh_yue=火箭隊城堡 ''{{tt|Fójin-déui Sìhngbóu|Team Rocket's Castle}} | ||
|zh_cmn=火箭隊城堡 / 火箭队城堡 ''{{tt| | |zh_cmn=火箭隊城堡 / 火箭队城堡 ''{{tt|Huǒjiàn-duì Chéngbǎo|Team Rocket's Castle}} | ||
|fr=Château Rocket | |fr=Château Rocket | ||
|de=Rocket-Schloss | |de=Rocket-Schloss | ||
|it=Castello Team Rocket | |it=Castello Team Rocket | ||
|ko=로켓단의 성 ''Team Rocket's Castle'' | |ko=로켓단의 성 ''{{tt|Rocket-dan-ui Seong|Team Rocket's Castle}}'' | ||
|es=Castillo Team Rocket | |es=Castillo Team Rocket | ||
}} | }} | ||
{{Team Rainbow Rocket}} | |||
{{Alola}}<br> | {{Alola}}<br> | ||
{{Project Locations notice}} | {{Project Locations notice}} | ||
| Line 1,006: | Line 1,183: | ||
[[Category:Ultra Sun and Ultra Moon locations]] | [[Category:Ultra Sun and Ultra Moon locations]] | ||
[[Category:Villainous team bases]] | [[Category:Villainous team bases]] | ||
[[Category:Castles]] | |||
[[de:Rocket-Schloss]] | [[de:Rocket-Schloss]] | ||
[[es:Castillo del Team Rocket]] | |||
[[fr:Château Rocket]] | |||
[[it:Castello Team Rocket]] | |||
[[ja:ロケットだんのしろ]] | [[ja:ロケットだんのしろ]] | ||
[[zh:火箭隊城堡]] | [[zh:火箭隊城堡]] | ||
Latest revision as of 08:43, 10 April 2024

|
This article is incomplete. Please feel free to edit this article to add missing information and complete it. Reason: Layout maps of the Entrance Room, Lusamine's Room, and Trophy Room |
| ||||
| ||||
| Location: | Aether Paradise | |||
|---|---|---|---|---|
| Region: | Alola | |||
| Generations: | VII | |||
 Location of Team Rocket's Castle in Alola. | ||||
| Pokémon world locations | ||||
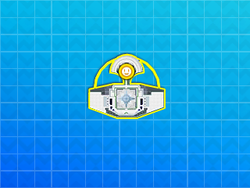
Team Rocket's Castle (Japanese: ロケット団の城 Team Rocket's Castle) is a location on Aether Paradise in Alola. It is Team Rainbow Rocket's base in the region, temporarily replacing Lusamine's mansion during Episode RR. It only appears in Pokémon Ultra Sun and Ultra Moon.
Geography
Team Rocket's Castle's entrance room and bedroom have identical layouts to the ones seen in Lusamine's mansion. When first entering the bedroom, Lillie will try to activate the warp tile to the center of the castle, but is unable to even open the mirror door leading to the tile. Upon exiting the bedroom, two Team Rainbow Rocket Grunts appear to stop the player and Lillie. However, Guzma also shows up and helps the player in defeating the two Grunts in a Multi Battle. After being defeated, the Grunts flee, opening the gates to the southern wings of the castle in the process. Lillie will then station herself in the bedroom, healing the player's Pokémon whenever she's talked to, while Guzma will stay in the entrance room.
At the end of each of the castle's four wings lies a room guarded by a pair of Team Rainbow Rocket Grunts, who battle the player consecutively before letting them through. Inside each of these rooms is a villainous team leader from an alternate reality, in which they succeeded in their plans due to the lack of a player character to stop them. Each of them also wields a Legendary Pokémon from their native region. Once the player defeats a leader in battle, they will provide the player with a method to advance further into the castle, simultaneously activating a one-way warp tile back to the entrance room.
Several item balls found here are actually Electrode, which will attack the player if interacted with. If they are not defeated or caught, they will remain on the floor.
In the southwest wing, the player must navigate through a maze of warp tiles in order to reach the end. Some of these paths lead to a dead end. In one room, different rows of warp panels are separated by walls of Team Rainbow Rocket Grunts standing in rows across the room. The end of the wing has a room occupied by Team Aqua leader Archie. After he is defeated, he will allow the player to press a secret switch behind a painting.
In the southeast wing, the player must solve three memory puzzles in order to advance through the three puzzle rooms. The player must first press the button in the middle of the room, causing the four colored panels on the floor to light up in a certain order. The player must then step on the tiles in the given order. If they step on a wrong tile, the puzzle will be reset. Each room has three possible puzzles to be generated. If the player presses the button again before stepping on any of the tiles, a new puzzle will be generated. The first puzzle requires memorizing the order of four panels, the second one requires six, and the third one requires eight. In the second puzzle room, a Team Rainbow Rocket Grunt will strike a pose in an attempt to distract the player in the middle of them trying to solve the puzzle, while in the third room, the player's attempt to solve the puzzle will be distrupted by a pair of Team Rainbow Rocket Grunts, who in turn challenge the player to a battle while they're solving the puzzle. If the third puzzle is reset after a Grunt has been defeated, said Grunt will not battle the player again. Once a puzzle is solved, a warp tile leading to the next room will be activated. At the end of the wing is a room housing Maxie, the leader of Team Magma. Like Archie, Maxie will allow the player to press a secret switch behind a painting after being defeated.
After the player has pressed both secret switches, the gates to the northern wings of the castle will open in the entrance room. Two Team Rainbow Rocket Grunts will emerge from the gates when they're opened and try to attack Guzma, only to be physically held back by him until all the evil team leaders have been defeated. Archie and Maxie will also appear in the entrance room, and, upon noticing each other, challenge each other to a battle to see which one of them gets to rule Alola. However, before they can even exit the building, they are warped away by an invisible force.
In the northwest wing, the rooms are filled with spin tiles, similar to the original Team Rocket Hideout in Kanto. This wing's final room is occupied by Team Galactic leader Cyrus. Once he's defeated, he will hand the player the Galactic Key, which they can use to activate a machine on the wall and remove one of the two last obstacles.
In the northeast wing, the rooms are guarded by Meowth statues. If the player steps into a statue's line of sight, they will be warped back to the beginning of the room. By interacting with a Meowth statue from behind, the player can push a button to turn the statue into a direction marked by an arrow on the floor, allowing them to advance through the room unnoticed. If the player is warped back to the entrance, any rotated statues will be reset. The statues will also be reset when the player leaves the room. The room at the end of the wing houses Lysandre, the leader of Team Flare, who forces the player to make a choice between pressing one of two buttons, with the wrong choice leading to him activating the ultimate weapon. No matter which button the player chooses, the ultimate weapon will be activated, but once he's defeated, Lysandre will allow the player to press the other button as well, deactivating the weapon and removing one of the two last obstacles blocking access to the center of the castle.
Once the player has beaten both Cyrus and Lysandre, the mirror door in the bedroom will have opened and the warp tile behind it has become active. However, once the player tries to step onto the warp tile, Team Plasma leader Ghetsis will appear through it, explaining to the player and Lillie that he's planning to make the leader of Team Rainbow Rocket his "king" to rule above all existence, similar to how he had previously made N the king of Team Plasma to rule Unova, and challenges the player to a battle to keep them from foiling his plans. Upon being defeated, Ghetsis flies into a fit of rage and starts threatening Lillie's life. However, she's saved by the arrival of Colress, who then proceeds to warp Ghetsis back to his own reality, allowing the player to move forward.
In the Trophy Room at the center of the castle, the player will encounter Giovanni, the leader of Team Rainbow Rocket, who tells the player about his plan to conquer all realities with an army of Ultra Beasts. He's also taken Lusamine hostage, planning to turn her into his loyal servant. To keep the player from interfering with his plans, Giovanni then challenges them to a battle. Once Giovanni is defeated, he declares that although he will step aside this time, Team Rainbow Rocket will never fall. As he warps away, the castle is restored back to its state as Lusamine's mansion by one of Colress's inventions.
Items
Any items not obtained here before defeating Giovanni can be obtained from a Janitor outside of Lusamine's mansion after Episode RR has ended.
| Item | Location | Games | |
|---|---|---|---|
| Iron Ball | Southwest Wing, in side room 4 | US UM | |
| Guard Spec. | Southwest Wing, in side room 8 | US UM | |
| Max Potion | Southwest Wing, in side room 10 | US UM | |
| Rare Candy | Southwest Wing, in side room 12 | US UM | |
| Revive ×2 |
|
US UM | |
| Full Restore ×2 |
|
US UM | |
| Full Heal | Southeast Wing, in the third room | US UM | |
| X Attack | Southeast Wing, in the side room | US UM | |
| Zinc | Northwest Wing, in the third room | US UM | |
| HP Up | Northwest Wing, in the fourth room | US UM | |
| Hyper Potion | Northwest Wing, in the fifth room | US UM | |
| Galactic Key | Northwest Wing, from Cyrus after defeating him | US UM | |
| Calcium | Northeast Wing, in the second room | US UM | |
| PP Up | Northeast Wing, in the third room | US UM | |
| Cell Battery | Northeast Wing, in the fourth room | US UM | |
| Max Revive | Northeast Wing, in the fifth room | US UM | |
Fake items
The Electrode can no longer be found once Episode RR ends.
| Item | Location | Games | |
|---|---|---|---|
| Electrode ×3 |
|
US UM | |
Special encounters
Three Electrode appear here as fake items. They are coded to never be Shiny.
| ||||||||||||||||||||||||||||||||
Trainers
Entrance Room
Guzma joins the player in a Multi Battle against two Team Rainbow Rocket Grunts.
|
||||||||||||||||||||||||||||||||||||||||||||||||||||||||||||||||||||||||||||||||||||||||||||||||||||||||||||||||||||||||||||||||||||||||||||||||||||||||||||||||||||||||||||||
| ||||||||||||||||||||||||||||||||||||||||||||||||||||||||||||||||||||||||||||||||||||||||||||||||||||||||||||||||||||||||||||||||||||||||||||||||||||||||||||||||||||||||||||||
| Trainer | Pokémon | |||||||||||
|---|---|---|---|---|---|---|---|---|---|---|---|---|
|
| |||||||||||
|
| |||||||||||
Southwest Wing
| Trainer | Pokémon | |||||||||||
|---|---|---|---|---|---|---|---|---|---|---|---|---|
| Second room | ||||||||||||
|
| |||||||||||
| Side room 1 | ||||||||||||
|
| |||||||||||
| Side room 2 | ||||||||||||
|
| |||||||||||
| Side room 4 | ||||||||||||
|
| |||||||||||
| Side room 5 | ||||||||||||
|
| |||||||||||
| Side room 6 | ||||||||||||
|
| |||||||||||
| Side room 7 | ||||||||||||
|
| |||||||||||
| Side room 9 | ||||||||||||
|
| |||||||||||
| Side room 11 | ||||||||||||
|
| |||||||||||
| Fourth room | ||||||||||||
|
| |||||||||||
| Side room 13 | ||||||||||||
|
| |||||||||||
| ||||||||||||
| Side room 14 | ||||||||||||
|
| |||||||||||
| Fifth room | ||||||||||||
|
| |||||||||||
|
| |||||||||||
|
||||||||||||||||||||||||||||||||||||||||||||||||||||||||||||||||||||||||||||||||||||||||||||||||||||||||||||||||||||||||||||||||||||||||||||||||||||||||||||||||||||||||||
| ||||||||||||||||||||||||||||||||||||||||||||||||||||||||||||||||||||||||||||||||||||||||||||||||||||||||||||||||||||||||||||||||||||||||||||||||||||||||||||||||||||||||||
Southeast Wing
| Trainer | Pokémon | |||||||||||
|---|---|---|---|---|---|---|---|---|---|---|---|---|
| Second room | ||||||||||||
|
| |||||||||||
| Fourth room | ||||||||||||
|
| |||||||||||
|
| |||||||||||
| ||||||||||||
| Side room | ||||||||||||
|
| |||||||||||
| Fifth room | ||||||||||||
|
| |||||||||||
|
| |||||||||||
|
||||||||||||||||||||||||||||||||||||||||||||||||||||||||||||||||||||||||||||||||||||||||||||||||||||||||||||||||||||||||||||||||||||||||||||||||||||||||||||||||||||||||||
| ||||||||||||||||||||||||||||||||||||||||||||||||||||||||||||||||||||||||||||||||||||||||||||||||||||||||||||||||||||||||||||||||||||||||||||||||||||||||||||||||||||||||||
Northwest Wing
| Trainer | Pokémon | |||||||||||
|---|---|---|---|---|---|---|---|---|---|---|---|---|
| First room | ||||||||||||
|
| |||||||||||
| Second room | ||||||||||||
|
| |||||||||||
| Third room | ||||||||||||
|
| |||||||||||
| Fifth room | ||||||||||||
|
| |||||||||||
|
| |||||||||||
| ||||||||||||
Pokémon Ultra Sun
|
||||||||||||||||||||||||||||||||||||||||||||||||||||||||||||||||||||||||||||||||||||||||||||||||||||||||||||||||||||||||||||||||||||||||||||||||||||||||||||||||||||||||||||||||
| ||||||||||||||||||||||||||||||||||||||||||||||||||||||||||||||||||||||||||||||||||||||||||||||||||||||||||||||||||||||||||||||||||||||||||||||||||||||||||||||||||||||||||||||||
Pokémon Ultra Moon
|
||||||||||||||||||||||||||||||||||||||||||||||||||||||||||||||||||||||||||||||||||||||||||||||||||||||||||||||||||||||||||||||||||||||||||||||||||||||||||||||||||||||||||||||||
| ||||||||||||||||||||||||||||||||||||||||||||||||||||||||||||||||||||||||||||||||||||||||||||||||||||||||||||||||||||||||||||||||||||||||||||||||||||||||||||||||||||||||||||||||
Northeast Wing
| Trainer | Pokémon | |||||||||||
|---|---|---|---|---|---|---|---|---|---|---|---|---|
| First room | ||||||||||||
|
| |||||||||||
| Second room | ||||||||||||
|
| |||||||||||
| Third room | ||||||||||||
|
| |||||||||||
| Fifth room | ||||||||||||
|
| |||||||||||
| ||||||||||||
|
| |||||||||||
Pokémon Ultra Sun
|
||||||||||||||||||||||||||||||||||||||||||||||||||||||||||||||||||||||||||||||||||||||||||||||||||||||||||||||||||||||||||||||||||||||||||||||||||||||||||||||||||||||||||||
| ||||||||||||||||||||||||||||||||||||||||||||||||||||||||||||||||||||||||||||||||||||||||||||||||||||||||||||||||||||||||||||||||||||||||||||||||||||||||||||||||||||||||||||
Pokémon Ultra Moon
|
||||||||||||||||||||||||||||||||||||||||||||||||||||||||||||||||||||||||||||||||||||||||||||||||||||||||||||||||||||||||||||||||||||||||||||||||||||||||||||||||||||||||||||||
| ||||||||||||||||||||||||||||||||||||||||||||||||||||||||||||||||||||||||||||||||||||||||||||||||||||||||||||||||||||||||||||||||||||||||||||||||||||||||||||||||||||||||||||||
Lusamine's Room
Pokémon Ultra Sun
|
||||||||||||||||||||||||||||||||||||||||||||||||||||||||||||||||||||||||||||||||||||||||||||||||||||||||||||||||||||||||||||||||||||||||||||||||||||||||||||||||||||||||||||
| ||||||||||||||||||||||||||||||||||||||||||||||||||||||||||||||||||||||||||||||||||||||||||||||||||||||||||||||||||||||||||||||||||||||||||||||||||||||||||||||||||||||||||||
Pokémon Ultra Moon
|
||||||||||||||||||||||||||||||||||||||||||||||||||||||||||||||||||||||||||||||||||||||||||||||||||||||||||||||||||||||||||||||||||||||||||||||||||||||||||||||||||||||||||||
| ||||||||||||||||||||||||||||||||||||||||||||||||||||||||||||||||||||||||||||||||||||||||||||||||||||||||||||||||||||||||||||||||||||||||||||||||||||||||||||||||||||||||||||
Trophy Room
Pokémon Ultra Sun
|
||||||||||||||||||||||||||||||||||||||||||||||||||||||||||||||||||||||||||||||||||||||||||||||||||||||||||||||||||||||||||||||||||||||||||||||||||||||||||||||||||||||||||||
| ||||||||||||||||||||||||||||||||||||||||||||||||||||||||||||||||||||||||||||||||||||||||||||||||||||||||||||||||||||||||||||||||||||||||||||||||||||||||||||||||||||||||||||
Pokémon Ultra Moon
|
||||||||||||||||||||||||||||||||||||||||||||||||||||||||||||||||||||||||||||||||||||||||||||||||||||||||||||||||||||||||||||||||||||||||||||||||||||||||||||||||||||||||||||
| ||||||||||||||||||||||||||||||||||||||||||||||||||||||||||||||||||||||||||||||||||||||||||||||||||||||||||||||||||||||||||||||||||||||||||||||||||||||||||||||||||||||||||||
Layout
Southwest Wing
| Game | First room | Second room | Third room | Fourth room | Fifth room | Archie's room |
|---|---|---|---|---|---|---|
| Ultra Sun | 
|
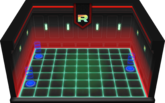
|
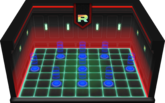
|

|
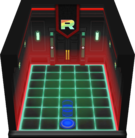
|

|
| Ultra Moon | ||||||
Side rooms
| Game | Side room 1 | Side room 2, 3, 7, and 8 | Side room 4 and 9 | Side room 5 and 13 | Side room 6 | Side room 10 | Side room 11 | Side room 12 | Side room 14 | |
|---|---|---|---|---|---|---|---|---|---|---|
| Ultra Sun | 
|

|

|

|

|

|

|

|

| |
| Ultra Moon | ||||||||||
Southeast Wing
| Game | First room | Second and third room | Fourth room | Side room | Fifth room | Maxie's room |
|---|---|---|---|---|---|---|
| Ultra Sun | 
|
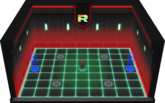
|
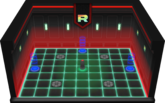
|
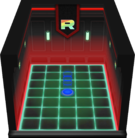
|

|

|
| Ultra Moon | ||||||
Northwest Wing
| Game | First room | Second room | Third room | Fourth room | Fifth room | Cyrus's room |
|---|---|---|---|---|---|---|
| Ultra Sun | 
|
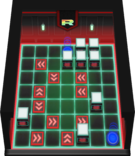
|
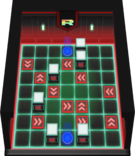
|
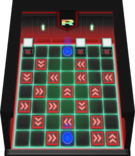
|

|

|
| Ultra Moon | ||||||
Northeast Wing
| Game | First room | Second room | Third room | Fourth room | Fifth room | Lysandre's room |
|---|---|---|---|---|---|---|
| Ultra Sun | 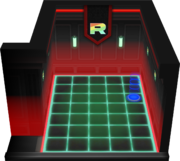
|

|
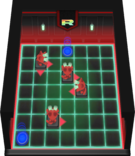
|
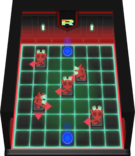
|

|

|
| Ultra Moon | ||||||
In the spin-off games
Pokémon Masters EX
Artwork depicting Team Rocket's Castle is seen in Giovanni's mindscape.
|
Trivia
- More core series villainous team leaders are encountered here than any other villainous team base, with eight.
- N is the only core series villainous team leader introduced as of Generation VII to not be encountered here.
In other languages
| ||||||||||||||||||||||||||
| |||||||||||||||||

|
This article is part of Project Locations, a Bulbapedia project that aims to write comprehensive articles on every location in the Pokémon world. |
