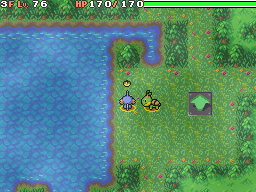
Sky Peak Mountain Path: Difference between revisions
No edit summary |
|||
| (41 intermediate revisions by 19 users not shown) | |||
| Line 1: | Line 1: | ||
{{Incomplete|2= | {{Incomplete|2=Items, other encountered Pokémon}} | ||
{{DungeonPrevNext|Shaymin Village| | {{DungeonPrevNext|Shaymin Village|Blizzard Island|3}} | ||
{{Dungeon infobox | {{Dungeon infobox | ||
|colorscheme=MD Sky | |colorscheme=MD Sky | ||
|bordercolorscheme=MD Sky | |bordercolorscheme=MD Sky | ||
|name=Sky Peak | |name=Sky Peak Mountain Path | ||
|jname= | |jname=そらのいただき とざんどう | ||
|jtrans= | |jtrans=Sky Summit Mountain Path | ||
|image=Sky Peak Station Pass 1.png | |image=Sky Peak Station Pass 1 S.png | ||
|size=256px | |size=256px | ||
|floors={{tt| | |floors={{tt|40|1st-4th Station Pass with 3 floors each, 5th with 4 floors, 5th Station Clearing, 6th-8th with 4 floors each, 9th-10th with 5 floors each, and the summit}} | ||
|rest=Yes{{tt|*|One between each Pass}} | |rest=Yes{{tt|*|One between each Pass}} | ||
|traps=Yes | |traps=Yes | ||
|maintype={{t|Grass}} | |monsterhouses=Yes{{tt|*|Sky Peak Summit Pass floors 2-5 only}} | ||
|boss={{P|Carnivine}} ×5< | |maintype={{t|Grass}}{{tt|*|1st-5th Station Pass}}<br>{{t|Normal}}, <small>{{t|Fighting}}</small>{{tt|*|6th Station-Summit Pass}}<br>{{t|Poison}}{{tt|*|Summit}} | ||
|boss={{P|Carnivine}} ×5 <small>(5th Station, first visit)</small><br>{{P|Muk}} ×3, {{p|Grimer}} ×5 <small>(summit; first visit)</small> | |||
|recruitable=Yes | |recruitable=Yes | ||
|items=48 | |items=48 | ||
| Line 20: | Line 21: | ||
|teamsize=4 | |teamsize=4 | ||
}} | }} | ||
The '''Sky Peak Mountain Path''' (Japanese: ''' | The '''Sky Peak Mountain Path''' (Japanese: '''そらのいただき とざんどう''' ''Sky Summit Mountain Path'') is a path of ten very similar mystery dungeons only accessible in [[Pokémon Mystery Dungeon: Explorers of Sky]]. This mountain path of ten passes connecting nine stations leads to the summit of [[Sky Peak]], the mountain above [[Shaymin Village]]. | ||
The Pokémon in these dungeons begin with Pokémon generally found in [[Mystifying Forest]] in the first dungeons, and gradually phasing them out for Pokémon generally found on [[Mt. Travail]]. Players can find Hidden Stairs leading to a floor with [[Treasure | The first nine passes are named '''1st Station Pass''' (Japanese: '''1ごうめまでのみちのり''' ''Path to the 1st Station'') to '''9th Station Pass''' (Japanese: '''9ごうめまでのみちのり''' ''Path to the 9th Station''), while the tenth pass is known as the '''Sky Peak Summit Pass''' (Japanese: '''ちょうじょうまでのみちのり''' ''Path to the Summit''). Each pass has between three and five floors each. [[Sky Gift]]s can be found here. The Pokémon in these dungeons begin with Pokémon generally found in [[Mystifying Forest]] in the first dungeons, and gradually phasing them out for Pokémon generally found on [[Mt. Travail]]. Players can find Hidden Stairs leading to a floor with [[Treasure Box]]es. On the Summit Pass, there is a chance of fog, and the [[Secret Bazaar]] and [[Monster House]]s may appear on floors 2-5. | ||
A player can only go through this series of dungeons after defeating [[Primal Dialga]] and graduating from [[Wigglytuff's Guild]]. In the first playthrough of these dungeons, a {{p|Shaymin}} comes with the player. After the first visit, this will unlock the [[Sky Jukebox]]. | |||
When reaching the summit for the first time, the place will be covered with filth. To clear it the player needs to defeat three {{p|Muk}} and five {{p|Grimer}}. The Shaymin accompanying the player then absorbs the filth and cleans the place. [[Team|Team Frontier]], a team including a {{p|Machoke}}, {{p|Mawile}}, and a {{p|Breloom}}, helps fight the Muk and Grimer during the first visit. | |||
The player can recruit Shaymin by reaching the summit for a second time. | |||
==Stations== | ==Stations== | ||
At the end of each Pass, the player will reach a Station. Each Station has a [[Kangaskhan Rock]] with the ability both to save the game and to store items | At the end of each Pass, the player will reach a Station. Each Station has a [[Kangaskhan Rock]] with the ability both to save the game and, at the even-numbered Stations, to store items. The one exception is the 5th Station. Upon entering the 5th Station during the first visit, the player will encounter a group of hostile {{p|Carnivine}} which appear to be beating up a {{p|Sneasel}}. The player defeats these Pokémon with the help of [[Team|Team Frontier]]. On each following visit, the 5th station is completely empty. | ||
In the even numbered Stations, there is a method of transport called [[Shaymin Village|Drifblim's Gondola]], where a {{p|Drifblim}} can transport the player instantly between that Station, any previous even numbered Station, and the base camp at [[Shaymin Village]]. The only exception to this is the 8th Station, where an {{p|Ampharos}} lives. After finishing the 8th Pass and going into the 9th Station for the second time, the {{p|Ampharos}} will give the player a [[Sky Gift]] that the {{p|Sneasel}} they helped left behind. | |||
In many Stations a Pokémon may appear, giving the player a Sky Gift. Occasionally, at a Station, a {{p|Jumpluff}}, {{p|Numel}} or {{p|Happiny}} will be in need of an item. If the player has said item, they can trade for an item the Pokémon is offering in return, or the Pokémon will return the favor by leaving a Sky Gift at [[Spinda's Cafe]] later. | |||
==Pokémon encountered== | ==Pokémon encountered== | ||
===1st Station Pass=== | ===1st Station Pass=== | ||
{{mdloc/h|grass}} | {{mdloc/h|grass}} | ||
{{mdloc|002|Ivysaur| | {{mdloc|002|Ivysaur|1-3|40|-10}} | ||
{{mdloc|011|Metapod| | {{mdloc|011|Metapod|1-3|40|-10}} | ||
{{mdloc|020|Raticate| | {{mdloc|020|Raticate|1-3|42|-4.5}} | ||
{{mdloc|070|Weepinbell| | {{mdloc|070|Weepinbell|1-3|40|-10}} | ||
{{mdloc|153|Bayleef| | {{mdloc|153|Bayleef|1-3|38|-10}} | ||
{{mdloc|315|Roselia| | {{mdloc|315|Roselia|1-3|40|6.4}} | ||
{{mdloc|330|Flygon| | {{mdloc|330|Flygon|1-3|40|-12}} | ||
{{mdloc|389|Torterra| | {{mdloc|389|Torterra|1-3|40|-12}} | ||
{{mdloc|435|Skuntank| | {{mdloc|435|Skuntank|1-3|40|0.5}} | ||
{{mdloc/f|grass}} | {{mdloc/f|grass}} | ||
===2nd Station Pass=== | ===2nd Station Pass=== | ||
{{mdloc/h|grass}} | {{mdloc/h|grass}} | ||
{{mdloc|002|Ivysaur| | {{mdloc|002|Ivysaur|1-3|40-41|-10}} | ||
{{mdloc|011|Metapod| | {{mdloc|011|Metapod|1-3|40-41|-10}} | ||
{{mdloc|020|Raticate| | {{mdloc|020|Raticate|1-3|42-43|-4.5}} | ||
{{mdloc|070|Weepinbell| | {{mdloc|070|Weepinbell|1-3|40-41|-10}} | ||
{{mdloc|153|Bayleef| | {{mdloc|153|Bayleef|1-3|38-39|-10}} | ||
{{mdloc|315|Roselia| | {{mdloc|315|Roselia|1-3|40-41|6.4}} | ||
{{mdloc|330|Flygon| | {{mdloc|330|Flygon|1-3|40-41|-12}} | ||
{{mdloc|389|Torterra| | {{mdloc|389|Torterra|1-3|40-41|-12}} | ||
{{mdloc|435|Skuntank| | {{mdloc|435|Skuntank|1-3|40-41|0.5}} | ||
{{mdloc/f|grass}} | {{mdloc/f|grass}} | ||
===3rd Station Pass=== | ===3rd Station Pass=== | ||
{{mdloc/h|grass}} | {{mdloc/h|grass}} | ||
{{mdloc|002|Ivysaur| | {{mdloc|002|Ivysaur|1-3|41|-10}} | ||
{{mdloc|011|Metapod| | {{mdloc|011|Metapod|1-3|41|-10}} | ||
{{mdloc|020|Raticate| | {{mdloc|020|Raticate|1-3|43|-4.5}} | ||
{{mdloc|070|Weepinbell| | {{mdloc|070|Weepinbell|1-3|41|-10}} | ||
{{mdloc|153|Bayleef| | {{mdloc|153|Bayleef|1-3|39|-10}} | ||
{{mdloc|315|Roselia| | {{mdloc|315|Roselia|1-3|41|6.4}} | ||
{{mdloc|330|Flygon| | {{mdloc|330|Flygon|1-3|41|-12}} | ||
{{mdloc|389|Torterra| | {{mdloc|389|Torterra|1-3|41|-12}} | ||
{{mdloc|435|Skuntank| | {{mdloc|435|Skuntank|1-3|41|0.5}} | ||
{{mdloc/f|grass}} | {{mdloc/f|grass}} | ||
===4th Station Pass=== | ===4th Station Pass=== | ||
{{mdloc/h|grass}} | {{mdloc/h|grass}} | ||
{{mdloc|002|Ivysaur| | {{mdloc|002|Ivysaur|1-3|42|-10}} | ||
{{mdloc|011|Metapod| | {{mdloc|011|Metapod|1-3|42|-10}} | ||
{{mdloc|020|Raticate| | {{mdloc|020|Raticate|1-3|44|-4.5}} | ||
{{mdloc|070|Weepinbell| | {{mdloc|070|Weepinbell|1-3|42|-10}} | ||
{{mdloc|107|Hitmonchan| | {{mdloc|107|Hitmonchan|1-3|42|-12}} | ||
{{mdloc|153|Bayleef| | {{mdloc|153|Bayleef|1-3|40|-10}} | ||
{{mdloc|315|Roselia| | {{mdloc|315|Roselia|1-3|42|6.4}} | ||
{{mdloc|330|Flygon| | {{mdloc|330|Flygon|1-3|42|-12}} | ||
{{mdloc|389|Torterra| | {{mdloc|389|Torterra|1-3|42|-12}} | ||
{{mdloc| | {{mdloc|435|Skuntank|1-3|42|0.5}} | ||
{{mdloc| | {{mdloc|057|Primeape|2-3|42|-4.5}} | ||
{{mdloc| | {{mdloc|217|Ursaring|2-3|42|-12}} | ||
{{mdloc| | {{mdloc|400|Bibarel|2-3|42|3.5}} | ||
{{mdloc/f|grass}} | {{mdloc/f|grass}} | ||
===5th Station Pass=== | ===5th Station Pass=== | ||
{{mdloc/h|grass}} | {{mdloc/h|grass}} | ||
{{mdloc|011|Metapod| | {{mdloc|011|Metapod|1-3|42|-10}} | ||
{{mdloc|002|Ivysaur| | {{mdloc|002|Ivysaur|1-4|42|-10}} | ||
{{mdloc|020|Raticate| | {{mdloc|020|Raticate|1-4|44|-4.5}} | ||
{{mdloc|070|Weepinbell| | {{mdloc|057|Primeape|1-4|42|-4.5}} | ||
{{mdloc|107|Hitmonchan| | {{mdloc|070|Weepinbell|1-4|42|-10}} | ||
{{mdloc|153|Bayleef| | {{mdloc|107|Hitmonchan|1-4|42|-12}} | ||
{{mdloc|217|Ursaring| | {{mdloc|153|Bayleef|1-4|40|-10}} | ||
{{mdloc|315|Roselia| | {{mdloc|217|Ursaring|1-4|42|-12}} | ||
{{mdloc|330|Flygon| | {{mdloc|315|Roselia|1-4|42|6.4}} | ||
{{mdloc|389|Torterra| | {{mdloc|330|Flygon|1-4|42|-12}} | ||
{{mdloc|400|Bibarel| | {{mdloc|389|Torterra|1-4|42|-12}} | ||
{{mdloc|435|Skuntank| | {{mdloc|400|Bibarel|1-4|42|3.5}} | ||
{{mdloc|022|Fearow| | {{mdloc|435|Skuntank|1-4|42|0.5}} | ||
{{mdloc|022|Fearow|4|42|-4.5}} | |||
{{mdloc/f|grass}} | {{mdloc/f|grass}} | ||
===5th Station Clearing=== | ===5th Station Clearing=== | ||
{{mdloc/h|grass}} | {{mdloc/h|grass}} | ||
{{mdloc|455|Carnivine| | {{mdloc|455|Carnivine|Clearing|40|0|boss=yes}} | ||
{{mdloc/f|grass|Five Carnivine form the boss of 5th Station Clearing}} | {{mdloc/f|grass|Five Carnivine form the boss of 5th Station Clearing}} | ||
===6th Station Pass=== | ===6th Station Pass=== | ||
{{mdloc/h| | {{mdloc/h|normal|fighting}} | ||
{{mdloc|002|Ivysaur| | {{mdloc|002|Ivysaur|1-3|42|-10}} | ||
{{mdloc|020|Raticate| | {{mdloc|020|Raticate|1-3|44|-4.5}} | ||
{{mdloc|070|Weepinbell| | {{mdloc|070|Weepinbell|1-3|42|-10}} | ||
{{mdloc|153|Bayleef| | {{mdloc|153|Bayleef|1-3|40|-10}} | ||
{{mdloc|315|Roselia| | {{mdloc|315|Roselia|1-3|42|6.4}} | ||
{{mdloc|330|Flygon| | {{mdloc|330|Flygon|1-3|42|-12}} | ||
{{mdloc|389|Torterra| | {{mdloc|389|Torterra|1-3|42|-12}} | ||
{{mdloc|057|Primeape| | {{mdloc|022|Fearow|1-4|42-43|-4.5}} | ||
{{mdloc|107|Hitmonchan| | {{mdloc|057|Primeape|1-4|42-43|-4.5}} | ||
{{mdloc|162|Furret| | {{mdloc|107|Hitmonchan|1-4|42-43|-12}} | ||
{{mdloc|217|Ursaring| | {{mdloc|162|Furret|1-4|42-43|-4.5}} | ||
{{mdloc|400|Bibarel| | {{mdloc|217|Ursaring|1-4|42-43|-12}} | ||
{{mdloc|400|Bibarel|1-4|42-43|3.5}} | |||
{{mdloc|435|Skuntank|1-4|42-43|0.5}} | |||
{{mdloc/f|grass}} | {{mdloc/f|grass}} | ||
===7th Station Pass=== | ===7th Station Pass=== | ||
{{mdloc/h|normal|fighting}} | |||
{{mdloc|022|Fearow|1-4|43|-4.5}} | |||
{{mdloc|057|Primeape|1-4|43|-4.5}} | |||
{{mdloc|107|Hitmonchan|1-4|43|-12}} | |||
{{mdloc|162|Furret|1-4|43|-4.5}} | |||
{{mdloc|217|Ursaring|1-4|43|-12}} | |||
{{mdloc|400|Bibarel|1-4|43|3.5}} | |||
{{mdloc|435|Skuntank|1-4|43|0.5}} | |||
{{mdloc/f|grass}} | |||
{{mdloc/h| | ===8th Station Pass=== | ||
{{mdloc|022|Fearow| | {{mdloc/h|normal|fighting}} | ||
{{mdloc|057|Primeape| | {{mdloc|435|Skuntank|1|43|0.5}} | ||
{{mdloc|107|Hitmonchan| | {{mdloc|022|Fearow|1-4|43|-4.5}} | ||
{{mdloc|162|Furret| | {{mdloc|057|Primeape|1-4|43|-4.5}} | ||
{{mdloc|217|Ursaring| | {{mdloc|105|Marowak|1-4|43|-4.5}} | ||
{{mdloc| | {{mdloc|107|Hitmonchan|1-4|43|-12}} | ||
{{mdloc| | {{mdloc|162|Furret|1-4|43|-4.5}} | ||
{{mdloc|217|Ursaring|1-4|43|-12}} | |||
{{mdloc|292|Shedinja|1-4|45|-12}} | |||
{{mdloc|400|Bibarel|1-4|43|3.5}} | |||
{{mdloc/f|grass}} | {{mdloc/f|grass}} | ||
=== | ===9th Station Pass=== | ||
{{mdloc/h| | {{mdloc/h|normal|fighting}} | ||
{{mdloc| | {{mdloc|400|Bibarel|1-2|43|3.5}} | ||
{{mdloc| | {{mdloc|022|Fearow|1-5|43-44|-4.5}} | ||
{{mdloc| | {{mdloc|057|Primeape|1-5|43-44|-4.5}} | ||
{{mdloc| | {{mdloc|105|Marowak|1-5|43-44|-4.5}} | ||
{{mdloc| | {{mdloc|107|Hitmonchan|1-5|43-44|-12}} | ||
{{mdloc|162|Furret| | {{mdloc|162|Furret|1-5|43-44|-4.5}} | ||
{{mdloc| | {{mdloc|217|Ursaring|1-5|43-44|-12}} | ||
{{mdloc| | {{mdloc|292|Shedinja|1-5|45-46|-12}} | ||
{{mdloc/f|grass}} | {{mdloc/f|grass}} | ||
===Sky Peak Summit Pass=== | |||
{{mdloc/h|normal|fighting}} | |||
{{mdloc|022|Fearow|1-5|44|-4.5}} | |||
{{mdloc|057|Primeape|1-5|44|-4.5}} | |||
{{mdloc|105|Marowak|1-5|44|-4.5}} | |||
{{mdloc|107|Hitmonchan|1-5|44|-12}} | |||
{{mdloc|162|Furret|1-5|44|-4.5}} | |||
{{mdloc|217|Ursaring|1-5|44|-12}} | |||
{{mdloc|292|Shedinja|1-5|46|-12}} | |||
{{mdloc/f|fighting}} | |||
===Sky Peak Summit=== | |||
{{mdloc/h|poison}} | |||
{{mdloc|088|Grimer|Summit|43|0|boss=yes}} | |||
{{mdloc|089|Muk|Summit|44|0|boss=yes}} | |||
{{mdloc/f|poison}} | |||
==Items== | ==Items== | ||
| Line 158: | Line 201: | ||
{{DungeonItem|Blast Seed|Seed|??}} | {{DungeonItem|Blast Seed|Seed|??}} | ||
{{DungeonItem|Dough Seed|Seed|??}} | {{DungeonItem|Dough Seed|Seed|??}} | ||
{{DungeonItem|Eyedrop Seed|Seed|??}} | |||
{{DungeonItem|Heal Seed|Seed|??}} | {{DungeonItem|Heal Seed|Seed|??}} | ||
{{DungeonItem|Totter Seed|Seed|??}} | {{DungeonItem|Totter Seed|Seed|??}} | ||
| Line 171: | Line 215: | ||
{{DungeonItem|Trapbust Orb|Wonder Orb|??}} | {{DungeonItem|Trapbust Orb|Wonder Orb|??}} | ||
{{DungeonItem|Warp Orb|Wonder Orb|??}} | {{DungeonItem|Warp Orb|Wonder Orb|??}} | ||
{{DungeonItem|Sky Gift|Sky Gift|??}} | |||
{{DungeonItem/f|grass}} | {{DungeonItem/f|grass}} | ||
| Line 187: | Line 232: | ||
| [[File:WarpTrap.png]] | | [[File:WarpTrap.png]] | ||
| Warp Trap | | Warp Trap | ||
|- style="background: #FFF" | |||
| [[File:GrimyTrap.png]] | |||
| Grimy Trap | |||
|- style="background: #FFF" | |- style="background: #FFF" | ||
| [[File:SlowTrap.png]] | | [[File:SlowTrap.png]] | ||
| Line 211: | Line 259: | ||
| style="background: #FFF; {{roundybl|5px}}" | [[File:TripTrap.png]] | | style="background: #FFF; {{roundybl|5px}}" | [[File:TripTrap.png]] | ||
| style="background: #FFF; {{roundybr|5px}}" | Trip Trap | | style="background: #FFF; {{roundybr|5px}}" | Trip Trap | ||
|} | |||
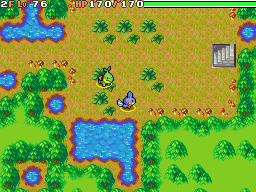
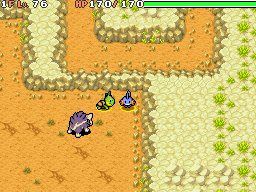
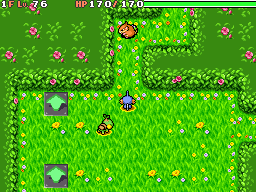
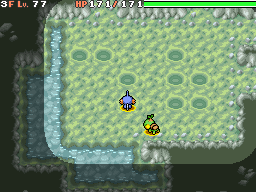
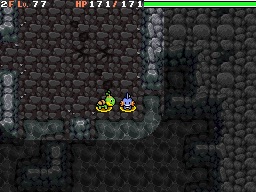
==Layout== | |||
{{incomplete|section|needs=missing clearings}} | |||
{| class="roundy" style="margin:auto; background: #000; border: 3px solid #{{MD Sky color}}" | |||
|- | |||
! style="background:#{{MD Sky color light}}; {{roundytl|5px}}" | Tileset #2 | |||
! style="background:#{{MD Sky color light}}" | Tileset #3 | |||
! style="background:#{{MD Sky color light}}; {{roundytr|5px}}" | Tileset #4 | |||
|- style="text-align:center;" | |||
| [[File:Sky Peak Station Pass 2 S.png]] | |||
| [[File:Sky Peak Station Pass 3 S.png]] | |||
| [[File:Sky Peak Station Pass 4 5 S.png]] | |||
|- | |||
! style="background:#{{MD Sky color light}}" | 5th Station Clearing | |||
! style="background:#{{MD Sky color light}}" | Tileset #5 | |||
! style="background:#{{MD Sky color light}}" | Tileset #6 | |||
|- style="text-align:center;" | |||
| [[File:Sky Peak 5th Station Clearing boss S.png|x192px]] | |||
| [[File:Sky Peak Station Pass 6 S.png]] | |||
| [[File:Sky Peak Station Pass 7 8 S.png]] | |||
|- | |||
! style="background:#{{MD Sky color light}}" | 8th Station Clearing | |||
! style="background:#{{MD Sky color light}}" | Tileset #7 | |||
! style="background:#{{MD Sky color light}}" | Tileset #8 | |||
|- style="text-align:center;" | |||
| [[File:Sky Peak 8th Station Clearing S.png|x192px]] | |||
| [[File:Sky Peak Station Pass 9 S.png]] | |||
| [[File:Sky Peak Summit Pass S.png]] | |||
|- | |||
| colspan=4 style="background:#{{MD Sky color light}}; {{roundybottom|5px}}" | | |||
|} | |} | ||
==Trivia== | ==Trivia== | ||
* Interestingly, if {{p|Giratina}} enters this dungeon, it will not be in [[ | * Interestingly, if {{p|Giratina}} enters this dungeon, it will not be in [[List of Pokémon with form differences#Giratina|Altered Forme]] but will be instead in its Origin Forme. This trait is shared with [[Star Cave]] and [[Destiny Tower (Explorers of Sky)|Destiny Tower]]. | ||
==In other languages== | ==In other languages== | ||
{{langtable|color={{MD Sky color}}|bordercolor={{MD Sky color dark}} | {{langtable|color={{MD Sky color}}|bordercolor={{MD Sky color dark}} | ||
|fr= | |fr=Ascension du Pic Céleste | ||
|de= | |de=Himmelsgipfel-Gebirgspfad | ||
|it= | |it=Sentiero del Picco del Cielo | ||
|es=Sendero alpino de la Cumbre del Cielo | |||
|es= | }} | ||
}} | |||
| style="vertical-align:top | {| | ||
|- style="vertical-align:top" | |||
| | |||
''X Station Pass'' | ''X Station Pass'' | ||
{{langtable|color={{MD Sky color}}|bordercolor={{MD Sky color dark}} | {{langtable|color={{MD Sky color}}|bordercolor={{MD Sky color dark}} | ||
|fr= | |fr={{tt|Xxxx|1er, 2ème, etc.}} Relais - col | ||
|de=X. Zwischenlagerpass | |de={{tt|X|number}}. Zwischenlagerpass | ||
|it= | |it=Passaggio {{tt|X|number}} | ||
| | |es=Camino hasta el {{tt|xxxxx|written out}} puerto | ||
|es= | }} | ||
| | |||
''Sky Peak Summit Pass'' | |||
{{langtable|color={{normal color}}|bordercolor={{fighting color dark}} | |||
|fr=Sommet du Pic Céleste - col | |||
|de=Himmelsgipfelspitzenpass | |||
|it=Passo del Cielo | |||
|es=Paso Cumbre del Cielo | |||
}} | |||
| | |||
''Sky Peak Summit'' | |||
{{langtable|color={{poison color light}}|bordercolor={{poison color}} | |||
|fr=Sommet du Pic Céleste | |||
|de=Himmelsgipfelspitze | |||
|it=Sommità del Cielo | |||
|es=Cumbre del Cielo | |||
}} | }} | ||
|} | |} | ||
| Line 242: | Line 333: | ||
{{DoubleProjectTag|Locations|Sidegames}} | {{DoubleProjectTag|Locations|Sidegames}} | ||
[[Category:Mountains]] | [[Category:Mountains]] | ||
[[Category:Caves]] | |||
[[Category:Pokémon Mystery Dungeon: Explorers of Sky locations]] | [[Category:Pokémon Mystery Dungeon: Explorers of Sky locations]] | ||
[[it: | [[it:Passaggio]] | ||
Revision as of 18:30, 29 December 2020

|
This article is incomplete. Please feel free to edit this article to add missing information and complete it. Reason: Items, other encountered Pokémon |
|
|
|
| ||||||||||||||||||||||||||||||||||||||||||
| ||||||||||||||||||||||||||||||||||||||||||
| ||||||||||||||||||||||||||||||||||||||||||
The Sky Peak Mountain Path (Japanese: そらのいただき とざんどう Sky Summit Mountain Path) is a path of ten very similar mystery dungeons only accessible in Pokémon Mystery Dungeon: Explorers of Sky. This mountain path of ten passes connecting nine stations leads to the summit of Sky Peak, the mountain above Shaymin Village.
The first nine passes are named 1st Station Pass (Japanese: 1ごうめまでのみちのり Path to the 1st Station) to 9th Station Pass (Japanese: 9ごうめまでのみちのり Path to the 9th Station), while the tenth pass is known as the Sky Peak Summit Pass (Japanese: ちょうじょうまでのみちのり Path to the Summit). Each pass has between three and five floors each. Sky Gifts can be found here. The Pokémon in these dungeons begin with Pokémon generally found in Mystifying Forest in the first dungeons, and gradually phasing them out for Pokémon generally found on Mt. Travail. Players can find Hidden Stairs leading to a floor with Treasure Boxes. On the Summit Pass, there is a chance of fog, and the Secret Bazaar and Monster Houses may appear on floors 2-5.
A player can only go through this series of dungeons after defeating Primal Dialga and graduating from Wigglytuff's Guild. In the first playthrough of these dungeons, a Shaymin comes with the player. After the first visit, this will unlock the Sky Jukebox.
When reaching the summit for the first time, the place will be covered with filth. To clear it the player needs to defeat three Muk and five Grimer. The Shaymin accompanying the player then absorbs the filth and cleans the place. Team Frontier, a team including a Machoke, Mawile, and a Breloom, helps fight the Muk and Grimer during the first visit.
The player can recruit Shaymin by reaching the summit for a second time.
Stations
At the end of each Pass, the player will reach a Station. Each Station has a Kangaskhan Rock with the ability both to save the game and, at the even-numbered Stations, to store items. The one exception is the 5th Station. Upon entering the 5th Station during the first visit, the player will encounter a group of hostile Carnivine which appear to be beating up a Sneasel. The player defeats these Pokémon with the help of Team Frontier. On each following visit, the 5th station is completely empty.
In the even numbered Stations, there is a method of transport called Drifblim's Gondola, where a Drifblim can transport the player instantly between that Station, any previous even numbered Station, and the base camp at Shaymin Village. The only exception to this is the 8th Station, where an Ampharos lives. After finishing the 8th Pass and going into the 9th Station for the second time, the Ampharos will give the player a Sky Gift that the Sneasel they helped left behind.
In many Stations a Pokémon may appear, giving the player a Sky Gift. Occasionally, at a Station, a Jumpluff, Numel or Happiny will be in need of an item. If the player has said item, they can trade for an item the Pokémon is offering in return, or the Pokémon will return the favor by leaving a Sky Gift at Spinda's Cafe later.
Pokémon encountered
1st Station Pass
| Pokémon | Floors | Levels | Recruit Rate | |
|---|---|---|---|---|
| Ivysaur | 1-3 | 40 | -10% | |
| Metapod | 1-3 | 40 | -10% | |
| Raticate | 1-3 | 42 | -4.5% | |
| Weepinbell | 1-3 | 40 | -10% | |
| Bayleef | 1-3 | 38 | -10% | |
| Roselia | 1-3 | 40 | 6.4% | |
| Flygon | 1-3 | 40 | -12% | |
| Torterra | 1-3 | 40 | -12% | |
| Skuntank | 1-3 | 40 | 0.5% | |
2nd Station Pass
| Pokémon | Floors | Levels | Recruit Rate | |
|---|---|---|---|---|
| Ivysaur | 1-3 | 40-41 | -10% | |
| Metapod | 1-3 | 40-41 | -10% | |
| Raticate | 1-3 | 42-43 | -4.5% | |
| Weepinbell | 1-3 | 40-41 | -10% | |
| Bayleef | 1-3 | 38-39 | -10% | |
| Roselia | 1-3 | 40-41 | 6.4% | |
| Flygon | 1-3 | 40-41 | -12% | |
| Torterra | 1-3 | 40-41 | -12% | |
| Skuntank | 1-3 | 40-41 | 0.5% | |
3rd Station Pass
| Pokémon | Floors | Levels | Recruit Rate | |
|---|---|---|---|---|
| Ivysaur | 1-3 | 41 | -10% | |
| Metapod | 1-3 | 41 | -10% | |
| Raticate | 1-3 | 43 | -4.5% | |
| Weepinbell | 1-3 | 41 | -10% | |
| Bayleef | 1-3 | 39 | -10% | |
| Roselia | 1-3 | 41 | 6.4% | |
| Flygon | 1-3 | 41 | -12% | |
| Torterra | 1-3 | 41 | -12% | |
| Skuntank | 1-3 | 41 | 0.5% | |
4th Station Pass
| Pokémon | Floors | Levels | Recruit Rate | |
|---|---|---|---|---|
| Ivysaur | 1-3 | 42 | -10% | |
| Metapod | 1-3 | 42 | -10% | |
| Raticate | 1-3 | 44 | -4.5% | |
| Weepinbell | 1-3 | 42 | -10% | |
| Hitmonchan | 1-3 | 42 | -12% | |
| Bayleef | 1-3 | 40 | -10% | |
| Roselia | 1-3 | 42 | 6.4% | |
| Flygon | 1-3 | 42 | -12% | |
| Torterra | 1-3 | 42 | -12% | |
| Skuntank | 1-3 | 42 | 0.5% | |
| Primeape | 2-3 | 42 | -4.5% | |
| Ursaring | 2-3 | 42 | -12% | |
| Bibarel | 2-3 | 42 | 3.5% | |
5th Station Pass
| Pokémon | Floors | Levels | Recruit Rate | |
|---|---|---|---|---|
| Metapod | 1-3 | 42 | -10% | |
| Ivysaur | 1-4 | 42 | -10% | |
| Raticate | 1-4 | 44 | -4.5% | |
| Primeape | 1-4 | 42 | -4.5% | |
| Weepinbell | 1-4 | 42 | -10% | |
| Hitmonchan | 1-4 | 42 | -12% | |
| Bayleef | 1-4 | 40 | -10% | |
| Ursaring | 1-4 | 42 | -12% | |
| Roselia | 1-4 | 42 | 6.4% | |
| Flygon | 1-4 | 42 | -12% | |
| Torterra | 1-4 | 42 | -12% | |
| Bibarel | 1-4 | 42 | 3.5% | |
| Skuntank | 1-4 | 42 | 0.5% | |
| Fearow | 4 | 42 | -4.5% | |
5th Station Clearing
| Pokémon | Floors | Levels | Recruit Rate | |
|---|---|---|---|---|
| Carnivine | Clearing | 40 | Unrecruitable Boss | |
| Five Carnivine form the boss of 5th Station Clearing | ||||
6th Station Pass
| Pokémon | Floors | Levels | Recruit Rate | |
|---|---|---|---|---|
| Ivysaur | 1-3 | 42 | -10% | |
| Raticate | 1-3 | 44 | -4.5% | |
| Weepinbell | 1-3 | 42 | -10% | |
| Bayleef | 1-3 | 40 | -10% | |
| Roselia | 1-3 | 42 | 6.4% | |
| Flygon | 1-3 | 42 | -12% | |
| Torterra | 1-3 | 42 | -12% | |
| Fearow | 1-4 | 42-43 | -4.5% | |
| Primeape | 1-4 | 42-43 | -4.5% | |
| Hitmonchan | 1-4 | 42-43 | -12% | |
| Furret | 1-4 | 42-43 | -4.5% | |
| Ursaring | 1-4 | 42-43 | -12% | |
| Bibarel | 1-4 | 42-43 | 3.5% | |
| Skuntank | 1-4 | 42-43 | 0.5% | |
7th Station Pass
| Pokémon | Floors | Levels | Recruit Rate | |
|---|---|---|---|---|
| Fearow | 1-4 | 43 | -4.5% | |
| Primeape | 1-4 | 43 | -4.5% | |
| Hitmonchan | 1-4 | 43 | -12% | |
| Furret | 1-4 | 43 | -4.5% | |
| Ursaring | 1-4 | 43 | -12% | |
| Bibarel | 1-4 | 43 | 3.5% | |
| Skuntank | 1-4 | 43 | 0.5% | |
8th Station Pass
| Pokémon | Floors | Levels | Recruit Rate | |
|---|---|---|---|---|
| Skuntank | 1 | 43 | 0.5% | |
| Fearow | 1-4 | 43 | -4.5% | |
| Primeape | 1-4 | 43 | -4.5% | |
| Marowak | 1-4 | 43 | -4.5% | |
| Hitmonchan | 1-4 | 43 | -12% | |
| Furret | 1-4 | 43 | -4.5% | |
| Ursaring | 1-4 | 43 | -12% | |
| Shedinja | 1-4 | 45 | -12% | |
| Bibarel | 1-4 | 43 | 3.5% | |
9th Station Pass
| Pokémon | Floors | Levels | Recruit Rate | |
|---|---|---|---|---|
| Bibarel | 1-2 | 43 | 3.5% | |
| Fearow | 1-5 | 43-44 | -4.5% | |
| Primeape | 1-5 | 43-44 | -4.5% | |
| Marowak | 1-5 | 43-44 | -4.5% | |
| Hitmonchan | 1-5 | 43-44 | -12% | |
| Furret | 1-5 | 43-44 | -4.5% | |
| Ursaring | 1-5 | 43-44 | -12% | |
| Shedinja | 1-5 | 45-46 | -12% | |
Sky Peak Summit Pass
| Pokémon | Floors | Levels | Recruit Rate | |
|---|---|---|---|---|
| Fearow | 1-5 | 44 | -4.5% | |
| Primeape | 1-5 | 44 | -4.5% | |
| Marowak | 1-5 | 44 | -4.5% | |
| Hitmonchan | 1-5 | 44 | -12% | |
| Furret | 1-5 | 44 | -4.5% | |
| Ursaring | 1-5 | 44 | -12% | |
| Shedinja | 1-5 | 46 | -12% | |
Sky Peak Summit
| Pokémon | Floors | Levels | Recruit Rate | |
|---|---|---|---|---|
| Grimer | Summit | 43 | Unrecruitable Boss | |
| Muk | Summit | 44 | Unrecruitable Boss | |
Items
| Item | Floors | |||||||
|---|---|---|---|---|---|---|---|---|
| 2-212 Poké | ??F | |||||||
| Power Band | ??F | |||||||
| Zinc Band | ??F | |||||||
| Cheri Berry | ??F | |||||||
| Oran Berry | ??F | |||||||
| Pecha Berry | ??F | |||||||
| Chesto Berry | ??F | |||||||
| Apple | ??F | |||||||
| Blast Seed | ??F | |||||||
| Dough Seed | ??F | |||||||
| Eyedrop Seed | ??F | |||||||
| Heal Seed | ??F | |||||||
| Totter Seed | ??F | |||||||
| Violent Seed | ??F | |||||||
| File:MDBag Health drink TDS Sprite.png | Max Elixir | ??F | ||||||
| Iron Thorn (4) | ??F | |||||||
| All-Hit Orb | ??F | |||||||
| Luminous Orb | ??F | |||||||
| Petrify Orb | ??F | |||||||
| Radar Orb | ??F | |||||||
| Rollcall Orb | ??F | |||||||
| Scanner Orb | ??F | |||||||
| Trapbust Orb | ??F | |||||||
| Warp Orb | ??F | |||||||
| File:MDBag Sky Gift TDS Sprite.png | Sky Gift | ??F | ||||||
Traps encountered
| Image | Trap |
|---|---|
| Chestnut Trap | |
| Selfdestruct Trap | |
| Warp Trap | |
| Grimy Trap | |
| Slow Trap | |
| Spin Trap | |
| Pokémon Trap | |
| Slumber Trap | |
| Summon Trap | |
| Gust Trap | |
| Poison Trap | |
| Trip Trap |
Layout

|
This section is incomplete. Please feel free to edit this section to add missing information and complete it. Reason: missing clearings |
| Tileset #2 | Tileset #3 | Tileset #4 | |
|---|---|---|---|
|
|
| |
| 5th Station Clearing | Tileset #5 | Tileset #6 | |
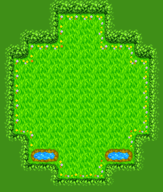
|
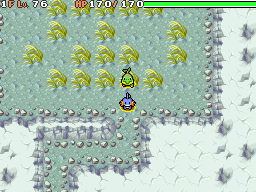
|
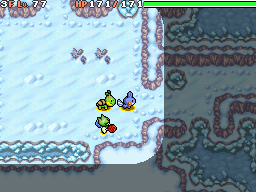
| |
| 8th Station Clearing | Tileset #7 | Tileset #8 | |
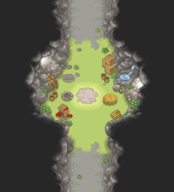
|
|
| |
Trivia
- Interestingly, if Giratina enters this dungeon, it will not be in Altered Forme but will be instead in its Origin Forme. This trait is shared with Star Cave and Destiny Tower.
In other languages
| ||||||||||||||||||
|
X Station Pass
|
Sky Peak Summit Pass
|
Sky Peak Summit
| |||||||||||||||||||||||||||||||||||||||||||||||||||||||||

|
This article is part of both Project Locations and Project Sidegames, Bulbapedia projects that, together, aim to write comprehensive articles on the Pokémon Locations and Sidegames, respectively. | 
|
