Ruins of Alph: Difference between revisions
mNo edit summary |
m (relinking Gen II Berries, replaced: {{DL|Berry (Generation II)|Berry}} → {{OBP|Berry|item}}, {{DL|Berry (Generation II)|Gold Berry}} → Gold Berry (2), {{DL|Berry (Generation II)|PSNCureBerry}} → PSNCureBerry, {{DL|Berry (Generation II)|My...) |
||
| (41 intermediate revisions by 28 users not shown) | |||
| Line 12: | Line 12: | ||
}} | }} | ||
The '''Ruins of Alph''' (Japanese: '''アルフのいせき''' ''Ruins of Alph'') are located in [[Johto]], with entrances to the south and west of | The '''Ruins of Alph''' (Japanese: '''アルフのいせき''' ''Ruins of Alph'') are located in [[Johto]] near [[Violet City]], with entrances to the south of {{rt|36|johto}} and west of {{rt|32|johto}}. The ruins are filled with {{p|Unown}} once any of the four slide puzzles inside the chambers have been activated. The name may come from the first four letters of "alphabet," which the {{p|Unown}} inside represent. | ||
In {{game|HeartGold and SoulSilver|s}}, | If the player listens to the [[Pokégear]] radio while near or inside the ruins, they will hear strange noises known as Mysterious Transmission on channel 13.5. In {{game|HeartGold and SoulSilver|s}}, the player must be inside one of the chambers, and tuning the radio near the center will broadcast these noises. Some of those noises are actually {{p|Ho-Oh}}'s distorted cries, and the melody of the [[Azure Flute]]. It also increases the chance of encountering an {{p|Unown}} shape the player has not yet encountered. | ||
==Geography== | |||
[[File:Ruins of Alph Sinjoh Ruins Event.png|thumb|200px|Activating the [[Sinjoh Ruins]] outside the ruins in {{2v2|HeartGold|SoulSilver}}]] | |||
===Outside the ruins=== | |||
There are several {{tc|scientist}}s in the area listening and studying the ruins to discover more about them. They say it is more than it seems and that the puzzles in the caves must have something to do with the mystery of the past of the Ruins of Alph. | |||
In {{game|HeartGold and SoulSilver|s}}, if the player has {{p|Arceus}} in their party, the [[Sinjoh Ruins]] will be accessible. | |||
===Puzzle chambers=== | |||
Four small chambers in the ruins hold slide puzzles that, when solved, cause the floor below the player to break, dropping the player into the main chamber of the ruins. The puzzles also cause {{p|Unown}} to appear in the main chamber. Each puzzle corresponds to a specific subset of the 26 alphabetic forms of Unown. To unlock all 26 alphabetic forms, all four slide puzzles must be activated. The puzzles can be completed in any order. {{game|Crystal}} explains that these puzzles are signals that summon the {{p|Unown}}. | |||
In [[Generation II]], catching three Unown and speaking to a researcher outside the ruins will cause him to unlock [[Unown Mode]] in the player's Pokédex. In {{game|HeartGold and SoulSilver|s}}, the first completed slide puzzle will cause a man to give the player the [[Unown Report]]. Once the first seven pages of the report are complete and the 26 alphabetic Unown forms have been caught, the ! and ? forms can be encountered in the entrance room. | |||
In Crystal, HeartGold, and SoulSilver, each puzzle chamber has a word on the far wall that is a hint to unlocking a secret room. When the player completes a certain criterion, the secret room opens, revealing several items. Additionally, in these games, completing the slide puzzles reveals part of the history of Unown written on the floor of the main chamber. In the Japanese version of Crystal, a scientist theorizes that the sudden appearance of these patterns is related to the newly-built [[Pokémon Communication Center]] and the radio waves emanating from it. | |||
The puzzles cause the following Unown to appear in the main chamber: | |||
{| class="roundy" style="background:#{{psychic color}}; border: 3px solid #{{psychic color dark}}; {{roundy|10px}} padding: 1px; margin:auto" | |||
! style="background:#{{psychic color light}}; {{roundytl|10px}}" | Chamber | |||
! style="background:#{{psychic color light}}" | In [[Generation II]] | |||
! style="background:#{{psychic color light}}; {{roundytr|10px}}" | In [[Generation IV]] | |||
|- style="background:#{{psychic color light}}" | |||
| Northeastern chamber | |||
| {{MSP|201A|Unown}} {{MSP|201B|Unown}} {{MSP|201C|Unown}} {{MSP|201D|Unown}} {{MSP|201E|Unown}} {{MSP|201F|Unown}} {{MSP|201G|Unown}}<br>{{MSP|201H|Unown}} {{MSP|201I|Unown}} {{MSP|201J|Unown}} {{MSP|201K|Unown}} | |||
| {{MSP|201A|Unown}} {{MSP|201B|Unown}} {{MSP|201C|Unown}} {{MSP|201D|Unown}} {{MSP|201E|Unown}} {{MSP|201F|Unown}} {{MSP|201G|Unown}}<br>{{MSP|201H|Unown}} {{MSP|201I|Unown}} {{MSP|201J|Unown}} | |||
|- style="background:#{{psychic color light}}" | |||
| Southeastern chamber | |||
| {{MSP|201S|Unown}} {{MSP|201T|Unown}} {{MSP|201U|Unown}} {{MSP|201V|Unown}} {{MSP|201W|Unown}} | |||
| {{MSP|201R|Unown}} {{MSP|201S|Unown}} {{MSP|201T|Unown}} {{MSP|201U|Unown}} {{MSP|201V|Unown}} | |||
|- style="background:#{{psychic color light}}" | |||
| Northwestern chamber | |||
| {{MSP|201X|Unown}} {{MSP|201Y|Unown}} {{MSP|201Z|Unown}} | |||
| {{MSP|201W|Unown}} {{MSP|201X|Unown}} {{MSP|201Y|Unown}} {{MSP|201Z|Unown}} | |||
|- | |||
| style="background:#{{psychic color light}}; {{roundybl|10px}}" | Southwestern chamber | |||
| style="background:#{{psychic color light}}" | {{MSP|201L|Unown}} {{MSP|201M|Unown}} {{MSP|201N|Unown}} {{MSP|201O|Unown}} {{MSP|201P|Unown}} {{MSP|201Q|Unown}} {{MSP|201R|Unown}} | |||
| style="background:#{{psychic color light}}; {{roundybr|10px}}" | {{MSP|201K|Unown}} {{MSP|201L|Unown}} {{MSP|201M|Unown}} {{MSP|201N|Unown}} {{MSP|201O|Unown}} {{MSP|201P|Unown}} {{MSP|201Q|Unown}} | |||
|} | |||
== | ====Northeastern chamber==== | ||
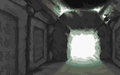
[[File:Ruins of Alph | [[File:Ruins of Alph.jpg|thumb|250px|Artwork of {{ga|Ethan}} at the entrance of the Ruins of Alph]] | ||
The northeastern chamber, near the Route 36 entrance, requires no HMs to access. In Pokémon Crystal, HeartGold, and SoulSilver, the far wall reads <sc>escape</sc> upon inspection. Using an [[Escape Rope]] there opens a hidden room. In Crystal, the item is consumed and the player must re-enter the chamber in order to reach the hidden room. In HeartGold and SoulSilver, the item is not consumed and the room opens immediately. | |||
The chamber's puzzle forms an image of {{p|Kabuto}}. Completing this puzzle and falling through to the floor below reveals the following message spelled out on the ground in Unown: | |||
<blockquote><sc>Our words shall remain here for the ages</sc>'''{{sup/2|C}}'''<br/> | |||
<sc>Our clan engraved words in this place</sc>'''{{sup/4|HGSS}}'''</blockquote> | |||
====Southeastern chamber==== | |||
The southeastern chamber requires [[HM03]] {{m|Surf}} to cross the pond on the south side of the ruins. In Pokémon Crystal, HeartGold, and SoulSilver, the far wall reads <sc>light</sc>. Using [[HM05]] {{m|Flash}} will open the hidden room. | |||
The chamber's puzzle forms an image of {{p|Aerodactyl}}. Completing this puzzle and falling through to the floor below reveals the following message spelled out on the ground in Unown: | |||
'' | <blockquote><sc>Thus we shall erect a Pokémon statue outside</sc>'''{{sup/2|C}}'''<br/> | ||
<sc>Our clan created Pokémon statue outside</sc>'''{{sup/4|HGSS}}'''</blockquote> | |||
=== | ====Northwestern chamber==== | ||
The northwestern chamber is accessible only from the basement of [[Union Cave]], which requires [[HM03]] {{m|Surf}} to navigate. In Pokémon Crystal, HeartGold, and SoulSilver, the far wall reads <sc>Ho Oh</sc>. The hidden room will open {{p|Ho-Oh}} is the first Pokémon in the player's [[party]] in Crystal, or anywhere in the player's party in Generation IV. | |||
The chamber's puzzle forms an image of {{p|Ho-Oh}}. Completing this puzzle and falling through to the floor below reveals the following message spelled out on the ground in Unown: | |||
<blockquote><sc>We humans must learn to walk in harmony with them. We depart for their sakes</sc>'''{{sup/2|C}}'''<br/> | |||
<sc>We humans need to walk with them. We leave here for the sake of them</sc>'''{{sup/4|HGSS}}'''</blockquote> | |||
=== | ====Southwestern chamber==== | ||
The southwestern chamber is accessible only by moving a boulder in the basement of [[Union Cave]], which requires [[HM03]] {{m|Surf}} to navigate as well as [[HM04]] {{m|Strength}}. In Pokémon Crystal, HeartGold, and SoulSilver, the far wall reads <sc>water</sc>. The hidden room will open if the player has a [[Water Stone]] in their inventory in Crystal, and when the player selects "Use" on a Water Stone from the [[Bag]] while facing the wall. | |||
The chamber's puzzle forms an image of {{p|Omanyte}}. Completing this puzzle and falling through to the floor below reveals the following message spelled out on the ground in Unown: | |||
<blockquote><sc>They possess great insight and refuse the outside world</sc>'''{{sup/2|C}}'''<br/> | |||
<sc>They possess power to sense with mind and reject outside</sc>'''{{sup/4|HGSS}}'''</blockquote> | |||
====Puzzles==== | |||
<gallery perrow=4> | |||
File:Ruins of Alph NE puzzle GSC.png|Puzzle in the northeastern chamber, featuring {{p|Kabuto}}<br>(Generation II) | |||
File:Ruins of Alph SE puzzle GSC.png|Puzzle in the southeastern chamber, featuring {{p|Aerodactyl}}<br>(Generation II) | |||
File:Ruins of Alph NW puzzle GSC.png|Puzzle in the northwestern chamber, featuring {{p|Ho-Oh}}<br>(Generation II) | |||
File:Ruins of Alph SW puzzle GSC.png|Puzzle in the southwestern chamber, featuring {{p|Omanyte}}<br>(Generation II) | |||
File:Ruins of Alph NE puzzle HGSS.png|Puzzle in the northeastern chamber, featuring {{p|Kabuto}}<br>(Generation IV) | |||
File:Ruins of Alph SE puzzle HGSS.png|Puzzle in the southeastern chamber, featuring {{p|Aerodactyl}}<br>(Generation IV) | |||
File:Ruins of Alph NW puzzle HGSS.png|Puzzle in the northwestern chamber, featuring {{p|Ho-Oh}}<br>(Generation IV) | |||
File:Ruins of Alph SW puzzle HGSS.png|Puzzle in the southwestern chamber, featuring {{p|Omanyte}}<br>(Generation IV) | |||
</gallery> | |||
==Items== | ==Items== | ||
{{incomplete|needs=Needs confirmation of the contents of the hidden chambers in Crystal}} | |||
{{itlisth|ruins}} | {{itlisth|ruins}} | ||
{{itemlist|none|Given | {{itemlist|none|Given by a researcher outside the ruins as an upgrade to the [[Pokédex]] after catching at least three different {{p|Unown}} variants|G=yes|S=yes|C=yes|display=[[Unown Mode]]}} | ||
{{itemlist|Unown Report|Given | {{itemlist|Unown Report|Given by a researcher right after solving the first chamber puzzle|HG=yes|SS=yes}} | ||
{{itemlist| | {{itemlist|Potion|In the left wall of the building, southmost of the three in the northeast ''(hidden)''|HG=yes|SS=yes|display={{DL|Potion|Potion}}}} | ||
{{itemlist|Great Ball| | {{itemlist|Great Ball|In the central solid rock among a group near the southern entrance ''(hidden)''|HG=yes|SS=yes}} | ||
{{itemlist|TinyMushroom| | {{itemlist|TinyMushroom|In the small mound of dirt east of the western pond ''(hidden)''|HG=yes|SS=yes}} | ||
{{itemlist|Rare Candy| | {{itemlist|Rare Candy|In a solid rock west of a smashable rock to the west of the northern entrance (requires {{m|Rock Smash}}) ''(hidden)''|HG=yes|SS=yes}} | ||
{{itemlist|Nugget|On a boulder outside the third chamber (accessed via [[Union Cave]]) ''(hidden)''|HG=yes|SS=yes | {{itemlist|Hyper Potion|North of the western pond (requires {{m|Rock Smash}} or {{m|Surf}})|HG=yes|SS=yes}} | ||
{{itemlist|Nugget|On a boulder outside the third chamber (accessed via [[Union Cave]]) ''(hidden)''|HG=yes|SS=yes}} | |||
{{itemlist|Big Mushroom|On a boulder outside the third chamber (accessed via Union Cave) ''(hidden)''|HG=yes|SS=yes | {{itemlist|Big Mushroom|On a boulder outside the third chamber (accessed via [[Union Cave]]) ''(hidden)''|HG=yes|SS=yes}} | ||
{{itlistfoot|ruins}} | {{itlistfoot|ruins}} | ||
===Rock Smash=== | ===Rock Smash=== | ||
{{itlisth|ruins}} | {{itlisth|ruins}} | ||
{{itemlist|Red Shard|Randomly found by {{m|Rock Smash|smashing rocks}}|HG=yes|SS=yes | {{itemlist|Red Shard|Randomly found by {{m|Rock Smash|smashing rocks}}|HG=yes|SS=yes}} | ||
{{itemlist|Green Shard|Randomly found by {{m|Rock Smash|smashing rocks}}|HG=yes|SS=yes | {{itemlist|Green Shard|Randomly found by {{m|Rock Smash|smashing rocks}}|HG=yes|SS=yes}} | ||
{{itemlist|Blue Shard|Randomly found by {{m|Rock Smash|smashing rocks}}|HG=yes|SS=yes | {{itemlist|Blue Shard|Randomly found by {{m|Rock Smash|smashing rocks}}|HG=yes|SS=yes}} | ||
{{itemlist|Yellow Shard|Randomly found by {{m|Rock Smash|smashing rocks}}|HG=yes|SS=yes | {{itemlist|Yellow Shard|Randomly found by {{m|Rock Smash|smashing rocks}}|HG=yes|SS=yes}} | ||
{{itemlist|Max Revive|Randomly found by {{m|Rock Smash|smashing rocks}}|HG=yes|SS=yes | {{itemlist|Max Revive|Randomly found by {{m|Rock Smash|smashing rocks}}|HG=yes|SS=yes}} | ||
{{itemlist|Max Ether|Randomly found by {{m|Rock Smash|smashing rocks}}|HG=yes|SS=yes | {{itemlist|Max Ether|Randomly found by {{m|Rock Smash|smashing rocks}}|HG=yes|SS=yes}} | ||
{{itemlist|Old Amber|Randomly found by {{m|Rock Smash|smashing rocks}}|HG=yes|SS=yes}} | {{itemlist|Old Amber|Randomly found by {{m|Rock Smash|smashing rocks}}|HG=yes|SS=yes}} | ||
{{itemlist|Helix Fossil|Randomly found by {{m|Rock Smash|smashing rocks}}|HG=yes | {{itemlist|Helix Fossil|Randomly found by {{m|Rock Smash|smashing rocks}}|HG=yes}} | ||
{{itemlist|Dome Fossil|Randomly found by {{m|Rock Smash|smashing rocks}}|SS=yes | {{itemlist|Dome Fossil|Randomly found by {{m|Rock Smash|smashing rocks}}|SS=yes}} | ||
{{itlistfoot|ruins}} | {{itlistfoot|ruins}} | ||
=== | ===Northeastern hidden room=== | ||
{{itlisth|ruins}} | {{itlisth|ruins}} | ||
{{itemlist|none| | {{itemlist|none|Hidden room|C=yes|display={{OBP|Berry|item}}}} | ||
{{itemlist|none| | {{itemlist|none|Hidden room|C=yes|display=[[PSNCureBerry]]}} | ||
{{itemlist|Heal Powder| | {{itemlist|Heal Powder|Hidden room|C=yes|HG=yes|SS=yes}} | ||
{{itemlist|EnergyPowder| | {{itemlist|EnergyPowder|Hidden room|C=yes|HG=yes|SS=yes}} | ||
{{itemlist|Oran Berry| | {{itemlist|Oran Berry|Hidden room|HG=yes|SS=yes}} | ||
{{itemlist|Pecha Berry| | {{itemlist|Pecha Berry|Hidden room|HG=yes|SS=yes}} | ||
{{itlistfoot|ruins}} | {{itlistfoot|ruins}} | ||
=== | ===Southeastern hidden room=== | ||
{{itlisth|ruins}} | {{itlisth|ruins}} | ||
{{itemlist|Heal Powder| | {{itemlist|Heal Powder|Hidden room|C=yes|HG=yes|SS=yes}} | ||
{{itemlist|Energy Root| | {{itemlist|Energy Root|Hidden room|C=yes|HG=yes|SS=yes}} | ||
{{itemlist|none| | {{itemlist|none|Hidden room|C=yes|display=[[Gold Berry]]}} | ||
{{itemlist|Moon Stone| | {{itemlist|Moon Stone|Hidden room|C=yes|HG=yes|SS=yes}} | ||
{{itemlist|Sitrus Berry| | {{itemlist|Sitrus Berry|Hidden room|HG=yes|SS=yes}} | ||
{{itlistfoot|ruins}} | {{itlistfoot|ruins}} | ||
===Northwestern hidden room=== | |||
{{itlisth|ruins}} | {{itlisth|ruins}} | ||
{{itemlist| | {{itemlist|Revival Herb|Hidden room|C=yes|HG=yes|SS=yes}} | ||
{{itemlist| | {{itemlist|Charcoal|Hidden room|C=yes|HG=yes|SS=yes}} | ||
{{itemlist|none| | {{itemlist|none|Hidden room|C=yes|display=[[Gold Berry]]}} | ||
{{itemlist| | {{itemlist|none|Hidden room|C=yes|display=[[MysteryBerry]]}} | ||
{{itemlist|Leppa Berry| | {{itemlist|Life Orb|Hidden room|HG=yes|SS=yes}} | ||
{{itemlist|Leppa Berry|Hidden room|HG=yes|SS=yes}} | |||
{{itlistfoot|ruins}} | {{itlistfoot|ruins}} | ||
===Southwestern hidden room=== | |||
{{itlisth|ruins}} | {{itlisth|ruins}} | ||
{{itemlist| | {{itemlist|Stardust|Hidden room|C=yes|HG=yes|SS=yes}} | ||
{{itemlist| | {{itemlist|Star Piece|Hidden room|C=yes|HG=yes|SS=yes}} | ||
{{itemlist|none| | {{itemlist|none|Hidden room|C=yes|display=[[MysteryBerry]]}} | ||
{{itemlist| | {{itemlist|Mystic Water|Hidden room|C=yes|HG=yes|SS=yes}} | ||
{{itemlist|Leppa Berry|Hidden room|HG=yes|SS=yes}} | |||
{{itemlist|Leppa Berry| | |||
{{itlistfoot|ruins}} | {{itlistfoot|ruins}} | ||
==Pokémon== | ==Pokémon== | ||
| Line 130: | Line 164: | ||
====Inside==== | ====Inside==== | ||
{{catch/header|ruins|4}} | {{catch/header|ruins|4}} | ||
{{catch/ | {{catch/div|ruins|After at least one puzzle has been solved}} | ||
{{catch/entry2| | {{catch/entry2|201|Unown|yes|yes|yes|Cave|5|all={{tt|100%|divided among all forms whose puzzles have been solved}}|type1=Psychic}} | ||
{{ | |||
{{catch/footer|ruins}} | {{catch/footer|ruins}} | ||
* The puzzle in the northeastern chamber causes Unown A, B, C, D, E, F, G, H, I, J, and K to appear. | |||
* The puzzle in the southeastern chamber causes Unown S, T, U, V, and W to appear. | |||
* The puzzle in the northwestern chamber causes Unown X, Y, and Z to appear. | |||
* The puzzle in the southwestern chamber causes Unown L, M, N, O, P, Q, and R to appear. | |||
====Outside==== | ====Outside==== | ||
| Line 182: | Line 196: | ||
=====Underground hall===== | =====Underground hall===== | ||
{{catch/header|ruins|4}} | {{catch/header|ruins|4}} | ||
{{catch/div|ruins|After | {{catch/div|ruins|After at least one puzzle has been solved}} | ||
{{catch/entryhs|201|Unown|yes|yes|Cave|5|all= | {{catch/entryhs|201|Unown|yes|yes|Cave|5|all={{tt|100%|divided equally among all forms whose puzzles have been solved}}|type1=Psychic}} | ||
{{ | |||
{{catch/footer|ruins}} | {{catch/footer|ruins}} | ||
* The puzzle in the northeastern chamber causes Unown A, B, C, D, E, F, G, H, I, and J to appear. | |||
* The puzzle in the southeastern chamber causes Unown R, S, T, U, and V to appear. | |||
* The puzzle in the northwestern chamber causes Unown W, X, Y, and Z to appear. | |||
* The puzzle in the southwestern chamber causes Unown K, L, M, N, O, P, and Q to appear. | |||
=====Entrance===== | =====Entrance===== | ||
{{catch/header|ruins|4}} | {{catch/header|ruins|4}} | ||
{{catch/div|ruins|After obtaining all 26 | {{catch/div|ruins|After obtaining all 26 alphabetic Unown forms}} | ||
{{catch/entryhs|201QU|Unown|yes|yes|Cave|5|all=50%|type1=Psychic}} | {{catch/entryhs|201QU|Unown|yes|yes|Cave|5|all=50%|type1=Psychic}} | ||
{{catch/entryhs|201EX|Unown|yes|yes|Cave|5|all=50%|type1=Psychic}} | {{catch/entryhs|201EX|Unown|yes|yes|Cave|5|all=50%|type1=Psychic}} | ||
| Line 291: | Line 237: | ||
===Generation II=== | ===Generation II=== | ||
{{trainerheader|ruins}} | {{trainerheader|ruins}} | ||
{{trainerdiv|ruins|Requires Surf}} | |||
{{trainerentry|Spr GS Psychic.png|Psychic|Nathan|832|1|203|Girafarig|♂|26|None|36=ジョウ|37=Jō}} | {{trainerentry|Spr GS Psychic.png|Psychic|Nathan|832|1|203|Girafarig|♂|26|None|36=ジョウ|37=Jō}} | ||
{{trainerfooter|ruins|II}} | {{trainerfooter|ruins|II}} | ||
| Line 296: | Line 243: | ||
===Generation IV=== | ===Generation IV=== | ||
{{trainerheader|ruins}} | {{trainerheader|ruins}} | ||
{{trainerdiv|ruins|Requires Surf}} | |||
{{trainerentry|Spr DP Psychic M.png|Psychic|Nathan|832|1|203|Girafarig|♂|26|None|36=ジョウ|37=Jō}} | {{trainerentry|Spr DP Psychic M.png|Psychic|Nathan|832|1|203|Girafarig|♂|26|None|36=ジョウ|37=Jō}} | ||
{{trainerfooter|ruins|II}} | {{trainerfooter|ruins|II}} | ||
| Line 304: | Line 252: | ||
! style="background:#{{locationcolor/light|ruins}}; {{roundytl|5px}}" | Version | ! style="background:#{{locationcolor/light|ruins}}; {{roundytl|5px}}" | Version | ||
! style="background:#{{locationcolor/light|ruins}}" | Outside | ! style="background:#{{locationcolor/light|ruins}}" | Outside | ||
! style="background:#{{locationcolor/light|ruins}}" | Main | ! style="background:#{{locationcolor/light|ruins}}" | Main entrance | ||
! style="background:#{{locationcolor/light|ruins}}" | Main | ! style="background:#{{locationcolor/light|ruins}}" | Main chamber | ||
! style="background:#{{locationcolor/light|ruins}}" | Puzzle | ! style="background:#{{locationcolor/light|ruins}}" | Puzzle chamber | ||
! style="background:#{{locationcolor/light|ruins}}; {{roundytr|5px}}" | Item | ! style="background:#{{locationcolor/light|ruins}}; {{roundytr|5px}}" | Item chamber | ||
|- | |- | ||
! style="background:#{{gold color}}" | {{color2|000|Pokémon Gold and Silver Versions|Gold}} | ! style="background:#{{gold color}}" | {{color2|000|Pokémon Gold and Silver Versions|Gold}} | ||
| rowspan=" | | rowspan="3" | [[File:Ruins of Alph GSC.png|100px]] | ||
| | | | ||
| rowspan=" | | rowspan="3" | [[File:Ruins of Alph interior GSC.png|120px]] | ||
| rowspan="2" | [[File:Ruins of Alph Puzzle GS.png|120px]] | | rowspan="2" | [[File:Ruins of Alph Puzzle GS.png|120px]] | ||
|- | |- | ||
| Line 318: | Line 266: | ||
|- | |- | ||
! style="background:#{{crystal color}}" | {{color2|000|Pokémon Crystal Version|Crystal}} | ! style="background:#{{crystal color}}" | {{color2|000|Pokémon Crystal Version|Crystal}} | ||
| | | | ||
| [[File:Ruins of Alph Puzzle C.png|120px]] | | [[File:Ruins of Alph Puzzle C.png|120px]] | ||
| [[File:Ruins of Alph Item C.png|120px]] | | [[File:Ruins of Alph Item C.png|120px]] | ||
| Line 338: | Line 284: | ||
|- | |- | ||
! style="background:#{{locationcolor/light|ruins}}; {{roundytl|5px}}" | Version | ! style="background:#{{locationcolor/light|ruins}}; {{roundytl|5px}}" | Version | ||
! style="background:#{{locationcolor/light|ruins}}" | First | ! style="background:#{{locationcolor/light|ruins}}" | First chamber | ||
! style="background:#{{locationcolor/light|ruins}}" | Second | ! style="background:#{{locationcolor/light|ruins}}" | Second chamber | ||
! style="background:#{{locationcolor/light|ruins}}" | Third | ! style="background:#{{locationcolor/light|ruins}}" | Third chamber | ||
! style="background:#{{locationcolor/light|ruins}}; {{roundytr|5px}}" | Fourth | ! style="background:#{{locationcolor/light|ruins}}; {{roundytr|5px}}" | Fourth chamber | ||
|- | |- | ||
! style="background:#{{crystal color}}" | {{color2|000|Pokémon Crystal Version|Crystal}} | ! style="background:#{{crystal color}}" | {{color2|000|Pokémon Crystal Version|Crystal}} | ||
| Line 360: | Line 306: | ||
|} | |} | ||
== | ==[[Location preview|Preview]]== | ||
<gallery> | <gallery> | ||
File:HGSS Ruins of Alph-Morning.png|Morning (Unown S) | File:HGSS Ruins of Alph-Morning.png|Morning (Unown S) | ||
| Line 366: | Line 312: | ||
File:HGSS Ruins of Alph-Night.png|Night (Unown T) | File:HGSS Ruins of Alph-Night.png|Night (Unown T) | ||
</gallery> | </gallery> | ||
==Walking Pokémon effects== | |||
When interacting with [[walking Pokémon]] in {{v2|HeartGold and SoulSilver|s}}, the Pokémon may occasionally show an altered mood specific to this location. | |||
*{{p|Unown}} makes a strange sound, growls in a way that sounds almost like speech, and seems to be singing something. It also spins around in circles and sometimes stops moving. | |||
*All walking Pokémon, including Unown, gaze around restlessly and scratch at the ground as if searching for something. They stare intently at nothing and suddenly turn around then may start barking. Happy emotions are seen as they look very interested and wander around listening to the different sounds. | |||
==In the anime== | ==In the anime== | ||
[[File:Ruins of Alph anime.png|thumb|200px | [[File:Ruins of Alph anime.png|thumb|200px|Ruins of Alph in the anime]] | ||
The Ruins of Alph appeared in ''[[EP163|Fossil Fools]]'', | The Ruins of Alph appeared in ''[[EP163|Fossil Fools]]'', where {{Ash}} and {{ashfr}} visited them, meeting {{an|Professor Oak}} upin their arrival. Unlike the games, no {{p|Unown}} were featured there. Instead, it was a site where multiple [[Fossil]]s had been dug out. One of the scientists working at the site was [[Foster]], one of Professor Oak's former top students at the [[Celadon University]]. Soon Ash, his friends, and Professor Oak found out that Foster had discovered living {{p|Omanyte}} and {{p|Omastar}} at the ruins, which he was trying to protect by keeping them a secret. After rescuing the Fossil Pokémon from being stolen by {{TRT}}, the group agreed that the ancient Pokémon should be left alone, and promised Foster not to tell anyone about them. | ||
{{-}} | |||
==In the manga== | ==In the manga== | ||
[[File:Ruins of Alph Adventures.png|thumb|200px|Ruins of Alph in Pokémon Adventures]] | |||
The Ruins of Alph | [[File:Ruins of Alph PM.png|thumb|left|200px|Ruins of Alph in Pokémon Pocket Monsters]] | ||
===In the Pokémon Adventures manga=== | |||
The Ruins of Alph first appeared in ''[[PS100|Into the Unown]]'' as the location where {{adv|Gold}} met [[Bugsy]] for the first time. He helped Bugsy rescue his research team who were trapped in the ruins, and also foiled a [[Team Rocket]] plan to capture the {{p|Unown}}. | |||
In ''[[PS134|Hurray for Heracross]]'', while doing research at the ruins, Bugsy was challenged by {{DL|Legendary beasts (Adventures)|Suicune}}, who was seeking a worthy Trainer to stand on its side during the upcoming confrontation with the [[Masked Man]]. Bugsy did his best, but in the end, he was unable to defeat and {{pkmn2|caught|capture}} the [[Legendary Pokémon]]. | |||
In the {{chap|HeartGold & SoulSilver}}, Gold, having rescued Bugsy after [[Ecruteak Gym|Ecruteak City's Gym]] was destroyed by {{adv|Arceus}}, chased Arceus towards the Ruins of Alph, where he also found an injured [[Lance]]. After leaving Lance in Bugsy's care, Gold confronted Arceus by himself. When {{adv|Silver}} and {{adv|Crystal}} soon arrived at the site, with Silver having managed to collect the 16 [[Plate]]s from across [[Johto]], Arceus transported the [[Pokédex holder]]s to the [[Sinjoh Ruins]], unintentionally bringing the four Team Rocket {{tc|Executive}}s along as well. Later, Arceus returned the Pokédex holders, Executives, Lance, {{adv|Giovanni}}, and [[Pryce]] to the Ruins of Alph. | |||
In the {{chap|Omega Ruby & Alpha Sapphire}}, it was revealed that [[Archie]] and [[Maxie]] had appeared at the Ruins of Alph after their spirits had been pulled out of the [[Distortion World]] during the events of the ''HeartGold & SoulSilver'' chapter. | |||
===In the Pokémon Pocket Monsters manga=== | |||
The Ruins of Alph appeared in ''[[PM072|Rampage at the Ruins of Alph!]]''. | |||
{{sectionstub}} | |||
{{right clear}} | |||
==In the TCG== | ==In the TCG== | ||
| Line 391: | Line 356: | ||
|de=Alph-Ruinen | |de=Alph-Ruinen | ||
|it=Rovine d'Alfa | |it=Rovine d'Alfa | ||
|ko=알프의 유적 ''Ruins of | |ko=알프의 유적 ''Ruins of Alph'' | ||
|es_eu=Ruinas Alfa}} | |pt_br=Ruínas de Alfa | ||
|es_eu=Ruinas Alfa<br>Ruinas Alfabeto{{tt|*|anime}} | |||
|sv=Alph-ruinerna | |||
|vi=Di tích Arufu | |||
}} | |||
{{-}} | {{-}} | ||
| Line 405: | Line 374: | ||
[[it:Rovine d'Alfa]] | [[it:Rovine d'Alfa]] | ||
[[de:Alph-Ruinen]] | [[de:Alph-Ruinen]] | ||
[[fr:Ruines d'Alpha]] | [[fr:Ruines d'Alpha]] | ||
[[ja:アルフのいせき]] | [[ja:アルフのいせき]] | ||
[[zh:阿露福遗迹]] | [[zh:阿露福遗迹]] | ||
Revision as of 17:09, 16 July 2017
| ||||
| ||||
| Map description: | A place where you can find a former adventure. | |||
|---|---|---|---|---|
| Location: | Southwest of Violet City | |||
| Region: | Johto | |||
| Generations: | II, IV | |||
 Location of Ruins of Alph in Johto. | ||||
| Pokémon world locations | ||||

The Ruins of Alph (Japanese: アルフのいせき Ruins of Alph) are located in Johto near Violet City, with entrances to the south of Route 36 and west of Route 32. The ruins are filled with Unown once any of the four slide puzzles inside the chambers have been activated. The name may come from the first four letters of "alphabet," which the Unown inside represent.
If the player listens to the Pokégear radio while near or inside the ruins, they will hear strange noises known as Mysterious Transmission on channel 13.5. In Pokémon HeartGold and SoulSilver, the player must be inside one of the chambers, and tuning the radio near the center will broadcast these noises. Some of those noises are actually Ho-Oh's distorted cries, and the melody of the Azure Flute. It also increases the chance of encountering an Unown shape the player has not yet encountered.
Geography

Outside the ruins
There are several scientists in the area listening and studying the ruins to discover more about them. They say it is more than it seems and that the puzzles in the caves must have something to do with the mystery of the past of the Ruins of Alph.
In Pokémon HeartGold and SoulSilver, if the player has Arceus in their party, the Sinjoh Ruins will be accessible.
Puzzle chambers
Four small chambers in the ruins hold slide puzzles that, when solved, cause the floor below the player to break, dropping the player into the main chamber of the ruins. The puzzles also cause Unown to appear in the main chamber. Each puzzle corresponds to a specific subset of the 26 alphabetic forms of Unown. To unlock all 26 alphabetic forms, all four slide puzzles must be activated. The puzzles can be completed in any order. Pokémon Crystal explains that these puzzles are signals that summon the Unown.
In Generation II, catching three Unown and speaking to a researcher outside the ruins will cause him to unlock Unown Mode in the player's Pokédex. In Pokémon HeartGold and SoulSilver, the first completed slide puzzle will cause a man to give the player the Unown Report. Once the first seven pages of the report are complete and the 26 alphabetic Unown forms have been caught, the ! and ? forms can be encountered in the entrance room.
In Crystal, HeartGold, and SoulSilver, each puzzle chamber has a word on the far wall that is a hint to unlocking a secret room. When the player completes a certain criterion, the secret room opens, revealing several items. Additionally, in these games, completing the slide puzzles reveals part of the history of Unown written on the floor of the main chamber. In the Japanese version of Crystal, a scientist theorizes that the sudden appearance of these patterns is related to the newly-built Pokémon Communication Center and the radio waves emanating from it.
The puzzles cause the following Unown to appear in the main chamber:
| Chamber | In Generation II | In Generation IV |
|---|---|---|
| Northeastern chamber |           
|
|
| Southeastern chamber |     
|

|
| Northwestern chamber |   
|
|
| Southwestern chamber |      
|
|
Northeastern chamber

The northeastern chamber, near the Route 36 entrance, requires no HMs to access. In Pokémon Crystal, HeartGold, and SoulSilver, the far wall reads escape upon inspection. Using an Escape Rope there opens a hidden room. In Crystal, the item is consumed and the player must re-enter the chamber in order to reach the hidden room. In HeartGold and SoulSilver, the item is not consumed and the room opens immediately.
The chamber's puzzle forms an image of Kabuto. Completing this puzzle and falling through to the floor below reveals the following message spelled out on the ground in Unown:
Our words shall remain here for the agesC
Our clan engraved words in this placeHGSS
Southeastern chamber
The southeastern chamber requires HM03 Surf to cross the pond on the south side of the ruins. In Pokémon Crystal, HeartGold, and SoulSilver, the far wall reads light. Using HM05 Flash will open the hidden room.
The chamber's puzzle forms an image of Aerodactyl. Completing this puzzle and falling through to the floor below reveals the following message spelled out on the ground in Unown:
Thus we shall erect a Pokémon statue outsideC
Our clan created Pokémon statue outsideHGSS
Northwestern chamber
The northwestern chamber is accessible only from the basement of Union Cave, which requires HM03 Surf to navigate. In Pokémon Crystal, HeartGold, and SoulSilver, the far wall reads Ho Oh. The hidden room will open Ho-Oh is the first Pokémon in the player's party in Crystal, or anywhere in the player's party in Generation IV.
The chamber's puzzle forms an image of Ho-Oh. Completing this puzzle and falling through to the floor below reveals the following message spelled out on the ground in Unown:
We humans must learn to walk in harmony with them. We depart for their sakesC
We humans need to walk with them. We leave here for the sake of themHGSS
Southwestern chamber
The southwestern chamber is accessible only by moving a boulder in the basement of Union Cave, which requires HM03 Surf to navigate as well as HM04 Strength. In Pokémon Crystal, HeartGold, and SoulSilver, the far wall reads water. The hidden room will open if the player has a Water Stone in their inventory in Crystal, and when the player selects "Use" on a Water Stone from the Bag while facing the wall.
The chamber's puzzle forms an image of Omanyte. Completing this puzzle and falling through to the floor below reveals the following message spelled out on the ground in Unown:
They possess great insight and refuse the outside worldC
They possess power to sense with mind and reject outsideHGSS
Puzzles

Puzzle in the northeastern chamber, featuring Kabuto
(Generation II)
Puzzle in the southeastern chamber, featuring Aerodactyl
(Generation II)
Puzzle in the northwestern chamber, featuring Ho-Oh
(Generation II)
Puzzle in the southwestern chamber, featuring Omanyte
(Generation II)
Puzzle in the northeastern chamber, featuring Kabuto
(Generation IV)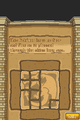
Puzzle in the southeastern chamber, featuring Aerodactyl
(Generation IV)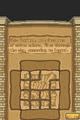
Puzzle in the northwestern chamber, featuring Ho-Oh
(Generation IV)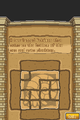
Puzzle in the southwestern chamber, featuring Omanyte
(Generation IV)


Items

|
This article is incomplete. Please feel free to edit this article to add missing information and complete it. Reason: Needs confirmation of the contents of the hidden chambers in Crystal |
| Item | Location | Games | |
|---|---|---|---|
| Unown Mode | Given by a researcher outside the ruins as an upgrade to the Pokédex after catching at least three different Unown variants | G S C | |
| Unown Report | Given by a researcher right after solving the first chamber puzzle | HG SS | |
| Potion | In the left wall of the building, southmost of the three in the northeast (hidden) | HG SS | |
| Great Ball | In the central solid rock among a group near the southern entrance (hidden) | HG SS | |
| TinyMushroom | In the small mound of dirt east of the western pond (hidden) | HG SS | |
| Rare Candy | In a solid rock west of a smashable rock to the west of the northern entrance (requires Rock Smash) (hidden) | HG SS | |
| Hyper Potion | North of the western pond (requires Rock Smash or Surf) | HG SS | |
| Nugget | On a boulder outside the third chamber (accessed via Union Cave) (hidden) | HG SS | |
| Big Mushroom | On a boulder outside the third chamber (accessed via Union Cave) (hidden) | HG SS | |
Rock Smash
| Item | Location | Games | |
|---|---|---|---|
| Red Shard | Randomly found by smashing rocks | HG SS | |
| Green Shard | Randomly found by smashing rocks | HG SS | |
| Blue Shard | Randomly found by smashing rocks | HG SS | |
| Yellow Shard | Randomly found by smashing rocks | HG SS | |
| Max Revive | Randomly found by smashing rocks | HG SS | |
| Max Ether | Randomly found by smashing rocks | HG SS | |
| Old Amber | Randomly found by smashing rocks | HG SS | |
| Helix Fossil | Randomly found by smashing rocks | HG | |
| Dome Fossil | Randomly found by smashing rocks | SS | |
| Item | Location | Games | |
|---|---|---|---|
| Berry | Hidden room | C | |
| PSNCureBerry | Hidden room | C | |
| Heal Powder | Hidden room | C HG SS | |
| EnergyPowder | Hidden room | C HG SS | |
| Oran Berry | Hidden room | HG SS | |
| Pecha Berry | Hidden room | HG SS | |
| Item | Location | Games | |
|---|---|---|---|
| Heal Powder | Hidden room | C HG SS | |
| Energy Root | Hidden room | C HG SS | |
| Gold Berry | Hidden room | C | |
| Moon Stone | Hidden room | C HG SS | |
| Sitrus Berry | Hidden room | HG SS | |
| Item | Location | Games | |
|---|---|---|---|
| Revival Herb | Hidden room | C HG SS | |
| Charcoal | Hidden room | C HG SS | |
| Gold Berry | Hidden room | C | |
| MysteryBerry | Hidden room | C | |
| Life Orb | Hidden room | HG SS | |
| Leppa Berry | Hidden room | HG SS | |
| Item | Location | Games | |
|---|---|---|---|
| Stardust | Hidden room | C HG SS | |
| Star Piece | Hidden room | C HG SS | |
| MysteryBerry | Hidden room | C | |
| Mystic Water | Hidden room | C HG SS | |
| Leppa Berry | Hidden room | HG SS | |
Pokémon
Generation II
Inside
| Pokémon | Games | Location | Levels | Rate | |||||||||||
|---|---|---|---|---|---|---|---|---|---|---|---|---|---|---|---|
| After at least one puzzle has been solved | |||||||||||||||
|
G | S | C |
|
5 | 100% | |||||||||
| A colored background means that the Pokémon can be found in this location in the specified game. A white background with a colored letter means that the Pokémon cannot be found here. | |||||||||||||||
- The puzzle in the northeastern chamber causes Unown A, B, C, D, E, F, G, H, I, J, and K to appear.
- The puzzle in the southeastern chamber causes Unown S, T, U, V, and W to appear.
- The puzzle in the northwestern chamber causes Unown X, Y, and Z to appear.
- The puzzle in the southwestern chamber causes Unown L, M, N, O, P, Q, and R to appear.
Outside
| Pokémon | Games | Location | Levels | Rate | |||||||||||
|---|---|---|---|---|---|---|---|---|---|---|---|---|---|---|---|
|
G | S | C |
|
18-24 | 90% | |||||||||
|
G | S | C |
|
22 | 0% | 0% | 5% | |||||||
|
G | S | C |
|
22 | 0% | 0% | 5% | |||||||
|
G | S | C |
|
20-22 | 10% | |||||||||
|
G | S | C |
|
20-22 | 10% | 10% | 0% | |||||||
| Surfing | |||||||||||||||
|
G | S | C |
|
15-19 | 60% | |||||||||
|
G | S | C |
|
15-24 | 40% | |||||||||
| Fishing | |||||||||||||||
|
G | S | C |
|
10 | 15% | |||||||||
|
G | S | C |
|
10 | 85% | |||||||||
|
G | S | C |
|
20 | 65% | |||||||||
|
G | S | C |
|
20 | 35% | |||||||||
|
G | S | C |
|
40 | 70% | |||||||||
|
G | S | C |
|
40 | 10% | |||||||||
|
G | S | C |
|
40 | 20% | |||||||||
| A colored background means that the Pokémon can be found in this location in the specified game. A white background with a colored letter means that the Pokémon cannot be found here. | |||||||||||||||
Generation IV
Inside
Underground hall
| Pokémon | Games | Location | Levels | Rate | |||||||||||
|---|---|---|---|---|---|---|---|---|---|---|---|---|---|---|---|
| After at least one puzzle has been solved | |||||||||||||||
|
HG | SS |
|
5 | 100% | ||||||||||
| A colored background means that the Pokémon can be found in this location in the specified game. A white background with a colored letter means that the Pokémon cannot be found here. | |||||||||||||||
- The puzzle in the northeastern chamber causes Unown A, B, C, D, E, F, G, H, I, and J to appear.
- The puzzle in the southeastern chamber causes Unown R, S, T, U, and V to appear.
- The puzzle in the northwestern chamber causes Unown W, X, Y, and Z to appear.
- The puzzle in the southwestern chamber causes Unown K, L, M, N, O, P, and Q to appear.
Entrance
| Pokémon | Games | Location | Levels | Rate | |||||||||||
|---|---|---|---|---|---|---|---|---|---|---|---|---|---|---|---|
| After obtaining all 26 alphabetic Unown forms | |||||||||||||||
|
HG | SS |
|
5 | 50% | ||||||||||
|
HG | SS |
|
5 | 50% | ||||||||||
| A colored background means that the Pokémon can be found in this location in the specified game. A white background with a colored letter means that the Pokémon cannot be found here. | |||||||||||||||
Outside
| Pokémon | Games | Location | Levels | Rate | |||||||||||
|---|---|---|---|---|---|---|---|---|---|---|---|---|---|---|---|
|
HG | SS |
|
18-24 | 90% | ||||||||||
|
HG | SS |
|
20-22 | 10% | ||||||||||
| Surfing | |||||||||||||||
|
HG | SS |
|
10-20 | 60% | ||||||||||
|
HG | SS |
|
10-25 | 40% | ||||||||||
| Fishing | |||||||||||||||
|
HG | SS |
|
10 | 5% | ||||||||||
|
HG | SS |
|
10 | 95% | ||||||||||
|
HG | SS |
|
20 | 40% | ||||||||||
|
HG | SS |
|
20 | 60% | ||||||||||
|
HG | SS |
|
40 | 93% | ||||||||||
|
HG | SS |
|
40 | 7% | ||||||||||
| Rock Smash | |||||||||||||||
|
HG | SS |
|
3-14 | 100% | ||||||||||
| Special Pokémon | |||||||||||||||
|
HG | SS |
|
18 | 20% | ||||||||||
|
HG | SS |
|
20-22 | 20% | ||||||||||
|
HG | SS |
|
18 | 20% | ||||||||||
|
HG | SS |
|
20-22 | 20% | ||||||||||
| A colored background means that the Pokémon can be found in this location in the specified game. A white background with a colored letter means that the Pokémon cannot be found here. | |||||||||||||||
Trainers
Generation II
| Trainer | Pokémon | |||||||||||
|---|---|---|---|---|---|---|---|---|---|---|---|---|
| Requires Surf | ||||||||||||
|
| |||||||||||
| Trainers with a telephone symbol by their names will give their Pokégear number to the player, and may call or be called for a rematch with higher-level Pokémon. | ||||||||||||

Generation IV
| Trainer | Pokémon | |||||||||||
|---|---|---|---|---|---|---|---|---|---|---|---|---|
| Requires Surf | ||||||||||||
|
| |||||||||||
| Trainers with a telephone symbol by their names will give their Pokégear number to the player, and may call or be called for a rematch with higher-level Pokémon. | ||||||||||||

Layout
| Version | Outside | Main entrance | Main chamber | Puzzle chamber | Item chamber |
|---|---|---|---|---|---|
| Gold | 
|

|

| ||
| Silver | |||||
| Crystal | 
|

| |||
| HeartGold | 
|

|

|

|

|
| SoulSilver | |||||
| Version | First chamber | Second chamber | Third chamber | Fourth chamber |
|---|---|---|---|---|
| Crystal | 
|

|

|

|
| HeartGold | 
|

|

|

|
| SoulSilver | ||||
Preview
Morning (Unown S)

Day/Evening (Unown G)
Night (Unown T)


Walking Pokémon effects
When interacting with walking Pokémon in HeartGold and SoulSilver, the Pokémon may occasionally show an altered mood specific to this location.
- Unown makes a strange sound, growls in a way that sounds almost like speech, and seems to be singing something. It also spins around in circles and sometimes stops moving.
- All walking Pokémon, including Unown, gaze around restlessly and scratch at the ground as if searching for something. They stare intently at nothing and suddenly turn around then may start barking. Happy emotions are seen as they look very interested and wander around listening to the different sounds.
In the anime

The Ruins of Alph appeared in Fossil Fools, where Ash and his friends visited them, meeting Professor Oak upin their arrival. Unlike the games, no Unown were featured there. Instead, it was a site where multiple Fossils had been dug out. One of the scientists working at the site was Foster, one of Professor Oak's former top students at the Celadon University. Soon Ash, his friends, and Professor Oak found out that Foster had discovered living Omanyte and Omastar at the ruins, which he was trying to protect by keeping them a secret. After rescuing the Fossil Pokémon from being stolen by Team Rocket, the group agreed that the ancient Pokémon should be left alone, and promised Foster not to tell anyone about them.
In the manga


In the Pokémon Adventures manga
The Ruins of Alph first appeared in Into the Unown as the location where Gold met Bugsy for the first time. He helped Bugsy rescue his research team who were trapped in the ruins, and also foiled a Team Rocket plan to capture the Unown.
In Hurray for Heracross, while doing research at the ruins, Bugsy was challenged by Suicune, who was seeking a worthy Trainer to stand on its side during the upcoming confrontation with the Masked Man. Bugsy did his best, but in the end, he was unable to defeat and capture the Legendary Pokémon.
In the HeartGold & SoulSilver arc, Gold, having rescued Bugsy after Ecruteak City's Gym was destroyed by Arceus, chased Arceus towards the Ruins of Alph, where he also found an injured Lance. After leaving Lance in Bugsy's care, Gold confronted Arceus by himself. When Silver and Crystal soon arrived at the site, with Silver having managed to collect the 16 Plates from across Johto, Arceus transported the Pokédex holders to the Sinjoh Ruins, unintentionally bringing the four Team Rocket Executives along as well. Later, Arceus returned the Pokédex holders, Executives, Lance, Giovanni, and Pryce to the Ruins of Alph.
In the Omega Ruby & Alpha Sapphire arc, it was revealed that Archie and Maxie had appeared at the Ruins of Alph after their spirits had been pulled out of the Distortion World during the events of the HeartGold & SoulSilver chapter.
In the Pokémon Pocket Monsters manga
The Ruins of Alph appeared in Rampage at the Ruins of Alph!.
In the TCG
This listing is of cards mentioning or featuring the Ruins of Alph in the Pokémon Trading Card Game.
| Related cards Cards listed with a blue background are only legal to use in the current Expanded format. Cards listed with a green background are legal to use in both the current Standard and Expanded formats. | |||||||
|---|---|---|---|---|---|---|---|
| Card | Type | English Expansion |
Rarity | # | Japanese Expansion |
Rarity | # |
| Ruin Wall | T | Neo Discovery | 74/75 | Crossing the Ruins... | |||
| Natu | Unleashed | 55/95 | SoulSilver Collection | 042/070 | |||
| Ruins of Alph | T [St] | Undaunted | 76/90 | Reviving Legends | 077/080 | ||
In other languages
| ||||||||||||||||||||||||||||||||||||
| Johto | ||||||||
|---|---|---|---|---|---|---|---|---|
|
| ||||||||
|
| This article is part of Project Locations, a Bulbapedia project that aims to write comprehensive articles on every location in the Pokémon world. |