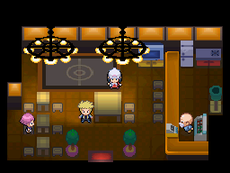
Rematch: Difference between revisions
(→In the anime: The article is titled rematch and yet for whatever reason we're using a different terminology.) |
|||
| (20 intermediate revisions by 9 users not shown) | |||
| Line 12: | Line 12: | ||
===Rival=== | ===Rival=== | ||
Since Generation I, the player's [[rival]] plays a key role within the game, occasionally giving hints, helping out or even challenging the player to a rematch. With the exception of {{ga|Brendan}} and {{ga|May}}, the player's rival can be repeatedly rematched after entering the [[Hall of Fame]] of that region. In {{ga|Silver}}'s case however, he can only be rematched after the battle in [[Mt. Moon]]{{sup/2|GSC}} or | Since Generation I, the player's [[rival]] plays a key role within the game, occasionally giving hints, helping out or even challenging the player to a rematch. With the exception of {{ga|Brendan}} and {{ga|May}}, the player's rival can be repeatedly rematched after entering the [[Hall of Fame]] of that region. In {{ga|Silver}}'s case however, he can only be rematched after the battle in [[Mt. Moon]]{{sup/2|GSC}} or the [[Multi Battle]] with him in [[Dragon's Den]]{{sup/4|HGSS}}. | ||
The following table shows where and when the player's Rival can be challenged for subsequent rematches: | The following table shows where and when the player's Rival can be challenged for subsequent rematches: | ||
| Line 23: | Line 23: | ||
| {{ga|Blue}}{{sup/1}}{{sup/3|FRLG}} | | {{ga|Blue}}{{sup/1}}{{sup/3|FRLG}} | ||
| rowspan=2 | Any time | | rowspan=2 | Any time | ||
| rowspan=2 | [[Indigo Plateau]] | | rowspan=2 | [[Indigo Plateau]] | ||
|- style="background:#{{kanto color light}}" | |- style="background:#{{kanto color light}}" | ||
| {{ga|Trace}}{{sup/7|PE}} | | {{ga|Trace}}{{sup/7|PE}} | ||
| Line 30: | Line 30: | ||
| {{ga|Silver}} | | {{ga|Silver}} | ||
| Mondays and Wednesdays | | Mondays and Wednesdays | ||
| [[Indigo Plateau]] | | [[Indigo Plateau]] | ||
|- style="background:#{{hoenn color light}}" | |- style="background:#{{hoenn color light}}" | ||
| rowspan=2 | [[Hoenn]] | | rowspan=2 | [[Hoenn]] | ||
| rowspan=2 | [[Wally]] | | rowspan=2 | [[Wally]] | ||
| rowspan=2 | Once per day | | rowspan=2 | Once per day | ||
| | | {{ho|Victory Road}}{{sup/3|RSE}} | ||
|- style="background:#{{hoenn color light}}" | |- style="background:#{{hoenn color light}}" | ||
| [[Battle Maison]]{{sup/6|ORAS}} | | [[Battle Maison]]{{sup/6|ORAS}} | ||
| Line 42: | Line 42: | ||
| rowspan=2 | {{ga|Barry}} | | rowspan=2 | {{ga|Barry}} | ||
| rowspan=2 | Saturdays and Sundays | | rowspan=2 | Saturdays and Sundays | ||
| [[Fight Area]] | | [[Fight Area]]{{sup/4|DP}} | ||
|- style="background:#{{sinnoh color light}}" | |- style="background:#{{sinnoh color light}}" | ||
| [[Survival Area]] | | [[Survival Area]]{{sup/4|Pt}} | ||
|- style="background:#{{unova color light}}" | |- style="background:#{{unova color light}}" | ||
| rowspan=3 | [[Unova]] | | rowspan=3 | [[Unova]] | ||
| [[Cheren]]{{sup/5|BW}} | | [[Cheren]]{{sup/5|BW}} | ||
| Once per day | | Once per day | ||
| | | {{OBP|Victory Road|Black and White}} | ||
|- style="background:#{{unova color light}}" | |- style="background:#{{unova color light}}" | ||
| [[Bianca]]{{sup/5|BW}} | | [[Bianca]]{{sup/5|BW}} | ||
| Saturdays and Sundays | | Saturdays and Sundays | ||
| [[Nuvema Town | | [[Nuvema Town]] | ||
|- style="background:#{{unova color light}}" | |- style="background:#{{unova color light}}" | ||
| [[Hugh]]{{sup/5|B2W2}} | | [[Hugh]]{{sup/5|B2W2}} | ||
| Line 60: | Line 60: | ||
|- style="background:#{{kalos color light}}" | |- style="background:#{{kalos color light}}" | ||
| [[Kalos]] | | [[Kalos]] | ||
| {{ga|Calem}}{{tt|*|If the player is | | {{ga|Calem}}{{tt|*|If the player character is female}} or {{ga|Serena}}{{tt|*|If the player character is male}} | ||
| Once per day | | Once per day | ||
| [[Kiloude City]] | | [[Kiloude City]] | ||
| Line 261: | Line 261: | ||
====Pokémon: Let's Go, Pikachu! and Let's Go, Eevee!==== | ====Pokémon: Let's Go, Pikachu! and Let's Go, Eevee!==== | ||
In [[Pokémon: Let's Go, Pikachu! and Let's Go, Eevee!]], after the player has entered the [[Hall of Fame]], each Gym Leader of [[Kanto]] can be rematched at their respective Gym once per day. At the [[Viridian Gym]], {{ga|Blue}} is battled instead of [[Giovanni]]. | In [[Pokémon: Let's Go, Pikachu! and Let's Go, Eevee!]], after the player has entered the [[Hall of Fame]], each Gym Leader of [[Kanto]] can be rematched at their respective Gym once per day. At the [[Viridian Gym]], {{ga|Blue}} is battled instead of [[Giovanni]]. In addition, the Pokémon League can also be challenged again, with all Elite Four members possessing a Kanto Pokémon's [[Regional variant|Alola Form]]. | ||
===Legendary and special encounter Pokémon=== | ===Legendary and special encounter Pokémon=== | ||
| Line 271: | Line 271: | ||
In Pokémon FireRed, LeafGreen, and Emerald, if the player flees from a stationary Legendary Pokémon, it will reappear upon leaving and re-entering the room. The game informs the player that "The <sc><Pokémon></sc> flew away!" | In Pokémon FireRed, LeafGreen, and Emerald, if the player flees from a stationary Legendary Pokémon, it will reappear upon leaving and re-entering the room. The game informs the player that "The <sc><Pokémon></sc> flew away!" | ||
In Pokémon Platinum, if the player defeats or flees from a stationary Legendary Pokémon, it reappears after the player enters the [[Hall of Fame]] | In Pokémon Platinum, if the player defeats or flees from a stationary Legendary Pokémon, it reappears after the player next enters the [[Hall of Fame]]. If the player defeats a [[roaming Pokémon]], it will reappear only after the player has re-triggered the event which caused it to start roaming; for example, the player must talk to [[Professor Oak]] to cause a [[Legendary birds|Legendary bird]] to resume roaming. If the player flees from or defeats [[List of Pokémon with form differences#Giratina|Origin Forme]] {{p|Giratina}} in the [[Distortion World]], it will reappear in [[Turnback Cave]] in its Altered Forme, where it behaves in the same way as all other stationary Legendary Pokémon. | ||
This was extended to all stationary Pokémon ([[red Gyarados]], {{p|Sudowoodo}}, and {{p|Snorlax}}) in HeartGold and SoulSilver. If {{p|Suicune}} is defeated or fled from, [[Eusine]] will comment on this fact, and it will instead reappear at the [[Burned Tower]], where it behaves in the same way as all other stationary Legendary Pokémon. If {{p|Ho-Oh}}{{sup/4|HG}} or {{p|Lugia}}{{sup/4|SS}} is defeated or fled from during the storyline, the [[Kimono Girl]]s will comment on this fact before leaving; however, the Pokémon still behave like any other stationary Pokémon. | This was extended to all stationary Pokémon ([[red Gyarados]], {{p|Sudowoodo}}, and {{p|Snorlax}}) in HeartGold and SoulSilver. If {{p|Suicune}} is defeated or fled from, [[Eusine]] will comment on this fact, and it will instead reappear at the [[Burned Tower]], where it behaves in the same way as all other stationary Legendary Pokémon. If {{p|Ho-Oh}}{{sup/4|HG}} or {{p|Lugia}}{{sup/4|SS}} is defeated or fled from during the storyline, the [[Kimono Girl]]s will comment on this fact before leaving; however, the Pokémon still behave like any other stationary Pokémon. | ||
| Line 283: | Line 283: | ||
In Pokémon Sun and Moon, {{p|Solgaleo}}{{sup/7|S}} or {{p|Lunala}}{{sup/7|M}} must be caught; defeating, fleeing from or losing to it does not cause it to disappear, the battle yields no [[experience]], and the story cannot be progressed until it is caught. The 31st box in the [[Pokémon Storage System]] does not become available until after the player catches the Legendary Pokémon. If the player defeats, flees from, or loses to {{p|Tapu Koko}} instead of catching it during the post-credits event, [[Lillie]] will comment on this fact, and Tapu Koko will immediately be available to battle again at the [[Ruins of Conflict]]. If the player defeats, flees from or loses to a roaming [[Ultra Beast]] or {{p|Necrozma}}, it will continue to reappear in the area until it is caught (the game reassures the player that it is still in the area). | In Pokémon Sun and Moon, {{p|Solgaleo}}{{sup/7|S}} or {{p|Lunala}}{{sup/7|M}} must be caught; defeating, fleeing from or losing to it does not cause it to disappear, the battle yields no [[experience]], and the story cannot be progressed until it is caught. The 31st box in the [[Pokémon Storage System]] does not become available until after the player catches the Legendary Pokémon. If the player defeats, flees from, or loses to {{p|Tapu Koko}} instead of catching it during the post-credits event, [[Lillie]] will comment on this fact, and Tapu Koko will immediately be available to battle again at the [[Ruins of Conflict]]. If the player defeats, flees from or loses to a roaming [[Ultra Beast]] or {{p|Necrozma}}, it will continue to reappear in the area until it is caught (the game reassures the player that it is still in the area). | ||
In Pokémon Ultra Sun and Ultra Moon, {{p|Solgaleo}}{{sup/7|US}} or {{p|Lunala}}{{sup/7|UM}} must be caught; defeating, fleeing from or losing to it does not cause it to disappear | In Pokémon Ultra Sun and Ultra Moon, {{p|Solgaleo}}{{sup/7|US}} or {{p|Lunala}}{{sup/7|UM}} must be caught for it to disappear; defeating, fleeing from or losing to it does not cause it to disappear and the battle yields no [[experience]]. The 31st box in the [[Pokémon Storage System]] does not become available until after the player catches the Legendary Pokémon. | ||
==In spin-off series== | ==In spin-off series== | ||
| Line 293: | Line 293: | ||
==In the anime== | ==In the anime== | ||
With the exception of the [[Orange League]], {{Ash}} has had | With the exception of the [[Orange League]], {{Ash}} has had rematches with least one Gym Leader, [[Frontier Brain]] or [[Island Kahuna]] in each leg of his {{pkmn|journey}}. It is noted that the list does not list any match-up which could not be defined as a battle. | ||
===[[ | ===[[Indigo League]]=== | ||
{| class="roundy" style="border:3px solid #{{colorschemelight|Kanto}}; background:#{{colorschemedark|Kanto}}; margin:auto; text-align:center" width=" | {| class="roundy" style="border:3px solid #{{colorschemelight|Kanto}}; background:#{{colorschemedark|Kanto}}; margin:auto; text-align:center" | ||
! style="width:100px" | Opponent | |||
! style="width:200px" | First match | |||
! style="width:200px" | Result | |||
! style="width:200px" | Rematch | |||
! style="width:200px" | Result | |||
|- | |- | ||
! style="background:#{{rock color light}}" | [[File:Boulder Badge.png|40px|Boulder Badge]]<br>{{color2|{{rock color dark}}|Brock (anime)|Brock}} | ! style="background:#{{rock color light}}" | [[File:Boulder Badge.png|40px|Boulder Badge]]<br>{{color2|{{rock color dark}}|Brock (anime)|Brock}} | ||
| [[File:Brock Onix Bind.png|150px|Showdown in Pewter City]]<br>''[[EP005|Showdown in Pewter City]]'' | | style="background:#FFF; vertical-align:top" | [[File:Brock Onix Bind.png|150px|Showdown in Pewter City]]<br>''[[EP005|Showdown in Pewter City]]'' | ||
| style="background:#FFF; color:#{{red color dark}}" | '''Forfeit''' | |||
| [[File:EP005.png|150px|Showdown in Pewter City]]<br>''[[EP005|Showdown in Pewter City]]'' | | style="background:#FFF; vertical-align:top" | [[File:EP005.png|150px|Showdown in Pewter City]]<br>''[[EP005|Showdown in Pewter City]]'' | ||
| style="background:#FFF; color:#{{green color dark}}" | '''Ash forfeits again, but Brock rewards his Badge in recognition of Ash's compassion.''' | |||
|- | |- | ||
! style="background:#{{water color light}}" | [[File:Cascade Badge.png|40px|Cascade Badge]]<br>{{color2|{{water color dark}}|Misty (anime)|Misty}} | ! style="background:#{{water color light}}" | [[File:Cascade Badge.png|40px|Cascade Badge]]<br>{{color2|{{water color dark}}|Misty (anime)|Misty}} | ||
| [[File:EP007.png|150px| The Water Flowers of Cerulean City]]<br>''[[EP007|The Water Flowers of Cerulean City]]'' | | style="background:#FFF; vertical-align:top" | [[File:EP007.png|150px|The Water Flowers of Cerulean City]]<br>''[[EP007|The Water Flowers of Cerulean City]]'' | ||
| style="background:#FFF; color:#{{green color dark}}" | '''Interrupted by {{color2|{{green color dark}}|Team Rocket trio|Team Rocket}}<br>Ash earns Badge as thanks for protecting the Gym.''' | |||
| [[File:Misty Mega Gyarados.png|200px|SM043]]<br>''[[SM043|When Regions Collide!]]'' | | style="background:#FFF; vertical-align:top" | [[File:Misty Mega Gyarados.png|200px|SM043]]<br>''[[SM043|When Regions Collide!]]'' | ||
| style="background:#FFF; color:#{{green color dark}}" | '''Demonstration battle<br>Victory''' | |||
|- style="background:#FFF" | |- style="background:#FFF" | ||
! style="background:#{{electric color light}}" | [[File:Thunder Badge.png|40px|Thunder Badge]]<br>{{color2|{{electric color dark}}|Lt. Surge}} | ! style="background:#{{electric color light}}" | [[File:Thunder Badge.png|40px|Thunder Badge]]<br>{{color2|{{electric color dark}}|Lt. Surge}} | ||
| [[File:Lt Surge Raichu | | [[File:Lt Surge Raichu Mega Punch.png|150px|Electric Shock Showdown]]<br>''[[EP014|Electric Shock Showdown]]'' | ||
| style="color:#{{red color dark}}" | '''Loss''' | |||
| [[File:EP014.png|150px|Electric Shock Showdown]]<br>''[[EP014|Electric Shock Showdown]]'' | | [[File:EP014.png|150px|Electric Shock Showdown]]<br>''[[EP014|Electric Shock Showdown]]'' | ||
| style="color:#{{green color dark}}" | '''Victory''' | |||
|- | |- | ||
! style="background:#{{psychic color light}}" | [[File:Marsh Badge.png|40px|Marsh Badge]]<br>{{color2|{{psychic color dark}}|Sabrina}} | ! style="background:#{{psychic color light}}" | [[File:Marsh Badge.png|40px|Marsh Badge]]<br>{{color2|{{psychic color dark}}|Sabrina}} | ||
| [[File:EP022.png|150px|Abra and the Psychic Showdown]]<br>''[[EP022|Abra and the Psychic Showdown]]'' | | style="background:#FFF; vertical-align:top" | [[File:EP022.png|150px|Abra and the Psychic Showdown]]<br>''[[EP022|Abra and the Psychic Showdown]]'' | ||
| style="background:#FFF; color:#{{red color dark}}" | '''Forfeit''' | |||
| [[File:Sabrina and Haunter.png|150px|Haunter versus Kadabra]]<br>''[[EP024|Haunter versus Kadabra]]'' | | style="background:#FFF; vertical-align:top" | [[File:Sabrina and Haunter.png|150px|Haunter versus Kadabra]]<br>''[[EP024|Haunter versus Kadabra]]'' | ||
| style="background:#FFF; color:#{{green color dark}}" | '''Interrupted by {{color2|{{green color dark}}|Sabrina's Haunter|Haunter}}, who manages to break Sabrina out of her trance.<br>Ash receives Badge as a token of gratitude.''' | |||
|- | |- | ||
! style="background:#{{fire color light}}" | [[File:Volcano Badge.png|40px|Volcano Badge]]<br>{{color2|{{fire color dark}}|Blaine}} | ! style="background:#{{fire color light}}; {{roundybl|5px}}" | [[File:Volcano Badge.png|40px|Volcano Badge]]<br>{{color2|{{fire color dark}}|Blaine}} | ||
| [[File:Cinnabar Gym Battlefield.png|150px|Riddle Me This]]<br>''[[EP058|Riddle Me This]]'' | | style="background:#FFF; vertical-align:top" | [[File:Cinnabar Gym Battlefield.png|150px|Riddle Me This]]<br>''[[EP058|Riddle Me This]]'' | ||
| style="background:#FFF; color:#{{red color dark}}" | '''Forfeit''' | |||
| [[File:EP059.png|150px|Volcanic Panic]]<br>''[[EP059|Volcanic Panic]]'' | | style="background:#FFF; vertical-align:top" | [[File:EP059.png|150px|Volcanic Panic]]<br>''[[EP059|Volcanic Panic]]'' | ||
| style="background:#FFF; color:#{{green color dark}}; {{roundybr|5px}}" | '''Victory''' | |||
| | |} | ||
===[[Johto League]]=== | |||
{| class="roundy" style="border:3px solid #{{colorschemelight|Johto}}; background:#{{colorschemedark|Johto}}; margin:auto; text-align:center" | |||
! style="width:100px" | Opponent | |||
! style="width:200px" | First match | |||
! style="width:200px" | Result | |||
! style="width:200px" | Rematch | |||
! style="width:200px" | Result | |||
|- | |||
! style="background:#{{normal color light}}" | [[File:Plain Badge.png|40px|Plain Badge]]<br>{{color2|{{normal color dark}}|Whitney}} | ! style="background:#{{normal color light}}" | [[File:Plain Badge.png|40px|Plain Badge]]<br>{{color2|{{normal color dark}}|Whitney}} | ||
| [[File:EP158.png|150px|A Goldenrod Opportunity]]<br>''[[EP158|A Goldenrod Opportunity]]'' | | style="background:#FFF; vertical-align:top" | [[File:EP158.png|150px|A Goldenrod Opportunity]]<br>''[[EP158|A Goldenrod Opportunity]]'' | ||
| style="background:#FFF; color:#{{red color dark}}" | '''Loss''' | |||
| [[File:EP159.png|150px|A Dairy Tale Ending]]<br>''[[EP159|A Dairy Tale Ending]]'' | | style="background:#FFF; vertical-align:top" | [[File:EP159.png|150px|A Dairy Tale Ending]]<br>''[[EP159|A Dairy Tale Ending]]'' | ||
| style="background:#FFF; color:#{{green color dark}}" | '''Unofficial battle<br>Ash wins<br>Ash receives Badge despite the battle being unofficial.''' | |||
|- | |- | ||
! style="background:#{{ice color light}}" | [[File:Glacier Badge.png|40px|Glacier Badge]]<br>{{color2|{{ice color dark}}|Pryce}} | ! style="background:#{{ice color light}}" | [[File:Glacier Badge.png|40px|Glacier Badge]]<br>{{color2|{{ice color dark}}|Pryce}} | ||
| [[File:EP237.png|150px|As Cold as Pryce]]<br>''[[EP237|As Cold as Pryce]]'' | | style="background:#FFF; vertical-align:top" | [[File:EP237.png|150px|As Cold as Pryce]]<br>''[[EP237|As Cold as Pryce]]'' | ||
| style="background:#FFF; color:#{{red color dark}}" | '''Unofficial one-on-one battle<br>Ash loses''' | |||
| [[File:EP238.png|150px|Nice Pryce, Baby!]]<br>''[[EP238|Nice Pryce, Baby!]]'' | | style="background:#FFF; vertical-align:top" | [[File:EP238.png|150px|Nice Pryce, Baby!]]<br>''[[EP238|Nice Pryce, Baby!]]'' | ||
| style="background:#FFF; color:#{{green color dark}}" | '''Victory''' | |||
|- | |- | ||
! style="background:#{{dragon color light}}; {{roundybl|5px}}" |[[File:Rising Badge.png|40px|Rising Badge]]<br>{{color2|{{dragon color dark}}|Clair}} | ! style="background:#{{dragon color light}}; {{roundybl|5px}}" |[[File:Rising Badge.png|40px|Rising Badge]]<br>{{color2|{{dragon color dark}}|Clair}} | ||
| style="background:#FFF" | [[File:EP252.png|150px|Fangs for Nothin']]<br>''[[EP252|Fangs for Nothin']]'' | | style="background:#FFF; vertical-align:top" | [[File:EP252.png|150px|Fangs for Nothin']]<br>''[[EP252|Fangs for Nothin']]'' | ||
| style="background:#FFF; color:#{{red color dark}}" | '''Interrupted by<br>{{color2|{{red color dark}}|Team Rocket trio|Team Rocket}}''' | |||
| style="background:#FFF" | [[File:EP254.png|150px|Better Eight Than Never]]<br>''[[EP254|Better Eight Than Never]]'' | | style="background:#FFF; vertical-align:top" | [[File:EP254.png|150px|Better Eight Than Never]]<br>''[[EP254|Better Eight Than Never]]'' | ||
| style="background:#FFF; color:#{{green color dark}}; {{roundybr|5px}}" | '''Victory''' | |||
|} | |} | ||
=== | ===[[Hoenn League]]=== | ||
{| class="roundy" style="border:3px solid #{{colorschemelight|Hoenn}}; background:#{{colorschemedark|Hoenn}}; margin:auto; text-align:center" | {| class="roundy" style="border:3px solid #{{colorschemelight|Hoenn}}; background:#{{colorschemedark|Hoenn}}; margin:auto; text-align:center" | ||
| | ! style="width:100px" | Opponent | ||
! | ! style="width:200px" | First match | ||
! style="width:200px" | Result | |||
! width | ! style="width:200px" | Rematch | ||
! width | ! style="width:200px" | Result | ||
! width | |||
|- style="background:#FFF" | |- style="background:#FFF" | ||
! style="background:#{{fighting color light}}" | [[File:Knuckle Badge.png|40px|Knuckle Badge]]<br>{{color2|{{fighting color dark}}|Brawly}} | ! style="background:#{{fighting color light}}" | [[File:Knuckle Badge.png|40px|Knuckle Badge]]<br>{{color2|{{fighting color dark}}|Brawly}} | ||
| [[File:Brawly Makuhita Vital Throw1.png|150px|Brave the Wave]]<br>''[[AG020|Brave the Wave]]'' | | [[File:Brawly Makuhita Vital Throw1.png|150px|Brave the Wave]]<br>''[[AG020|Brave the Wave]]'' | ||
| style="color:#{{red color dark}}" | '''Loss''' | |||
| [[File:AG031.png|150px|Just One of the Geysers]]<br>''[[AG031|Just One of the Geysers]]'' | | [[File:AG031.png|150px|Just One of the Geysers]]<br>''[[AG031|Just One of the Geysers]]'' | ||
| style="color:#{{green color dark}}" | '''Victory''' | |||
|- style="background:#FFF" | |- style="background:#FFF" | ||
! style="background:#{{electric color light}}" | [[File:Dynamo Badge.png|40px|Dynamo Badge]]<br>{{color2|{{electric color dark}}|Wattson}} | ! style="background:#{{electric color light}}" | [[File:Dynamo Badge.png|40px|Dynamo Badge]]<br>{{color2|{{electric color dark}}|Wattson}} | ||
| [[File:AG040.png|150px|Watt's with Wattson?]]<br>''[[AG040|Watt's with Wattson?]]'' | | [[File:AG040.png|150px|Watt's with Wattson?]]<br>''[[AG040|Watt's with Wattson?]]'' | ||
| style="color:#{{green color dark}}" | '''Ash wins with an overcharged {{color2|{{green color dark}}|Ash's Pikachu|Pikachu}}.<br>Wattson insists Ash keeps the Badge.''' | |||
| [[File:AG059.png|150px|Manectric Charge]]<br>''[[AG059|Manectric Charge]]'' | | [[File:AG059.png|150px|Manectric Charge]]<br>''[[AG059|Manectric Charge]]'' | ||
| style="color:#{{red color dark}}" | '''Unofficial rematch<br>Ash loses''' | |||
|- style="background:#FFF" | |- style="background:#FFF" | ||
! style="background:#{{normal color light}}" | [[File:Balance Badge.png|40px|Balance Badge]]<br>{{color2|{{normal color dark}}|Norman}} | ! style="background:#{{normal color light}}; {{roundybl|5px}}" | [[File:Balance Badge.png|40px|Balance Badge]]<br>{{color2|{{normal color dark}}|Norman}} | ||
| [[File:AG003.png|150px|There's No Place Like Hoenn]]<br>''[[AG003|There's No Place Like Hoenn]]'' | | [[File:AG003.png|150px|There's No Place Like Hoenn]]<br>''[[AG003|There's No Place Like Hoenn]]'' | ||
| style="color:#{{red color dark}}" | '''Unofficial one-on-one battle<br>Ash loses''' | |||
| [[File:AG070.png|150px|Balance of Power]]<br>''[[AG070|Balance of Power]]'' | | [[File:AG070.png|150px|Balance of Power]]<br>''[[AG070|Balance of Power]]'' | ||
| style="color:#{{green color dark}}; {{roundybr|5px}}" | '''Official match<br>Ash wins''' | |||
|} | |||
==={{gdis|Battle Frontier|III}}=== | |||
{| class="roundy" style="border:3px solid #{{colorschemelight|Frontier}}; background:#{{colorschemedark|Frontier}}; margin:auto; text-align:center" | |||
! style="width:100px" | Opponent | |||
! style="width:200px" | First match | |||
! style="width:200px" | Result | |||
! style="width:200px" | Rematch | |||
! style="width:200px" | Result | |||
|- style="background:#FFF" | |- style="background:#FFF" | ||
! style="background:#{{frontier color light}}" | [[File:Abilitysymbol.png|40px|Ability Symbol]]<br>{{color2|{{frontier color dark}}|Anabel}} | ! style="background:#{{frontier color light}}" | [[File:Abilitysymbol.png|40px|Ability Symbol]]<br>{{color2|{{frontier color dark}}|Salon Maiden Anabel|Anabel}} | ||
| [[File:AG169.png|150px|Talking a Good Game!]]<br>''[[AG169|Talking a Good Game!]]'' | | [[File:AG169.png|150px|Talking a Good Game!]]<br>''[[AG169|Talking a Good Game!]]'' | ||
| style="color:#{{red color dark}}" | '''Loss''' | |||
| [[File:AG170.png|150px|Second Time's the Charm!]]<br>''[[AG170|Second Time's the Charm!]]'' | | [[File:AG170.png|150px|Second Time's the Charm!]]<br>''[[AG170|Second Time's the Charm!]]'' | ||
| style="color:#{{green color dark}}" | '''Victory''' | |||
|- | |- | ||
| style="background:#{{frontier color light}}; {{roundybl|5px}}" rowspan="2" | [[File:Bravesymbol.png|40px|Brave Symbol]]<br>'''{{color2|{{frontier color dark}}|Pyramid King Brandon|Brandon}}''' | | style="background:#{{frontier color light}}; {{roundybl|5px}}" rowspan="2" | [[File:Bravesymbol.png|40px|Brave Symbol]]<br>'''{{color2|{{frontier color dark}}|Pyramid King Brandon|Brandon}}''' | ||
| Line 390: | Line 406: | ||
! style="background:#FFF; color:#{{red color dark}}" rowspan="2" | Ash is {{color2|{{red color dark}}|King of Pokélantis|possessed}}, and the match is declared unofficial. | ! style="background:#FFF; color:#{{red color dark}}" rowspan="2" | Ash is {{color2|{{red color dark}}|King of Pokélantis|possessed}}, and the match is declared unofficial. | ||
| style="background:#FFF" | [[File:AG186.png|150px|Overjoyed!]]<br>''[[AG186|Overjoyed!]]'' | | style="background:#FFF" | [[File:AG186.png|150px|Overjoyed!]]<br>''[[AG186|Overjoyed!]]'' | ||
| style="background:#FFF; color:#{{red color dark}}" | '''First official match<br>Ash loses''' | |||
|- | |- | ||
| style="background:#FFF" | [[File:AG190.png|150px|Pace - The Final Frontier!]]<br>''[[AG190|Pace - The Final Frontier!]]'' | | style="background:#FFF" | [[File:AG190.png|150px|Pace - The Final Frontier!]]<br>''[[AG190|Pace - The Final Frontier!]]'' | ||
| style="background:#FFF; color:#{{green color dark}}; {{roundybr|5px}}" | '''Second official match<br>Ash wins''' | |||
|} | |} | ||
=== | ===[[Sinnoh League]]=== | ||
{| class="roundy" style="border:3px solid #{{colorschemelight|Sinnoh}}; background:#{{colorschemedark|Sinnoh}}; margin:auto; text-align:center" width=" | {| class="roundy" style="border:3px solid #{{colorschemelight|Sinnoh}}; background:#{{colorschemedark|Sinnoh}}; margin:auto; text-align:center" | ||
! style="width:100px" | Opponent | |||
! style="width:200px" | First match | |||
! style="width:200px" | Result | |||
! style="width:200px" | Rematch | |||
! style="width:200px" | Result | |||
|- | |- | ||
! style="background:#{{rock color light}}" | [[File:Coal Badge.png|40px|Coal Badge]]<br>{{color2|{{rock color dark}}|Roark}} | ! style="background:#{{rock color light}}" | [[File:Coal Badge.png|40px|Coal Badge]]<br>{{color2|{{rock color dark}}|Roark}} | ||
| [[File:DP016.png|150px|A Gruff Act to Follow!]]<br>''[[DP016|A Gruff Act to Follow!]]'' | | style="background:#FFF; vertical-align:top" | [[File:DP016.png|150px|A Gruff Act to Follow!]]<br>''[[DP016|A Gruff Act to Follow!]]'' | ||
| style="background:#FFF; color:#{{red color dark}}" | '''Loss''' | |||
| [[File:DP018.png|150px|O'er the Rampardos We Watched!]]<br>''[[DP018|O'er the Rampardos We Watched!]]'' | | style="background:#FFF; vertical-align:top" | [[File:DP018.png|150px|O'er the Rampardos We Watched!]]<br>''[[DP018|O'er the Rampardos We Watched!]]'' | ||
| style="background:#FFF; color:#{{green color dark}}" | '''Victory''' | |||
|- | |- | ||
! style="background:#{{grass color light}}" | [[File:Forest Badge.png|40px|Forest Badge]]<br>{{color2|{{grass color dark}}|Gardenia}} | ! style="background:#{{grass color light}}" | [[File:Forest Badge.png|40px|Forest Badge]]<br>{{color2|{{grass color dark}}|Gardenia}} | ||
| [[File:DP031.png|150px|The Grass-Type Is Always Greener!]]<br>''[[DP031|The Grass-Type Is Always Greener!]]'' | | style="background:#FFF; vertical-align:top" | [[File:DP031.png|150px|The Grass-Type Is Always Greener!]]<br>''[[DP031|The Grass-Type Is Always Greener!]]'' | ||
| style="background:#FFF; color:#{{red color dark}}" | '''Unofficial battle<br>Ash loses''' | |||
| [[File:DP037.png|150px|The Grass Menagerie!]]<br>''[[DP037|The Grass Menagerie!]]'' | | style="background:#FFF; vertical-align:top" | [[File:DP037.png|150px|The Grass Menagerie!]]<br>''[[DP037|The Grass Menagerie!]]'' | ||
| style="background:#FFF; color:#{{green color dark}}" | '''Victory''' | |||
|- | |- | ||
! style="background:#{{ghost color light}}" | [[File:Relic Badge.png|40px|Relic Badge]]<br>{{color2|{{ghost color dark}}|Fantina}} | ! style="background:#{{ghost color light}}" | [[File:Relic Badge.png|40px|Relic Badge]]<br>{{color2|{{ghost color dark}}|Fantina}} | ||
| [[File:Fantina Drifblim Hypnosis.png|150px|Playing the Leveling Field!]]<br>''[[DP093|Playing the Leveling Field!]]'' | | style="background:#FFF; vertical-align:top" | [[File:Fantina Drifblim Hypnosis.png|150px|Playing the Leveling Field!]]<br>''[[DP093|Playing the Leveling Field!]]'' | ||
| style="background:#FFF; color:#{{red color dark}}" | '''Unofficial battle<br>Forfeit''' | |||
| [[File:DP102.png|150px|Shield with a Twist!]]<br>''[[DP102|Shield with a Twist!]]'' | | style="background:#FFF; vertical-align:top" | [[File:DP102.png|150px|Shield with a Twist!]]<br>''[[DP102|Shield with a Twist!]]'' | ||
| style="background:#FFF; color:#{{green color dark}}" | '''Victory''' | |||
|- | |- | ||
! style="background:#{{electric color light}}; {{roundybl|5px}}" |[[File:Beacon Badge.png|40px|Beacon Badge]]<br>{{color2|{{electric color dark}}|Volkner}} | ! style="background:#{{electric color light}}; {{roundybl|5px}}" |[[File:Beacon Badge.png|40px|Beacon Badge]]<br>{{color2|{{electric color dark}}|Volkner}} | ||
| style="background:#FFF" | [[File:Volkner Luxray Spark.png| | | style="background:#FFF; vertical-align:top" | [[File:Volkner Luxray Spark.png|200px|The Fleeing Tower of Sunyshore!]]<br>''[[DP166|The Fleeing Tower of Sunyshore!]]'' | ||
| style="background:#FFF; color:#{{red color dark}}" | '''Interrupted by {{color2|{{red color dark}}|Team Rocket trio|Team Rocket}}''' | |||
| style="background:#FFF" | [[File:DP179.png| | | style="background:#FFF; vertical-align:top" | [[File:DP179.png|200px|The Eighth Wonder of the Sinnoh World!]]<br>''[[DP179|The Eighth Wonder of the Sinnoh World!]]'' | ||
| style="background:#FFF; color:#{{green color dark}}; {{roundybr|5px}}" | '''Victory''' | |||
|} | |} | ||
=== | ===[[Unova League]]=== | ||
{| class="roundy" style="border:3px solid #{{colorschemelight|Unova}}; background:#{{colorschemedark|Unova}}; margin:auto; text-align:center" | {| class="roundy" style="border:3px solid #{{colorschemelight|Unova}}; background:#{{colorschemedark|Unova}}; margin:auto; text-align:center" | ||
! style="width:100px" | Opponent | |||
! | ! style="width:200px" | First match | ||
! | ! style="width:200px" | Result | ||
! | ! style="width:200px" | Rematch | ||
! | ! style="width:200px" | Result | ||
! | |||
|- | |- | ||
! style="background:#{{normal color light}}; {{roundybl|5px}}" | [[File:Basic Badge.png|40px|Basic Badge]]<br>{{color2|{{normal color dark}}|Lenora}} | ! style="background:#{{normal color light}}; {{roundybl|5px}}" | [[File:Basic Badge.png|40px|Basic Badge]]<br>{{color2|{{normal color dark}}|Lenora}} | ||
| style="background:#FFF" | [[File:BW015.png|200px|The Battle According to Lenora!]]<br>''[[BW015|The Battle According to Lenora!]]'' | | style="background:#FFF" | [[File:BW015.png|200px|The Battle According to Lenora!]]<br>''[[BW015|The Battle According to Lenora!]]'' | ||
| style="background:#FFF; color:#{{red color dark}}" | '''Loss''' | |||
| style="background:#FFF" | [[File:BW016.png|200px|Rematch at the Nacrene Gym!]]<br>''[[BW016|Rematch at the Nacrene Gym!]]'' | | style="background:#FFF" | [[File:BW016.png|200px|Rematch at the Nacrene Gym!]]<br>''[[BW016|Rematch at the Nacrene Gym!]]'' | ||
| style="background:#FFF; color:#{{green color dark}}; {{roundybr|5px}}" | '''Victory''' | |||
|} | |} | ||
=== | ===[[Kalos League]]=== | ||
{| class="roundy" style="border:3px solid #{{colorschemelight|Kalos}}; background:#{{colorschemedark|Kalos}}; margin:auto; text-align:center" | {| class="roundy" style="border:3px solid #{{colorschemelight|Kalos}}; background:#{{colorschemedark|Kalos}}; margin:auto; text-align:center" | ||
| | ! style="width:100px" | Opponent | ||
! style="width:200px" | First match | |||
! First match | ! style="width:200px" | Result | ||
! Result | ! style="width:200px" | Rematch | ||
! Rematch | ! style="width:200px" | Result | ||
! Result | |||
|- | |- | ||
! style="background:#{{bug color light}}" | [[File:Bug Badge.png|40px|Bug Badge]]<br>{{color2|{{bug color dark}}|Viola}} | ! style="background:#{{bug color light}}" | [[File:Bug Badge.png|40px|Bug Badge]]<br>{{color2|{{bug color dark}}|Viola}} | ||
| style="background:#FFF" | [[File:XY005.png|200px]]<br>''[[XY005|A Blustery Santalune Gym Battle!]]'' | | style="background:#FFF" | [[File:XY005.png|200px]]<br>''[[XY005|A Blustery Santalune Gym Battle!]]'' | ||
| style="background:#FFF; color:#{{red color dark}}" | '''Loss''' | |||
| style="background:#FFF" | [[File:XY006.png|200px]]<br>''[[XY006|Battling on Thin Ice!]]'' | | style="background:#FFF" | [[File:XY006.png|200px]]<br>''[[XY006|Battling on Thin Ice!]]'' | ||
| style="background:#FFF; color:#{{green color dark}}" | '''Victory''' | |||
|- | |- | ||
| style="background:#{{fighting color light}}" rowspan="3" | [[File:Rumble Badge.png|40px|Rumble Badge]]<br>'''{{color2|{{fighting color dark}}|Korrina}}''' | | style="background:#{{fighting color light}}" rowspan="3" | [[File:Rumble Badge.png|40px|Rumble Badge]]<br>'''{{color2|{{fighting color dark}}|Korrina}}''' | ||
| Line 465: | Line 478: | ||
! style="background:#FFF; color:#{{red color dark}}" rowspan="3" | First unofficial battle<br>Loss | ! style="background:#FFF; color:#{{red color dark}}" rowspan="3" | First unofficial battle<br>Loss | ||
| style="background:#FFF" | [[File:Korrina Mega Lucario berserk.png|200px|The Aura Storm!]]<br>''[[XY032|The Aura Storm!]]'' | | style="background:#FFF" | [[File:Korrina Mega Lucario berserk.png|200px|The Aura Storm!]]<br>''[[XY032|The Aura Storm!]]'' | ||
| style="background:#FFF; color:#{{red color dark}}" | '''Second unofficial battle<br>Battle called off due to {{color2|{{red color dark}}|Korrina's Lucario|Lucario}} losing control.''' | |||
|- | |- | ||
| style="background:#FFF" | [[File:XY033.png|200px|Calling from Beyond the Aura!]]<br>''[[XY033|Calling from Beyond the Aura!]]'' | | style="background:#FFF" | [[File:XY033.png|200px|Calling from Beyond the Aura!]]<br>''[[XY033|Calling from Beyond the Aura!]]'' | ||
| style="background:#FFF; color:#{{red color dark}}" | '''Third unofficial battle<br>Battle called off due to {{color2|{{red color dark}}|Korrina's Lucario|Lucario}} losing control again.''' | |||
|- | |- | ||
| style="background:#FFF" | [[File:XY044.png|200px|XY044]]<br>''[[XY044|Showdown at the Shalour Gym!]]'' | | style="background:#FFF" | [[File:XY044.png|200px|XY044]]<br>''[[XY044|Showdown at the Shalour Gym!]]'' | ||
| style="background:#FFF; color:#{{green color dark}}" | '''Official battle<br>Victory''' | |||
|- | |- | ||
! style="background:#{{electric color light}}" | [[File:Voltage Badge.png|40px|Voltage Badge]]<br>{{color2|{{electric color dark}}|Clemont (anime)|Clemont}} | ! style="background:#{{electric color light}}" | [[File:Voltage Badge.png|40px|Voltage Badge]]<br>{{color2|{{electric color dark}}|Clemont (anime)|Clemont}} | ||
| style="background:#FFF" | [[File:XY001 Ash VS Clemont.png|200px]]<br>''[[XY001|Kalos, Where Dreams and Adventures Begin!]]'' | | style="background:#FFF; vertical-align:top" | [[File:XY001 Ash VS Clemont.png|200px]]<br>''[[XY001|Kalos, Where Dreams and Adventures Begin!]]'' | ||
| style="background:#FFF; color:#{{red color dark}}" | '''Unofficial battle<br>Interrupted by {{color2|{{red color dark}}|Team Rocket trio|Team Rocket}}''' | |||
| style="background:#FFF" | [[File:XY067.png|200px]]<br>''[[XY067|The Moment of Lumiose Truth!]]'' | | style="background:#FFF; vertical-align:top" | [[File:XY067.png|200px]]<br>''[[XY067|The Moment of Lumiose Truth!]]'' | ||
| style="background:#FFF; color:#{{green color dark}}" | '''Official battle<br>Victory''' | |||
|- | |- | ||
! style="background:#{{ice color light}}; {{roundybl|5px}}" | [[File:Iceberg Badge.png|40px|Iceberg Badge]]<br>{{color2|{{ice color dark}}|Wulfric}} | ! style="background:#{{ice color light}}; {{roundybl|5px}}" | [[File:Iceberg Badge.png|40px|Iceberg Badge]]<br>{{color2|{{ice color dark}}|Wulfric}} | ||
| style="background:#FFF" | [[File:XY120.png|200px]]<br>''[[XY120|All Hail the Ice Battlefield!]]'' | | style="background:#FFF" | [[File:XY120.png|200px]]<br>''[[XY120|All Hail the Ice Battlefield!]]'' | ||
| style="background:#FFF; color:#{{red color dark}}" | '''Loss''' | |||
| style="background:#FFF" | [[File:XY122.png|200px]]<br>''[[XY122|A Real Icebreaker!]]'' | | style="background:#FFF" | [[File:XY122.png|200px]]<br>''[[XY122|A Real Icebreaker!]]'' | ||
| style="background:#FFF; color:#{{green color dark}}; {{roundybr|5px}}" | '''Victory''' | |||
|} | |} | ||
=== | ===[[Island challenge]]=== | ||
{| class="roundy" style="border:3px solid #{{colorschemelight|Alola}}; background:#{{colorschemedark|Alola}}; margin:auto; text-align:center" width=" | {| class="roundy" style="border:3px solid #{{colorschemelight|Alola}}; background:#{{colorschemedark|Alola}}; margin:auto; text-align:center" | ||
! style="width:100px" | Opponent | |||
! style="width:200px" | First match | |||
! style="width:200px" | Result | |||
! style="width:200px" | Rematch | |||
! style="width:200px" | Result | |||
|- | |- | ||
! style="background:#{{dark color light}}" | [[File:Dream Darkinium Z Sprite.png|40px|Darkinium Z]]<br>{{color2|{{dark color dark}}|Nanu}} | |||
! style="background:#{{dark color light | |||
| style="background:#FFF" | [[File:Nanu Krookodile Sand Tomb.png|200px]]<br>''[[SM074|Tough Guy Trials!]]'' | | style="background:#FFF" | [[File:Nanu Krookodile Sand Tomb.png|200px]]<br>''[[SM074|Tough Guy Trials!]]'' | ||
| style="background:#FFF; color:#{{red color dark}}" | '''Unofficial battle<br>Loss''' | |||
| style="background:#FFF" | [[File:SM077.png|200px]]<br>''[[SM077|Guiding an Awakening!]]'' | | style="background:#FFF" | [[File:SM077.png|200px]]<br>''[[SM077|Guiding an Awakening!]]'' | ||
! style="background:#FFF; color:#{{green color dark}}; {{roundybr|5px}}" | Victory<br>Awarded the {{color2|{{green color dark}}| | | style="background:#FFF; color:#{{green color dark}}" | '''Victory<br>Awarded the {{color2|{{green color dark}}|Lycanium Z}}''' | ||
|- | |||
! style="background:#{{ground color light}}; {{roundybl|5px}}" | [[File:Dream Groundium Z Sprite.png|40px|Groundium Z]]<br>{{color2|{{ground color dark}}|Hapu}} | |||
| style="background:#FFF" | [[File:SM104.png|200px]]<br>''[[SM104|That's Some Spicy Island Research!]]'' | |||
| style="background:#FFF; color:#{{red color dark}}" | '''Unofficial battle<br>Loss''' | |||
| style="background:#FFF" | [[File:SM109.png|200px]]<br>''[[SM109|A Grand Debut!]]'' | |||
| style="background:#FFF; color:#{{green color dark}}; {{roundybr|5px}}" | '''Victory<br>Awarded the {{color2|{{green color dark}}|Steelium Z}}''' | |||
|} | |} | ||
| Line 515: | Line 533: | ||
|ko= | |ko= | ||
|no=Omkamp | |no=Omkamp | ||
|pl=Rewanż | |||
|es= | |es= | ||
|sv=Revanchmatch<br>Retur-match | |sv=Revanchmatch<br>Retur-match | ||
| Line 526: | Line 545: | ||
[[de:Rückkämpfe]] | [[de:Rückkämpfe]] | ||
[[es:Revancha]] | |||
[[fr:Revanche]] | [[fr:Revanche]] | ||
[[it:Rivincita (lotta Pokémon)]] | [[it:Rivincita (lotta Pokémon)]] | ||
[[ja:再戦]] | [[ja:再戦]] | ||
[[zh:重复对战]] | [[zh:重复对战]] | ||
Revision as of 20:07, 10 May 2019

|
This article is incomplete. Please feel free to edit this article to add missing information and complete it. Reason: Missing Japanese name and update on ORAS and SM |
A rematch or re-battle is a second or subsequent battle against a Trainer or Pokémon.
In the core series games, it is mandatory for the player to defeat certain Trainers to advance within the game. Technically, if the player is defeated, they are given the chance to battle this opponent again until defeated (barring exceptional circumstances), but this isn't considered a rematch.
Most of the time, however, if a Trainer is defeated, that Trainer will not be available for a rematch until certain conditions have been met. When Trainers usually agree to rematch, their Pokémon will have become stronger (level up or evolution), or they would already have acquired more Pokémon (sometimes from another region, once the player has obtained the National Pokédex).
Types of rematch

Elite Four and Champion
The Elite Four and Champion/Rival can be re-battled in all core series games; in Generation I, they are the only Trainers that can be re-battled. Starting in Pokémon FireRed and LeafGreen, rematches against the Elite Four and Champion may feature teams at higher levels, sometimes with different Pokémon and movesets.
Rival
Since Generation I, the player's rival plays a key role within the game, occasionally giving hints, helping out or even challenging the player to a rematch. With the exception of Brendan and May, the player's rival can be repeatedly rematched after entering the Hall of Fame of that region. In Silver's case however, he can only be rematched after the battle in Mt. MoonGSC or the Multi Battle with him in Dragon's DenHGSS.
The following table shows where and when the player's Rival can be challenged for subsequent rematches:
| Region | Rival | Time and location for (the most recent) rematch | |
|---|---|---|---|
| Kanto | BlueRBYFRLG | Any time | Indigo Plateau |
| TracePE | |||
| Johto | Silver | Mondays and Wednesdays | Indigo Plateau |
| Hoenn | Wally | Once per day | Victory RoadRSE |
| Battle MaisonORAS | |||
| Sinnoh | Barry | Saturdays and Sundays | Fight AreaDP |
| Survival AreaPt | |||
| Unova | CherenBW | Once per day | Victory Road |
| BiancaBW | Saturdays and Sundays | Nuvema Town | |
| HughB2W2 | Once per day | Driftveil City | |
| Kalos | Calem* or Serena* | Once per day | Kiloude City |
| Alola | Hau | Any time | Pokémon League (Title Defense) |
| Gladion | Any time | Pokémon League (Title Defense) | |
Regular Trainers
From Generation II onwards, with the exception of Pokémon Black and White and X and Y, some regular Trainers found along normal routes and caves can be challenged for a rematch.
In Pokémon Gold, Silver, and Crystal and Pokémon HeartGold and SoulSilver, the player can exchange Pokégear phone numbers with specific Trainers, allowing them to contact the player for a rematch. In Pokémon HeartGold and SoulSilver, the Trainers' teams have three different difficulty levels: the first level is used in the first rematch, the second after the player has first entered the Hall of Fame, and the third after the player has obtained all 16 Badges.
In Pokémon Ruby, Sapphire, and Emerald, the PokéNav's Trainer's Eyes or Match Call has similar functions to the Pokégear, keeping track of Trainers who eventually want to re-battle the player. In Pokémon Omega Ruby and Alpha Sapphire, the Trainer's Eye function returns, and Trainers are ready for a rematch more frequently than in Generation III; in these games, the Trainers' teams improve as the player progresses through the game, and are at their strongest after the player has entered the Hall of Fame.
In Pokémon FireRed and LeafGreen and Pokémon Diamond, Pearl, and Platinum, while outdoors, the player can use the Vs. Seeker to check which nearby Trainers are ready for a rematch.
In Pokémon Diamond, Pearl, and Platinum, certain Trainers can be challenged daily at the Seven Stars Restaurant. In Pokémon Diamond and Pearl, the player can battle one Trainer per day at Jubilife TV, with the Trainer that appears varying with the day of the week. In Pokémon Platinum, players can challenge several Trainers that appear in different Pokémon Centers once per day each, as well as repeatedly battle the Maids in the 5-Maid Knockout Exact-Turn Attack Challenge in the Pokémon Mansion.
In Pokémon Black and White and Pokémon Black 2 and White 2, Trainers in the Big Stadium and Small Court of Nimbasa City can be rematched daily. As the player progresses through the game, the Trainers' Pokémon are battled at higher levels, and will be at their strongest after the player has entered the Hall of Fame. Some Trainers may replace their Pokémon. In Pokémon Black 2 and White 2, Pokémon Breeders will re-challenge the player upon sight (as long as the player has left the area since their last battle), even if the player had previously defeated them; however, their teams remain the same during each battle.
In Pokémon X and Y, Trainers in the Battle Chateau can be battled each time that Trainer has entered the Battle Chateau. Only those whose rank is the same as or lower than the player's will appear. The player can purchase writs to have an effect on three different factors (party levels, prize money, and Trainer arrival rate) for the remainder of that day, although issued writs can be swapped out if the new one has the same type of effect.
In Pokémon Sun, Moon, Ultra Sun, and Ultra Moon, certain Trainers can be challenged daily at the Battle Buffet at Hau'oli City's Shopping District.
In Pokémon Colosseum and Pokémon XD, there are certain areas that allow for multiple rematches, most notably in Pyrite Town's Duel Square. Other locations such as Agate Village and The Under Subway allow for rematches only after getting past a certain point in the game.
Gym Leaders
Gym Leader rematches were first introduced in Pokémon Emerald. They are featured in all subsequent core series games, except for Pokémon Diamond, Pearl, Black, White, Omega Ruby, and Alpha Sapphire.
Pokémon Emerald

|
This section is incomplete. Please feel free to edit this section to add missing information and complete it. |
In Pokémon Emerald, after the player has entered the Hall of Fame, each Gym Leader will offer to rematch the player in a Double Battle via the PokéNav's Match Call. Unlike regular Trainers, walking in the same area as a Gym Leader does not make them more likely to be ready for a rematch.
Pokémon Platinum
- Main article: Battleground
In Pokémon Platinum, the Gym Leaders of Sinnoh, together with the player's previous Multi Battle partners, can be found in the Battleground. Up to four of these Trainers appear each day and they can be battled only once a day. The residing Trainers are generated upon entering the Battleground, potentially allowing for different Trainers after game resets.
Pokémon HeartGold and SoulSilver
- Main article: Fighting Dojo
In Pokémon HeartGold and SoulSilver, the Gym Leaders of Kanto and Johto are found in the Fighting Dojo. However, unlike Platinum, the Leaders will not arrive at the Dojo until they have been called on for a rematch.
To re-battle a Gym Leader, the player has to first obtain the Gym Leader's number. Following that, the player can call the Gym Leader at any time, but he or she will only accept a rematch when their schedule is free.
When a Gym Leader has accepted a rematch, he or she will stay in the Fighting Dojo until he or she is defeated. There is no limit to the number of times a Gym Leader can be rematched.
Note that the phone numbers for most of the Leaders can be obtained after defeating the Elite Four. However, rematches with the Gym Leaders cannot be scheduled until after the Earth Badge has been obtained (i.e. Blue has been defeated).
Gym Leader phone listing
Each Leader's telephone number must be obtained from them personally when he or she is out of their Gym (except Chuck and Blue, which have to be obtained from their wife and sister respectively). By speaking with them at the appropriate time and place, players can obtain their phone numbers.
The following table shows how each Leader's number can be obtained:
| Johto Gym Leaders | |||||
|---|---|---|---|---|---|
| Leader | Day | Time | Location | Pre-requisites (post-Hall of Fame) | |
| Falkner | Monday | Any time | Celadon Department Store, 4F | Must have beaten Janine | |
| Bugsy | Thursday | Any time | Viridian Forest | None | |
| Whitney | Any day | 12:00 PM to 4:00 PM |
Goldenrod Department Store, 6F | None | |
| Morty | Monday or Tuesday | Any time | Bellchime Trail | None | |
| Chuck | Any day | Any time | From Chuck's wife at Cianwood City | None | |
| Jasmine | Any day | 1:00 PM to 2:00 PM |
Olivine Café | None | |
| Pryce | Any day | 6:00 AM to 10:00 AM |
By the Lake of Rage | None | |
| Clair | Any day | 6:00 AM to 10:00 AM |
Inside Dragon's Den | Must have defeated her and Lance in a Multi Battle | |
| Kanto Gym Leaders | |||||
| Leader | Day | Time | Location | Pre-requisites (post-Hall of Fame) | |
| Badges? | Additional requirements | ||||
| Brock | Any day | 12:00 PM to 3:00 PM |
Inside Diglett's Cave | All 16 | None |
| Misty | Any day | 4:00 PM to 6:00 PM |
Route 25 | All 16 | Will not appear if Suicune is present |
| Lt. Surge | Any day | 9:00 AM to 11:00 AM |
Outside Kanto Power Plant | All 16 | Appears after Zapdos is captured. Gives his phone number if the player is walking with a Pikachu |
| Erika | Saturday or Sunday | 3:00 PM to 5:00 PM |
Celadon City fountain | All 16 | None |
| Janine | Any day | 4:00 PM to 6:00 PM |
Pokémon League Reception Gate | Any number | Defeat Janine |
| Sabrina | Friday | Any time | Olivine Harbor | Any number | Defeat Sabrina, must have S.S. Ticket |
| Blaine | Tuesday | Any time | Cinnabar Island | All 16 | None |
| Blue | Any day | Any time | From Daisy Oak at Pallet Town | All 16 | After having at least seven massages and showing Daisy a Pokémon with max friendship (from 3 pm to 3:59 pm only) |
Gym Leader rematch schedule
The following table shows when the Gym Leaders are free to accept a rematch.
As midnight to 3:59 AM is considered to be "night" by the game, any Leader who can be battled at night can be battled from midnight to 3:59 AM or from 8:00 PM to 11:59 PM.
Gym Leaders' Schedule
| ||||||||||||||||||||||||||||||||||||||||||||||||||||||||
|---|---|---|---|---|---|---|---|---|---|---|---|---|---|---|---|---|---|---|---|---|---|---|---|---|---|---|---|---|---|---|---|---|---|---|---|---|---|---|---|---|---|---|---|---|---|---|---|---|---|---|---|---|---|---|---|---|
Pokémon Black 2 and White 2
- Main article: Pokémon World Tournament
In Black 2 and White 2, Gym Leaders can be rematched in the Unova Leaders Tournament at the Pokémon World Tournament.
Pokémon X and Y
- Main article: Battle Chateau
In X and Y, the Gym Leaders of Kalos can be rematched at the Battle Chateau once the player has reached the rank of Marquis or Marchioness. The Gym Leaders use two of their Pokémon, who start at level 40. After the player has entered the Hall of Fame, the base level of their team is changed to level 50, and the Pokémon for some of the Gym Leaders have been replaced.
Unlike in previous games, the Elite Four and Champion of Kalos do not receive higher level teams when rematched at the Pokémon League. Instead, they can also be encountered at the Chateau. The Elite Four can be rematched when the player reaches the rank of Duke or Duchess. They use three Pokémon at the base level of 55. Finally, Champion Diantha can be rematched when the player reaches the highest rank, Grand Duke or Grand Duchess, respectively. She uses four Pokémon, including her Mega Gardevoir, at the base level of 60.
Like other Trainers at the Battle Chateau, issuing certain writs can be used to adjust the levels of the teams used there by Gym Leaders, the Elite Four, and Diantha, as well as giving them the chance to appear more frequently.
Pokémon: Let's Go, Pikachu! and Let's Go, Eevee!
In Pokémon: Let's Go, Pikachu! and Let's Go, Eevee!, after the player has entered the Hall of Fame, each Gym Leader of Kanto can be rematched at their respective Gym once per day. At the Viridian Gym, Blue is battled instead of Giovanni. In addition, the Pokémon League can also be challenged again, with all Elite Four members possessing a Kanto Pokémon's Alola Form.
Legendary and special encounter Pokémon
In all games, being defeated by a Legendary Pokémon does not cause it to disappear. In all games in which roaming Pokémon exist, fleeing from them does not cause them to permanently disappear; the game simply behaves the same as if they were the ones to flee.
Prior to Pokémon FireRed and LeafGreen, fleeing from stationary Legendary Pokémon causes the Pokémon to permanently disappear.
In Pokémon FireRed, LeafGreen, and Emerald, if the player flees from a stationary Legendary Pokémon, it will reappear upon leaving and re-entering the room. The game informs the player that "The <Pokémon> flew away!"
In Pokémon Platinum, if the player defeats or flees from a stationary Legendary Pokémon, it reappears after the player next enters the Hall of Fame. If the player defeats a roaming Pokémon, it will reappear only after the player has re-triggered the event which caused it to start roaming; for example, the player must talk to Professor Oak to cause a Legendary bird to resume roaming. If the player flees from or defeats Origin Forme Giratina in the Distortion World, it will reappear in Turnback Cave in its Altered Forme, where it behaves in the same way as all other stationary Legendary Pokémon.
This was extended to all stationary Pokémon (red Gyarados, Sudowoodo, and Snorlax) in HeartGold and SoulSilver. If Suicune is defeated or fled from, Eusine will comment on this fact, and it will instead reappear at the Burned Tower, where it behaves in the same way as all other stationary Legendary Pokémon. If Ho-OhHG or LugiaSS is defeated or fled from during the storyline, the Kimono Girls will comment on this fact before leaving; however, the Pokémon still behave like any other stationary Pokémon.
In Pokémon Black and White, ReshiramB or ZekromW must be caught; defeating, fleeing from or losing to the Pokémon does not cause it to disappear, the battle yields no experience, and the story cannot be progressed until it is caught. However, if the player has a full party and PC, it is possible to progress without catching it, in which case it instead appears at Dragonspiral Tower after defeating Ghetsis, where it behaves in the same way as all other stationary Legendary Pokémon, except that it will still not give any experience points.
In Pokémon X and Y, XerneasX or YveltalY must be caught; defeating, fleeing from or losing to it does not cause it to disappear, the battle yields no experience, and the story cannot be progressed until it is caught. The 31st box in the Pokémon Storage System does not become available until after the player catches it, so it is not possible to avoid the capture even if the player's party and PC are both full.
In Pokémon Omega Ruby and Alpha Sapphire, if the player defeats GroudonOR or KyogreAS instead of catching them in the main story, they will reappear in the Cave of Origin after entering the Hall of Fame. During the Delta Episode, Rayquaza must be caught; defeating, fleeing from or losing to it does not cause it to disappear, the battle yields no experience, and the story cannot be progressed until it is caught. The 31st box in the Pokémon Storage System does not become available until after the player catches Rayquaza, so it is not possible to avoid the capture even if the player's party and PC are both full. If the player flees from or defeats Deoxys in during the Delta Episode, it will reappear at the Dragonhark altar atop the Sky Pillar after entering the Hall of Fame again, where it behaves in the same way as all other stationary Legendary Pokémon.
In Pokémon Sun and Moon, SolgaleoS or LunalaM must be caught; defeating, fleeing from or losing to it does not cause it to disappear, the battle yields no experience, and the story cannot be progressed until it is caught. The 31st box in the Pokémon Storage System does not become available until after the player catches the Legendary Pokémon. If the player defeats, flees from, or loses to Tapu Koko instead of catching it during the post-credits event, Lillie will comment on this fact, and Tapu Koko will immediately be available to battle again at the Ruins of Conflict. If the player defeats, flees from or loses to a roaming Ultra Beast or Necrozma, it will continue to reappear in the area until it is caught (the game reassures the player that it is still in the area).
In Pokémon Ultra Sun and Ultra Moon, SolgaleoUS or LunalaUM must be caught for it to disappear; defeating, fleeing from or losing to it does not cause it to disappear and the battle yields no experience. The 31st box in the Pokémon Storage System does not become available until after the player catches the Legendary Pokémon.
In spin-off series
In the Pokémon Mystery Dungeon series
In the Pokémon Mystery Dungeon series, Legendary Pokémon that have been battled and are involved in the storyline must be fought again in order to be recruited.
In the Pokémon Ranger series
In the Pokémon Ranger series, the Drowsy Guy will allow the player to re-do a memorable capture. In Pokémon Ranger, he allows the player to re-capture the Legendary beasts, while in the sequel, he allows the player to re-capture Darkrai. In Pokémon Ranger: Guardian Signs, Nema allows the player to re-battle several Boss Pokémon on a model of Dolce Island via the use of her "Many Times Any Time Capture Machine".
In the anime
With the exception of the Orange League, Ash has had rematches with least one Gym Leader, Frontier Brain or Island Kahuna in each leg of his journey. It is noted that the list does not list any match-up which could not be defined as a battle.
Indigo League
| Opponent | First match | Result | Rematch | Result |
|---|---|---|---|---|
Brock |
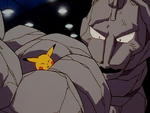 Showdown in Pewter City |
Forfeit | 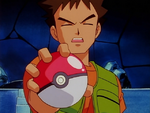 Showdown in Pewter City |
Ash forfeits again, but Brock rewards his Badge in recognition of Ash's compassion. |
Misty |
 The Water Flowers of Cerulean City |
Interrupted by Team Rocket Ash earns Badge as thanks for protecting the Gym. |
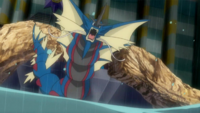 When Regions Collide! |
Demonstration battle Victory |
Lt. Surge |
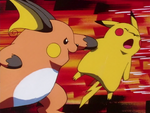 Electric Shock Showdown |
Loss | 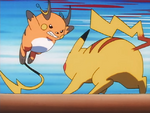 Electric Shock Showdown |
Victory |
Sabrina |
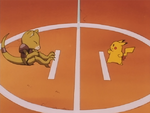 Abra and the Psychic Showdown |
Forfeit |  Haunter versus Kadabra |
Interrupted by Haunter, who manages to break Sabrina out of her trance. Ash receives Badge as a token of gratitude. |
Blaine |
 Riddle Me This |
Forfeit | 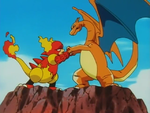 Volcanic Panic |
Victory |
Johto League
| Opponent | First match | Result | Rematch | Result |
|---|---|---|---|---|
Whitney |
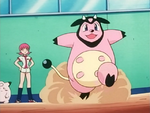 A Goldenrod Opportunity |
Loss | 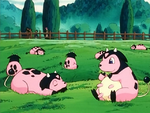 A Dairy Tale Ending |
Unofficial battle Ash wins Ash receives Badge despite the battle being unofficial. |
Pryce |
 As Cold as Pryce |
Unofficial one-on-one battle Ash loses |
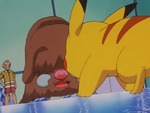 Nice Pryce, Baby! |
Victory |
Clair |
 Fangs for Nothin' |
Interrupted by Team Rocket |
 Better Eight Than Never |
Victory |
Hoenn League
| Opponent | First match | Result | Rematch | Result |
|---|---|---|---|---|
Brawly |
 Brave the Wave |
Loss |  Just One of the Geysers |
Victory |
Wattson |
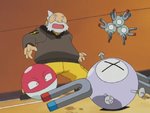 Watt's with Wattson? |
Ash wins with an overcharged Pikachu. Wattson insists Ash keeps the Badge. |
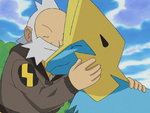 Manectric Charge |
Unofficial rematch Ash loses |
Norman |
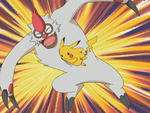 There's No Place Like Hoenn |
Unofficial one-on-one battle Ash loses |
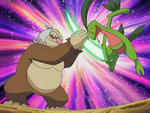 Balance of Power |
Official match Ash wins |
Battle Frontier
| Opponent | First match | Result | Rematch | Result |
|---|---|---|---|---|
Anabel |
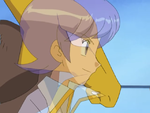 Talking a Good Game! |
Loss | 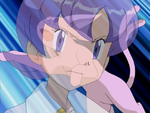 Second Time's the Charm! |
Victory |
Brandon |
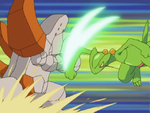 Battling the Enemy Within! |
Ash is possessed, and the match is declared unofficial. | 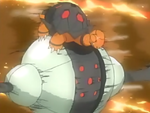 Overjoyed! |
First official match Ash loses |
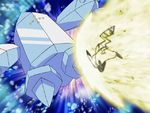 Pace - The Final Frontier! |
Second official match Ash wins |
Sinnoh League
| Opponent | First match | Result | Rematch | Result |
|---|---|---|---|---|
Roark |
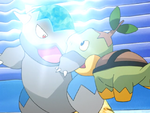 A Gruff Act to Follow! |
Loss | 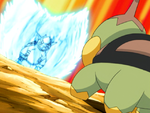 O'er the Rampardos We Watched! |
Victory |
Gardenia |
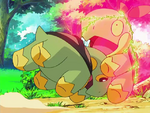 The Grass-Type Is Always Greener! |
Unofficial battle Ash loses |
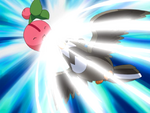 The Grass Menagerie! |
Victory |
Fantina |
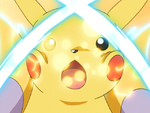 Playing the Leveling Field! |
Unofficial battle Forfeit |
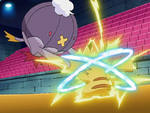 Shield with a Twist! |
Victory |
Volkner |
 The Fleeing Tower of Sunyshore! |
Interrupted by Team Rocket |  The Eighth Wonder of the Sinnoh World! |
Victory |
Unova League
| Opponent | First match | Result | Rematch | Result |
|---|---|---|---|---|
Lenora |
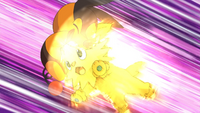 The Battle According to Lenora! |
Loss | 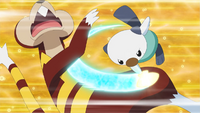 Rematch at the Nacrene Gym! |
Victory |
Kalos League
| Opponent | First match | Result | Rematch | Result |
|---|---|---|---|---|
Viola |
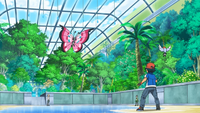 A Blustery Santalune Gym Battle! |
Loss | 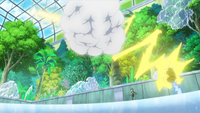 Battling on Thin Ice! |
Victory |
Korrina |
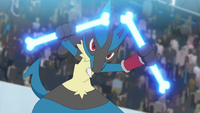 Mega Revelations! |
First unofficial battle Loss |
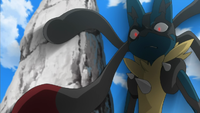 The Aura Storm! |
Second unofficial battle Battle called off due to Lucario losing control. |
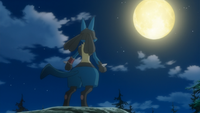 Calling from Beyond the Aura! |
Third unofficial battle Battle called off due to Lucario losing control again. | |||
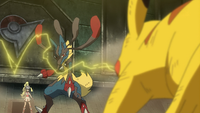 Showdown at the Shalour Gym! |
Official battle Victory | |||
Clemont |
 Kalos, Where Dreams and Adventures Begin! |
Unofficial battle Interrupted by Team Rocket |
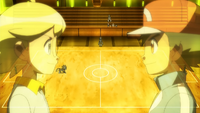 The Moment of Lumiose Truth! |
Official battle Victory |
Wulfric |
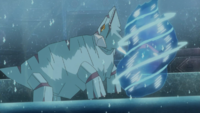 All Hail the Ice Battlefield! |
Loss | 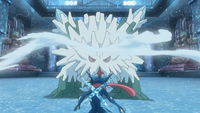 A Real Icebreaker! |
Victory |
Island challenge
| Opponent | First match | Result | Rematch | Result |
|---|---|---|---|---|
Nanu |
 Tough Guy Trials! |
Unofficial battle Loss |
 Guiding an Awakening! |
Victory Awarded the Lycanium Z |
Hapu |
 That's Some Spicy Island Research! |
Unofficial battle Loss |
 A Grand Debut! |
Victory Awarded the Steelium Z |
Trivia
- Giovanni is the only in-game Gym Leader that cannot be rematched an indefinite amount of times. However, he can be battled multiple times via an event at Tohjo Falls, if the player has multiple Celebi. Koga, the other former Kanto Gym Leader, has been able to be rematched indefinitely since Generation II, where he was an Elite Four member.
In other languages
| ||||||||||||||||||||||||||||||

|
This game mechanic article is part of Project Games, a Bulbapedia project that aims to write comprehensive articles on the Pokémon games. |

