Pokémon Omega Ruby and Pokémon Alpha Sapphire Special Demo Version: Difference between revisions
Tiddlywinks (talk | contribs) (→Gameplay: Not half so awkward. And I always thought there was no way to just delete the save data) |
|||
| (10 intermediate revisions by 6 users not shown) | |||
| Line 1: | Line 1: | ||
{{Infobox_game |colorscheme=Omega Ruby |bordercolorscheme=Alpha Sapphire| | {{Infobox_game |colorscheme=Omega Ruby |bordercolorscheme=Alpha Sapphire| | ||
|name=Pokémon Omega Ruby and Pokémon Alpha Sapphire Special Demo Version | |name={{color|fff|Pokémon Omega Ruby and Pokémon Alpha Sapphire Special Demo Version}} | ||
|jname=ポケットモンスター オメガルビー・アルファサファイア 特別体験版 | |jname={{color|fff|ポケットモンスター オメガルビー・アルファサファイア 特別体験版}} | ||
|boxart=ORAS Prerelease Demo Intro.png | |boxart=ORAS Prerelease Demo Intro.png | ||
|caption=Screenshot of [[Mossdeep City]] from the Demo Version | |caption=Screenshot of [[Mossdeep City]] from the Demo Version | ||
| Line 40: | Line 40: | ||
If the player faints during any adventure, they will be returned to Mossdeep City standing in front of Steven and the Pokémon Center, with everything reset to its default state. That is, no items will have been used or experience gained and all progress is reset; not even the mission type or the Trainer class or bonus NPC that was present are saved for random mission adventures. During the first adventure, however, losing the first battle at Mossdeep City or the battle with Steelix/Glalie does not cause the player to faint. | If the player faints during any adventure, they will be returned to Mossdeep City standing in front of Steven and the Pokémon Center, with everything reset to its default state. That is, no items will have been used or experience gained and all progress is reset; not even the mission type or the Trainer class or bonus NPC that was present are saved for random mission adventures. During the first adventure, however, losing the first battle at Mossdeep City or the battle with Steelix/Glalie does not cause the player to faint. | ||
The player's default inventory consists of three | The player's default inventory consists of three [[Hyper Potion]]s, three [[Full Heal]]s, and (after the first adventure) the [[Key Stone|Mega Bracelet]]. Pokémon are only allowed to [[held item|hold]] Mega Stones. The other items that Steven rewards the player with after completing certain adventures cannot be used within the Demo Version. | ||
When the Demo Version is started with no saved data, it will randomly choose a theme: "red" or "blue". Throughout the Demo Version, this variable controls: the title screen's theme (Team Aqua for blue or Team Magma for red), the team that appears during missions or as NPCs at Mossdeep City, and the Pokémon that Steven rides ({{p|Latios}} for blue, {{p|Latias}} for red). This variable switches its value after every adventure that is completed, so that the adventures have alternating themes. It also switches its value if the player sends any of their rewards to their full Omega Ruby or Alpha Sapphire game. | When the Demo Version is started with no saved data, it will randomly choose a theme: "red" or "blue". Throughout the Demo Version, this variable controls: the title screen's theme (Team Aqua for blue or Team Magma for red), the team that appears during missions or as NPCs at Mossdeep City, and the Pokémon that Steven rides ({{p|Latios}} for blue, {{p|Latias}} for red). This variable switches its value after every adventure that is completed, so that the adventures have alternating themes. It also switches its value if the player sends any of their rewards to their full Omega Ruby or Alpha Sapphire game. | ||
| Line 93: | Line 93: | ||
At the back end of the island cave, the player will find {{tc|Aqua Admin}} {{FB|Aqua Admin|Matt}} and {{tc|Magma Admin}} [[Tabitha]], who call a truce to take the player down. Before the battle can begin, however, Steven arrives, presenting the player with three gifts to shift the battle in their favor. First, he overwrites the player's Pokémon's [[status move]] with its respective {{m|Hyper Beam}} variant ({{m|Frenzy Plant}}, {{m|Blast Burn}}, or {{m|Hydro Cannon}}). Then he gives the player a [[Key Stone|Mega Bracelet]] and gives the player's Pokémon its respective [[Mega Stone]] to hold. He encourages the player to test these powers in the battle with the admins. | At the back end of the island cave, the player will find {{tc|Aqua Admin}} {{FB|Aqua Admin|Matt}} and {{tc|Magma Admin}} [[Tabitha]], who call a truce to take the player down. Before the battle can begin, however, Steven arrives, presenting the player with three gifts to shift the battle in their favor. First, he overwrites the player's Pokémon's [[status move]] with its respective {{m|Hyper Beam}} variant ({{m|Frenzy Plant}}, {{m|Blast Burn}}, or {{m|Hydro Cannon}}). Then he gives the player a [[Key Stone|Mega Bracelet]] and gives the player's Pokémon its respective [[Mega Stone]] to hold. He encourages the player to test these powers in the battle with the admins. | ||
After defeating the admins and clearing [[Team Magma]] and [[Team Aqua]] off the island, Steven leads the player to a deeper part of the cave, where a single patch of [[tall grass]] houses the Pokémon sought by the two villainous teams. Steven gives the player five | After defeating the admins and clearing [[Team Magma]] and [[Team Aqua]] off the island, Steven leads the player to a deeper part of the cave, where a single patch of [[tall grass]] houses the Pokémon sought by the two villainous teams. Steven gives the player five {{i|Poké Ball}}s to catch the Pokémon. After a successful catch, the two Trainers return to Mossdeep City, the adventure ends, and progress is saved. | ||
===Subsequent adventures=== | ===Subsequent adventures=== | ||
| Line 111: | Line 111: | ||
One is a follow-up to the Demo Version's first adventure, where one of the evil teams has shown up again and Orlando must battle them with the help of {{ga|May}}. It takes place at the Mirage Cave north of {{rt|124|Hoenn}}. This mission appears entirely randomly and is very rare, possibly on the order of {{pkmn2|Shiny}} chances (one in thousands). However, once the mission has been completed once, it may be started again at any time by selecting "Let's go somewhere secret!" from Steven's menu of options. | One is a follow-up to the Demo Version's first adventure, where one of the evil teams has shown up again and Orlando must battle them with the help of {{ga|May}}. It takes place at the Mirage Cave north of {{rt|124|Hoenn}}. This mission appears entirely randomly and is very rare, possibly on the order of {{pkmn2|Shiny}} chances (one in thousands). However, once the mission has been completed once, it may be started again at any time by selecting "Let's go somewhere secret!" from Steven's menu of options. | ||
The other is a mission where the player investigates a strange man who ends up gifting the player a | The other is a mission where the player investigates a strange man who ends up gifting the player a [[Nugget]], which may be transferred to the Omega Ruby and Alpha Sapphire games. It takes place at the Mirage Island north of {{rt|111|Hoenn}}. When this mission's conditions are met, it preempts the other random missions so that it is the only one that will appear. Its only requirement is that fifteen days have passed since the first adventure was completed. | ||
==Completion bonuses== | ==Completion bonuses== | ||
| Line 141: | Line 141: | ||
===Transferrable rewards=== | ===Transferrable rewards=== | ||
{{itlisth|water}} | {{itlisth|water}} | ||
{{Itemlist|None|sprite=208MS|Complete the first adventure (Japanese region)|OR=yes|AS=yes|display={{p|Steelix}} and | {{Itemlist|None|sprite=208MS|Complete the first adventure (Japanese region)|OR=yes|AS=yes|display={{p|Steelix}} and [[Steelixite]]}} | ||
{{Itemlist|None|sprite=362MS|Complete the first adventure (Korean, PAL, and American regions)|OR=yes|AS=yes|display={{p|Glalie}} and | {{Itemlist|None|sprite=362MS|Complete the first adventure (Korean, PAL, and American regions)|OR=yes|AS=yes|display={{p|Glalie}} and [[Glalitite]]}} | ||
{{Itemlist|Poké Ball|Complete three adventures|OR=yes|AS=yes|display={{ | {{Itemlist|Poké Ball|Complete three adventures|OR=yes|AS=yes|display={{i|Poké Ball}} ×10}} | ||
{{Itemlist|Heal Ball|Complete five adventures|OR=yes|AS=yes|display= | {{Itemlist|Heal Ball|Complete five adventures|OR=yes|AS=yes|display=[[Heal Ball]] ×10}} | ||
{{Itemlist|Heart Scale|Complete ten adventures|OR=yes|AS=yes|display= | {{Itemlist|Heart Scale|Complete ten adventures|OR=yes|AS=yes|display=[[Heart Scale]] ×5}} | ||
{{Itemlist|Nugget|Complete the special Nugget mission|OR=yes|AS=yes | {{Itemlist|Nugget|Complete the special Nugget mission|OR=yes|AS=yes}} | ||
{{itlistfoot|water}} | {{itlistfoot|water}} | ||
| Line 155: | Line 155: | ||
|border=Alpha Sapphire | |border=Alpha Sapphire | ||
|ball=Poké | |ball=Poké | ||
|balllink=Poké Ball (item) | |||
|pokemon=Glalie | |pokemon=Glalie | ||
|nick=Glalie{{tt|*|The player has the opportunity to nickname it after capture}} | |nick=Glalie{{tt|*|The player has the opportunity to nickname it after capture}} | ||
| Line 181: | Line 182: | ||
|border=Alpha Sapphire | |border=Alpha Sapphire | ||
|ball=Poké | |ball=Poké | ||
|balllink=Poké Ball (item) | |||
|pokemon=Steelix | |pokemon=Steelix | ||
|nick=Steelix{{tt|*|The player has the opportunity to nickname it after capture}} | |nick=Steelix{{tt|*|The player has the opportunity to nickname it after capture}} | ||
| Line 541: | Line 543: | ||
==Gallery== | ==Gallery== | ||
<gallery> | |||
Canada ORAS Special Demo Version code.png|Code card given away at {{pmin|Canada}}'s Pokémon Video Game Event 2014 | |||
<!--EU Special Demo Code.png|Code card given out at select stores in the European region--> | |||
ORAS Demo icon.png|Home Menu icon | |||
| | </gallery> | ||
| | |||
==Trivia== | ==Trivia== | ||
* | *New moves cannot be learned when leveling up. | ||
*Evolution cannot be canceled. | |||
*All Trainers the player faces in the demo also appear in the Pokémon Omega Ruby and Alpha Sapphire games, though they have different teams. Some Trainers mention the places where they normally train. | *All Trainers the player faces in the demo also appear in the Pokémon Omega Ruby and Alpha Sapphire games, though they have different teams. Some Trainers mention the places where they normally train. | ||
*All of the "lost" NPCs in the missions to find a lost person/Pokémon are located where an item would be on the Mirage spot in the full Omega Ruby and Alpha Sapphire games. In most cases, the item would be a visible item, but on the [[Mirage Islands|Mirage Island]] west of Dewford Town, the NPC occupies the location of the hidden item. | *All of the "lost" NPCs in the missions to find a lost person/Pokémon are located where an item would be on the Mirage spot in the full Omega Ruby and Alpha Sapphire games. In most cases, the item would be a visible item, but on the [[Mirage Islands|Mirage Island]] west of Dewford Town, the NPC occupies the location of the hidden item. | ||
| Line 565: | Line 565: | ||
[[Category:Nintendo 3DS games]] | [[Category:Nintendo 3DS games]] | ||
[[es:Demo especial de Pokémon Rubí Omega y Pokémon Zafiro Alfa]] | |||
[[fr:Pokémon Rubis Oméga et Saphir Alpha : Version démo spéciale]] | [[fr:Pokémon Rubis Oméga et Saphir Alpha : Version démo spéciale]] | ||
[[it:Pokémon Rubino Omega e Zaffiro Alpha Versione Demo Speciale]] | [[it:Pokémon Rubino Omega e Zaffiro Alpha Versione Demo Speciale]] | ||
[[ja:ポケットモンスター オメガルビー・アルファサファイア 特別体験版]] | |||
Revision as of 10:55, 17 June 2019
| Pokémon Omega Ruby and Pokémon Alpha Sapphire Special Demo Version ポケットモンスター オメガルビー・アルファサファイア 特別体験版 | |
|---|---|
 Screenshot of Mossdeep City from the Demo Version | |
Basic info
| |
| Platform: | Nintendo 3DS (digital) |
| Category: | RPG demo |
| Players: | 1 player |
| Connectivity: | None |
| Developer: | Game Freak |
| Publisher: | Nintendo/The Pokémon Company |
| Part of: | Generation VI |
Ratings
| |
| CERO: | A |
| ESRB: | E |
| ACB: | PG |
| OFLC: | PG |
| PEGI: | 7 |
| GRAC: | ALL |
| GSRR: | N/A |
Release dates
| |
| Japan: | October 15, 2014 |
| North America: | October 21, 2014 |
| Australia: | October 15, 2014 |
| Europe: | October 15, 2014 |
| South Korea: | October 15, 2014 |
| Hong Kong: | N/A |
| Taiwan: | N/A |
Websites
| |
| Japanese: | Official Japanese sub-page |
| English: | Official English sub-page |
|
Japanese boxart
 Japanese title screen | |
The Pokémon Omega Ruby and Pokémon Alpha Sapphire Special Demo Version (Japanese: ポケットモンスター オメガルビー・アルファサファイア 特別体験版 Pokémon Omega Ruby and Pokémon Alpha Sapphire Special Demo Version) is a special, expanded demo edition of Pokémon Omega Ruby and Alpha Sapphire. It is an unlimited-use demo that is downloadable on Nintendo's 3DS eShop, but could originally only be accessed via serial code. The serial code began distribution around October 15, 2014, but the date varies by country and provider. Codes for the demo expired on May 31, 2015. It later became available for download from the eShop in North America and Europe on December 27, 2014, and in Japan from August 2 to September 30, 2016.
Gameplay
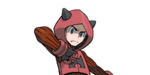
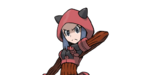
In the Demo Version, players assume the role of the promotional player character Orlando (Japanese: オメガ Omega), who shares the appearance of Brendan. The Demo is set in Mossdeep City and various Mirage spots. During the first adventure, the player assists Steven in stopping Team Aqua or Team Magma's plot to catch a Pokémon that can Mega Evolve. Subsequent adventures feature the player helping Steven complete other miscellaneous missions, including a couple of special missions that only appear rarely or when the right conditions are met. On every fifth adventure, the player will face an Expert who will challenge the player to a battle.
During gameplay, the player can only access the Pokémon and Bag menu options, and when the menu is closed, the bottom screen shows TV Mauville's Pokémon News on the BuzzNav. The Demo Version only saves after the player has completed an adventure, immediately before it returns to the title screen.
As the player clears more adventures, more non-playable characters (NPCs) will fill Mossdeep City and Steven will reward the player with items that can be transferred to the Pokémon Omega Ruby and Alpha Sapphire games. Clearing the first adventure also allows the player to transfer a Steelix or Glalie with its Mega Stone to the main games. After the first adventure, once a day, the player may talk to Steven to transfer the new Mega Pokémon or items to their full Omega Ruby or Alpha Sapphire game via Pokémon Link. There is no restriction on sending items to a full game, but if an Omega Ruby or Alpha Sapphire game has previously received a Steelix or Glalie from a Demo Version, it will not be able to receive another.
If the player faints during any adventure, they will be returned to Mossdeep City standing in front of Steven and the Pokémon Center, with everything reset to its default state. That is, no items will have been used or experience gained and all progress is reset; not even the mission type or the Trainer class or bonus NPC that was present are saved for random mission adventures. During the first adventure, however, losing the first battle at Mossdeep City or the battle with Steelix/Glalie does not cause the player to faint.
The player's default inventory consists of three Hyper Potions, three Full Heals, and (after the first adventure) the Mega Bracelet. Pokémon are only allowed to hold Mega Stones. The other items that Steven rewards the player with after completing certain adventures cannot be used within the Demo Version.
When the Demo Version is started with no saved data, it will randomly choose a theme: "red" or "blue". Throughout the Demo Version, this variable controls: the title screen's theme (Team Aqua for blue or Team Magma for red), the team that appears during missions or as NPCs at Mossdeep City, and the Pokémon that Steven rides (Latios for blue, Latias for red). This variable switches its value after every adventure that is completed, so that the adventures have alternating themes. It also switches its value if the player sends any of their rewards to their full Omega Ruby or Alpha Sapphire game.
The game's save data can be erased by pressing the Up, B, and X buttons simultaneously on the Demo's title screen.
First adventure
The Demo Version features a unique scenario that begins in Mossdeep City, where Steven requests the player's assistance at the Mossdeep Space Center, where they are intercepted by a male and female pair of Team Magma or Team Aqua Grunts. The player is given a choice between a level 35 Grovyle, Combusken, and Marshtomp to help Steven fight them off.
|
|
| ||||||||||||||||||||||||||||||||||||||||||||||||||||||||||||||||||||||||||||||||||||||||||||||||||||


After the battle, Professor Cozmo will inform the player and Steven that the evil team they just fought is seeking out a Pokémon with a recently discovered Mega Evolution. After Steven gets the coordinates of the unnamed island where the Pokémon is located, the player is allowed to explore Mossdeep City before returning to Steven to begin their pursuit.
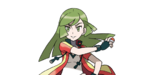
After riding Latios or Latias to an unnamed island, Steven will tell the player to go forward, where they'll encounter wild Pokémon, several grunts from each team, and May, who came to investigate but was overpowered by the enemy. May will heal the player's team after the player's battle inside the cave. At this point, the player's Pokémon will have received enough experience to reach its final evolutionary form.
At the back end of the island cave, the player will find Aqua Admin Matt and Magma Admin Tabitha, who call a truce to take the player down. Before the battle can begin, however, Steven arrives, presenting the player with three gifts to shift the battle in their favor. First, he overwrites the player's Pokémon's status move with its respective Hyper Beam variant (Frenzy Plant, Blast Burn, or Hydro Cannon). Then he gives the player a Mega Bracelet and gives the player's Pokémon its respective Mega Stone to hold. He encourages the player to test these powers in the battle with the admins.
After defeating the admins and clearing Team Magma and Team Aqua off the island, Steven leads the player to a deeper part of the cave, where a single patch of tall grass houses the Pokémon sought by the two villainous teams. Steven gives the player five Poké Balls to catch the Pokémon. After a successful catch, the two Trainers return to Mossdeep City, the adventure ends, and progress is saved.
Subsequent adventures
All adventures after the fifth adventure where the player does not have to battle an Expert can be one of three random types of missions. The second, third, and fourth adventures introduce the player to these missions and are not random, with the second adventure requiring the player to battle three Trainers, the third requiring the player to find a lost Pokémon or person (a Whismur, a Youngster, or a Twin—Gina, separated from her sister Mia), and the fourth requiring the player to find a Pokémon (a Poochyena, Skitty, or Shroomish). The lost characters will be partially hidden, while Pokémon inhabitants can be found by stepping to the left or right of an open patch in the middle of the tall grass. Immediately after an Expert battle adventure, any of these three missions may be randomly selected, but in the subsequent adventures, the mission type that was completed in the previous adventure will not be selected.
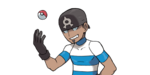
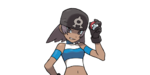
Trainers also appear in the random missions. The Trainers that appear will always be of the same Trainer class, with six different Trainer classes available to be randomly selected. The Trainer class that was present during the most recent random mission that was completed will not be selected, however. During Trainer battle missions, three Trainers will be present, but during the other missions, only two will be present.
A bonus NPC may also randomly appear at the destination Mirage spot during the random missions. These NPCs may be: Aarune, Lisia, an old man from Cave of Origin, one of the cardinal sisters from Mauville City, or a Scientist working for Captain Stern.
The location of the random missions is also randomly chosen from five different Mirage spots. Those locations are: the Mirage Islands west of Dewford Town (a beach) and north of Route 125 (an island with ruins), the Mirage Forest south of Route 109 (a circular path in a forest), and the Mirage Mountains northeast of Route 125 (on the cliffs of a mountain) and southeast of Route 129 (a small mountain). The expert battle always happens at the Mirage Cave west of Route 115.
All adventures after the first start with the player having the same party, consisting of a level 40 Steelix or Glalie and a level 36 Sceptile, Blaziken, and Swampert. If the player sends Steelix/Glalie to a full Omega Ruby or Alpha Sapphire game, however, it will not be part of the player's party. All Pokémon hold their respective Mega Stones.
Special missions
During the adventures where random missions are possible, two special missions may also be selected.
One is a follow-up to the Demo Version's first adventure, where one of the evil teams has shown up again and Orlando must battle them with the help of May. It takes place at the Mirage Cave north of Route 124. This mission appears entirely randomly and is very rare, possibly on the order of Shiny chances (one in thousands). However, once the mission has been completed once, it may be started again at any time by selecting "Let's go somewhere secret!" from Steven's menu of options.
The other is a mission where the player investigates a strange man who ends up gifting the player a Nugget, which may be transferred to the Omega Ruby and Alpha Sapphire games. It takes place at the Mirage Island north of Route 111. When this mission's conditions are met, it preempts the other random missions so that it is the only one that will appear. Its only requirement is that fifteen days have passed since the first adventure was completed.
Completion bonuses
Completing certain adventures may add NPCs around Mossdeep City or a new BuzzNav program. The new NPCs have a set location, and for each location there are three different sets of NPCs that are randomly chosen each time the Demo Version loads.
- After adventure 1: new BuzzNav program, "A Special Lesson from the Trainers' School"
- After adventure 2: new NPCs on the west beach
- Flannery being interviewed by Gabby and Ty
- Three Team Aqua/Magma grunts
- Three Swimmers
- After adventure 4: new BuzzNav program, Trouble Talk, and a new NPC southeast of the Pokémon Center
- After adventure 6: new NPCs in the southwest of the city
- Brawly and Roxanne
- Captain Stern and Dock
- A Black Belt and Schoolkid
- After adventure 7: new NPC west of the Space Center
- After adventure 8: new NPC east of the house north of the Pokémon Center
- Fossil Maniac
- Shroomish
- An old man
After 15 days have passed since the first adventure was finished, a number of changes also occur around Mossdeep City. Tate and Liza's quotes when they are directly spoken to change, and the little brother of the Poké Mart owner has left Mossdeep for Oldale Town. The invisible Kecleon that was blocking the door to Steven's house is also gone, allowing the player to enter it.
Transferrable rewards
| Item | Location | Games | |
|---|---|---|---|
| Steelix and Steelixite | Complete the first adventure (Japanese region) | OR AS | |
| Glalie and Glalitite | Complete the first adventure (Korean, PAL, and American regions) | OR AS | |
| Poké Ball ×10 | Complete three adventures | OR AS | |
| Heal Ball ×10 | Complete five adventures | OR AS | |
| Heart Scale ×5 | Complete ten adventures | OR AS | |
| Nugget | Complete the special Nugget mission | OR AS | |
Mega-Evolving Pokémon
Korean, PAL, and American regions
|
| |||||||||||||||||||||||||
| ||||||||||||||||||||||||||
| ||||||||||||||||||||||||||
| Moves in bold can be taught again at the Move Reminder if forgotten. | ||||||||||||||||||||||||||
| This Pokémon is set to the same language as the game that received it. | ||||||||||||||||||||||||||

Japanese region
|
| ||||||||||||||||||||||||||
| |||||||||||||||||||||||||||
| |||||||||||||||||||||||||||
| Moves in bold can be taught again at the Move Reminder if forgotten. | |||||||||||||||||||||||||||
| This Pokémon is set to the same language as the game that received it. | |||||||||||||||||||||||||||

Trainers
The player is given prize money after all Trainer battles, but there is no way to spend money in the demo, nor is there a way to import that money to the main game.
First adventure
Mossdeep City
| Trainer | Pokémon | |||||||||||
|---|---|---|---|---|---|---|---|---|---|---|---|---|
|
| |||||||||||
| or | ||||||||||||
|
| |||||||||||
Mirage Cave north of Fallarbor Town
| Trainer | Pokémon | |||||||||||
|---|---|---|---|---|---|---|---|---|---|---|---|---|
|
| |||||||||||
|
| |||||||||||
|
| |||||||||||
|
| |||||||||||
|
|||||||||||||||||||||||||||||||||||||||||||||||||||||||||||||||||||||||
| |||||||||||||||||||||||||||||||||||||||||||||||||||||||||||||||||||||||


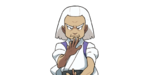
Steven (partner)
Steven only partners with the player for the battle with Tabitha and Matt.
|
||||||||||||||||||||||||||||||||||||
| ||||||||||||||||||||||||||||||||||||


Random missions
These Trainers may appear in any of the regular random missions (excluding special missions, that is), including during adventures 2, 3, and 4. Any Trainers that appear during the mission will be from the same Trainer class. In those missions with only two Trainers, only the first two Trainers of any Trainer class listed below will be present. When all three Trainers are present, the first two will be in the same position as they are in the other missions, while the third Trainer may be in one of two different positions.
| Trainer | Pokémon | |||||||||||
|---|---|---|---|---|---|---|---|---|---|---|---|---|
| Ace Trainers | ||||||||||||
|
| |||||||||||
|
| |||||||||||
|
| |||||||||||
| Aroma Ladies | ||||||||||||
|
| |||||||||||
|
| |||||||||||
|
| |||||||||||
| Battle Girls | ||||||||||||
|
| |||||||||||
|
| |||||||||||
|
| |||||||||||
| Campers | ||||||||||||
|
| |||||||||||
|
| |||||||||||
|
| |||||||||||
| Rich Boys | ||||||||||||
|
| |||||||||||
|
| |||||||||||
|
| |||||||||||
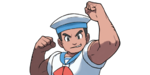
| Sailors | ||||||||||||
|
| |||||||||||
|
| |||||||||||
|
| |||||||||||

Expert mission
Expert missions occur every fifth adventure, with Expert Timothy appearing during the fifth adventure and Expert Theodore during all others.
| Trainer | Pokémon | |||||||||||
|---|---|---|---|---|---|---|---|---|---|---|---|---|
|
| |||||||||||
| ||||||||||||
| ||||||||||||
|
| |||||||||||
| ||||||||||||
| ||||||||||||
| ||||||||||||
Special Team Aqua/Magma mission
May will team up with Orlando to battle Team Aqua/Magma during this mission.
Team Aqua
| Trainer | Pokémon | |||||||||||
|---|---|---|---|---|---|---|---|---|---|---|---|---|
|
| |||||||||||
|
| |||||||||||
|
| |||||||||||
|
| |||||||||||
|
|||||||||||||||||||||||||||||||||||||||||||||||||||||||||||||||||||||||||||||||||||||||||||||||||||||||||||||||||||||||||||||||||||||||||
| |||||||||||||||||||||||||||||||||||||||||||||||||||||||||||||||||||||||||||||||||||||||||||||||||||||||||||||||||||||||||||||||||||||||||


Team Magma
| Trainer | Pokémon | |||||||||||
|---|---|---|---|---|---|---|---|---|---|---|---|---|
|
| |||||||||||
|
| |||||||||||
|
| |||||||||||
|
| |||||||||||
|
|||||||||||||||||||||||||||||||||||||||||||||||||||||||||||||||||||||||||||||||||||||||||||||||||||||||||||||||||||||||||||||||||||||||||||
| |||||||||||||||||||||||||||||||||||||||||||||||||||||||||||||||||||||||||||||||||||||||||||||||||||||||||||||||||||||||||||||||||||||||||||


May (partner)
|
|||||||||||||||||||||||||||||||||||||||||||||||||||||||||||||||||||||
| |||||||||||||||||||||||||||||||||||||||||||||||||||||||||||||||||||||


Gallery
Code card given away at Canada's Pokémon Video Game Event 2014

Home Menu icon

Trivia
- New moves cannot be learned when leveling up.
- Evolution cannot be canceled.
- All Trainers the player faces in the demo also appear in the Pokémon Omega Ruby and Alpha Sapphire games, though they have different teams. Some Trainers mention the places where they normally train.
- All of the "lost" NPCs in the missions to find a lost person/Pokémon are located where an item would be on the Mirage spot in the full Omega Ruby and Alpha Sapphire games. In most cases, the item would be a visible item, but on the Mirage Island west of Dewford Town, the NPC occupies the location of the hidden item.
- When adventure 9 is completed, the game says that the player has earned a reward of Heart Scales, but upon starting adventure 10, the player receives no reward. When adventure 10 is completed, the game says that the player has earned "another" set of Heart Scales, but upon starting adventure 11, the player only has five Heart Scales. It may be that a reward of five was originally meant to be received after both adventures so that the player would have ten Heart Scales (just like the other item rewards are stacks of ten items).
- All wild Pokémon and obtainable Pokémon in the demo cannot be Shiny, with the exception of the starter Pokémon Grovyle, Combusken, and Marshtomp during the first adventure. However, since the demo does not include Shiny textures (with the exception of Steven's Metagross), these Pokémon appear in their normal coloration except for a red star on their summary screen and a sparkle effect when they enter a battle. After the first adventure, they are no longer treated as Shiny in any way.
| This game-related article is part of Project Games, a Bulbapedia project that aims to write comprehensive articles on the Pokémon games. |