|
|
| (47 intermediate revisions by 21 users not shown) |
| Line 1: |
Line 1: |
| :''This article is about the location in [[Pokémon Omega Ruby and Alpha Sapphire]]. For the cave from [[Pokémon Mystery Dungeon: Gates to Infinity]] with a similar name, see [[Mirage Cave]].
| | {{move|Mirage Cave}} |
| ----
| | {{incomplete|article|Images}} |
| {{incomplete|article|Needs missing hidden items and images}} | |
| {{Infobox location | | {{Infobox location |
| |image=None.png
| |
| |type=cave | | |type=cave |
| |location_name=Mirage Cave | | |location_name=Mirage Cave |
| |japanese_name=マボロシ洞窟 | | |japanese_name=マボロシ{{tt|洞窟|どうくつ}} |
| |translated_name=Phantom Cave | | |translated_name=Phantom Cave |
| |location=Eight various locations | | |location=Eight various locations |
| Line 14: |
Line 12: |
| }} | | }} |
|
| |
|
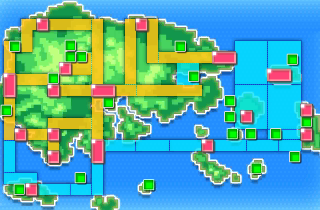
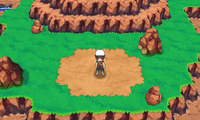
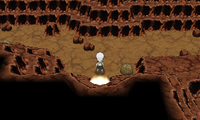
| A '''Mirage Cave''' (Japanese: '''マボロシ洞窟''' ''Phantom Cave'') is a location in [[Hoenn]] located on an island in [[Pokémon Omega Ruby and Alpha Sapphire]]. It is only accessible by [[Soaring in the sky|soaring]] on {{p|Latias}}{{sup/6|AS}} or {{p|Latios}}{{sup/6|OR}}. A Mirage Cave can appear daily, or it may not appear, being replaced with a [[Mirage Islands|Mirage Island]], [[Mirage Forests|Mirage Forest]], or [[Mirage Mountains|Mirage Mountain]]. More Mirage Spots can appear via StreetPass. | | A '''Mirage Cave''' (Japanese: '''マボロシ{{tt|洞窟|どうくつ}}''' ''Phantom Cave'') is a location in [[Hoenn]] located on an island in [[Pokémon Omega Ruby and Alpha Sapphire]]. It is only accessible by [[Soaring in the sky|soaring]] on {{p|Latias}}{{sup/6|AS}} or {{p|Latios}}{{sup/6|OR}}. A Mirage Cave can appear daily, or it may not appear, being replaced with a [[Mirage Islands|Mirage Island]], [[Mirage Forests|Mirage Forest]], or [[Mirage Mountains|Mirage Mountain]]. More [[Mirage spot]]s can appear via [[StreetPass]]. |
|
| |
|
| In the [[Pokémon Omega Ruby and Pokémon Alpha Sapphire Special Demo Version]], several of the Mirage Caves can also be visited during play. The cave by [[Fallarbor Town]] is the location of the demo's first adventure, the cave by {{rt|115|Hoenn}} is where the player battles {{tc|Expert}}s on every fifth mission, and the cave by {{rt|124|Hoenn}} is where the secret [[Team Aqua]]/[[Team Magma]] mission takes place.
| | If a Mirage Cave is received via StreetPass, it will not have a hidden item. |
|
| |
|
| ==South of {{rt|107|Hoenn}}==
| | In the [[Pokémon Omega Ruby and Pokémon Alpha Sapphire Special Demo Version]], several of the Mirage Caves can also be visited during play. The cave [[Mirage Cave (north of Fallarbor Town)|north of Fallarbor Town]] is the location of the demo's first adventure, the cave [[Mirage Cave (west of Route 115)|west of Route 115]] is where the {{player}} battles {{tc|Expert}}s on every fifth mission, and the cave [[Mirage Cave (north of Route 124)|north of Route 124]] is where the secret [[Team Aqua]]/[[Team Magma]] mission takes place. |
| ===Items===
| |
| [[File:none.png|thumb|300px|South of Route 107]] <!--Placeholder image for a future layout image (East-West tunnel with a depression [Only Unown])--> | |
| {{Itlisth|cave}}
| |
| {{Itemlist|Max Ether|Lowered area of the cave|OR=yes|AS=yes|display={{DL|Ether|Max Ether}}}}
| |
| {{Itlistfoot|cave}} | |
|
| |
|
| ===Pokémon=== | | ==Mirage Caves== |
| {{Catch/header|cave|6}}
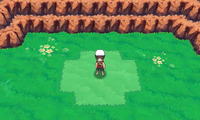
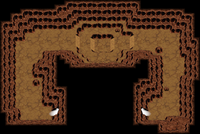
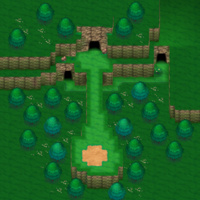
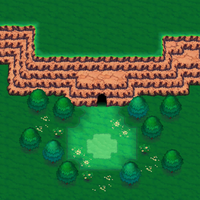
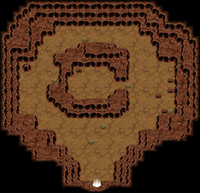
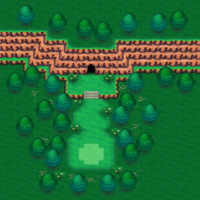
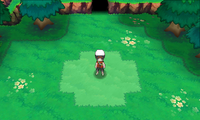
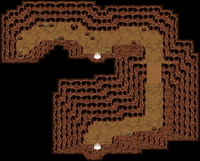
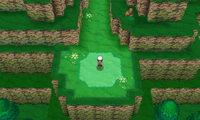
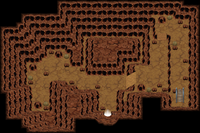
| | Each Mirage Cave contains one item that can only be obtained once, as well as one of three possible items ([[Blue Shard]], [[Red Shard]], or [[Deep Sea Tooth]]) that will be present whenever it appears as the daily Mirage spot; the unique item is listed below. Additionally, some Mirage Caves include [[breakable rock]]s, which the player can destroy with {{m|Rock Smash}} to encounter wild Pokémon or obtain [[fossil]]s. |
| {{catch/entryoras|201|Unown|yes|yes|Cave|36-38|3.6%|type1=psychic}}
| |
| {{catch/entryoras|201B|Unown|yes|yes|Cave|36-38|3.6%|type1=psychic}} | |
| {{catch/entryoras|201C|Unown|yes|yes|Cave|36-38|3.6%|type1=psychic}}
| |
| {{catch/entryoras|201D|Unown|yes|yes|Cave|36-38|3.6%|type1=psychic}}
| |
| {{catch/entryoras|201E|Unown|yes|yes|Cave|36-38|3.6%|type1=psychic}}
| |
| {{catch/entryoras|201F|Unown|yes|yes|Cave|36-38|3.6%|type1=psychic}}
| |
| {{catch/entryoras|201G|Unown|yes|yes|Cave|36-38|3.6%|type1=psychic}}
| |
| {{catch/entryoras|201H|Unown|yes|yes|Cave|36-38|3.6%|type1=psychic}}
| |
| {{catch/entryoras|201I|Unown|yes|yes|Cave|36-38|3.6%|type1=psychic}}
| |
| {{catch/entryoras|201J|Unown|yes|yes|Cave|36-38|3.6%|type1=psychic}}
| |
| {{catch/entryoras|201K|Unown|yes|yes|Cave|36-38|3.6%|type1=psychic}}
| |
| {{catch/entryoras|201L|Unown|yes|yes|Cave|36-38|3.6%|type1=psychic}}
| |
| {{catch/entryoras|201M|Unown|yes|yes|Cave|36-38|3.6%|type1=psychic}}
| |
| {{catch/entryoras|201N|Unown|yes|yes|Cave|36-38|3.6%|type1=psychic}}
| |
| {{catch/entryoras|201O|Unown|yes|yes|Cave|36-38|3.6%|type1=psychic}}
| |
| {{catch/entryoras|201P|Unown|yes|yes|Cave|36-38|3.6%|type1=psychic}}
| |
| {{catch/entryoras|201Q|Unown|yes|yes|Cave|36-38|3.6%|type1=psychic}}
| |
| {{catch/entryoras|201R|Unown|yes|yes|Cave|36-38|3.6%|type1=psychic}}
| |
| {{catch/entryoras|201S|Unown|yes|yes|Cave|36-38|3.6%|type1=psychic}}
| |
| {{catch/entryoras|201T|Unown|yes|yes|Cave|36-38|3.6%|type1=psychic}}
| |
| {{catch/entryoras|201U|Unown|yes|yes|Cave|36-38|3.6%|type1=psychic}}
| |
| {{catch/entryoras|201V|Unown|yes|yes|Cave|36-38|3.6%|type1=psychic}}
| |
| {{catch/entryoras|201W|Unown|yes|yes|Cave|36-38|3.6%|type1=psychic}}
| |
| {{catch/entryoras|201X|Unown|yes|yes|Cave|36-38|3.6%|type1=psychic}}
| |
| {{catch/entryoras|201Y|Unown|yes|yes|Cave|36-38|3.6%|type1=psychic}}
| |
| {{catch/entryoras|201Z|Unown|yes|yes|Cave|36-38|3.6%|type1=psychic}}
| |
| {{catch/entryoras|201QU|Unown|yes|yes|Cave|36-38|3.6%|type1=psychic}}
| |
| {{catch/entryoras|201EX|Unown|yes|yes|Cave|36-38|3.6%|type1=psychic}}
| |
| {{Catch/footer|cave}}
| |
|
| |
|
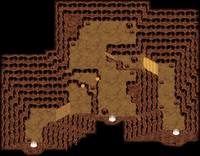
| ==North of [[Fallarbor Town]]== | | {| style="background: #{{Locationcolor/med|cave}}; {{roundy|10px}} border: 2px solid #{{Locationcolor/dark|cave}};" |
| ===Items=== | | !Exterior |
| [[File:none.png|thumb|300px|North of Fallarbor Town]] <!--Placeholder image for a future layout image (Demo cave where catch Glalie/Steelix)--> | | !Interior |
| {{Itlisth|cave}} | | !Mirage Cave |
| {{Itemlist|TM Dark VI|Right side of the cave (requires {{DL|Bicycle|Acro Bike}} and {{DL|Bicycle|Mach Bike}})|OR=yes|AS=yes|display={{TM|95|Snarl}}}} | | !Item |
| {{Itlistfoot|cave}} | | !Breakable rocks |
| | |- style="background: #FFF" |
| | |[[File:Mirage Cave South of Route 107 exterior ORAS.png|200px]] |
| | |[[File:Mirage Cave South of Route 107 interior ORAS.png|200px]] |
| | |[[Mirage Cave (south of Route 107)|South of Route 107]] |
| | |{{Bag2|Max Ether}} |
| | |class="c" {{No}} |
| | |- style="background: #FFF" |
| | |[[File:Mirage Cave North of Fallarbor Town exterior ORAS.png|200px]] |
| | |[[File:Mirage Cave North of Fallarbor Town interior ORAS.png|200px]] |
| | |[[Mirage Cave (north of Fallarbor Town)|North of Fallarbor Town]] |
| | |{{Bag|TM Dark VI}} {{TM|95|Snarl}} |
| | |class="c" {{No}} |
| | |- style="background: #FFF" |
| | |[[File:Mirage Cave West of Route 115 exterior ORAS.png|200px]] |
| | |[[File:Mirage Cave West of Route 115 interior ORAS.png|200px]] |
| | |[[Mirage Cave (west of Route 115)|West of Route 115]] |
| | |{{Bag2|Yellow Shard}} |
| | |class="c" {{Yes}} |
| | |- style="background: #FFF" |
| | |[[File:Mirage Cave North of Fortree City exterior ORAS.png|200px]] |
| | |[[File:Mirage Cave North of Fortree City interior ORAS.png|200px]] |
| | |[[Mirage Cave (north of Fortree City)|North of Fortree City]] |
| | |{{Bag2|Carbos}} |
| | |class="c" {{Yes}} |
| | |- style="background: #FFF" |
| | |[[File:Mirage Cave North of Route 124 exterior ORAS.png|200px]] |
| | |[[File:Mirage Cave North of Route 124 interior ORAS.png|200px]] |
| | |[[Mirage Cave (north of Route 124)|North of Route 124]] |
| | |{{Bag2|PP Up}} |
| | |class="c" {{Yes}} |
| | |- style="background: #FFF" |
| | |[[File:Mirage Cave Southeast of Route 129 exterior ORAS.png|200px]] |
| | |[[File:Mirage Cave Southeast of Route 129 interior ORAS.png|200px]] |
| | |[[Mirage Cave (southeast of Route 129)|Southeast of Route 129]] |
| | |{{Bag2|Rare Candy}} |
| | |class="c" {{Yes}} |
| | |- style="background: #FFF" |
| | |[[File:Mirage Cave South of Route 131 exterior ORAS.png|200px]] |
| | |[[File:Mirage Cave South of Route 131 interior ORAS.png|200px]] |
| | |[[Mirage Cave (south of Route 131)|South of Route 131]] |
| | |{{Bag2|Full Heal}} |
| | |class="c" {{No}} |
| | |- style="background: #FFF" |
| | |[[File:Mirage Cave North of Route 132 exterior ORAS.png|200px]] |
| | |[[File:Mirage Cave North of Route 132 interior ORAS.png|200px]] |
| | |[[Mirage Cave (north of Route 132)|North of Route 132]] |
| | |{{Bag2|Big Pearl}} |
| | |class="c" {{No}} |
| | |} |
|
| |
|
| ===Pokémon=== | | ==Trivia== |
| ====[[Pokémon Omega Ruby and Alpha Sapphire]]====
| | * Although Mirage Caves are caves, the increased capture modifier for the [[Dusk Ball]] only applies at night. |
| {{Catch/header|cave|6}}
| |
| {{Catch/entryoras|079|Slowpoke|yes|yes|Cave|36-38|40%|type1=Water|type2=Psychic}}
| |
| {{Catch/entryoras|602|Tynamo|yes|yes|Cave|36-38|60%|type1=Electric}}
| |
| {{Catch/footer|cave}}
| |
| | |
| ====[[Pokémon Omega Ruby and Pokémon Alpha Sapphire Special Demo Version]]====
| |
| =====Outside=====
| |
| {{Catch/header|grass|6}}
| |
| {{Catch/entryoras|264|Linoone|yes|yes|Grass|24-26|50%|type1=Normal}}
| |
| {{Catch/entryoras|287|Slakoth|yes|yes|Grass|25-27|50%|type1=Normal}}
| |
| {{Catch/footer|grass}}
| |
| | |
| =====Cave=====
| |
| {{Catch/header|cave|6}}
| |
| {{Catch/entryoras|294|Loudred|yes|yes|Cave|27-29|50%|type1=Normal}}
| |
| {{Catch/entryoras|299|Nosepass|yes|yes|Cave|25-27|50%|type1=Rock}}
| |
| {{Catch/div|land|Special}}
| |
| {{Catch/entryoras|362|Glalie|yes|yes|Special|40|{{tt|One|In the South Korean, European, Australian, North and South American, and Singaporean versions of the demo}}|type1=ice}}
| |
| {{Catch/entryoras|208|Steelix|yes|yes|Special|40|{{tt|One|In the Japanese version of the demo}}|type1=steel|type2=ground}}
| |
| {{Catch/footer|cave}}
| |
| | |
| ==West of {{rt|115|Hoenn}}==
| |
| ===Items===
| |
| [[File:none.png|thumb|300px|West of Route 115]] <!--Placeholder image for a future layout image -->
| |
| {{Itlisth|cave}}
| |
| {{Itemlist|Yellow Shard|Center of the cave (requires {{m|Rock Smash}})|OR=yes|AS=yes|display={{DL|Shard|Yellow Shard}}}}
| |
| {{Itemlist|Old Amber|Randomly found by {{m|Rock Smash|smashing rocks}}|OR=yes|AS=yes}}
| |
| {{Itemlist|Dome Fossil|Randomly found by {{m|Rock Smash|smashing rocks}}|OR=yes}}
| |
| {{Itemlist|Helix Fossil|Randomly found by {{m|Rock Smash|smashing rocks}}|AS=yes}}
| |
| {{Itemlist|Armor Fossil|Randomly found by {{m|Rock Smash|smashing rocks}}|OR=yes}}
| |
| {{Itemlist|Skull Fossil|Randomly found by {{m|Rock Smash|smashing rocks}}|AS=yes}}
| |
| {{Itemlist|Plume Fossil|Randomly found by {{m|Rock Smash|smashing rocks}}|OR=yes}}
| |
| {{Itemlist|Cover Fossil|Randomly found by {{m|Rock Smash|smashing rocks}}|AS=yes}}
| |
| {{Itlistfoot|cave}}
| |
| | |
| ===Pokémon===
| |
| {{Catch/header|cave|6}}
| |
| {{Catch/entryoras|599|Klink|yes|yes|Cave|36-38|60%|type1=Steel}}
| |
| {{Catch/entryoras|602|Tynamo|yes|yes|Cave|36-38|40%|type1=Electric}}
| |
| {{catch/div|cave|{{mcolor|Rock Smash|000}}}}
| |
| {{Catch/entryoras|075|Graveler|yes|yes|Rock Smash|35-38|85%|type1=Rock|type2=Ground}}
| |
| {{Catch/entryoras|525|Boldore|yes|yes|Rock Smash|37|15%|type1=Rock}}
| |
| {{Catch/footer|cave}}
| |
| | |
| ==North of [[Fortree City]]==
| |
| [[File:Mirage Cave Fortree City overview.png|thumb|300px|North of Fortree City]] <!--Placeholder image for a future layout image (Cave with Strength rock)-->
| |
| ===Items===
| |
| {{Itlisth|cave}}
| |
| {{Itemlist|Carbos|East area (requires {{m|Strength}})|OR=yes|AS=yes|display={{DL|Vitamin|Carbos}}}}
| |
| {{Itemlist|Red Shard|North Area''(randomly hidden)''|OR=no|AS=yes|display={{DL|Shard|Red Shard}}}}
| |
| {{Itemlist|Old Amber|Randomly found by {{m|Rock Smash|smashing rocks}}|OR=yes|AS=yes}}
| |
| {{Itemlist|Dome Fossil|Randomly found by {{m|Rock Smash|smashing rocks}}|OR=yes}}
| |
| {{Itemlist|Helix Fossil|Randomly found by {{m|Rock Smash|smashing rocks}}|AS=yes}}
| |
| {{Itemlist|Armor Fossil|Randomly found by {{m|Rock Smash|smashing rocks}}|OR=yes}}
| |
| {{Itemlist|Skull Fossil|Randomly found by {{m|Rock Smash|smashing rocks}}|AS=yes}}
| |
| {{Itemlist|Plume Fossil|Randomly found by {{m|Rock Smash|smashing rocks}}|OR=yes}}
| |
| {{Itemlist|Cover Fossil|Randomly found by {{m|Rock Smash|smashing rocks}}|AS=yes}}
| |
| {{Itlistfoot|cave}}
| |
| | |
| ===Pokémon===
| |
| {{Catch/header|cave|6}}
| |
| {{Catch/entryoras|095|Onix|yes|yes|Cave|36-38|10%|type1=Rock|type2=Ground}}
| |
| {{Catch/entryoras|530|Excadrill|yes|yes|Cave|36-38|30%|type1=Ground|type2=Steel}}
| |
| {{Catch/entryoras|599|Klink|yes|yes|Cave|36-38|30%|type1=Steel}}
| |
| {{Catch/entryoras|602|Tynamo|yes|yes|Cave|36-38|30%|type1=Electric}}
| |
| {{catch/div|cave|{{mcolor|Rock Smash|000}}}}
| |
| {{Catch/entryoras|075|Graveler|yes|yes|Rock Smash|35-38|85%|type1=Rock|type2=Ground}}
| |
| {{Catch/entryoras|525|Boldore|yes|yes|Rock Smash|37|15%|type1=Rock}}
| |
| {{Catch/footer|cave}}
| |
| | |
| ==North of {{rt|124|Hoenn}}==
| |
| ===Items===
| |
| [[File:none.png|thumb|300px|North of Route 124]] <!--Placeholder image for a future layout image (East-West tunnel)-->
| |
| {{Itlisth|cave}}
| |
| {{Itemlist|PP Up|Eastern area of the cave|OR=yes|AS=yes|display={{DL|Vitamin|PP Up}}}}
| |
| {{Itemlist|Old Amber|Randomly found by {{m|Rock Smash|smashing rocks}}|OR=yes|AS=yes}}
| |
| {{Itemlist|Dome Fossil|Randomly found by {{m|Rock Smash|smashing rocks}}|OR=yes}}
| |
| {{Itemlist|Helix Fossil|Randomly found by {{m|Rock Smash|smashing rocks}}|AS=yes}}
| |
| {{Itemlist|Armor Fossil|Randomly found by {{m|Rock Smash|smashing rocks}}|OR=yes}}
| |
| {{Itemlist|Skull Fossil|Randomly found by {{m|Rock Smash|smashing rocks}}|AS=yes}}
| |
| {{Itemlist|Plume Fossil|Randomly found by {{m|Rock Smash|smashing rocks}}|OR=yes}}
| |
| {{Itemlist|Cover Fossil|Randomly found by {{m|Rock Smash|smashing rocks}}|AS=yes}}
| |
| {{Itlistfoot|cave}}
| |
| | |
| ===Pokémon===
| |
| {{Catch/header|cave|6}}
| |
| {{Catch/entryoras|563|Cofagrigus|yes|yes|Cave|36-38|40%|type1=Ghost}}
| |
| {{Catch/entryoras|599|Klink|yes|yes|Cave|36-38|60%|type1=Steel}}
| |
| {{catch/div|cave|{{mcolor|Rock Smash|000}}}}
| |
| {{Catch/entryoras|075|Graveler|yes|yes|Rock Smash|35-38|85%|type1=Rock|type2=Ground}}
| |
| {{Catch/entryoras|525|Boldore|yes|yes|Rock Smash|37|15%|type1=Rock}}
| |
| {{Catch/footer|cave}}
| |
| | |
| ==Southeast of {{rt|129|Hoenn}}==
| |
| ===Items===
| |
| [[File:none.png|thumb|300px|Southeast of Route 129]] <!--Placeholder image for a future layout image (cave with ladder)-->
| |
| {{Itlisth|cave}}
| |
| {{Itemlist|Rare Candy|Up the ladder|OR=yes|AS=yes|display={{DL|Vitamin|Rare Candy}}}}
| |
| {{Itemlist|Old Amber|Randomly found by {{m|Rock Smash|smashing rocks}}|OR=yes|AS=yes}}
| |
| {{Itemlist|Dome Fossil|Randomly found by {{m|Rock Smash|smashing rocks}}|OR=yes}}
| |
| {{Itemlist|Helix Fossil|Randomly found by {{m|Rock Smash|smashing rocks}}|AS=yes}}
| |
| {{Itemlist|Armor Fossil|Randomly found by {{m|Rock Smash|smashing rocks}}|OR=yes}}
| |
| {{Itemlist|Skull Fossil|Randomly found by {{m|Rock Smash|smashing rocks}}|AS=yes}}
| |
| {{Itemlist|Plume Fossil|Randomly found by {{m|Rock Smash|smashing rocks}}|OR=yes}}
| |
| {{Itemlist|Cover Fossil|Randomly found by {{m|Rock Smash|smashing rocks}}|AS=yes}}
| |
| {{Itlistfoot|cave}}
| |
| | |
| ===Pokémon===
| |
| {{Catch/header|cave|6}}
| |
| {{Catch/entryoras|095|Onix|yes|yes|Cave|36-38|40%|type1=Rock|type2=Ground}}
| |
| {{Catch/entryoras|602|Tynamo|yes|yes|Cave|36-38|60%|type1=Electric}}
| |
| {{catch/div|cave|{{mcolor|Rock Smash|000}}}}
| |
| {{Catch/entryoras|075|Graveler|yes|yes|Rock Smash|35-38|85%|type1=Rock|type2=Ground}}
| |
| {{Catch/entryoras|525|Boldore|yes|yes|Rock Smash|37|15%|type1=Rock}}
| |
| {{Catch/footer|cave}}
| |
| | |
| ==South of [[Pacifidlog Town]]==
| |
| ===Items===
| |
| [[File:none.png|thumb|300px|South of Pacifidlog Town]] <!--Placeholder image for a future layout image (longer north-south tunnel)-->
| |
| {{Itlisth|cave}}
| |
| {{Itemlist|Full Heal|Southeastern side of the cave|OR=yes|AS=yes|display={{DL|Status condition healing item|Full Heal}}}}
| |
| {{Itlistfoot|cave}}
| |
| | |
| ===Pokémon===
| |
| {{Catch/header|cave|6}}
| |
| {{Catch/entryoras|079|Slowpoke|yes|yes|Cave|36-38|10%|type1=Water|type2=Psychic}}
| |
| {{Catch/entryoras|563|Cofagrigus|yes|yes|Cave|36-38|30%|type1=Ghost}}
| |
| {{Catch/entryoras|602|Tynamo|yes|yes|Cave|36-38|60%|type1=Electric}}
| |
| {{Catch/footer|cave}}
| |
| | |
| ==North of {{rt|132|Hoenn}}==
| |
| ===Items===
| |
| [[File:none.png|thumb|300px|West of Route 132]] <!--Placeholder image for a future layout image (cave with water under the ground [holes allow view of water])-->
| |
| {{Itlisth|cave}}
| |
| {{Itemlist|Big Pearl|South area of the cave|OR=yes|AS=yes|display={{DL|Valuable item|Big Pearl}}}}
| |
| {{Itemlist|Deep Sea Tooth|West of the center crater ''(randomly hidden)''|OR=yes|AS=yes|display={{DL|Evolution-inducing held item|Deep Sea Tooth}}}}
| |
| {{Itlistfoot|cave}}
| |
| | |
| ===Pokémon===
| |
| {{Catch/header|cave|6}}
| |
| {{Catch/entryoras|132|Ditto|yes|yes|Cave|36-38|40%|type1=Normal}}
| |
| {{Catch/entryoras|530|Excadrill|yes|yes|Cave|36-38|30%|type1=Ground|type2=Steel}}
| |
| {{Catch/entryoras|602|Tynamo|yes|yes|Cave|36-38|30%|type1=Electric}}
| |
| {{Catch/footer|cave}}
| |
|
| |
|
| ==In other languages== | | ==In other languages== |
| <!-- Singular Form, Not Plural Form --> | | <!-- Singular Form, Not Plural Form --> |
| {{Langtable|color={{locationcolor/light|cave}}|bordercolor={{locationcolor/dark|cave}} | | {{Langtable|color={{locationcolor/light|cave}}|bordercolor={{locationcolor/dark|cave}} |
| | |zh_yue=幻之洞窟 ''{{tt|Waahn jī Duhngfāt|Mirage Cavern}}'' |
| | |zh_cmn=幻之洞窟 ''{{tt|Huàn zhī Dòngkū|Mirage Cavern}}'' |
| |de=Wunderhöhlen | | |de=Wunderhöhlen |
| |fr=Grotte Mirage | | |fr=Grotte Mirage |
| Line 230: |
Line 101: |
|
| |
|
| [[de:Wunderhöhle]] | | [[de:Wunderhöhle]] |
| | [[es:Cueva Espejismo]] |
| [[fr:Grotte Mirage]] | | [[fr:Grotte Mirage]] |
| | [[it:Grotte Miraggio]] |
| | [[zh:幻影洞窟]] |


