Holehills: Difference between revisions
m (r2.7.3) (Robot: Adding de:Hohlhügel) |
Lady Ariel (talk | contribs) No edit summary |
||
| (20 intermediate revisions by 10 users not shown) | |||
| Line 4: | Line 4: | ||
|bordercolorscheme=Water | |bordercolorscheme=Water | ||
|name=Holehills | |name=Holehills | ||
|jname= | |jname={{tt|風穴|ふうけつ}}の{{tt|丘|おか}} | ||
|jtrans=Windhole Hill | |jtrans=Windhole Hill | ||
|image=Holehills PMDGTI.png | |image=Holehills PMDGTI.png | ||
|size=300px | |||
|recruitable=Yes | |recruitable=Yes | ||
|floors=12 | |floors=12 | ||
|rest=No | |rest=No | ||
|traps=Yes | |traps=Yes | ||
|items= | |monsterhouses=Yes | ||
|items=Current | |||
|money=Allowed | |money=Allowed | ||
|teamsize=4 | |teamsize=4 | ||
|startlevel=Current | |startlevel=Current | ||
|maintype= | |maintype=None | ||
|boss= | |boss=None | ||
}} | }} | ||
'''Holehills''' (Japanese: ''' | '''Holehills''' (Japanese: '''{{tt|風穴|ふうけつ}}の{{tt|丘|おか}}''' ''Windhole Hill'') is a playable dungeon the {{player}} goes through in [[Pokémon Mystery Dungeon: Gates to Infinity]]. It has 12 floors and no boss. <!--bosses are only in the cut-scenes and not battled--> This dungeon is accessible after the player completes the [[Withered Savanna]] dungeon. This dungeon can be used to enter the [[Glacier Palace]] dungeon at a high mysteriosity level. Pokémon can only be recruited after the main storyline. This dungeon has outer areas with three shimmering tiles, and is known for the massive series of caves that connect each and every hole in the vicinity. The seventh floor contains a detour that requires a {{type|Fire}} Pokémon to pass through. | ||
==Pokémon encountered== | ==Pokémon encountered== | ||
{{mdloc/h|Rock}} | {{mdloc/h|Rock}} | ||
{{mdloc|135|Jolteon| | {{mdloc|135|Jolteon|1F-12F|?|?}} | ||
{{mdloc|298|Azurill| | {{mdloc|298|Azurill|1F-12F|?|?}} | ||
{{mdloc|511|Pansage| | {{mdloc|511|Pansage|1F-12F|?|?}} | ||
{{mdloc|514|Simisear| | {{mdloc|514|Simisear|1F-12F|?|?}} | ||
{{mdloc|524|Roggenrola| | {{mdloc|524|Roggenrola|1F-12F|24|?}} | ||
{{mdloc|545|Scolipede| | {{mdloc|545|Scolipede|1F-12F|?|?}} | ||
{{mdloc|549|Lilligant| | {{mdloc|549|Lilligant|1F-12F|28|?}} | ||
{{mdloc|636|Larvesta| | {{mdloc|636|Larvesta|1F-12F|27|?}} | ||
{{mdloc/f|Rock}} | {{mdloc/f|Rock}} | ||
==Party== | |||
On the first visit, [[Hydreigon (Gates to Infinity)|Hydreigon]] is on the {{player}}'s team. Its stats (minus HP), Exp. Points, and "To next level" sections of the Status screen are all shown as "---". | |||
{{Pokémon/5 | |||
|ndex=635 | |||
|pokemon=Hydreigon | |||
|gender= | |||
|level=64 | |||
|type1=Dark|type2=Dragon | |||
|ability=Levitate | |||
|move1=DragonBreath|move1type=Dragon|move1cat=Special | |||
|move2=Crunch|move2type=Dark|move2cat=Physical | |||
|move3=Tri Attack|move3type=Normal|move3cat=Special | |||
|move4=Roar|move4type=Normal|move4cat=Status}} | |||
==Items== | ==Items== | ||
{{DungeonItem/h|rock}} | {{DungeonItem/h|rock}} | ||
{{DungeonItem|Poké|4= | {{DungeonItem|Poké|4=62-284|sprite=Poké currency V|3=1F-12}} | ||
{{DungeonItem|Chesto Berry|3= | {{DungeonItem|Oran Berry|sprite=MDBag Oran Berry V Sprite|3=1F-12}} | ||
{{DungeonItem|Cheri Berry|3= | {{DungeonItem|Chesto Berry|sprite=MDBag Chesto Berry V Sprite|3=1F-12}} | ||
{{DungeonItem|Pecha Berry|sprite=MDBag Pecha Berry Sprite|3= | {{DungeonItem|Cheri Berry|sprite=MDBag Cheri Berry V Sprite|3=1F-12}} | ||
{{DungeonItem|Health Orb|Wonder Orb|3= | {{DungeonItem|Pecha Berry|sprite=MDBag Pecha Berry V Sprite|3=1F-12}} | ||
{{DungeonItem|Slow Orb|Wonder Orb|3= | {{DungeonItem|Rawst Berry|sprite=MDBag Rawst Berry V Sprite|3=1F-12}} | ||
{{DungeonItem| | {{DungeonItem|Gravelerock|4=5|Throwing item|sprite=MDBag Gravelerock V Sprite|3=1F-17}} | ||
{{DungeonItem| | {{DungeonItem|All Dodge Orb|Wonder Orb|sprite=MDBag Wonder Orb V Sprite|3=1F-12}} | ||
{{DungeonItem|Violent Seed|Seed|3= | {{DungeonItem|All Power-Up Orb|Wonder Orb|sprite=MDBag Wonder Orb V Sprite|3=1F-12}} | ||
{{DungeonItem| | {{DungeonItem|Health Orb|Wonder Orb|sprite=MDBag Wonder Orb V Sprite|3=1F-12}} | ||
{{DungeonItem| | {{DungeonItem|Rollcall Orb|Wonder Orb|sprite=MDBag Wonder Orb V Sprite|3=1F-12}} | ||
{{DungeonItem| | {{DungeonItem|Slow Orb|Wonder Orb|sprite=MDBag Wonder Orb V Sprite|3=1F-12}} | ||
{{DungeonItem|Max Elixir|Health drink|sprite=MDBag | {{DungeonItem|Slumber Orb|Wonder Orb|sprite=MDBag Wonder Orb V Sprite|3=1F-12}} | ||
{{DungeonItem|Scope Lens|Glasses|sprite=MDBag | {{DungeonItem|Sleep Seed|Seed|sprite=MDBag Seed V Sprite|3=1F-12}} | ||
{{DungeonItem|Stun Seed|Seed|sprite=MDBag Seed V Sprite|3=1F-12}} | |||
{{DungeonItem|Violent Seed|Seed|sprite=MDBag Seed V Sprite|3=1F-12}} | |||
{{DungeonItem|Coalition Scarf|Scarf (Mystery Dungeon)|3=1F-12|sprite=MDBag Scarf V Sprite}} | |||
{{DungeonItem|Defense Scarf|Scarf (Mystery Dungeon)|3=1F-12|sprite=MDBag Scarf V Sprite}} | |||
{{DungeonItem|Joy Ribbon|Scarf (Mystery Dungeon)|3=1F-12|sprite=MDBag Scarf V Sprite}} | |||
{{DungeonItem|Power Band|Scarf (Mystery Dungeon)|3=1F-12|sprite=MDBag Scarf V Sprite}} | |||
{{DungeonItem|Reunion Cape|Scarf (Mystery Dungeon)|3=1F-12|sprite=MDBag Scarf V Sprite}} | |||
{{DungeonItem|Zinc Band|Scarf (Mystery Dungeon)|3=1F-12|sprite=MDBag Scarf V Sprite}} | |||
{{DungeonItem|Max Elixir|Health drink|sprite=MDBag Max Elixir V Sprite|3=1F-12}} | |||
{{DungeonItem|Scope Lens|Glasses|sprite=MDBag Glasses V Sprite|3=1F-12}} | |||
{{DungeonItem/f|rock}} | |||
==Traps encountered== | |||
{| class="roundy" style="background: #{{rock color}}; border: 3px solid #{{water color dark}}; text-align:center" | |||
! style="background:#{{rock color light}}; {{roundytl|5px}}"| Image | |||
! style="background:#{{rock color light}}" | Trap | |||
! style="background:#{{rock color light}}; {{roundytr|5px}}"| Floors | |||
|- style="background: #FFF" | |||
| [[File:SlumberTrapGTI.png]] | |||
| Slumber Trap | |||
| 5F | |||
|- | |||
| style="background: #FFF; {{roundybl|5px}}"| [[File:WarpTrapGTI.png]] | |||
| style="background: #FFF"| Warp Trap | |||
| style="background: #FFF; {{roundybr|5px}}"| 3F | |||
|} | |} | ||
| Line 66: | Line 108: | ||
File:Holehills cliff view PMDGTI.png|View of the ground while being chased | File:Holehills cliff view PMDGTI.png|View of the ground while being chased | ||
</gallery> | </gallery> | ||
==In other languages== | |||
{{langtable|color={{rock color}}|bordercolor={{water color dark}} | |||
|fr=Monts Troglodytes | |||
|de=Hohlhügel | |||
|it=Colli Bucherellati | |||
|es=Hoquemonte | |||
}} | |||
{{-}} | {{-}} | ||
{{PMD GTI locations}} | |||
{{DoubleProjectTag|Locations|Sidegames}} | {{DoubleProjectTag|Locations|Sidegames}} | ||
| Line 75: | Line 125: | ||
[[de:Hohlhügel]] | [[de:Hohlhügel]] | ||
[[es:Hoquemonte]] | |||
[[ja:風穴の丘]] | |||
[[zh:風穴之丘]] | |||
Revision as of 17:37, 5 November 2018
|
|
|
| ||||||||||||||||||||||||||||||||||||||||||
| ||||||||||||||||||||||||||||||||||||||||||
| ||||||||||||||||||||||||||||||||||||||||||

Holehills (Japanese: 風穴の丘 Windhole Hill) is a playable dungeon the player goes through in Pokémon Mystery Dungeon: Gates to Infinity. It has 12 floors and no boss. This dungeon is accessible after the player completes the Withered Savanna dungeon. This dungeon can be used to enter the Glacier Palace dungeon at a high mysteriosity level. Pokémon can only be recruited after the main storyline. This dungeon has outer areas with three shimmering tiles, and is known for the massive series of caves that connect each and every hole in the vicinity. The seventh floor contains a detour that requires a Fire-type Pokémon to pass through.
Pokémon encountered
| Pokémon | Floors | Levels | Recruit Rate | |
|---|---|---|---|---|
| Jolteon | 1F-12F | ? | ?% | |
| Azurill | 1F-12F | ? | ?% | |
| Pansage | 1F-12F | ? | ?% | |
| Simisear | 1F-12F | ? | ?% | |
| Roggenrola | 1F-12F | 24 | ?% | |
| Scolipede | 1F-12F | ? | ?% | |
| Lilligant | 1F-12F | 28 | ?% | |
| Larvesta | 1F-12F | 27 | ?% | |
Party
On the first visit, Hydreigon is on the player's team. Its stats (minus HP), Exp. Points, and "To next level" sections of the Status screen are all shown as "---".
|
| ||||||||||||||||||||
| Hydreigon Lv.64 | |||||||||||||||||||||
| |||||||||||||||||||||

Items
| Item | Floors | |||||||
|---|---|---|---|---|---|---|---|---|
| 62-284 Poké | 1F-12F | |||||||
| Oran Berry | 1F-12F | |||||||
| Chesto Berry | 1F-12F | |||||||
| Cheri Berry | 1F-12F | |||||||
| Pecha Berry | 1F-12F | |||||||
| Rawst Berry | 1F-12F | |||||||
| 5 Gravelerock | 1F-17F | |||||||
| All Dodge Orb | 1F-12F | |||||||
| All Power-Up Orb | 1F-12F | |||||||
| Health Orb | 1F-12F | |||||||
| Rollcall Orb | 1F-12F | |||||||
| Slow Orb | 1F-12F | |||||||
| Slumber Orb | 1F-12F | |||||||
| Sleep Seed | 1F-12F | |||||||
| Stun Seed | 1F-12F | |||||||
| Violent Seed | 1F-12F | |||||||
| Coalition Scarf | 1F-12F | |||||||
| Defense Scarf | 1F-12F | |||||||
| Joy Ribbon | 1F-12F | |||||||
| Power Band | 1F-12F | |||||||
| Reunion Cape | 1F-12F | |||||||
| Zinc Band | 1F-12F | |||||||
| Max Elixir | 1F-12F | |||||||
| Scope Lens | 1F-12F | |||||||
Traps encountered
| Image | Trap | Floors |
|---|---|---|

|
Slumber Trap | 5F |

|
Warp Trap | 3F |
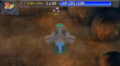
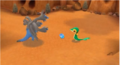
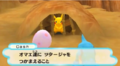
Gallery
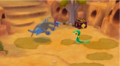
Entrance
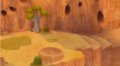
1F outside
2F interior

Outside floors
Frism with Toxicroak's voice inside

Boss area
Partner Pokémon trapped
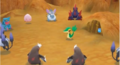
Ambushed by enemies after being tricked
Hydreigon attacking the enemies
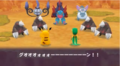
Cornered on the cliff-side by the enemies
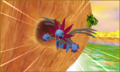
Hydreigon coming to the rescue
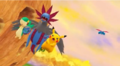
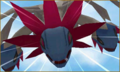
Being chased by Salamence

View of the ground while being chased


In other languages
| ||||||||||||||||||
| This article is part of both Project Locations and Project Sidegames, Bulbapedia projects that, together, aim to write comprehensive articles on the Pokémon Locations and Sidegames, respectively. |