Gym: Difference between revisions
HoennMaster (talk | contribs) No edit summary |
ArcToraphim (talk | contribs) m (→Official Gyms) |
||
| Line 13: | Line 13: | ||
There are eight known official Gyms in each [[region]]. | There are eight known official Gyms in each [[region]]. | ||
{| | {| style="float:left; text-align:center; {{roundy|10px}}; border: 4px solid #{{green color light}};" colspan="4" cellspacing="1" cellpadding="2" | ||
|- | |- | ||
! colspan="4 | ! colspan="4" style="background: #{{kanto color light}}; {{roundytl|10px}}; {{roundytr|10px}};" | Kanto | ||
|- | |- | ||
! style="background: #{{kanto color light}}" | Gym | ! style="background: #{{kanto color light}}" | Gym | ||
| Line 21: | Line 21: | ||
! width="30%" style="background: #{{kanto color light}}" | Type | ! width="30%" style="background: #{{kanto color light}}" | Type | ||
! style="background: #{{kanto color light}}" | Leader | ! style="background: #{{kanto color light}}" | Leader | ||
|- | |- | ||
| [[Pewter Gym]] | | [[Pewter Gym]] | ||
| [[File:Boulder Badge.png|20px]]<br><small>{{Badge|Boulder}}</small> | | [[File:Boulder Badge.png|20px]]<br><small>{{Badge|Boulder}}</small> | ||
| style="background: #{{rock color light}}; border: 2px solid #{{rock color dark}}; {{roundy|10px}}" | {{Tcolor|Rock}} | | style="background: #{{rock color light}}; border: 2px solid #{{rock color dark}}; {{roundy|10px}}" | {{Tcolor|Rock}} | ||
| [[Brock]] | | [[Brock]] | ||
|- | |- | ||
| [[Cerulean Gym]] | | [[Cerulean Gym]] | ||
| [[File:Cascade Badge.png|20px]]<br><small>{{Badge|Cascade}}</small> | | [[File:Cascade Badge.png|20px]]<br><small>{{Badge|Cascade}}</small> | ||
| style="background: #{{water color light}}; border: 2px solid #{{water color dark}}; {{roundy|10px}}" | {{Tcolor|Water}} | | style="background: #{{water color light}}; border: 2px solid #{{water color dark}}; {{roundy|10px}}" | {{Tcolor|Water}} | ||
| [[Misty]] | | [[Misty]] | ||
|- | |- | ||
| [[Vermilion Gym]] | | [[Vermilion Gym]] | ||
| [[File:Thunder Badge.png|20px]]<br><small>{{Badge|Thunder}}</small> | | [[File:Thunder Badge.png|20px]]<br><small>{{Badge|Thunder}}</small> | ||
| style="background: #{{electric color light}}; border: 2px solid #{{electric color dark}}; {{roundy|10px}}" | {{Tcolor|Electric}} | | style="background: #{{electric color light}}; border: 2px solid #{{electric color dark}}; {{roundy|10px}}" | {{Tcolor|Electric}} | ||
| [[Lt. Surge]] | | [[Lt. Surge]] | ||
|- | |- | ||
| [[Celadon Gym]] | | [[Celadon Gym]] | ||
| [[File:Rainbow Badge.png|20px]]<br><small>{{Badge|Rainbow}}</small> | | [[File:Rainbow Badge.png|20px]]<br><small>{{Badge|Rainbow}}</small> | ||
| style="background: #{{grass color light}}; border: 2px solid #{{grass color dark}}; {{roundy|10px}}" | {{Tcolor|Grass}} | | style="background: #{{grass color light}}; border: 2px solid #{{grass color dark}}; {{roundy|10px}}" | {{Tcolor|Grass}} | ||
| [[Erika]] | | [[Erika]] | ||
|- | |- | ||
| [[Fuchsia Gym]] | | [[Fuchsia Gym]] | ||
| [[File:Soul Badge.png|20px]]<br><small>{{Badge|Soul}}</small> | | [[File:Soul Badge.png|20px]]<br><small>{{Badge|Soul}}</small> | ||
| style="background: #{{poison color light}}; border: 2px solid #{{poison color dark}}; {{roundy|10px}}" | {{Tcolor|Poison}} | | style="background: #{{poison color light}}; border: 2px solid #{{poison color dark}}; {{roundy|10px}}" | {{Tcolor|Poison}} | ||
| [[Koga]]{{tt|*|Generations I and III}}<br>[[Janine]]{{tt|*|Generations II and IV}} | | [[Koga]]{{tt|*|Generations I and III}}<br>[[Janine]]{{tt|*|Generations II and IV}} | ||
|- | |- | ||
| [[Saffron Gym]] | | [[Saffron Gym]] | ||
| [[File:Marsh Badge.png|20px]]<br><small>{{Badge|Marsh}}</small> | | [[File:Marsh Badge.png|20px]]<br><small>{{Badge|Marsh}}</small> | ||
| style="background: #{{psychic color light}}; border: 2px solid #{{psychic color dark}}; {{roundy|10px}}" | {{Tcolor|Psychic}} | | style="background: #{{psychic color light}}; border: 2px solid #{{psychic color dark}}; {{roundy|10px}}" | {{Tcolor|Psychic}} | ||
| [[Sabrina]] | | [[Sabrina]] | ||
|- | |- | ||
| [[Cinnabar Gym]] | | [[Cinnabar Gym]] | ||
| [[File:Volcano Badge.png|20px]]<br><small>{{Badge|Volcano}}</small> | | [[File:Volcano Badge.png|20px]]<br><small>{{Badge|Volcano}}</small> | ||
| style="background: #{{fire color light}}; border: 2px solid #{{fire color dark}}; {{roundy|10px}}" | {{Tcolor|Fire}} | | style="background: #{{fire color light}}; border: 2px solid #{{fire color dark}}; {{roundy|10px}}" | {{Tcolor|Fire}} | ||
| [[Blaine]] | | [[Blaine]] | ||
|- | |- | ||
| rowspan="2" | [[Viridian Gym]] | | rowspan="2" | [[Viridian Gym]] | ||
| rowspan="2" | [[File:Earth Badge.png|20px]]<br><small>{{Badge|Earth}}</small> | | rowspan="2" | [[File:Earth Badge.png|20px]]<br><small>{{Badge|Earth}}</small> | ||
| style="background: #{{ground color light}}; border: 2px solid #{{ground color dark}}; {{roundy|10px}}" | {{Tcolor|Ground}}{{tt|*|Generations I and III}} | | style="background: #{{ground color light}}; border: 2px solid #{{ground color dark}}; {{roundy|10px}}" | {{Tcolor|Ground}}{{tt|*|Generations I and III}} | ||
| [[Giovanni]]{{tt|*|Generations I and III}} | | [[Giovanni]]{{tt|*|Generations I and III}} | ||
|- | |- | ||
| style="background: #{{blue color light}}; border: 2px solid #{{blue color dark}}; {{roundy|10px}}" | {{color|{{blue color dark}}|Various}}{{tt|*|Generations II and IV}} | | style="background: #{{blue color light}}; border: 2px solid #{{blue color dark}}; {{roundy|10px}}" | {{color|{{blue color dark}}|Various}}{{tt|*|Generations II and IV}} | ||
| {{ga|Blue}}{{tt|*|Generations II and IV}} | | {{ga|Blue}}{{tt|*|Generations II and IV}} | ||
| Line 67: | Line 67: | ||
| | | | ||
|- | |- | ||
! colspan="4 | ! colspan="4" style="background: #{{johto color light}}; {{roundytl|10px}}; {{roundytr|10px}};" | Johto | ||
|- | |- | ||
! style="background: #{{johto color light}}" | Gym | ! style="background: #{{johto color light}}" | Gym | ||
| Line 73: | Line 73: | ||
! width="30%" style="background: #{{johto color light}}" | Type | ! width="30%" style="background: #{{johto color light}}" | Type | ||
! style="background: #{{johto color light}}" | Leader | ! style="background: #{{johto color light}}" | Leader | ||
|- | |- | ||
| [[Violet Gym]] | | [[Violet Gym]] | ||
| [[File:Zephyr Badge.png|20px]]<br><small>{{Badge|Zephyr}}</small> | | [[File:Zephyr Badge.png|20px]]<br><small>{{Badge|Zephyr}}</small> | ||
| style="background: #{{flying color light}}; border: 2px solid #{{flying color dark}}; {{roundy|10px}}" | {{Tcolor|Flying}} | | style="background: #{{flying color light}}; border: 2px solid #{{flying color dark}}; {{roundy|10px}}" | {{Tcolor|Flying}} | ||
| [[Falkner]] | | [[Falkner]] | ||
|- | |- | ||
| [[Azalea Gym]] | | [[Azalea Gym]] | ||
| [[File:Hive Badge.png|20px]]<br><small>{{Badge|Hive}}</small> | | [[File:Hive Badge.png|20px]]<br><small>{{Badge|Hive}}</small> | ||
| style="background: #{{bug color light}}; border: 2px solid #{{bug color dark}}; {{roundy|10px}}" | {{Tcolor|Bug}} | | style="background: #{{bug color light}}; border: 2px solid #{{bug color dark}}; {{roundy|10px}}" | {{Tcolor|Bug}} | ||
| [[Bugsy]] | | [[Bugsy]] | ||
|- | |- | ||
| [[Goldenrod Gym]] | | [[Goldenrod Gym]] | ||
| [[File:Plain Badge.png|20px]]<br><small>{{Badge|Plain}}</small> | | [[File:Plain Badge.png|20px]]<br><small>{{Badge|Plain}}</small> | ||
| style="background: #{{normal color light}}; border: 2px solid #{{normal color dark}}; {{roundy|10px}}" | {{Tcolor|Normal}} | | style="background: #{{normal color light}}; border: 2px solid #{{normal color dark}}; {{roundy|10px}}" | {{Tcolor|Normal}} | ||
| [[Whitney]] | | [[Whitney]] | ||
|- | |- | ||
| [[Ecruteak Gym]] | | [[Ecruteak Gym]] | ||
| [[File:Fog Badge.png|20px]]<br><small>{{Badge|Fog}}</small> | | [[File:Fog Badge.png|20px]]<br><small>{{Badge|Fog}}</small> | ||
| style="background: #{{ghost color light}}; border: 2px solid #{{ghost color dark}}; {{roundy|10px}}" | {{Tcolor|Ghost}} | | style="background: #{{ghost color light}}; border: 2px solid #{{ghost color dark}}; {{roundy|10px}}" | {{Tcolor|Ghost}} | ||
| [[Morty]] | | [[Morty]] | ||
|- | |- | ||
| [[Cianwood Gym]] | | [[Cianwood Gym]] | ||
| [[File:Storm Badge.png|20px]]<br><small>{{Badge|Storm}}</small> | | [[File:Storm Badge.png|20px]]<br><small>{{Badge|Storm}}</small> | ||
| style="background: #{{fighting color light}}; border: 2px solid #{{fighting color dark}}; {{roundy|10px}}" | {{Tcolor|Fighting}} | | style="background: #{{fighting color light}}; border: 2px solid #{{fighting color dark}}; {{roundy|10px}}" | {{Tcolor|Fighting}} | ||
| [[Chuck]] | | [[Chuck]] | ||
|- | |- | ||
| [[Olivine Gym]] | | [[Olivine Gym]] | ||
| [[File:Mineral Badge.png|20px]]<br><small>{{Badge|Mineral}}</small> | | [[File:Mineral Badge.png|20px]]<br><small>{{Badge|Mineral}}</small> | ||
| style="background: #{{steel color light}}; border: 2px solid #{{steel color dark}}; {{roundy|10px}}" | {{Tcolor|Steel}} | | style="background: #{{steel color light}}; border: 2px solid #{{steel color dark}}; {{roundy|10px}}" | {{Tcolor|Steel}} | ||
| [[Jasmine]] | | [[Jasmine]] | ||
|- | |- | ||
| [[Mahogany Gym]] | | [[Mahogany Gym]] | ||
| [[File:Glacier Badge.png|20px]]<br><small>{{Badge|Glacier}}</small> | | [[File:Glacier Badge.png|20px]]<br><small>{{Badge|Glacier}}</small> | ||
| style="background: #{{ice color light}}; border: 2px solid #{{ice color dark}}; {{roundy|10px}}" | {{Tcolor|Ice}} | | style="background: #{{ice color light}}; border: 2px solid #{{ice color dark}}; {{roundy|10px}}" | {{Tcolor|Ice}} | ||
| [[Pryce]] | | [[Pryce]] | ||
|- | |- | ||
| [[Blackthorn Gym]] | | [[Blackthorn Gym]] | ||
| [[File:Rising Badge.png|20px]]<br><small>{{Badge|Rising}}</small> | | [[File:Rising Badge.png|20px]]<br><small>{{Badge|Rising}}</small> | ||
| Line 116: | Line 116: | ||
| | | | ||
|- | |- | ||
! colspan="4 | ! colspan="4" style="background: #{{hoenn color light}}; {{roundytl|10px}}; {{roundytr|10px}};" | Hoenn | ||
|- | |- | ||
! style="background: #{{hoenn color light}}" | Gym | ! style="background: #{{hoenn color light}}" | Gym | ||
| Line 122: | Line 122: | ||
! width="30%" style="background: #{{hoenn color light}}" | Type | ! width="30%" style="background: #{{hoenn color light}}" | Type | ||
! style="background: #{{hoenn color light}}" | Leader | ! style="background: #{{hoenn color light}}" | Leader | ||
|- | |- | ||
| [[Rustboro Gym]] | | [[Rustboro Gym]] | ||
| [[File:Stone Badge.png|20px]]<br><small>{{Badge|Stone}}</small> | | [[File:Stone Badge.png|20px]]<br><small>{{Badge|Stone}}</small> | ||
| style="background: #{{rock color light}}; border: 2px solid #{{rock color dark}}; {{roundy|10px}}" | {{Tcolor|Rock}} | | style="background: #{{rock color light}}; border: 2px solid #{{rock color dark}}; {{roundy|10px}}" | {{Tcolor|Rock}} | ||
| [[Roxanne]] | | [[Roxanne]] | ||
|- | |- | ||
| [[Dewford Gym]] | | [[Dewford Gym]] | ||
| [[File:Knuckle Badge.png|20px]]<br><small>{{Badge|Knuckle}}</small> | | [[File:Knuckle Badge.png|20px]]<br><small>{{Badge|Knuckle}}</small> | ||
| style="background: #{{fighting color light}}; border: 2px solid #{{fighting color dark}}; {{roundy|10px}}" | {{Tcolor|Fighting}} | | style="background: #{{fighting color light}}; border: 2px solid #{{fighting color dark}}; {{roundy|10px}}" | {{Tcolor|Fighting}} | ||
| [[Brawly]] | | [[Brawly]] | ||
|- | |- | ||
| [[Mauville Gym]] | | [[Mauville Gym]] | ||
| [[File:Dynamo Badge.png|20px]]<br><small>{{Badge|Dynamo}}</small> | | [[File:Dynamo Badge.png|20px]]<br><small>{{Badge|Dynamo}}</small> | ||
| style="background: #{{electric color light}}; border: 2px solid #{{electric color dark}}; {{roundy|10px}}" | {{Tcolor|Electric}} | | style="background: #{{electric color light}}; border: 2px solid #{{electric color dark}}; {{roundy|10px}}" | {{Tcolor|Electric}} | ||
| [[Wattson]] | | [[Wattson]] | ||
|- | |- | ||
| [[Lavaridge Gym]] | | [[Lavaridge Gym]] | ||
| [[File:Heat Badge.png|20px]]<br><small>{{Badge|Heat}}</small> | | [[File:Heat Badge.png|20px]]<br><small>{{Badge|Heat}}</small> | ||
| style="background: #{{fire color light}}; border: 2px solid #{{fire color dark}}; {{roundy|10px}}" | {{Tcolor|Fire}} | | style="background: #{{fire color light}}; border: 2px solid #{{fire color dark}}; {{roundy|10px}}" | {{Tcolor|Fire}} | ||
| [[Flannery]] | | [[Flannery]] | ||
|- | |- | ||
| [[Petalburg Gym]] | | [[Petalburg Gym]] | ||
| [[File:Balance Badge.png|20px]]<br><small>{{Badge|Balance}}</small> | | [[File:Balance Badge.png|20px]]<br><small>{{Badge|Balance}}</small> | ||
| style="background: #{{normal color light}}; border: 2px solid #{{normal color dark}}; {{roundy|10px}}" | {{Tcolor|Normal}} | | style="background: #{{normal color light}}; border: 2px solid #{{normal color dark}}; {{roundy|10px}}" | {{Tcolor|Normal}} | ||
| [[Norman]] | | [[Norman]] | ||
|- | |- | ||
| [[Fortree Gym]] | | [[Fortree Gym]] | ||
| [[File:Feather Badge.png|20px]]<br><small>{{Badge|Feather}}</small> | | [[File:Feather Badge.png|20px]]<br><small>{{Badge|Feather}}</small> | ||
| style="background: #{{flying color light}}; border: 2px solid #{{flying color dark}}; {{roundy|10px}}" | {{Tcolor|Flying}} | | style="background: #{{flying color light}}; border: 2px solid #{{flying color dark}}; {{roundy|10px}}" | {{Tcolor|Flying}} | ||
| [[Winona]] | | [[Winona]] | ||
|- | |- | ||
| [[Mossdeep Gym]] | | [[Mossdeep Gym]] | ||
| [[File:Mind Badge.png|20px]]<br><small>{{Badge|Mind}}</small> | | [[File:Mind Badge.png|20px]]<br><small>{{Badge|Mind}}</small> | ||
| style="background: #{{psychic color light}}; border: 2px solid #{{psychic color dark}}; {{roundy|10px}}" | {{Tcolor|Psychic}} | | style="background: #{{psychic color light}}; border: 2px solid #{{psychic color dark}}; {{roundy|10px}}" | {{Tcolor|Psychic}} | ||
| [[Tate and Liza]] | | [[Tate and Liza]] | ||
|- | |- | ||
| rowspan="2" | [[Sootopolis Gym]] | | rowspan="2" | [[Sootopolis Gym]] | ||
| rowspan="2" | [[File:Rain Badge.png|20px]]<br><small>{{Badge|Rain}}</small> | | rowspan="2" | [[File:Rain Badge.png|20px]]<br><small>{{Badge|Rain}}</small> | ||
| Line 165: | Line 165: | ||
| | | | ||
|- | |- | ||
! colspan="4 | ! colspan="4" style="background: #{{sinnoh color light}}; {{roundytl|10px}}; {{roundytr|10px}};" | Sinnoh | ||
|- | |- | ||
! style="background: #{{sinnoh color light}}" | Gym | ! style="background: #{{sinnoh color light}}" | Gym | ||
| Line 171: | Line 171: | ||
! width="30%" style="background: #{{sinnoh color light}}" | Type | ! width="30%" style="background: #{{sinnoh color light}}" | Type | ||
! style="background: #{{sinnoh color light}}" | Leader | ! style="background: #{{sinnoh color light}}" | Leader | ||
|- | |- | ||
| [[Oreburgh Gym]] | | [[Oreburgh Gym]] | ||
| [[File:Coal Badge.png|20px]]<br><small>{{Badge|Coal}}</small> | | [[File:Coal Badge.png|20px]]<br><small>{{Badge|Coal}}</small> | ||
| style="background: #{{rock color light}}; border: 2px solid #{{rock color dark}}; {{roundy|10px}}" | {{Tcolor|Rock}} | | style="background: #{{rock color light}}; border: 2px solid #{{rock color dark}}; {{roundy|10px}}" | {{Tcolor|Rock}} | ||
| [[Roark]] | | [[Roark]] | ||
|- | |- | ||
| [[Eterna Gym]] | | [[Eterna Gym]] | ||
| [[File:Forest Badge.png|20px]]<br><small>{{Badge|Forest}}</small> | | [[File:Forest Badge.png|20px]]<br><small>{{Badge|Forest}}</small> | ||
| style="background: #{{grass color light}}; border: 2px solid #{{grass color dark}}; {{roundy|10px}}" | {{Tcolor|Grass}} | | style="background: #{{grass color light}}; border: 2px solid #{{grass color dark}}; {{roundy|10px}}" | {{Tcolor|Grass}} | ||
| [[Gardenia]] | | [[Gardenia]] | ||
|- | |- | ||
| [[Veilstone Gym]]{{tt|*|Hearthome Gym is the third Gym in Platinum Version}} | | [[Veilstone Gym]]{{tt|*|Hearthome Gym is the third Gym in Platinum Version}} | ||
| [[File:Cobble Badge.png|20px]]<br><small>{{Badge|Cobble}}</small> | | [[File:Cobble Badge.png|20px]]<br><small>{{Badge|Cobble}}</small> | ||
| style="background: #{{fighting color light}}; border: 2px solid #{{fighting color dark}}; {{roundy|10px}}" | {{Tcolor|Fighting}} | | style="background: #{{fighting color light}}; border: 2px solid #{{fighting color dark}}; {{roundy|10px}}" | {{Tcolor|Fighting}} | ||
| [[Maylene]] | | [[Maylene]] | ||
|- | |- | ||
| [[Pastoria Gym]]{{tt|*|Veilstone Gym is the fourth Gym in Platinum Version}} | | [[Pastoria Gym]]{{tt|*|Veilstone Gym is the fourth Gym in Platinum Version}} | ||
| [[File:Fen Badge.png|20px]]<br><small>{{Badge|Fen}}</small> | | [[File:Fen Badge.png|20px]]<br><small>{{Badge|Fen}}</small> | ||
| style="background: #{{water color light}}; border: 2px solid #{{water color dark}}; {{roundy|10px}}" | {{Tcolor|Water}} | | style="background: #{{water color light}}; border: 2px solid #{{water color dark}}; {{roundy|10px}}" | {{Tcolor|Water}} | ||
| [[Crasher Wake]] | | [[Crasher Wake]] | ||
|- | |- | ||
| [[Hearthome Gym]]{{tt|*|Pastoria Gym is the fifth Gym in Platinum Version}} | | [[Hearthome Gym]]{{tt|*|Pastoria Gym is the fifth Gym in Platinum Version}} | ||
| [[File:Relic Badge.png|20px]]<br><small>{{Badge|Relic}}</small> | | [[File:Relic Badge.png|20px]]<br><small>{{Badge|Relic}}</small> | ||
| style="background: #{{ghost color light}}; border: 2px solid #{{ghost color dark}}; {{roundy|10px}}" | {{Tcolor|Ghost}} | | style="background: #{{ghost color light}}; border: 2px solid #{{ghost color dark}}; {{roundy|10px}}" | {{Tcolor|Ghost}} | ||
| [[Fantina]] | | [[Fantina]] | ||
|- | |- | ||
| [[Canalave Gym]] | | [[Canalave Gym]] | ||
| [[File:Mine Badge.png|20px]]<br><small>{{Badge|Mine}}</small> | | [[File:Mine Badge.png|20px]]<br><small>{{Badge|Mine}}</small> | ||
| style="background: #{{steel color light}}; border: 2px solid #{{steel color dark}}; {{roundy|10px}}" | {{Tcolor|Steel}} | | style="background: #{{steel color light}}; border: 2px solid #{{steel color dark}}; {{roundy|10px}}" | {{Tcolor|Steel}} | ||
| [[Byron]] | | [[Byron]] | ||
|- | |- | ||
| [[Snowpoint Gym]] | | [[Snowpoint Gym]] | ||
| [[File:Icicle Badge.png|20px]]<br><small>{{Badge|Icicle}}</small> | | [[File:Icicle Badge.png|20px]]<br><small>{{Badge|Icicle}}</small> | ||
| style="background: #{{ice color light}}; border: 2px solid #{{ice color dark}}; {{roundy|10px}}" | {{Tcolor|Ice}} | | style="background: #{{ice color light}}; border: 2px solid #{{ice color dark}}; {{roundy|10px}}" | {{Tcolor|Ice}} | ||
| [[Candice]] | | [[Candice]] | ||
|- | |- | ||
| [[Sunyshore Gym]] | | [[Sunyshore Gym]] | ||
| [[File:Beacon Badge.png|20px]]<br><small>{{Badge|Beacon}}</small> | | [[File:Beacon Badge.png|20px]]<br><small>{{Badge|Beacon}}</small> | ||
| Line 214: | Line 214: | ||
| | | | ||
|- | |- | ||
! colspan="4 | ! colspan="4" style="background: #{{unova color light}}; {{roundytl|10px}}; {{roundytr|10px}};" | Unova | ||
|- | |- | ||
! style="background: #{{unova color light}}" | Gym | ! style="background: #{{unova color light}}" | Gym | ||
| Line 220: | Line 220: | ||
! width="30%" style="background: #{{unova color light}}" | Type | ! width="30%" style="background: #{{unova color light}}" | Type | ||
! style="background: #{{unova color light}}" | Leader | ! style="background: #{{unova color light}}" | Leader | ||
|- | |- | ||
| rowspan="3" | [[Striaton Gym]] | | rowspan="3" | [[Striaton Gym]] | ||
| rowspan="3" | [[File:Trio Badge.png|20px]]<br><small>{{Badge|Trio}}</small> | | rowspan="3" | [[File:Trio Badge.png|20px]]<br><small>{{Badge|Trio}}</small> | ||
| style="background: #{{grass color light}}; border: 2px solid #{{grass color dark}}; {{roundy|10px}}" | {{Tcolor|Grass}} | | style="background: #{{grass color light}}; border: 2px solid #{{grass color dark}}; {{roundy|10px}}" | {{Tcolor|Grass}} | ||
| [[Cilan]]{{tt|*|If player's starter is Oshawott, Black and White only}} | | [[Cilan]]{{tt|*|If player's starter is Oshawott, Black and White only}} | ||
|- | |- | ||
| style="background: #{{fire color light}}; border: 2px solid #{{fire color dark}}; {{roundy|10px}}" | {{Tcolor|Fire}} | | style="background: #{{fire color light}}; border: 2px solid #{{fire color dark}}; {{roundy|10px}}" | {{Tcolor|Fire}} | ||
| [[Chili]]{{tt|*|If player's starter is Snivy, Black and White only}} | | [[Chili]]{{tt|*|If player's starter is Snivy, Black and White only}} | ||
|- | |- | ||
| style="background: #{{water color light}}; border: 2px solid #{{water color dark}}; {{roundy|10px}}" | {{Tcolor|Water}} | | style="background: #{{water color light}}; border: 2px solid #{{water color dark}}; {{roundy|10px}}" | {{Tcolor|Water}} | ||
| [[Cress]]{{tt|*|If player's starter is Tepig, Black and White only}} | | [[Cress]]{{tt|*|If player's starter is Tepig, Black and White only}} | ||
|- | |- | ||
| [[Nacrene Gym]]{{tt|*|Black and White}}<br>[[Aspertia Gym]]{{tt|*|Black 2 and White 2}} | | [[Nacrene Gym]]{{tt|*|Black and White}}<br>[[Aspertia Gym]]{{tt|*|Black 2 and White 2}} | ||
| [[File:Basic Badge.png|20px]]<br><small>{{Badge|Basic}}</small> | | [[File:Basic Badge.png|20px]]<br><small>{{Badge|Basic}}</small> | ||
| style="background: #{{normal color light}}; border: 2px solid #{{normal color dark}}; {{roundy|10px}}" | {{Tcolor|Normal}} | | style="background: #{{normal color light}}; border: 2px solid #{{normal color dark}}; {{roundy|10px}}" | {{Tcolor|Normal}} | ||
| [[Lenora]]{{tt|*|Black and White}}<br>[[Cheren]]{{tt|*|Black 2 and White 2}} | | [[Lenora]]{{tt|*|Black and White}}<br>[[Cheren]]{{tt|*|Black 2 and White 2}} | ||
|- | |- | ||
| [[Virbank Gym]] | | [[Virbank Gym]] | ||
| [[File:Toxic Badge.png|20px]]<br><small>{{Badge|Toxic}}</small> | | [[File:Toxic Badge.png|20px]]<br><small>{{Badge|Toxic}}</small> | ||
| style="background: #{{poison color light}}; border: 2px solid #{{poison color dark}}; {{roundy|10px}}" | {{Tcolor|Poison}} | | style="background: #{{poison color light}}; border: 2px solid #{{poison color dark}}; {{roundy|10px}}" | {{Tcolor|Poison}} | ||
| [[Roxie]]{{tt|*|Black 2 and White 2}} | | [[Roxie]]{{tt|*|Black 2 and White 2}} | ||
|- | |- | ||
| [[Castelia Gym]] | | [[Castelia Gym]] | ||
| [[File:Insect Badge.png|20px]]<br><small>{{Badge|Insect}}</small> | | [[File:Insect Badge.png|20px]]<br><small>{{Badge|Insect}}</small> | ||
| style="background: #{{bug color light}}; border: 2px solid #{{bug color dark}}; {{roundy|10px}}" | {{Tcolor|Bug}} | | style="background: #{{bug color light}}; border: 2px solid #{{bug color dark}}; {{roundy|10px}}" | {{Tcolor|Bug}} | ||
| [[Burgh]] | | [[Burgh]] | ||
|- | |- | ||
| [[Nimbasa Gym]] | | [[Nimbasa Gym]] | ||
| [[File:Bolt Badge.png|20px]]<br><small>{{Badge|Bolt}}</small> | | [[File:Bolt Badge.png|20px]]<br><small>{{Badge|Bolt}}</small> | ||
| style="background: #{{electric color light}}; border: 2px solid #{{electric color dark}}; {{roundy|10px}}" | {{Tcolor|Electric}} | | style="background: #{{electric color light}}; border: 2px solid #{{electric color dark}}; {{roundy|10px}}" | {{Tcolor|Electric}} | ||
| [[Elesa]] | | [[Elesa]] | ||
|- | |- | ||
| [[Driftveil Gym]] | | [[Driftveil Gym]] | ||
| [[File:Quake Badge.png|20px]]<br><small>{{Badge|Quake}}</small> | | [[File:Quake Badge.png|20px]]<br><small>{{Badge|Quake}}</small> | ||
| style="background: #{{ground color light}}; border: 2px solid #{{ground color dark}}; {{roundy|10px}}" | {{Tcolor|Ground}} | | style="background: #{{ground color light}}; border: 2px solid #{{ground color dark}}; {{roundy|10px}}" | {{Tcolor|Ground}} | ||
| [[Clay]] | | [[Clay]] | ||
|- | |- | ||
| [[Mistralton Gym]] | | [[Mistralton Gym]] | ||
| [[File:Jet Badge.png|20px]]<br><small>{{Badge|Jet}}</small> | | [[File:Jet Badge.png|20px]]<br><small>{{Badge|Jet}}</small> | ||
| style="background: #{{flying color light}}; border: 2px solid #{{flying color dark}}; {{roundy|10px}}" | {{Tcolor|Flying}} | | style="background: #{{flying color light}}; border: 2px solid #{{flying color dark}}; {{roundy|10px}}" | {{Tcolor|Flying}} | ||
| [[Skyla]] | | [[Skyla]] | ||
|- | |- | ||
| [[Icirrus Gym]] | | [[Icirrus Gym]] | ||
| [[File:Freeze Badge.png|20px]]<br><small>{{Badge|Freeze}}</small> | | [[File:Freeze Badge.png|20px]]<br><small>{{Badge|Freeze}}</small> | ||
| style="background: #{{ice color light}}; border: 2px solid #{{ice color dark}}; {{roundy|10px}}" | {{Tcolor|Ice}} | | style="background: #{{ice color light}}; border: 2px solid #{{ice color dark}}; {{roundy|10px}}" | {{Tcolor|Ice}} | ||
| [[Brycen]]{{tt|*|Black and White}} | | [[Brycen]]{{tt|*|Black and White}} | ||
|- | |- | ||
| [[Opelucid Gym]] | | [[Opelucid Gym]] | ||
| [[File:Legend Badge.png|20px]]<br><small>{{Badge|Legend}}</small> | | [[File:Legend Badge.png|20px]]<br><small>{{Badge|Legend}}</small> | ||
| style="background: #{{dragon color light}}; border: 2px solid #{{dragon color dark}}; {{roundy|10px}}" | {{Tcolor|Dragon}} | | style="background: #{{dragon color light}}; border: 2px solid #{{dragon color dark}}; {{roundy|10px}}" | {{Tcolor|Dragon}} | ||
| [[Drayden]]{{tt|*|Black Version and Black 2 and White 2}}<br>[[Iris]]{{tt|*|White Version}} | | [[Drayden]]{{tt|*|Black Version and Black 2 and White 2}}<br>[[Iris]]{{tt|*|White Version}} | ||
|- | |- | ||
| rowspan="2" | [[Humilau Gym]] | | rowspan="2" | [[Humilau Gym]] | ||
| rowspan="2" | [[File:Wave Badge.png|20px]]<br><small>{{Badge|Wave}}</small> | | rowspan="2" | [[File:Wave Badge.png|20px]]<br><small>{{Badge|Wave}}</small> | ||
| style="background: #{{water color light}}; border: 2px solid #{{water color dark}}; {{roundy|10px}}" | {{Tcolor|Water}} | | style="background: #{{water color light}}; border: 2px solid #{{water color dark}}; {{roundy|10px}}" | {{Tcolor|Water}} | ||
| [[Marlon]]{{tt|*|Black 2 and White 2}} | | [[Marlon]]{{tt|*|Black 2 and White 2}} | ||
|} | |}{{-}} | ||
===In the anime=== | ===In the anime=== | ||
| Line 291: | Line 291: | ||
The [[Orange Archipelago]] also contains its own league, complete with its own Gyms: | The [[Orange Archipelago]] also contains its own league, complete with its own Gyms: | ||
{| | {| style="float:left; text-align:center; {{roundy|10px}}; border: 4px solid #{{green color light}};" colspan="4" cellspacing="1" cellpadding="2" | ||
|- | |- | ||
! colspan="4 | ! colspan="4" style="background: #{{Orange color light}}; {{roundytl|10px}}; {{roundytr|10px}};" | Orange Islands | ||
|- | |- | ||
! style="background: #{{orange color light}}" | Gym | ! style="background: #{{orange color light}}" | Gym | ||
| Line 299: | Line 299: | ||
! width="30%" style="background: #{{orange color light}}" | Type | ! width="30%" style="background: #{{orange color light}}" | Type | ||
! style="background: #{{orange color light}}" | Leader | ! style="background: #{{orange color light}}" | Leader | ||
|- | |- | ||
| [[Mikan Gym]] | | [[Mikan Gym]] | ||
| [[File:Coral-Eye Badge.png|20px]]<br><small>{{Badge|Coral-Eye}}</small> | | [[File:Coral-Eye Badge.png|20px]]<br><small>{{Badge|Coral-Eye}}</small> | ||
| style="background: #{{water color light}}; border: 2px solid #{{water color dark}}; {{roundy|10px}}" | {{Tcolor|Water}} | | style="background: #{{water color light}}; border: 2px solid #{{water color dark}}; {{roundy|10px}}" | {{Tcolor|Water}} | ||
| [[Cissy]] | | [[Cissy]] | ||
|- | |- | ||
| [[Navel Gym]] | | [[Navel Gym]] | ||
| [[File:Sea Ruby Badge.png|20px]]<br><small>{{Badge|Sea Ruby}}</small> | | [[File:Sea Ruby Badge.png|20px]]<br><small>{{Badge|Sea Ruby}}</small> | ||
| style="background: #{{ground color light}}; border: 2px solid #{{ground color dark}}; {{roundy|10px}}" | {{color|{{ground color dark}}|Various}} | | style="background: #{{ground color light}}; border: 2px solid #{{ground color dark}}; {{roundy|10px}}" | {{color|{{ground color dark}}|Various}} | ||
| [[Danny]] | | [[Danny]] | ||
|- | |- | ||
| [[Trovita Gym]] | | [[Trovita Gym]] | ||
| [[File:Spike Shell Badge.png|20px]]<br><small>{{Badge|Spike Shell}}</small> | | [[File:Spike Shell Badge.png|20px]]<br><small>{{Badge|Spike Shell}}</small> | ||
| style="background: #{{grass color light}}; border: 2px solid #{{grass color dark}}; {{roundy|10px}}" | {{color|{{green color dark}}|Various}} | | style="background: #{{grass color light}}; border: 2px solid #{{grass color dark}}; {{roundy|10px}}" | {{color|{{green color dark}}|Various}} | ||
| [[Rudy]] | | [[Rudy]] | ||
|- | |- | ||
| [[Kumquat Gym]] | | [[Kumquat Gym]] | ||
| [[File:Jade Star Badge.png|20px]]<br><small>{{Badge|Jade Star}}</small> | | [[File:Jade Star Badge.png|20px]]<br><small>{{Badge|Jade Star}}</small> | ||
| style="background: #{{psychic color light}}; border: 2px solid #{{psychic color dark}}; {{roundy|10px}}" | {{color|{{psychic color dark}}|Various}} | | style="background: #{{psychic color light}}; border: 2px solid #{{psychic color dark}}; {{roundy|10px}}" | {{color|{{psychic color dark}}|Various}} | ||
| [[Luana]] | | [[Luana]] | ||
|- | |- | ||
| [[Pummelo Stadium]] | | [[Pummelo Stadium]] | ||
| [[File:WinnerTrophy.png|20px]]<br><small>Winner's Trophy</small> | | [[File:WinnerTrophy.png|20px]]<br><small>Winner's Trophy</small> | ||
| style="background: #{{dragon color light}}; border: 2px solid #{{dragon color dark}}; {{roundy|10px}}" | {{color|{{dragon color dark}}|Various}} | | style="background: #{{dragon color light}}; border: 2px solid #{{dragon color dark}}; {{roundy|10px}}" | {{color|{{dragon color dark}}|Various}} | ||
| {{OBP|Drake|Orange League}} | | {{OBP|Drake|Orange League}} | ||
|} | |}{{-}} | ||
===In the TCG=== | ===In the TCG=== | ||
Revision as of 17:41, 27 January 2013

|
It has been suggested that this article be moved to Pokémon Gym. Please discuss whether or not to move it on its talk page. |

A Pokémon Gym (Japanese: ジム Gym) is a place where Pokémon Trainers go to train their Pokémon. Just like real life gymnasiums, where one can go to work out and build physical strength, Pokémon Gyms are places where Trainers can go to sharpen their battling skills and where their Pokémon can go to gain experience.
Often specializing in a particular type, Gyms create an environment which allows Trainers to test both their skills and Pokémon against those of others. The most powerful Trainer in a given Gym is called the Gym Leader, who is revered by both the lower-ranking members of the Gym and local fans. In the games, there is a character that stands near the door giving tips on how to beat the Gym's challenges.
Official Gyms
Gyms that are certified by the Pokémon League are vital to a Trainer's Pokémon journey. Leagues are designed so that conventional Trainers must travel far and wide before entering a League Competition, as the only way to enter one is by gaining at least eight official Gym Badges, and there can only be one official Gym per city.
In the games
In the games, most Gyms feature a number of Trainers the player may face before battling the Gym Leader. Their teams typically consisting of the same type of Pokémon that the Gym Leader has. These Trainers cannot be battled after the Gym Leader has been defeated.
There are eight known official Gyms in each region.
In the anime
In the anime, Gary Oak reveals that he has more than eight Badges, suggesting that there are more Gyms in the anime than players are given access to in the games. Specifically, he has at least ten Badges excluding the Earth Badge. Before the Indigo League competition, Ash encounters Otoshi in Bad to the Bone; he owns eight Badges, but only shares four in common with Ash. Later in the episode, another Trainer appears with eight other completely different Badges. In total, Ash, Gary, Otoshi and the other Trainer displayed 27 different types of Badges prior to competing in the Indigo Plateau Conference, so there must have been at least this number of official Gyms in the anime version of Kanto at the time.
Whilst on her journey collecting Badges, Sakura collected Badges from both Kanto and Johto, so it is unclear what the rules are for competing in championship tournaments.
At the Hoenn Pokémon League Championship, Morrison is shown to have an eighth Badge different from Ash's, suggesting that there are at least 9 official Gyms in Hoenn. Many believe it could be a Badge from Slateport or Pacifidlog.
During Barry's Busting Out All Over!, in the Sinnoh saga, Barry was seen to have a Badge that is not present in the games. Barry was seen with two more unknown Badges in Fighting Ire with Fire!, two of which also appeared in Nando's ownership in Last Call — First Round!.
Orange Archipelago
The Orange Archipelago also contains its own league, complete with its own Gyms:
| Orange Islands | |||
|---|---|---|---|
| Gym | Badge | Type | Leader |
| Mikan Gym | Coral-Eye Badge |
Water | Cissy |
| Navel Gym | Sea Ruby Badge |
Various | Danny |
| Trovita Gym | Spike Shell Badge |
Various | Rudy |
| Kumquat Gym | Jade Star Badge |
Various | Luana |
| Pummelo Stadium | Winner's Trophy |
Various | Drake |
In the TCG
In the Pokémon Trading Card Game, all Gyms are Stadium cards, which provide a specific effect while they are in play. This listing is of cards based on official Gyms from the Pokémon games and often focus on the type speciality of a particular Gym.
| Related cards Cards listed with a blue background are only legal to use in the current Expanded format. Cards listed with a green background are legal to use in both the current Standard and Expanded formats. | |||||||
|---|---|---|---|---|---|---|---|
| Card | Type | English Expansion |
Rarity | # | Japanese Expansion |
Rarity | # |
| Pewter City Gym | T [St] | Gym Heroes | 115/132 | Leaders' Stadium | |||
| Cerulean City Gym | T [St] | Gym Heroes | 57/132 | Leaders' Stadium | |||
| Vermilion City Gym | T [St] | Gym Heroes | 120/132 | Leaders' Stadium | |||
| Celadon City Gym | T [St] | Gym Heroes | 107/132 | Leaders' Stadium | |||
| Fuchsia City Gym | T [St] | Gym Challenge | 114/132 | Challenge from the Darkness | |||
| Saffron City Gym | T [St] | Gym Challenge | 122/132 | Challenge from the Darkness | |||
| Cinnabar City Gym | T [St] | Gym Challenge | 113/132 | Challenge from the Darkness | |||
| Viridian City Gym | T [St] | Gym Challenge | 123/132 | Challenge from the Darkness | |||
| Sunyshore City Gym | St | Rising Rivals | 94/111 | Bonds to the End of Time | 082/090 | ||
| Virbank City Gym | St | Freeze Bolt | 057/059 | ||||
| Aspertia City Gym | St | Boundaries Crossed | 127/149 | Cold Flare | 057/059 | ||
Unofficial Gyms
In the games
Saffron City Dojo
- Main article: Fighting Dojo
The Trainers of this Gym specialize in Fighting-type Pokémon. It used to be an official Gym until Sabrina defeated its Leader, Kiyo. After the player defeats the Dojo's Karate Master Kiyo, he will give the player either Hitmonlee or Hitmonchan as a reward.
Prestige Precept center
- Main article: Prestige Precept Center
Also known as the Pre Gym, this unofficial Gym of Phenac City doubles as an academy. In Pokémon Colosseum, its Leader, Justy, will not battle the Trainer until they have at least six Pokémon, and will give away TM27 (Return).
In the anime
A.J.'s Gym
This Gym is run solely by the Trainer A.J., and is notable for its rigorous training methods. It is unknown what prize if any A.J. gave to any victorious challengers, because he left it to enter the Pokémon League after he defeated 100 challengers in a row using only his Sandshrew. This Gym appears in The Path to the Pokémon League.
Fighting Spirit Gym
This Gym was run by Anthony, who was training his Hitmonchan for the P1 Grand Prix. It did not appear to be used for actual Pokémon battles. Instead, it had the appearance of a gym used for training and exercising.
Kaz Gym
This Gym in Dark City wanted to become an official Gym to earn money, but was rejected by the Pokémon League. It has Pokémon of various types, but its primary Pokémon is an Electabuzz. This Gym appears in Showdown at Dark City and is run by Kaz.
Yas Gym
This Gym in Dark City wanted to become an official Gym to earn money, but was rejected by the Pokémon League. The Gym Trainers specialize in Fighting but the Gym Leader's Pokémon is a Scyther. This Gym appears in Showdown at Dark City and is run by Yas.
Coastline Gym
This is an unofficial Gym that was featured in Just Add Water. It is located on the outskirts of Blackthorn City. Led by Dorian, the Gym specializes in Water-type Pokémon. Unlike the other Water-type Gyms, Dorian holds his battles underwater.
Although the Gym is unofficial, Dorian is hoping that by word of mouth it will become more popular. In fact, after Ash and his friends visited the Gym, they promised they would tell everyone at the Silver Conference about it. However, it hasn't been mentioned since then.
Powerzone Gym
This is an unofficial Gym run by Jessie, James and Meowth in Gymbaliar!. They used the Gym as a method of training and building strategies, however they were on a losing streak until a wild Croagunk appeared and was used as Jessie's powerhouse.
In the TCG
This listing is of cards that feature TCG-exclusive Gyms, which focus on altering a certain gameplay mechanic.
| Related cards Cards listed with a blue background are only legal to use in the current Expanded format. Cards listed with a green background are legal to use in both the current Standard and Expanded formats. | |||||||
|---|---|---|---|---|---|---|---|
| Card | Type | English Expansion |
Rarity | # | Japanese Expansion |
Rarity | # |
| No Removal Gym | T [St] | Gym Heroes | 103/132 | Leaders' Stadium | |||
| The Rocket's Training Gym | T [St] | Gym Heroes | 104/132 | Leaders' Stadium | |||
| Narrow Gym | T [St] | Gym Heroes | 124/132 | Leaders' Stadium | |||
| Chaos Gym | T [St] | Gym Challenge | 102/132 | Leaders' Stadium | |||
| Resistance Gym | T [St] | Gym Challenge | 109/132 | Leaders' Stadium | |||
| Rocket's Minefield Gym | T [St] | Gym Challenge | 119/132 | Challenge from the Darkness | |||
| Ecogym | T [St] | Neo Genesis | 84/111 | Gold, Silver, to a New World... | |||
| Broken Ground Gym | T [St] | Neo Destiny | 84/105 | Darkness, and to Light... | |||
| Rocket's Tricky Gym | T [St] | EX Team Rocket Returns | 90/109 | Rocket Gang Strikes Back | 082/085 | ||
Differences between generations
Generations II and V have a unique design for each Gym (except Cinnabar Gym, which is destroyed). However, in Generation II the only difference is the shape and color of the roof, with the exception of Saffron and Cerulean Gyms.

Generation I
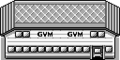
Generation I

Generation III (Hoenn)
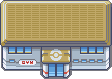
Generation III (Kanto)

Generation IV (Sinnoh)

Generation IV (Johto)

Generation IV (Kanto)


Generation II


Trivia
- For Gymbaliar!, Professor Oak's lecture is about Gyms. He writes this Pokémon senryū about them: かてるまで なんどもちょうせん ポケモンジム Kateru made nandomo chōsen, Pokémon Jimu "Until you win, battle again and again; that is a Pokémon Gym."
- This is also the episode Team Rocket set up a fake Gym, with Jessie acting as its Leader.
- In Generation I, a glitch allows Trainers to fish in the statues at the front of the Gyms.
- No known Gym has specialized in Dark-type Pokémon.
- As the Fighting Dojo in Kanto was once official, every region except Unova has had a Fighting-type Gym at one time.
- Despite the above fact, there has been a Fighting-type specialist in every region, either as a Gym Leader or an Elite Four member.
- A Trainer in the Glitter Lighthouse also says Jasmine used to specialize in Rock-type Pokémon, meaning every region except Unova has had a Rock-type Gym at one time.
- In Pokémon HeartGold and SoulSilver, each Gym's frame is colored according to the type, except for the Viridian Gym, which has no specialist type. The Viridian Gym's frame is green.
- In Pokémon HeartGold and SoulSilver, Walking Pokémon are not allowed in the Blackthorn Gym and Viridian Gym because the flooring is unstable. Coincidentally, both gyms are the last in gyms fought in Kanto and Johto respectively.
- In Generation V, eight of the eleven Unova Gyms serve dual purposes, both as a place of battle and as a service; Striaton Gym is a restaurant, Nacrene Gym is a museum, Castelia Gym is a gallery showcasing the paintings of the Gym Leader Burgh, Nimbasa Gym is a set of roller coasters to go with the Ferris Wheel in Nimbasa City in Pokémon Black and White or a fashion show catwalk in Pokémon Black 2 and White 2, Driftveil Gym is a mining operation, Mistralton Gym is an airfield, Aspertia Gym is a school, and Virbank Gym is a music club.
- In Generation V, Gyms do not take on a single appearance, their look being customized to suit the Gym Leader's specialist type. Gyms had only previously had unique designs in Generation II, where the roof colors differed.
- In Pokémon Black and White 2, each gym has a unique remix of the usual Pokémon Gym theme music.
In other languages
| ||||||||||||||||||||||||||||||

|
The Pokémon League | 
| |
|---|---|---|---|
| Participation Trainer • Battle • Gym Leaders Gyms • Badges • Referee Championship matches Elite Four • Orange League Champion League Pokémon League Conferences Indigo • Silver • Ever Grande • Lily of the Valley Vertress • Lumiose • Manalo |
Regional Pokémon Leagues Indigo • Orange* • Johto • Hoenn • Sinnoh Unova • Kalos • Alola • Galar • Paldea Areas of jurisdiction Pokémon League Reception Gate • Hall of Fame Palace of Victory • Cerulean Cave Others Pokémon Association • PIA World Coronation Series (Masters Eight Tournament) | ||
| This article is part of Project Locations, a Bulbapedia project that aims to write comprehensive articles on every location in the Pokémon world. |