Glacier Palace Great Spire: Difference between revisions
mNo edit summary |
|||
| (21 intermediate revisions by 10 users not shown) | |||
| Line 1: | Line 1: | ||
{{DungeonPrevNext|Glacier Palace | {{DungeonPrevNext|Glacier Palace Western Spire|Windy Shoreline|5}} | ||
{{Dungeon infobox | {{Dungeon infobox | ||
|colorscheme=Rock | |colorscheme=Rock | ||
|bordercolorscheme=Water | |bordercolorscheme=Water | ||
|name=Glacier Palace | |name=Glacier Palace Great Spire | ||
|jname= | |jname=グレッシャーパレス {{tt|大結晶|だいけっしょう}}の{{tt|塔|とう}} | ||
|jtrans=Glacier Palace | |jtrans=Glacier Palace Great Crystal Tower | ||
|image=Glacier Palace Great Spire PMDGTI.png | |image=Glacier Palace Great Spire PMDGTI.png | ||
|recruitable=Yes | |recruitable=Yes | ||
|floors= | |floors=5 | ||
|rest=Yes | |rest=Yes | ||
|traps=Yes | |traps=Yes | ||
|monsterhouses=Yes | |monsterhouses=Yes | ||
|items= | |items=Current | ||
|money=Allowed | |money=Allowed | ||
|teamsize=4 | |teamsize=4 | ||
|startlevel=Current | |startlevel=Current | ||
|maintype= | |maintype=None | ||
|boss= | |boss={{p|Kyurem}} and [[Bittercold]] | ||
}} | }} | ||
'''Glacier Palace | '''Glacier Palace Great Spire''' (Japanese: '''グレッシャーパレス {{tt|大結晶|だいけっしょう}}の{{tt|塔|とう}}''' ''Glacier Palace Great Crystal Tower'') is a playable dungeon the {{player}} goes through in [[Pokémon Mystery Dungeon: Gates to Infinity]]. It has five floors and two bosses. This dungeon is accessible after the player completes [[Glacier Palace Western Spire]]. Recruited Pokémon automatically get sent back to [[Pokémon Paradise]] instead of staying with the group. | ||
The [[Bittercold]] is battled in the '''Great Spire Inner Chamber''' (Japanese: '''{{tt|大結晶|だいけっしょう}}の{{tt|塔|とう}} {{tt|奥|おく}}の{{tt|間|ま}}''' ''Great Crystal Tower Inner Room''). | |||
==Pokémon encountered== | ==Pokémon encountered== | ||
{{mdloc/h|Rock}} | {{mdloc/h|Rock}} | ||
{{mdloc|601|Klinklang| | {{mdloc|601|Klinklang|1F-5F|49|?}} | ||
{{mdloc|625|Bisharp| | {{mdloc|625|Bisharp|1F-5F|52|?}} | ||
{{mdloc|634|Zweilous| | {{mdloc|634|Zweilous|1F-5F|50|?}} | ||
{{mdloc|646|Kyurem| | {{mdloc|646|Kyurem|Top|40|0|boss=yes}} | ||
{{mdloc/f|Rock}} | {{mdloc/f|Rock}} | ||
== | ===Great Spire Inner Chamber=== | ||
{{mdloc/h|Rock}} | |||
{| | |||
|- | |- | ||
| style="background: #FFF" | [[File:Bittercold Core PMDGTI.png|50px]] | |||
| style="background: #FFF" | [[Bittercold]] | |||
| style="background: #FFF" | Inner Chamber | |||
| style="background: #FFF; text-align:center" | 60 | |||
| style="background: #FFF" | Unrecruitable <small><sup>Boss</sup></small> | |||
| | {{mdloc/f|Rock}} | ||
| | |||
|} | |||
==Items== | ==Items== | ||
{{DungeonItem/h|rock}} | {{DungeonItem/h|rock}} | ||
{{DungeonItem|Poké|4= | {{DungeonItem|Poké|4=62-280|sprite=Poké currency V|3=1F-5}} | ||
{{DungeonItem|Pecha Berry|3= | {{DungeonItem|Cheri Berry|sprite=MDBag Cheri Berry V Sprite|3=1F-5}} | ||
{{DungeonItem|Escape Orb|Wonder Orb|3= | {{DungeonItem|Chesto Berry|sprite=MDBag Chesto Berry V Sprite|3=1F-5}} | ||
{{DungeonItem|Health Orb|Wonder Orb|3= | {{DungeonItem|Oran Berry|sprite=MDBag Oran Berry V Sprite|3=1F-5}} | ||
{{DungeonItem|Slow Orb|Wonder Orb|3= | {{DungeonItem|Pecha Berry|sprite=MDBag Pecha Berry V Sprite|3=1F-5}} | ||
{{DungeonItem|Pure Seed|Seed|3= | {{DungeonItem|Rawst Berry|sprite=MDBag Rawst Berry V Sprite|3=1F-5}} | ||
{{DungeonItem|Sleep Seed|Seed|3= | {{DungeonItem|Gravelerock|4=5|Throwing item|sprite=MDBag Gravelerock V Sprite|3=1F-5}} | ||
{{DungeonItem|Violent Seed|Seed|3= | {{DungeonItem|All Power-Up Orb|sprite=MDBag Wonder Orb V Sprite|3=1F-5}} | ||
{{DungeonItem|Max Elixir|Health drink|3= | {{DungeonItem|Escape Orb|sprite=MDBag Wonder Orb V Sprite|3=1F-5}} | ||
{{DungeonItem| | {{DungeonItem|Foe-Hold Orb|sprite=MDBag Wonder Orb V Sprite|3=1F-5}} | ||
{{DungeonItem|Health Orb|sprite=MDBag Wonder Orb V Sprite|3=1F-5}} | |||
{{DungeonItem|Slow Orb|sprite=MDBag Wonder Orb V Sprite|3=1F-5}} | |||
{{DungeonItem|Pure Seed|Seed|sprite=MDBag Seed V Sprite|3=1F-5}} | |||
{{DungeonItem|Sleep Seed|Seed|sprite=MDBag Seed V Sprite|3=1F-5}} | |||
{{DungeonItem|Violent Seed|Seed|sprite=MDBag Seed V Sprite|3=1F-5}} | |||
{{DungeonItem|Max Elixir|Health drink|sprite=MDBag Max Elixir V Sprite|3=1F-5}} | |||
{{DungeonItem/f|rock}} | |||
==Traps encountered== | |||
{| class="roundy" style="background: #{{rock color}}; border: 3px solid #{{water color dark}}; text-align:center" | |||
! style="background:#{{rock color light}}; {{roundytl|5px}}"| Image | |||
! style="background:#{{rock color light}}" | Trap | |||
! style="background:#{{rock color light}}; {{roundytr|5px}}"| Floors | |||
|- style="background: #FFF" | |||
| [[File:PoisonTrapGTI.png]] | |||
| Poison Trap | |||
| 4F | |||
|- style="background: #FFF" | |||
| [[File:SlowTrapGTI.png]] | |||
| Slow Trap | |||
| 3F | |||
|- | |||
| style="background: #FFF; {{roundybl|5px}}"| [[File:SpinTrapGTI.png]] | |||
| style="background: #FFF"| Spin Trap | |||
| style="background: #FFF; {{roundybr|5px}}"| 2F | |||
|} | |} | ||
| Line 71: | Line 90: | ||
File:Bittercold attack 2 PMDGTI.png|Bittercold's second attack | File:Bittercold attack 2 PMDGTI.png|Bittercold's second attack | ||
File:Bittercold attack 3 PMDGTI.png|Bittercold's third attack | File:Bittercold attack 3 PMDGTI.png|Bittercold's third attack | ||
File:Glacier Palace small rainbow PMDGTI.png|Glacier Palace with a small rainbow | File:Glacier Palace small rainbow PMDGTI.png|Glacier Palace with a small rainbow midway through the boss battle | ||
File:Bittercold Core PMDGTI.png|Bittercold's red core exposed | File:Bittercold Core PMDGTI.png|Bittercold's red core exposed | ||
File:Attacking Bittercold Core PMDGTI.png|Attacking the red core | File:Attacking Bittercold Core PMDGTI.png|Attacking the red core | ||
| Line 78: | Line 97: | ||
File:Glacier Palace breaking apart PMDGTI.png|Glacier Palace breaking apart and collapsing | File:Glacier Palace breaking apart PMDGTI.png|Glacier Palace breaking apart and collapsing | ||
</gallery> | </gallery> | ||
==In other languages== | |||
{{langtable|color={{rock color}}|bordercolor={{water color dark}} | |||
|fr=Palais de Glace Tour du Cristal | |||
|de=Eispalast - Riesenkristallturm | |||
|it=Palazzo di Ghiaccio - Torre di Cristallo | |||
|es=Palacio Glacial (Torre del Gigacristal) | |||
}} | |||
''Great Spire Inner Chamber'' | |||
{{langtable|color={{rock color}}|bordercolor={{water color dark}} | |||
|fr=Antre du Cristal | |||
|de=Riesenkristallturm - Innerstes | |||
|it=Torre di Cristallo - Sala Interna | |||
|es=Torre del Gigacristal (Cámara Interior) | |||
}} | |||
{{-}} | {{-}} | ||
| Line 84: | Line 119: | ||
[[Category:Pokémon Mystery Dungeon: Gates to Infinity locations]] | [[Category:Pokémon Mystery Dungeon: Gates to Infinity locations]] | ||
[[Category: | [[Category:Towers]] | ||
[[de:Eispalast – Riesenkristallturm]] | [[de:Eispalast – Riesenkristallturm]] | ||
[[es:Palacio Glacial - Torre del Gigacristal]] | |||
[[fr:Palais de Glace - Tour du Cristal]] | |||
[[it:Palazzo di Ghiaccio - Torre di Cristallo]] | |||
[[ja:グレッシャーパレス 大結晶の塔]] | |||
[[zh:冰河宮殿 大結晶之塔]] | |||
Latest revision as of 10:35, 2 April 2022
|
|
|
| ||||||||||||||||||||||||||||||||||||||||||
| ||||||||||||||||||||||||||||||||||||||||||
| ||||||||||||||||||||||||||||||||||||||||||

Glacier Palace Great Spire (Japanese: グレッシャーパレス 大結晶の塔 Glacier Palace Great Crystal Tower) is a playable dungeon the player goes through in Pokémon Mystery Dungeon: Gates to Infinity. It has five floors and two bosses. This dungeon is accessible after the player completes Glacier Palace Western Spire. Recruited Pokémon automatically get sent back to Pokémon Paradise instead of staying with the group.
The Bittercold is battled in the Great Spire Inner Chamber (Japanese: 大結晶の塔 奥の間 Great Crystal Tower Inner Room).
Pokémon encountered
| Pokémon | Floors | Levels | Recruit Rate | |
|---|---|---|---|---|
| Klinklang | 1F-5F | 49 | ?% | |
| Bisharp | 1F-5F | 52 | ?% | |
| Zweilous | 1F-5F | 50 | ?% | |
| Kyurem | Top | 40 | Unrecruitable Boss | |
Great Spire Inner Chamber
| Pokémon | Floors | Levels | Recruit Rate | |
|---|---|---|---|---|
| Bittercold | Inner Chamber | 60 | Unrecruitable Boss | |
Items
| Item | Floors | |||||||
|---|---|---|---|---|---|---|---|---|
| 62-280 Poké | 1F-5F | |||||||
| Cheri Berry | 1F-5F | |||||||
| Chesto Berry | 1F-5F | |||||||
| Oran Berry | 1F-5F | |||||||
| Pecha Berry | 1F-5F | |||||||
| Rawst Berry | 1F-5F | |||||||
| 5 Gravelerock | 1F-5F | |||||||
| All Power-Up Orb | 1F-5F | |||||||
| Escape Orb | 1F-5F | |||||||
| Foe-Hold Orb | 1F-5F | |||||||
| Health Orb | 1F-5F | |||||||
| Slow Orb | 1F-5F | |||||||
| Pure Seed | 1F-5F | |||||||
| Sleep Seed | 1F-5F | |||||||
| Violent Seed | 1F-5F | |||||||
| Max Elixir | 1F-5F | |||||||
Traps encountered
| Image | Trap | Floors |
|---|---|---|

|
Poison Trap | 4F |

|
Slow Trap | 3F |

|
Spin Trap | 2F |
Gallery

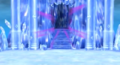
Entrance
Kyurem boss area
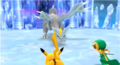
Battling Kyurem
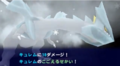
Kyurem using Glaciate
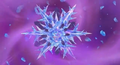
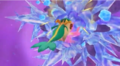
Bittercold
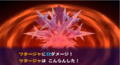
Bittercold's first attack
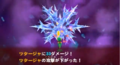
Bittercold's second attack
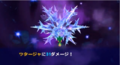
Bittercold's third attack

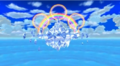
Glacier Palace with a small rainbow midway through the boss battle
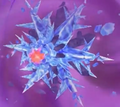
Bittercold's red core exposed
Attacking the red core

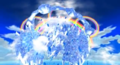
Bittercold exploding
Glacier Palace with a large rainbow after Bittercold's defeat
Glacier Palace breaking apart and collapsing


In other languages
| ||||||||||||||||||
Great Spire Inner Chamber
| ||||||||||||||||||
| This article is part of both Project Locations and Project Sidegames, Bulbapedia projects that, together, aim to write comprehensive articles on the Pokémon Locations and Sidegames, respectively. |