Ecruteak Gym: Difference between revisions
No edit summary |
m (→In the manga) |
||
| (64 intermediate revisions by 23 users not shown) | |||
| Line 3: | Line 3: | ||
|characters=エンジュ | |characters=エンジュ | ||
|japanese=Enju | |japanese=Enju | ||
|image=Ecruteak Gym.png | |image=Ecruteak Gym anime.png | ||
|location=Ecruteak City | |location=Ecruteak City | ||
|leader=[[Morty]] | |leader=[[Morty]] | ||
| Line 13: | Line 13: | ||
|colorlight=CDB891 | |colorlight=CDB891 | ||
}} | }} | ||
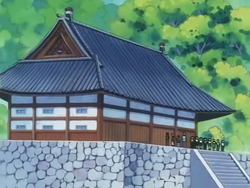
The '''Ecruteak Gym''' (Japanese: '''エンジュジム''' ''Enju Gym'') is the official [[Gym]] of [[Ecruteak City]]. It is based on {{ | The '''Ecruteak Gym''' (Japanese: '''エンジュジム''' ''Enju Gym'') is the official [[Gym]] of [[Ecruteak City]]. It is based on {{type|Ghost}} {{OBP|Pokémon|species}}. The [[Gym Leader]] is [[Morty]]. {{pkmn|Trainer}}s who defeat him receive the {{Badge|Fog}}. | ||
==In the games== | ==In the games== | ||
In {{game|Crystal}} and [[Generation IV]], the {{player}} won't be able to challenge the Ecruteak Gym when they first arrive in Ecruteak City. An elderly man will force the player out of the Gym, telling the player that Morty is with [[Eusine]] at the [[Burned Tower]], searching for signs of the [[Legendary beasts]]. As soon as the player has awakened {{p|Raikou}}, {{p|Entei}}, and {{p|Suicune}}, Morty will return to the Gym, allowing it to be challenged. The elderly man will then assume his normal position outside the Burned Tower. | |||
===Generation II=== | ===Generation II=== | ||
In {{ | {{sign|RBY|header}} | ||
{{sign|RBY|title|Ecruteak City}} | |||
{{sign|RBY|title|Pokémon Gym}} | |||
{{sign|RBY|title|Leader: Morty}} | |||
{{sign|RBY|The Mystic Seer of the Future}} | |||
{{sign|RBY|footer}} | |||
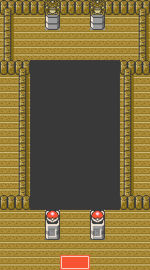
In {{game2|Gold|Silver|Crystal}}, the Ecruteak Gym has an invisible floor which can cause many problems for someone who doesn't know what they are doing. The body of Morty's Gym is a dark pit. If a challenger steps in the wrong place, they will be sent back to the beginning of the path. Trainers appear to float in the air, standing on an invisible floor. A challenger able to navigate along the invisible floor using trial and error can safely reach Morty and challenge him. | |||
A field based on the Gym also appears in [[Pokémon Stadium 2]]'s Johto [[Gym Leader Castle]]. | |||
===Generation IV=== | ===Generation IV=== | ||
| Line 23: | Line 34: | ||
{{sign|DPcity|title|Ecruteak City Pokémon Gym}} | {{sign|DPcity|title|Ecruteak City Pokémon Gym}} | ||
{{sign|DPcity|title|Leader: Morty}} | {{sign|DPcity|title|Leader: Morty}} | ||
{{sign|DPcity| | {{sign|DPcity|The Mystic Seer of the Future}} | ||
{{sign|DPcity|footer}} | {{sign|DPcity|footer}} | ||
In {{game|HeartGold and SoulSilver|s}}, the Ecruteak Gym has changed | |||
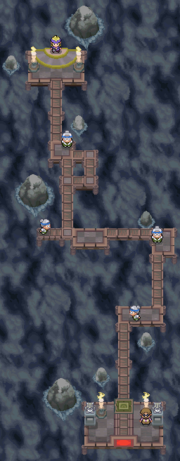
In {{game|HeartGold and SoulSilver|s}}, the Ecruteak Gym has changed significantly. Flames light up some dim patches within the Gym. While there is still one path to Morty, sections are lit up, revealing Trainers that must be battled in order to reach the Gym Leader. In addition, when a Trainer is defeated, the lights will go out at the section where the player is standing on, forcing them to navigate through the dark patch with the help of their memory. | |||
===Appearance=== | ===Appearance=== | ||
| Line 32: | Line 44: | ||
|colordark={{ghost color}} | |colordark={{ghost color}} | ||
|colorlight={{ghost color light}} | |colorlight={{ghost color light}} | ||
|genII=Ecruteak Gym | |genII=Ecruteak Gym GSC.png | ||
|genIV=Ecruteak Gym HGSS | |genIV=Ecruteak Gym HGSS.png | ||
|sizeII=150px | |sizeII=150px | ||
|sizeIV=180px}} | |sizeIV=180px}} | ||
===Trainers=== | ===Trainers=== | ||
===={{game2|Gold|Silver|Crystal}}==== | ====Core series==== | ||
====={{game2|Gold|Silver|Crystal}}===== | |||
{{Trainerheader|Ghost}} | {{Trainerheader|Ghost}} | ||
{{Trainerentry| | {{Trainerentry|Spr GS Sage.png|Sage|Ping|512|5|092|Gastly|♂|16|None|092|Gastly|♂|16|None|092|Gastly|♂|16|None|092|Gastly|♂|16|None|092|Gastly|♂|16|None|36=ジエイ|37=Jiei}} | ||
{{Trainerdiv|Ghost}} | {{Trainerdiv|Ghost}} | ||
{{Trainerentry| | {{Trainerentry|Spr GS Medium.png|Medium|Grace|800|2|093|Haunter|♀|20|None|093|Haunter|♀|20|None|36=タエコ|37=Taeko}} | ||
{{Trainerdiv|Ghost}} | {{Trainerdiv|Ghost}} | ||
{{Trainerentry| | {{Trainerentry|Spr GS Sage.png|Sage|Jeffrey|704|1|093|Haunter|♂|22|None|36=ウンショウ|37=Unshō}} | ||
{{Trainerdiv|Ghost}} | {{Trainerdiv|Ghost}} | ||
{{Trainerentry| | {{Trainerentry|Spr GS Medium.png|Medium|Martha|800|3|092|Gastly|♀|18|None|093|Haunter|♀|20|None|092|Gastly|♀|20|None|36=ヨネコ|37=Yoneko}} | ||
{{Trainerfooter|Ghost|2|inside}} | {{Trainerfooter|Ghost|2|inside}} | ||
{{Party | {{Party/Single | ||
|color={{ghost color}} | |color={{ghost color}} | ||
|headcolor={{ghost color light}} | |headcolor={{ghost color light}} | ||
|bordercolor={{ghost color dark}} | |bordercolor={{ghost color dark}} | ||
|sprite= | |sprite=Spr GS Morty.png | ||
|prize={{ | |prize={{PDollar}}2300 | ||
|class=Leader | |class=Leader | ||
|name=Morty | |classlink=Gym Leader | ||
|name={{color2|000000|Morty}} | |||
|game=GSC | |game=GSC | ||
|location=Ecruteak Gym | |location=Ecruteak Gym | ||
|pokemon=4 | |pokemon=4}} | ||
|{{Pokémon/2 | |||
| | |game=Crystal | ||
|game= | |||
|ndex=092 | |ndex=092 | ||
|pokemon=Gastly | |pokemon=Gastly | ||
| Line 73: | Line 85: | ||
|move3=Mean Look|move3type=Normal | |move3=Mean Look|move3type=Normal | ||
|move4=Curse|move4type=???}} | |move4=Curse|move4type=???}} | ||
|{{Pokémon/2 | |||
| | |game=Crystal | ||
|game= | |||
|ndex=093 | |ndex=093 | ||
|pokemon=Haunter | |pokemon=Haunter | ||
| Line 86: | Line 96: | ||
|move3=Mimic|move3type=Normal | |move3=Mimic|move3type=Normal | ||
|move4=Night Shade|move4type=Ghost}} | |move4=Night Shade|move4type=Ghost}} | ||
{{Party/Div|color={{ghost color}}}} | |||
| | |{{Pokémon/2 | ||
| | |game=Crystal | ||
|game= | |ndex=094 | ||
|pokemon=Gengar | |||
|gender=male | |||
|level=25 | |||
|type1=Ghost|type2=Poison | |||
|move1=Shadow Ball|move1type=Ghost | |||
|move2=Mean Look|move2type=Normal | |||
|move3=Hypnosis|move3type=Psychic | |||
|move4=Dream Eater|move4type=Psychic}} | |||
|{{Pokémon/2 | |||
|game=Crystal | |||
|ndex=093 | |ndex=093 | ||
|pokemon=Haunter | |pokemon=Haunter | ||
| Line 99: | Line 119: | ||
|move3=Mimic|move3type=Normal | |move3=Mimic|move3type=Normal | ||
|move4=Night Shade|move4type=Ghost}} | |move4=Night Shade|move4type=Ghost}} | ||
{{Party/Footer}} | |||
====={{game|HeartGold and SoulSilver|s}}===== | |||
===={{game|HeartGold and SoulSilver|s}}==== | |||
{{Trainerheader|Ghost}} | {{Trainerheader|Ghost}} | ||
{{Trainerentry|HGSS Medium.png|Medium|Georgina|768|5|092|Gastly|♀|16|None|092|Gastly|♀|16|None|092|Gastly|♀|16|None|092|Gastly|♀|16|None|092|Gastly|♀|16|None|36=スズコ|37=Suzuko}} | {{Trainerentry|Spr HGSS Medium.png|Medium|Georgina|768|5|092|Gastly|♀|16|None|092|Gastly|♀|16|None|092|Gastly|♀|16|None|092|Gastly|♀|16|None|092|Gastly|♀|16|None|36=スズコ|37=Suzuko}} | ||
{{Trainerdiv|Ghost}} | {{Trainerdiv|Ghost}} | ||
{{Trainerentry|HGSS Medium.png|Medium|Grace|960|2|093|Haunter|♀|20|None|093|Haunter|♀|20|None|36=タエコ|37=Taeko}} | {{Trainerentry|Spr HGSS Medium.png|Medium|Grace|960|2|093|Haunter|♀|20|None|093|Haunter|♀|20|None|36=タエコ|37=Taeko}} | ||
{{Trainerdiv|Ghost}} | {{Trainerdiv|Ghost}} | ||
{{Trainerentry|HGSS Medium.png|Medium|Edith|1056|1|093|Haunter|♀|22|None|36=ウメコ|37=Umeko}} | {{Trainerentry|Spr HGSS Medium.png|Medium|Edith|1056|1|093|Haunter|♀|22|None|36=ウメコ|37=Umeko}} | ||
{{Trainerdiv|Ghost}} | {{Trainerdiv|Ghost}} | ||
{{Trainerentry| | {{Trainerentry|Spr HGSS Medium.png|Medium|Martha|960|3|092|Gastly|♀|18|None|093|Haunter|♀|20|None|092|Gastly|♀|20|None|36=ヨネコ|37=Yoneko}} | ||
{{Trainerfooter|Ghost|2|inside}} | {{Trainerfooter|Ghost|2|inside}} | ||
{{Party|color={{ghost color}}|headcolor={{ghost color light}}|bordercolor={{ghost color dark}} | {{Party/Single | ||
|sprite= | |color={{ghost color}} | ||
|prize={{ | |headcolor={{ghost color light}} | ||
|bordercolor={{ghost color dark}} | |||
|sprite=Spr HGSS Morty.png | |||
|prize={{PDollar}}2760 | |||
|class=Leader | |class=Leader | ||
|name=Morty | |classlink=Gym Leader | ||
|name={{color2|000000|Morty}} | |||
|game=HGSS | |game=HGSS | ||
|location=Ecruteak Gym | |location=Ecruteak Gym | ||
|pokemon=4 | |pokemon=4}} | ||
| | |{{Pokémon/4 | ||
|gender=male|level=21|type1=Ghost|type2=Poison|ability=Levitate | |game=HeartGold | ||
|ndex=092 | |||
|pokemon=Gastly | |||
|gender=male | |||
|level=21 | |||
|type1=Ghost|type2=Poison | |||
|ability=Levitate | |||
|move1=Lick|move1type=Ghost|move1cat=Physical | |move1=Lick|move1type=Ghost|move1cat=Physical | ||
|move2=Spite|move2type=Ghost|move2cat=Status | |move2=Spite|move2type=Ghost|move2cat=Status | ||
|move3=Mean Look|move3type=Normal|move3cat=Status | |move3=Mean Look|move3type=Normal|move3cat=Status | ||
|move4=Curse|move4type=???|move4cat=Status}} | |move4=Curse|move4type=???|move4cat=Status}} | ||
| | |{{Pokémon/4 | ||
|gender=male|level=21|type1=Ghost|type2=Poison|ability=Levitate | |game=HeartGold | ||
|ndex=093 | |||
|pokemon=Haunter | |||
|gender=male | |||
|level=21 | |||
|type1=Ghost|type2=Poison | |||
|ability=Levitate | |||
|move1=Hypnosis|move1type=Psychic|move1cat=Status | |move1=Hypnosis|move1type=Psychic|move1cat=Status | ||
|move2=Dream Eater|move2type=Psychic|move2cat=Special | |move2=Dream Eater|move2type=Psychic|move2cat=Special | ||
|move3=Curse|move3type=???|move3cat=Status | |move3=Curse|move3type=???|move3cat=Status | ||
|move4=Nightmare|move4type=Ghost|move4cat=Status}} | |move4=Nightmare|move4type=Ghost|move4cat=Status}} | ||
| | {{Party/Div|color={{ghost color}}}} | ||
|gender=male|level=23|type1=Ghost|type2=Poison|ability=Levitate | |{{Pokémon/4 | ||
|game=HeartGold | |||
|ndex=094 | |||
|pokemon=Gengar | |||
|gender=male | |||
|level=25 | |||
|type1=Ghost|type2=Poison | |||
|ability=Levitate | |||
|held=Sitrus Berry | |||
|move1=Hypnosis|move1type=Psychic|move1cat=Status | |||
|move2=Shadow Ball|move2type=Ghost|move2cat=Special | |||
|move3=Mean Look|move3type=Normal|move3cat=Status | |||
|move4=Sucker Punch|move4type=Dark|move4cat=Physical}} | |||
|{{Pokémon/4 | |||
|game=HeartGold | |||
|ndex=093 | |||
|pokemon=Haunter | |||
|gender=male| | |||
level=23 | |||
|type1=Ghost|type2=Poison | |||
|ability=Levitate | |||
|move1=Curse|move1type=???|move1cat=Status | |move1=Curse|move1type=???|move1cat=Status | ||
|move2=Mean Look|move2type=Normal|move2cat=Status | |move2=Mean Look|move2type=Normal|move2cat=Status | ||
|move3=Sucker Punch|move3type=Dark|move3cat=Physical | |move3=Sucker Punch|move3type=Dark|move3cat=Physical | ||
|move4=Night Shade|move4type=Ghost|move4cat=Special}} | |move4=Night Shade|move4type=Ghost|move4cat=Special}} | ||
| | {{Party/Footer}} | ||
|gender=male|level= | |||
|move1= | ====Side series==== | ||
|move2=Shadow Ball| | =====[[Pokémon Stadium 2]]===== | ||
|move3= | ======Round 1====== | ||
|move4= | {{Trainerheader|Ghost}} | ||
{{Trainerentry|S2 Medium.png|Medium|Holly|N/A|6|069|Bellsprout|♀|50-100|Berry|163|Hoothoot|♂|50-100|PSNCureBerry|166|Ledian|♀|50-100|Burnt Berry|132|Ditto||50-100|Metal Powder|030|Nidorina|♀|50-100|Poison Barb|201B|Unown||50-100|PRZCureBerry|36=タケ|37=Take}} | |||
{{Trainerdiv|Ghost}} | |||
{{Trainerentry|S2 Sage.png|Sage|Ty|N/A|6|041|Zubat|♂|50-100|Burnt Berry|238|Smoochum|♀|50-100|PRZCureBerry|092|Gastly|♂|50-100|Berry|042|Golbat|♂|50-100|Mint Berry|200|Misdreavus|♀|50-100|PSNCureBerry|093|Haunter|♀|50-100|Bitter Berry|36=ダイカク|37=Daikaku}} | |||
{{Trainerfooter|Ghost|1|Inside}} | |||
{{Party/Single | |||
|color={{ghost color}} | |||
|headcolor={{ghost color light}} | |||
|bordercolor={{ghost color dark}} | |||
|sprite=S2 Leader Morty.png | |||
|prize=N/A | |||
|class=Gym Leader | |||
|classlink=Gym Leader | |||
|name={{color2|000|Morty}} | |||
|game=Stadium2 | |||
|location=Gym Leader Castle | |||
|locationname=Johto Gym Leader Castle | |||
|pokemon=6}} | |||
|{{Pokémon/2 | |||
|ndex=094 | |||
|pokemon=Gengar | |||
|gender=male | |||
|level=50-100 | |||
|type1=Ghost|type2=Poison | |||
|held=Bitter Berry | |||
|move1=Shadow Ball|move1type=Ghost | |||
|move2=Night Shade|move2type=Ghost | |||
|move3=Psychic|move3type=Psychic | |||
|move4=Fire Punch|move4type=Fire}} | |||
|{{Pokémon/2 | |||
|ndex=168 | |||
|pokemon=Ariados | |||
|gender=female | |||
|level=50-100 | |||
|type1=Bug|type2=Poison | |||
|held=Burnt Berry | |||
|move1=Psychic|move1type=Psychic | |||
|move2=Sludge Bomb|move2type=Poison | |||
|move3=Dig|move3type=Ground | |||
|move4=Night Shade|move4type=Ghost}} | |||
|{{Pokémon/2 | |||
|ndex=185 | |||
|pokemon=Sudowoodo | |||
|gender=male | |||
|level=50-100 | |||
|type1=Rock | |||
|held=Berry | |||
|move1=Strength|move1type=Normal | |||
|move2=Rock Slide|move2type=Rock | |||
|move3=Low Kick|move3type=Fighting | |||
|move4=Earthquake|move4type=Ground}} | |||
{{Party/Div|color={{ghost color}}}} | |||
|{{Pokémon/2 | |||
|ndex=105 | |||
|pokemon=Marowak | |||
|gender=female | |||
|level=50-100 | |||
|type1=Ground | |||
|held=Mint Berry | |||
|move1=Bonemerang|move1type=Ground | |||
|move2=Headbutt|move2type=Normal | |||
|move3=Bone Club|move3type=Ground | |||
|move4=Iron Tail|move4type=Steel}} | |||
|{{Pokémon/2 | |||
|ndex=203 | |||
|pokemon=Girafarig | |||
|gender=male | |||
|level=50-100 | |||
|type1=Normal|type2=Psychic | |||
|held=PRZCureBerry | |||
|move1=Psybeam|move1type=Psychic | |||
|move2=Thunder|move2type=Electric | |||
|move3=Swift|move3type=Normal | |||
|move4=Nightmare|move4type=Ghost}} | |||
|{{Pokémon/2 | |||
|ndex=164 | |||
|pokemon=Noctowl | |||
|gender=female | |||
|level=50-100 | |||
|type1=Normal|type2=Flying | |||
|held=PSNCureBerry | |||
|move1=Fly|move1type=Flying | |||
|move2=Confusion|move2type=Psychic | |||
|move3=Take Down|move3type=Normal | |||
|move4=Foresight|move4type=Normal}} | |||
{{Party/Footer}} | |||
======Round 2====== | |||
{{Trainerheader|Ghost}} | |||
{{Trainerentry|S2 Medium.png|Medium|Holly|N/A|6|092|Gastly|♀|50-100|Spell Tag|164|Noctowl|♂|50-100|PRZCureBerry|070|Weepinbell|♀|50-100|Mint Berry|211|Qwilfish|♀|50-100|Bitter Berry|119|Seaking|♂|50-100|Gold Berry|132|Ditto||50-100|Metal Powder|36=タケ|37=Take}} | |||
{{Trainerdiv|Ghost}} | |||
{{Trainerentry|S2 Sage.png|Sage|Ty|N/A|6|093|Haunter|♀|50-100|PRZCureBerry|088|Grimer|♂|50-100|Mint Berry|124|Jynx|♀|50-100|Ice Berry|042|Golbat|♂|50-100|Bitter Berry|089|Muk|♂|50-100|Burnt Berry|198|Murkrow|♀|50-100|PSNCureBerry|36=ダイカク|37=Daikaku}} | |||
{{Trainerfooter|Ghost|1|Inside}} | |||
{{Party/Single | |||
|color={{ghost color}} | |||
|headcolor={{ghost color light}} | |||
|bordercolor={{ghost color dark}} | |||
|sprite=S2 Leader Morty.png | |||
|prize=N/A | |||
|class=Gym Leader | |||
|classlink=Gym Leader | |||
|name={{color2|000|Morty}} | |||
|game=Stadium2 | |||
|location=Gym Leader Castle | |||
|locationname=Johto Gym Leader Castle | |||
|pokemon=6}} | |||
|{{Pokémon/2 | |||
|ndex=094 | |||
|pokemon=Gengar | |||
|level=50-100 | |||
|gender=male | |||
|type1=Ghost|type2=Poison | |||
|held=King's Rock | |||
|move1=Confuse Ray|move1type=Ghost | |||
|move2=Psychic|move2type=Psychic | |||
|move3=Fire Punch|move3type=Fire | |||
|move4=Thunderbolt|move4type=Electric}} | |||
|{{Pokémon/2 | |||
|ndex=226 | |||
|pokemon=Mantine | |||
|level=50-100 | |||
|gender=male | |||
|type1=Water|type2=Flying | |||
|held=BrightPowder | |||
|move1=Surf|move1type=Water | |||
|move2=Ice Beam|move2type=Ice | |||
|move3=Confuse Ray|move3type=Ghost | |||
|move4=Wing Attack|move4type=Flying}} | |||
|{{Pokémon/2 | |||
|ndex=210 | |||
|pokemon=Granbull | |||
|level=50-100 | |||
|gender=female | |||
|type1=Normal | |||
|held=Scope Lens | |||
|move1=Take Down|move1type=Normal | |||
|move2=Lick|move2type=Ghost | |||
|move3=Shadow Ball|move3type=Ghost | |||
|move4=Sludge Bomb|move4type=Poison}} | |||
{{Party/Div|color={{ghost color}}}} | |||
|{{Pokémon/2 | |||
|ndex=131 | |||
|pokemon=Lapras | |||
|level=50-100 | |||
|gender=female | |||
|type1=Water|type2=Ice | |||
|held=MiracleBerry | |||
|move1=Surf|move1type=Water | |||
|move2=Ice Beam|move2type=Ice | |||
|move3=Headbutt|move3type=Normal | |||
|move4=Thunderbolt|move4type=Electric}} | |||
|{{Pokémon/2 | |||
|ndex=200 | |||
|pokemon=Misdreavus | |||
|level=50-100 | |||
|gender=female | |||
|type1=Ghost | |||
|held=Focus Band | |||
|move1=Confuse Ray|move1type=Ghost | |||
|move2=Shadow Ball|move2type=Ghost | |||
|move3=Psychic|move3type=Psychic | |||
|move4=Thunderbolt|move4type=Electric}} | |||
|{{Pokémon/2 | |||
|ndex=103 | |||
|pokemon=Exeggutor | |||
|level=50-100 | |||
|gender=male | |||
|type1=Grass|type2=Psychic | |||
|held=Quick Claw | |||
|move1=Psychic|move1type=Psychic | |||
|move2=Giga Drain|move2type=Grass | |||
|move3=Stun Spore|move3type=Grass | |||
|move4=Double-Edge|move4type=Normal}} | |||
{{Party/Footer}} | |||
===Items=== | ===Items=== | ||
{{Itlisth|Ghost}} | {{Itlisth|Ghost}} | ||
{{ | {{itemlist|TM Ghost|Reward for defeating Morty|G=yes|S=yes|C=yes|HG=yes|SS=yes|display={{TM|30|Shadow Ball}}}} | ||
{{Itlistfoot|Ghost}} | {{Itlistfoot|Ghost}} | ||
==In the anime== | ==In the anime== | ||
Ecruteak Gym | The Ecruteak Gym first appeared in ''[[EP182|From Ghost to Ghost]]'', where Morty was seen teaching a group of children about {{type|Ghost}} Pokémon before his Gym battle with {{Ash}}. Mostly thanks to his {{AP|Noctowl}}'s {{m|Foresight}} and newly learned {{m|Confusion}}, Ash was able to defeat Morty and earn himself the {{badge|Fog}}. | ||
The Gym reappeared in ''[[EP227|For Ho-Oh the Bells Toll!]]'', where Morty and his friend [[Eusine]] told Ash and {{ashfr}} the legend of the [[Legendary beasts]]. When Ash mentioned that he had seen {{p|Suicune}} before, Eusine accused him of lying and challenged him to a battle. However, the battle was interrupted before it could even properly begin, due to a large number of {{type|Bug}} Pokémon attacking the city out of anger of {{TRT}} having accidentally broken one of the [[Clear Bell|Crystal Bells]] they had stolen. | |||
{{ | ===Pokémon used in Gym=== | ||
{{TrainerPoké | |||
|trainer=Morty | |||
|pkmn=Gastly | |||
|type1=Ghost | |||
|type2=Poison | |||
|img=Morty Gastly.png | |||
|epnum=EP182 | |||
|epname=From Ghost to Ghost | |||
|vajp= | |||
|vaen=Ted Lewis{{!}}Ed Paul | |||
|desc=Morty sent out his {{p|Gastly}} as the first Pokémon he used in his match against {{Ash}}. Ash started with {{AP|Noctowl}}, using {{m|Foresight}} to make Gastly vulnerable to physical attacks, but switched for {{AP|Pikachu}} shortly afterwards. Gastly defeated Pikachu easily, but was then defeated by [[Ash's Cyndaquil]]. | |||
Gastly's known moves are {{m|Night Shade}} and {{m|Lick}}.}} | |||
{{TrainerPoké | |||
|trainer=Morty | |||
|pkmn=Haunter | |||
|type1=Ghost | |||
|type2=Poison | |||
|img=Morty Haunter.png | |||
|epnum=EP182 | |||
|epname=From Ghost to Ghost | |||
|vajp= | |||
|vaen=Ted Lewis{{!}}Ed Paul | |||
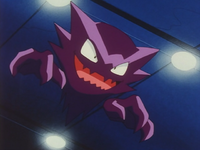
|desc={{p|Haunter}} was the second Pokémon Morty used against {{Ash}}. It used Mean Look to force Ash to stick with {{AP|Cyndaquil}}, and with Hypnosis and Lick, it won the round. Ash now had only {{AP|Noctowl}} left to battle with. Things looked bad for Ash when Haunter managed to [[Status condition#Confusion|confuse]] Noctowl with its Confuse Ray, and was ready to finish it with Night Shade, but then Noctowl learned how to use {{m|Confusion}}, and beat Haunter with one try. | |||
Haunter's known moves are {{m|Mean Look}}, {{m|Hypnosis}}, {{m|Lick}}, {{m|Confuse Ray}}, and {{m|Night Shade}}.}} | |||
{{TrainerPoké | |||
|main=Morty's Gengar | |||
|trainer=Morty | |||
|pkmn=Gengar | |||
|type1=Ghost | |||
|type2=Poison | |||
|img=Morty Gengar.png | |||
|epnum=EP181 | |||
|epname=A Ghost of a Chance | |||
<!--|vajp=--> | |||
|vaen=Ted Lewis{{!}}Ed Paul | |||
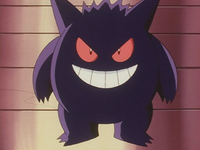
|desc=Gengar is always out of its Poké Ball and hiding in the shadows, always coming out whenever Morty needs it. It loves to play tricks on people, especially on those who enter the [[Burned Tower]]. When {{TRT}} tried to steal [[Ash's Pikachu]] as usual, Morty used Gengar to blast them away with a powerful Shadow Ball attack. | |||
Morty used Gengar in the Gym battle against {{Ash}} in ''[[EP182|From Ghost to Ghost]]''. Gengar was shown to be a formidable battler. It is able to attack opponents even when it is invisible, making it almost impossible for its opponents to find it. [[Ash's Noctowl]] was able to reveal Gengar's location by using {{m|Confusion}} through the whole building and then using {{m|Foresight}} to keep Gengar visible. It then finished Gengar off with a {{m|Tackle}} attack and Ash got the {{Badge|Fog}}.}} | |||
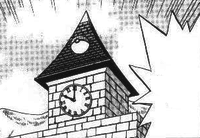
==In the manga== | |||
[[File:Ecruteak Gym Adventures.png|thumb|left|180px|Ecruteak Gym in Pokémon Adventures]] | |||
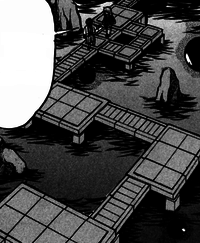
[[File:Ecruteak Gym interior Adventures.png|thumb|200px|Ecruteak Gym's interior in Pokémon Adventures]] | |||
===In the Pokémon Adventures manga=== | |||
Ecruteak Gym first appeared in ''[[PS141|Hello, Lickitung]]'' and ''[[PS142|Really Remoraid]]'', where [[Lt. Surge]] arrived at the Gym to ask Morty's help to locate {{adv|Gold}} and {{adv|Silver}}, who had gone missing after their battle against the [[Masked Man]] at the [[Lake of Rage]]. Using Gold's cap and goggles and Silver's boot, which the two [[Pokédex holder]]s had lost during the battle, Morty was able to use his special power to locate Gold and Silver on one of the [[Whirl Islands]]. | |||
Ecruteak Gym appeared again in the {{chap|HeartGold & SoulSilver}}, where Gold visited the Gym to ask Morty help to find [[Lance]], who was missing after he had been attacked by [[Petrel]] on his way to the [[Pokéathlon Dome]]. Morty was able to draw a crude image of what he saw, later leading Gold to the [[Ruins of Alph]], where Lance was hiding. Silver also arrived at the Gym to ask Morty's help to find the 13 remaining [[Plate]]s. At the Gym, he was confronted by [[Falkner]], [[Bugsy]], and [[Chuck]], who were protecting the Gym per Morty's request. At first, they were suspicious towards him, but when Silver revealed that {{adv|Blue}} had entrusted him with the {{TP|Blue|Rhyperior}} he had helped Blue to evolve, they allowed him to enter. Before Silver could ask Morty anything, however, {{adv|Arceus}} appeared and blasted the Gym, destroying it. Despite being weakened by the attack, Morty was able to use his last remaining strength to mark the locations of the Plates on a map, allowing Silver and his {{TP|Silver|Weavile}} to track them down across the [[region]]. | |||
{{-}} | |||
[[File:Ecruteak Gym Golden Boys.png|thumb|200px|Ecruteak Gym in Pokémon Gold & Silver: The Golden Boys]] | |||
===In the Pokémon Gold & Silver: The Golden Boys manga=== | |||
Ecruteak Gym first appeared in ''[[GB13|A Promise Given to Miltank]]'', where {{GnB|Gold}} tried to enter the Gym in order to challenge Morty. However, since he only had two Badges, Morty refused to let him in. When Gold [[GB14|later]] returned to the Gym after having received the {{badge|Plain}} from [[Whitney]], he was dismayed to learn that since Morty was going to the grand reopening of the [[Moomoo Farm]] and then to a month-lasting conference in [[Kanto]], he was unable to accept Gold's challenge. Because of this, and for having seen Gold's true strength already, Morty chose to give Gold a free {{badge|Fog}}, telling him to keep it at least until he would be able to battle him to see if he could earn it for good. | |||
{{-}} | {{-}} | ||
{{Gym Leaders of Johto}}<br> | {{Gym Leaders of Johto}}<br> | ||
| Line 178: | Line 450: | ||
[[de:Pokémon-Arena von Teak City]] | [[de:Pokémon-Arena von Teak City]] | ||
[[es:Gimnasio Pokémon de Ciudad Iris]] | |||
[[fr:Arène de Rosalia]] | [[fr:Arène de Rosalia]] | ||
[[it:Palestra di Amarantopoli]] | |||
[[ja:エンジュジム]] | [[ja:エンジュジム]] | ||
[[zh:圓朱道館]] | |||
Revision as of 06:36, 22 October 2019
| Ecruteak Gym エンジュジム Enju Gym | |
| |
| Location | Ecruteak City |
| Gym Leader | Morty |
| Badge | Fog Badge |
| Dominant Type | Ghost |
| Region | Johto |

| |
| Battlefield | |
The Ecruteak Gym (Japanese: エンジュジム Enju Gym) is the official Gym of Ecruteak City. It is based on Ghost-type Pokémon. The Gym Leader is Morty. Trainers who defeat him receive the Fog Badge.
In the games
In Pokémon Crystal and Generation IV, the player won't be able to challenge the Ecruteak Gym when they first arrive in Ecruteak City. An elderly man will force the player out of the Gym, telling the player that Morty is with Eusine at the Burned Tower, searching for signs of the Legendary beasts. As soon as the player has awakened Raikou, Entei, and Suicune, Morty will return to the Gym, allowing it to be challenged. The elderly man will then assume his normal position outside the Burned Tower.
Generation II
Ecruteak City
Pokémon Gym
Leader: Morty
The Mystic Seer of the Future
In Pokémon Gold, Silver, and Crystal, the Ecruteak Gym has an invisible floor which can cause many problems for someone who doesn't know what they are doing. The body of Morty's Gym is a dark pit. If a challenger steps in the wrong place, they will be sent back to the beginning of the path. Trainers appear to float in the air, standing on an invisible floor. A challenger able to navigate along the invisible floor using trial and error can safely reach Morty and challenge him.
A field based on the Gym also appears in Pokémon Stadium 2's Johto Gym Leader Castle.
Generation IV
In Pokémon HeartGold and SoulSilver, the Ecruteak Gym has changed significantly. Flames light up some dim patches within the Gym. While there is still one path to Morty, sections are lit up, revealing Trainers that must be battled in order to reach the Gym Leader. In addition, when a Trainer is defeated, the lights will go out at the section where the player is standing on, forcing them to navigate through the dark patch with the help of their memory.
Appearance
|
Trainers
Core series
Pokémon Gold, Silver, and Crystal
| Trainer | Pokémon | |||||||||||
|---|---|---|---|---|---|---|---|---|---|---|---|---|
|
| |||||||||||
| ||||||||||||
| ||||||||||||
| ||||||||||||
| ||||||||||||
|
| |||||||||||
| ||||||||||||
|
| |||||||||||
|
| |||||||||||
| ||||||||||||
| ||||||||||||
| Trainers with a telephone symbol by their names will give their Pokégear number to the player, and may call or be called for a rematch with higher-level Pokémon. | ||||||||||||
|
|||||||||||||||||||||||||||||||||||||||||||||||||||||||||||||||||||||||||||||||||||||||||||||||||||||
| |||||||||||||||||||||||||||||||||||||||||||||||||||||||||||||||||||||||||||||||||||||||||||||||||||||
Pokémon HeartGold and SoulSilver
| Trainer | Pokémon | |||||||||||
|---|---|---|---|---|---|---|---|---|---|---|---|---|
|
| |||||||||||
| ||||||||||||
| ||||||||||||
| ||||||||||||
| ||||||||||||
|
| |||||||||||
| ||||||||||||
|
| |||||||||||
|
| |||||||||||
| ||||||||||||
| ||||||||||||
| Trainers with a telephone symbol by their names will give their Pokégear number to the player, and may call or be called for a rematch with higher-level Pokémon. | ||||||||||||
|
|||||||||||||||||||||||||||||||||||||||||||||||||||||||||||||||||||||||||||||||||||||||||||||||||||||||||||||||||||||||||||||||||||||||||||||
| |||||||||||||||||||||||||||||||||||||||||||||||||||||||||||||||||||||||||||||||||||||||||||||||||||||||||||||||||||||||||||||||||||||||||||||
Side series
Pokémon Stadium 2
Round 1
| Trainer | Pokémon | |||||||||||
|---|---|---|---|---|---|---|---|---|---|---|---|---|
|
| |||||||||||
| ||||||||||||
| ||||||||||||
| ||||||||||||
| ||||||||||||
| ||||||||||||
|
| |||||||||||
| ||||||||||||
| ||||||||||||
| ||||||||||||
| ||||||||||||
| ||||||||||||
|
|||||||||||||||||||||||||||||||||||||||||||||||||||||||||||||||||||||||||||||||||||||||||||||||||||||||||||||||||||||||||||||||||||||||||||||||||||
| |||||||||||||||||||||||||||||||||||||||||||||||||||||||||||||||||||||||||||||||||||||||||||||||||||||||||||||||||||||||||||||||||||||||||||||||||||
Round 2
| Trainer | Pokémon | |||||||||||
|---|---|---|---|---|---|---|---|---|---|---|---|---|
|
| |||||||||||
| ||||||||||||
| ||||||||||||
| ||||||||||||
| ||||||||||||
| ||||||||||||
|
| |||||||||||
| ||||||||||||
| ||||||||||||
| ||||||||||||
| ||||||||||||
| ||||||||||||
|
|||||||||||||||||||||||||||||||||||||||||||||||||||||||||||||||||||||||||||||||||||||||||||||||||||||||||||||||||||||||||||||||||||||||||||||||||||
| |||||||||||||||||||||||||||||||||||||||||||||||||||||||||||||||||||||||||||||||||||||||||||||||||||||||||||||||||||||||||||||||||||||||||||||||||||
Items
| Item | Location | Games | |
|---|---|---|---|
| TM30 (Shadow Ball) | Reward for defeating Morty | G S C HG SS | |
In the anime
The Ecruteak Gym first appeared in From Ghost to Ghost, where Morty was seen teaching a group of children about Ghost-type Pokémon before his Gym battle with Ash. Mostly thanks to his Noctowl's Foresight and newly learned Confusion, Ash was able to defeat Morty and earn himself the Fog Badge.
The Gym reappeared in For Ho-Oh the Bells Toll!, where Morty and his friend Eusine told Ash and his friends the legend of the Legendary beasts. When Ash mentioned that he had seen Suicune before, Eusine accused him of lying and challenged him to a battle. However, the battle was interrupted before it could even properly begin, due to a large number of Bug-type Pokémon attacking the city out of anger of Team Rocket having accidentally broken one of the Crystal Bells they had stolen.
Pokémon used in Gym

|
||
| Morty sent out his Gastly as the first Pokémon he used in his match against Ash. Ash started with Noctowl, using Foresight to make Gastly vulnerable to physical attacks, but switched for Pikachu shortly afterwards. Gastly defeated Pikachu easily, but was then defeated by Ash's Cyndaquil.
Gastly's known moves are Night Shade and Lick. | ||
| Debut | From Ghost to Ghost | |
|---|---|---|
| Voice actors | ||
| Japanese | ||
| English | Ed Paul | |
|
||
| Haunter was the second Pokémon Morty used against Ash. It used Mean Look to force Ash to stick with Cyndaquil, and with Hypnosis and Lick, it won the round. Ash now had only Noctowl left to battle with. Things looked bad for Ash when Haunter managed to confuse Noctowl with its Confuse Ray, and was ready to finish it with Night Shade, but then Noctowl learned how to use Confusion, and beat Haunter with one try.
Haunter's known moves are Mean Look, Hypnosis, Lick, Confuse Ray, and Night Shade. | ||
| Debut | From Ghost to Ghost | |
|---|---|---|
| Voice actors | ||
| Japanese | ||
| English | Ed Paul | |
|
||
Gengar is always out of its Poké Ball and hiding in the shadows, always coming out whenever Morty needs it. It loves to play tricks on people, especially on those who enter the Burned Tower. When Team Rocket tried to steal Ash's Pikachu as usual, Morty used Gengar to blast them away with a powerful Shadow Ball attack. Morty used Gengar in the Gym battle against Ash in From Ghost to Ghost. Gengar was shown to be a formidable battler. It is able to attack opponents even when it is invisible, making it almost impossible for its opponents to find it. Ash's Noctowl was able to reveal Gengar's location by using Confusion through the whole building and then using Foresight to keep Gengar visible. It then finished Gengar off with a Tackle attack and Ash got the Fog Badge. | ||
| Debut | A Ghost of a Chance | |
|---|---|---|
| Voice actors | ||
| Japanese | ||
| English | Ed Paul | |
In the manga
In the Pokémon Adventures manga
Ecruteak Gym first appeared in Hello, Lickitung and Really Remoraid, where Lt. Surge arrived at the Gym to ask Morty's help to locate Gold and Silver, who had gone missing after their battle against the Masked Man at the Lake of Rage. Using Gold's cap and goggles and Silver's boot, which the two Pokédex holders had lost during the battle, Morty was able to use his special power to locate Gold and Silver on one of the Whirl Islands.
Ecruteak Gym appeared again in the HeartGold & SoulSilver arc, where Gold visited the Gym to ask Morty help to find Lance, who was missing after he had been attacked by Petrel on his way to the Pokéathlon Dome. Morty was able to draw a crude image of what he saw, later leading Gold to the Ruins of Alph, where Lance was hiding. Silver also arrived at the Gym to ask Morty's help to find the 13 remaining Plates. At the Gym, he was confronted by Falkner, Bugsy, and Chuck, who were protecting the Gym per Morty's request. At first, they were suspicious towards him, but when Silver revealed that Blue had entrusted him with the Rhyperior he had helped Blue to evolve, they allowed him to enter. Before Silver could ask Morty anything, however, Arceus appeared and blasted the Gym, destroying it. Despite being weakened by the attack, Morty was able to use his last remaining strength to mark the locations of the Plates on a map, allowing Silver and his Weavile to track them down across the region.
In the Pokémon Gold & Silver: The Golden Boys manga
Ecruteak Gym first appeared in A Promise Given to Miltank, where Gold tried to enter the Gym in order to challenge Morty. However, since he only had two Badges, Morty refused to let him in. When Gold later returned to the Gym after having received the Plain Badge from Whitney, he was dismayed to learn that since Morty was going to the grand reopening of the Moomoo Farm and then to a month-lasting conference in Kanto, he was unable to accept Gold's challenge. Because of this, and for having seen Gold's true strength already, Morty chose to give Gold a free Fog Badge, telling him to keep it at least until he would be able to battle him to see if he could earn it for good.
| Gym Leaders of the Johto region | |||||||||||||||||||
|---|---|---|---|---|---|---|---|---|---|---|---|---|---|---|---|---|---|---|---|
|
|
|
| ||||||||||||||||
|
|
|
| ||||||||||||||||

|
This article is part of Project Locations, a Bulbapedia project that aims to write comprehensive articles on every location in the Pokémon world. |
