|
|
| (27 intermediate revisions by 11 users not shown) |
| Line 1: |
Line 1: |
| {{redirect|Nameless Cave|the location in [[Hoenn]] with a similar name|Nameless Cavern}} | | {{redirect|Nameless Cave|the location in [[Hoenn]] with a similar name|Nameless Cavern}} |
| {{incomplete|needs=fishing odds for the Super Rod at night}}
| |
| {{Infobox location | | {{Infobox location |
| |image=HGSS Cerulean Cave-{{#switch: {{#time: G}}|4|5|6|7|8|9=Morning|10|11|12|13|14|15|16=Day|17|18|19=Evening|20|21|22|23|0|1|2|3=Night}}.png | | |image=HGSS Cerulean Cave-{{#switch: {{#time: G}}|4|5|6|7|8|9=Morning|10|11|12|13|14|15|16=Day|17|18|19=Evening|20|21|22|23|0|1|2|3=Night}}.png |
| Line 15: |
Line 14: |
| }} | | }} |
|
| |
|
| '''Cerulean Cave''' (Japanese: '''ハナダの{{tt|洞窟|どうくつ}}''' ''Hanada Cave'') is a [[cave]] located in the northwest corner of [[Cerulean City]] in [[Kanto]]. | | '''Cerulean Cave''' (Japanese: '''ハナダの{{tt|洞窟|どうくつ}}''' ''Hanada Cave''), introduced as '''Unknown Dungeon''' (Japanese: '''ななしのどうくつ''' ''Nameless Cave'') in the Japanese [[Generation I]] games, is a [[cave]] located in the northwest corner of [[Cerulean City]] in [[Kanto]]. |
|
| |
|
| In [[Generation I]], the cave was inconsistently referred to as the '''Unknown Dungeon''' (Japanese: '''ななしのどうくつ''' ''Nameless Cave'') in addition to its name. This moniker would later be reused for the {{kal|Unknown Dungeon}} in [[Kalos]], which is a direct reference to Cerulean Cave.
| | The cave's moniker would later be reused for the {{kal|Unknown Dungeon}} in [[Kalos]], which is a direct reference to Cerulean Cave. |
| | |
| | ==Names== |
| | ===Unknown Dungeon=== |
| | The English name "Unknown Dungeon" is only found in {{eng|Pokémon Stadium}}'s game data. However, this name is not seen in-game, because this place is not selectable on the Pokémon location map from Stadium's {{OBP|Pokédex|Stadium}} prior to [[Pokémon Stadium 2]]. Despite being virtually unused in the games themselves, this was still the most widely used name for the cave in [[Generation I]] times due to its usage by various official sources, such as the Trainer's Guide released together with the [[core series]] games, as well as the officially-licensed strategy guides by [[Prima Games]] and [[Nintendo Power]]. |
| | |
| | This place is known as "ななしのどうくつ" (''Nameless Cave'') in the Japanese [[Generation I]] [[Town Map]]. This Japanese name is also found in the game data (but not seen in-game either) of the {{jap|Pokémon Stadium|Japanese Pokémon Stadium}}, as well as the Japanese version of {{eng|Pokémon Stadium}}. |
| | |
| | ===Cerulean Cave=== |
| | The English name "Cerulean Cave" was introduced in {{game2|Red|Blue|Yellow}} (as seen in the [[Town Map]], and also mentioned by the [[Non-player character|NPC]] who blocks the cave entrance), even though the Japanese version of these games used "ななしのどうくつ" (''Nameless Cave'') in the Town Map instead. It's also referred to as "the cavern close to Cerulean" in an e-mail message found in a [[computer]] in [[Cinnabar Lab]]. The English name "Cerulean Cave" is also used later in [[Pokémon Stadium 2]] (on the Pokémon location map), as well as multiple [[core series]] games. |
| | |
| | The Japanese katakana name "ハナダ どうくつ" (''Hanada Cave''), lacking the "の" between words, was also mentioned in the [[Generation I]] games. Specifically, this is said by the NPC who blocks the cave entrance, and is also mentioned in the email from the computer in Cinnabar Lab. |
| | |
| | In {{game2|Gold|Silver|Crystal}}, this cave is not named in-game due to fact that it is inaccessible. However, the English name "Cerulean Cave" is found in the game data nonetheless. Similarly, the equivalent Japanese katakana name "ハナダのどうくつ" (''Hanada Cave''), with the "の" between words, was introduced in the data of these Generation II games. This Japanese name was first used in-game in [[Pokémon Stadium 2]]'s {{OBP|Pokédex|Stadium}}'s Pokémon location map, and then also used later in other [[core series]] games. Its kanji equivalent "ハナダの{{tt|洞窟|どうくつ}}" was introduced in [[Pokémon: Let's Go, Pikachu! and Let's Go, Eevee!]]. |
|
| |
|
| ==In the games== | | ==In the games== |
| Line 26: |
Line 38: |
| In Pokémon FireRed and LeafGreen, more Pokémon can be found only by [[fishing]], while there are fewer different species of wild Pokémon found by walking around in the cave. | | In Pokémon FireRed and LeafGreen, more Pokémon can be found only by [[fishing]], while there are fewer different species of wild Pokémon found by walking around in the cave. |
|
| |
|
| In [[Generation II]], Cerulean Cave completely collapsed but the leftovers of Mewtwo's presence remain and are found in the lake near the cave, in the form of the item [[Berserk Gene]]. In {{game|HeartGold and SoulSilver|s}}, Cerulean Cave has been rebuilt and Mewtwo can once again be found inside. An [[Non-player character|NPC]] blocks the entrance until the player has obtained all eight Kanto Gym [[Badge]]s (as opposed to defeating the Pokémon League at Indigo Plateau, the requirement in the Generation I games and Pokémon FireRed and LeafGreen). If Mew is [[Walking Pokémon|brought along]], it will sense Mewtwo's presence and act apprehensive. | | In [[Generation II]], Cerulean Cave completely collapsed but the leftovers of Mewtwo's presence remain and are found in the lake near the cave, in the form of the item [[Berserk Gene]]. In {{game|HeartGold and SoulSilver|s}}, Cerulean Cave has been rebuilt and Mewtwo can once again be found inside. An [[Non-player character|NPC]] blocks the entrance until the player has obtained all eight Kanto Gym [[Badge]]s (as opposed to defeating the Pokémon League at Indigo Plateau, the requirement in the Generation I games and Pokémon FireRed and LeafGreen). In Pokémon HeartGold and SoulSilver, if Mew is [[Walking Pokémon|brought along]], it will sense Mewtwo's presence and act apprehensive. |
|
| |
|
| ===Geography=== | | ===Geography=== |
| Line 37: |
Line 49: |
|
| |
|
| ===Items=== | | ===Items=== |
| {{incomplete|section|needs=Item locations in Japanese Red and Green}} | | ====Pokémon Red and Green==== |
| | {{Itlisth|cave}} |
| | {{Itemlist|Nugget|1F, in the northwest area of the floor|JR=yes|JG=yes}} |
| | {{Itemlist|Full Restore| |
| | *1F, in the southwest area of the floor |
| | *2F, in the eastern area of the floor; accessible from the ladder on the plateau north of the entrance|JR=yes|JG=yes|display=[[Full Restore]] ×2}} |
| | {{Itemlist|Max Elixer|1F, northernmost point of the large middle plateau|JR=yes|JG=yes|display=[[Max Elixir|Max Elixer]]|sprite=Bag Max Elixir Sprite}} |
| | {{Itemlist|Rare Candy|1F, on a rock southwest of [[Max Elixir|Max Elixer]] ''(hidden, [[Broken hidden items|broken]])''|JR=yes|JG=yes}} |
| | {{Itemlist|Ultra Ball| |
| | *2F, in the southeast area of the floor, accessible from the ladder on the large middle plateau on 1F |
| | *B1F, in the eastern area on the plateau |
| | *B1F, on a lone rock near [[Max Revive]] ''(hidden, [[Broken hidden items|broken]])''|JR=yes|JG=yes|display=[[Ultra Ball]] ×3}} |
| | {{Itemlist|PP Up|2F, in the southwest area of the floor, accessible from the south ladder on the western plateau on 1F|JR=yes|JG=yes}} |
| | {{Itemlist|Max Revive|B1F, in the northeast area of the floor|JR=yes|JG=yes}} |
| | {{Itlistfoot|cave}} |
| ====Pokémon Red and Blue==== | | ====Pokémon Red and Blue==== |
| The Japanese game {{game|Blue| (Japanese)}} has the same map and item locations as the international games {{game|Red and Blue|s}}. | | The Japanese game {{game|Blue| (Japanese)}} has the same map and item locations as the international games {{game|Red and Blue|s}}. |
| Line 44: |
Line 70: |
| {{Itemlist|Nugget|1F, in the northwest area of the floor|R=yes|B=yes}} | | {{Itemlist|Nugget|1F, in the northwest area of the floor|R=yes|B=yes}} |
| {{Itemlist|Rare Candy|1F, on a rock on the plateau east of the [[Full Restore]] ''(hidden)''|R=yes|B=yes}} | | {{Itemlist|Rare Candy|1F, on a rock on the plateau east of the [[Full Restore]] ''(hidden)''|R=yes|B=yes}} |
| {{Itemlist|Full Restore|1F, in the southwest area of the floor|R=yes|B=yes}} | | {{Itemlist|Full Restore| |
| | *1F, in the southwest area of the floor |
| | *2F, northwest of the center of the floor, accessible from the ladder on a plateau in the northwest area of 1F|R=yes|B=yes|display=[[Full Restore]] ×2}} |
| {{Itemlist|PP Up|2F, in the east area of the floor, accessible from the ladder on the plateau north of the entrance on 1F|R=yes|B=yes}} | | {{Itemlist|PP Up|2F, in the east area of the floor, accessible from the ladder on the plateau north of the entrance on 1F|R=yes|B=yes}} |
| {{Itemlist|Full Restore|2F, northwest of the center of the floor, accessible from the ladder on a plateau in the northwest area of 1F|R=yes|B=yes}}
| | {{Itemlist|Ultra Ball| |
| {{Itemlist|Ultra Ball|2F, in the southwest area of the floor, accessible from the southwesternmost ladder on 1F|R=yes|B=yes}} | | *2F, in the southwest area of the floor, accessible from the southwesternmost ladder on 1F |
| {{Itemlist|Ultra Ball|B1F, near the center of the floor|R=yes|B=yes}}
| | *B1F, near the center of the floor |
| {{Itemlist|Ultra Ball|B1F, on a rock that stands out in the northeast area of the floor ''(hidden)''|R=yes|B=yes}}
| | *B1F, on a rock that stands out in the northeast area of the floor ''(hidden)''|R=yes|B=yes|display=[[Ultra Ball]] ×3}} |
| {{Itemlist|Max Revive|B1F, in the northeast area of the floor|R=yes|B=yes}} | | {{Itemlist|Max Revive|B1F, in the northeast area of the floor|R=yes|B=yes}} |
| {{Itlistfoot|cave}} | | {{Itlistfoot|cave}} |
| Line 55: |
Line 83: |
| ====Pokémon Yellow==== | | ====Pokémon Yellow==== |
| {{Itlisth|cave}} | | {{Itlisth|cave}} |
| {{Itemlist|Max Elixir|1F, northeast of the southwesternmost ladder|Y=yes|display=[[Max Elixir|Max Elixer]]}} | | {{Itemlist|Max Elixir| |
| {{Itemlist|Rare Candy|1F, near the southeast corner of the floor|Y=yes}} | | *1F, northeast of the southwesternmost ladder |
| {{Itemlist|Ultra Ball|1F, northeast of the center of the floor|Y=yes}}
| | *B1F, in the north area of the floor|Y=yes|display=[[Max Elixir|Max Elixer]] ×2}} |
| {{Itemlist|Max Revive|1F, in the east area of the floor|Y=yes}}
| | {{Itemlist|Rare Candy| |
| {{Itemlist|PP Up|1F, on a lone rock south of the [[Ultra Ball]] ''(hidden)''|Y=yes}}
| | *1F, near the southeast corner of the floor |
| {{Itemlist|Rare Candy|2F, in the west area of the floor, accessible from the easternmost ladder in the northeast area of 1F|Y=yes}}
| | *2F, in the west area of the floor, accessible from the easternmost ladder in the northeast area of 1F|Y=yes|display=[[Rare Candy]] ×2}} |
| {{Itemlist|Ultra Ball|2F, near the center of the floor, accessible from the southwesternmost ladder on 1F|Y=yes}} | | {{Itemlist|Ultra Ball| |
| {{Itemlist|Max Revive|2F, southeast of the center of the floor, accessible from the southwesternmost ladder on 1F|Y=yes}} | | *1F, northeast of the center of the floor |
| {{Itemlist|PP Up|2F, on the lone rock south of the center of the floor, accessible from the southwesternmost ladder on 1F ''(hidden)''|Y=yes}} | | *2F, near the center of the floor, accessible from the southwesternmost ladder on 1F |
| | *B1F, on the southwesternmost plateau |
| | *B1F, near the northeast corner of the floor|Y=yes|display=[[Ultra Ball]] ×4}} |
| | {{Itemlist|Max Revive| |
| | *1F, in the east area of the floor |
| | *2F, southeast of the center of the floor, accessible from the southwesternmost ladder on 1F |
| | *B1F, on the southwesternmost plateau|Y=yes|display=[[Max Revive]] ×3}} |
| | {{Itemlist|PP Up| |
| | *1F, on a lone rock south of the [[Ultra Ball]] ''(hidden)'' |
| | *2F, on the lone rock south of the center of the floor, accessible from the southwesternmost ladder on 1F ''(hidden)'' |
| | *B1F, on a rock that stands out close to the waterway to the southwesternmost plateau ''(hidden)''|Y=yes|display=[[PP Up]] ×3}} |
| {{Itemlist|Full Restore|2F, in the east area of the floor, accessible from the ladder in the east area of 1F|Y=yes}} | | {{Itemlist|Full Restore|2F, in the east area of the floor, accessible from the ladder in the east area of 1F|Y=yes}} |
| {{Itemlist|Max Elixir|B1F, in the north area of the floor|Y=yes|display=[[Max Elixir|Max Elixer]]}}
| |
| {{Itemlist|Ultra Ball|B1F, on the southwesternmost plateau|Y=yes}}
| |
| {{Itemlist|Ultra Ball|B1F, near the northeast corner of the floor|Y=yes}}
| |
| {{Itemlist|Max Revive|B1F, on the southwesternmost plateau|Y=yes}}
| |
| {{Itemlist|PP Up|B1F, on a rock that stands out close to the waterway to the southwesternmost plateau ''(hidden)''|Y=yes}}
| |
| {{Itlistfoot|cave}} | | {{Itlistfoot|cave}} |
|
| |
|
| Line 75: |
Line 108: |
| {{Itlisth|cave}} | | {{Itlisth|cave}} |
| {{Itemlist|Nugget|1F, in the northwest area of the floor|FR=yes|LG=yes}} | | {{Itemlist|Nugget|1F, in the northwest area of the floor|FR=yes|LG=yes}} |
| {{Itemlist|Ultra Ball|1F, near the [[Nugget]] ''(hidden)''|FR=yes|LG=yes}} | | {{Itemlist|Ultra Ball| |
| | *1F, near the [[Nugget]] ''(hidden)'' |
| | *2F, in the southeast area of the floor, accessible from the ladder in the east area of 1F (requires {{m|Rock Smash}}) |
| | *B1F, northeast of the center of the map, on a plateau|FR=yes|LG=yes|display=[[Ultra Ball]] ×3}} |
| {{Itemlist|Max Elixir|1F, northeast of the center of the floor, on a plateau|FR=yes|LG=yes}} | | {{Itemlist|Max Elixir|1F, northeast of the center of the floor, on a plateau|FR=yes|LG=yes}} |
| {{Itemlist|Full Restore|1F, in the southwest area of the floor|FR=yes|LG=yes}} | | {{Itemlist|Full Restore| |
| {{Itemlist|Ultra Ball|2F, in the southeast area of the floor, accessible from the ladder in the east area of 1F (requires {{m|Rock Smash}})|FR=yes|LG=yes}}
| | *1F, in the southwest area of the floor |
| {{Itemlist|Full Restore|2F, in the east area of the floor, accessible from the northeasternmost ladder on 1F (requires {{m|Rock Smash}})|FR=yes|LG=yes}}
| | *2F, in the east area of the floor, accessible from the northeasternmost ladder on 1F (requires {{m|Rock Smash}})|FR=yes|LG=yes|display=[[Full Restore]] ×2}} |
| {{Itemlist|PP Up|2F, in the southwest area of the floor, accessible from the southwesternmost ladder on 1F (requires {{m|Rock Smash}})|FR=yes|LG=yes}} | | {{Itemlist|PP Up|2F, in the southwest area of the floor, accessible from the southwesternmost ladder on 1F (requires {{m|Rock Smash}})|FR=yes|LG=yes}} |
| {{Itemlist|Ultra Ball|B1F, northeast of the center of the map, on a plateau|FR=yes|LG=yes}}
| |
| {{Itemlist|Max Revive|B1F, in the northeast area of the floor|FR=yes|LG=yes}} | | {{Itemlist|Max Revive|B1F, in the northeast area of the floor|FR=yes|LG=yes}} |
| {{Itlistfoot|cave}} | | {{Itlistfoot|cave}} |
| Line 87: |
Line 122: |
| ====Pokémon HeartGold and SoulSilver==== | | ====Pokémon HeartGold and SoulSilver==== |
| {{Itlisth|cave}} | | {{Itlisth|cave}} |
| {{Itemlist|Nugget|1F, near the northwest corner|HG=yes|SS=yes}} | | {{Itemlist|Nugget| |
| | *1F, near the northwest corner |
| | *B1F, behind a lone [[breakable rock]] northeast of the rocks in the center ''(hidden)''|HG=yes|SS=yes|display=[[Nugget]] ×2}} |
| {{Itemlist|Hyper Potion|1F, on the wall behind the [[breakable rock]]s in the southwest corner ''(hidden)''|HG=yes|SS=yes}} | | {{Itemlist|Hyper Potion|1F, on the wall behind the [[breakable rock]]s in the southwest corner ''(hidden)''|HG=yes|SS=yes}} |
| {{Itemlist|Full Restore|1F, along the south wall|HG=yes|SS=yes}} | | {{Itemlist|Full Restore|1F, along the south wall|HG=yes|SS=yes}} |
| Line 95: |
Line 132: |
| {{Itemlist|Rare Candy|1F, in the far southeast corner ''(hidden)''|HG=yes|SS=yes}} | | {{Itemlist|Rare Candy|1F, in the far southeast corner ''(hidden)''|HG=yes|SS=yes}} |
| {{Itemlist|TM Electric|2F, northeast corner (requires {{m|Rock Smash}})|HG=yes|SS=yes|display={{TM|24|Thunderbolt}}}} | | {{Itemlist|TM Electric|2F, northeast corner (requires {{m|Rock Smash}})|HG=yes|SS=yes|display={{TM|24|Thunderbolt}}}} |
| {{Itemlist|PP Up|2F, west side of 2F|HG=yes|SS=yes}} | | {{Itemlist|PP Up| |
| {{Itemlist|PP Up|2F, in the isolated crystal in the bottom left ''(hidden)''|HG=yes|SS=yes}}
| | *2F, west side of 2F |
| | *2F, in the isolated crystal in the bottom left ''(hidden)''|HG=yes|SS=yes|display=[[PP Up]] ×2}} |
| {{Itemlist|Zinc|2F, in the large open area on the east side ''(hidden)''|HG=yes|SS=yes}} | | {{Itemlist|Zinc|2F, in the large open area on the east side ''(hidden)''|HG=yes|SS=yes}} |
| {{Itemlist|Full Heal|2F, in the large open area on the east side ''(hidden)''|HG=yes|SS=yes}} | | {{Itemlist|Full Heal|2F, in the large open area on the east side ''(hidden)''|HG=yes|SS=yes}} |
| {{Itemlist|Big Pearl|2F, in the large open area on the east side ''(hidden)''|HG=yes|SS=yes}} | | {{Itemlist|Big Pearl|2F, in the large open area on the east side ''(hidden)''|HG=yes|SS=yes}} |
| {{Itemlist|Ultra Ball|2F, west side|HG=yes|SS=yes}} | | {{Itemlist|Ultra Ball| |
| {{Itemlist|Ultra Ball|2F, in the large open area on the east side ''(hidden)''|HG=yes|SS=yes}}
| | *2F, west side |
| | *2F, in the large open area on the east side ''(hidden)'' |
| | *B1F, west of the [[breakable rock]]s in the center ''(hidden)'' |
| | *B1F, near the southwest corner|HG=yes|SS=yes|display=[[Ultra Ball]] ×4}} |
| {{Itemlist|Odd Incense|2F, near the center (requires {{m|Rock Smash}})|HG=yes|SS=yes}} | | {{Itemlist|Odd Incense|2F, near the center (requires {{m|Rock Smash}})|HG=yes|SS=yes}} |
| {{Itemlist|Protein|2F, near the northwest corner ''(hidden)''|HG=yes|SS=yes}} | | {{Itemlist|Protein|2F, near the northwest corner ''(hidden)''|HG=yes|SS=yes}} |
| {{Itemlist|Nugget|B1F, behind a lone [[breakable rock]] northeast of the rocks in the center ''(hidden)''|HG=yes|SS=yes}}
| | {{Itemlist|Max Revive| |
| {{Itemlist|Ultra Ball|B1F, west of the [[breakable rock]]s in the center ''(hidden)''|HG=yes|SS=yes}}
| | *B1F, among the [[breakable rock]]s on the west side ''(hidden)'' |
| {{Itemlist|Ultra Ball|B1F, near the southwest corner|HG=yes|SS=yes}}
| | *B1F, northwest of the [[breakable rock]]s in the center|HG=yes|SS=yes|display=[[Max Revive]] ×2}} |
| {{Itemlist|Max Revive|B1F, among the [[breakable rock]]s on the west side ''(hidden)''|HG=yes|SS=yes}} | |
| {{Itemlist|Max Revive|B1F, northwest of the [[breakable rock]]s in the center|HG=yes|SS=yes}}
| |
| {{Itemlist|Dusk Stone|B1F, center (requires {{m|Rock Climb}})|HG=yes|SS=yes}} | | {{Itemlist|Dusk Stone|B1F, center (requires {{m|Rock Climb}})|HG=yes|SS=yes}} |
| {{Itemlist|Electirizer|B1F, northeast corner (requires {{m|Rock Climb}})|HG=yes|SS=yes}} | | {{Itemlist|Electirizer|B1F, northeast corner (requires {{m|Rock Climb}})|HG=yes|SS=yes}} |
| Line 159: |
Line 198: |
| {{Itemlist|Ultra Ball|2F, sometimes found on a glowing spot|LP=yes|LE=yes|display=[[Ultra Ball]] ×10}} | | {{Itemlist|Ultra Ball|2F, sometimes found on a glowing spot|LP=yes|LE=yes|display=[[Ultra Ball]] ×10}} |
| {{Itemlist|Master Ball|2F, sometimes found on a glowing spot|LP=yes|LE=yes}} | | {{Itemlist|Master Ball|2F, sometimes found on a glowing spot|LP=yes|LE=yes}} |
| {{Itemlist|Golden Razz Berry|2F, sometimes found on a glowing spot|LP=yes|LE=yes|display=[[Razz Berry|Golden Razz Berry]]}} | | {{Itemlist|Golden Razz Berry|2F, sometimes found on a glowing spot|LP=yes|LE=yes}} |
| {{Itemlist|Golden Nanab Berry|2F, sometimes found on a glowing spot|LP=yes|LE=yes|display=[[Nanab Berry|Golden Nanab Berry]]}} | | {{Itemlist|Golden Nanab Berry|2F, sometimes found on a glowing spot|LP=yes|LE=yes}} |
| | {{Itemlist|Golden Pinap Berry|2F, sometimes found on a glowing spot|LP=yes|LE=yes}} |
| {{Itlistfoot|cave}} | | {{Itlistfoot|cave}} |
|
| |
|
| Line 182: |
Line 222: |
| ===Pokémon=== | | ===Pokémon=== |
| ====Generation I==== | | ====Generation I==== |
| Cerulean Cave is not listed as a [[Pokédex]] area in the [[Generation I]] games. Therefore, any Pokémon that can only be found in Cerulean Cave is listed as "<sc>Area Unknown</sc>" by the {{DL|List of Pokémon by Kanto Pokédex number|Kanto Pokédex}} in these games. | | Cerulean Cave is only listed in the [[Town Map]] if the player uses this item while inside the cave. However, Cerulean Cave is not listed at all in the Pokémon location map from the [[Pokédex]] in the [[Generation I]] games. For instance, {{p|Rhydon}} is only available at the Cerulean Cave in {{game|Red and Blue|s}}, but Rhydon's Pokédex map simply says "Area unknown". Similarly, {{p|Golbat}} is available in multiple places including the Cerulean Cave, but only the other places are shown in the Pokédex map. |
| | |
| | Cerulean Cave is also absent from the Pokémon location map in the {{OBP|Pokédex|Stadium}} from both the [[Pokémon Stadium (Japanese)|Japanese Pokémon Stadium]] and {{eng|Pokémon Stadium}}, but it is present in [[Pokémon Stadium 2]]. As a result, the player may connect any [[Generation I]] or [[Generation II|II]] [[core series]] game to Pokémon Stadium 2 via [[Transfer Pak]] and check their location in the Pokédex normally, including those Pokémon available in the Cerulean Cave. |
|
| |
|
| =====1F===== | | =====1F===== |
| Line 367: |
Line 409: |
| {{catch/div|water|Fishing}} | | {{catch/div|water|Fishing}} |
| {{catch/entryhs|129|Magikarp|yes|yes|Fish Old|10|all=100%|type1=Water}} | | {{catch/entryhs|129|Magikarp|yes|yes|Fish Old|10|all=100%|type1=Water}} |
| {{catch/entryhs|060|Poliwag|yes|yes|Fish Good|20|all=62%|type1=Water}} | | {{catch/entryhs|060|Poliwag|yes|yes|Fish Good|20|all=45%|type1=Water}} |
| {{catch/entryhs|118|Goldeen|yes|yes|Fish Good|20|all=33%|type1=Water}} | | {{catch/entryhs|118|Goldeen|yes|yes|Fish Good|20|all=40%|type1=Water}} |
| {{catch/entryhs|129|Magikarp|yes|yes|Fish Good|20|all=5%|type1=Water}} | | {{catch/entryhs|129|Magikarp|yes|yes|Fish Good|20|all=15%|type1=Water}} |
| {{catch/entryhs|060|Poliwag|yes|yes|Fish Super|40|all=60%|type1=Water}} | | {{catch/entryhs|060|Poliwag|yes|yes|Fish Super|40|all=40%|type1=Water}} |
| {{catch/entryhs|061|Poliwhirl|yes|yes|Fish Super|40|all=30%|type1=Water}} | | {{catch/entryhs|061|Poliwhirl|yes|yes|Fish Super|40|all=30%|type1=Water}} |
| {{catch/entryhs|130|Gyarados|yes|yes|Fish Super|40|all=10%|type1=Water|type2=Flying}} | | {{catch/entryhs|130|Gyarados|yes|yes|Fish Super|40|all=30%|type1=Water|type2=Flying}} |
| {{catch/div|cave|Rock Smash}} | | {{catch/div|cave|Rock Smash}} |
| {{catch/entryhs|074|Geodude|yes|yes|Rock Smash|23|all=90%|type1=Rock|type2=Ground}} | | {{catch/entryhs|074|Geodude|yes|yes|Rock Smash|23|all=90%|type1=Rock|type2=Ground}} |
| Line 395: |
Line 437: |
| {{catch/entryhs|132|Ditto|yes|yes|Cave|42|all=10%|type1=Normal}} | | {{catch/entryhs|132|Ditto|yes|yes|Cave|42|all=10%|type1=Normal}} |
| {{catch/entryhs|202|Wobbuffet|yes|yes|Cave|42|all=5%|type1=Psychic}} | | {{catch/entryhs|202|Wobbuffet|yes|yes|Cave|42|all=5%|type1=Psychic}} |
| | {{catch/div|water|Fishing}} |
| | {{catch/entryhs|129|Magikarp|yes|yes|Fish Old|10|all=100%|type1=Water}} |
| | {{catch/entryhs|060|Poliwag|yes|yes|Fish Good|20|all=45%|type1=Water}} |
| | {{catch/entryhs|118|Goldeen|yes|yes|Fish Good|20|all=40%|type1=Water}} |
| | {{catch/entryhs|129|Magikarp|yes|yes|Fish Good|20|all=15%|type1=Water}} |
| | {{catch/entryhs|060|Poliwag|yes|yes|Fish Super|40|all=40%|type1=Water}} |
| | {{catch/entryhs|061|Poliwhirl|yes|yes|Fish Super|40|all=30%|type1=Water}} |
| | {{catch/entryhs|130|Gyarados|yes|yes|Fish Super|40|all=30%|type1=Water|type2=Flying}} |
| {{catch/div|cave|Special}} | | {{catch/div|cave|Special}} |
| {{catch/entryhs|296|Makuhita|yes|yes|Hoenn|41-42|all=20%|type1=Fighting}} | | {{catch/entryhs|296|Makuhita|yes|yes|Hoenn|41-42|all=20%|type1=Fighting}} |
| Line 417: |
Line 467: |
| {{catch/div|water|Fishing}} | | {{catch/div|water|Fishing}} |
| {{catch/entryhs|129|Magikarp|yes|yes|Fish Old|10|all=100%|type1=Water}} | | {{catch/entryhs|129|Magikarp|yes|yes|Fish Old|10|all=100%|type1=Water}} |
| {{catch/entryhs|060|Poliwag|yes|yes|Fish Good|20|all=62%|type1=Water}} | | {{catch/entryhs|060|Poliwag|yes|yes|Fish Good|20|all=45%|type1=Water}} |
| {{catch/entryhs|118|Goldeen|yes|yes|Fish Good|20|all=33%|type1=Water}} | | {{catch/entryhs|118|Goldeen|yes|yes|Fish Good|20|all=40%|type1=Water}} |
| {{catch/entryhs|129|Magikarp|yes|yes|Fish Good|20|all=5%|type1=Water}} | | {{catch/entryhs|129|Magikarp|yes|yes|Fish Good|20|all=15%|type1=Water}} |
| {{catch/entryhs|060|Poliwag|yes|yes|Fish Super|40|all=60%|type1=Water}} | | {{catch/entryhs|060|Poliwag|yes|yes|Fish Super|40|all=40%|type1=Water}} |
| {{catch/entryhs|061|Poliwhirl|yes|yes|Fish Super|40|30%|30%|0%|type1=Water}} | | {{catch/entryhs|061|Poliwhirl|yes|yes|Fish Super|40|all=30%|type1=Water}} |
| {{catch/entryhs|130|Gyarados|yes|yes|Fish Super|40|all=10%|type1=Water|type2=Flying}} | | {{catch/entryhs|130|Gyarados|yes|yes|Fish Super|40|all=30%|type1=Water|type2=Flying}} |
| {{catch/div|cave|Rock Smash}} | | {{catch/div|cave|Rock Smash}} |
| {{catch/entryhs|074|Geodude|yes|yes|Rock Smash|22|all=90%|type1=Rock|type2=Ground}} | | {{catch/entryhs|074|Geodude|yes|yes|Rock Smash|22|all=90%|type1=Rock|type2=Ground}} |
| Line 593: |
Line 643: |
| ! style="background:#{{Locationcolor/light|cave}}; {{roundytr|5px}}" | B1F | | ! style="background:#{{Locationcolor/light|cave}}; {{roundytr|5px}}" | B1F |
| |- | | |- |
| ! style="background:#{{red color}}" | {{color2|000|Pokémon Red and Green Versions|Red (Ja)}} | | ! style="background:#{{red color}}" | {{color2|000|Pokémon Red and Green Versions|Red (J)}} |
| | rowspan="2" | [[File:Unknown Dungeon 1F RG.png|180px]] | | | rowspan="2" | [[File:Unknown Dungeon 1F RG.png|180px]] |
| | rowspan="2" | [[File:Unknown Dungeon 2F RG.png|180px]] | | | rowspan="2" | [[File:Unknown Dungeon 2F RG.png|180px]] |
| Line 605: |
Line 655: |
| | rowspan="2" | [[File:Unknown Dungeon B1F RB.png|180px]] | | | rowspan="2" | [[File:Unknown Dungeon B1F RB.png|180px]] |
| |- | | |- |
| ! style="background:#{{blue color}}" | {{color2|fff|Pokémon Red and Blue Versions|Blue}} | | ! style="background:#{{blue color}}" | {{color2|fff|Pokémon Red and Blue Versions|Blue}}<br>{{color2|fff|Pokémon Blue Version (Japanese)|Blue (J)}} |
| |- | | |- |
| ! style="background:#{{yellow color}}" | {{color2|000|Pokémon Yellow Version|Yellow}} | | ! style="background:#{{yellow color}}" | {{color2|000|Pokémon Yellow Version|Yellow}} |
| Line 641: |
Line 691: |
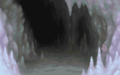
| [[File:Cerulean Cave entrance PO.png|thumb|220px|left|Cerulean Cave's entrance in [[Pokémon Origins]]]] | | [[File:Cerulean Cave entrance PO.png|thumb|220px|left|Cerulean Cave's entrance in [[Pokémon Origins]]]] |
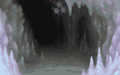
| [[File:Cerulean Cave inside PO.png|thumb|220px|Cerulean Cave's interior in Pokémon Origins]] | | [[File:Cerulean Cave inside PO.png|thumb|220px|Cerulean Cave's interior in Pokémon Origins]] |
| Cerulean Cave appeared in ''[[PO04|File 4: Charizard]]''. It was first mentioned by {{OBP|Blue|Origins}}, who had went to the cave after hearing rumors of an extremely strong Pokémon living in there. He intended to catch it, but got badly injured while battling it when his {{p|Blastoise}} was sent flying and crashed on top of him. After he had told [[Professor Oak]] and {{OBP|Red|Origins}} about this, Red soon recalled the {{FB|Pokémon Mansion|journals}} he had found at the {{ka|Pokémon Mansion}} at [[Cinnabar Island]], and understood that the mysterious Pokémon was in fact {{p|Mewtwo}}, an [[artificial Pokémon]] created by enhancing the powers of {{p|Mew}}. | | Cerulean Cave appeared in ''[[PO04|File 4: Charizard]]''. It was first mentioned by {{OBP|Blue|Origins}}, who had gone to the cave after hearing rumors of an extremely strong Pokémon living in there. He intended to catch it, but got badly injured while battling it when his {{p|Blastoise}} was sent flying and crashed on top of him. After he had told [[Professor Oak]] and {{OBP|Red|Origins}} about this, Red soon recalled the {{FB|Pokémon Mansion|journals}} he had found at the {{ka|Pokémon Mansion}} at [[Cinnabar Island]], and understood that the mysterious Pokémon was in fact {{p|Mewtwo}}, an [[artificial Pokémon]] created by enhancing the powers of {{p|Mew}}. |
|
| |
|
| Wanting to help Professor Oak to complete the [[Pokédex]], Red then headed to Cerulean Cave, where he encountered Mewtwo. Being amazingly strong and {{m|Recover|durable}}, Mewtwo was capable of defeating almost all of Red's Pokémon, excluding only his {{TP|Red|Charizard}}. At first, even Charizard was losing, and was sent into the waters of the cave, along with Red. However, Red's [[Key Stone]] and Charizard's [[Mega Stone]] then activated, [[Mega Evolution|Mega Evolving]] Charizard into Mega Charizard X and making it able to defeat Mewtwo, allowing Red to catch it. | | Wanting to help Professor Oak to complete the [[Pokédex]], Red then headed to Cerulean Cave, where he encountered Mewtwo. Being amazingly strong and {{m|Recover|durable}}, Mewtwo was capable of defeating almost all of Red's Pokémon, excluding only his {{TP|Red|Charizard}}. At first, even Charizard was losing, and was sent into the waters of the cave, along with Red. However, Red's [[Key Stone]] and Charizard's [[Mega Stone]] then activated, [[Mega Evolution|Mega Evolving]] Charizard into Mega Charizard X and making it able to defeat Mewtwo, allowing Red to catch it. |
| Line 648: |
Line 698: |
| ==In the manga== | | ==In the manga== |
| ===In the Pokémon Adventures manga=== | | ===In the Pokémon Adventures manga=== |
| [[File:Cerulean Cave Adventures.png|thumb|230px|Cerulean Cave in Pokémon Adventures]] | | [[File:Cerulean Cave Adventures.png|thumb|230px|Cerulean Cave in [[Pokémon Adventures]]]] |
| Cerulean Cave appeared in ''[[PS034|And Mewtwo Too?!]]'' and ''[[PS035|And Mewtwo... Three!]]''. Upon hearing from {{adv|Bill}} about a monster that had caused massive destruction in the northwest sector of Cerulean City, {{adv|Red}} went to investigate Cerulean Cave, where the monster was said to have fled to. Once Red arrived at the cave, he and {{cat|Red's Pokémon|his Pokémon}} were soon caught in a tornado, which seemed to originate from inside the cave. Red and his Pokémon were saved from being blown away by [[Blaine]] and his {{p|Rapidash}}. Blaine explained that the tornado was actually {{m|Psywave}}, a {{type|Psychic}} move capable of both attacking and defending at the same time, and the user of the move was {{adv|Mewtwo}}, the "beast" sighted in Cerulean City. | | Cerulean Cave appeared in ''[[PS034|And Mewtwo Too?!]]'' and ''[[PS035|And Mewtwo... Three!]]''. Upon hearing from {{adv|Bill}} about a monster that had caused massive destruction in the northwest sector of Cerulean City, {{adv|Red}} went to investigate Cerulean Cave, where the monster was said to have fled to. Once Red arrived at the cave, he and {{cat|Red's Pokémon|his Pokémon}} were soon caught in a tornado, which seemed to originate from inside the cave. Red and his Pokémon were saved from being blown away by [[Blaine]] and his {{p|Rapidash}}. Blaine explained that the tornado was actually {{m|Psywave}}, a {{type|Psychic}} move capable of both attacking and defending at the same time, and the user of the move was {{adv|Mewtwo}}, the "beast" sighted in Cerulean City. |
|
| |
|
- Nameless Cave redirects here. For the location in Hoenn with a similar name, see Nameless Cavern.
Cerulean Cave
Unknown Dungeon
|
|
ハナダの洞窟
Hanada Cave
|
| "Wild Missingno. appeared!"
|
|
|
|
| Map description:
|
A mysterious cave that is filled with terribly tough Pokémon. It is so dangerous, the Pokémon League is in charge of it.FRLG
A cave that had collapsed once. It has been reconstructed.HGSS
|
| Location:
|
Cerulean City
|
| Region:
|
Kanto
|
| Generations:
|
I, III, IV, VII
|
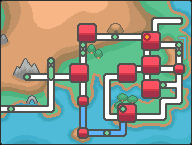
Location of Cerulean Cave in Kanto.
|
| Pokémon world locations
|
Cerulean Cave (Japanese: ハナダの洞窟 Hanada Cave), introduced as Unknown Dungeon (Japanese: ななしのどうくつ Nameless Cave) in the Japanese Generation I games, is a cave located in the northwest corner of Cerulean City in Kanto.
The cave's moniker would later be reused for the Unknown Dungeon in Kalos, which is a direct reference to Cerulean Cave.
Names
Unknown Dungeon
The English name "Unknown Dungeon" is only found in Pokémon Stadium's game data. However, this name is not seen in-game, because this place is not selectable on the Pokémon location map from Stadium's Pokédex prior to Pokémon Stadium 2. Despite being virtually unused in the games themselves, this was still the most widely used name for the cave in Generation I times due to its usage by various official sources, such as the Trainer's Guide released together with the core series games, as well as the officially-licensed strategy guides by Prima Games and Nintendo Power.
This place is known as "ななしのどうくつ" (Nameless Cave) in the Japanese Generation I Town Map. This Japanese name is also found in the game data (but not seen in-game either) of the Japanese Pokémon Stadium, as well as the Japanese version of Pokémon Stadium.
Cerulean Cave
The English name "Cerulean Cave" was introduced in Pokémon Red, Blue, and Yellow (as seen in the Town Map, and also mentioned by the NPC who blocks the cave entrance), even though the Japanese version of these games used "ななしのどうくつ" (Nameless Cave) in the Town Map instead. It's also referred to as "the cavern close to Cerulean" in an e-mail message found in a computer in Cinnabar Lab. The English name "Cerulean Cave" is also used later in Pokémon Stadium 2 (on the Pokémon location map), as well as multiple core series games.
The Japanese katakana name "ハナダ どうくつ" (Hanada Cave), lacking the "の" between words, was also mentioned in the Generation I games. Specifically, this is said by the NPC who blocks the cave entrance, and is also mentioned in the email from the computer in Cinnabar Lab.
In Pokémon Gold, Silver, and Crystal, this cave is not named in-game due to fact that it is inaccessible. However, the English name "Cerulean Cave" is found in the game data nonetheless. Similarly, the equivalent Japanese katakana name "ハナダのどうくつ" (Hanada Cave), with the "の" between words, was introduced in the data of these Generation II games. This Japanese name was first used in-game in Pokémon Stadium 2's Pokédex's Pokémon location map, and then also used later in other core series games. Its kanji equivalent "ハナダの洞窟" was introduced in Pokémon: Let's Go, Pikachu! and Let's Go, Eevee!.
In the games
Cerulean Cave is home to a wide variety of high-level wild Pokémon. Mewtwo inhabits the deepest part of the cave.
The Pokémon League only permits Trainers who have entered the Hall of Fame to enter. In Pokémon FireRed and LeafGreen, players must further prove themselves before entering the cave, which is done by completing the quest on Sevii Islands and restoring the Network Machine of the Pokémon Network Center to operational status.
In Pokémon FireRed and LeafGreen, more Pokémon can be found only by fishing, while there are fewer different species of wild Pokémon found by walking around in the cave.
In Generation II, Cerulean Cave completely collapsed but the leftovers of Mewtwo's presence remain and are found in the lake near the cave, in the form of the item Berserk Gene. In Pokémon HeartGold and SoulSilver, Cerulean Cave has been rebuilt and Mewtwo can once again be found inside. An NPC blocks the entrance until the player has obtained all eight Kanto Gym Badges (as opposed to defeating the Pokémon League at Indigo Plateau, the requirement in the Generation I games and Pokémon FireRed and LeafGreen). In Pokémon HeartGold and SoulSilver, if Mew is brought along, it will sense Mewtwo's presence and act apprehensive.
Geography
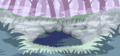
Encountering Mewtwo in the cave in Let's Go, Pikachu! and Let's Go, Eevee!
Cerulean Cave is a large underground complex of maze-like tunnels which extend out from Cerulean City to the mountains beyond. With the dark entrance positioned on the outskirts of Cerulean City, only accessible by surfing down Route 24 to the entrance near the northern border of Cerulean City, the cave has been renowned for its mystery. The entrance to the cave looks like it has been carved out from a hillside, forming an indented entrance into the hill. An NPC guards the entrance to the cave and only allows Trainers who own all eight Kanto Gym Badges and have entered the Hall of Fame to enter.
At the deepest point of the cave lives Mewtwo, a Pokémon that can only be found in Cerulean Cave. Mewtwo was artificially created in the Pokémon Mansion before it became too powerful and escaped, exiling itself to the cave, never to be seen again.
Cerulean Cave has had many different layouts over time, getting a change from not only one generation to the next but also from one game release to the next. Despite these changes, the first floor is mostly unaffected and has a large underground lake which covers most of the area. Using the complex of stairs and ladders, Trainers can make their way around the lake and the first floor of the cave. They will reach the upper floor, which has no underground river, but a like maze-like structure formed by large boulders and rocks that must be maneuvered around in order to reach the end. Once Trainers get through the maze formation, they are able to climb the ladders and get around the underground lake on the basement floor, which will lead them straight to a dead end and to Mewtwo.
Items
Pokémon Red and Green
| Item
|
Location
|
Games
|

|
Nugget
|
1F, in the northwest area of the floor
|
Rᴶ G
|

|
Full Restore ×2
|
- 1F, in the southwest area of the floor
- 2F, in the eastern area of the floor; accessible from the ladder on the plateau north of the entrance
|
Rᴶ G
|

|
Max Elixer
|
1F, northernmost point of the large middle plateau
|
Rᴶ G
|

|
Rare Candy
|
1F, on a rock southwest of Max Elixer (hidden, broken)
|
Rᴶ G
|

|
Ultra Ball ×3
|
- 2F, in the southeast area of the floor, accessible from the ladder on the large middle plateau on 1F
- B1F, in the eastern area on the plateau
- B1F, on a lone rock near Max Revive (hidden, broken)
|
Rᴶ G
|

|
PP Up
|
2F, in the southwest area of the floor, accessible from the south ladder on the western plateau on 1F
|
Rᴶ G
|

|
Max Revive
|
B1F, in the northeast area of the floor
|
Rᴶ G
|
|
|
Pokémon Red and Blue
The Japanese game Pokémon Blue has the same map and item locations as the international games Pokémon Red and Blue.
| Item
|
Location
|
Games
|
|
|
Max Elixer
|
1F, southwest of the northeasternmost ladder
|
R B
|
|
|
Nugget
|
1F, in the northwest area of the floor
|
R B
|
|
|
Rare Candy
|
1F, on a rock on the plateau east of the Full Restore (hidden)
|
R B
|
|
|
Full Restore ×2
|
- 1F, in the southwest area of the floor
- 2F, northwest of the center of the floor, accessible from the ladder on a plateau in the northwest area of 1F
|
R B
|
|
|
PP Up
|
2F, in the east area of the floor, accessible from the ladder on the plateau north of the entrance on 1F
|
R B
|
|
|
Ultra Ball ×3
|
- 2F, in the southwest area of the floor, accessible from the southwesternmost ladder on 1F
- B1F, near the center of the floor
- B1F, on a rock that stands out in the northeast area of the floor (hidden)
|
R B
|
|
|
Max Revive
|
B1F, in the northeast area of the floor
|
R B
|
|
|
Pokémon Yellow
| Item
|
Location
|
Games
|
|
|
Max Elixer ×2
|
- 1F, northeast of the southwesternmost ladder
- B1F, in the north area of the floor
|
Y
|
|
|
Rare Candy ×2
|
- 1F, near the southeast corner of the floor
- 2F, in the west area of the floor, accessible from the easternmost ladder in the northeast area of 1F
|
Y
|
|
|
Ultra Ball ×4
|
- 1F, northeast of the center of the floor
- 2F, near the center of the floor, accessible from the southwesternmost ladder on 1F
- B1F, on the southwesternmost plateau
- B1F, near the northeast corner of the floor
|
Y
|
|
|
Max Revive ×3
|
- 1F, in the east area of the floor
- 2F, southeast of the center of the floor, accessible from the southwesternmost ladder on 1F
- B1F, on the southwesternmost plateau
|
Y
|
|
|
PP Up ×3
|
- 1F, on a lone rock south of the Ultra Ball (hidden)
- 2F, on the lone rock south of the center of the floor, accessible from the southwesternmost ladder on 1F (hidden)
- B1F, on a rock that stands out close to the waterway to the southwesternmost plateau (hidden)
|
Y
|
|
|
Full Restore
|
2F, in the east area of the floor, accessible from the ladder in the east area of 1F
|
Y
|
|
|
Pokémon FireRed and LeafGreen
| Item
|
Location
|
Games
|
|
|
Nugget
|
1F, in the northwest area of the floor
|
FR LG
|
|
|
Ultra Ball ×3
|
- 1F, near the Nugget (hidden)
- 2F, in the southeast area of the floor, accessible from the ladder in the east area of 1F (requires Rock Smash)
- B1F, northeast of the center of the map, on a plateau
|
FR LG
|
|
|
Max Elixir
|
1F, northeast of the center of the floor, on a plateau
|
FR LG
|
|
|
Full Restore ×2
|
- 1F, in the southwest area of the floor
- 2F, in the east area of the floor, accessible from the northeasternmost ladder on 1F (requires Rock Smash)
|
FR LG
|
|
|
PP Up
|
2F, in the southwest area of the floor, accessible from the southwesternmost ladder on 1F (requires Rock Smash)
|
FR LG
|
|
|
Max Revive
|
B1F, in the northeast area of the floor
|
FR LG
|
|
|
Pokémon HeartGold and SoulSilver
| Item
|
Location
|
Games
|
|
|
Nugget ×2
|
- 1F, near the northwest corner
- B1F, behind a lone breakable rock northeast of the rocks in the center (hidden)
|
HG SS
|

|
Hyper Potion
|
1F, on the wall behind the breakable rocks in the southwest corner (hidden)
|
HG SS
|
|
|
Full Restore
|
1F, along the south wall
|
HG SS
|

|
Revive
|
1F, on a small crystal in the middle (hidden)
|
HG SS
|
|
|
Max Elixir
|
1F, near the center, at the end of a bridge
|
HG SS
|

|
Sea Incense
|
1F, north edge
|
HG SS
|
|
|
Rare Candy
|
1F, in the far southeast corner (hidden)
|
HG SS
|

|
TM24 (Thunderbolt)
|
2F, northeast corner (requires Rock Smash)
|
HG SS
|
|
|
PP Up ×2
|
- 2F, west side of 2F
- 2F, in the isolated crystal in the bottom left (hidden)
|
HG SS
|

|
Zinc
|
2F, in the large open area on the east side (hidden)
|
HG SS
|

|
Full Heal
|
2F, in the large open area on the east side (hidden)
|
HG SS
|

|
Big Pearl
|
2F, in the large open area on the east side (hidden)
|
HG SS
|
|
|
Ultra Ball ×4
|
- 2F, west side
- 2F, in the large open area on the east side (hidden)
- B1F, west of the breakable rocks in the center (hidden)
- B1F, near the southwest corner
|
HG SS
|

|
Odd Incense
|
2F, near the center (requires Rock Smash)
|
HG SS
|

|
Protein
|
2F, near the northwest corner (hidden)
|
HG SS
|
|
|
Max Revive ×2
|
|
HG SS
|

|
Dusk Stone
|
B1F, center (requires Rock Climb)
|
HG SS
|

|
Electirizer
|
B1F, northeast corner (requires Rock Climb)
|
HG SS
|

|
Black Sludge
|
B1F, southeast corner
|
HG SS
|
|
|
Rock Smash
Pokémon: Let's Go, Pikachu! and Let's Go, Eevee!
| Item
|
Location
|
Games
|

|
PP Max
|
1F, near the ladder in the northeast corner of the floor
|
P E
|
|
|
Full Heal
|
1F, at the end of the water
|
P E
|
|
|
Full Restore
|
1F, on the plateau near the entrance (hidden) (daily)
|
P E
|
|
|
Max Revive
|
1F, northwest of the eastern ladder
|
P E
|

|
Max Repel
|
1F, southwest of the northern ladder
|
P E
|

|
Max Lure
|
2F, northwest of the pair of ladders
|
P E
|
|
|
Ultra Ball ×5
|
2F, near some rocks along the southern wall
|
P E
|
|
|
Rare Candy
|
2F, northwest of the Ultra Balls
|
P E
|
|
|
Full Restore ×2
|
- 2F, near the east wall, east of the pair of ladders
- B1F southwest of the Escape Rope, on a plateau
|
P E
|

|
Escape Rope
|
B1F, near the northeast corner of the floor
|
P E
|
|
|
Max Elixir
|
B1F, in the south area of the floor
|
P E
|
|
|
Max Revive
|
B1F, southeast of the pair of ladders (hidden) (daily)
|
P E
|
|
|
PP Max
|
B1F, at the end of the water west of Mewtwo's plateau (hidden) (daily)
|
P E
|

|
Mewtwonite X
|
B1F, received from Green after defeating her
|
P E
|

|
Mewtwonite Y
|
B1F, received from Green after defeating her
|
P E
|

|
Poké Ball ×5
|
B1F, on the ground after defeating Green
|
P E
|
|
|
Recurring hidden items
These items are hidden at certain spots of the cave and respawn occasionally or daily. The item received is not determined until it is picked up, so what the item is can be affected by resetting.
2F glowing spot
These hidden items respawn at random.
2F crystal
This hidden item respawns daily.
| Item
|
Location
|
Games
|
|
|
Max Revive
|
2F, sometimes found on the crystal in the middle of the floor
|
P E
|

|
Dome Fossil
|
2F, sometimes found on the crystal in the middle of the floor
|
P E
|

|
Helix Fossil
|
2F, sometimes found on the crystal in the middle of the floor
|
P E
|

|
Old Amber
|
2F, sometimes found on the crystal in the middle of the floor
|
P E
|
|
|
B1F plateau
This hidden item respawns daily.
Pokémon
Generation I
Cerulean Cave is only listed in the Town Map if the player uses this item while inside the cave. However, Cerulean Cave is not listed at all in the Pokémon location map from the Pokédex in the Generation I games. For instance, Rhydon is only available at the Cerulean Cave in Pokémon Red and Blue, but Rhydon's Pokédex map simply says "Area unknown". Similarly, Golbat is available in multiple places including the Cerulean Cave, but only the other places are shown in the Pokédex map.
Cerulean Cave is also absent from the Pokémon location map in the Pokédex from both the Japanese Pokémon Stadium and Pokémon Stadium, but it is present in Pokémon Stadium 2. As a result, the player may connect any Generation I or II core series game to Pokémon Stadium 2 via Transfer Pak and check their location in the Pokédex normally, including those Pokémon available in the Cerulean Cave.
1F
| Pokémon
|
Games
|
Location
|
Levels
|
Rate
|
|
|
R
|
B
|
Y
|
|
52
|
10%
|
|
|
R
|
B
|
Y
|
|
53
|
4%
|
|
|
R
|
B
|
Y
|
|
52
|
10%
|
|
|
R
|
B
|
Y
|
|
46
|
25%
|
|
|
R
|
B
|
Y
|
|
50, 55
|
40%
|
|
|
R
|
B
|
Y
|
|
55
|
10%
|
|
|
R
|
B
|
Y
|
|
52
|
5%
|
|
|
R
|
B
|
Y
|
|
54
|
5%
|
|
|
R
|
B
|
Y
|
|
49
|
10%
|
|
|
R
|
B
|
Y
|
|
54
|
5%
|
|
|
R
|
B
|
Y
|
|
49
|
5%
|
|
|
R
|
B
|
Y
|
|
55
|
10%
|
|
|
R
|
B
|
Y
|
|
45
|
15%
|
|
|
R
|
B
|
Y
|
|
46
|
15%
|
|
|
R
|
B
|
Y
|
|
49
|
10%
|
|
|
R
|
B
|
Y
|
|
46
|
15%
|
|
|
R
|
B
|
Y
|
|
53
|
1%
|
|
|
R
|
B
|
Y
|
|
55, 60
|
5%
|
| Fishing
|
|
|
R
|
B
|
Y
|
|
5
|
100%
|
|
|
R
|
B
|
Y
|
|
10
|
50%
|
|
|
R
|
B
|
Y
|
|
10
|
50%
|
|
|
R
|
B
|
Y
|
|
23
|
25%
|
|
|
R
|
B
|
Y
|
|
23
|
25%
|
|
|
R
|
B
|
Y
|
|
23
|
25%
|
|
|
R
|
B
|
Y
|
|
25
|
40%
|
|
|
R
|
B
|
Y
|
|
23
|
25%
|
|
|
R
|
B
|
Y
|
|
35, 45, 55
|
60%
|
| A colored background means that the Pokémon can be found in this location in the specified game. A white background with a colored letter means that the Pokémon cannot be found here.
|
2F
| Pokémon
|
Games
|
Location
|
Levels
|
Rate
|
|
|
R
|
B
|
Y
|
|
56
|
10%
|
|
|
R
|
B
|
Y
|
|
54
|
5%
|
|
|
R
|
B
|
Y
|
|
52, 57
|
40%
|
|
|
R
|
B
|
Y
|
|
58
|
5%
|
|
|
R
|
B
|
Y
|
|
51
|
15%
|
|
|
R
|
B
|
Y
|
|
51
|
15%
|
|
|
R
|
B
|
Y
|
|
58
|
5%
|
|
|
R
|
B
|
Y
|
|
50
|
15%
|
|
|
R
|
B
|
Y
|
|
51
|
25%
|
|
|
R
|
B
|
Y
|
|
52
|
10%
|
|
|
R
|
B
|
Y
|
|
52
|
10%
|
|
|
R
|
B
|
Y
|
|
50
|
10%
|
|
|
R
|
B
|
Y
|
|
52
|
10%
|
|
|
R
|
B
|
Y
|
|
58, 60
|
5%
|
|
|
R
|
B
|
Y
|
|
56
|
5%
|
|
|
R
|
B
|
Y
|
|
55, 60
|
5%
|
|
|
R
|
B
|
Y
|
|
60
|
10%
|
| A colored background means that the Pokémon can be found in this location in the specified game. A white background with a colored letter means that the Pokémon cannot be found here.
|
B1F
| Pokémon
|
Games
|
Location
|
Levels
|
Rate
|
|
|
R
|
B
|
Y
|
|
57
|
5%
|
|
|
R
|
B
|
Y
|
|
64
|
10%
|
|
|
R
|
B
|
Y
|
|
57
|
5%
|
|
|
R
|
B
|
Y
|
|
54, 59
|
40%
|
|
|
R
|
B
|
Y
|
|
64
|
10%
|
|
|
R
|
B
|
Y
|
|
55
|
15%
|
|
|
R
|
B
|
Y
|
|
55
|
15%
|
|
|
R
|
B
|
Y
|
|
55
|
15%
|
|
|
R
|
B
|
Y
|
|
50, 55
|
5%
|
|
|
R
|
B
|
Y
|
|
52
|
10%
|
|
|
R
|
B
|
Y
|
|
55
|
25%
|
|
|
R
|
B
|
Y
|
|
62
|
10%
|
|
|
R
|
B
|
Y
|
|
64
|
10%
|
|
|
R
|
B
|
Y
|
|
56
|
5%
|
|
|
R
|
B
|
Y
|
|
63, 65, 67
|
10%
|
|
|
R
|
B
|
Y
|
|
60, 65
|
15%
|
| Fishing
|
|
|
R
|
B
|
Y
|
|
5
|
100%
|
|
|
R
|
B
|
Y
|
|
10
|
50%
|
|
|
R
|
B
|
Y
|
|
10
|
50%
|
|
|
R
|
B
|
Y
|
|
23
|
25%
|
|
|
R
|
B
|
Y
|
|
23
|
25%
|
|
|
R
|
B
|
Y
|
|
23
|
25%
|
|
|
R
|
B
|
Y
|
|
30
|
40%
|
|
|
R
|
B
|
Y
|
|
23
|
25%
|
|
|
R
|
B
|
Y
|
|
40, 50, 60
|
60%
|
| Special Pokémon
|
|
|
R
|
B
|
Y
|

|
Only one
|
|
70
|
One
|
| A colored background means that the Pokémon can be found in this location in the specified game. A white background with a colored letter means that the Pokémon cannot be found here.
|
Generation III
1F
| Pokémon
|
Games
|
Location
|
Levels
|
Rate
|
|
|
FR
|
LG
|
|
49, 58
|
25%
|
|
|
FR
|
LG
|
|
49
|
20%
|
|
|
FR
|
LG
|
|
46, 55
|
14%
|
|
|
FR
|
LG
|
|
52, 61
|
11%
|
|
|
FR
|
LG
|
|
52, 61
|
11%
|
|
|
FR
|
LG
|
|
46
|
10%
|
|
|
FR
|
LG
|
|
58
|
5%
|
|
|
FR
|
LG
|
|
55
|
4%
|
| Surfing
|
|
|
FR
|
LG
|
|
30-50
|
65%
|
|
|
FR
|
LG
|
|
30-50
|
65%
|
|
|
FR
|
LG
|
|
40-55
|
35%
|
|
|
FR
|
LG
|
|
40-55
|
35%
|
| Fishing
|
|
|
FR
|
LG
|
|
5
|
100%
|
|
|
FR
|
LG
|
|
5-15
|
60%
|
|
|
FR
|
LG
|
|
5-15
|
20%
|
|
|
FR
|
LG
|
|
5-15
|
20%
|
|
|
FR
|
LG
|
|
15-25
|
40%
|
|
|
FR
|
LG
|
|
20-30
|
40%
|
|
|
FR
|
LG
|
|
15-25
|
15%
|
|
|
FR
|
LG
|
|
15-35
|
5%
|
|
|
FR
|
LG
|
|
15-35
|
5%
|
| Rock Smash
|
|
|
FR
|
LG
|
|
30-50
|
65%
|
|
|
FR
|
LG
|
|
40-55
|
35%
|
| A colored background means that the Pokémon can be found in this location in the specified game. A white background with a colored letter means that the Pokémon cannot be found here.
|
2F
| Pokémon
|
Games
|
Location
|
Levels
|
Rate
|
|
|
FR
|
LG
|
|
49, 58
|
25%
|
|
|
FR
|
LG
|
|
49
|
20%
|
|
|
FR
|
LG
|
|
52, 61
|
14%
|
|
|
FR
|
LG
|
|
55, 64
|
11%
|
|
|
FR
|
LG
|
|
55, 64
|
11%
|
|
|
FR
|
LG
|
|
52
|
10%
|
|
|
FR
|
LG
|
|
58
|
5%
|
|
|
FR
|
LG
|
|
61
|
4%
|
| Rock Smash
|
|
|
FR
|
LG
|
|
35-55
|
65%
|
|
|
FR
|
LG
|
|
45-60
|
35%
|
| A colored background means that the Pokémon can be found in this location in the specified game. A white background with a colored letter means that the Pokémon cannot be found here.
|
B1F
| Pokémon
|
Games
|
Location
|
Levels
|
Rate
|
|
|
FR
|
LG
|
|
58, 67
|
25%
|
|
|
FR
|
LG
|
|
58, 67
|
25%
|
|
|
FR
|
LG
|
|
55, 64
|
14%
|
|
|
FR
|
LG
|
|
52, 61
|
11%
|
|
|
FR
|
LG
|
|
52
|
10%
|
|
|
FR
|
LG
|
|
55
|
10%
|
|
|
FR
|
LG
|
|
64
|
4%
|
|
|
FR
|
LG
|
|
61
|
1%
|
| Surfing
|
|
|
FR
|
LG
|
|
40-60
|
65%
|
|
|
FR
|
LG
|
|
40-60
|
65%
|
|
|
FR
|
LG
|
|
50-65
|
35%
|
|
|
FR
|
LG
|
|
50-65
|
35%
|
| Fishing
|
|
|
FR
|
LG
|
|
5
|
100%
|
|
|
FR
|
LG
|
|
5-15
|
60%
|
|
|
FR
|
LG
|
|
5-15
|
20%
|
|
|
FR
|
LG
|
|
5-15
|
20%
|
|
|
FR
|
LG
|
|
15-25
|
40%
|
|
|
FR
|
LG
|
|
20-30
|
40%
|
|
|
FR
|
LG
|
|
15-35
|
16%
|
|
|
FR
|
LG
|
|
15-25
|
4%
|
|
|
FR
|
LG
|
|
15-25
|
4%
|
| Rock Smash
|
|
|
FR
|
LG
|
|
40-60
|
65%
|
|
|
FR
|
LG
|
|
50-65
|
35%
|
| Special Pokémon
|
|
|
FR
|
LG
|
|
|
Only one
|
|
70
|
One
|
| A colored background means that the Pokémon can be found in this location in the specified game. A white background with a colored letter means that the Pokémon cannot be found here.
|
Generation IV
1F
| Pokémon
|
Games
|
Location
|
Levels
|
Rate
|

|

|

|
|
|
HG
|
SS
|
|
40
|
5%
|
|
|
HG
|
SS
|
|
37
|
5%
|
|
|
HG
|
SS
|
|
39-40
|
24%
|
24%
|
6%
|
|
|
HG
|
SS
|
|
38
|
20%
|
20%
|
10%
|
|
|
HG
|
SS
|
|
38-39
|
14%
|
14%
|
0%
|
|
|
HG
|
SS
|
|
39
|
0%
|
0%
|
4%
|
|
|
HG
|
SS
|
|
38-39
|
14%
|
14%
|
0%
|
|
|
HG
|
SS
|
|
39
|
0%
|
0%
|
4%
|
|
|
HG
|
SS
|
|
40
|
11%
|
11%
|
10%
|
|
|
HG
|
SS
|
|
39-40
|
11%
|
11%
|
10%
|
|
|
HG
|
SS
|
|
38
|
10%
|
10%
|
0%
|
|
|
HG
|
SS
|
|
38-39
|
0%
|
0%
|
50%
|
| Surfing
|
|
|
HG
|
SS
|
|
35-40
|
90%
|
|
|
HG
|
SS
|
|
40
|
10%
|
| Fishing
|
|
|
HG
|
SS
|
|
10
|
100%
|
|
|
HG
|
SS
|
|
20
|
45%
|
|
|
HG
|
SS
|
|
20
|
40%
|
|
|
HG
|
SS
|
|
20
|
15%
|
|
|
HG
|
SS
|
|
40
|
40%
|
|
|
HG
|
SS
|
|
40
|
30%
|
|
|
HG
|
SS
|
|
40
|
30%
|
| Rock Smash
|
|
|
HG
|
SS
|
|
23
|
90%
|
|
|
HG
|
SS
|
|
26-30
|
10%
|
| Special Pokémon
|
|
|
HG
|
SS
|
|
39-40
|
20%
|
|
|
HG
|
SS
|
|
38
|
20%
|
|
|
HG
|
SS
|
|
39-40
|
20%
|
|
|
HG
|
SS
|
|
38
|
20%
|
| A colored background means that the Pokémon can be found in this location in the specified game. A white background with a colored letter means that the Pokémon cannot be found here.
|
2F
| Pokémon
|
Games
|
Location
|
Levels
|
Rate
|
|
|
|
|
|
|
HG
|
SS
|
|
41
|
10%
|
10%
|
0%
|
|
|
HG
|
SS
|
|
41-42
|
0%
|
0%
|
20%
|
|
|
HG
|
SS
|
|
40
|
20%
|
|
|
HG
|
SS
|
|
42
|
20%
|
|
|
HG
|
SS
|
|
39-42
|
20%
|
20%
|
0%
|
|
|
HG
|
SS
|
|
39
|
0%
|
0%
|
10%
|
|
|
HG
|
SS
|
|
41
|
10%
|
|
|
HG
|
SS
|
|
41
|
5%
|
|
|
HG
|
SS
|
|
42
|
10%
|
|
|
HG
|
SS
|
|
42
|
5%
|
| Fishing
|
|
|
HG
|
SS
|
|
10
|
100%
|
|
|
HG
|
SS
|
|
20
|
45%
|
|
|
HG
|
SS
|
|
20
|
40%
|
|
|
HG
|
SS
|
|
20
|
15%
|
|
|
HG
|
SS
|
|
40
|
40%
|
|
|
HG
|
SS
|
|
40
|
30%
|
|
|
HG
|
SS
|
|
40
|
30%
|
| Special Pokémon
|
|
|
HG
|
SS
|
|
41-42
|
20%
|
|
|
HG
|
SS
|
|
39-41
|
20%
|
|
|
HG
|
SS
|
|
41-42
|
20%
|
|
|
HG
|
SS
|
|
39-41
|
20%
|
| A colored background means that the Pokémon can be found in this location in the specified game. A white background with a colored letter means that the Pokémon cannot be found here.
|
B1F
| Pokémon
|
Games
|
Location
|
Levels
|
Rate
|
|
|
HG
|
SS
|
|
45-47
|
25%
|
|
|
HG
|
SS
|
|
46
|
20%
|
|
|
HG
|
SS
|
|
45-47
|
15%
|
|
|
HG
|
SS
|
|
47
|
10%
|
|
|
HG
|
SS
|
|
45
|
10%
|
|
|
HG
|
SS
|
|
45
|
10%
|
|
|
HG
|
SS
|
|
46
|
5%
|
|
|
HG
|
SS
|
|
49
|
5%
|
| Surfing
|
|
|
HG
|
SS
|
|
35-40
|
90%
|
|
|
HG
|
SS
|
|
40
|
10%
|
| Fishing
|
|
|
HG
|
SS
|
|
10
|
100%
|
|
|
HG
|
SS
|
|
20
|
45%
|
|
|
HG
|
SS
|
|
20
|
40%
|
|
|
HG
|
SS
|
|
20
|
15%
|
|
|
HG
|
SS
|
|
40
|
40%
|
|
|
HG
|
SS
|
|
40
|
30%
|
|
|
HG
|
SS
|
|
40
|
30%
|
| Rock Smash
|
|
|
HG
|
SS
|
|
22
|
90%
|
|
|
HG
|
SS
|
|
26
|
10%
|
| Special Pokémon
|
|
|
HG
|
SS
|
|
|
Only one
|
|
70
|
One
|
|
|
HG
|
SS
|
|
45
|
20%
|
|
|
HG
|
SS
|
|
45-47
|
20%
|
|
|
HG
|
SS
|
|
45
|
20%
|
|
|
HG
|
SS
|
|
45-47
|
20%
|
| A colored background means that the Pokémon can be found in this location in the specified game. A white background with a colored letter means that the Pokémon cannot be found here.
|
Generation VII
1F
| Pokémon
|
Games
|
Location
|
Levels
|
Rate
|
|
|
P
|
E
|
|
51-56
|
10%
|
|
|
P
|
E
|
|
51-56
|
15%
|
|
|
P
|
E
|
|
51-56
|
5%
|
|
|
P
|
E
|
|
51-56
|
15%
|
|
|
P
|
E
|
|
51-56
|
10%
|
|
|
P
|
E
|
|
51-56
|
15%
|
|
|
P
|
E
|
|
51-56
|
10%
|
|
|
P
|
E
|
|
51-56
|
10%
|
|
|
P
|
E
|
|
51-56
|
5%
|
|
|
P
|
E
|
|
51-56
|
5%
|
| Rare Spawns
|
|
|
P
|
E
|
|
51-56
|
-
|
| Sea Skim
|
|
|
P
|
E
|
|
51-56
|
45%
|
|
|
P
|
E
|
|
51-56
|
9%
|
|
|
P
|
E
|
|
51-56
|
1%
|
|
|
P
|
E
|
|
51-56
|
45%
|
| A colored background means that the Pokémon can be found in this location in the specified game. A white background with a colored letter means that the Pokémon cannot be found here.
|
2F
| Pokémon
|
Games
|
Location
|
Levels
|
Rate
|
|
|
P
|
E
|
|
51-56
|
5%
|
|
|
P
|
E
|
|
51-56
|
20%
|
|
|
P
|
E
|
|
51-56
|
5%
|
|
|
P
|
E
|
|
51-56
|
20%
|
|
|
P
|
E
|
|
51-56
|
15%
|
|
|
P
|
E
|
|
51-56
|
10%
|
|
|
P
|
E
|
|
51-56
|
10%
|
|
|
P
|
E
|
|
51-56
|
10%
|
|
|
P
|
E
|
|
51-56
|
5%
|
| Rare Spawns
|
|
|
P
|
E
|
|
51-56
|
-
|
| A colored background means that the Pokémon can be found in this location in the specified game. A white background with a colored letter means that the Pokémon cannot be found here.
|
B1F
| Pokémon
|
Games
|
Location
|
Levels
|
Rate
|
|
|
P
|
E
|
|
51-56
|
10%
|
|
|
P
|
E
|
|
51-56
|
15%
|
|
|
P
|
E
|
|
51-56
|
5%
|
|
|
P
|
E
|
|
51-56
|
15%
|
|
|
P
|
E
|
|
51-56
|
10%
|
|
|
P
|
E
|
|
51-56
|
15%
|
|
|
P
|
E
|
|
51-56
|
10%
|
|
|
P
|
E
|
|
51-56
|
10%
|
|
|
P
|
E
|
|
51-56
|
5%
|
|
|
P
|
E
|
|
51-56
|
5%
|
| Rare Spawns
|
|
|
P
|
E
|
|
51-56
|
-
|
| Sea Skim
|
|
|
P
|
E
|
|
51-56
|
45%
|
|
|
P
|
E
|
|
51-56
|
9%
|
|
|
P
|
E
|
|
51-56
|
1%
|
|
|
P
|
E
|
|
51-56
|
45%
|
| Special Pokémon
|
|
|
P
|
E
|
|
|
Only one
|
|
70
|
One
|
| A colored background means that the Pokémon can be found in this location in the specified game. A white background with a colored letter means that the Pokémon cannot be found here.
|
Trainers
Generation VII

|
|
Reward: $19,040
|
|
|
|
|
|
Layout
The layout of the cave has been tweaked several times in the past, particularly in Generation I.
In Pokémon FireRed and LeafGreen, it has been restored to the original layout found in Pokémon Red and Green, with the addition of breakable rocks.
In Pokémon HeartGold and SoulSilver, the layout of the first and second floors is based on the equivalent layout from Pokémon FireRed and LeafGreen, while the layout of the basement is based on the respective layout from Pokémon Yellow. Breakable rocks are also present and Rock Climb surfaces were added.
In the anime
In Pokémon Origins

Cerulean Cave's interior in Pokémon Origins
Cerulean Cave appeared in File 4: Charizard. It was first mentioned by Blue, who had gone to the cave after hearing rumors of an extremely strong Pokémon living in there. He intended to catch it, but got badly injured while battling it when his Blastoise was sent flying and crashed on top of him. After he had told Professor Oak and Red about this, Red soon recalled the journals he had found at the Pokémon Mansion at Cinnabar Island, and understood that the mysterious Pokémon was in fact Mewtwo, an artificial Pokémon created by enhancing the powers of Mew.
Wanting to help Professor Oak to complete the Pokédex, Red then headed to Cerulean Cave, where he encountered Mewtwo. Being amazingly strong and durable, Mewtwo was capable of defeating almost all of Red's Pokémon, excluding only his Charizard. At first, even Charizard was losing, and was sent into the waters of the cave, along with Red. However, Red's Key Stone and Charizard's Mega Stone then activated, Mega Evolving Charizard into Mega Charizard X and making it able to defeat Mewtwo, allowing Red to catch it.
In the manga
In the Pokémon Adventures manga
Cerulean Cave appeared in And Mewtwo Too?! and And Mewtwo... Three!. Upon hearing from Bill about a monster that had caused massive destruction in the northwest sector of Cerulean City, Red went to investigate Cerulean Cave, where the monster was said to have fled to. Once Red arrived at the cave, he and his Pokémon were soon caught in a tornado, which seemed to originate from inside the cave. Red and his Pokémon were saved from being blown away by Blaine and his Rapidash. Blaine explained that the tornado was actually Psywave, a Psychic-type move capable of both attacking and defending at the same time, and the user of the move was Mewtwo, the "beast" sighted in Cerulean City.
To Red's horror, Blaine revealed that he, while working as a scientist in Team Rocket, had been involved in Mewtwo's creation. Since Team Rocket had been unable to get enough of Mew's DNA to complete the Genetic Pokémon, Blaine had finished it by using cells from his own arm. In the process, some of Mewtwo's cells ended up in his arm, causing it to be horribly mutatated. This also gave both him and Mewtwo the ability to sense each other's presence. However, the mutated cells in his arm were slowly spreading to the rest of his body, and would eventually kill him. Realizing what kind of an abomination he had created, Blaine had subsequently left Team Rocket.
Blaine was determined to destroy the monster he himself had created, even if it would cost him his life. After putting Red inside of a protective fireball, he and Rapidash charged through the Psywave tornado at Mewtwo, creating a massive explosion. Despite the hit, Mewtwo was still capable of fighting. As Blaine was down for the count, Red tried to battle Mewtwo himself, sending out Poli. However, Mewtwo easily knocked the Tadpole Pokémon back with a giant spoon it created. Blaine explained that Mewtwo would form its Psywave into a tornado while fighting multiple enemies at once, and into a spoon for a single enemy. This gave Red an idea, and he sent out all of his Pokémon, causing Mewtwo to switch into its tornado tactic again. However, before the tornado got to full power, Red dived into the eye of the storm with Aero, and sent Pika diving further down into Mewtwo itself, capturing it with the Master Ball Blaine had given Red just moments earlier. Afterwards, Red gave Mewtwo to Blaine, telling him to teach it the kindness of humans, before heading off to the Indigo Plateau.
Trivia
- In the Generation I handheld games, the nest feature of the Pokédex never displays Pokémon as appearing in Cerulean Cave, likely to keep its existence as a secret until the player beats the game. However, the Pokémon Stadium games do display Pokémon appearing here.
In other languages
|
Cerulean Cave
|
Unknown Dungeon
|