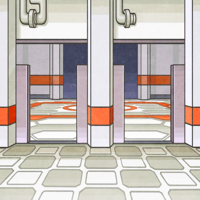
Battle Factory (Generation III): Difference between revisions
mNo edit summary |
m ((Automated edit) {{chap}} → {{MangaArc}}) |
||
| (49 intermediate revisions by 28 users not shown) | |||
| Line 4: | Line 4: | ||
|jtrans=Battle Factory | |jtrans=Battle Factory | ||
|image=Battle Factory E.png | |image=Battle Factory E.png | ||
|slogan=Seek out the toughest | |slogan=Seek out the toughest POKéMON! | ||
|bpr=7 | |bpr=7 | ||
|partsing=3 | |partsing=3 | ||
|partdoub=3 | |partdoub=3 | ||
|brain=Factory Head Noland | |brain=Factory Head Noland | ||
|brainlink=Noland | |||
|brainsprite=Spr E Noland | |brainsprite=Spr E Noland | ||
|symbol=Knowledge | |symbol=Knowledge | ||
| Line 15: | Line 16: | ||
}} | }} | ||
The '''Battle Factory''' (Japanese: '''バトルファクトリー''' ''Battle Factory'') is a facility located within the [[Hoenn]] {{gdis|Battle Frontier|III}} in {{game|Emerald}}. | The '''Battle Factory''' (Japanese: '''バトルファクトリー''' ''Battle Factory'') is a [[Battle facility|facility]] located within the [[Hoenn]] {{gdis|Battle Frontier|III}} in {{game|Emerald}}. | ||
==Challenges== | ==Challenges== | ||
The Battle Factory is more dedicated to research than the other facilities, and the subject of the scientists' research is the abilities of Trainers when using [[rental Pokémon]] in battle. Before the player begins a battle, they will be told some information about the opponent's team, and may switch one of the Pokémon they have with them with one of the Pokémon used by the Trainer they just defeated. This is just like the [[Battle Tent]] in [[Slateport City]]. The pool of possible rental Pokémon is the same as that of possible Pokémon NPC Trainers use in other facilities in the Battle Frontier. | The Battle Factory is more dedicated to research than the other facilities, and the subject of the scientists' research is the abilities of Trainers when using [[rental Pokémon]] in battle. Before the player begins a battle, they will be told some information about the opponent's team, and may switch one of the Pokémon they have with them with one of the Pokémon used by the Trainer they just defeated. This is just like the [[Battle Tent]] in [[Slateport City]]. The pool of possible rental Pokémon is the same as that of possible Pokémon NPC Trainers use in other facilities in the Battle Frontier. | ||
In addition to win streaks, the monitors inside the lobby display the number of times the players swapped | In addition to win streaks, the monitors inside the lobby display the number of times the players swapped their Pokémon during the challenge. | ||
===Battle style=== | ===Battle style=== | ||
A Trainer's battle style is based on the moves that | A Trainer's battle style is based on the moves that their Pokémon know. Certain moves fall under one of seven different categories, as shown below: | ||
{| class="roundy" style="background: #{{frontier color light}}; border: 3px solid #{{frontier color}}" | {| class="roundy" style="background: #{{frontier color light}}; border: 3px solid #{{frontier color}}" | ||
|- style="text-align:center" | |- style="text-align:center" | ||
| Line 50: | Line 51: | ||
| style="background:#FFF; {{roundybr|5px}}" | {{m|Hail}}, {{m|Rain Dance}}, {{m|Sandstorm}}, {{m|Sunny Day}}, {{m|Weather Ball}} | | style="background:#FFF; {{roundybr|5px}}" | {{m|Hail}}, {{m|Rain Dance}}, {{m|Sandstorm}}, {{m|Sunny Day}}, {{m|Weather Ball}} | ||
|} | |} | ||
Depending on how many moves in each category the Trainer's Pokémon know, | Depending on how many moves in each category the Trainer's Pokémon know, their battle style will be described differently. A move may be counted more than once if more than one Pokémon has it, and any attack not in any of the categories is not considered. | ||
Each category has a threshold number. For the first three categories, this is three, while for the last four categories, it is two. If the Trainer's Pokémon know enough moves to cross the threshold in exactly one or two categories, then their battle style is described by whichever of those categories is farthest down on the table below. If they do not cross the threshold in any category, though, or if they cross it in more than three categories, then the Trainer's battle style is given a special description. | Each category has a threshold number. For the first three categories, this is three, while for the last four categories, it is two. If the Trainer's Pokémon know enough moves to cross the threshold in exactly one or two categories, then their battle style is described by whichever of those categories is farthest down on the table below. If they do not cross the threshold in any category, though, or if they cross it in more than three categories, then the Trainer's battle style is given a special description. | ||
| Line 88: | Line 88: | ||
| style="background:#FFF; {{roundybr|5px}}" | "appears to be flexibly adaptable to the situation" | | style="background:#FFF; {{roundybr|5px}}" | "appears to be flexibly adaptable to the situation" | ||
|} | |} | ||
{{ | |||
===Available Pokémon=== | |||
Opponents are prevented from generating with the same species of Pokémon that are already on the player's team, to ensure that no trade the player can possibly make after the battle will cause the resulting team to violate Species Clause. However, the initial rentals in a round may not respect those clauses if they include a selection of stronger Pokémon, in which case players are prevented from selecting combinations from those initial six picks that would do so. | |||
Where the lists of Pokémon below show one that knows {{m|Return}}, that move is programmatically replaced with {{m|Frustration}} in all cases where it shows up in Battle Factory, and the Pokémon receive minimum [[friendship]] to be able to use that move with its maximum power. | |||
====Lvl. 50==== | |||
The enemy Pokémon and initial rental Pokémon encountered come from these lists: | |||
Round 1: | |||
:''[[Battle Frontier (Generation III)/Pokémon (Group 1)|List of Battle Frontier Pokémon (Generation III)/Group 1]]'' | |||
::{{P|Unown}} will never be used. | |||
Round 2-3: | |||
:''[[Battle Frontier (Generation III)/Pokémon (Group 2)|List of Battle Frontier Pokémon (Generation III)/Group 2]]'' | |||
::In round 2, first of the two listed variants for each Pokémon will be encountered, in round 3, the second. | |||
Round 4 onwards: | |||
:''[[Battle Frontier (Generation III)/Pokémon (Group 3)|List of Battle Frontier Pokémon (Generation III)/Group 3]]'' | |||
::In round 4, the player will encounter the first variant; in round 5, the second; in round 6, the third; and in round 7, the fourth variant of any given Pokémon. From round 8 onwards, any variant of any Pokémon from group 3 may appear, except for {{p|Dragonite}}, {{p|Tyranitar}}, and the last two variants of {{p|Articuno}}, {{p|Zapdos}}, {{p|Moltres}}, {{p|Raikou}}, {{p|Entei}}, and {{p|Suicune}}, none of which will ever appear at Lvl. 50. [[Legendary Pokémon]] also do not appear before round 8 (except for as strong Pokémon; see below). | |||
====Open Level==== | |||
The enemy Pokémon and initial rental Pokémon come from this list: | |||
:''[[Battle Frontier (Generation III)/Pokémon (Group 3)|List of Battle Frontier Pokémon (Generation III)/Group 3]]'' | |||
In round 1, the player will encounter the first variant; in round 2, the second; in round 3 the third; and in round 4, the fourth variant of any given Pokémon. From round 5 onwards, any variant of any Pokémon from group 3 may appear. Dragonite, Tyranitar, and Legendary Pokémon also do not appear before round 5 (except for as strong Pokémon; see below). | |||
====Stat calculation==== | ====Stat calculation==== | ||
The Pokémon that are offered to the player at the beginning of the round are generated with uniform {{IV}}s in each stat. The IVs that the Pokémon get are based on the length of the player's win streak: | |||
The Pokémon that are offered to the player at the beginning of the round are generated with uniform | |||
{| class="roundy" style="margin:auto; text-align:center; background: #505050; border: 2px solid #6f6f6f" | {| class="roundy" style="margin:auto; text-align:center; background: #505050; border: 2px solid #6f6f6f" | ||
| Line 121: | Line 145: | ||
|} | |} | ||
However, depending on the number of | Due to a [[glitch]], the initial rental Pokémon on round 9 will have random IVs instead of the expected 31. If the player has enough swaps (see below), one or more Pokémon might have "round 10 strength" and have the expected 31 IVs. However, this means that one or more Pokémon on round 8 might get the "random IVs" issue instead. | ||
The last trainer in each round (with the exception of Noland) uses a different table of IVs: | |||
{| class="roundy" style="margin:auto; text-align:center; background: #505050; border: 2px solid #6f6f6f" | |||
|- style="color: #fff" | |||
! style="background: #6f6f6f; {{roundytl|5px}}" | Current Round | |||
! style="background: #6f6f6f; {{roundytr|5px}}" | Fixed IV | |||
|- style="background: #fff" | |||
| {{color|000|1}} | |||
| 6 | |||
|- style="background: #fff" | |||
| {{color|000|2}} | |||
| 9 | |||
|- style="background: #fff" | |||
| {{color|000|3}} | |||
| 12 | |||
|- style="background: #fff" | |||
| {{color|000|4}} | |||
| 15 | |||
|- style="background: #fff" | |||
| {{color|000|5}} | |||
| 18 | |||
|- | |||
| style="background: #fff; {{roundybl|5px}}" | {{color|000|6 or later}} | |||
| style="background: #fff; {{roundybr|5px}}" | 31 | |||
|} | |||
However, depending on the number of times the player has rented or swapped Pokémon (i.e. the initial rental counts as one), some of the generated Pokémon will be stronger. These Pokémon have IVs and movesets corresponding to the following round. The number of rentals required is shown below: | |||
{| class="roundy" style="margin:auto; text-align:center; background: #505050; border: 2px solid #6f6f6f" | {| class="roundy" style="margin:auto; text-align:center; background: #505050; border: 2px solid #6f6f6f" | ||
| Line 147: | Line 199: | ||
|} | |} | ||
The Pokémon used by Trainers in the Battle Factory are also generated with fixed IVs in each stat. The first six Trainers in each round have Pokémon with uniform IVs corresponding to the current round (using the lookup table above), while the last Trainer's Pokémon have IVs corresponding to the following round. However, due to a | The Pokémon used by Trainers in the Battle Factory are also generated with fixed IVs in each stat. The first six Trainers in each round have Pokémon with uniform IVs corresponding to the current round (using the lookup table above), while the last Trainer's Pokémon have IVs corresponding to the following round. However, due to a [[glitch]], the "current round" used for the Trainers' Pokémon is the player's current win streak in the Battle Tower, not the Battle Factory. This means, for instance, that if the player currently has a 10-round win streak in the Battle Tower, and starts round 1 of the Battle Factory, the player's Pokémon will have IVs of 3, while the opponent Pokémon will all have IVs of 31. | ||
The only exception to this IV calculation is Factory Head Noland. His Pokémon always have IVs corresponding to two rounds after the current win streak in the Battle Factory (not the Tower). This means that during the Silver Symbol | The only exception to this IV calculation is Factory Head Noland. His Pokémon always have IVs corresponding to two rounds after the current win streak in the Battle Factory (not the Tower). This means that during the Silver Symbol battle, his Pokémon will have IVs of 15, and during the Gold Symbol battle, they will have IVs of 31. | ||
===Battle Points=== | ===Battle Points=== | ||
{ | {| class="wikitable" style="text-align:center" | ||
! BP per round !! 1 !! 2 !! 3 !! 4 !! 5 !! 6 !! 7 !! 8 !! 9 !! 10 !! 11 !! 12 !! 13 !! 14 !! 15 !! 16 !! 17 !! 18 !! 19 !! 20 !! 21 !! 22 !! 23 !! 24 !! 25 | |||
|- | |||
| Single Battle || 3 || 3 || 14 || 4 || 5 || 15 || 6 || 6 || 17 || 7 || 8 || 18 || 9 || 9 || 20 || 10 || 11 || 21 || 12 || 12 || 23 || 13 || 14 || 24 || 15 | |||
|- | |||
| Double Battle || 4 || 4 || 5 || 5 || 6 || 6 || 7 || 7 || 8 || 8 || 9 || 9 || 10 || 10 || 11 || 11 || 12 || 12 || 13 || 13 || 14 || 14 || 15 || 15 || 15 | |||
|} | |||
In Single Battles, Factory Head Noland appears every three rounds, which results in 10 more BP being awarded in those rounds. Factory Head Noland does not challenge the player in Double Battles. | |||
===Factory Head=== | ===Factory Head=== | ||
At the 21st and 42nd battle in a streak, three and six runs through the Battle Factory, [[ | At the 21st and 42nd battle in a streak, three and six runs through the Battle Factory, [[Noland]] will challenge the player to a battle. Like all other Trainers in the facility, including the player, his Pokémon are completely random, and so cannot be known until he is encountered. If he is defeated, he awards the Knowledge Symbol. | ||
Noland's team | Noland's team is drawn from the same pool of Pokémon as a normal Trainer in the round in which he appears, but with fixed IVs of 15 and 31 for the Silver and Gold Symbol fights, respectively. | ||
==Layout== | ==Layout== | ||
| Line 172: | Line 230: | ||
| <small>Before battle in the Battle Factory</small> | | <small>Before battle in the Battle Factory</small> | ||
|} | |} | ||
{{-}} | |||
==In the spin-off games== | |||
===[[Pokémon Masters EX]]=== | |||
Artwork depicting Hoenn's Battle Factory is seen in {{mas|Noland}}'s mindscape. | |||
{| style="background: #7B30B2; {{roundy}}; border: #7B30B2;" | |||
| | |||
{| style="background: #AB60E2; {{roundy}}; border: #AB60E2;" | |||
|- style="text-align:center" | |||
| | |||
{| style="background: #{{bug color light}}; {{roundy}}; border: #{{bug color light}}; padding: 0px 5px 5px 5px" | |||
|- | |||
|<big>'''{{color2|000|Noland (Masters)#Pinsir|Noland & Pinsir}}'''</big> | |||
|- | |||
| [[File:Noland Mindscape.png|200px]] | |||
|} | |||
|} | |||
|} | |||
==In the anime== | ==In the anime== | ||
[[File:Battle Factory anime.png|thumb|250px|The Battle Factory in the anime]] | [[File:Battle Factory anime.png|thumb|left|250px|The Battle Factory in the {{pkmn|anime}}]] | ||
[[File:Battle Factory battlefield.png|thumb||250px|The Battle Factory's battlefield in the anime]] | |||
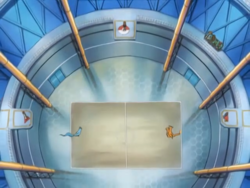
The Battle Factory appeared in ''[[AG135|Numero Uno Articuno]]'' and ''[[AG136|The Symbol Life]]''. In the anime, it is located near [[Cerulean City]] and was the first {{gdis|Battle Frontier|III}} facility challenged by {{Ash}}. {{ashfr|The group}} discovered its location in ''[[AG133|The Right Place and the Right Mime]]''. It is run by [[Noland]] and the battles are [[Battle judge|refereed]] by [[Sergio]]. | |||
In the Battle Factory, Noland allows his challengers to choose which one of his Pokémon they want to face in a one-on-one battle. The battlefield's rooftop can be opened to allow {{type|Flying}} Pokémon take full advantage of their abilities. | |||
Ash had trouble choosing which Pokémon he wanted to face, but when he learned that Noland had befriended a {{pkmn2|wild}} {{TP|Noland|Articuno}}, he decided to choose it as his opponent, recalling his {{AP|Charizard}} from [[Charicific Valley]] for the match. Despite Charizard having the type advantage, it still had a tough time against the powers of a [[Legendary Pokémon]]. Eventually, however, Charizard was able to emerge victorious with its signature finisher move, {{m|Seismic Toss}}, earning Ash the [[Symbol|Knowledge Symbol]], his first Frontier Symbol. | |||
===Pokémon used in the Battle Factory=== | |||
The following is a list of {{OBP|Pokémon|species}} used in the Battle Factory: | |||
{{TrainerPoké | {{TrainerPoké | ||
|main=yes | |main=yes | ||
|trainer=Noland | |trainer=Noland | ||
| Line 194: | Line 273: | ||
Noland revealed that on his biplane's maiden voyage, Noland was surprised to find an Articuno flying beside him and it had trouble flying due to an injured wing. The Factory Head got the Pokémon to land on top of his plane and brought it down. Noland helped it to heal, and ever since then Articuno had been regularly visiting him.}} | Noland revealed that on his biplane's maiden voyage, Noland was surprised to find an Articuno flying beside him and it had trouble flying due to an injured wing. The Factory Head got the Pokémon to land on top of his plane and brought it down. Noland helped it to heal, and ever since then Articuno had been regularly visiting him.}} | ||
{| width="100%" | {| width="100%" | ||
|- | |- | ||
| {{InactivePoké|Noland|Venusaur|Noland | | {{InactivePoké|Noland|Venusaur|Noland Venusaur.png|Grass|Poison|link=no}} | ||
| {{InactivePoké|Noland|Machamp|Noland | | {{InactivePoké|Noland|Machamp|Noland Machamp.png|Fighting|link=no}} | ||
| {{InactivePoké|Noland|Rhyhorn|Noland Sandslash.png|Ground|Rock|link=no}} | | {{InactivePoké|Noland|Rhyhorn|Noland Sandslash.png|Ground|Rock|link=no}} | ||
| {{InactivePoké|Noland|Breloom|Noland Breloom Pinsir Golduck.png|Grass|Fighting|link=no}} | | {{InactivePoké|Noland|Breloom|Noland Breloom Pinsir Golduck.png|Grass|Fighting|link=no}} | ||
| Line 213: | Line 293: | ||
==In the manga== | ==In the manga== | ||
[[File:Battle Factory AP.png|thumb|left|150px|The Battle Factory in [[Ash & Pikachu]]]] | |||
=== | ===Ash & Pikachu=== | ||
[[File:Battle Factory | The Battle Factory appeared in ''[[SP33|Off To The Battle Frontier!!]]'', where Ash, like in the anime, took on and defeated Noland. | ||
{{-}} | |||
===Pokémon Adventures=== | |||
[[File:Battle Factory III Adventures.png|thumb|250px|The Battle Factory in [[Pokémon Adventures]]]] | |||
===={{MangaArc|Emerald}}==== | |||
The Battle Factory first appeared in ''[[PS305|Interesting Interactions Involving Illumise]]'', where {{adv|Emerald}} challenged it as his first Battle Frontier challenge during the Battle Frontier's seven-day opening ceremony. Due to each of his {{pkmn|battle}}s taking at least 15 minutes, it took him about 15 hours to win the 41 battles required to reach Noland. | |||
The battle between Emerald and Noland commenced in ''[[PS306|Pinsir Me, I Must Be Dreaming]]'', eventually coming down to a clash between [[Emerald's Sceptile]] and Noland's {{p|Glalie}}. Noland intended to first force Sceptile into using {{m|Detect}} repeatedly and then finish it off with the [[one-hit knockout move]] {{m|Sheer Cold}}. Although his plan seemed to work, Sceptile was inexplicably able to survive a direct hit from Sheer Cold, allowing it to defeat Glalie with a combination of {{m|Leech Seed}} and {{m|Iron Tail}}, earning Emerald the [[Symbol|Knowledge Symbol]]. | |||
Emerald [[PS308|later]] revealed that Sceptile was on a higher [[level]] than the other rental Pokémon, explaining how it had managed to survive being hit by Sheer Cold. It had also made him realize that Sceptile wasn't a rental Pokémon to begin with, but had been snuck into the facility someone, prompting him to take it with him. | |||
In ''[[PS310|Just My Luck...Shuckle]]'', Noland was attacked by [[Guile Hideout]], who stole every single rental Pokémon from the Battle Factory to be used against those in his way while searching for the {{pkmn2|Mythical}} [[Pokémon category|Wish Pokémon]], {{adv|Jirachi}}. | |||
[[ | |||
{{-}} | {{-}} | ||
==In other languages== | ==In other languages== | ||
{{langtable|color={{frontier color light}}|bordercolor={{frontier color}} | {{langtable|color={{frontier color light}}|bordercolor={{frontier color}} | ||
|zh_cmn=對戰工廠 ''{{tt|Duìzhàn Gōngchǎng|Battle Factory}}'' | |zh_yue=對戰工廠 ''{{tt|Deuijin Gūngchóng|Battle Factory}}'' | ||
|zh_cmn=對戰工廠 / 对战工厂 ''{{tt|Duìzhàn Gōngchǎng|Battle Factory}}'' | |||
|da=Kampfabrikken | |da=Kampfabrikken | ||
|nl=Strijdfabriek | |nl=Strijdfabriek | ||
| Line 244: | Line 331: | ||
{{Project Locations notice}} | {{Project Locations notice}} | ||
[[Category:Emerald locations]] | |||
[[Category:Battle facilities]] | |||
[[Category:Battle Frontier]] | [[Category:Battle Frontier]] | ||
[[de:Kampffabrik (Hoenn)]] | [[de:Kampffabrik (Hoenn)]] | ||
[[es:Frente Batalla (Hoenn)#Fábrica Batalla]] | [[es:Frente Batalla (Hoenn)#Fábrica Batalla]] | ||
[[fr:Usine de Combat ( | [[fr:Usine de Combat (Troisième génération)]] | ||
[[it:Azienda Lotta (Smeraldo)]] | [[it:Azienda Lotta (Smeraldo)]] | ||
[[ja:バトルファクトリー (第三世代)]] | [[ja:バトルファクトリー (第三世代)]] | ||
[[zh:对战工厂(第三世代)]] | [[zh:对战工厂(第三世代)]] | ||
Latest revision as of 00:19, 19 October 2023
| Battle Factory バトルファクトリー Battle Factory | |||||||||||||||||||||
| |||||||||||||||||||||
| "Seek out the toughest POKéMON!" | |||||||||||||||||||||
| |||||||||||||||||||||
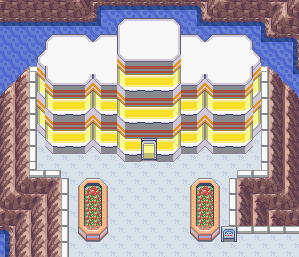
The Battle Factory (Japanese: バトルファクトリー Battle Factory) is a facility located within the Hoenn Battle Frontier in Pokémon Emerald.
Challenges
The Battle Factory is more dedicated to research than the other facilities, and the subject of the scientists' research is the abilities of Trainers when using rental Pokémon in battle. Before the player begins a battle, they will be told some information about the opponent's team, and may switch one of the Pokémon they have with them with one of the Pokémon used by the Trainer they just defeated. This is just like the Battle Tent in Slateport City. The pool of possible rental Pokémon is the same as that of possible Pokémon NPC Trainers use in other facilities in the Battle Frontier.
In addition to win streaks, the monitors inside the lobby display the number of times the players swapped their Pokémon during the challenge.
Battle style
A Trainer's battle style is based on the moves that their Pokémon know. Certain moves fall under one of seven different categories, as shown below:
Depending on how many moves in each category the Trainer's Pokémon know, their battle style will be described differently. A move may be counted more than once if more than one Pokémon has it, and any attack not in any of the categories is not considered.
Each category has a threshold number. For the first three categories, this is three, while for the last four categories, it is two. If the Trainer's Pokémon know enough moves to cross the threshold in exactly one or two categories, then their battle style is described by whichever of those categories is farthest down on the table below. If they do not cross the threshold in any category, though, or if they cross it in more than three categories, then the Trainer's battle style is given a special description.
| Category | Battle Style |
|---|---|
| (None) | "appears to be free-spirited and unrestrained" |
| 1 | "appears to be one based on total preparation" |
| 2 | "appears to be slow and steady" |
| 3 | "appears to be one of endurance" |
| 4 | "appears to be high risk, high return" |
| 5 | "appears to be weakening the foe to start" |
| 6 | "appears to be impossible to predict" |
| 7 | "appears to depend on the battle's flow" |
| (3 or more categories) |
"appears to be flexibly adaptable to the situation" |
Available Pokémon
Opponents are prevented from generating with the same species of Pokémon that are already on the player's team, to ensure that no trade the player can possibly make after the battle will cause the resulting team to violate Species Clause. However, the initial rentals in a round may not respect those clauses if they include a selection of stronger Pokémon, in which case players are prevented from selecting combinations from those initial six picks that would do so.
Where the lists of Pokémon below show one that knows Return, that move is programmatically replaced with Frustration in all cases where it shows up in Battle Factory, and the Pokémon receive minimum friendship to be able to use that move with its maximum power.
Lvl. 50
The enemy Pokémon and initial rental Pokémon encountered come from these lists:
Round 1:
- List of Battle Frontier Pokémon (Generation III)/Group 1
- Unown will never be used.
Round 2-3:
- List of Battle Frontier Pokémon (Generation III)/Group 2
- In round 2, first of the two listed variants for each Pokémon will be encountered, in round 3, the second.
Round 4 onwards:
- List of Battle Frontier Pokémon (Generation III)/Group 3
- In round 4, the player will encounter the first variant; in round 5, the second; in round 6, the third; and in round 7, the fourth variant of any given Pokémon. From round 8 onwards, any variant of any Pokémon from group 3 may appear, except for Dragonite, Tyranitar, and the last two variants of Articuno, Zapdos, Moltres, Raikou, Entei, and Suicune, none of which will ever appear at Lvl. 50. Legendary Pokémon also do not appear before round 8 (except for as strong Pokémon; see below).
Open Level
The enemy Pokémon and initial rental Pokémon come from this list:
In round 1, the player will encounter the first variant; in round 2, the second; in round 3 the third; and in round 4, the fourth variant of any given Pokémon. From round 5 onwards, any variant of any Pokémon from group 3 may appear. Dragonite, Tyranitar, and Legendary Pokémon also do not appear before round 5 (except for as strong Pokémon; see below).
Stat calculation
The Pokémon that are offered to the player at the beginning of the round are generated with uniform IVs in each stat. The IVs that the Pokémon get are based on the length of the player's win streak:
| Current Round | Fixed IV |
|---|---|
| 1 | 3 |
| 2 | 6 |
| 3 | 9 |
| 4 | 12 |
| 5 | 15 |
| 6 | 21 |
| 7 or later | 31 |
Due to a glitch, the initial rental Pokémon on round 9 will have random IVs instead of the expected 31. If the player has enough swaps (see below), one or more Pokémon might have "round 10 strength" and have the expected 31 IVs. However, this means that one or more Pokémon on round 8 might get the "random IVs" issue instead.
The last trainer in each round (with the exception of Noland) uses a different table of IVs:
| Current Round | Fixed IV |
|---|---|
| 1 | 6 |
| 2 | 9 |
| 3 | 12 |
| 4 | 15 |
| 5 | 18 |
| 6 or later | 31 |
However, depending on the number of times the player has rented or swapped Pokémon (i.e. the initial rental counts as one), some of the generated Pokémon will be stronger. These Pokémon have IVs and movesets corresponding to the following round. The number of rentals required is shown below:
| Rent/Swaps | # of stronger Pokémon offered |
|---|---|
| Less than 15 | 0 |
| 15 to 21 | 1 |
| 22 to 28 | 2 |
| 29 to 35 | 3 |
| 36 to 42 | 4 |
| 43 or greater | 5 |
The Pokémon used by Trainers in the Battle Factory are also generated with fixed IVs in each stat. The first six Trainers in each round have Pokémon with uniform IVs corresponding to the current round (using the lookup table above), while the last Trainer's Pokémon have IVs corresponding to the following round. However, due to a glitch, the "current round" used for the Trainers' Pokémon is the player's current win streak in the Battle Tower, not the Battle Factory. This means, for instance, that if the player currently has a 10-round win streak in the Battle Tower, and starts round 1 of the Battle Factory, the player's Pokémon will have IVs of 3, while the opponent Pokémon will all have IVs of 31.
The only exception to this IV calculation is Factory Head Noland. His Pokémon always have IVs corresponding to two rounds after the current win streak in the Battle Factory (not the Tower). This means that during the Silver Symbol battle, his Pokémon will have IVs of 15, and during the Gold Symbol battle, they will have IVs of 31.
Battle Points
| BP per round | 1 | 2 | 3 | 4 | 5 | 6 | 7 | 8 | 9 | 10 | 11 | 12 | 13 | 14 | 15 | 16 | 17 | 18 | 19 | 20 | 21 | 22 | 23 | 24 | 25 |
|---|---|---|---|---|---|---|---|---|---|---|---|---|---|---|---|---|---|---|---|---|---|---|---|---|---|
| Single Battle | 3 | 3 | 14 | 4 | 5 | 15 | 6 | 6 | 17 | 7 | 8 | 18 | 9 | 9 | 20 | 10 | 11 | 21 | 12 | 12 | 23 | 13 | 14 | 24 | 15 |
| Double Battle | 4 | 4 | 5 | 5 | 6 | 6 | 7 | 7 | 8 | 8 | 9 | 9 | 10 | 10 | 11 | 11 | 12 | 12 | 13 | 13 | 14 | 14 | 15 | 15 | 15 |
In Single Battles, Factory Head Noland appears every three rounds, which results in 10 more BP being awarded in those rounds. Factory Head Noland does not challenge the player in Double Battles.
Factory Head
At the 21st and 42nd battle in a streak, three and six runs through the Battle Factory, Noland will challenge the player to a battle. Like all other Trainers in the facility, including the player, his Pokémon are completely random, and so cannot be known until he is encountered. If he is defeated, he awards the Knowledge Symbol.
Noland's team is drawn from the same pool of Pokémon as a normal Trainer in the round in which he appears, but with fixed IVs of 15 and 31 for the Silver and Gold Symbol fights, respectively.
Layout
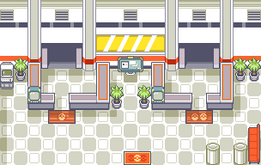
|
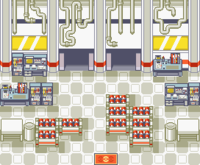
|
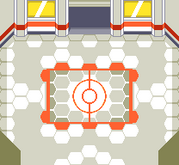
|
| Inside the Battle Factory | Room with rental Pokémon | Before battle in the Battle Factory |
In the spin-off games
Pokémon Masters EX
Artwork depicting Hoenn's Battle Factory is seen in Noland's mindscape.
|
In the anime
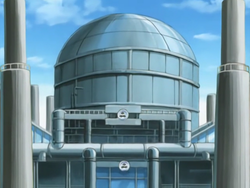
The Battle Factory appeared in Numero Uno Articuno and The Symbol Life. In the anime, it is located near Cerulean City and was the first Battle Frontier facility challenged by Ash. The group discovered its location in The Right Place and the Right Mime. It is run by Noland and the battles are refereed by Sergio.
In the Battle Factory, Noland allows his challengers to choose which one of his Pokémon they want to face in a one-on-one battle. The battlefield's rooftop can be opened to allow Flying-type Pokémon take full advantage of their abilities.
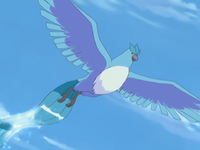
Ash had trouble choosing which Pokémon he wanted to face, but when he learned that Noland had befriended a wild Articuno, he decided to choose it as his opponent, recalling his Charizard from Charicific Valley for the match. Despite Charizard having the type advantage, it still had a tough time against the powers of a Legendary Pokémon. Eventually, however, Charizard was able to emerge victorious with its signature finisher move, Seismic Toss, earning Ash the Knowledge Symbol, his first Frontier Symbol.
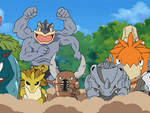
Pokémon used in the Battle Factory
The following is a list of Pokémon used in the Battle Factory:
|
||
While on their way to the Battle Factory, Ash and his friends spotted Articuno flying through the night sky, accompanied by a biplane. After meeting up with Noland, he explains that he'd been cruising with Articuno the previous night. Max was impressed on how Noland caught such a powerful Pokémon, but Noland further explains that Articuno is wild, and a friend of his. Noland revealed that on his biplane's maiden voyage, Noland was surprised to find an Articuno flying beside him and it had trouble flying due to an injured wing. The Factory Head got the Pokémon to land on top of his plane and brought it down. Noland helped it to heal, and ever since then Articuno had been regularly visiting him. | ||
| Debut | Numero Uno Articuno | |
|---|---|---|
| Voice actors | ||
| Japanese | Katsuyuki Konishi | |
| English | Katsuyuki Konishi | |
 Venusaur |
 Machamp |
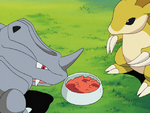 Rhyhorn |
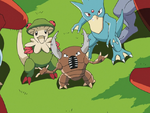 Breloom |
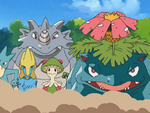 Rhydon |
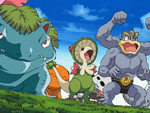 Lairon |
 Pinsir |
 Camerupt |
 Sandslash |
 Golduck |
 Manectric |
 Trapinch |
In the manga

Ash & Pikachu
The Battle Factory appeared in Off To The Battle Frontier!!, where Ash, like in the anime, took on and defeated Noland.
Pokémon Adventures

Emerald arc
The Battle Factory first appeared in Interesting Interactions Involving Illumise, where Emerald challenged it as his first Battle Frontier challenge during the Battle Frontier's seven-day opening ceremony. Due to each of his battles taking at least 15 minutes, it took him about 15 hours to win the 41 battles required to reach Noland.
The battle between Emerald and Noland commenced in Pinsir Me, I Must Be Dreaming, eventually coming down to a clash between Emerald's Sceptile and Noland's Glalie. Noland intended to first force Sceptile into using Detect repeatedly and then finish it off with the one-hit knockout move Sheer Cold. Although his plan seemed to work, Sceptile was inexplicably able to survive a direct hit from Sheer Cold, allowing it to defeat Glalie with a combination of Leech Seed and Iron Tail, earning Emerald the Knowledge Symbol.
Emerald later revealed that Sceptile was on a higher level than the other rental Pokémon, explaining how it had managed to survive being hit by Sheer Cold. It had also made him realize that Sceptile wasn't a rental Pokémon to begin with, but had been snuck into the facility someone, prompting him to take it with him.
In Just My Luck...Shuckle, Noland was attacked by Guile Hideout, who stole every single rental Pokémon from the Battle Factory to be used against those in his way while searching for the Mythical Wish Pokémon, Jirachi.
In other languages
| |||||||||||||||||||||||||||||||||||||||||||||||||
| Hoenn | ||||||||
|---|---|---|---|---|---|---|---|---|
|
| ||||||||
|

|
This article is part of Project Locations, a Bulbapedia project that aims to write comprehensive articles on every location in the Pokémon world. |


