Barren Valley: Difference between revisions
m (→Intro) |
mNo edit summary |
||
| (38 intermediate revisions by 17 users not shown) | |||
| Line 1: | Line 1: | ||
{{DungeonPrevNext|Limestone Cavern|Dark Wasteland|3}} | {{DungeonPrevNext|Limestone Cavern|Dark Wasteland|3}} | ||
{{dungeon infobox | {{dungeon infobox | ||
|size=256 | |||
|colorscheme=Black | |colorscheme=Black | ||
|bordercolorscheme=MD Sky | |bordercolorscheme=MD Sky | ||
|name=Barren Valley | |name={{color|fff|Barren Valley}} | ||
|jname=こかつのたに | |jname={{color|fff|{{tt|こかつのたに|Kokatsu no Tani}}}} | ||
|jtrans=Barren Valley | |jtrans={{color|fff|Barren Valley}} | ||
|image=Barren Valley.png | |image=Barren Valley S.png | ||
|recruitable=No | |recruitable=No | ||
|floors= | |floors=11{{tt|*|All three areas}} | ||
|traps=Yes | |traps=Yes | ||
|rest= | |rest=Yes | ||
|monsterhouses=Yes | |||
|items=48 | |items=48 | ||
|money=Allowed | |money=Allowed | ||
|teamsize={{tt| | |teamsize=1{{tt|*|Grovyle only; Dusknoir joins in boss battle}} | ||
|startlevel=Current | |startlevel=Current | ||
|maintype=None | |maintype=None | ||
|boss={{p|Sableye}} (×4) | |boss={{p|Sableye}} (×4) | ||
}} | }} | ||
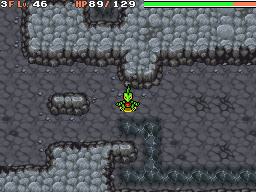
'''Barren Valley''' (Japanese: '''こかつのたに''' ''Barren Valley'') is | '''Barren Valley''' (Japanese: '''こかつのたに''' ''Barren Valley'') is the first mystery dungeon that can only be played in the [[Special Episode]] called ''[[In the Future of Darkness]]'' in the game {{g|Mystery Dungeon: Explorers of Sky}}. | ||
== Pokémon encountered == | After the player's partner summons the [[Rainbow Stoneship]], {{mdc|Dusknoir|2}} opens up a portal back to the future, intending to take all four characters with him; however, {{mdc|Grovyle|2}}, mustering his strength, pushes him back into it, so that only the two of them return. Grovyle then says goodbye to the player and the partner in the present, giving the pair all five [[Time Gear]]s they need, and with his last bit of energy, pushes both Dusknoir and himself into the portal and thus into the future; they are deposited at the entrance to this dungeon. After some bickering and arguing between the two, Grovyle leaves Dusknoir behind to explore the dungeon alone; however, Dusknoir follows him inside. | ||
There are ten floors total - five in Barren Valley and five in Deep Barren Valley, with a waypoint between the two (after the fifth floor but before the sixth). At the end of the dungeon is the Barren Valley Clearing, where Dusknoir catches up to Grovyle before the duo are ambushed by four of Dusknoir's servants, {{p|Sableye}}. It is after this battle that Grovyle and Dusknoir call for a truce and journey together. | |||
==Gameplay== | |||
As this is a Special Episode dungeon, the player cannot recruit Pokémon inside and cannot be rescued if knocked out. | |||
This dungeon uses two floor layouts: | |||
*Medium-sized with 3-8 rooms on floor 1 of Barren Valley and 3-9 rooms on floors 2 and 3 of Barren Valley and floors 2, 3, and 4 of Deep Barren Valley. | |||
*Large-sized with: | |||
**3-8 rooms on floor 5 of Deep Barren Valley | |||
**3-11 rooms on floor 4 of Barren Valley | |||
**3-12 rooms on floor 5 of Barren Valley and floor 1 of Deep Barren Valley | |||
There's 3-6 items on each floor and 2-5 items buried in the walls. There's 2-3 starting enemies on each floor. | |||
The IQ Booster does not activate in this dungeon. The turn limit is 1000. There is water on floors 3 and 5 of Barren Valley and floor 2 of Barren Valley. The enemies in this dungeon have 26IQ. | |||
==Pokémon encountered== | |||
===Barren Valley=== | |||
{{mdloc/h|Black}} | |||
{{mdloc|189|Jumpluff|1-5|33|0}} | |||
{{mdloc|330|Flygon|1-5|33|0}} | |||
{{mdloc|337|Lunatone|1-5|33|0}} | |||
{{mdloc|353|Shuppet|1-5|30|0}} | |||
{{mdloc|430|Honchkrow|1-5|30|0}} | |||
{{mdloc|431|Glameow|1-5|33|0}} | |||
{{mdloc|454|Toxicroak|1-5|32|0}} | |||
{{mdloc/f|MD Sky|Since this is a Special Episode, no Pokémon can be recruited.}} | |||
===Deep Barren Valley=== | |||
{{mdloc/h|Black}} | |||
{{mdloc|189|Jumpluff|1-5|34|0}} | |||
{{mdloc|275|Shiftry|1-5|28|0}} | |||
{{mdloc|330|Flygon|1-5|34|0}} | |||
{{mdloc|337|Lunatone|1-5|34|0}} | |||
{{mdloc|353|Shuppet|1-5|31|0}} | |||
{{mdloc|430|Honchkrow|1-5|31|0}} | |||
{{mdloc|431|Glameow|1-5|34|0}} | |||
{{mdloc|454|Toxicroak|1-5|33|0}} | |||
{{mdloc/f|MD Sky|Since this is a Special Episode, no Pokémon can be recruited.}} | |||
===Barren Valley Clearing=== | |||
{{mdloc/h|Black}} | {{mdloc/h|Black}} | ||
{{mdloc| | {{mdloc|302|Sableye|N/A|38|0|boss=yes}} | ||
{{ | {{mdloc/f|MD Sky|There are four Sableye as the bosses.}} | ||
{{ | |||
{{ | ==Items== | ||
{{ | ===Ground=== | ||
{{ | {{DungeonItem/h|black}} | ||
{{ | {{DungeonItem|Poké|3=B1-B5F, DB1-DB5|4=2-200|sprite=MDBag Poké TDS Sprite}} | ||
{{ | {{DungeonItem|Insomniscope|Glasses|B1-B5F, DB1-DB5|sprite=MDBag Scope TDS Sprite}} | ||
{{ | {{DungeonItem|Def. Scarf|Scarf (Mystery Dungeon)|sprite=MDBag Scarf TDS Sprite|B1-B5F, DB1-DB5}} | ||
{{ | {{DungeonItem|Pecha Scarf|Scarf (Mystery Dungeon)|sprite=MDBag Scarf TDS Sprite|B1-B5F, DB1-DB5}} | ||
{{DungeonItem|Persim Band|Scarf (Mystery Dungeon)|sprite=MDBag Scarf TDS Sprite|B1-B5F, DB1-DB5}} | |||
{{DungeonItem|Power Band|Scarf (Mystery Dungeon)|sprite=MDBag Scarf TDS Sprite|B1-B5F, DB1-DB5}} | |||
{{DungeonItem|Special Band|Scarf (Mystery Dungeon)|sprite=MDBag Scarf TDS Sprite|B1-B5F, DB1-DB5}} | |||
{{DungeonItem|Stamina Band|Scarf (Mystery Dungeon)|sprite=MDBag Scarf TDS Sprite|B1-B5F, DB1-DB5}} | |||
{{DungeonItem|Zinc Band|Scarf (Mystery Dungeon)|sprite=MDBag Scarf TDS Sprite|B1-B5F, DB1-DB5}} | |||
{{DungeonItem|Gravelerock|Gravelerock|B1-B5F, DB1-DB5|5}} | |||
{{DungeonItem|Iron Thorn|Iron Thorn|B1-B5F, DB1-DB5|4|RTRB TDS}} | |||
{{DungeonItem|Apple|Apple|B1-B5F, DB1-DB5}} | |||
{{DungeonItem|Cheri Berry|Cheri Berry|B1-B5F, DB1-DB5}} | |||
{{DungeonItem|Chesto Berry|Chesto Berry|B1-B5F, DB1-DB5|5=RTRB TDS}} | |||
{{DungeonItem|Oran Berry|Oran Berry|B1-B5F, DB1-DB5}} | |||
{{DungeonItem|Pecha Berry|Pecha Berry|B1-B5F, DB1-DB5}} | |||
{{DungeonItem|Rawst Berry|Rawst Berry|B1-B5F, DB1-DB5}} | |||
{{DungeonItem|Blinker Seed|Seed|B1-B5F, DB1-DB5}} | |||
{{DungeonItem|Eyedrop Seed|Seed|B1-B5F, DB1-DB5}} | |||
{{DungeonItem|Reviver Seed|Seed|B1-B5F, DB1-DB5}} | |||
{{DungeonItem|Totter Seed|Seed|B1-B5F, DB1-DB5}} | |||
{{DungeonItem|Max Elixir|Health drink|B1-B5F, DB1-DB5|sprite=MDBag Drink TDS Sprite}} | |||
{{DungeonItem|All-Hit Orb|Wonder Orb|B1-B5F, DB1-DB5}} | |||
{{DungeonItem|All-Mach Orb|Wonder Orb|B1-B5F, DB1-DB5}} | |||
{{DungeonItem|Decoy Orb|Wonder Orb|B1-B5F, DB1-DB5}} | |||
{{DungeonItem|Escape Orb|Wonder Orb|B1-B5F, DB1-DB5}} | |||
{{DungeonItem|Foe-Fear Orb|Wonder Orb|B1-B5F, DB1-DB5}} | |||
{{DungeonItem|Foe-Hold Orb|Wonder Orb|B1-B5F, DB1-DB5}} | |||
{{DungeonItem|Foe-Seal Orb|Wonder Orb|B1-B5F, DB1-DB5}} | |||
{{DungeonItem|Luminous Orb|Wonder Orb|B1-B5F, DB1-DB5}} | |||
{{DungeonItem|Petrify Orb|Wonder Orb|B1-B5F, DB1-DB5}} | |||
{{DungeonItem|Quick Orb|Wonder Orb|B1-B5F, DB1-DB5}} | |||
{{DungeonItem|Radar Orb|Wonder Orb|B1-B5F, DB1-DB5}} | |||
{{DungeonItem|Scanner Orb|Wonder Orb|B1-B5F, DB1-DB5}} | |||
{{DungeonItem|Spurn Orb|Wonder Orb|B1-B5F, DB1-DB5}} | |||
{{DungeonItem|Sunny Orb|Wonder Orb|B1-B5F, DB1-DB5}} | |||
{{DungeonItem|Warp Orb|Wonder Orb|B1-B5F, DB1-DB5}} | |||
|} | |||
===Monster House=== | |||
{{DungeonItem/h|black}} | |||
{{DungeonItem|Poké|3=DB1-DB5|4=2-200|sprite=MDBag Poké TDS Sprite}} | |||
{{DungeonItem|Black Gummi|Black Gummi|DB1-DB5}} | |||
{{DungeonItem|Blue Gummi|Blue Gummi|DB1-DB5}} | |||
{{DungeonItem|Brown Gummi|Brown Gummi|DB1-DB5}} | |||
{{DungeonItem|Clear Gummi|Clear Gummi|DB1-DB5}} | |||
{{DungeonItem|Gold Gummi|Gold Gummi|DB1-DB5}} | |||
{{DungeonItem|Grass Gummi|Grass Gummi|DB1-DB5}} | |||
{{DungeonItem|Gray Gummi|Gray Gummi|DB1-DB5}} | |||
{{DungeonItem|Green Gummi|Green Gummi|DB1-DB5}} | |||
{{DungeonItem|Orange Gummi|Orange Gummi|DB1-DB5}} | |||
{{DungeonItem|Pink Gummi|Pink Gummi|DB1-DB5}} | |||
{{DungeonItem|Purple Gummi|Purple Gummi|DB1-DB5}} | |||
{{DungeonItem|Red Gummi|Red Gummi|DB1-DB5}} | |||
{{DungeonItem|Royal Gummi|Royal Gummi|DB1-DB5}} | |||
{{DungeonItem|Silver Gummi|Silver Gummi|DB1-DB5}} | |||
{{DungeonItem|Sky Gummi|Sky Gummi|DB1-DB5}} | |||
{{DungeonItem|White Gummi|White Gummi|DB1-DB5}} | |||
{{DungeonItem|Yellow Gummi|Yellow Gummi|DB1-DB5}} | |||
{{DungeonItem|Aerial Ace|TM|DB1-DB5}} | |||
{{DungeonItem|Attract|TM|DB1-DB5}} | |||
{{DungeonItem|Brick Break|TM|DB1-DB5}} | |||
{{DungeonItem|Brine|TM|DB1-DB5}} | |||
{{DungeonItem|Bullet Seed|TM|DB1-DB5}} | |||
{{DungeonItem|Calm Mind|TM|DB1-DB5}} | |||
{{DungeonItem|Dig|TM|DB1-DB5}} | |||
{{DungeonItem|Dive|TM|DB1-DB5}} | |||
{{DungeonItem|Embargo|TM|DB1-DB5}} | |||
{{DungeonItem|Energy Ball|TM|DB1-DB5}} | |||
{{DungeonItem|Explosion|TM|DB1-DB5}} | |||
{{DungeonItem|False Swipe|TM|DB1-DB5}} | |||
{{DungeonItem|Flash|TM|DB1-DB5}} | |||
{{DungeonItem|Focus Blast|TM|DB1-DB5}} | |||
{{DungeonItem|Focus Punch|TM|DB1-DB5}} | |||
{{DungeonItem|Giga Drain|TM|DB1-DB5}} | |||
{{DungeonItem|Giga Impact|TM|DB1-DB5}} | |||
{{DungeonItem|Hidden Power|TM|DB1-DB5}} | |||
{{DungeonItem|Hyper Beam|TM|DB1-DB5}} | |||
{{DungeonItem|Iron Tail|TM|DB1-DB5}} | |||
{{DungeonItem|Light Screen|TM|DB1-DB5}} | |||
{{DungeonItem|Natural Gift|TM|DB1-DB5}} | |||
{{DungeonItem|Payback|TM|DB1-DB5}} | |||
{{DungeonItem|Poison Jab|TM|DB1-DB5}} | |||
{{DungeonItem|Protect|TM|DB1-DB5}} | |||
{{DungeonItem|Recycle|TM|DB1-DB5}} | |||
{{DungeonItem|Reflect|TM|DB1-DB5}} | |||
{{DungeonItem|Rest|TM|DB1-DB5}} | |||
{{DungeonItem|Roar|TM|DB1-DB5}} | |||
{{DungeonItem|Rock Slide|TM|DB1-DB5}} | |||
{{DungeonItem|Roost|TM|DB1-DB5}} | |||
{{DungeonItem|Safeguard|TM|DB1-DB5}} | |||
{{DungeonItem|Shadow Claw|TM|DB1-DB5}} | |||
{{DungeonItem|Shock Wave|TM|DB1-DB5}} | |||
{{DungeonItem|SolarBeam|TM|DB1-DB5}} | |||
{{DungeonItem|Stealth Rock|TM|DB1-DB5}} | |||
{{DungeonItem|Steel Wing|TM|DB1-DB5}} | |||
{{DungeonItem|Swords Dance|TM|DB1-DB5}} | |||
{{DungeonItem|Taunt|TM|DB1-DB5}} | |||
{{DungeonItem|Thunder Wave|TM|DB1-DB5}} | |||
{{DungeonItem|Thunderbolt|TM|DB1-DB5}} | |||
{{DungeonItem|Torment|TM|DB1-DB5}} | |||
{{DungeonItem|Vacuum-Cut|TM|DB1-DB5}} | |||
{{DungeonItem|Water Pulse|TM|DB1-DB5}} | |||
{{DungeonItem|Wide Slash|TM|DB1-DB5}} | |||
|} | |||
===Buried items=== | |||
{{DungeonItem/h|black}} | |||
{{DungeonItem|Poké|3=B1-B5F, DB1-DB5|4=2-200|sprite=MDBag Poké TDS Sprite}} | |||
|} | |||
==Traps== | |||
The amount of traps depends on the floor: | |||
*3-7 on floors 1, 2 and 3 of Barren Valley | |||
*4-8 on floors 4 and 5 of Barren Valley, and in Deep Barren Valley | |||
Game will spawn extra in a Monster House. | |||
{| class="roundy" style="text-align:center; background: #{{black color}}; border: 3px solid #{{MD Sky color dark}}" | |||
|- | |||
! style="background: #{{black color light}}; {{roundytl|5px}}"| Image | |||
! style="background: #{{black color light}}"| Trap | |||
! style="background: #{{black color light}}; {{roundytr|5px}}"| Appearance % | |||
|- style="background: #FFF" | |||
|[[File:Chestnut Trap RTRB TDS.png]] | |||
|Chestnut Trap | |||
|6.33% | |||
|- style="background: #FFF" | |||
|[[File:Explosion Trap RTRB TDS.png]] | |||
|Explosion Trap | |||
|2.53% | |||
|- style="background: #FFF" | |||
|[[File:Grimy Trap RTRB TDS.png]] | |||
|Grimy Trap | |||
|6.33% | |||
|- style="background: #FFF" | |||
|[[File:Gust Trap RTRB TDS.png]] | |||
|Gust Trap | |||
|3.17% | |||
|- style="background: #FFF" | |||
|[[File:Mud Trap RTRB TDS.png]] | |||
|Mud Trap | |||
|3.16% | |||
|- style="background: #FFF" | |||
|[[File:PP-Zero Trap RTRB TDS.png]] | |||
|PP-Zero Trap | |||
|6.33% | |||
|- style="background: #FFF" | |||
|[[File:Poison Trap RTRB TDS.png]] | |||
|Poison Trap | |||
|6.33% | |||
|- style="background: #FFF" | |||
|[[File:Pokémon Trap RTRB TDS.png]] | |||
|Pokémon Trap | |||
|6.33% | |||
|- style="background: #FFF" | |||
|[[File:Seal Trap RTRB TDS.png]] | |||
|Seal Trap | |||
|3.16% | |||
|- style="background: #FFF" | |||
|[[File:Selfdestruct Trap RTRB TDS.png]] | |||
|Selfdestruct Trap | |||
|1.90% | |||
|- style="background: #FFF" | |||
|[[File:Slow Trap RTRB TDS.png]] | |||
|Slow Trap | |||
|6.33% | |||
|- style="background: #FFF" | |||
|[[File:Slumber Trap RTRB TDS.png]] | |||
|Slumber Trap | |||
|7.60% | |||
|- style="background: #FFF" | |||
|[[File:Spin Trap RTRB TDS.png]] | |||
|Spin Trap | |||
|5.69% | |||
|- style="background: #FFF" | |||
|[[File:Trip Trap RTRB TDS.png]] | |||
|Trip Trap | |||
|3.16% | |||
|- style="background: #FFF" | |||
|[[File:Warp Trap RTRB TDS.png]] | |||
|Warp Trap | |||
|6.33% | |||
|- style="background: #FFF" | |||
|[[File:Wonder Tile RTRB TDS.png]] | |||
|Wonder Tile | |||
|25.32% | |||
|} | |||
==Other encounters== | |||
{| style="background: #{{black color}}; margin-left: 10px; margin-bottom: 10px; {{roundy|10px}} border: 3px solid #{{MD Sky color dark}}" | |||
|- | |||
! style="background: #{{black color light}}; {{roundytl|10px}}"| Image | |||
! style="background: #{{black color light}}" | Encounter | |||
! style="background: #{{black color light}}" | B1F-B5F | |||
! style="background: #{{black color light}}; {{roundytr|5px}}" data-sort-type="number" | BD1-BD5F | |||
|- style="background: #FFFFFF" | |||
| align="center"|[[File:MDBag Wonder Orb TDS Sprite.png]] | |||
| align="center"|'''Monster House''' | |||
| align="center"|0% | |||
| align="center"|5% | |||
|} | |||
==Layout== | |||
{| class="roundy" style="margin:auto; background: #000; border: 3px solid #{{MD sky color}}" | |||
|- | |||
! style="background:#{{black color light}}; {{roundytl|5px}}" | Entrance | |||
! style="background:#{{black color light}}; {{roundytr|5px}}" | Rest stop | |||
|- style="text-align:center;" | |||
| [[File:Barren Valley entrance S.png|x192px]] | |||
| [[File:Barren Valley rest stop S.png|x192px]] | |||
|- | |||
! style="background:#{{black color light}}" | Deep Barren Valley | |||
! style="background:#{{black color light}}" | Clearing | |||
|- style="text-align:center;" | |||
| [[File:Deep Barren Valley S.png]] | |||
| [[File:Barren Valley clearing S.png|x192px]] | |||
|- | |||
| colspan="2" style="background:#{{black color light}}; {{roundybottom|5px}}" | | |||
|} | |||
==In other languages== | |||
{| style="float:left;" | |||
|- | |||
| style="vertical-align:top;" | | |||
''Barren Valley'' | |||
{{langtable|color={{black color light}}|bordercolor={{MD Sky color}} | |||
|fr=Vallée Stérile | |||
|de=Kargtal | |||
|it=Valle Desolata | |||
|es=Valle Desolado | |||
}} | |||
| style="vertical-align:top;" | | |||
''Deep Barren Valley'' | |||
{{langtable|color={{black color light}}|bordercolor={{MD Sky color}} | |||
|ja=こかつのたに おくち ''Kokatsu no Tani Okuchi'' | |||
|fr=Vallée Stérile profondeurs | |||
|de=Tiefes Kargtal | |||
|it=Gola Desolata | |||
|es=Corazón Valle Desolado | |||
}} | |||
| style="vertical-align:top;" | | |||
''Barren Valley Clearing'' | |||
{{langtable|color={{black color light}}|bordercolor={{MD Sky color}} | |||
|ja=こかつのたに さいおうぶ ''Kokatsu no Tani Saiōbu'' | |||
|fr=Vallée Stérile - trouée | |||
|de=Kargtallichtung | |||
|it=Altopiano Desolato | |||
|es=Claro Desolado | |||
}} | |||
|} | |||
{{-}} | {{-}} | ||
{{ | {{PMD2 locations}} | ||
{{DoubleProjectTag|Locations|Sidegames}} | |||
[[Category:Pokémon Mystery Dungeon: Explorers of Sky locations]] | [[Category:Pokémon Mystery Dungeon: Explorers of Sky locations]] | ||
[[de:Kargtal]] | [[de:Kargtal]] | ||
[[es:Valle Desolado]] | |||
[[fr:Vallée Stérile]] | |||
[[it:Valle Desolata]] | |||
[[ja:こかつのたに]] | |||
[[zh:枯竭之谷]] | |||
Latest revision as of 20:47, 20 August 2022
|
|
|
| ||||||||||||||||||||||||||||||||||||||||||
| ||||||||||||||||||||||||||||||||||||||||||
| ||||||||||||||||||||||||||||||||||||||||||
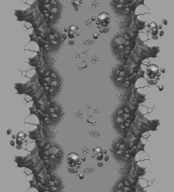
Barren Valley (Japanese: こかつのたに Barren Valley) is the first mystery dungeon that can only be played in the Special Episode called In the Future of Darkness in the game Pokémon Mystery Dungeon: Explorers of Sky.
After the player's partner summons the Rainbow Stoneship, Dusknoir opens up a portal back to the future, intending to take all four characters with him; however, Grovyle, mustering his strength, pushes him back into it, so that only the two of them return. Grovyle then says goodbye to the player and the partner in the present, giving the pair all five Time Gears they need, and with his last bit of energy, pushes both Dusknoir and himself into the portal and thus into the future; they are deposited at the entrance to this dungeon. After some bickering and arguing between the two, Grovyle leaves Dusknoir behind to explore the dungeon alone; however, Dusknoir follows him inside.
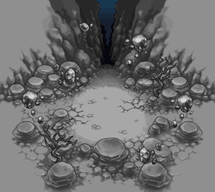
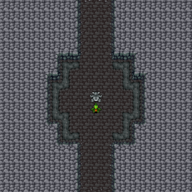
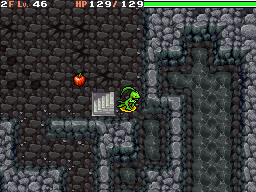
There are ten floors total - five in Barren Valley and five in Deep Barren Valley, with a waypoint between the two (after the fifth floor but before the sixth). At the end of the dungeon is the Barren Valley Clearing, where Dusknoir catches up to Grovyle before the duo are ambushed by four of Dusknoir's servants, Sableye. It is after this battle that Grovyle and Dusknoir call for a truce and journey together.
Gameplay
As this is a Special Episode dungeon, the player cannot recruit Pokémon inside and cannot be rescued if knocked out.
This dungeon uses two floor layouts:
- Medium-sized with 3-8 rooms on floor 1 of Barren Valley and 3-9 rooms on floors 2 and 3 of Barren Valley and floors 2, 3, and 4 of Deep Barren Valley.
- Large-sized with:
- 3-8 rooms on floor 5 of Deep Barren Valley
- 3-11 rooms on floor 4 of Barren Valley
- 3-12 rooms on floor 5 of Barren Valley and floor 1 of Deep Barren Valley
There's 3-6 items on each floor and 2-5 items buried in the walls. There's 2-3 starting enemies on each floor.
The IQ Booster does not activate in this dungeon. The turn limit is 1000. There is water on floors 3 and 5 of Barren Valley and floor 2 of Barren Valley. The enemies in this dungeon have 26IQ.
Pokémon encountered
Barren Valley
| Pokémon | Floors | Levels | Recruit Rate | |
|---|---|---|---|---|
| Jumpluff | 1-5 | 33 | Unrecruitable | |
| Flygon | 1-5 | 33 | Unrecruitable | |
| Lunatone | 1-5 | 33 | Unrecruitable | |
| Shuppet | 1-5 | 30 | Unrecruitable | |
| Honchkrow | 1-5 | 30 | Unrecruitable | |
| Glameow | 1-5 | 33 | Unrecruitable | |
| Toxicroak | 1-5 | 32 | Unrecruitable | |
| Since this is a Special Episode, no Pokémon can be recruited. | ||||
Deep Barren Valley
| Pokémon | Floors | Levels | Recruit Rate | |
|---|---|---|---|---|
| Jumpluff | 1-5 | 34 | Unrecruitable | |
| Shiftry | 1-5 | 28 | Unrecruitable | |
| Flygon | 1-5 | 34 | Unrecruitable | |
| Lunatone | 1-5 | 34 | Unrecruitable | |
| Shuppet | 1-5 | 31 | Unrecruitable | |
| Honchkrow | 1-5 | 31 | Unrecruitable | |
| Glameow | 1-5 | 34 | Unrecruitable | |
| Toxicroak | 1-5 | 33 | Unrecruitable | |
| Since this is a Special Episode, no Pokémon can be recruited. | ||||
Barren Valley Clearing
| Pokémon | Floors | Levels | Recruit Rate | |
|---|---|---|---|---|
| Sableye | N/A | 38 | Unrecruitable Boss | |
| There are four Sableye as the bosses. | ||||
Items
Ground
| Item | Floors | |
|---|---|---|
| 2-200 Poké | B1-B5F, DB1-DB5F | |
| Insomniscope | B1-B5F, DB1-DB5F | |
| Def. Scarf | B1-B5F, DB1-DB5F | |
| Pecha Scarf | B1-B5F, DB1-DB5F | |
| Persim Band | B1-B5F, DB1-DB5F | |
| Power Band | B1-B5F, DB1-DB5F | |
| Special Band | B1-B5F, DB1-DB5F | |
| Stamina Band | B1-B5F, DB1-DB5F | |
| Zinc Band | B1-B5F, DB1-DB5F | |
| 5 Gravelerock | B1-B5F, DB1-DB5F | |
| 4 Iron Thorn | B1-B5F, DB1-DB5F | |
| Apple | B1-B5F, DB1-DB5F | |
| Cheri Berry | B1-B5F, DB1-DB5F | |
| Chesto Berry | B1-B5F, DB1-DB5F | |
| Oran Berry | B1-B5F, DB1-DB5F | |
| Pecha Berry | B1-B5F, DB1-DB5F | |
| Rawst Berry | B1-B5F, DB1-DB5F | |
| Blinker Seed | B1-B5F, DB1-DB5F | |
| Eyedrop Seed | B1-B5F, DB1-DB5F | |
| Reviver Seed | B1-B5F, DB1-DB5F | |
| Totter Seed | B1-B5F, DB1-DB5F | |
| Max Elixir | B1-B5F, DB1-DB5F | |
| All-Hit Orb | B1-B5F, DB1-DB5F | |
| All-Mach Orb | B1-B5F, DB1-DB5F | |
| Decoy Orb | B1-B5F, DB1-DB5F | |
| Escape Orb | B1-B5F, DB1-DB5F | |
| Foe-Fear Orb | B1-B5F, DB1-DB5F | |
| Foe-Hold Orb | B1-B5F, DB1-DB5F | |
| Foe-Seal Orb | B1-B5F, DB1-DB5F | |
| Luminous Orb | B1-B5F, DB1-DB5F | |
| Petrify Orb | B1-B5F, DB1-DB5F | |
| Quick Orb | B1-B5F, DB1-DB5F | |
| Radar Orb | B1-B5F, DB1-DB5F | |
| Scanner Orb | B1-B5F, DB1-DB5F | |
| Spurn Orb | B1-B5F, DB1-DB5F | |
| Sunny Orb | B1-B5F, DB1-DB5F | |
| Warp Orb | B1-B5F, DB1-DB5F | |
Monster House
| Item | Floors | |
|---|---|---|
| 2-200 Poké | DB1-DB5F | |
| Black Gummi | DB1-DB5F | |
| Blue Gummi | DB1-DB5F | |
| Brown Gummi | DB1-DB5F | |
| Clear Gummi | DB1-DB5F | |
| Gold Gummi | DB1-DB5F | |
| Grass Gummi | DB1-DB5F | |
| Gray Gummi | DB1-DB5F | |
| Green Gummi | DB1-DB5F | |
| Orange Gummi | DB1-DB5F | |
| Pink Gummi | DB1-DB5F | |
| Purple Gummi | DB1-DB5F | |
| Red Gummi | DB1-DB5F | |
| Royal Gummi | DB1-DB5F | |
| Silver Gummi | DB1-DB5F | |
| Sky Gummi | DB1-DB5F | |
| White Gummi | DB1-DB5F | |
| Yellow Gummi | DB1-DB5F | |
| Aerial Ace | DB1-DB5F | |
| Attract | DB1-DB5F | |
| Brick Break | DB1-DB5F | |
| Brine | DB1-DB5F | |
| Bullet Seed | DB1-DB5F | |
| Calm Mind | DB1-DB5F | |
| Dig | DB1-DB5F | |
| Dive | DB1-DB5F | |
| Embargo | DB1-DB5F | |
| Energy Ball | DB1-DB5F | |
| Explosion | DB1-DB5F | |
| False Swipe | DB1-DB5F | |
| Flash | DB1-DB5F | |
| Focus Blast | DB1-DB5F | |
| Focus Punch | DB1-DB5F | |
| Giga Drain | DB1-DB5F | |
| Giga Impact | DB1-DB5F | |
| Hidden Power | DB1-DB5F | |
| Hyper Beam | DB1-DB5F | |
| Iron Tail | DB1-DB5F | |
| Light Screen | DB1-DB5F | |
| Natural Gift | DB1-DB5F | |
| Payback | DB1-DB5F | |
| Poison Jab | DB1-DB5F | |
| Protect | DB1-DB5F | |
| Recycle | DB1-DB5F | |
| Reflect | DB1-DB5F | |
| Rest | DB1-DB5F | |
| Roar | DB1-DB5F | |
| Rock Slide | DB1-DB5F | |
| Roost | DB1-DB5F | |
| Safeguard | DB1-DB5F | |
| Shadow Claw | DB1-DB5F | |
| Shock Wave | DB1-DB5F | |
| SolarBeam | DB1-DB5F | |
| Stealth Rock | DB1-DB5F | |
| Steel Wing | DB1-DB5F | |
| Swords Dance | DB1-DB5F | |
| Taunt | DB1-DB5F | |
| Thunder Wave | DB1-DB5F | |
| Thunderbolt | DB1-DB5F | |
| Torment | DB1-DB5F | |
| Vacuum-Cut | DB1-DB5F | |
| Water Pulse | DB1-DB5F | |
| Wide Slash | DB1-DB5F | |
Buried items
| Item | Floors | |
|---|---|---|
| 2-200 Poké | B1-B5F, DB1-DB5F | |
Traps
The amount of traps depends on the floor:
- 3-7 on floors 1, 2 and 3 of Barren Valley
- 4-8 on floors 4 and 5 of Barren Valley, and in Deep Barren Valley
Game will spawn extra in a Monster House.
Other encounters
| Image | Encounter | B1F-B5F | BD1-BD5F |
|---|---|---|---|
| Monster House | 0% | 5% |
Layout
| Entrance | Rest stop |
|---|---|
|
|
| Deep Barren Valley | Clearing |
|
|
In other languages
|
Barren Valley
|
Deep Barren Valley
|
Barren Valley Clearing
| |||||||||||||||||||||||||||||||||||||||||||||||||||||||||||||||

|
This article is part of both Project Locations and Project Sidegames, Bulbapedia projects that, together, aim to write comprehensive articles on the Pokémon Locations and Sidegames, respectively. | 
|
