Appendix:Yellow walkthrough/Section 9: Difference between revisions
No edit summary |
mNo edit summary |
||
| Line 1: | Line 1: | ||
== Saffron City == | == Saffron City == | ||
[[File:Saffron City RBY.png|thumb|350px|Saffron City]] | [[File:Saffron City RBY.png|thumb|350px|Saffron City]] | ||
{| class="expandable" align="center" style="background: #f6d263; {{roundy}}; border: 5px solid #F9E197;" | |||
|- align="center" | |||
! Available Pokémon | |||
|- | |||
| | |||
{{catch/header|building|no}} | |||
{{catch/div|building|Fighting Dojo}} | |||
{{catch/entry1|106|Hitmonlee|no|no|yes|Gift|30|Only one|type1=Fighting}} | |||
{{catch/entry1|107|Hitmonchan|no|no|yes|Gift|30|Only one|type1=Fighting}} | |||
{{catch/div|building|Silph Co.}} | |||
{{catch/entry1|131|Lapras|no|no|yes|Gift|15|Only one|type1=Water|type2=Ice}} | |||
{{catch/footer|building}} | |||
|} | |||
{| class="expandable" align="center" style="background: #f6d263; {{roundy}}; border: 5px solid #F9E197;" | |||
|- align="center" | |||
! Items | |||
|- | |||
| | |||
{{itlisth|road}} | |||
{{itlistbod|TM Psychic|From Mr. Psychic in the southeast house|Y|display={{TM|29|Psychic}}}} | |||
{{itlistbod|TM Normal|From Copycat in the northwest house|Y|display={{TM|31|Mimic}}}} | |||
{{itlistbod|Nugget|In Copycat's room, on her desk (hidden)|Y|display={{DL|Valuable item|Nugget}}}} | |||
{{itlistfoot|road}} | |||
|} | |||
=== City Under Siege === | === City Under Siege === | ||
| Line 6: | Line 32: | ||
=== Mr. Psychic === | === Mr. Psychic === | ||
Visit the house in the southeast to meet Mr. Psychic, and get {{TM|29|Psychic}} from him. | |||
=== Fighting Dojo === | === Fighting Dojo === | ||
One of {{ci|Saffron}}'s major attractions is that there are two Gyms here, not one. Located right next door to the official [[Saffron Gym]], the [[Fighting Dojo]] is an optional challenge. While you don't receive a [[badge]] from defeating the Trainers inside, | One of {{ci|Saffron}}'s major attractions is that there are two Gyms here, not one. Located right next door to the official [[Saffron Gym]], the [[Fighting Dojo]] is an optional challenge. While you don't receive a [[badge]] from defeating the Trainers inside, the Karate Master will give you the choice of two {{t|Fighting}} Pokémon—the hard-kicking {{p|Hitmonlee}} or the piston-punching {{p|Hitmonchan}}. | ||
{| align="center" class="expandable" style="background: #{{fighting color light}}; {{roundy | {| align="center" class="expandable" style="background: #{{fighting color light}}; {{roundy}} border: 5px solid #{{fighting color}};" | ||
|- align="center" | |- align="center" | ||
! Trainers | ! Trainers | ||
| Line 17: | Line 43: | ||
| | | | ||
{{trainerheader|building}} | {{trainerheader|building}} | ||
{{trainerentry|Spr RG Blackbelt.png|Black Belt||775|3|066|Machop||31|None|056|Mankey||31|None|057|Primeape||31|None | {{trainerentry|Spr RG Blackbelt.png|Black Belt||775|3|066|Machop||31|None|056|Mankey||31|None|057|Primeape||31|None}} | ||
{{trainerdiv|building}} | {{trainerdiv|building}} | ||
{{trainerentry|Spr RG Blackbelt.png|Black Belt||800|2|066|Machop||32|None|067|Machoke||32|None | {{trainerentry|Spr RG Blackbelt.png|Black Belt||800|2|066|Machop||32|None|067|Machoke||32|None}} | ||
{{trainerdiv|building}} | {{trainerdiv|building}} | ||
{{trainerentry|Spr RG Blackbelt.png|Black Belt||900|1|057|Primeape||36|None | {{trainerentry|Spr RG Blackbelt.png|Black Belt||900|1|057|Primeape||36|None}} | ||
{{trainerdiv|building}} | {{trainerdiv|building}} | ||
{{trainerentry|Spr RG Blackbelt.png|Black Belt||775|3|056|Mankey||31|None|056|Mankey||31|None|057|Primeape||31|None | {{trainerentry|Spr RG Blackbelt.png|Black Belt||775|3|056|Mankey||31|None|056|Mankey||31|None|057|Primeape||31|None}} | ||
{{trainerdiv|building}} | {{trainerdiv|building}} | ||
{{trainerentry|Spr RG Blackbelt.png|Black Belt||925|2|106|Hitmonlee||37||107|Hitmonchan||37|}} | {{trainerentry|Spr RG Blackbelt.png|Black Belt||925|2|106|Hitmonlee||37|None|107|Hitmonchan||37|None}} | ||
{{trainerfooter|building}} | {{trainerfooter|building}} | ||
|} | |} | ||
| Line 179: | Line 198: | ||
{{itlisth|building}} | {{itlisth|building}} | ||
{{itemlist|TM Normal|2F, from the woman in the northwest room|Y=yes|display={{TM|36|Selfdestruct}}}} | {{itemlist|TM Normal|2F, from the woman in the northwest room|Y=yes|display={{TM|36|Selfdestruct}}}} | ||
{{itemlist|Card Key III|5F, in the southern hallway|Y=yes|display= | {{itemlist|Card Key III|5F, in the southern hallway|Y=yes|display={{key|I|Card Key}}}} | ||
{{itemlist|Protein|5F, in the southwest room|Y=yes}} | {{itemlist|Protein|5F, in the southwest room|Y=yes|display={{DL|Vitamin|Protein}}}} | ||
{{itemlist|HP Up|6F, in the southwest room (requires Card Key)|Y=yes}} | {{itemlist|HP Up|6F, in the southwest room (requires Card Key)|Y=yes|display={{DL|Vitamin|HP Up}}}} | ||
{{itemlist|X Accuracy|6F, in the southwest room (requires Card Key)|Y=yes}} | {{itemlist|X Accuracy|6F, in the southwest room (requires Card Key)|Y=yes|display={{DL|Battle item|X Accuracy}}}} | ||
{{itemlist|TM Normal|7F, in the northeast room|Y=yes|display={{TM|03|Swords Dance}}}} | {{itemlist|TM Normal|7F, in the northeast room|Y=yes|display={{TM|03|Swords Dance}}}} | ||
{{itemlist|Calcium|7F, in the southwest area|Y=yes}} | {{itemlist|Calcium|7F, in the southwest area|Y=yes|display={{DL|Vitamin|Calcium}}}} | ||
{{itemlist|Carbos|10F, in the southwest room|Y=yes}} | {{itemlist|Carbos|10F, in the southwest room|Y=yes|display={{DL|Vitamin|Carbos}}}} | ||
{{itemlist|Rare Candy|10F, in the southwest room|Y=yes}} | {{itemlist|Rare Candy|10F, in the southwest room|Y=yes|display={{DL|Vitamin|Rare Candy}}}} | ||
{{itemlist|TM Ground|10F, in the southwest room|Y=yes|display={{TM|26|Earthquake}}}} | {{itemlist|TM Ground|10F, in the southwest room|Y=yes|display={{TM|26|Earthquake}}}} | ||
{{itemlist|Hyper Potion|3F, in the western room (requires Card Key)|Y=yes}} | {{itemlist|Hyper Potion|3F, in the western room (requires Card Key)|Y=yes|display={{DL|Potion|Hyper Potion}}}} | ||
{{itemlist|Full Heal|4F, in the northwest room (requires Card Key)|Y=yes}} | {{itemlist|Full Heal|4F, in the northwest room (requires Card Key)|Y=yes|display={{DL|Status ailment healing item|Full Heal}}}} | ||
{{itemlist|Max Revive|4F, in the northwest room (requires Card Key)|Y=yes}} | {{itemlist|Max Revive|4F, in the northwest room (requires Card Key)|Y=yes|display={{DL|Revive|Max Revive}}}} | ||
{{itemlist|Escape Rope|4F, in the northwest room (requires Card Key)|Y=yes}} | {{itemlist|Escape Rope|4F, in the northwest room (requires Card Key)|Y=yes}} | ||
{{itemlist|Master Ball|11F, from the president as a reward for saving his company|Y=yes}} | {{itemlist|Master Ball|11F, from the president as a reward for saving his company|Y=yes|display={{ball|Master}}}} | ||
{{itlistfoot|building}} | {{itlistfoot|building}} | ||
|} | |} | ||
| Line 205: | Line 224: | ||
==== 2F ==== | ==== 2F ==== | ||
The electronic doors are locked tight, so step on either warp tile to teleport to 8F. | The electronic doors are locked tight, so step on either warp tile to teleport to 8F. | ||
==== 8F ==== | ==== 8F ==== | ||
| Line 211: | Line 229: | ||
Clear out the Rockets here, then take the elevator to 3F. | Clear out the Rockets here, then take the elevator to 3F. | ||
==== 3F ==== | ==== 3F ==== | ||
| Line 219: | Line 236: | ||
Back on the 3rd floor, fight the lone Rocket and take the warp in the southwest corner to a locked room on the 5th floor. Grab the {{TM|09|Take Down}} there and warp back. Climb the stairs to the fourth floor. | Back on the 3rd floor, fight the lone Rocket and take the warp in the southwest corner to a locked room on the 5th floor. Grab the {{TM|09|Take Down}} there and warp back. Climb the stairs to the fourth floor. | ||
==== 4F ==== | ==== 4F ==== | ||
| Line 225: | Line 241: | ||
Knock these two Rockets around a bit, then climb to the 5th floor. | Knock these two Rockets around a bit, then climb to the 5th floor. | ||
==== 5F ==== | ==== 5F ==== | ||
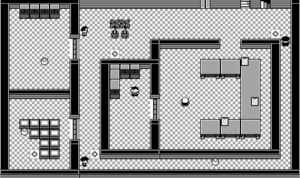
[[File:Silph Co 5F RBY.png|thumb|left|Silph Co, 5F]] | [[File:Silph Co 5F RBY.png|thumb|left|Silph Co, 5F]] | ||
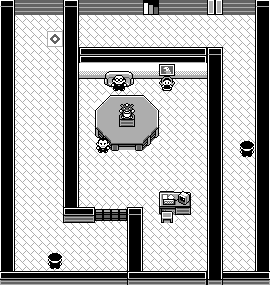
Beat the Rocket and Scientist near the north wall and follow the hallway to the south, where you'll find a Rocket next to another warp tile. Defeat the Rocket, step on the warp, and warp right back to 5F. Walk down and follow the narrow path to the right, where you'll find the | Beat the Rocket and Scientist near the north wall and follow the hallway to the south, where you'll find a Rocket next to another warp tile. Defeat the Rocket, step on the warp, and warp right back to 5F. Walk down and follow the narrow path to the right, where you'll find the {{key|I|Card Key}}, which unlocks all of the electronic doors in the building. Go left past the Rocket, and open the door to the northwest room for a {{DL|Vitamin|Protein}}. Climb up to 6F. | ||
==== 6F ==== | ==== 6F ==== | ||
| Line 237: | Line 251: | ||
Open the door to the southwest room to reach an {{DL|Vitamin|HP Up}} and an {{DL|Battle item|X Accuracy}}. Head up to 7F. | Open the door to the southwest room to reach an {{DL|Vitamin|HP Up}} and an {{DL|Battle item|X Accuracy}}. Head up to 7F. | ||
==== 7F ==== | ==== 7F ==== | ||
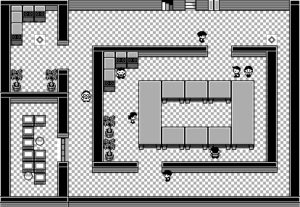
[[File:Silph Co 7F RBY.png|thumb|left|Silph Co, 7F]] | [[File:Silph Co 7F RBY.png|thumb|left|Silph Co, 7F]] | ||
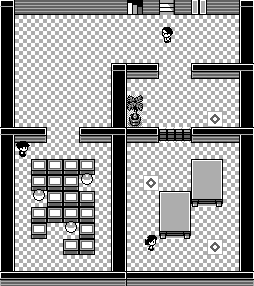
Use the Card Key to open the nearest door and grab {{TM|03|Swords Dance}}. You can battle the grunt on the other side of the door near the TM, but the nearby warp only leads back to 5F. After battling the Rocket along the north wall (next to the counter), walk to the left you'll see your rival loitering in the next room | Use the Card Key to open the nearest door and grab {{TM|03|Swords Dance}}. You can battle the grunt on the other side of the door near the TM, but the nearby warp only leads back to 5F. After battling the Rocket along the north wall (next to the counter), walk to the left you'll see your rival loitering in the next room. Follow the narrow hallway south to an area with a Scientist, grab the {{DL|Vitamin|Calcium}}, and head up two flights of stairs to reach 9F. | ||
==== 9F ==== | ==== 9F ==== | ||
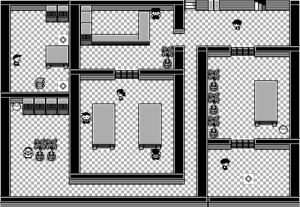
[[File:Silph Co 9F RBY.png|thumb|Silph Co, 9F]] | [[File:Silph Co 9F RBY.png|thumb|Silph Co, 9F]] | ||
By now, your team may be running out of energy. After beating the Rocket | By now, your team may be running out of energy. After beating the Rocket, open the door nearby and talk to the woman near the beds. To thank you for your efforts, she'll heal your team to full health. Beat the second Rocket (but ignore the warp), and take the stairs to 10F. | ||
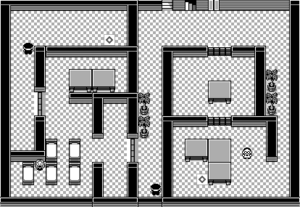
==== 10F ==== | ==== 10F ==== | ||
| Line 255: | Line 266: | ||
There are only two thugs here, but make sure to grab the {{DL|Vitamin|Carbos}}, {{DL|Vitamin|Rare Candy}}, and {{TM|26|Earthquake}} from the southwest room. Take the stairs to 11F for a quick grunt battle. | There are only two thugs here, but make sure to grab the {{DL|Vitamin|Carbos}}, {{DL|Vitamin|Rare Candy}}, and {{TM|26|Earthquake}} from the southwest room. Take the stairs to 11F for a quick grunt battle. | ||
==== 11F (east) ==== | ==== 11F (east) ==== | ||
| Line 261: | Line 271: | ||
Beat the lone grunt here, then take the elevator back down to 3F. | Beat the lone grunt here, then take the elevator back down to 3F. | ||
==== 3F ==== | ==== 3F ==== | ||
If you haven't already, use the Card Key on the door in the center of the room. Open the locked door beyond that, defeat the Scientist, and grab the {{DL|Potion|Hyper Potion}} behind him. Take the warp on the other side of the wall from the Scientist, and you'll find yourself on the 7th floor again. Get ready to face your rival! | If you haven't already, use the Card Key on the door in the center of the room. Open the locked door beyond that, defeat the Scientist, and grab the {{DL|Potion|Hyper Potion}} behind him. Take the warp on the other side of the wall from the Scientist, and you'll find yourself on the 7th floor again. Get ready to face your rival! | ||
==== 7F ==== | |||
Take a single step off of the warp tile, and your rival challenges you. | |||
{| align="center" | |||
! {{MS|135|Jolteon (Pokémon)}} If {{p|Eevee}} evolved to {{p|Jolteon}}: | |||
! {{MS|136|Flareon (Pokémon)}} If {{p|Eevee}} evolved to {{p|Flareon}}: | |||
! {{MS|134|Vaporeon (Pokémon)}} If {{p|Eevee}} evolved to {{p|Vaporeon}}: | |||
|- | |||
|{{Party|color={{yellow color}}|headcolor={{blue color light}}|bordercolor={{yellow color dark}} | |||
|sprite=Spr Y Blue 2.png | |||
|prize={{pdollar}}2600 | |||
|class=Rival|name=Blue | |||
|game=Y|location=Silph Co. | |||
|pokemon=5 | |||
|pokemon1={{Pokémon/1|game=Yellow | |||
|ndex=028|pokemon=Sandslash | |||
|type1=Ground | |||
|level=38 | |||
|move1=Slash|move1type=Normal | |||
|move2=Sand-Attack|move2type=Normal | |||
|move3=Poison Sting|move3type=Poison | |||
|move4=Swift|move4type=Normal}} | |||
|pokemon2{{Pokémon/1|game=Yellow | |||
|ndex=064|pokemon=Kadabra | |||
|type1=Psychic | |||
|level=35 | |||
|move1=Confusion|move1type=Psychic | |||
|move2=Disable|move2type=Normal | |||
|move3=Psybeam|move3type=Psychic | |||
|move4=Recover|move4type=Normal}} | |||
|pokemon3{{Pokémon/1|game=Yellow | |||
|ndex=091|pokemon=Cloyster | |||
|type1=Water|type2=Ice | |||
|level=37 | |||
|move1=Withdraw|move1type=Water | |||
|move2=Supersonic|move2type=Normal | |||
|move3=Clamp|move3type=Water | |||
|move4=Aurora Beam|move4type=Ice}} | |||
|pokemon4={{Pokémon/1|game=Yellow | |||
|ndex=038|pokemon=Ninetales | |||
|type1=Fire | |||
|level=35 | |||
|move1=Ember|move1type=Fire | |||
|move2=Tail Whip|move2type=Normal | |||
|move3=Quick Attack|move3type=Normal | |||
|move4=Roar|move4type=Normal}} | |||
|pokemon5={{Pokémon/1|game=Yellow | |||
|ndex=135|pokemon=Jolteon | |||
|type1=Electric | |||
|level=40 | |||
|move1=ThunderShock|move1type=Electric | |||
|move2=Quick Attack|move2type=Normal | |||
|move3=Double Kick|move3type=Fighting | |||
|move4=Pin Missile|move4type=Bug}} | |||
}} | |||
|{{Party|color={{yellow color}}|headcolor={{blue color light}}|bordercolor={{yellow color dark}} | |||
|sprite=Spr Y Blue 2.png | |||
|prize={{pdollar}}2600 | |||
|class=Rival|name=Blue | |||
|game=Y|location=Silph Co. | |||
|pokemon=5 | |||
|pokemon1={{Pokémon/1|game=Yellow | |||
|ndex=028|pokemon=Sandslash | |||
|type1=Ground | |||
|level=35 | |||
|move1=Slash|move1type=Normal | |||
|move2=Sand-Attack|move2type=Normal | |||
|move3=Poison Sting|move3type=Poison | |||
|move4=Swift|move4type=Normal}} | |||
|pokemon2{{Pokémon/1|game=Yellow | |||
|ndex=064|pokemon=Kadabra | |||
|type1=Psychic | |||
|level=35 | |||
|move1=Confusion|move1type=Psychic | |||
|move2=Disable|move2type=Normal | |||
|move3=Psybeam|move3type=Psychic | |||
|move4=Recover|move4type=Normal}} | |||
|pokemon3={{Pokémon/1|game=Yellow | |||
|ndex=082|pokemon=Magneton | |||
|type1=Electric | |||
|level=37 | |||
|move1=Tackle|move1type=Normal | |||
|move2=SonicBoom|move2type=Normal | |||
|move3=ThunderShock|move3type=Electric | |||
|move4=Supersonic|move4type=Normal}} | |||
==== | |pokemon4={{Pokémon/1|game=Yellow | ||
|ndex=091|pokemon=Cloyster | |||
|type1=Water|type2=Ice | |||
|level=35 | |||
|move1=Withdraw|move1type=Water | |||
|move2=Supersonic|move2type=Normal | |||
|move3=Clamp|move3type=Water | |||
|move4=Aurora Beam|move4type=Ice}} | |||
|pokemon5={{Pokémon/1|game=Yellow | |||
|ndex=136|pokemon=Flareon | |||
|type1=Fire | |||
|level=40 | |||
|move1=Ember|move1type=Fire | |||
|move2=Quick Attack|move2type=Normal | |||
|move3=Bite|move3type=Normal | |||
|move4=Fire Spin|move4type=Fire}} | |||
}} | }} | ||
|{{Party|color={{yellow color}}|headcolor={{blue color light}}|bordercolor={{yellow color dark}}|sprite=Spr Y Blue 2.png|prize={{pdollar}}2600|class=Rival|name=Blue|game=Y|location=Silph Co.|pokemon=5| | |{{Party|color={{yellow color}}|headcolor={{blue color light}}|bordercolor={{yellow color dark}} | ||
pokemon1={{Pokémon | |sprite=Spr Y Blue 2.png | ||
|prize={{pdollar}}2600 | |||
|class=Rival|name=Blue | |||
|game=Y|location=Silph Co. | |||
|pokemon=5 | |||
}} | |||
|pokemon1={{Pokémon/1|game=Yellow | |||
|ndex=028|pokemon=Sandslash | |||
|type1=Ground | |||
|level=35 | |||
|move1=Slash|move1type=Normal | |||
|move2=Sand-Attack|move2type=Normal | |||
|move3=Poison Sting|move3type=Poison | |||
|move4=Swift|move4type=Normal}} | |||
| | |pokemon2={{Pokémon/1|game=Yellow | ||
|ndex=064|pokemon=Kadabra | |||
|type1=Psychic | |||
|level=35 | |||
|move1=Confusion|move1type=Psychic | |||
|move2=Disable|move2type=Normal | |||
|move3=Psybeam|move3type=Psychic | |||
|move4=Recover|move4type=Normal}} | |||
|pokemon3={{Pokémon/1|game=Yellow | |||
|ndex=038|pokemon=Ninetales | |||
|type1=Fire | |||
|level=37 | |||
|move1=Ember|move1type=Fire | |||
|move2=Tail Whip|move2type=Normal | |||
|move3=Quick Attack|move3type=Normal | |||
|move4=Roar|move4type=Normal}} | |||
|pokemon4={{Pokémon/1|game=Yellow | |||
|ndex=082|pokemon=Magneton | |||
|type1=Electric | |||
|level=35 | |||
|move1=Tackle|move1type=Normal | |||
|move2=SonicBoom|move2type=Normal | |||
|move3=ThunderShock|move3type=Electric | |||
|move4=Supersonic|move4type=Normal}} | |||
|pokemon5={{Pokémon/1|game=Yellow | |||
|ndex=134|pokemon=Vaporeon | |||
{{ | |type1=Water | ||
|level=40 | |||
|move1=Water Gun|move1type=Water | |||
|move2=Quick Attack|move2type=Normal | |||
|move3=Bite|move3type=Normal | |||
|move4=Aurora Beam|move4type=Ice}} | |||
}} | |||
|} | |} | ||
Once he leaves, speak with the Silph employee nearby to get a {{p|Lapras}}, a rare {{2t|Water|Ice}} Pokémon, and take the southern warp to the 11th floor. | |||
==== 11F (west) ==== | ==== 11F (west) ==== | ||
| Line 324: | Line 453: | ||
{{Party|color=666666|bordercolor=CC0000|headcolor={{yellow color light}} | {{Party|color=666666|bordercolor=CC0000|headcolor={{yellow color light}} | ||
|sprite=Spr Y Jessie James.png | |sprite=Spr Y Jessie James.png | ||
|prize={{ | |prize={{pdollar}}930 | ||
|class=Rocket | |class=Rocket|name=Jessie and James | ||
|name=Jessie and James | |game=Y|location=Silph Co. | ||
|game=Y | |||
|location=Silph Co. | |||
|pokemon=3 | |pokemon=3 | ||
|pokemon1={{Pokémon | |||
|level=31 | |pokemon1={{Pokémon/1|game=Yellow | ||
|ndex=024|pokemon=Arbok | |||
|type1=Poison | |||
|level=31 | |||
|move1=Bite|move1type=Normal | |move1=Bite|move1type=Normal | ||
|move2=Leer|move2type=Normal | |move2=Leer|move2type=Normal | ||
|move3=Poison Sting|move3type=Poison | |move3=Poison Sting|move3type=Poison | ||
|move4=Glare|move4type=Normal}} | |move4=Glare|move4type=Normal}} | ||
|pokemon2={{Pokémon | |||
|level=31 | |pokemon2={{Pokémon/1|game=Yellow | ||
|ndex=052|pokemon=Meowth | |||
|type1=Normal | |||
|level=31 | |||
|move1=Growl|move1type=Normal | |move1=Growl|move1type=Normal | ||
|move2=Bite|move2type=Normal | |move2=Bite|move2type=Normal | ||
|move3=Pay Day|move3type=Normal | |move3=Pay Day|move3type=Normal | ||
|move4=Screech|move4type=Normal}} | |move4=Screech|move4type=Normal}} | ||
|pokemon3={{Pokémon | |||
|level=31 | |pokemon3={{Pokémon/1|game=Yellow | ||
|ndex=110|pokemon=Weezing | |||
|type1=Poison | |||
|level=31 | |||
|move1=Tackle|move1type=Normal | |move1=Tackle|move1type=Normal | ||
|move2=Smog|move2type=Poison | |move2=Smog|move2type=Poison | ||
| Line 351: | Line 487: | ||
Make sure your team is at full health, so take a trip to the | Make sure your team is at full health, so take a trip to the Pokémon Center or the woman on 9F. Open the door with the Card Key, and approach [[Giovanni|the mob boss]]. | ||
{| align="center" | {| align="center" | ||
| | | | ||
{{Party|color=666666|bordercolor=CC0000|headcolor=CCCCCC | {{Party|color=666666|bordercolor=CC0000|headcolor=CCCCCC | ||
|sprite=Spr Y Giovanni. | |sprite=Spr Y Giovanni.png | ||
|class=Boss | |prize={{pdollar}}4059 | ||
|name=Giovanni | |class=Boss|name=Giovanni | ||
|game=Y | |game=Y|location=Silph Co. | ||
|location=Silph Co. | |||
|pokemon=4 | |pokemon=4 | ||
|pokemon1={{Pokémon | |||
|level=37 | |pokemon1={{Pokémon/1|game=Yellow | ||
|ndex=033|pokemon=Nidorino | |||
|type1=Poison | |||
|level=37 | |||
|move1=Double Kick|move1type=Fighting | |move1=Double Kick|move1type=Fighting | ||
|move2=Poison Sting|move2type=Poison | |move2=Poison Sting|move2type=Poison | ||
|move3=Focus Energy|move3type=Normal | |move3=Focus Energy|move3type=Normal | ||
|move4=Fury Attack|move4type=Normal}} | |move4=Fury Attack|move4type=Normal}} | ||
|pokemon2={{Pokémon | |||
|pokemon2={{Pokémon/1|game=Yellow | |||
|ndex=111|pokemon=Rhyhorn | |||
|type1=Ground|type2=Rock | |||
|level=37 | |||
|move1=Horn Attack|move1type=Normal | |move1=Horn Attack|move1type=Normal | ||
|move2=Stomp|move2type=Normal | |move2=Stomp|move2type=Normal | ||
|move3=Tail Whip|move3type=Normal}} | |move3=Tail Whip|move3type=Normal}} | ||
|pokemon3={{Pokémon | |||
|level=35 | |pokemon3={{Pokémon/1|game=Yellow | ||
|ndex=053|pokemon=Persian | |||
|type1=Normal | |||
|level=35 | |||
|move1=Scratch|move1type=Normal | |move1=Scratch|move1type=Normal | ||
|move2=Growl|move2type=Normal | |move2=Growl|move2type=Normal | ||
|move3=Bite|move3type=Normal | |move3=Bite|move3type=Normal | ||
|move4=Pay Day|move4type=Normal}} | |move4=Pay Day|move4type=Normal}} | ||
|pokemon4={{Pokémon | |||
|pokemon4={{Pokémon/1|game=Yellow | |||
|ndex=031|pokemon=Nidoqueen | |||
|type1=Poison|type2=Ground | |||
|level=41 | |||
|move1=Double Kick|move1type=Fighting | |move1=Double Kick|move1type=Fighting | ||
|move2=Tail Whip|move2type=Normal | |move2=Tail Whip|move2type=Normal | ||
| Line 389: | Line 536: | ||
With [[Giovanni]] defeated, [[Team Rocket]]'s hold on [[Silph Co.]] is broken. The president is so relieved that his company is saved that he rewards you with the {{ball|Master}} prototype, a version of Poké Ball that catches any Pokémon without fail! | |||
With the Rockets gone, you are free to collect any leftover items sitting around the building; stop by the 4th floor, and check the west room for a [[Full Heal]], {{DL|Revive|Max Revive}}, and [[Escape Rope]]. You're also free to challenge the [[Saffron Gym]]. | With the Rockets gone, you are free to collect any leftover items sitting around the building; stop by the 4th floor, and check the west room for a [[Full Heal]], {{DL|Revive|Max Revive}}, and [[Escape Rope]]. You're also free to challenge the [[Saffron Gym]]. | ||
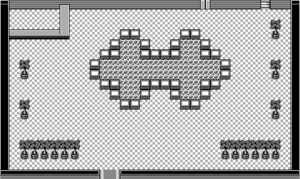
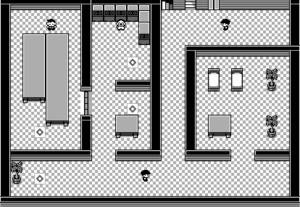
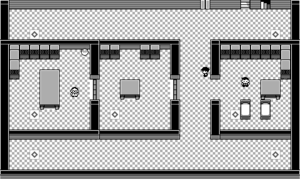
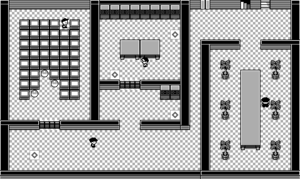
=== Saffron Gym === | === Saffron Gym === | ||
[[File:Saffron Gym RBY.png|thumb|Saffron Gym]] | |||
{{sign|RBY|header}} | {{sign|RBY|header}} | ||
{{sign|RBY|SAFFRON CITY <br> POKéMON GYM <br> LEADER: SABRINA <br> The Master of <br> Psychic Pokémon!}} | {{sign|RBY|SAFFRON CITY<br>POKéMON GYM<br>LEADER: SABRINA<br>The Master of<br>Psychic Pokémon!}} | ||
{{sign|RBY|footer}} | {{sign|RBY|footer}} | ||
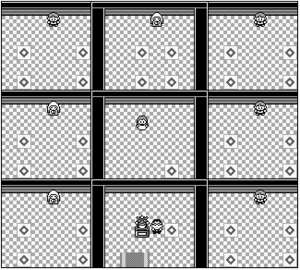
The [[Saffron Gym]] | The [[Saffron Gym]] specializes in {{t|Psychic}} Pokémon, and {{type|Bug}} moves like {{m|Twineedle}} are their worst nightmare. Despite the low number of Bug attacks, Bug Pokémon like {{p|Butterfree}}, {{p|Beedrill}}, or {{p|Parasect}} are able to resist [[Sabrina]]'s psychic offensive. Her team's {{stat|defense}}s are weak, so try attacking with physical moves like {{m|Earthquake}} or {{m|Body Slam}}. | ||
{| align="center" | {| align="center" | ||
|- align="center" valign="top" | |- align="center" valign="top" | ||
| | | | ||
{| align="center" style="background: #{{psychic color}}; {{roundy | {| align="center" style="background: #{{psychic color}}; {{roundy}} border: 5px solid #{{psychic color light}};" | ||
|- align="center" | |- align="center" | ||
! Saffron Gym <br> [[ | ! Saffron Gym <br> [[File:Marsh Badge.png|35px|The Marsh Badge]] <br><br> | ||
|- | |- | ||
| | | | ||
{| align="center" class="expandable" style="background: #{{psychic color}}; {{roundy | {| align="center" class="expandable" style="background: #{{psychic color}}; {{roundy}} border: 5px solid #{{psychic color light}};" | ||
|- align="center" | |- align="center" | ||
! Trainers | ! Trainers | ||
| Line 421: | Line 563: | ||
| | | | ||
{{trainerheader|Psychic}} | {{trainerheader|Psychic}} | ||
{{trainerentry|Spr RG Psychic.png|Psychic||330|3|079|Slowpoke||33||079|Slowpoke||33||080|Slowbro||33|}} | {{trainerentry|Spr RG Psychic.png|Psychic||330|3|079|Slowpoke||33|None|079|Slowpoke||33|None|080|Slowbro||33|None}} | ||
{{trainerdiv|Psychic}} | {{trainerdiv|Psychic}} | ||
{{trainerentry|Spr RG Channeler.png|Channeler||990|3|092|Gastly||33||092|Gastly||33||093|Haunter||33|}} | {{trainerentry|Spr RG Channeler.png|Channeler||990|3|092|Gastly||33|None|092|Gastly||33|None|093|Haunter||33|None}} | ||
{{trainerdiv|Psychic}} | {{trainerdiv|Psychic}} | ||
{{trainerentry|Spr RG Psychic.png|Psychic||310|4|064|Kadabra||31||079|Slowpoke||31||122|Mr. Mime||31||064|Kadabra||31|}} | {{trainerentry|Spr RG Psychic.png|Psychic||310|4|064|Kadabra||31|None|079|Slowpoke||31|None|122|Mr. Mime||31|None|064|Kadabra||31|None}} | ||
{{trainerdiv|Psychic}} | {{trainerdiv|Psychic}} | ||
{{trainerentry|Spr RG Psychic.png|Psychic||380|1|080|Slowbro||38|}} | {{trainerentry|Spr RG Psychic.png|Psychic||380|1|080|Slowbro||38|None}} | ||
{{trainerdiv|Psychic}} | {{trainerdiv|Psychic}} | ||
{{trainerentry|Spr RG Channeler.png|Channeler||1020|2|092|Gastly||34||093|Haunter||34|}} | {{trainerentry|Spr RG Channeler.png|Channeler||1020|2|092|Gastly||34|None|093|Haunter||34|None}} | ||
{{trainerdiv|Psychic}} | {{trainerdiv|Psychic}} | ||
{{trainerentry|Spr RG Psychic.png|Psychic||340|2|122|Mr. Mime||34||064|Kadabra||34|}} | {{trainerentry|Spr RG Psychic.png|Psychic||340|2|122|Mr. Mime||34|None|064|Kadabra||34|None}} | ||
{{trainerdiv|Psychic}} | {{trainerdiv|Psychic}} | ||
{{trainerentry|Spr RG Channeler.png|Channeler||1140|1|093|Haunter||38|}} | {{trainerentry|Spr RG Channeler.png|Channeler||1140|1|093|Haunter||38|None}} | ||
{{trainerfooter|Psychic|1|inside}} | {{trainerfooter|Psychic|1|inside}} | ||
|} | |} | ||
| Line 439: | Line 581: | ||
{{Party | {{Party|color={{psychic color}}|bordercolor={{psychic color dark}}|headcolor={{psychic color light}} | ||
|color={{psychic color}} | |||
|bordercolor={{psychic color dark}} | |||
|headcolor={{psychic color light}} | |||
|sprite=Spr Y Sabrina.png | |sprite=Spr Y Sabrina.png | ||
|prize={{pdollar}}4950 | |prize={{pdollar}}4950 | ||
|class=Leader | |class=Leader|name=Sabrina | ||
|name=Sabrina | |game=Y|location=Saffron Gym | ||
|game=Y | |||
|location=Saffron Gym | |||
|pokemon=3 | |pokemon=3 | ||
|pokemon1={{Pokémon | |||
|pokemon1={{Pokémon/1|game=Yellow | |||
|game=Yellow | |ndex=063|pokemon=Abra | ||
|ndex=063 | |type1=Psychic | ||
|pokemon=Abra | |||
|level=50 | |level=50 | ||
|move1=Teleport|move1type=Psychic | |move1=Teleport|move1type=Psychic | ||
|move2=Flash|move2type=Normal}} | |move2=Flash|move2type=Normal}} | ||
|pokemon2={{Pokémon | |||
|pokemon2={{Pokémon/1|game=Yellow | |||
|game=Yellow | |ndex=064|pokemon=Kadabra | ||
|ndex=064 | |type1=Psychic | ||
|pokemon=Kadabra | |||
|level=50 | |level=50 | ||
|move1=Psybeam|move1type=Psychic | |||
|move2=Recover|move2type=Normal | |||
|move3=Kinesis|move3type=Psychic | |||
|move4=Psywave|move4type=Psychic}} | |||
|pokemon3={{Pokémon/1|game=Yellow | |||
|ndex=065|pokemon=Alakazam | |||
|type1=Psychic | |type1=Psychic | ||
|level=50 | |level=50 | ||
|move1=Psybeam|move1type=Psychic | |||
|move1=Psybeam | |move2=Psywave|move2type=Psychic | ||
|move1type=Psychic | |move3=Reflect|move3type=Psychic | ||
|move2=Psywave | |move4=Recover|move4type=Normal}} | ||
|move2type=Psychic | |||
|move3=Reflect | |||
|move3type=Psychic | |||
|move4=Recover | |||
|move4type=Normal}} | |||
}} | }} | ||
|} | |} | ||
| Line 494: | Line 617: | ||
After the battle, [[Sabrina]] awards you the {{badge|Marsh}}. This badge | After the battle, [[Sabrina]] awards you the {{badge|Marsh}}. This badge ensures obedience from all Pokémon up to level 70. She also gives you {{TM|46|Psywave}} as a gift. | ||
The next stop is [[Fuchsia City]] to the south, where you'll finally find {{HM|03|Surf}} and {{HM|04|Strength}}. There are two ways to get to | The next stop is [[Fuchsia City]] to the south, where you'll finally find {{HM|03|Surf}} and {{HM|04|Strength}}. There are two ways to get to Fuchsia—either head south from [[Lavender Town]], or west from [[Celadon City]]. The western path is where you'll find {{HM|02|Fly}}, and the {{key|I|Super Rod}} is found on the eastern path. For now, go west through [[Celadon City]] to reach {{rt|16|Kanto}}. | ||
Revision as of 16:14, 23 March 2013
Saffron City
| Available Pokémon | ||||||||||||||||||||||||||||||||||||||||||||||||||||||||||||||||||||||||||||||||||||||||||||||||||||||||
|---|---|---|---|---|---|---|---|---|---|---|---|---|---|---|---|---|---|---|---|---|---|---|---|---|---|---|---|---|---|---|---|---|---|---|---|---|---|---|---|---|---|---|---|---|---|---|---|---|---|---|---|---|---|---|---|---|---|---|---|---|---|---|---|---|---|---|---|---|---|---|---|---|---|---|---|---|---|---|---|---|---|---|---|---|---|---|---|---|---|---|---|---|---|---|---|---|---|---|---|---|---|---|---|---|
| ||||||||||||||||||||||||||||||||||||||||||||||||||||||||||||||||||||||||||||||||||||||||||||||||||||||||
| Items | ||||||||
|---|---|---|---|---|---|---|---|---|
| ||||||||
City Under Siege
Team Rocket's operation has led them to Saffron City, and Silph Co. was a perfect target. With those criminals around, the residents have been confined to their homes while the Silph employees are being held hostage. Gather a strong team in order to infiltrate the company.
Mr. Psychic
Visit the house in the southeast to meet Mr. Psychic, and get TM29 (Psychic) from him.
Fighting Dojo
One of Saffron's major attractions is that there are two Gyms here, not one. Located right next door to the official Saffron Gym, the Fighting Dojo is an optional challenge. While you don't receive a badge from defeating the Trainers inside, the Karate Master will give you the choice of two Fighting Pokémon—the hard-kicking Hitmonlee or the piston-punching Hitmonchan.
| Trainers | |||||||||||||||||||||||||||||||||||||||||||||||||||||||||||||||||||||||||||||||||||||||||||||||||||||||||||||||||
|---|---|---|---|---|---|---|---|---|---|---|---|---|---|---|---|---|---|---|---|---|---|---|---|---|---|---|---|---|---|---|---|---|---|---|---|---|---|---|---|---|---|---|---|---|---|---|---|---|---|---|---|---|---|---|---|---|---|---|---|---|---|---|---|---|---|---|---|---|---|---|---|---|---|---|---|---|---|---|---|---|---|---|---|---|---|---|---|---|---|---|---|---|---|---|---|---|---|---|---|---|---|---|---|---|---|---|---|---|---|---|---|---|---|
| |||||||||||||||||||||||||||||||||||||||||||||||||||||||||||||||||||||||||||||||||||||||||||||||||||||||||||||||||
Liberate Silph Co!
Now that you've made it through Pokémon Tower, the guard outside Silph Co. is gone. The company uses warp tiles to allow their employees to quickly move around the building, which create a giant maze between you and Giovanni.
The objective is to reach the top floor and rescue the Silph president from Giovanni. If you know how to get there, you can avoid most of the 31 Trainer battles here (and the money and EXP that goes with it), beat the boss, and collect the items without opposition. When you need to heal, either leave for the Poké Center, or look for the woman in the southwest corner of the 9th floor.
| Trainers | |||||||||||||||||||||||||||||||||||||||||||||||||||||||||||||||||||||||||||||||||||||||||||||||||||||||||||||||||||||||||||||||||||||||||||||||||||||||||||||||||||||||||||||||||||||||||||||||||||||||||||||||||||||||||||||||||||||||||||||||||||||||||||||||||||||||||||||||||||||||||||||||||||||||||||||||||||||||||||||||||||||||||||||||||||||||||||||||||||||||||||||||||||||||||||||||||||||||||||||||||||||||||||||||||||||||||||||||||||||||||||||||||||||||||||||||||||||||||||||||||||||||||||||||||||||||||||||||||||||||||||||||||||||||||||||||||||||||||||||||||||||||||||||||||||||||||||||||||||||||||||||||||||||||||||||||||||||||||||||||||||||||||||||||||||||||||||||||||||||||||||||||||||||||||||||||||||||||||||||||||||||||
|---|---|---|---|---|---|---|---|---|---|---|---|---|---|---|---|---|---|---|---|---|---|---|---|---|---|---|---|---|---|---|---|---|---|---|---|---|---|---|---|---|---|---|---|---|---|---|---|---|---|---|---|---|---|---|---|---|---|---|---|---|---|---|---|---|---|---|---|---|---|---|---|---|---|---|---|---|---|---|---|---|---|---|---|---|---|---|---|---|---|---|---|---|---|---|---|---|---|---|---|---|---|---|---|---|---|---|---|---|---|---|---|---|---|---|---|---|---|---|---|---|---|---|---|---|---|---|---|---|---|---|---|---|---|---|---|---|---|---|---|---|---|---|---|---|---|---|---|---|---|---|---|---|---|---|---|---|---|---|---|---|---|---|---|---|---|---|---|---|---|---|---|---|---|---|---|---|---|---|---|---|---|---|---|---|---|---|---|---|---|---|---|---|---|---|---|---|---|---|---|---|---|---|---|---|---|---|---|---|---|---|---|---|---|---|---|---|---|---|---|---|---|---|---|---|---|---|---|---|---|---|---|---|---|---|---|---|---|---|---|---|---|---|---|---|---|---|---|---|---|---|---|---|---|---|---|---|---|---|---|---|---|---|---|---|---|---|---|---|---|---|---|---|---|---|---|---|---|---|---|---|---|---|---|---|---|---|---|---|---|---|---|---|---|---|---|---|---|---|---|---|---|---|---|---|---|---|---|---|---|---|---|---|---|---|---|---|---|---|---|---|---|---|---|---|---|---|---|---|---|---|---|---|---|---|---|---|---|---|---|---|---|---|---|---|---|---|---|---|---|---|---|---|---|---|---|---|---|---|---|---|---|---|---|---|---|---|---|---|---|---|---|---|---|---|---|---|---|---|---|---|---|---|---|---|---|---|---|---|---|---|---|---|---|---|---|---|---|---|---|---|---|---|---|---|---|---|---|---|---|---|---|---|---|---|---|---|---|---|---|---|---|---|---|---|---|---|---|---|---|---|---|---|---|---|---|---|---|---|---|---|---|---|---|---|---|---|---|---|---|---|---|---|---|---|---|---|---|---|---|---|---|---|---|---|---|---|---|---|---|---|---|---|---|---|---|---|---|---|---|---|---|---|---|---|---|---|---|---|---|---|---|---|---|---|---|---|---|---|---|---|---|---|---|---|---|---|---|---|---|---|---|---|---|---|---|---|---|---|---|---|---|---|---|---|---|---|---|---|---|---|---|---|---|---|---|---|---|---|---|---|---|---|---|---|---|---|---|---|---|---|---|---|---|---|---|---|---|---|---|---|---|---|---|---|---|---|---|---|---|---|---|---|---|---|---|---|---|---|---|---|---|---|---|---|---|---|---|---|---|---|---|---|---|---|---|---|---|---|---|---|---|---|---|---|---|---|---|---|---|---|---|---|---|---|---|---|---|---|---|---|---|---|---|---|---|---|---|---|---|---|---|---|---|---|---|---|---|---|---|---|---|---|---|---|---|---|---|---|---|---|---|---|---|---|---|---|---|---|---|---|---|---|---|---|---|---|---|---|---|---|---|---|---|---|---|---|---|---|---|---|---|---|---|---|---|---|---|---|---|---|---|---|---|---|---|---|---|---|---|---|---|---|---|---|---|---|---|---|---|---|---|---|---|---|---|---|---|---|---|---|---|---|---|---|---|---|---|
| |||||||||||||||||||||||||||||||||||||||||||||||||||||||||||||||||||||||||||||||||||||||||||||||||||||||||||||||||||||||||||||||||||||||||||||||||||||||||||||||||||||||||||||||||||||||||||||||||||||||||||||||||||||||||||||||||||||||||||||||||||||||||||||||||||||||||||||||||||||||||||||||||||||||||||||||||||||||||||||||||||||||||||||||||||||||||||||||||||||||||||||||||||||||||||||||||||||||||||||||||||||||||||||||||||||||||||||||||||||||||||||||||||||||||||||||||||||||||||||||||||||||||||||||||||||||||||||||||||||||||||||||||||||||||||||||||||||||||||||||||||||||||||||||||||||||||||||||||||||||||||||||||||||||||||||||||||||||||||||||||||||||||||||||||||||||||||||||||||||||||||||||||||||||||||||||||||||||||||||||||||||||
| Items | ||||||||||||||||||||||||||||||||||||||||||||||||||||||||||||||||||||
|---|---|---|---|---|---|---|---|---|---|---|---|---|---|---|---|---|---|---|---|---|---|---|---|---|---|---|---|---|---|---|---|---|---|---|---|---|---|---|---|---|---|---|---|---|---|---|---|---|---|---|---|---|---|---|---|---|---|---|---|---|---|---|---|---|---|---|---|---|
| ||||||||||||||||||||||||||||||||||||||||||||||||||||||||||||||||||||
1F
The lobby is totally deserted. Climb the stairs in the back to 2F.
2F
The electronic doors are locked tight, so step on either warp tile to teleport to 8F.
8F
Clear out the Rockets here, then take the elevator to 3F.
3F
Step out of the elevator and take the warp near the stairs back to the 2nd floor. Talk to the woman to get TM36 (Selfdestruct), and warp back to 3F.
Back on the 3rd floor, fight the lone Rocket and take the warp in the southwest corner to a locked room on the 5th floor. Grab the TM09 (Take Down) there and warp back. Climb the stairs to the fourth floor.
4F
Knock these two Rockets around a bit, then climb to the 5th floor.
5F
Beat the Rocket and Scientist near the north wall and follow the hallway to the south, where you'll find a Rocket next to another warp tile. Defeat the Rocket, step on the warp, and warp right back to 5F. Walk down and follow the narrow path to the right, where you'll find the Card Key, which unlocks all of the electronic doors in the building. Go left past the Rocket, and open the door to the northwest room for a Protein. Climb up to 6F.
6F
Open the door to the southwest room to reach an HP Up and an X Accuracy. Head up to 7F.
7F
Use the Card Key to open the nearest door and grab TM03 (Swords Dance). You can battle the grunt on the other side of the door near the TM, but the nearby warp only leads back to 5F. After battling the Rocket along the north wall (next to the counter), walk to the left you'll see your rival loitering in the next room. Follow the narrow hallway south to an area with a Scientist, grab the Calcium, and head up two flights of stairs to reach 9F.
9F
By now, your team may be running out of energy. After beating the Rocket, open the door nearby and talk to the woman near the beds. To thank you for your efforts, she'll heal your team to full health. Beat the second Rocket (but ignore the warp), and take the stairs to 10F.
10F
There are only two thugs here, but make sure to grab the Carbos, Rare Candy, and TM26 (Earthquake) from the southwest room. Take the stairs to 11F for a quick grunt battle.
11F (east)
Beat the lone grunt here, then take the elevator back down to 3F.
3F
If you haven't already, use the Card Key on the door in the center of the room. Open the locked door beyond that, defeat the Scientist, and grab the Hyper Potion behind him. Take the warp on the other side of the wall from the Scientist, and you'll find yourself on the 7th floor again. Get ready to face your rival!
7F
Take a single step off of the warp tile, and your rival challenges you.
Once he leaves, speak with the Silph employee nearby to get a Lapras, a rare Water/Ice Pokémon, and take the southern warp to the 11th floor.
11F (west)
One last battle stands between you and Giovanni.
| |||||||||||||||||||||||||||||||||||||||||||||||||||||||||||||||||||||||||||||||
Make sure your team is at full health, so take a trip to the Pokémon Center or the woman on 9F. Open the door with the Card Key, and approach the mob boss.
| ||||||||||||||||||||||||||||||||||||||||||||||||||||||||||||||||||||||||||||||||||||||||||||||||||||||||
With Giovanni defeated, Team Rocket's hold on Silph Co. is broken. The president is so relieved that his company is saved that he rewards you with the Master Ball prototype, a version of Poké Ball that catches any Pokémon without fail!
With the Rockets gone, you are free to collect any leftover items sitting around the building; stop by the 4th floor, and check the west room for a Full Heal, Max Revive, and Escape Rope. You're also free to challenge the Saffron Gym.
Saffron Gym
SAFFRON CITY
POKéMON GYM
LEADER: SABRINA
The Master of
Psychic Pokémon!
The Saffron Gym specializes in Psychic Pokémon, and Bug-type moves like Twineedle are their worst nightmare. Despite the low number of Bug attacks, Bug Pokémon like Butterfree, Beedrill, or Parasect are able to resist Sabrina's psychic offensive. Her team's defenses are weak, so try attacking with physical moves like Earthquake or Body Slam.
| |||||||||||||||||||||||||||||||||||||||||||||||||||||||||||||||||||||||||||||||||||||||||||||||||||||||||||||||||||||||||||||||||||||||||||||||||||||||||||||||||||||||||||||||||||||||||||||||||||||||||||||||||||||||||||||||||||||||||||||||||||||||
After the battle, Sabrina awards you the Marsh Badge. This badge ensures obedience from all Pokémon up to level 70. She also gives you TM46 (Psywave) as a gift.
The next stop is Fuchsia City to the south, where you'll finally find HM03 (Surf) and HM04 (Strength). There are two ways to get to Fuchsia—either head south from Lavender Town, or west from Celadon City. The western path is where you'll find HM02 (Fly), and the Super Rod is found on the eastern path. For now, go west through Celadon City to reach Route 16.
|
Yellow walkthrough |
|

|
This article is part of Project Walkthroughs, a Bulbapedia project that aims to write comprehensive step-by-step guides on each Pokémon game. |


