This is the Bulbapedia walkthrough for Pokémon HeartGold and SoulSilver Versions. This walkthrough follows the remade Nintendo DS versions, not Pokémon Gold and Silver.
The guide for those can be found here.
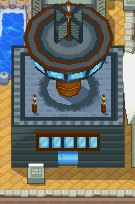
Radio Tower
When you get back to Goldenrod, you'll notice that Team Rocket grunts are blocking off many of the buildings, including the Gym and the Flower Shop, as well as the Happiness Rater and the Bike Shop. Luckily, the Pokémon Center and Department Store are still accessible. Get over to the Radio Tower when your team is ready. A single Rocket is blocking access to the upper levels of the tower, so trek down to the now-deserted Goldenrod Underground and talk to the only guy around, another Rocket, who gives you a Rocket uniform to change into. Head back up into the tower.
The grunt will move out of the way, but your rival will show up and expose you, forcing the Rocket to attack you.
| Trainer
|
Pokémon
|
|
|
|
|
|
| Trainers with a telephone symbol by their names will give their Pokégear number to the player, and may call or be called for a rematch with higher-level Pokémon.
|
The defeated grunt runs upstairs to alert the other Rockets, and your rival, after blowing your disguise, is perfectly happy running off, muttering about defeating that Dragon Tamer. It seems that the Radio Tower's director is being held hostage on the fifth floor, so your first objective is to rescue him. Fortunately, you can leave at any time to heal up at the Poké Center.
2F: Sales
The second floor has four Rocket grunts standing guard (as well as a few hostage DJs). Beat the Rockets here, and head up to the third floor.
| Trainers
|
| Trainer
|
Pokémon
|
|
|
|
|
|
|
|
|
|
|
|
|
|
|
|
|
|
|
|
|
|
|
|
|
|
|
|
|
|
|

|
Muk♂
|
Lv.25
|
| No item
|
|
| Trainers with a telephone symbol by their names will give their Pokégear number to the player, and may call or be called for a rematch with higher-level Pokémon.
|
|
3F: Personnel
The third floor has a locked door, two Rockets, and a grunt disguised as a Scientist. Defeat the three and climb the only accessible stairs to the fourth floor.
| Trainers
|
| Trainer
|
Pokémon
|
|
|
|
|
|
|
|
|
|
|
|
|
|
|
|
|
|
|
|
|
|
|
|
| Trainers with a telephone symbol by their names will give their Pokégear number to the player, and may call or be called for a rematch with higher-level Pokémon.
|
|
4F: Production
Mary and her Meowth are being held as hostages on the fourth floor, along with Ben. Fight past the two Rockets and the Scientist, and climb to the fifth floor.
| Trainers
|
| Trainer
|
Pokémon
|
|
|
|
|
|
|
|
|
|
|
|
|
|
|
|
|
|
|
|
|
|
|
|
|
|
|
|
|
|
|
| Trainers with a telephone symbol by their names will give their Pokégear number to the player, and may call or be called for a rematch with higher-level Pokémon.
|
|
5F: Director's Office
When you get to the Director's office, you'll find not the Director, but Petrel in disguise again. He'll note that the director is elsewhere, and then challenge you a battle. This battle can be very easy or very hard, so make sure that your moves are at least normal effectiveness so that you don't get poisoned by his Pokémon. Remember that Koffing have low Special Defense, so use Special Attack moves.

|
|
Reward: $1200
|
|
|
|
|
|
Petrel hands over the Basement Key, which opens up the locked door at the southern end of the Goldenrod Tunnel. Rest your team, save your game, and head into the tunnel.
Goldenrod Tunnel
You'll encounter another Kimono Girl on the way, and then your rival shows up yet again. This time, however, he wants to fight you.
| Trainers
|
| Trainer
|
Pokémon
|
|
|
|
|
|
|
|

|
Muk♂
|
Lv.23
|
| No item
|
|
|
|
|
|
|
|
|
|
|
|
|
|
|
|
|
|
|
|
|
|
|
|
|
|
|

|
Muk♂
|
Lv.24
|
| No item
|
|
|
|
|
|
|
|
|
|
|
|
|
|
|
|
|
|
|
|
|
|
|
|
|
|
|
|
|
|
| Trainers with a telephone symbol by their names will give their Pokégear number to the player, and may call or be called for a rematch with higher-level Pokémon.
|
|
| Items
|
| Item
|
Location
|
Games
|

|
Full Heal
|
Near the north wall, north of the blue, green, red switches
|
HG SS
|

|
Smoke Ball
|
Southwest corner of the outer area
|
HG SS
|
|
|
|
After your rival leaves, you'll run across a puzzle involving switches. The correct sequence of switches to press is blue, green, and then red. Pressing the switches in this order will open the necessary doors for you to reach the door in the southeast. Fight the female grunt, then walk through the door.
Now, you'll find yourself underneath the Dept Store. Grab the Ultra Ball, and follow the hallway around to the east. Pick up the Max Ether in the southeast corner, and continue north. Detour up the stairs in the northeast to reach an Amulet Coin, and walk back down. Fight one last Rocket grunt, grab the TM82 (Sleep Talk) near the Radio Tower's Director, and speak to him in the center of the floor. He'll give you the Card Key, which unlocks those shutters on the Radio Tower's third floor. Get back to the tower to finally clear out the Rockets!
Radio Tower
3F
Swipe the Card Key through the slot, and the door opens. Fight the lone grunt, and head up the stairs.
| Trainer
|
Pokémon
|
|
|
|
|
|
| Trainers with a telephone symbol by their names will give their Pokégear number to the player, and may call or be called for a rematch with higher-level Pokémon.
|
4F
You know you're getting close when the Rocket executives themselves are guarding the stairs. Fight Proton, grab the Ultra Ball, and run up the stairs.

|
|
Reward: $1320
|
|
|
|
|
|
5F
Fight Ariana, then step inside the elevator to reach the tower's Observation Deck.

|
|
Reward: $2560
|
|
|
|
|
|
Observation Deck
One Rocket executive left! Walk up to Archer, the current leader of Team Rocket. Archer tells you that seizing the Radio Tower was all part of their plan to call Giovanni away from his solo training, and to reclaim the gang's former glory. Battle against Archer and put an end to Team Rocket's wishful thinking!

|
|
Reward: $3040
|
|
|
|
|
|
Once you defeat him, Archer laments that their operation was in vain. Like Giovanni had done three years ago, he formally disbands Team Rocket, and disappears.
The Director walks up to you, and thanks you for chasing the gang away. To show his appreciation, he gives you the Rainbow WingHG / Silver WingSS. The Director tells you that the Radio Tower stands on what was once the site of an old tower, and while it was being demolished to make room for the Radio Tower, that shimmering feather was found at the top. Once the Director leaves the Observation Deck, you're free to leave the tower. Speak to the girl near the Card Key door on 3F to get TM11 (Sunny Day), and talk to DJ Mary on 4F to get a BrightPowder.
Now that you've managed to thwart Team Rocket's plans, your next task is to get your eighth Gym Badge and challenge the Pokémon League. You will also now be able to face Trainers whose numbers are in your Pokégear in a rematch when they are in contact with you and agree to a rematch. When ready to continue your journey, fly back to Mahogany Town, and head east to Route 44.
Route 44
Route 44 is a verdant, tree-lined path. Between its two lakes, you'll find the area's single patch of tall grass. Trade phone numbers with Fisherman Wilton by the northern lake, and he'll inform you when wild Remoraid are swarming. Make your way to the route's east end to reach the entrance to the frozen Ice Path, but be sure to bring along a Pokémon that knows Strength; there are plenty of inconveniently-placed boulders inside the cave.
| Trainers
|
| Trainer
|
Pokémon
|
|
|
|
|
|
|
|
|
|
|
|
|
|
|
|
|
|
|
|
|
|
|
|
|
|
|
|
|
|
|
|
|
|
|
|
|
|
|
|
|
|
|
|
|
|
|
|
| Trainers with a telephone symbol by their names will give their Pokégear number to the player, and may call or be called for a rematch with higher-level Pokémon.
|
|
| Available Pokémon
|
| Pokémon
|
Games
|
Location
|
Levels
|
Rate
|

|

|

|
|
|
HG
|
SS
|
|
22
|
20%
|
|
|
HG
|
SS
|
|
22-24
|
35%
|
|
|
HG
|
SS
|
|
24-26
|
15%
|
|
|
HG
|
SS
|
|
23
|
30%
|
|
|
HG
|
SS
|
|
Unknown
|
Unknown
|
|
|
HG
|
SS
|
|
Unknown
|
Unknown
|
|
|
HG
|
SS
|
|
Unknown
|
Unknown
|
| Surfing and Fishing
|
|
|
HG
|
SS
|
|
10
|
95%
|
|
|
HG
|
SS
|
|
10
|
5%
|
|
|
HG
|
SS
|
|
20
|
60%
|
|
|
HG
|
SS
|
|
20
|
38%
|
|
|
HG
|
SS
|
|
20
|
2%
|
|
|
HG
|
SS
|
|
40
|
7%
|
|
|
HG
|
SS
|
|
40
|
90%
|
|
|
HG
|
SS
|
|
40
|
3%
|
| Swarm
|
|
|
HG
|
SS
|
|
40, 20, 10
|
Common
|
| Special Pokémon
|
|
|
HG
|
SS
|
|
Unknown
|
Unknown
|
|
|
HG
|
SS
|
|
Unknown
|
Unknown
|
|
|
HG
|
SS
|
|
Unknown
|
Unknown
|
|
|
HG
|
SS
|
|
Unknown
|
Unknown
|
| A colored background means that the Pokémon can be found in this location in the specified game. A white background with a colored letter means that the Pokémon cannot be found here.
|
|
Ice Path
| Available Pokémon
|
| Pokémon
|
Games
|
Location
|
Levels
|
Rate
|

|

|

|
|
|
HG
|
SS
|
|
22
|
25%
|
20%
|
25%
|
|
|
HG
|
SS
|
|
22
|
5%
|
20%
|
5%
|
|
|
HG
|
SS
|
|
22
|
30%
|
|
|
HG
|
SS
|
|
22
|
5%
|
10%
|
5%
|
|
|
HG
|
SS
|
|
21-23
|
40%
|
|
|
HG
|
SS
|
|
22
|
20%
|
| A colored background means that the Pokémon can be found in this location in the specified game. A white background with a colored letter means that the Pokémon cannot be found here.
|
|
1F
As you enter, you'll notice that the floors are sporadically covered by a glaze of ice, making attempts to traverse the cave more difficult. From the entrance, slide over the first stretch of ice, and continue on to the second. This one is a bit harder; you need to slide ↑, ←, ↑, ←, ↓, ←, ↑, → to reach the clear patch of ground in the center. Slide across the ice patch to the east (→, ↑, ←, ↓, ←, ↑, →) to reach the item, HM07 (Waterfall). Backtrack a little, and walk up across the rock ledge to reach the stairs in the northeast.
B1F
On this floor, you'll need to drop the four boulders down each of the four holes in the floor. Walk up north around the row of ice-covered stones, and south to reach the first two boulders. Push the bottom boulder →1, ↓3, ←5, ↓1, and →1 to drop it through the hole to the floor below. While you're nearby, head back north to the other boulder, and push it ↑4. Walk around to the southeast, and head up along the east wall to the third boulder. Shove this one ←1, ↓5, ←1, ↓3, ↑1, and ←4 to drop it through the southeastern hole. Walk north past that hole, and you'll find the fourth boulder - push this one ↑2, →2,↑3, and ←2. Three down, one to go! Now that you're on the opposite side of the first boulder, push it →1, ↓1 through the northwest hole, and you're done. Head down the northeast stairs.
B2F
Before you head for the next set of stairs, don't pass up the Max Potion sitting along the western wall. Start by sliding ↓ from the northeast stairs (pick up the Carbos hidden in the wall), then ←, ↑, ←, ↓, and ← to reach it.
Start by the northeast stairs again, and this time slide ← across the ice to bump into the first boulder. Slide ↓, ←, ↑, then → to reach the clear bit of ground in the center of the floor. Grab the Full Heal and head downstairs.
B3F
Not much to see here. Grab the NeverMeltIce (you don't need Rock Smash for this), and take the eastern stairs back to the next area of B2F.
B2F
Walk down and around onto the rock ledge, and stand two spaces east of the side of the platform. Slide south across the ice, and turn east to reach TM72 (Avalanche). Take the stairs in the southwest back the next area of B1F.
B1F
You'll find another ice puzzle here, as well as a lone boulder. Shove the rock a single space to the south, then slide up and around over the ice to reach the Iron. Take the western stairs to reach the tiny eastern area of 1F.
1F
Grab the Protein near the stairs, and head south. You'll see another Kimono Girl to the south, stuck on the ice. Of the two open spaces at the ice's edge, stand on the right-hand side and slide ↓, ←, ↓, and → to reach her. After a quick shove, she thanks you and leaves. From here, you can slide directly south to reach the exit. Otherwise, from the spot of ice next to the Kimono Girl, slide ←, ↑, →, ↓, →, and ↓ to reach the PP Up.
Step outside to reach Blackthorn City.
 If the player chose Chikorita:
 If the player chose Cyndaquil:
 If the player chose Totodile:


