|
|
| (4 intermediate revisions by 4 users not shown) |
| Line 1: |
Line 1: |
| ==Rustboro City== | | ==Routes 105 and 106== |
| [[File:Rustboro City E.png|325px|thumb|right|Rustboro City]] | | [[File:Hoenn Route 105 E.png|thumb|150px|left|Route 105]] |
| Back in {{ci|Rustboro|Rustboro}}, the man you saved earlier in [[Petalburg Woods]] will give you a {{DL|Poké Ball|Great Ball}} and bring you to [[Devon Corporation]]'s president, [[Mr. Stone]], who will ask two favors of you: to bring a letter to [[Steven Stone|Steven]] in [[Dewford Town]] and the {{DL|List of key items in Generation III|Devon Goods}} to [[Captain Stern]] in [[Slateport City]]. You will also receive your [[PokéNav]], an electronic device that has a map function, a way to check the [[Contest condition|condition]] of your Pokémon for {{pkmn|Contest}}s, and a listing of the [[Ribbon]]s your Pokémon have. You can also register your PokéNav with certain Trainers for a rematch with them later on. You can even rematch Gym Leaders this way!
| | [[File:Hoenn Route 106 E.png|thumb|300px|Route 106]] |
|
| |
|
| By the time you get the [[PokéNav]], you've already missed a few. Here's the ones you've missed:
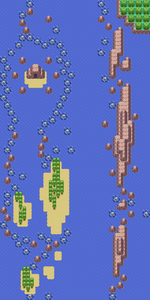
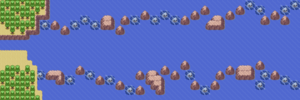
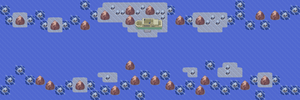
| | As the voyage is a quick one, there is no time to fully explore the waters of Routes {{rtn|105|Hoenn}} and {{rtn|106|Hoenn}} just yet. Return after earning the {{DL|Badge|Balance Badge|fifth Badge}} in order to {{m|Surf|travel}} at your own speed. |
| *Your [[mom]] and [[Professor Birch]] in Littleroot Town.
| |
| *Youngster Calvin on Route 102.
| |
| *Lady Cindy in Route 104 (South section).
| |
| *Bug Catcher James in the Petalburg Woods.
| |
| *Rich Boy Winston and Lass Haley in Route 104 (North section).
| |
| *School Kids Karen and Jerry in Route 116.
| |
| *[[Roxanne]] at the Rustboro Gym (she will do so at some point after you defeat Brawly, the next Gym).
| |
|
| |
|
| The rematch trainers change their teams' levels (and possibly evolve their Pokémon) up to four times. However, you can rebattle them indefinitely.
| | {| class="expandable" style="margin: auto; background: #{{locationcolor/med|ocean}}; {{roundy}}; border: 5px solid #{{locationcolor/light|ocean}};" |
| | | |- align="center" |
| To know when a trainer wants a rematch, use the [[Match Call]] and look for the Poke Ball symbol near a trainer's feet. Note that the more often you travel on the route or cave where any of these unique Trainers are located, the greater chance the trainer in that area will be ready for a rematch.
| | ! Trainers |
| | | |- |
| | | | |
| When you go back outside, your rival will be waiting for you, wanting a second battle. Here you'll register his/her in your [[PokéNav]]. This time, (s)he will also have a new Pokémon (either {{p|Lotad}}, {{p|Slugma}}/{{p|Torkoal}}, or {{p|Wingull}}), and his/her starter will be more powerful. When you win, (s)he will tell you that [[Mr. Briney]] is a sailor.
| | {| class="expandable" style="margin: auto; background: #{{locationcolor/med|ocean}}; {{roundy}}; border: 5px solid #{{locationcolor/light|ocean}};" |
| | | |- align="center" |
| {{MSP|252|Treecko}} If the {{player}} chose {{p|Treecko}}:
| | ! Route 105 |
| {{Party/Single | | |- |
| |color={{ruby color}} | | | |
| |headcolor={{ruby color light}} | | {{trainerheader|ocean|3}} |
| |bordercolor={{ruby color dark}} | | {{catch/div|ocean|Requires {{mcolor|Surf|000}}}} |
| |sprite=Spr E Brendan.png | | {{trainerentry|Spr RS Swimmer F.png|Swimmer|Imani|208|1|183|Marill|♀|26|}} |
| |prize={{Pdollar}}900 | | {{Trainerdiv|ocean}} |
| |class={{PK}}{{MN}} Trainer
| | {{Trainerentry|Spr RS Swimmer M.png|Swimmer|Dominik|208|1|072|Tentacool|♂|26|}} |
| |classlink=Pokémon Trainer | | {{Trainerdiv|ocean}} |
| |name=Brendan | | {{Trainerentry|Spr RS Ruin Maniac.png|Ruin Maniac|Foster|1500|2|027|Sandshrew|♂|25||028|Sandslash|♂|25|}} |
| |game=E | | {{Trainerdiv|ocean}} |
| |location=Rustboro City | | {{Trainerentry|Spr RS Swimmer F.png|Swimmer|Beverly|200|2|278|Wingull|♀|25||320|Wailmer|♀|25|}} |
| |pokemon=2 | | {{Trainerdiv|ocean}} |
| }} | | {{Trainerentry|Spr RS Ruin Maniac.png|Ruin Maniac|Andres|1500<br><small>Potential [[Double Battle]] with Josue</small>|2|027|Sandshrew|♂|25||027|Sandshrew|♂|25||38=Nav}} |
| |{{Pokémon/3
| | {{trainerdiv|ocean}} |
| |game=Emerald | | {{Trainerentry|Spr RS Bird Keeper.png|Bird Keeper|Josue|800<br><small>Potential [[Double Battle]] with Andres</small>|2|276|Taillow|♂|25||278|Wingull|♂|25|}} |
| |ndex=270 | | {{Trainerdiv|ocean}} |
| |pokemon=Lotad | | {{Trainerentry|Spr RS Swimmer M.png|Swimmer|Luis|208|1|318|Carvanha|♂|26|}} |
| |gender=male | | {{catch/div|ocean|Rematch}} |
| |level=13
| | {{trainerentry|Spr RS Ruin Maniac.png|Ruin Maniac|Andres{{tt|*|First rematch}}|1860|2|027|Sandshrew|♂|31||027|Sandshrew|♂|31||38=Nav}} |
| |type1=Water|type2=Grass
| | {{trainerentry|Spr RS Ruin Maniac.png|Ruin Maniac|Andres{{tt|*|Second and third rematch}}|{{tt|1980|Second rematch}}/{{tt|2100|Third rematch}}|3|299|Nosepass|♂|{{tt|33|Second rematch}}/{{tt|35|Third rematch}}||027|Sandshrew|♂|{{tt|33|Second rematch}}/{{tt|35|Third rematch}}||027|Sandshrew|♂|{{tt|33|Second rematch}}/{{tt|35|Third rematch}}||38=Nav}} |
| |ability=Swift Swim
| | {{trainerentry|Spr RS Ruin Maniac.png|Ruin Maniac|Andres{{tt|*|Fourth rematch onwards}}|2220|3|299|Nosepass|♂|37||028|Sandslash|♂|37||028|Sandslash|♂|37||38=Nav}} |
| |move1=Astonish|move1type=Ghost
| | {{Trainerfooter|ocean|3}} |
| |move2=Growl|move2type=Normal
| | |} |
| |move3=Absorb|move3type=Grass
| | {| class="expandable" style="margin: auto; background: #{{locationcolor/med|ocean}}; {{roundy}}; border: 5px solid #{{locationcolor/light|ocean}};" |
| |move4=Nature Power|move4type=Normal}}
| |
| |{{Pokémon/3
| |
| |game=Emerald | |
| |ndex=255
| |
| |pokemon=Torchic
| |
| |gender=male
| |
| |level=15
| |
| |type1=Fire
| |
| |ability=Blaze | |
| |move1=Scratch|move1type=Normal | |
| |move2=Growl|move2type=Normal | |
| |move3=Focus Energy|move3type=Normal | |
| |move4=Ember|move4type=Fire}} | |
| {{Party/Footer}}
| |
| {{Party/Single | |
| |color={{sapphire color}} | |
| |headcolor={{sapphire color light}}
| |
| |bordercolor={{sapphire color dark}}
| |
| |sprite=Spr E May.png | |
| |prize={{PDollar}}900 | |
| |class={{PK}}{{MN}} Trainer | |
| |classlink=Pokémon Trainer | |
| |name=May | |
| |game=E | |
| |location=Rustboro City | |
| |pokemon=2 | |
| }} | |
| |{{Pokémon/3
| |
| |game=Emerald | |
| |ndex=270 | |
| |pokemon=Lotad | |
| |gender=female | |
| |level=13 | |
| |type1=Water|type2=Grass | |
| |ability=Swift Swim | |
| |move1=Astonish|move1type=Ghost | |
| |move2=Growl|move2type=Normal | |
| |move3=Absorb|move3type=Grass | |
| |move4=Nature Power|move4type=Normal}} | |
| |{{Pokémon/3
| |
| |game=Emerald | |
| |ndex=255 | |
| |pokemon=Torchic
| |
| |gender=male | |
| |level=15 | |
| |type1=Fire | |
| |ability=Blaze | |
| |move1=Scratch|move1type=Normal | |
| |move2=Growl|move2type=Normal
| |
| |move3=Focus Energy|move3type=Normal | |
| |move4=Ember|move4type=Fire}} | |
| {{Party/Footer}}
| |
| | |
| {{MSP|255|Torchic}} If the {{player}} chose {{p|Torchic}}:
| |
| {{Party/Single
| |
| |color={{ruby color}}
| |
| |headcolor={{ruby color light}} | |
| |bordercolor={{ruby color dark}}
| |
| |sprite=Spr E Brendan.png | |
| |prize={{Pdollar}}900
| |
| |class={{PK}}{{MN}} Trainer
| |
| |classlink=Pokémon Trainer | |
| |name=Brendan | |
| |game=E | |
| |location=Rustboro City
| |
| |pokemon=2 | |
| }}
| |
| |{{Pokémon/3
| |
| |game=Emerald | |
| |ndex=218 | |
| |pokemon=Slugma | |
| |gender=male | |
| |level=13 | |
| |type1=Fire | |
| |ability=Flame Body | |
| |move1=Yawn|move1type=Normal | |
| |move2=Smog|move2type=Poison | |
| |move3=Ember|move3type=Fire}} | |
| |{{Pokémon/3
| |
| |game=Emerald | |
| |ndex=258 | |
| |pokemon=Mudkip | |
| |gender=male | |
| |level=15 | |
| |type1=Water | |
| |ability=Torrent | |
| |move1=Growl|move1type=Normal | |
| |move2=Mud-Slap|move2type=Ground | |
| |move3=Water Gun|move3type=Water | |
| |move4=Bide|move4type=Normal}} | |
| {{Party/Footer}} | |
| {{Party/Single
| |
| |color={{sapphire color}} | |
| |headcolor={{sapphire color light}}
| |
| |bordercolor={{sapphire color dark}} | |
| |sprite=Spr E May.png
| |
| |prize={{PDollar}}900 | |
| |class={{PK}}{{MN}} Trainer | |
| |classlink=Pokémon Trainer | |
| |name=May | |
| |game=E | |
| |location=Rustboro City | |
| |pokemon=2 | |
| }} | |
| |{{Pokémon/3
| |
| |game=Emerald | |
| |ndex=324 | |
| |pokemon=Torkoal | |
| |gender=female | |
| |level=13 | |
| |type1=Fire
| |
| |ability=White Smoke | |
| |move1=Ember|move1type=Fire | |
| |move2=Smog|move2type=Poison
| |
| |move3=Curse|move3type=???}}
| |
| |{{Pokémon/3 | |
| |game=Emerald | |
| |ndex=258 | |
| |pokemon=Mudkip | |
| |gender=male | |
| |level=15 | |
| |type1=Water | |
| |ability=Torrent | |
| |move1=Growl|move1type=Normal
| |
| |move2=Mud-Slap|move2type=Ground
| |
| |move3=Water Gun|move3type=Water | |
| |move4=Bide|move4type=Normal}} | |
| {{Party/Footer}}
| |
| | |
| {{MSP|258|Mudkip}} If the {{player}} chose {{p|Mudkip}}: | |
| {{Party/Single | |
| |color={{ruby color}} | |
| |headcolor={{ruby color light}} | |
| |bordercolor={{ruby color dark}} | |
| |sprite=Spr E Brendan.png | |
| |prize={{Pdollar}}900 | |
| |class={{PK}}{{MN}} Trainer
| |
| |classlink=Pokémon Trainer
| |
| |name=Brendan | |
| |game=E | |
| |location=Rustboro City
| |
| |pokemon=2
| |
| }} | |
| |{{Pokémon/3 | |
| |game=Emerald | |
| |ndex=278 | |
| |pokemon=Wingull | |
| |gender=male | |
| |level=13 | |
| |type1=Water|type2=Flying | |
| |ability=Keen Eye | |
| |move1=Growl|move1type=Normal | |
| |move2=Water Gun|move2type=Water
| |
| |move3=Supersonic|move3type=Normal | |
| |move4=Wing Attack|move4type=Flying}} | |
| |{{Pokémon/3
| |
| |game=Emerald | |
| |ndex=252 | |
| |pokemon=Treecko
| |
| |gender=male
| |
| |level=15 | |
| |type1=Grass | |
| |ability=Overgrow | |
| |move1=Pound|move1type=Normal | |
| |move2=Leer|move2type=Normal
| |
| |move3=Absorb|move3type=Grass | |
| |move4=Quick Attack|move4type=Normal}}
| |
| {{Party/Footer}}
| |
| {{Party/Single | |
| |color={{sapphire color}} | |
| |headcolor={{sapphire color light}} | |
| |bordercolor={{sapphire color dark}}
| |
| |sprite=Spr E May.png | |
| |prize={{PDollar}}900 | |
| |class={{PK}}{{MN}} Trainer | |
| |classlink=Pokémon Trainer | |
| |name=May | |
| |game=E
| |
| |location=Rustboro City
| |
| |pokemon=2
| |
| }} | |
| |{{Pokémon/3 | |
| |game=Emerald | |
| |ndex=278 | |
| |pokemon=Wingull | |
| |gender=female | |
| |level=13 | |
| |type1=Water|type2=Flying | |
| |ability=Keen Eye | |
| |move1=Growl|move1type=Normal | |
| |move2=Water Gun|move2type=Water | |
| |move3=Supersonic|move3type=Normal | |
| |move4=Wing Attack|move4type=Flying}} | |
| |{{Pokémon/3
| |
| |game=Emerald | |
| |ndex=252 | |
| |pokemon=Treecko
| |
| |gender=male
| |
| |level=15
| |
| |type1=Grass
| |
| |ability=Overgrow
| |
| |move1=Pound|move1type=Normal
| |
| |move2=Leer|move2type=Normal
| |
| |move3=Absorb|move3type=Grass
| |
| |move4=Quick Attack|move4type=Normal}}
| |
| {{Party/Footer}}
| |
| | |
| ==Dewford Town==
| |
| [[File:Dewford Town E.png|235px|left|thumb|Dewford Town]]
| |
| | |
| | |
| After the battle, return to the empty house on the southern part of {{rt|104|Hoenn}} and you will see that it's not empty— [[Mr. Briney]] will be there. Talk to him, and he'll offer to take you to [[Dewford Town]] so you can deliver the letter to Steven. On the way to Dewford, [[Norman]] will call, and you will register him in [[PokéNav]]. After that, you will make land in Dewford.
| |
| | |
| {| class="expandable" align="center" style="background: #{{emerald color light}}; {{roundy}} border: 5px solid #{{emerald color}};" | |
| |- align="center" | | |- align="center" |
| | ! Route 106 |
| | |- |
| | | |
| | {{trainerheader|ocean|3}} |
| | {{Trainerentry|Spr RS Fisherman.png|Fisherman|Ned|440|1|072|Tentacool|♂|11|}} |
| | {{trainerdiv|ocean}} |
| | {{trainerentry|Spr RS Fisherman.png|Fisherman|Elliot|400|3|129|Magikarp|♂|10||072|Tentacool|♂|7||129|Magikarp|♂|10||38=Nav}} |
| | {{catch/div|ocean|Requires {{mcolor|Surf|000}}}} |
| | {{trainerentry|Spr RS Swimmer M.png|Swimmer|Douglas|192|2|072|Tentacool|♂|24||072|Tentacool|♂|24|}} |
| | {{trainerdiv|ocean}} |
| | {{trainerentry|Spr RS Swimmer F.png|Swimmer|Kyla|208|1|320|Wailmer|♀|26|}} |
| | {{catch/div|ocean|Rematch}} |
| | {{trainerentry|Spr RS Fisherman.png|Fisherman|Elliot{{tt|*|First rematch}}|1080|3|072|Tentacool|♂|24||130|Gyarados|♂|27||130|Gyarados|♂|27||38=Nav}} |
| | {{trainerentry|Spr RS Fisherman.png|Fisherman|Elliot{{tt|*|Second rematch}}|1160|4|130|Gyarados|♂|29||318|Carvanha|♂|26||072|Tentacool|♂|26||130|Gyarados|♂|29||38=Nav}} |
| | {{trainerentry|Spr RS Fisherman.png|Fisherman|Elliot{{tt|*|Third rematch}}|1240|4|130|Gyarados|♂|31||318|Carvanha|♂|30||073|Tentacruel|♂|30||130|Gyarados|♂|31||38=Nav}} |
| | {{trainerentry|Spr RS Fisherman.png|Fisherman|Elliot{{tt|*|Fourth rematch onwards}}|1400|4|130|Gyarados|♂|33||319|Sharpedo|♂|33||130|Gyarados|♂|33||073|Tentacruel|♂|35||38=Nav}} |
| | {{trainerfooter|ocean|3}} |
| | |} |
| | |} |
| | {| class="expandable" style="margin: auto; background: #{{locationcolor/med|ocean}}; {{roundy}}; border: 5px solid #{{locationcolor/light|ocean}};" |
| ! Available Pokémon | | ! Available Pokémon |
| |- | | |- |
| | | |
| | {| class="expandable" style="margin: auto; background: #{{locationcolor/med|ocean}}; {{roundy}}; border: 5px solid #{{locationcolor/light|ocean}};" |
| | |- align="center" |
| | ! Route 105 |
| | |- |
| | | | | |
| {{Catch/header|sand|no}} | | {{catch/header|ocean|no}} |
| {{Catch/div|water|Surfing}} | | {{Catch/div|ocean|Surfing}} |
| {{Catch/entry3|072|Tentacool|no|no|yes|Surf|5-35|60%|type1=Water|type2=Poison}} | | {{Catch/entry3|072|Tentacool|no|no|yes|Surf|5-35|60%|type1=Water|type2=Poison}} |
| {{Catch/entry3|278|Wingull|no|no|yes|Surf|10-30|35%|type1=Water|type2=Flying}} | | {{Catch/entry3|278|Wingull|no|no|yes|Surf|10-30|35%|type1=Water|type2=Flying}} |
| {{Catch/entry3|279|Pelipper|no|no|yes|Surf|25-30|5%|type1=Water|type2=Flying}} | | {{Catch/entry3|279|Pelipper|no|no|yes|Surf|25-30|5%|type1=Water|type2=Flying}} |
| {{Catch/div|water|Fishing}} | | {{Catch/div|ocean|Fishing}} |
| {{Catch/entry3|129|Magikarp|no|no|yes|Fish Old|5-10|70%|type1=Water}} | | {{Catch/entry3|129|Magikarp|no|no|yes|Fish Old|5-10|70%|type1=Water}} |
| {{Catch/entry3|072|Tentacool|no|no|yes|Fish Old|5-10|30%|type1=Water|type2=Poison}} | | {{Catch/entry3|072|Tentacool|no|no|yes|Fish Old|5-10|30%|type1=Water|type2=Poison}} |
| Line 274: |
Line 78: |
| {{Catch/entry3|320|Wailmer|no|no|yes|Fish Good|10-30|20%|type1=Water}} | | {{Catch/entry3|320|Wailmer|no|no|yes|Fish Good|10-30|20%|type1=Water}} |
| {{Catch/entry3|320|Wailmer|no|no|yes|Fish Super|20-45|100%|type1=Water}} | | {{Catch/entry3|320|Wailmer|no|no|yes|Fish Super|20-45|100%|type1=Water}} |
| {{Catch/footer|sand}} | | {{catch/footer|ocean}} |
| |} | | |} |
| | | {| class="expandable" style="margin: auto; background: #{{locationcolor/med|ocean}}; {{roundy}}; border: 5px solid #{{locationcolor/light|ocean}};" |
| {| class="expandable" align="center" style="background: #{{emerald color light}}; {{roundy}} border: 5px solid #{{emerald color}};" | |
| |- align="center" | | |- align="center" |
| ! Items | | ! Route 106 |
| |-
| | |- |
| |
| |
| {{itlisth|sand}}
| |
| {{Itemlist|Silk Scarf|Gift from a man in the house immediately north from the port|E=yes|display={{DL|Type-enhancing item|Silk Scarf}}}}
| |
| {{Itemlist|Old Rod VI|Gift from the {{tc|Fisherman}} near [[Dewford Gym]]|E=yes|display={{DL|Fishing|Old Rod}}}}
| |
| {{Itemlist|TM Poison VI|Gift from a {{tc|Collector}} in Dewford Hall (once the {{player}} has at least 5 [[Badge]]s)|E=yes|display={{TM|36|Sludge Bomb}}}}
| |
| {{itlistfoot|sand}}
| |
| |}
| |
| | |
| When you do, you will find several things. First, a boy outside of a house--the Dewford Hall--will let you set the current "Trendy Phrase". There will also be a Pokémon Center, a few more houses, and a Gym. Inside one of the houses is a man who gives you a [[Silk Scarf]].
| |
| | |
| To the south of the pier, you can see a fisherman. He will give you the [[Old Rod]]. If you use it to fish, you can find {{p|Magikarp}} and {{p|Tentacool}} in pretty much any body of water. Magikarp has terrible stats and cannot attack until it reaches level 15, so it's a pain to train; but once it reaches level 20 it evolves into {{p|Gyarados}}, a powerful {{t|Water}}/{{t|Flying}}-type. Tentacool evolves into {{p|Tentacruel}} into level 30, and is capable of learn many [[HM]]s.
| |
| | |
| ===Dewford Hall===
| |
| If someone says something "[[trendy phrase|trendy]]" there, it quickly spreads throughout the rest of Hoenn. There is a boy that lets the player change the "trendy" phrase. Changing this affects where {{p|Feebas}} appears in {{rt|119|Hoenn}} (you'll get there much later).
| |
| | |
| | |
| Head out to {{rt|106|Hoenn}}.
| |
| | |
| ==Route 106==
| |
| [[File:Hoenn Route 106 E.png|375px|thumb|right|Route 106]]
| |
| | |
| {| class="expandable" align="center" style="background: #{{emerald color light}}; {{roundy}} border: 5px solid #{{emerald color}};"
| |
| |- align="center"
| |
| ! Trainers
| |
| |-
| |
| |{{trainerheader|ocean|3}}
| |
| {{Trainerentry|Spr RS Fisherman.png|Fisherman|Ned|440|1|072|Tentacool|♂|11||}}
| |
| {{trainerdiv|ocean}}
| |
| {{trainerentry|Spr RS Fisherman.png|Fisherman|Elliot|400|3|129|Magikarp|♂|10||072|Tentacool|♂|7||129|Magikarp|♂|10||38=Nav}}
| |
| {{trainerdiv|ocean|Requires {{mcolor|Surf|FFF}}}}
| |
| {{trainerentry|Spr RS Swimmer M.png|Swimmer|Douglas|192|2|072|Tentacool|♂|24||072|Tentacool|♂|24||}}
| |
| {{trainerdiv|ocean}}
| |
| {{trainerentry|Spr RS Swimmer F.png|Swimmer|Kyla|208|1|320|Wailmer|♀|26||}}
| |
| {{trainerfooter|ocean|3}}
| |
| |}
| |
| {| class="expandable" align="center" style="background: #{{emerald color light}}; {{roundy}} border: 5px solid #{{emerald color}};"
| |
| |- align="center"
| |
| ! Available Pokémon
| |
| |- | |
| | | | | |
| {{catch/header|ocean|no}} | | {{catch/header|ocean|no}} |
| Line 335: |
Line 99: |
| {{catch/footer|ocean}} | | {{catch/footer|ocean}} |
| |} | | |} |
| {| class="expandable" align="center" style="background: #{{emerald color light}}; {{roundy}} border: 5px solid #{{emerald color}};" | | |} |
| | {| class="expandable" style="margin: auto; background: #{{locationcolor/med|ocean}}; {{roundy}}; border: 5px solid #{{locationcolor/light|ocean}};" |
| |- align="center" | | |- align="center" |
| ! Items | | ! Items |
| |- | | |- |
| |{{itlisth|ocean}} | | | |
| {{Itemlist|Heart Scale|In the sand east of Fisherman Ned in the northeast shoreline ''(hidden)''|E=yes|display={{DL|Exchangeable item|Heart Scale}}}} | | {{itlisth|ocean}} |
| {{Itemlist|Stardust|On the rock northeast of Fisherman Elliot ''(hidden)''|E=yes|display={{DL|Valuable item|Stardust}}}} | | {{catch/div|ocean|Route 105}} |
| {{Itemlist|Poké Ball|On the far left corner of the northern shore line ''(hidden)''|E=yes|display={{DL|Poké Ball|Poké Ball}}}} | | {{itemlist|Big Pearl|On the second-largest island, in the trees between Bird Keeper Josue and Ruin Maniac Andres (hidden)|E=yes|display={{DL|Valuable item|Big Pearl}}}} |
| {{Itemlist|Protein|On the far west shore line (requires {{m|Surf}})|E=yes|display={{DL|Vitamin|Protein}}}} | | {{itemlist|Heart Scale|Northern-most sand-only islet (hidden)|E=yes|display={{DL|Exchangeable item|Heart Scale}}}} |
| | {{itemlist|Iron|Southern-most island|E=yes|display={{DL|Vitamin|Iron}}}} |
| | {{catch/div|ocean|Route 106}} |
| | {{itemlist|Heart Scale|Water's edge, southeast of Fisherman Ned (hidden)|E=yes|display={{DL|Exchangeable item|Heart Scale}}}} |
| | {{itemlist|Stardust|On a rock, northwest of the signpost (hidden)|E=yes|display={{DL|Valuable item|Stardust}}}} |
| | {{itemlist|Poké Ball|Water's edge, northwest of Fisherman Elliot (hidden)|E=yes|display={{ball|Poké}}}} |
| | {{itemlist|Protein|Western-most part of the shoreline|E=yes|display={{DL|Vitamin|Protein}}}} |
| {{itlistfoot|ocean}} | | {{itlistfoot|ocean}} |
| |} | | |} |
|
| |
|
| Further west is [[Granite Cave]]. A hiker there will give you [[HM05]], {{m|Flash}}. This HM makes it much easier to navigate the lower levels of Granite Cave, and other caves in this region are easier to get through when you have Flash as well. However, you can't use it until you've defeated [[Brawly]], the [[Gym Leader]]!
| |
|
| |
|
| ==Dewford Gym== | | ===Checking In=== |
| [[File:Dewford Gym E.png|275px|thumb|Map of the Dewford Gym's interior]] | | As you sail with [[Mr. Briney]] through Route 105, you receive a call on your PokéNav. It's [[Norman|Dad]]; he heard from [[Mr. Stone]] about you getting the device and just wanted to check in. After the brief conversation, the ship makes landfall in Dewford Town. |
| '''Brawly's highest-leveled Pokémon is Lv. 19.''' Training your team to that level before before continuing is highly recommended. This Gym specializes in {{t|Fighting|Fighting-types}}, so {{t|Flying}}- and {{t|Psychic}}-type moves will work well here. Don't use {{t|Rock}}-, {{t|Normal}}-, or {{t|Steel}}-types, as they will be easily defeated. When you're ready, ''enter the Gym.''
| | |
| | {{-}} |
| | |
| | ==Dewford Town== |
| | [[File:Dewford Town E.png|thumb|Dewford Town]] |
| | |
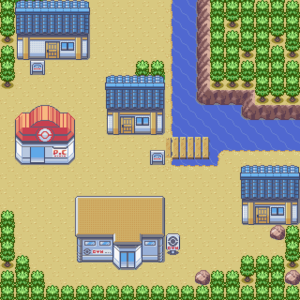
| | [[Dewford Town]] is a tiny island town in the southern ocean. Despite its isolation, many Trainers visit the area to challenge the [[Dewford Gym]]. |
| | |
| | {| class="expandable" style="margin: auto; background: #FFB27F; {{roundy}}; border: 5px solid #FFCC99;" |
| | |- align="center" |
| | ! Available Pokémon |
| | |- |
| | | |
| | {{Catch/header|sand|no}} |
| | {{Catch/div|water|Fishing}} |
| | {{Catch/entry3|129|Magikarp|no|no|yes|Fish Old|5-10|70%|type1=Water}} |
| | {{Catch/entry3|072|Tentacool|no|no|yes|Fish Old|5-10|30%|type1=Water|type2=Poison}} |
| | {{Catch/footer|sand}} |
| | |} |
| | {| class="expandable" style="margin: auto; background: #FFB27F; {{roundy}}; border: 5px solid #FFCC99;" |
| | |- align="center" |
| | ! Items |
| | |- |
| | | |
| | {{itlisth|sand}} |
| | {{itemlist|Silk Scarf|From an Ace Trainer in the house at the pier|E=yes|display={{DL|Type-enhancing item|Silk Scarf}}}} |
| | {{itemlist|Old Rod|From the Fisherman east of the Gym|E=yes|display={{key|III|Old Rod}}}} |
| | {{catch/div|sand|After defeating the Dewford Gym}} |
| | {{itemlist|TM Fighting|From Brawly upon his defeat|E=yes|display={{TM|08|Bulk Up}}}} |
| | {{catch/div|sand|Return trip}} |
| | {{itemlist|TM Poison|From a Collector in Dewford Hall, after earning at least 5 Badges|E=yes|display={{TM|36|Sludge Bomb}}}} |
| | {{itlistfoot|sand}} |
| | |} |
| | |
| | |
| | ===Dewford Hall=== |
| | Located to the north of the Pokémon Center, Dewford Hall is known as "Everyone's Information Exchange". Though Dewford is a tiny island community, when someone coins a [[Trend|trendy phrase]] here, it quickly spreads throughout the region. Speak to the boy outside the building to learn the coolest thing in cool right now; if you disagree, he offers a chance to change the current phrase, which the residents inside will quickly adopt. |
| | |
| | ===Hook the Big One!=== |
| | Speak to the Fisherman outside the Gym, and answer his question to receive the {{key|III|Old Rod}}. This low-end fishing rod can hook Pokémon from any body of water, so be sure to try it out everywhere! |
| | |
| | ===Dewford Gym=== |
| | [[File:Dewford Gym E.png|thumb|Dewford Gym]] |
| | |
| | {{sign|E|header}} |
| | {{sign|E|title|Dewford Town Pokémon Gym<br>Leader: Brawly}} |
| | {{sign|E|A big wave in fighting!}} |
| | {{sign|E|footer}} |
| | |
| | The [[Dewford Gym]] specializes in {{type|Fighting}} Pokémon. {{t|Flying}}- and {{type|Psychic}} moves are the most useful here, so this is a great opportunity to train {{p|Taillow}}, {{p|Wingull}}, or {{p|Ralts}}. Keep your {{t|Normal}}-, {{t|Rock}}-, and {{type|Dark}} Pokémon out of the fray for now. The Gym is dimly lit when you first enter, but the building lights up bit by bit for each Gym Trainer you defeat. Once the Gym Leader is defeated, the entire Gym lights up completely. |
|
| |
|
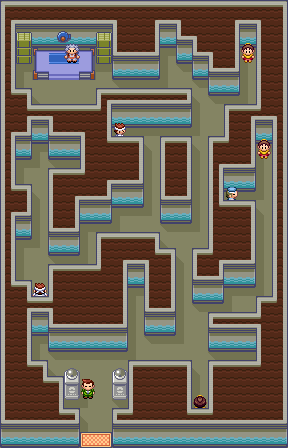
| The [[Dewford Gym]] has some Trainers that you will need to battle, and a big obstacle: the room is pitch black. However, the more Trainers you defeat, the less dark it becomes, making it easier to find Brawly.
| | Even with only three Pokémon, [[Brawly]] can be a tough opponent. Both his {{p|Machop}} and {{p|Makuhita}} have the {{a|Guts}} Ability, which boosts the Pokémon's {{stat|Attack}} by 50% when afflicted by any status condition. {{p|Meditite}} can use {{m|Reflect}} and {{m|Light Screen}} to boost his team's {{stat|Defense}} and {{stat|Special Defense}}, respectively, and {{m|Bulk Up}} allows each one to raise its Attack and {{stat|Defense}}. |
|
| |
|
| {| align="center" style="background: #{{fighting color}}; {{roundytop|10px}} {{roundybottom|10px}} border: 5px solid #{{fighting color light}};" | | {| align="center" |
| | |- align="center" valign="top" |
| | | |
| | {| align="center" style="background: #{{fighting color}}; {{roundy}}; border: 5px solid #{{fighting color light}};" |
| |- align="center" | | |- align="center" |
| ! Dewford Gym <br> [[File:Knuckle Badge.png|35px|The Knuckle Badge]] <br><br> | | ! Dewford Gym<br>[[File:Knuckle Badge.png|35px|The Knuckle Badge]]<br><br> |
| |- | | |- |
| | | | | |
| {| align="center" class="expandable" style="background: #{{fighting color}}; {{roundytop|10px}} {{roundybottom|10px}} border: 5px solid #{{fighting color light}};" | | {| align="center" class="expandable" style="background: #{{fighting color}}; {{roundy}}; border: 5px solid #{{fighting color light}};" |
| |- align="center" | | |- align="center" |
| ! Trainers | | ! Trainers |
| Line 366: |
Line 188: |
| | | | | |
| {{Trainerheader|Fighting}} | | {{Trainerheader|Fighting}} |
| {{Trainerentry|Spr RS Battle Girl.png|Battle Girl|Laura|312|1|307|Meditite|♀|13|None|}} | | {{Trainerentry|Spr RS Battle Girl.png|Battle Girl|Laura|312|1|307|Meditite|♀|13|}} |
| {{Trainerdiv|Fighting}} | | {{Trainerdiv|Fighting}} |
| {{Trainerentry|Spr RS Battle Girl.png|Battle Girl|Lilith|312<br/><small>[[Double Battle]] with Brenden</small>|1|307|Meditite|♀|13|None|}} | | {{Trainerentry|Spr RS Battle Girl.png|Battle Girl|Lilith|312<br/><small>[[Double Battle]] with Brenden</small>|1|307|Meditite|♀|13|}} |
| {{Trainerentry|Spr RS Sailor.png|Sailor|Brenden|416<br/><small>[[Double Battle]] with Lilith</small>|1|066|Machop|♂|13|None|}} | | {{Trainerentry|Spr RS Sailor.png|Sailor|Brenden|416<br/><small>[[Double Battle]] with Lilith</small>|1|066|Machop|♂|13|}} |
| {{Trainerdiv|Fighting}} | | {{Trainerdiv|Fighting}} |
| {{Trainerentry|Spr RS Black Belt.png|Black Belt|Takao|416|1|066|Machop|♂|13|None|}} | | {{Trainerentry|Spr RS Black Belt.png|Black Belt|Takao|416|1|066|Machop|♂|13|}} |
| {{Trainerdiv|Fighting}} | | {{Trainerdiv|Fighting}} |
| {{Trainerentry|Spr RS Black Belt.png|Black Belt|Cristian|416|1|296|Makuhita|♂|13|None|}} | | {{Trainerentry|Spr RS Black Belt.png|Black Belt|Cristian|416|1|296|Makuhita|♂|13|}} |
| {{Trainerdiv|Fighting}} | | {{Trainerdiv|Fighting}} |
| {{Trainerentry|Spr RS Battle Girl.png|Battle Girl|{{ho|Shauna|Jocelyn}}|312|1|307|Meditite|♀|13|None|}} | | {{Trainerentry|Spr RS Battle Girl.png|Battle Girl|{{ho|Shauna|Jocelyn}}|312|1|307|Meditite|♀|13|}} |
| {{Trainerfooter|Fighting|3}} | | {{Trainerfooter|Fighting|I}} |
| |} | | |} |
|
| |
|
|
| |
|
|
| |
|
| | {| style="margin: auto;" |
| | | |
| {{Party/Single | | {{Party/Single |
| |color={{fighting color}} | | |color={{fighting color}}|headcolor={{fighting color light}}|bordercolor={{fighting color dark}} |
| |headcolor={{fighting color light}} | |
| |bordercolor={{fighting color dark}} | |
| |sprite=Spr RS Brawly.png | | |sprite=Spr RS Brawly.png |
| |prize={{Pdollar}}1900 | | |prize={{PDollar}}1900 |
| |class=Leader | | |class=Leader|classlink=Gym Leader|name={{color2|000|Brawly}} |
| |name=Brawly | | |game=E|location=Dewford Gym |
| |game=E | |
| |location=Dewford Gym | |
| |pokemon=3}} | | |pokemon=3}} |
| |{{Pokémon/3 | | |
| |game=Emerald | | |{{Pokémon/3|game=Emerald |
| |ndex=066 | | |ndex=066|pokemon=Machop |
| |pokemon=Machop | |
| |gender=male
| |
| |level=16
| |
| |type1=Fighting | | |type1=Fighting |
| | |level=16|gender=male |
| |ability=Guts | | |ability=Guts |
| |move1=Karate Chop|move1type=Fighting | | |move1=Karate Chop|move1type=Fighting |
| Line 404: |
Line 222: |
| |move3=Seismic Toss|move3type=Fighting | | |move3=Seismic Toss|move3type=Fighting |
| |move4=Bulk Up|move4type=Fighting}} | | |move4=Bulk Up|move4type=Fighting}} |
| |{{Pokémon/3 | | |
| |game=Emerald | | |{{Pokémon/3|game=Emerald |
| |ndex=307 | | |ndex=307|pokemon=Meditite |
| |pokemon=Meditite | | |type1=Fighting|type2=Psychic |
| |gender=male | | |level=16|gender=male |
| |level=16 | |
| |type1=Fighting | |
| |type2=Psychic
| |
| |ability=Pure Power | | |ability=Pure Power |
| |move1=Focus Punch|move1type=Fighting | | |move1=Focus Punch|move1type=Fighting |
| Line 417: |
Line 232: |
| |move3=Reflect|move3type=Psychic | | |move3=Reflect|move3type=Psychic |
| |move4=Bulk Up|move4type=Fighting}} | | |move4=Bulk Up|move4type=Fighting}} |
| |{{Pokémon/3 | | |
| |game=Emerald | | |{{Pokémon/3|game=Emerald |
| |ndex=296 | | |ndex=296|pokemon=Makuhita |
| |pokemon=Makuhita | |
| |gender=male
| |
| |level=19
| |
| |type1=Fighting | | |type1=Fighting |
| | |level=19|gender=male |
| |ability=Guts | | |ability=Guts |
| |held=Sitrus Berry | | |held=Sitrus Berry |
| Line 432: |
Line 245: |
| {{Party/Footer}} | | {{Party/Footer}} |
| |} | | |} |
| <br />
| | |} |
| | |} |
|
| |
|
| When you challenge Brawly, you'll discover in battle that he has a {{p|Machop}}, a {{p|Meditite}} and a {{p|Makuhita}}. All three are weak to Flying-type attacks, and they all know {{m|Bulk Up}}, a move that simultaneously boosts their Attack and Defense. Brawly sends out Machop first. A good super-effective attack will take it out in one hit. Meditite knows a very powerful move— {{m|Focus Punch}}, which has 150 base power! However, you don't need to worry about getting hit by this move if you don't use Status-altering moves. Stick with attacking, and Focus Punch will be unable to hit. You should be able to take out Meditite reasonably quickly— don't let {{m|Light Screen}} and {{m|Reflect}} worry you. Makuhita is Brawly's best Pokémon. Its Attack stat gives a lot of power to its moves, which are {{m|Arm Thrust}}, {{m|Vital Throw}}, {{m|Reversal}}, and the aforementioned Bulk Up. Arm thrust strikes multiple times in the same turn, and hits two to five times. Vital Throw is an attack that cannot miss but always strikes last. Reversal gets more powerful the less HP Makuhita has, so watch out! The best strategy in this Gym is to just keep attacking.
| |
|
| |
|
| Once you defeat Brawly, he will award you the Knuckle Badge. He will also give you {{TM|08|Bulk Up}} and register himself in your [[PokéNav]]. You now have the ability to use {{m|Flash}}, so your next destination is [[Granite Cave]]!
| | After the battle, Brawly awards you the {{badge|Knuckle}}, which ensures obedience of all Pokémon up to level 30 and enables the use of {{m|Flash}} in the field. He also hands out {{TM|08|Bulk Up}} as a prize, and registers himself in your PokéNav. |
|
| |
|
| ==Granite Cave== | | ==Route 106== |
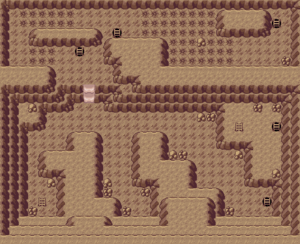
| [[File:Granite Cave 1F entrance E.png|275px|left|thumb|The first floor of Granite Cave]] | | [[File:Granite Cave 1F entrance E.png|thumb|left|Granite Cave, 1F (Entrance)]] |
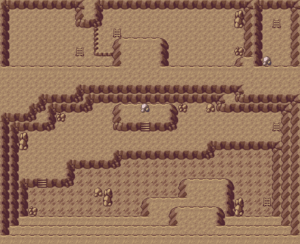
| [[File:Granite Cave B1F E.png|180px|thumb|Granite Cave B1F]] | | [[File:Granite Cave B1F E.png|thumb|Granite Cave, B1F]] |
| [[File:Granite Cave B2F E.png|180px|thumb|Granite Cave B2F]] | | [[File:Granite Cave B2F E.png|thumb|left|Granite Cave, B2F]] |
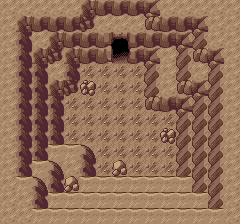
| | [[File:Granite Cave 1F E.png|thumb|Granite Cave, 1F (Back)]] |
| | ===Granite Cave=== |
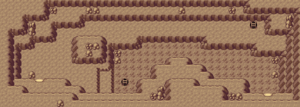
| | While the ground floor of [[Granite Cave]] is well-lit from the natural light outside, it can be difficult to explore the underground portion without the use of {{m|Flash}}. |
|
| |
|
| If you haven't already been to Granite Cave, a hiker there hands out {{HM|05|Flash}}. Teach it to one of your Pokémon ({{p|Lotad}} and {{p|Nincada}} are good choices) and then head down into the darkness by going down the first ladder.
| | {| class="expandable" style="margin: auto; background: #{{locationcolor/med|cave}}; {{roundy}}; border: 5px solid #{{locationcolor/light|cave}};" |
| | |
| {| class="expandable" align="center" style="background: #{{emerald color light}}; {{roundy}} border: 5px solid #{{emerald color}};" | |
| |- align="center" | | |- align="center" |
| ! Available Pokémon | | ! Available Pokémon |
| |- | | |- |
| | | | | |
| '''1F'''
| | {| class="expandable" style="margin: auto; background: #{{locationcolor/med|cave}}; {{roundy}}; border: 5px solid #{{locationcolor/light|cave}};" |
| {{catch/header|cave|no}}
| |
| {{catch/entry3|296|Makuhita|no|no|yes|Cave|6-10|50%|type1=Fighting}}
| |
| {{catch/entry3|041|Zubat|no|no|yes|Cave|7-8|30%|type1=Poison|type2=Flying}}
| |
| {{catch/entry3|063|Abra|no|no|yes|Cave|8|10%|type1=Psychic}}
| |
| {{catch/entry3|074|Geodude|no|no|yes|Cave|6-9|10%|type1=Rock|type2=Ground}}
| |
| {{catch/footer|cave}}
| |
| | |
| '''Steven's Room'''
| |
| {{catch/header|cave|no}}
| |
| {{catch/entry3|296|Makuhita|no|no|yes|Cave|6-10|50%|type1=Fighting}}
| |
| {{catch/entry3|041|Zubat|no|no|yes|Cave|7-8|30%|type1=Poison|type2=Flying}}
| |
| {{catch/entry3|063|Abra|no|no|yes|Cave|8|10%|type1=Psychic}}
| |
| {{catch/entry3|304|Aron|no|no|yes|Cave|7-8|10%|type1=Steel|type2=Rock}}
| |
| {{catch/footer|cave}}
| |
| | |
| '''B1F'''
| |
| {{catch/header|cave|no}}
| |
| {{catch/entry3|304|Aron|no|no|yes|Cave|9-11|40%|type1=Steel|type2=Rock}}
| |
| {{catch/entry3|041|Zubat|no|no|yes|Cave|9-10|30%|type1=Poison|type2=Flying}}
| |
| {{catch/entry3|063|Abra|no|no|yes|Cave|9|10%|type1=Psychic}}
| |
| {{catch/entry3|296|Makuhita|no|no|yes|Cave|10-11|10%|type1=Fighting}}
| |
| {{catch/entry3|302|Sableye|no|no|yes|Cave|9-11|10%|type1=Dark|type2=Ghost}}
| |
| {{catch/footer|cave}}
| |
| | |
| '''B2F'''
| |
| {{catch/header|cave|no}}
| |
| {{catch/entry3|304|Aron|no|no|yes|Cave|10-12|40%|type1=Steel|type2=Rock}}
| |
| {{catch/entry3|041|Zubat|no|no|yes|Cave|10-11|30%|type1=Poison|type2=Flying}}
| |
| {{catch/entry3|302|Sableye|no|no|yes|Cave|10-12|20%|type1=Dark|type2=Ghost}}
| |
| {{catch/entry3|063|Abra|no|no|yes|Cave|10|10%|type1=Psychic}}
| |
| {{Catch/div|cave|Rock Smash}}
| |
| {{catch/entry3|074|Geodude|no|no|yes|Rock Smash|5-20|70%|type1=Rock|type2=Ground}}
| |
| {{catch/entry3|299|Nosepass|no|no|yes|Rock Smash|10-20|30%|type1=Rock}}
| |
| {{catch/footer|cave}}
| |
| |}
| |
| {| class="expandable" align="center" style="background: #{{emerald color light}}; {{roundy}} border: 5px solid #{{emerald color}};" | |
| |- align="center" | | |- align="center" |
| ! Items | | ! 1F |
| |- | | |- |
| | | | | |
| {{itlisth|cave}} | | {{Catch/header|cave|no}} |
| {{Itemlist|HM Normal|1F, from a {{tc|Hiker}} near the entrance|E=yes|display={{HM|05|Flash}}}}
| | {{Catch/entry3|296|Makuhita|no|no|yes|Cave|6-10|50%|type1=Fighting}} |
| {{Itemlist|Escape Rope|1F, southwest of the entrance|E=yes}} | | {{Catch/entry3|041|Zubat|no|no|yes|Cave|7-8|30%|type1=Poison|type2=Flying}} |
| {{Itemlist|Poké Ball|B1F, south of the Mach Bike slope|E=yes|display={{ball|Poké}}}}
| | {{Catch/entry3|063|Abra|no|no|yes|Cave|8|10%|type1=Psychic}} |
| {{Itemlist|Everstone|
| | {{Catch/entry3|074|Geodude|no|no|yes|Cave|6-9|10%|type1=Rock|type2=Ground}} |
| *B2F, inside the lone rock near the series of {{m|Rock Smash|smashable rocks}} ''(hidden)''
| | {{catch/div|cave|1F (Back)}} |
| *B2F, inside the rock near the Rare Candy (requires {{DL|Bicycle|Mach Bike}}) ''(hidden)''|E=yes|display={{evostone|Everstone}} ×2}}
| | {{Catch/entry3|296|Makuhita|no|no|yes|Cave|6-10|50%|type1=Fighting}} |
| {{Itemlist|TM Steel|Steven's room, thank-you gift from {{Steven}} for delivering the {{key|III|Letter}} to him|E=yes|display={{TM|47|Steel Wing}}}}
| | {{Catch/entry3|041|Zubat|no|no|yes|Cave|7-8|30%|type1=Poison|type2=Flying}} |
| {{Itemlist|Repel|B2F, beneath the first two sets of cracked floors (requires {{DL|Bicycle|Mach Bike}})|E=yes|display={{DL|Repel|Repel}}}} | | {{Catch/entry3|063|Abra|no|no|yes|Cave|8|10%|type1=Psychic}} |
| {{Itemlist|Rare Candy|B2F, down the ladder past the three sets of cracked floors (requires {{DL|Bicycle|Mach Bike}})|E=yes|display={{DL|Vitamin|Rare Candy}}}}
| | {{catch/entry3|304|Aron|no|no|yes|Cave|7-8|10%|type1=Steel|type2=Rock}} |
| {{itlistfoot|cave}}
| | {{Catch/footer|cave}} |
| |}
| |
| <br />
| |
| | |
| When you are get inside, use Flash and the cave will light up. At the stairs, move up, continue west and walk south to the ladder. Then, head all the way west to the place with three boulders. From there, go north and then east. At the slightly bright stone, press A and you will receive an {{evostone|Everstone}}, and item that, when held, prevents Pokémon from evolving. This item can be more useful than it seems at first glance, so hang on to it. Now, walk to the ladder. Then, go west to another ladder. You will arrive at the part of the cave where Flash is no longer needed. Head all the way west and then south to the door. Steven is inside this next small room. Speak to him and deliver the letter. In return, he will give you {{TM|47|Steel Wing}} and register you in his [[PokéNav]]. If you talk to Mr. Stone at Devon Corporation after this event, he will give you the {{DL|Experience-affecting item|Exp. Share}} as a reward for delivering the letter.
| |
| | |
| Once the letter is delivered, [[Mr. Briney]] can now take you to [[Slateport City]] from the Dewford Town port.
| |
| | |
| ==Route 109==
| |
| [[File:Hoenn Route 109 E.png|180px|left|thumb|Route 109. (You cannot access the southern part of the route until you have {{m|Surf}}.)]]
| |
| Here on the beach are people, Pokémon, and battles all waiting for you! If you beat all the Trainers in the house on the west side of the beach and then talk to the northernmost man inside, he will give you six {{DL|Drink|Soda Pop}}s. These restore more HP than a [[Super Potion]] and are cheaper to buy. If you do speak to him again, you can buy additional Soda Pops for {{pdollar}}300 each.
| |
| | |
| {| class="expandable" align="center" style="background: #{{emerald color light}}; {{roundy}} border: 5px solid #{{emerald color}};"
| |
| |- align="center" | |
| ! Trainers
| |
| |-
| |
| |
| |
| {{trainerheader|ocean}}
| |
| {{trainerentry|Spr RS Sailor.png|Sailor|Huey|384|2|278|Wingull|♂|12|no|066|Machop|♂|12|no|}}
| |
| {{trainerdiv|ocean}} | |
| {{trainerentry|Spr RS Sailor.png|Sailor|Edmond|416<br><small>Potential [[Double Battle]] with Hailey or Ricky</small>|1|278|Wingull|♂|13|no|}}
| |
| {{trainerentry|Spr RS Tuber F.png|Tuber|Hailey|52<br><small>Potential [[Double Battle]] with Edmond or Ricky</small>|1|183|Marill|♀|13|no}}
| |
| {{trainerentry|Spr RS Tuber M.png|Tuber|Ricky|52<br><small>Potential [[Double Battle]] with Edmond or Hailey</small>|1|263|Zigzagoon|♂|13|no||38=Nav}}
| |
| {{trainerdiv|ocean}}
| |
| {{trainerentry|Spr RS Tuber F.png|Tuber|Lola|48<br><small>Potential [[Double Battle]] with Chandler</small>|2|298|Azurill|♀|12|no|298|Azurill|♀|12|no||38=Nav}} | |
| {{trainerentry|Spr RS Tuber M.png|Tuber|Chandler|48<br><small>Potential [[Double Battle]] with Lola</small>|2|072|Tentacool|♂|12|no|072|Tentacool|♂|12|no}} | |
| {{trainerdiv|ocean}} {{color|FFF|Seashore House}} | |
| {{trainerentry|Spr RS Tuber M.png|Tuber|Simon|48|2|298|Azurill|♀|12|no|183|Marill|♂|12|no|}}
| |
| {{trainerdiv|ocean}}
| |
| {{trainerentry|Spr RS Beauty.png|Beauty|Johanna|1040|1|118|Goldeen|♀|13|no|}}
| |
| {{trainerdiv|ocean}} | |
| {{trainerentry|Spr RS Sailor.png|Sailor|Dwayne|352|3|278|Wingull|♂|11|no|066|Machop|♂|11|no|072|Tentacool|♂|11|no|}}
| |
| {{trainerdiv|ocean}} {{color|FFF|Requires Surf}} | |
| {{trainerentry|Spr RS Tuber F.png|Tuber|Austina|104|1|183|Marill|♀|26|no|}}
| |
| {{trainerdiv|ocean}}
| |
| {{trainerentry|Spr RS Tuber F.png|Tuber|Gwen|104|1|183|Marill|♀|26|no|}}
| |
| {{trainerdiv|ocean}}
| |
| {{trainerentry|Spr RS Swimmer M.png|Swimmer|David|200|2|072|Tentacool|♂|25|no|318|Carvanha|♂|25|no}}
| |
| {{trainerdiv|ocean}} | |
| {{trainerentry|Spr RS Swimmer F.png|Swimmer|Alice|192|3|118|Goldeen|♀|24|no|278|Wingull|♀|24|no|118|Goldeen|♀|24|no}}
| |
| {{trainerdiv|ocean}}
| |
| {{trainerentry|Spr RS Fisherman.png|Fisherman|Carter|1000<br><small>Potential [[Double Battle]] with Elijah</small>|2|320|Wailmer|♂|25|no|073|Tentacruel|♂|25|no|}}
| |
| {{trainerentry|Spr RS Bird Keeper.png|Bird Keeper|Elijah|800<br><small>Potential [[Double Battle]] with Carter</small>|2|227|Skarmory|♂|25|no|227|Skarmory|♂|25|no|}} | |
| {{trainerdiv|ocean}}
| |
| {{trainerentry|Spr RS Young Couple.png|Young Couple|Mel & Paul|1728|2|269|Dustox|♂|27|no|267|Beautifly|♂|27|no|}}
| |
| {{trainerfooter|ocean|3}}
| |
| |} | | |} |
| {| class="expandable" align="center" style="background: #{{emerald color light}}; {{roundy}} border: 5px solid #{{emerald color}};" | | {| class="expandable" style="margin: auto; background: #{{locationcolor/med|cave}}; {{roundy}}; border: 5px solid #{{locationcolor/light|cave}};" |
| |- align="center" | | |- align="center" |
| ! Available Pokémon | | ! B1F |
| |- | | |- |
| | | | | |
| {{catch/header|ocean|no}} | | {{Catch/header|cave|no}} |
| {{Catch/div|ocean|Surfing}}
| | {{Catch/entry3|304|Aron|no|no|yes|Cave|9-11|40%|type1=Steel|type2=Rock}} |
| {{Catch/entry3|072|Tentacool|no|no|yes|Surf|5-35|60%|type1=Water|type2=Poison}} | | {{Catch/entry3|041|Zubat|no|no|yes|Cave|9-10|30%|type1=Poison|type2=Flying}} |
| {{Catch/entry3|278|Wingull|no|no|yes|Surf|10-30|35%|type1=Water|type2=Flying}} | | {{Catch/entry3|063|Abra|no|no|yes|Cave|9|10%|type1=Psychic}} |
| {{Catch/entry3|279|Pelipper|no|no|yes|Surf|25-30|5%|type1=Water|type2=Flying}}
| | {{Catch/entry3|296|Makuhita|no|no|yes|Cave|10-11|10%|type1=Fighting}} |
| {{Catch/div|ocean|Fishing}}
| | {{Catch/entry3|302|Sableye|no|no|yes|Cave|9-11|10%|type1=Dark|type2=Ghost}} |
| {{Catch/entry3|129|Magikarp|no|no|yes|Fish Old|5-10|70%|type1=Water}} | | {{Catch/footer|cave}} |
| {{Catch/entry3|072|Tentacool|no|no|yes|Fish Old|5-10|30%|type1=Water|type2=Poison}}
| |
| {{Catch/entry3|129|Magikarp|no|no|yes|Fish Good|10-30|60%|type1=Water}} | |
| {{Catch/entry3|072|Tentacool|no|no|yes|Fish Good|10-30|20%|type1=Water|type2=Poison}} | |
| {{Catch/entry3|320|Wailmer|no|no|yes|Fish Good|10-30|20%|type1=Water}} | |
| {{Catch/entry3|320|Wailmer|no|no|yes|Fish Super|20-45|100%|type1=Water}}
| |
| {{catch/footer|ocean}}
| |
| |} | | |} |
| {| class="expandable" align="center" style="background: #{{emerald color light}}; {{roundy}} border: 5px solid #{{emerald color}};" | | {| class="expandable" style="margin: auto; background: #{{locationcolor/med|cave}}; {{roundy}}; border: 5px solid #{{locationcolor/light|cave}};" |
| |- align="center" | | |- align="center" |
| ! Items | | ! B2F |
| |- | | |- |
| | | | | |
| {{Itlisth|ocean}} | | {{Catch/header|cave|no}} |
| {{Itemlist|Revive|Western tip of the shoreline slightly northwest of Mr. Briney ''(hidden)''|E=yes|display={{DL|Revive|Revive}}}} | | {{Catch/entry3|304|Aron|no|no|yes|Cave|10-12|40%|type1=Steel|type2=Rock}} |
| {{Itemlist|Ether|Southeast of the girl who gives away the Soft Sand ''(hidden)''|E=yes|display={{DL|Ether|Ether}}}}
| | {{Catch/entry3|041|Zubat|no|no|yes|Cave|10-11|30%|type1=Poison|type2=Flying}} |
| {{Itemlist|Soft Sand|From a young girl on the southeast of the shore|E=yes|display={{DL|Type-enhancing item|Soft Sand}}}} | | {{Catch/entry3|302|Sableye|no|no|yes|Cave|10-12|20%|type1=Dark|type2=Ghost}} |
| {{Itemlist|Heart Scale|Under the westernmost green umbrella ''(hidden)''|E=yes|display={{DL|Exchangeable item|Heart Scale}}}}
| | {{Catch/entry3|063|Abra|no|no|yes|Cave|10|10%|type1=Psychic}} |
| {{Itemlist|Heart Scale|Directly north of the old man with the {{p|Zigzagoon}} ''(hidden)''|E=yes|display={{DL|Exchangeable item|Heart Scale}}}}
| | {{Catch/footer|cave}} |
| {{Itemlist|Heart Scale|On the island with {{tc|Young Couple}} Mel & Paul (requires {{m|Surf}}) ''(hidden)''|E=yes|display={{DL|Exchangeable item|Heart Scale}}}} | |
| {{Itemlist|Great Ball|Under the westernmost blue beach chair ''(hidden)''|E=yes|display={{ball|Great}}}}
| |
| {{Itemlist|Soda Pop|Reward for beating all Trainers in the Seashore House|E=yes|display={{DL|Drink|Soda Pop}} ×6}} | |
| {{Itemlist|PP Up|On the eastern empty sandbar (requires {{m|Surf}})|E=yes|display={{DL|Vitamin|PP Up}}}}
| |
| {{Itlistfoot|ocean}} | |
| |} | | |} |
|
| |
| ==Slateport City==
| |
| [[File:Slateport City E.png|275px|thumb|Slateport City]]
| |
|
| |
| {| class="expandable" align="center" style="background: #{{emerald color light}}; {{roundy}} border: 5px solid #{{emerald color}};"
| |
| |- align="center"
| |
| ! Available Pokémon
| |
| |-
| |
| |
| |
| {{Catch/header|road|no}}
| |
| {{Catch/div|water|Surfing}}
| |
| {{Catch/entry3|072|Tentacool|no|no|yes|Surf|5-35|60%|type1=Water|type2=Poison}}
| |
| {{Catch/entry3|278|Wingull|no|no|yes|Surf|10-30|35%|type1=Water|type2=Flying}}
| |
| {{Catch/entry3|279|Pelipper|no|no|yes|Surf|25-30|5%|type1=Water|type2=Flying}}
| |
| {{Catch/div|water|Fishing}}
| |
| {{Catch/entry3|129|Magikarp|no|no|yes|Fish Old|5-10|70%|type1=Water}}
| |
| {{Catch/entry3|072|Tentacool|no|no|yes|Fish Old|5-10|30%|type1=Water|type2=Poison}}
| |
| {{Catch/entry3|129|Magikarp|no|no|yes|Fish Good|10-30|60%|type1=Water}}
| |
| {{Catch/entry3|072|Tentacool|no|no|yes|Fish Good|10-30|20%|type1=Water|type2=Poison}}
| |
| {{Catch/entry3|320|Wailmer|no|no|yes|Fish Good|10-30|20%|type1=Water}}
| |
| {{Catch/entry3|320|Wailmer|no|no|yes|Fish Super|20-45|100%|type1=Water}}
| |
| {{Catch/footer|road}}
| |
| |} | | |} |
| | | {| class="expandable" style="margin: auto; background: #{{locationcolor/med|cave}}; {{roundy}}; border: 5px solid #{{locationcolor/light|cave}};" |
| {| class="expandable" align="center" style="background: #{{emerald color light}}; {{roundy}} border: 5px solid #{{emerald color}};" | |
| |- align="center" | | |- align="center" |
| ! Items | | ! Items |
| |- | | |- |
| | | | | |
| {{itlisth|road}} | | {{itlisth|cave}} |
| {{Itemlist|Soothe Bell|Obtained from a woman in Pokémon Fan Club if the player's lead Pokémon has high [[friendship]]|E=yes|display={{DL|Out-of-battle effect item|Soothe Bell}}}} | | {{catch/div|cave|1F}} |
| {{Itemlist|Red Scarf|Obtained from a man in Pokémon Fan Club if the player's lead Pokémon has maxed out {{OBP|Cool|condition}}ness|E=yes|display={{DL|Scarf|Red Scarf}}}} | | {{itemlist|HM Normal|From a Hiker near the entrance|E=yes|display={{HM|05|Flash}}}} |
| {{Itemlist|Blue Scarf|Obtained from a man in Pokémon Fan Club if the player's lead Pokémon has maxed out {{OBP|Beautiful|condition|Beauty}}|E=yes|display={{DL|Scarf|Blue Scarf}}}} | | {{itemlist|Escape Rope|West of the entrance|E=yes}} |
| {{Itemlist|Pink Scarf|Obtained from a man in Pokémon Fan Club if the player's lead Pokémon has maxed out {{OBP|Cute|condition}}ness|E=yes|display={{DL|Scarf|Pink Scarf}}}} | | {{itemlist|TM Steel|From Steven, after delivering the {{key|III|Letter}} to him|E=yes|display={{TM|47|Steel Wing}}}} |
| {{Itemlist|Green Scarf|Obtained from a man in Pokémon Fan Club if the player's lead Pokémon has maxed out {{OBP|Clever|condition}}ness|E=yes|display={{DL|Scarf|Green Scarf}}}} | | {{catch/div|cave|B1F}} |
| {{Itemlist|Yellow Scarf|Obtained from a man in Pokémon Fan Club if the player's lead Pokémon has maxed out {{OBP|Tough|condition}}ness|E=yes|display={{DL|Scarf|Yellow Scarf}}}} | | {{itemlist|Poké Ball|Dead-end tunnel on the south side|E=yes|display={{ball|Poké}}}} |
| {{Itemlist|none|sprite=Effort Ribbon|From the woman next to the Energy Guru, if the player's lead Pokémon has 510 [[Effort values]]|E=yes|display={{DL|List of Ribbons in the games|Effort Ribbon}}}}
| | {{catch/div|cave|B2F}} |
| {{Itemlist|Powder Jar|Obtained from a woman in the upper-right market stall|E=yes|display={{key|III|Powder Jar}}}}
| | {{itemlist|Everstone| |
| {{Itemlist|Deep Sea Tooth|Obtained from Captain Stern in exchange for the {{key|III|Scanner}} (choice between this or the {{DL|Evolution-inducing held item|Deep Sea Scale|DeepSeaScale}})|E=yes|display={{DL|Evolution-inducing held item|Deep Sea Tooth|DeepSeaTooth}}}} | | * South side; in the rock on the upper platform (hidden) |
| {{Itemlist|Deep Sea Scale|Obtained from Captain Stern in exchange for the Scanner (choice between this or the {{DL|Evolution-inducing held item|Deep Sea Tooth|DeepSeaTooth}})|E=yes|display={{DL|Evolution-inducing held item|Deep Sea Scale|DeepScaleSea}}}} | | * North side; in the rock near the Rare Candy (hidden, requires {{key|III|Mach Bike}})|E=yes|display=[[Everstone]] ×2}} |
| {{itlistfoot|road}} | | {{itemlist|Repel|North side; northwest corner (requires {{key|III|Mach Bike}})|E=yes|display={{DL|Repel|Repel}}}} |
| | {{itemlist|Rare Candy|North side; northeast corner (requires {{key|III|Mach Bike}})|E=yes|display={{DL|Vitamin|Rare Candy}}}} |
| | {{itlistfoot|cave}} |
| |} | | |} |
|
| |
|
| When you arrive in {{ci|Slateport}}, go to [[Stern's Shipyard]] and talk to [[Dock]]. He asks you to find [[Captain Stern]] and give him the {{DL|List of key items in Generation III|Devon Goods}}. If you try to go to {{rt|110|Hoenn}} in the north, you will find the road blocked by [[Team Aqua]]! But it's okay, because there are lots of things to do here in the city.
| |
|
| |
|
| The [[Name Rater]] is in a house in the northern part of the city.
| | ====1F==== |
| | Speak to the Hiker near the entrance to receive {{HM|05|Flash}}. Head west to find an [[Escape Rope]], then climb down the ladder to B1F. |
|
| |
|
| Also a person in the [[Pokémon Fan Club]] will give you the {{DL|Out-of-battle effect item|Soothe Bell}} if your lead Pokémon has high [[happiness]]. There may be a TV reporter here waiting for an interview. These reporters are all around [[Hoenn]], wanting interviews! After an interview, go to a TV and watch the interview broadcast! The fan club president will give you a [[scarf]] if your lead Pokémon has maxed out a stat for a [[Pokémon Contest]]. Also here is a tutor who will teach a compatible Pokémon {{m|Swagger}} one time only.
| | ====B1F==== |
| | Go northeast until you reach a {{DL|Bike obstacles|Muddy slopes|muddy slope}}, then collect the {{ball|Poké}} from the dead-end tunnel to the south. Continue moving to the southeast and take the ladder down to B2F. |
|
| |
|
| ===Slateport Market=== | | ====B2F==== |
| The Slateport market to the southwest can be quite useful and has four sections:
| | Head southwest to a group of {{m|Rock Smash|cracked rocks}}, then climb onto the upper level. Turn northeast and inspect the rock on the center platform for a hidden [[Everstone]] before taking the ladder back up to B1F. |
| *[[Pokémon doll|Dolls]] can be bought from the doll shop in the bottom-left corner and will automatically be transported to your PC for later use. Dolls are decorations that can be placed inside your [[Secret Base]].
| |
| *As you know, [[TM]]s are neat little one-time use only machines for teaching Pokémon moves. These are available from the shopkeeper in the middle-right section that only appears after you obtains {{TM|43|Secret Power}} on {{rt|111|Hoenn}}.
| |
| *The Energy Guru sells [[vitamin]]s to boost you [[Pokémon]]'s [[stats]]! Unfortunately, they are quite expensive.
| |
| *The Secret Power Club sells items with which to decorate your Secret Base! They are fun to use; however, you need a Pokémon that knows TM43 (Secret Power) to make a Secret Base. This shop will remain closed until you obtain Secret Power.
| |
|
| |
|
| ===Name Rater=== | | ====B1F==== |
| The Name Rater allows Trainers to change the nickname of any Pokémon they captured or received in-game. If the Pokémon he's judging is an [[outsider Pokémon]] (if it was originally obtained in a different game, via an {{pkmn|event}}, or via an [[in-game trade]]), he refuse to change it. However, if both players have identical [[Trainer ID number|Trainer IDs and secret IDs]] (which is extremely unlikely), he will allow name changes.
| | Climb the next ladder back up to the north side of 1F. |
|
| |
|
| ===Oceanic Museum=== | | ====1F==== |
| {| class="expandable" align="center" style="background: #{{emerald color light}}; {{roundy}} border: 5px solid #{{emerald color}};"
| | Follow the tunnel all the way to the west, then turn south to reach an isolated chamber. |
| |- align="center"
| |
| ! Trainers
| |
| |-
| |
| |
| |
| {{trainerheader|building}}
| |
| {{trainerentry|Spr RS Team Aqua Grunt M.png|Team Aqua Grunt||300|1|318|Carvanha|♂|15|no|}}
| |
| {{trainerdiv|building}}
| |
| {{trainerentry|Spr RS Team Aqua Grunt M.png|Team Aqua Grunt||280|2|041|Zubat|♂|14|no|318|Carvanha|♂|14|no|}}
| |
| {{trainerfooter|building|3}}
| |
| |}
| |
| {| class="expandable" align="center" style="background: #{{emerald color light}}; {{roundy}} border: 5px solid #{{emerald color}};"
| |
| |- align="center"
| |
| ! Items
| |
| |-
| |
| |
| |
| {{itlisth|building}}
| |
| {{Itemlist|TM Dark VI|1F, from a {{tc|Team Aqua Grunt}}|E=yes|display={{TM|46|Thief}}}}
| |
| {{itlistfoot|building}}
| |
| |}
| |
|
| |
|
| Go to the [[Oceanic Museum]]. The entrance fee is {{pdollar}}50 (but if you have less than that, you'll be given free admission). Talk to all of the [[Team Aqua Grunt]]s— one is the guy who you defeated earlier and will give you {{TM|46|Thief}}. Go upstairs to find [[Captain Stern]]. Just as you are about to give him the Devon Goods, two more grunts will attack in two separate battles. After you defeat them, you will meet [[Archie]], the leader of Team Aqua. He will tell you not to interfere with his plans again, and then Team Aqua will leave Slateport City. After you finally give Captain Stern the Devon Goods, you will be approached by a [[Scott]] outside of the museum. He says that he is searching for tough Trainers and will register himself in your [[PokéNav]] before leaving.
| | ====1F (Back)==== |
| | In the rear chamber, you find {{steven}} researching rare stones. Give him the {{key|III|Letter}} from [[Mr. Stone]] to complete your mission, and Steven gives you [[TM47|the TM]] for his favorite move, {{m|Steel Wing}}, in return. |
|
| |
|
| ===Battle Tent=== | | ==Dewford Town== |
| [[File:Slateport City Battle Tent E.png|thumb|200px]] | | Talk to [[Mr. Briney]] on the pier to inform him of your successful delivery, and the two of you, along with [[Peeko]], set sail at once. [[Mr. Stone]] still needs you to deliver the {{key|III|Devon Goods}} to [[Captain Stern]], so now it's on to [[Slateport City]]! |
| {{sign|E|header}} | |
| {{sign|E|BATTLE TENT SLATEPORT SITE}}
| |
| {{sign|E|"Find it! The ultimate POKÉMON!"}}
| |
| {{sign|E|footer}}
| |
|
| |
|
| {| class="expandable" align="center" style="background: #{{emerald color light}}; {{roundy}} border: 5px solid #{{emerald color}};"
| | ==Routes 107 and 108== |
| |- align="center"
| | [[File:Hoenn Route 107 E.png|thumb|left|Route 107]] |
| ! Items
| | [[File:Hoenn Route 108 E.png|thumb|Route 108]] |
| |-
| |
| |
| |
| {{itlisth|building}}
| |
| {{Itemlist|TM Dark VI|Obtained from a {{tc|Sailor}} in the Battle Tent|E=yes|display={{TM|41|Torment}}}}
| |
| {{Itemlist|Full Heal|Reward for completing the Battle Tent|E=yes|display={{DL|Status ailment healing item|Full Heal}}}}
| |
| {{itlistfoot|building}}
| |
| |}
| |
| There are three [[Battle Tent]]s around Hoenn, each with different twists on Pokémon battling. Scott will come out of the Battle Tent if you try to go in and urge you to take the challenge. In this Battle Tent, you will have your Pokémon taken away for safekeeping. Then you will choose three Pokémon out of six choices to "rent", all level 30. You will use those rentals to battle a {{pkmn|Trainer}} who also has three level 30 Pokémon. After the battle, you will be asked if you would like to switch one of your rental Pokémon for a Pokémon you battled against. Then you will battle again, are asked again if you would like to switch, and then have one last battle. You will only be allowed to go to the next battle if you have won the previous one. If you win three times in a row, you will be awarded a {{DL|Status ailment healing item|Full Heal}}.
| |
|
| |
|
| | Like with Routes {{rtn|105|Hoenn}} and {{rtn|106|Hoenn}}, there's no time to fully explore the area at the moment. There is little of interest on {{rt|107|Hoenn}}, but {{rt|108|Hoenn}} holds what remains of the half-sunken [[Abandoned Ship]]. |
|
| |
|
| Now that Team Aqua has left, you can go to {{rt|110|Hoenn}}, where your rival is waiting. Remember to buy a piece of {{DL|Mail|Harbor Mail}} for {{pdollar}}50 before leaving the city, you'll need to trade that to someone later on.
| |
|
| |
|
|
| |
|
| {{WalkthroughPrevNext | | | {{WalkthroughPrevNext |
| game=Emerald | | | |game=Emerald |
| game2=Emerald |
| | |gamename=Emerald |
| gamename=Emerald| | | |prevsection=2 |
| prev=yes |
| | |prevname=Route 104, Petalburg Woods, Rustboro City, Route 116, Rusturf Tunnel |
| next=yes |
| | |nextsection=4 |
| prevsection=2 | | | |nextname=Route 109, Slateport City, Route 103, Route 110 |
| nextsection=4 |
| |
| prevname=Route 104, Petalburg Woods, Rustboro City, Route 115, Rustboro Gym, Route 116, Rusturf Tunnel | | |
| nextname=Route 110, Trick House, Route 103, Mauville City, Mauville Game Corner, Route 118, Mauville Gym | |
| }} | | }} |
|
| |
|

