|
|
| (48 intermediate revisions by 22 users not shown) |
| Line 1: |
Line 1: |
| ==Safari Zone== | | ==Routes 132, 133, and 134 (optional)== |
| [[File:Hoenn Safari Zone numbered E.png|180px|thumb|The six areas of the Safari Zone]] | | [[File:Hoenn Route 132 RSE.png|thumb|Route 132]] |
| Now that you've become Champion, head back to the {{safari|Hoenn}} to gain access to Areas 5 and 6 and get new items and catch new [[Generation II Pokémon]] for your National Pokédex quest.
| | [[File:Hoenn Route 133 RSE.png|thumb|Route 133]] |
| | [[File:Hoenn Route 134 RS.png|thumb|Route 134]] |
|
| |
|
| ===Area 5===
| | The waters of Routes {{rtn|132|Hoenn}}, {{rtn|133|Hoenn}}, and {{rtn|134|Hoenn}} hold strong ocean currents that make travel difficult. While moving primarily westbound, these currents can send you sailing in almost any direction. This makes it necessary to revisit the area in order to explore every island. |
| {| class="expandable" style="margin:auto; width:auto; background: #{{emerald color light}}; {{roundy|10px}}; border: 5px solid #{{emerald color}};" | | |
| |- style="text-align:center" | | {| class="expandable" style="margin: auto; background: #{{locationcolor/med|ocean}}; {{roundy}}; border: 5px solid #{{locationcolor/light|ocean}};" |
| ! Items | | |- align="center" |
| |- | | ! Trainers |
| | |- |
| | | | | |
| {{Itlisth}}
| | {| class="expandable" style="margin: auto; background: #{{locationcolor/med|ocean}}; {{roundy}}; border: 5px solid #{{locationcolor/light|ocean}};" |
| {{itemlist|PP Up|Hidden three squares south of the southernmost Pokéblock stand|E=yes|display={{DL|Vitamin|PP Up}}}}
| | |- align="center" |
| {{itemlist|Full Restore|Hidden amongst the furthest southeast patch of grass|E=yes|display={{DL|Potion|Full Restore}}}}
| | ! Route 132 |
| {{itemlist|Big Pearl|East in a patch of grass beyond the top of the waterfall|E=yes|display={{DL|Valuable item|Big Pearl}}}}
| | |- |
| {{Itlistfoot}}
| |
| |}
| |
| | |
| {| class="expandable" style="margin:auto; width:auto; background: #{{emerald color light}}; {{roundy|10px}}; border: 5px solid #{{emerald color}};" | |
| |- style="text-align:center" | |
| ! Available Pokémon | |
| |- | |
| | | | | |
| {{catch/header|land|no}} | | {{trainerheader|ocean}} |
| {{Catch/entry3|163|Hoothoot|no|no|yes|Grass|35|5%|type1=Normal|type2=Flying}} | | {{trainerentry|Spr RS Swimmer M.png|Swimmer|Gilbert|272|1|319|Sharpedo|♂|34|}} |
| {{Catch/entry3|167|Spinarak|no|no|yes|Grass|33|10%|type1=Bug|type2=Poison}} | | {{trainerdiv|ocean}} |
| {{Catch/entry3|179|Mareep|no|no|yes|Grass|34-36|30%|type1=Electric}} | | {{trainerentry|Spr RS Swimmer F.png|Swimmer|Dana|272|1|184|Azumarill|♀|34|}} |
| {{Catch/entry3|190|Aipom|no|no|yes|Grass|34|10%|type1=Normal}} | | {{trainerdiv|ocean}} |
| {{Catch/entry3|191|Sunkern|no|no|yes|Grass|33-35|30%|type1=Grass}} | | {{trainerentry|Spr RS Fisherman.png|Fisherman|Ronald|1400|6|129|Magikarp|♂|19||130|Gyarados|♂|21||130|Gyarados|♂|23||130|Gyarados|♂|26||130|Gyarados|♂|30||130|Gyarados|♂|35|}} |
| {{Catch/entry3|207|Gligar|no|no|yes|Grass|37-40|5%|type1=Ground|type2=Flying}}
| | {{trainerdiv|ocean}} |
| {{Catch/entry3|209|Snubbull|no|no|yes|Grass|34|5%|type1=Normal}}
| | {{trainerentry|Spr RS Black Belt.png|Black Belt|Kiyo|1088|1|297|Hariyama|♂|34|}} |
| {{Catch/entry3|234|Stantler|no|no|yes|Grass|36-39|5%|type1=Normal}}
| | {{trainerdiv|ocean}} |
| {{catch/div|water|Surfing}} | | {{trainerentry|Spr RS Expert M.png|Expert|Paxton|1320<br><small>Potential [[Double Battle]] with Darcy</small>|2|277|Swellow|♂|33||286|Breloom|♂|33|}} |
| {{Catch/entry3|183|Marill|no|no|yes|Surf|25-35|39%|type1=Water}} | | {{trainerdiv|ocean}} |
| {{Catch/entry3|194|Wooper|no|no|yes|Surf|25-30|60%|type1=Water|type2=Ground}} | | {{trainerentry|Spr RS Cooltrainer F.png|Cooltrainer|Darcy|1584<br><small>Potential [[Double Battle]] with Paxton</small>|2|279|Pelipper|♀|33||323|Camerupt|♀|33|}} |
| {{Catch/entry3|195|Quagsire|no|no|yes|Surf|35-40|1%|type1=Water|type2=Ground}} | | {{trainerdiv|ocean}} |
| {{catch/div|water|Fishing}} | | {{trainerentry|Spr RS Expert F.png|Expert|Makayla|1320<br><small>Potential [[Double Battle]] with Jonathan</small>|2|315|Roselia|♀|33||308|Medicham|♀|33|}} |
| {{Catch/entry3|118|Goldeen|no|no|yes|Fish Old|5-10|30%|type1=Water}} | | {{trainerdiv|ocean}} |
| {{Catch/entry3|129|Magikarp|no|no|yes|Fish Old|5-10|70%|type1=Water}}
| | {{trainerentry|Spr RS Cooltrainer M.png|Cooltrainer|Jonathan|1584<br><small>Potential [[Double Battle]] with Makayla</small>|2|352|Kecleon|♂|33||294|Loudred|♂|33|}} |
| {{Catch/entry3|118|Goldeen|no|no|yes|Fish Good|10-30|20%|type1=Water}} | | {{trainerfooter|ocean|3}} |
| {{Catch/entry3|129|Magikarp|no|no|yes|Fish Good|10-30|60%|type1=Water}} | |
| {{Catch/entry3|223|Remoraid|no|no|yes|Fish Good|10-30|20%|type1=Water}}
| |
| {{Catch/entry3|118|Goldeen|no|no|yes|Fish Super|25-30|40%|type1=Water}} | |
| {{Catch/entry3|223|Remoraid|no|no|yes|Fish Super|25-35|59%|type1=Water}} | |
| {{Catch/entry3|224|Octillery|no|no|yes|Fish Super|35-40|1%|type1=Water}}
| |
| {{catch/footer|land}} | |
| |} | | |} |
| | | {| class="expandable" style="margin: auto; background: #{{locationcolor/med|ocean}}; {{roundy}}; border: 5px solid #{{locationcolor/light|ocean}};" |
| ===Area 6===
| | |- align="center" |
| {| class="expandable" style="margin:auto; width:auto; background: #{{emerald color light}}; {{roundy|10px}}; border: 5px solid #{{emerald color}};" | | ! Route 133 |
| |- style="text-align:center" | | |- |
| ! Items | |
| |- | |
| | | | | |
| {{Itlisth}} | | {{trainerheader|ocean}} |
| {{itemlist|Rare Candy|In the southeast portion of the area there is a 2×3 patch of light green grass, where it is hidden in the lower right portion of it|E=yes|display={{DL|Vitamin|Rare Candy}}}} | | {{trainerentry|Spr RS Swimmer F.png|Swimmer|Linda|264|2|116|Horsea|♀|33||117|Seadra|♀|33|}} |
| {{itemlist|Zinc|In a small nook among the wall in the rocky path to the north ''(hidden)''|E=yes|display={{DL|Vitamin|Zinc}}}} | | {{trainerdiv|ocean}} |
| {{itemlist|Nugget|Between two ledges at the end of the rocky path to the west|E=yes|display={{DL|Valuable item|Nugget}}}} | | {{trainerentry|Spr RS Bird Keeper.png|Bird Keeper|Beck|1088|1|357|Tropius|♂|34|}} |
| {{Itlistfoot}} | | {{trainerdiv|ocean}} |
| | {{trainerentry|Spr RS Expert M.png|Expert|Conor|1320<br><small>Potential [[Double Battle]] with Mollie</small>|2|170|Chinchou|♂|33||297|Hariyama|♂|33|}} |
| | {{trainerdiv|ocean}} |
| | {{trainerentry|Spr RS Expert F.png|Expert|Mollie|1320<br><small>Potential [[Double Battle]] with Conor</small>|2|340|Whiscash|♀|33||307|Meditite|♀|33|}} |
| | {{trainerdiv|ocean}} |
| | {{trainerentry|Spr RS Cooltrainer M.png|Cool Trainer|Warren|1584|2|075|Graveler|♂|33||272|Ludicolo|♂|33|}} |
| | {{trainerdiv|ocean}} |
| | {{trainerentry|Spr RS Swimmer F.png|Swimmer|Debra|272<br><small>Potential [[Double Battle]] with Franklin</small>|1|119|Seaking|♀|34|}} |
| | {{trainerdiv|ocean}} |
| | {{trainerentry|Spr RS Swimmer M.png|Swimmer|Franklin|272<br><small>Potential [[Double Battle]] with Debra</small>|1|364|Sealeo|♂|34|}} |
| | {{trainerfooter|ocean|3}} |
| |} | | |} |
| | | {| class="expandable" style="margin: auto; background: #{{locationcolor/med|ocean}}; {{roundy}}; border: 5px solid #{{locationcolor/light|ocean}};" |
| {| class="expandable" style="margin:auto; width:auto; background: #{{emerald color light}}; {{roundy|10px}}; border: 5px solid #{{emerald color}};" | | |- align="center" |
| |- style="text-align:center" | | ! Route 134 |
| ! Available Pokémon | | |- |
| |- | |
| | | | | |
| {{catch/header|land|no}} | | {{trainerheader|ocean}} |
| {{Catch/entry3|163|Hoothoot|no|no|yes|Grass|35|5%|type1=Normal|type2=Flying}} | | {{trainerentry|Spr RS Swimmer F.png|Swimmer|Laurel|264|2|370|Luvdisc|♀|33||370|Luvdisc|♀|33|}} |
| {{Catch/entry3|165|Ledyba|no|no|yes|Grass|33|10%|type1=Bug|type2=Flying}}
| | {{trainerdiv|ocean}} |
| {{Catch/entry3|190|Aipom|no|no|yes|Grass|33-35|30%|type1=Normal}} | | {{trainerentry|Spr RS Swimmer M.png|Swimmer|Jack|272|1|130|Gyarados|♂|34|}} |
| {{Catch/entry3|191|Sunkern|no|no|yes|Grass|34|10%|type1=Grass}} | | {{trainerdiv|ocean}} |
| {{Catch/entry3|204|Pineco|no|no|yes|Grass|34|5%|type1=Bug}}
| | {{trainerentry|Spr RS Black Belt.png|Black Belt|Hitoshi|1024<br><small>Potential [[Double Battle]] with Reyna</small>|2|066|Machop|♂|32||067|Machoke|♂|32|}} |
| {{Catch/entry3|216|Teddiursa|no|no|yes|Grass|34-36|30%|type1=Normal}} | | {{trainerdiv|ocean}} |
| {{Catch/entry3|228|Houndour|no|no|yes|Grass|36-39|5%|type1=Dark|type2=Fire}} | | {{trainerentry|Spr RS Battle Girl.png|Battle Girl|Reyna|792<br><small>Potential [[Double Battle]] with Hitoshi</small>|2|307|Meditite|♀|33||297|Hariyama|♂|33|}} |
| {{Catch/entry3|241|Miltank|no|no|yes|Grass|37-40|5%|type1=Normal}}
| | {{trainerdiv|ocean}} |
| {{catch/div|land|Rock Smash}} | | {{trainerentry|Spr RS Sailor.png|Sailor|Hudson|1088|1|320|Wailmer|♂|34|}} |
| {{Catch/entry3|213|Shuckle|no|no|yes|Rock Smash|20-40|100%|type1=Bug|type2=Rock}} | | {{trainerdiv|ocean}} |
| {{catch/footer|land}} | | {{trainerentry|Spr RS Dragon Tamer.png|Dragon Tamer|Aaron|1632<br><small>[[Double Battle]] with Marley</small>|1|371|Bagon|♂|34|}} |
| |}
| | {{trainerdiv|ocean}} |
| | | {{trainerentry|Spr RS Cooltrainer F.png|Cooltrainer|Marley|1632<br><small>[[Double Battle]] with Aaron</small>|1|310|Manectric|♀|34|}} |
| == Steven's gift ==
| | {{trainerdiv|ocean}} |
| | | {{trainerentry|Spr RS Bird Keeper.png|Bird Keeper|Alex|1056<br><small>Potential [[Double Battle]] with Kelvin</small>|2|177|Natu|♂|33||277|Swellow|♂|33|}} |
| Go to [[Steven Stone]]'s house on the far west side of [[Mossdeep City]]. Enter it to find a note left for you on the table. It says that he has gone on a journey and is leaving a {{p|Beldum}}, his favorite Pokémon, as a gift for you. A [[Poké Ball]] next to the note contains a Level 5 Beldum.
| | {{trainerdiv|ocean}} |
| | | {{trainerentry|Spr RS Sailor.png|Sailor|Kelvin|1056<br><small>Potential [[Double Battle]] with Alex</small>|2|067|Machoke|♂|33||363|Spheal|♂|33|}} |
| ==Catching the Eon Duo==
| | {{trainerfooter|ocean|3}} |
| Upon returning home, a TV show will play and your [[Mom#Hoenn|mother]] will ask the color of the Pokémon that appeared on TV. Selecting "Red" will cause {{p|Latias}} to [[Roaming Pokémon#Hoenn|roam Hoenn]], while selecting "Blue" will cause {{p|Latios}} to roam Hoenn instead. When in possession of the [[Eon Ticket]] event item, the other part of the duo will be accessible at [[Southern Island]]. The non-roaming Latias has better defensive stats than Latios, but the blue Eon's attacking stats are better. Catching these Pokémon is not an easy task; they can be found in any random grass patch and will attempt to [[escape]] in every turn of the battle. These Pokémon are probably the best one to use your [[Master Ball]] on but if you already used yours or you don't want to, there are some strategies you can utilize. One strategy is to use {{m|Mean Look}} so the Pokémon can't escape. However, the Eon duo are fast and your Pokémon needs to be faster in order to use the move before it escapes so speedy Pokémon like {{p|Gengar}} and {{p|Crobat}} are recommended. Another strategy is to send out a Pokémon with the ability [[Arena Trap (Ability)|Arena Trap]]. However, the only Pokémon in Emerald that has this ability is the fragile {{p|Trapinch}} so unless you're willing to raise this Pokémon's level to the 40's or 50's without evolving it or trade a {{p|Dugtrio}} over from {{game|FireRed and LeafGreen|s}}, the former is probably the best option.
| |
| | |
| {|-
| |
| | style="verticle-align:top" |
| |
| {{Pokémon | |
| |gen=3 | |
| |game=Emerald | |
| |ndex=380 | |
| |pokemon=Latias | |
| |type1=Dragon | |
| |type2=Psychic | |
| |level=40 | |
| |gender=female | |
| |ability=Levitate | |
| |move1=Water Sport|move1type=Water | |
| |move2=Refresh|move2type=Normal | |
| |move3=Mist Ball|move3type=Psychic | |
| |move4=Psychic|move4type=Psychic}} | |
| | style="verticle-align:top" |
| |
| {{Pokémon | |
| |gen=3 | |
| |game=Emerald | |
| |ndex=381 | |
| |pokemon=Latios | |
| |type1=Dragon | |
| |type2=Psychic | |
| |level=40 | |
| |gender=male | |
| |ability=Levitate | |
| |move1=Protect|move1type=Normal | |
| |move2=Refresh|move2type=Normal | |
| |move3=Luster Purge|move3type=Psychic | |
| |move4=Psychic|move4type=Psychic}} | |
| |} | | |} |
|
| |
| Walk around in any grass patch in Hoenn and if you are lucky, you might encounter Latias/Latios! Alternatively, you can use the techniques described in [[Roaming Pokémon#Tracking|Roaming Pokémon]].
| |
|
| |
| ==Desert Underpass==
| |
| [[File:Desert Underpass E.png|thumb|270px|Desert Underpass]]
| |
| {| class="expandable" style="margin:auto; width:auto; background: #{{emerald color light}}; {{roundy|10px}}; border: 5px solid #{{emerald color}};"
| |
| |- style="text-align:center"
| |
| ! Items
| |
| |-
| |
| |
| |
| {{Itlisth|cave}}
| |
| {{itemlist|Claw Fossil|At the far end of the cave{{tt|*|appears if the Root Fossil is chosen at the Mirage Tower}}|E=yes|display=[[Root and Claw Fossils|Claw Fossil]]}}
| |
| {{itemlist|Root Fossil|At the far end of the cave{{tt|*|appears if the Claw Fossil is chosen at the Mirage Tower}}|E=yes|display=[[Root and Claw Fossils|Root Fossil]]}}
| |
| {{Itlistfoot|cave}}
| |
| |} | | |} |
| {| class="expandable" style="margin:auto; width:auto; background: #{{emerald color light}}; {{roundy|10px}}; border: 5px solid #{{emerald color}};" | | {| class="expandable" style="margin: auto; background: #{{locationcolor/med|ocean}}; {{roundy}}; border: 5px solid #{{locationcolor/light|ocean}};" |
| |- style="text-align:center" | | |- align="center" |
| ! Available Pokémon | | ! Available Pokémon |
| |- | | |- |
| | | | | |
| {{catch/header|cave|no}} | | {{Catch/header|ocean|no}} |
| {{catch/entry3|132|Ditto|no|no|yes|Cave|38-45|50%|type1=Normal}} | | {{Catch/div|ocean|Surfing}} |
| {{catch/entry3|293|Whismur|no|no|yes|Cave|35-38|34%|type1=Normal}} | | {{Catch/entry3|072|Tentacool|no|no|yes|Surf|5-35|60%|type1=Water|type2=Poison}} |
| {{catch/entry3|294|Loudred|no|no|yes|Cave|38-44|16%|type1=Normal}} | | {{Catch/entry3|278|Wingull|no|no|yes|Surf|10-30|35%|type1=Water|type2=Flying}} |
| {{catch/footer|cave}} | | {{Catch/entry3|279|Pelipper|no|no|yes|Surf|25-30|5%|type1=Water|type2=Flying}} |
| | {{Catch/div|ocean|Fishing}} |
| | {{Catch/entry3|129|Magikarp|no|no|yes|Fish Old|5-10|70%|type1=Water}} |
| | {{Catch/entry3|072|Tentacool|no|no|yes|Fish Old|5-10|30%|type1=Water|type2=Poison}} |
| | {{Catch/entry3|129|Magikarp|no|no|yes|Fish Good|10-30|60%|type1=Water}} |
| | {{Catch/entry3|072|Tentacool|no|no|yes|Fish Good|10-30|20%|type1=Water|type2=Poison}} |
| | {{Catch/entry3|320|Wailmer|no|no|yes|Fish Good|10-30|20%|type1=Water}} |
| | {{Catch/entry3|320|Wailmer|no|no|yes|Fish Super|30-45|45%|type1=Water}} |
| | {{Catch/entry3|319|Sharpedo|no|no|yes|Fish Super|30-35|40%|type1=Water|type2=Dark}} |
| | {{Catch/entry3|116|Horsea|no|no|yes|Fish Super|25-30|15%|type1=Water}} |
| | {{Catch/footer|ocean}} |
| |} | | |} |
|
| |
|
| Remember the fossil guy on [[Route 114]] that gave you [[TM28]] ({{m|Dig}})? Well, revisit his house and go back to that long tunnel. You will find that there is a new cave. Enter it and you're now in the [[Desert Underpass]]! The Desert Underpass is the only place where wild {{p|Ditto}} can be found. They can only learn one move, {{m|Transform}}. However, Ditto is extremely useful if you want to breed Pokémon. Also, remember the fossil that crumbled along with the [[Mirage Tower]]? It's there at the very end of the cave!
| | {| class="expandable" style="margin: auto; background: #{{locationcolor/med|ocean}}; {{roundy}}; border: 5px solid #{{locationcolor/light|ocean}};" |
| | | |- align="center" |
| ==Trick House==
| |
| ''Main Article: [[Trick House]]''
| |
| [[File:Trick House RSE.png|thumb|The Trick House is right next to Cycling Road.]]
| |
| | |
| If you haven't visited it yet, there is a place called the Trick House on [[Route 110]] near [[Slateport City]]. There will be a man called the Trick Master hiding somewhere in the house and upon finding him, you will get to enter a maze-like puzzle. Some puzzles require HMs and all of them are pretty tricky, but you'll get rewarded at the end. The Trick House can be challenged up to 8 times.
| |
| | |
| ==Battle with Steven==
| |
| Go to [[Meteor Falls]], a large cave west of [[Fallarbor Town]] with a waterfall inside. Navigate through the cave to find [[Steven Stone]] deep inside. When talked to he will battle with you. Watch out though, his Pokémon are considerably stronger than the {{pkmn|Champion}}'s.
| |
| | |
| {{Party
| |
| |color={{steel color}}
| |
| |headcolor={{steel color light}}
| |
| |bordercolor={{steel color dark}}
| |
| |sprite=Spr RS Steven.png
| |
| |prize={{Pdollar}}4680
| |
| |class=Pokémon Trainer
| |
| |name=Steven
| |
| |game=E
| |
| |location=Meteor Falls
| |
| |pokemon=6
| |
| |pokemon1={{Pokémon/3
| |
| |game=Emerald
| |
| |ndex=227
| |
| |pokemon=Skarmory
| |
| |gender=male
| |
| |level=77
| |
| |type1=Steel|type2=Flying
| |
| |ability=Keen Eye
| |
| |move1=Toxic|move1type=Poison
| |
| |move2=Spikes|move2type=Ground
| |
| |move3=Steel Wing|move3type=Steel
| |
| |move4=Aerial Ace|move4type=Flying}}
| |
| |pokemon2={{Pokémon/3
| |
| |game=Emerald
| |
| |ndex=344
| |
| |pokemon=Claydol
| |
| |level=75
| |
| |type1=Ground|type2=Psychic
| |
| |ability=Levitate
| |
| |move1=Earthquake|move1type=Ground
| |
| |move2=AncientPower|move2type=Rock
| |
| |move3=Light Screen|move3type=Psychic
| |
| |move4=Reflect|move4type=Psychic}}
| |
| |pokemon3={{Pokémon/3
| |
| |game=Emerald
| |
| |ndex=346
| |
| |pokemon=Cradily
| |
| |gender=male
| |
| |level=76
| |
| |type1=Rock|type2=Grass
| |
| |ability=Suction Cups
| |
| |move1=Confuse Ray|move1type=Ghost
| |
| |move2=Ingrain|move2type=Grass
| |
| |move3=AncientPower|move3type=Rock
| |
| |move4=Giga Drain|move4type=Grass}}
| |
| |pokemon4={{Pokémon/3
| |
| |game=Emerald
| |
| |ndex=348
| |
| |pokemon=Armaldo
| |
| |gender=male
| |
| |level=76
| |
| |type1=Rock|type2=Bug
| |
| |ability=Battle Armor
| |
| |move1=AncientPower|move1type=Rock
| |
| |move2=Aerial Ace|move2type=Flying
| |
| |move3=Water Pulse|move3type=Water
| |
| |move4=Slash|move4type=Normal}}
| |
| |pokemon5={{Pokémon/3
| |
| |game=Emerald
| |
| |ndex=306
| |
| |pokemon=Aggron
| |
| |gender=male
| |
| |level=76
| |
| |type1=Steel|type2=Rock
| |
| |ability=Sturdy
| |
| |move1=Earthquake|move1type=Ground
| |
| |move2=Dragon Claw|move2type=Dragon
| |
| |move3=SolarBeam|move3type=Grass
| |
| |move4=Thunder|move4type=Electric}}
| |
| |pokemon6={{Pokémon/3
| |
| |game=Emerald
| |
| |ndex=376
| |
| |pokemon=Metagross
| |
| |level=78
| |
| |type1=Steel|type2=Psychic
| |
| |held=Sitrus Berry
| |
| |ability=Clear Body
| |
| |move1=Meteor Mash|move1type=Steel
| |
| |move2=Earthquake|move2type=Ground
| |
| |move3=Shadow Ball|move3type=Ghost
| |
| |move4=Psychic|move4type=Psychic}}
| |
| }}
| |
| | |
| | |
| ==S.S. Tidal==
| |
| ''Main Article: [[S.S. Tidal]]''
| |
| | |
| With your S.S. Ticket, make your way to one of the ports at {{ci|Lilycove}} or {{ci|Slateport}}. Board the ship at the harbour and you will now be on board the S.S. Tidal! [[Scott]] will come and greet you and you can spend some time on the ship. Over here, you can collect [[Leftovers]] from a bin in the basement and someone in one of the cabins will give out {{TM|49|Snatch}}. Of course, there are trainers waiting to battle!
| |
| | |
| {| class="expandable" style="margin:auto; width:auto; background: #{{emerald color light}}; {{roundy|10px}}; border: 5px solid #{{emerald color}};" | |
| |- style="text-align:center" | |
| ! Items | | ! Items |
| |- | | |- |
| | | | | |
| {{itlisth|water}} | | {{itlisth|ocean}} |
| {{itemlist|TM Dark|Gift from [[non-player character]]|Ru=yes|Sa=yes|E=yes|III|display={{TM|49|Snatch}}}} | | {{catch/div|ocean|Route 132}} |
| {{itemlist|Leftovers|Hidden in trash can|Ru=yes|Sa=yes|E=yes|III|display={{DL|In-battle effect item|Leftovers}}}} | | {{itemlist|Rare Candy|North side of the northwest island|E=yes}} |
| {{itlistfoot|water}} | | {{itemlist|Protein|On the ring-shaped patch of shallow water in the southwest|E=yes}} |
| | {{catch/div|ocean|Route 133}} |
| | {{itemlist|Star Piece|North side of the northwest island|E=yes}} |
| | {{itemlist|Max Revive|Among the rocks in the large shallow water patch in the southeast|E=yes}} |
| | {{itemlist|Big Pearl|Southern of the two shallows in the northeast|E=yes}} |
| | {{catch/div|ocean|Route 134}} |
| | {{itemlist|Carbos|South side of the sandy part of the largest island|E=yes}} |
| | {{itemlist|Star Piece|Shallows in the southwest|E=yes}} |
| | {{itlistfoot|ocean}} |
| |} | | |} |
|
| |
|
| {| class="expandable" style="margin:auto; width:auto; background: #{{emerald color light}}; {{roundy|10px}}; border: 5px solid #{{emerald color}};"
| | ===Northern path=== |
| |- style="text-align:center"
| | Ride the central currents to Swimmer Gilbert, then sail westward to reach a [[Rare Candy]] opposite Black Belt Kiyo on the northwest island. From here, Surf westward through the northern shallows of Route 133 to reach the north side of the route's northwest island. Collect the [[Star Piece]] here, then sail west to the calm waters on Route 134's north side. Take the current south of here to reach the large, thin island. Fight Black Belt Hitoshi and Battle Girl Reyna, collect the nearby [[Carbos]], then Surf west to reach the shallows outside [[Slateport City]]. |
| ! Trainers
| |
| |-
| |
| |
| |
| {{trainerheader|water}}
| |
| {{Trainerentry|Spr RS Gentleman.png|Gentleman|Thomas|9000|1|335|Zangoose|♂|45|None}}
| |
| {{Trainerdiv|water}}
| |
| {{Trainerentry|Spr RS Rich Boy.png|Rich Boy|Garret|7200|1|184|Azumarill|♂|45|Nugget}}
| |
| {{Trainerdiv|water}}
| |
| {{Trainerentry|Spr RS Pokéfan M.png|Pokéfan|Colton|3360|6|300|Skitty|♀|22|Oran Berry|300|Skitty|♀|12|Oran Berry|300|Skitty|♀|30|Oran Berry|300|Skitty|♀|36|Oran Berry|300|Skitty|♀|40|Oran Berry|301|Delcatty|♀|42|Oran Berry}}
| |
| {{Trainerdiv|water}}
| |
| {{Trainerentry|Spr RS Gentleman.png|Gentleman|Tucker|8800|2|310|Manectric|♂|44|None|310|Manectric|♂|44|None}}
| |
| {{Trainerdiv|water}}
| |
| {{Trainerentry|Spr RS Young Couple.png|Young Couple|Lea & Jed|2520|2|370|Luvdisc|♀|45|None|370|Luvdisc|♂|45|None}}
| |
| {{Trainerdiv|water}}
| |
| {{Trainerentry|Spr RS Lady.png|Lady|Anette|7200|1|315|Roselia|♀|45|Nugget}}
| |
| {{Trainerfooter|water|RSE}}
| |
| | |
| {{trainerheader|water}}
| |
| {{Trainerentry|Spr RS Sailor.png|Sailor|Phillip|1408|2|073|Tentacruel|♂|44|None|067|Machoke|♂|44|None}}
| |
| {{Trainerdiv|water}}
| |
| {{Trainerentry|Spr RS Sailor.png|Sailor|Leonard|1376|3|066|Machop|♂|43|None|279|Pelipper|♂|43|None|067|Machoke|♂|43|None}}
| |
| {{Trainerfooter|water|RSE}}
| |
| |}
| |
|
| |
|
| After a while, the ship will dock. Exit the ship and board it once again. This time, choose to go to the Battle Frontier to hone your battling skills!
| | ===Central path=== |
| | Ride the southern currents to the southeast island to fight Fisherman Ronald. Wade into the waters off the north end of the shallows to follow the current to Black Belt Kiyo on the northwest island. Sail westward to ride the current to the southern of two shallows on Route 133, where you'll need to fight Experts Conor and Mollie before collecting the [[Big Pearl]] there. Continue westward to reach the south side of Route 133's northwest island, and battle Bird Keeper Beck. Sail west again to battle Sailor Hudson in the shallows of the large island. Head back into the water to follow the current to Slateport City. |
|
| |
|
| ==Battle Frontier== | | ===To the Depths=== |
| [[File:Battle Frontier E.png|300px|right|thumb|Battle Frontier]] | | Ride the southern currents to fight Fisherman Ronald on the crescent-shaped island, then sail westward to a calm patch of water surrounded by shallows. Grab the [[Protein]], then follow the currents westward to be funneled through a bottleneck; this leads to calm waters with two Swimmers, Debra and Franklin. Pass through the rocky southern islet, collecting the [[Max Revive]] along the way, to reach a rectangular patch of shallow water situated between Routes 133 and 134. Step into the water from the west-central side to reach a deep, dark pit of water surrounded by a ring of rocks. {{m|Dive}} beneath the waves and follow the underwater path southward. The markings on the nearby wall are an ancient form of writing, and translate to ''<sc>Go up here</sc>.'' Surface from this point to emerge in an ancient ruin known as the [[Sealed Chamber]]. Once you're done exploring the Sealed Chamber, surface on Route 134 where you left off and continue west and then south to a small maze of rocks. Leave the maze through its westernmost exit to Sailor Hudson's island, then Surf further west to reach the shallows outside Slateport City. |
| {{main|Battle Frontier (Generation III)|Battle Frontier}}
| |
| This is a fun place to go if you want to show off your battling skills and participate in more difficult battles, and you can purchase valuable items with [[Battle Points]] you've won. There is an {{DL|Stats judge|In Generation III|old man}} in the house north of the Pokémon Center that can check the [[IV]]s of your Pokémon, if you're into that sort of thing. There is also a Level 40 {{p|Sudowoodo}} that people have mistaken for a tree. If you water it with the [[Wailmer Pail]], it will attack and you can choose to capture or defeat it. Note that the Battle Frontier is for extremely skilled Trainers who can get long win streaks. That is the main purpose of the battle facilities: to train you not to lose. If you win enough battles in each facility, you can fight the Trainer (called the [[Frontier Brains (Hoenn)#Hoenn Frontier Brains|Frontier Brain]]) in charge of the building you're in. It will be a difficult fight, but the Frontier Brains' teams are listed below. The best way to win is to know your enemy!
| |
|
| |
|
| ====Salon Maiden Anabel's Silver Symbol challenge====
| | [[File:Sealed Chamber 1R E.png|thumb|left|Sealed Chamber, Entrance]] |
| {{Party|color={{frontier color}}|bordercolor={{frontier color dark}}|headcolor={{silver color light}}
| | [[File:Sealed Chamber 2R E.png|thumb|Sealed Chamber, Back Room]] |
| |sprite=Spr E Anabel.png
| | ===Sealed Chamber=== |
| |prize=15{{color2|000|Battle Point|BP}}
| | The [[Sealed Chamber]] is a mysterious ruin located in the depths of {{rt|134|Hoenn}}. The many stone tablets positioned around the chamber feature the same mysterious writing that was found near the underwater entrance. Solving some of [[Hoenn]]'s oldest mysteries hinges on deciphering this age-old system. |
| |class=Salon Maiden
| |
| |name=Anabel
| |
| |game=E
| |
| |location=Battle Frontier (Generation III)#Battle Tower
| |
| |locationname=Battle Tower | |
| |pokemon=3 | |
|
| |
|
| |pokemon1={{Pokémon/3|game=Emerald|ndex=065|pokemon=Alakazam|gender=both
| | ====Entrance==== |
| |ability=Synchronize|ability2=Inner Focus|level=50, 60-100|type1=Psychic|held=BrightPowder
| | The first chamber holds ten stone tablets that act as a key to decoding this ancient writing system, known as [[Braille]]. These 28 characters correspond to the 26 letters of the alphabet, as well as the comma and period. Inspect the markings on the cavern's north wall to reveal a phrase, which translates to ''<sc>Dig here</sc>''. Using {{m|Dig|the field move}} causes the wall to fall away, granting you access to a second cavern. |
| |move1=Ice Punch|move1type=Ice
| |
| |move2=Fire Punch|move2type=Fire
| |
| |move3=ThunderPunch|move3type=Electric
| |
| |move4=Disable|move4type=Normal}}
| |
|
| |
|
| |pokemon2={{Pokémon/3|game=Emerald|ndex=244|pokemon=Entei
| | ====Back Room==== |
| |ability=Pressure|level=50, 60-100|type1=Fire|held=Lum Berry | | The central ruins are encircled by {{DL|Sealed Chamber|Mounds 2|six more stone tablets}} which tell of a powerful Pokémon that was sealed away. The message on the north wall reads, ''<sc>First comes {{p|Wailord}}. Last comes {{p|Relicanth}}.</sc>'' Relicanth can be found only in a few underwater areas, while Wailord's pre-evolved form, {{p|Wailmer}}, can be found in many areas with the [[Good Rod]] or [[Super Rod]]. Position these Pokémon in their respective places in your party and examine the wall again. This causes a mighty earthquake to rock the Sealed Chamber, while the sound of doors opening echoes from somewhere far away. Three separate ruins have now been opened, and each one holds a legendary Pokémon! |
| |move1=Fire Blast|move1type=Fire
| | {{-}} |
| |move2=Calm Mind|move2type=Psychic | | ==Desert Ruins (optional)== |
| |move3=Return|move3type=Normal | | [[File:Desert Ruins E.png|thumb|left|Desert Ruins, exterior]] |
| |move4=Roar|move4type=Normal}} | | [[File:Desert Ruins interior RSE.png|thumb|Desert Ruins, interior]] |
| | The [[Desert Ruins]] lie among the dunes of {{rt|111|Hoenn}}. Another coded message can be found on the north wall. |
|
| |
|
| |pokemon3={{Pokémon/3|game=Emerald|ndex=143|pokemon=Snorlax|gender=both
| | ===Entrance=== |
| |ability=Immunity|ability2=Thick Fat|level=50, 60-100|type1=Normal|held=Quick Claw
| | Examine the north wall to view the message, which reads, ''<sc>Left, left, down, down. Then, use Rock Smash.</sc>'' Close the message box and move exactly as instructed, two steps west and two steps south. Have a Pokémon use {{m|Rock Smash}} from this location, and a secret passage opens in the north wall! |
| |move1=Body Slam|move1type=Normal
| |
| |move2=Belly Drum|move2type=Normal
| |
| |move3=Yawn|move3type=Normal
| |
| |move4=Shadow Ball|move4type=Ghost}}
| |
| }} | |
|
| |
|
| ====Salon Maiden Anabel's Gold Symbol challenge==== | | ===Back Room=== |
| {{Party|color={{frontier color}}|bordercolor={{frontier color dark}}|headcolor={{gold color light}} | | Follow the passage to the back cavern, where the legendary Pokémon {{p|Regirock}} awaits. |
| |sprite=Spr E Anabel.png
| |
| |prize=20{{color2|000|Battle Point|BP}}
| |
| |class=Salon Maiden
| |
| |name=Anabel
| |
| |game=E
| |
| |location=Battle Frontier (Generation III)#Battle Tower
| |
| |locationname=Battle Tower|
| |
| |pokemon=3
| |
|
| |
|
| |pokemon1={{Pokémon/3|game=Emerald|ndex=243|pokemon=Raikou
| | {| style="margin: auto;" |
| |ability=Pressure|level=50, 60-100|type1=Electric|held=Lum Berry
| | | |
| |move1=Thunderbolt|move1type=Electric
| | {{Pokémon/3|game=Emerald |
| |move2=Calm Mind|move2type=Psychic
| | |ndex=377|pokemon=Regirock |
| |move3=Reflect|move3type=Psychic
| |
| |move4=Rest|move4type=Psychic}}
| |
| | |
| |pokemon2={{Pokémon/3|game=Emerald|ndex=381|pokemon=Latios|gender=male
| |
| |ability=Levitate|level=50, 60-100|type1=Dragon|type2=Psychic|held=BrightPowder
| |
| |move1=Psychic|move1type=Psychic
| |
| |move2=Dragon Claw|move2type=Dragon
| |
| |move3=Calm Mind|move3type=Psychic
| |
| |move4=Recover|move4type=Normal}}
| |
| | |
| |pokemon3={{Pokémon/3|game=Emerald|ndex=143|pokemon=Snorlax|gender=both
| |
| |ability=Immunity|ability2=Thick Fat|level=50, 60-100|type1=Normal|held=Chesto Berry
| |
| |move1=Curse|move1type=???
| |
| |move2=Return|move2type=Normal
| |
| |move3=Rest|move3type=Psychic
| |
| |move4=Shadow Ball|move4type=Ghost}}
| |
| }}
| |
| | |
| ====Palace Maven Spenser's Pokemon Silver Symbol challenge====
| |
| {{Party|color={{frontier color}}|bordercolor={{frontier color dark}}|headcolor={{silver color light}}
| |
| |sprite=Spr E Spenser.png
| |
| |prize=15{{color2|000|Battle Point|BP}}
| |
| |class=Palace Maven
| |
| |name=Spenser
| |
| |game=E
| |
| |location=Battle Frontier (Generation III)#Battle Palace
| |
| |locationname=Battle Palace
| |
| |pokemon=3
| |
| | |
| |pokemon1={{Pokémon/3|game=Emerald|ndex=169|pokemon=Crobat|gender=both
| |
| |ability=Inner Focus|level=50, 60-100|type1=Poison|type2=Flying|held=BrightPowder
| |
| |move1=Confuse Ray|move1type=Ghost
| |
| |move2=Double Team|move2type=Normal
| |
| |move3=Toxic|move3type=Poison
| |
| |move4=Fly|move4type=Flying}}
| |
| | |
| |pokemon2={{Pokémon/3|game=Emerald|ndex=289|pokemon=Slaking|gender=both
| |
| |ability=Truant|level=50, 60-100|type1=Normal|held=Scope Lens
| |
| |move1=Earthquake|move1type=Ground
| |
| |move2=Swagger|move2type=Normal
| |
| |move3=Shadow Ball|move3type=Ghost
| |
| |move4=Brick Break|move4type=Fighting}}
| |
| | |
| |pokemon3={{Pokémon/3|game=Emerald|ndex=131|pokemon=Lapras|gender=both
| |
| |ability=Water Absorb|ability2=Shell Armor|level=50, 60-100|type1=Water|type2=Ice|held=Quick Claw
| |
| |move1=Ice Beam|move1type=Ice
| |
| |move2=Horn Drill|move2type=Normal
| |
| |move3=Confuse Ray|move3type=Ghost
| |
| |move4=Protect|move4type=Normal}}
| |
| }}
| |
| | |
| ====Palace Maven Spenser's Gold Symbol challenge====
| |
| {{Party|color={{frontier color}}|bordercolor={{frontier color dark}}|headcolor={{gold color light}}
| |
| |sprite=Spr E Spenser.png
| |
| |prize=16{{color2|000|Battle Point|BP}}
| |
| |class=Palace Maven
| |
| |name=Spenser
| |
| |game=E
| |
| |location=Battle Frontier (Generation III)#Battle Palace
| |
| |locationname=Battle Palace
| |
| |pokemon=3
| |
| | |
| |pokemon1={{Pokémon/3|game=Emerald|ndex=059|pokemon=Arcanine|gender=both
| |
| |ability=Intimidate|ability2=Flash Fire|level=50, 60-100|type1=Fire|held=White Herb
| |
| |move1=Overheat|move1type=Fire
| |
| |move2=ExtremeSpeed|move2type=Normal
| |
| |move3=Roar|move3type=Normal
| |
| |move4=Protect|move4type=Normal}}
| |
| | |
| |pokemon2={{Pokémon/3|game=Emerald|ndex=289|pokemon=Slaking|gender=both
| |
| |ability=Truant|level=50, 60-100|type1=Normal|held=Scope Lens
| |
| |move1=Hyper Beam|move1type=Normal
| |
| |move2=Earthquake|move2type=Ground
| |
| |move3=Shadow Ball|move3type=Ghost
| |
| |move4=Yawn|move4type=Normal}}
| |
| | |
| |pokemon3={{Pokémon/3|game=Emerald|ndex=245|pokemon=Suicune
| |
| |ability=Pressure|level=50, 60-100|type1=Water|held=King's Rock
| |
| |move1=Blizzard|move1type=Ice
| |
| |move2=Surf|move2type=Water
| |
| |move3=Bite|move3type=Dark
| |
| |move4=Calm Mind|move4type=Psychic}}
| |
| }}
| |
| | |
| Spenser also has a {{p|Dusclops}} and {{p|Azurill}}, but they won't participate in his battle with you.
| |
| | |
| ====Factory Head Noland's Silver and Gold Symbol challenge====
| |
| Like the challenger, he uses [[rental Pokémon]]. Therefore, all of his Pokémon are random for both the Gold and Silver Symbols, so he can use any Pokémon except for those that are not admissible in the {{Gdis|Battle Frontier|III}}; these include {{p|Mewtwo}}, {{p|Mew}}, {{p|Lugia}}, {{p|Ho-Oh}}, {{p|Celebi}}, {{p|Kyogre}}, {{p|Groudon}}, {{p|Rayquaza}}, {{p|Jirachi}}, and {{p|Deoxys}}.
| |
| | |
| ====Pyramid King Brandon's Silver Symbol challenge====
| |
| {{Party|color={{frontier color}}|bordercolor={{frontier color dark}}|headcolor={{silver color light}}
| |
| |sprite=Spr E Brandon.png | |
| |prize=16{{color2|000|Battle Point|BP}}
| |
| |class=Pyramid King
| |
| |name=Brandon
| |
| |game=E
| |
| |location=Battle Frontier (Generation III)#Battle Pyramid
| |
| |locationname=Battle Pyramid
| |
| |pokemon=3
| |
| |pokemon1={{Pokémon/3
| |
| |game=Emerald | |
| |ndex=377 | |
| |pokemon=Regirock | |
| |ability=Clear Body
| |
| |held=Quick Claw
| |
| |level=50, 60-100
| |
| |type1=Rock | | |type1=Rock |
| |move1=Explosion|move1type=Normal | | |level=40 |
| |move2=Superpower|move2type=Fighting
| |
| |move3=Earthquake|move3type=Ground
| |
| |move4=AncientPower|move4type=Rock}}
| |
| |pokemon2={{Pokémon/3
| |
| |game=Emerald
| |
| |ndex=379
| |
| |pokemon=Registeel
| |
| |ability=Clear Body | | |ability=Clear Body |
| |level=50, 60-100
| | |move1=Rock Throw|move1type=Rock |
| |type1=Steel
| | |move2=Curse|move2type=??? |
| |held=Leftovers
| | |move3=Superpower|move3type=Fighting |
| |move1=Earthquake|move1type=Ground
| | |move4=AncientPower|move4type=Rock |
| |move2=Metal Claw|move2type=Steel
| |
| |move3=Toxic|move3type=Poison
| |
| |move4=Iron Defense|move4type=Steel}}
| |
| |pokemon3={{Pokémon/3|game=Emerald|ndex=378|pokemon=Regice|ability=Clear Body|level=50, 60-100|type1=Ice|held=Chesto Berry|move1=Ice Beam|move1type=Ice|move2=Amnesia|move2type=Psychic|move3=Thunder|move3type=Electric|move4=Rest|move4type=Psychic}}
| |
| }}
| |
| | |
| ====Pyramid King Brandon's Gold Symbol challenge====
| |
| {{Party|color={{frontier color}}|bordercolor={{frontier color dark}}|headcolor={{gold color light}}
| |
| |sprite=Spr E Brandon.png
| |
| |prize=19{{color2|000|Battle Point|BP}}
| |
| |class=Pyramid King|name=Brandon
| |
| |game=E
| |
| |location=Battle Frontier (Generation III)#Battle Pyramid
| |
| |locationname=Battle Pyramid
| |
| |pokemon=3
| |
| |pokemon1={{Pokémon/3
| |
| |game=Emerald
| |
| |ndex=144
| |
| |pokemon=Articuno
| |
| |ability=Pressure
| |
| |held=Scope Lens
| |
| |level=50, 60-100
| |
| |type1=Ice|type2=Flying
| |
| |move1=Blizzard|move1type=Ice | |
| |move2=Water Pulse|move2type=Water | |
| |move3=Aerial Ace|move3type=Flying | |
| |move4=Reflect|move4type=Psychic}}
| |
| |pokemon2={{Pokémon/3
| |
| |game=Emerald
| |
| |ndex=145
| |
| |pokemon=Zapdos
| |
| |ability=Pressure
| |
| |level=50, 60-100
| |
| |type1=Electric|type2=Flying
| |
| |held=Lum Berry
| |
| |move1=Thunder|move1type=Electric
| |
| |move2=Detect|move2type=Fighting
| |
| |move3=Drill Peck|move3type=Flying
| |
| |move4=Light Screen|move4type=Psychic}}
| |
| |pokemon3={{Pokémon/3
| |
| |game=Emerald
| |
| |ndex=146
| |
| |pokemon=Moltres
| |
| |ability=Pressure
| |
| |level=50, 60-100
| |
| |type1=Fire|type2=Flying
| |
| |held=BrightPowder
| |
| |move1=Fire Blast|move1type=Fire
| |
| |move2=Hyper Beam|move2type=Normal
| |
| |move3=Aerial Ace|move3type=Flying
| |
| |move4=Safeguard|move4type=Normal}} | |
| }} | | }} |
| | |} |
|
| |
|
| ====Dome Ace Tucker's Silver Symbol challenge==== | | ==Island Cave (optional)== |
| {{Party|color={{frontier color}}|bordercolor={{frontier color dark}}|headcolor={{silver color light}}
| | [[File:Island Cave E.png|thumb|left|Island Cave, exterior]] |
| |sprite=Spr E Tucker.png
| | [[File:Island Cave interior RSE.png|thumb|Island Cave, interior]] |
| |prize=13{{color2|000|Battle Point|BP}}
| | The [[Island Cave]] sits on a small isle in the northwest part of {{rt|105|Hoenn}}. Another coded message can be found on the north wall. |
| |class=Dome Ace
| |
| |name=Tucker
| |
| |game=E
| |
| |location=Battle Frontier (Generation III)#Battle Dome
| |
| |locationname=Battle Dome
| |
| |pokemon=3
| |
|
| |
|
| |pokemon1={{Pokémon/3|game=Emerald|ndex=006|pokemon=Charizard|gender=both
| | ===Entrance=== |
| |ability=Blaze|level=50, 60-100|type1=Fire|type2=Flying|held=White Herb
| | Examine the north wall to view the message, which reads, ''<sc>Stay close to the wall. Run around one lap.</sc>'' Close the message box and make a lap of the chamber, staying near the walls. After doing so, a secret passage appears out of nowhere! |
| |move1=Overheat|move1type=Fire
| |
| |move2=Rock Slide|move2type=Rock
| |
| |move3=Aerial Ace|move3type=Flying
| |
| |move4=Earthquake|move4type=Ground}}
| |
|
| |
|
| |pokemon2={{Pokémon/3|game=Emerald|ndex=260|pokemon=Swampert|gender=both
| | ===Back Room=== |
| |ability=Torrent|level=50, 60-100|type1=Water|type2=Ground|held=Focus Band
| | Follow the passage to the back cavern, where the legendary Pokémon {{p|Regice}} awaits. |
| |move1=Surf|move1type=Water
| |
| |move2=Earthquake|move2type=Ground
| |
| |move3=Ice Beam|move3type=Ice
| |
| |move4=Counter|move4type=Fighting}}
| |
|
| |
|
| |pokemon3={{Pokémon/3|game=Emerald|ndex=373|pokemon=Salamence|gender=both | | {| style="margin: auto;" |
| |ability=Intimidate|level=50, 60-100|type1=Dragon|type2=Flying|held=Lum Berry
| | | |
| |move1=Earthquake|move1type=Ground | | {{Pokémon/3|game=Emerald |
| |move2=Brick Break|move2type=Fighting | | |ndex=378|pokemon=Regice |
| |move3=Dragon Claw|move3type=Dragon | | |type1=Ice |
| |move4=Aerial Ace|move4type=Flying}} | | |level=40 |
| | |ability=Clear Body |
| | |move1=Icy Wind|move1type=Ice |
| | |move2=Curse|move2type=??? |
| | |move3=Superpower|move3type=Fighting |
| | |move4=AncientPower|move4type=Rock |
| }} | | }} |
| | |} |
|
| |
|
| ====Dome Ace Tucker's Gold Symbol challenge==== | | ==Ancient Tomb (optional)== |
| {{Party|color={{frontier color}}|bordercolor={{frontier color dark}}|headcolor={{gold color light}}
| | [[File:Ancient Tomb E.png|thumb|left|Ancient Tomb, exterior]] |
| |sprite=Spr E Tucker.png
| | [[File:Ancient Tomb interior E.png|thumb|Ancient Tomb, interior]] |
| |prize=15{{color2|000|Battle Point|BP}}
| | The [[Ancient Tomb]] stands on the southwest plateau of {{rt|120|Hoenn}}. Another coded message can be found on the north wall. |
| |class=Dome Ace
| |
| |name=Tucker
| |
| |game=E
| |
| |location=Battle Frontier (Generation III)#Battle Dome
| |
| |locationname=Battle Dome
| |
| |pokemon=3
| |
|
| |
|
| |pokemon1={{Pokémon/3|game=Emerald|gender=female|ndex=380|pokemon=Latias
| | ===Entrance=== |
| |ability=Levitate|level=50, 60-100|type1=Dragon|type2=Psychic|held=Chesto Berry
| | Examine the north wall to view the message, which reads, ''<sc>Those who inherit our will, shine in the middle.</sc>'' Close the message box and move to the center of the cave. Have a Pokémon use {{m|Flash}} from this location, and a secret passage appears out of nowhere! |
| |move1=Thunderbolt|move1type=Electric
| |
| |move2=Psychic|move2type=Psychic
| |
| |move3=Calm Mind|move3type=Psychic
| |
| |move4=Rest|move4type=Psychic}}
| |
|
| |
|
| |pokemon2={{Pokémon/3|game=Emerald|ndex=260|pokemon=Swampert|gender=both
| | ===Back Room=== |
| |ability=Torrent|level=50, 60-100|type1=Water|type2=Ground|held=Leftovers
| | Follow the passage to the back cavern, where the legendary Pokémon {{p|Registeel}} awaits. |
| |move1=Surf|move1type=Water
| |
| |move2=Ice Beam|move2type=Ice
| |
| |move3=Earthquake|move3type=Ground
| |
| |move4=Mirror Coat|move4type=Psychic}}
| |
|
| |
|
| |pokemon3={{Pokémon/3|game=Emerald|ndex=376|pokemon=Metagross
| | {| style="margin: auto;" |
| |ability=Clear Body|level=50, 60-100|type1=Steel|type2=Psychic|held=Quick Claw
| | | |
| |move1=Psychic|move1type=Psychic
| | {{Pokémon/3|game=Emerald |
| |move2=Meteor Mash|move2type=Steel
| | |ndex=379|pokemon=Registeel |
| |move3=Earthquake|move3type=Ground
| | |type1=Steel |
| |move4=Protect|move4type=Normal}}
| | |level=40 |
| }}
| | |ability=Clear Body |
| | | |move1=Metal Claw|move1type=Steel |
| ====Arena Tycoon Greta's Silver Symbol challenge====
| | |move2=Curse|move2type=??? |
| {{Party|color={{frontier color}}|bordercolor={{frontier color dark}}|headcolor={{silver color light}}
| | |move3=Superpower|move3type=Fighting |
| |sprite=Spr E Greta.png | | |move4=AncientPower|move4type=Rock |
| |prize=12{{color2|000|Battle Point|BP}}
| |
| |class=Arena Tycoon
| |
| |name=Greta
| |
| |game=E
| |
| |location=Battle Frontier (Generation III)#Battle Arena
| |
| |locationname=Battle Arena
| |
| |pokemon=3
| |
| |pokemon1={{Pokémon/3
| |
| |game=Emerald | |
| |ndex=214 | |
| |pokemon=Heracross | |
| |gender=both
| |
| |ability=Swarm|ability2=Guts
| |
| |type1=Bug|type2=Fighting | |
| |held=Salac Berry
| |
| |level=50, 60-100 | |
| |move1=Megahorn|move1type=Bug
| |
| |move2=Rock Tomb|move2type=Rock
| |
| |move3=Endure|move3type=Normal
| |
| |move4=Reversal|move4type=Fighting}}
| |
| |pokemon2={{Pokémon/3
| |
| |game=Emerald
| |
| |ndex=197
| |
| |pokemon=Umbreon
| |
| |gender=both
| |
| |type1=Dark
| |
| |ability=Synchronize | |
| |held=Leftovers
| |
| |level=50, 60-100
| |
| |move1=Psychic|move1type=Psychic
| |
| |move2=Body Slam|move2type=Normal
| |
| |move3=Confuse Ray|move3type=Ghost
| |
| |move4=Faint Attack|move4type=Dark}}
| |
| |pokemon3={{Pokémon/3
| |
| |game=Emerald
| |
| |ndex=292
| |
| |pokemon=Shedinja
| |
| |type1=Bug|type2=Ghost
| |
| |ability=Wonder Guard
| |
| |held=BrightPowder
| |
| |level=50, 60-100
| |
| |move1=Shadow Ball|move1type=Ghost | |
| |move2=Return|move2type=Normal
| |
| |move3=Confuse Ray|move3type=Ghost
| |
| |move4=Aerial Ace|move4type=Flying}}
| |
| }}
| |
| | |
| ====Arena Tycoon Greta's Gold Symbol challenge====
| |
| {{Party|color={{frontier color}}|bordercolor={{frontier color dark}}|headcolor={{gold color light}}
| |
| |sprite=Spr E Greta.png
| |
| |prize=13{{color2|000|Battle Point|BP}}
| |
| |class=Arena Tycoon
| |
| |name=Greta
| |
| |game=E
| |
| |location=Battle Frontier (Generation III)#Battle Arena
| |
| |locationname=Battle Arena
| |
| |pokemon=3
| |
| |pokemon1={{Pokémon/3
| |
| |game=Emerald
| |
| |ndex=197
| |
| |pokemon=Umbreon
| |
| |gender=both
| |
| |type1=Dark
| |
| |ability=Synchronize
| |
| |held=Chesto Berry
| |
| |level=50, 60-100
| |
| |move1=Double-Edge|move1type=Normal
| |
| |move2=Confuse Ray|move2type=Ghost | |
| |move3=Rest|move3type=Psychic | |
| |move4=Psychic|move4type=Psychic}}
| |
| |pokemon2={{Pokémon/3
| |
| |game=Emerald
| |
| |ndex=094
| |
| |pokemon=Gengar
| |
| |gender=both
| |
| |type1=Ghost|type2=Poison
| |
| |ability=Levitate
| |
| |held=Leftovers
| |
| |level=50, 60-100
| |
| |move1=Psychic|move1type=Psychic
| |
| |move2=Hypnosis|move2type=Psychic
| |
| |move3=Dream Eater|move3type=Psychic
| |
| |move4=Destiny Bond|move4type=Ghost}}
| |
| |pokemon3={{Pokémon/3
| |
| |game=Emerald
| |
| |ndex=286
| |
| |pokemon=Breloom
| |
| |gender=both
| |
| |type1=Grass
| |
| |type2=Fighting
| |
| |ability=Effect Spore
| |
| |held=Lum Berry
| |
| |level=50, 60-100
| |
| |move1=Spore|move1type=Grass
| |
| |move2=Focus Punch|move2type=Fighting
| |
| |move3=Giga Drain|move3type=Grass
| |
| |move4=Headbutt|move4type=Normal}}
| |
| }}
| |
| | |
| ====Pike Queen Lucy's Silver Symbol challenge====
| |
| {{Party|color={{frontier color}}|bordercolor={{frontier color dark}}|headcolor={{silver color light}}
| |
| |sprite=Spr E Lucy.png
| |
| |prize=11{{color2|000|Battle Point|BP}}
| |
| |class=Pike Queen
| |
| |name=Lucy
| |
| |game=E
| |
| |location=Battle Frontier (Generation III)#Battle Pike
| |
| |locationname=Battle Pike
| |
| |pokemon=3
| |
| | |
| |pokemon1={{Pokémon/3|game=Emerald|ndex=336|pokemon=Seviper|gender=both
| |
| |ability=Shed Skin|level=50, 60-100|type1=Poison|held=Quick Claw
| |
| |move1=Swagger|move1type=Normal
| |
| |move2=Crunch|move2type=Dark
| |
| |move3=Poison Fang|move3type=Poison
| |
| |move4=Giga Drain|move4type=Grass}}
| |
| | |
| |pokemon2={{Pokémon/3|game=Emerald|ndex=213|pokemon=Shuckle|gender=both
| |
| |ability=Sturdy|level=50, 60-100|type1=Bug|type2=Rock|held=Chesto Berry
| |
| |move1=Toxic|move1type=Poison
| |
| |move2=Sandstorm|move2type=Rock
| |
| |move3=Protect|move3type=Normal
| |
| |move4=Rest|move4type=Psychic}}
| |
| | |
| |pokemon3={{Pokémon/3|game=Emerald|ndex=350|pokemon=Milotic|gender=both
| |
| |ability=Marvel Scale|level=50, 60-100|type1=Water|held=Leftovers
| |
| |move1=Surf|move1type=Water
| |
| |move2=Ice Beam|move2type=Ice
| |
| |move3=Mirror Coat|move3type=Psychic
| |
| |move4=Recover|move4type=Normal}} | |
| }}
| |
| | |
| ====Pike Queen Lucy's Gold Symbol challenge====
| |
| {{Party|color={{frontier color}}|bordercolor={{frontier color dark}}|headcolor={{gold color light}}
| |
| |sprite=Spr E Lucy.png
| |
| |prize=18{{color2|000|Battle Point|BP}}
| |
| |class=Pike Queen
| |
| |name=Lucy
| |
| |game=E
| |
| |location=Battle Frontier (Generation III)#Battle Pike
| |
| |locationname=Battle Pike
| |
| |pokemon=3
| |
| | |
| |pokemon1={{Pokémon/3|game=Emerald|ndex=336|pokemon=Seviper|gender=both
| |
| |ability=Shed Skin|level=50, 60-100|type1=Poison|held=Focus Band
| |
| |move1=Swagger|move1type=Normal
| |
| |move2=Crunch|move2type=Dark
| |
| |move3=Sludge Bomb|move3type=Poison
| |
| |move4=Giga Drain|move4type=Grass}}
| |
| | |
| |pokemon2={{Pokémon/3|game=Emerald|ndex=208|pokemon=Steelix|gender=both
| |
| |ability=Rock Head|ability2=Sturdy|level=50, 60-100|type1=Steel|type2=Ground|held=BrightPowder
| |
| |move1=Earthquake|move1type=Ground
| |
| |move2=Rock Slide|move2type=Rock
| |
| |move3=Screech|move3type=Normal
| |
| |move4=Explosion|move4type=Normal}}
| |
| | |
| |pokemon3={{Pokémon/3|game=Emerald|ndex=130|pokemon=Gyarados|gender=both
| |
| |ability=Intimidate|level=50, 60-100|type1=Water|type2=Flying|held=Chesto Berry
| |
| |move1=Dragon Dance|move1type=Dragon
| |
| |move2=Return|move2type=Normal
| |
| |move3=Roar|move3type=Normal
| |
| |move4=Rest|move4type=Psychic}}
| |
| }} | | }} |
|
| |
| ==Artisan Cave==
| |
| [[File:Artisan Cave entrance E.png|thumb|Artisan Cave]]
| |
| {| class="expandable" style="margin:auto; width:auto; background: #{{emerald color light}}; {{roundy|10px}}; border: 5px solid #{{emerald color}};"
| |
| |- style="text-align:center"
| |
| ! Items
| |
| |-
| |
| |
| |
| {{itlisth|cave}}
| |
| {{itemlist|Iron|B1F; on a rock just east of the entrance ''(hidden)''|E=yes|display={{DL|Vitamin|Iron}}}}
| |
| {{itemlist|Zinc|B1F; on a lone rock north of the HP Up ''(hidden)''|E=yes|display={{DL|Vitamin|Zinc}}}}
| |
| {{itemlist|HP Up|B1F; southeast of the map, south of the Zinc|E=yes|display={{DL|Vitamin|HP Up}}}}
| |
| {{itemlist|Calcium|B1F; right of two rocks north and center of the map, on the higher ledge left of the ladder ''(hidden)''|E=yes|display={{DL|Vitamin|Calcium}}}}
| |
| {{itemlist|Protein|B1F; on a rock at the most northwest point of the map ''(hidden)''|E=yes|display={{DL|Vitamin|Protein}}}}
| |
| {{itemlist|Carbos|1F; at the end of the eastern path from the exit|E=yes|display={{DL|Vitamin|Carbos}}}}
| |
| {{itlistfoot|cave}}
| |
| |} | | |} |
| Smeargle can only be found in [[Artisan Cave]] located near the [[Battle Frontier]]. The only move a wild Smeargle knows is its [[signature move]], {{m|Sketch}}, which can ''permanently'' copy nearly every move and only has 1 PP. Therefore, it may be a good idea to use a move that avoids damage on the first turn of battle such as {{m|Protect}} or {{m|Dig}}. Smeargle will then be forced to use {{m|Struggle}}, making an easy capture, yet you will keep the Sketch for your own use. Smeargle learns Sketch every 10 levels and also from the [[Move Reminder]]. Therefore, it is possible to come up with practically any moveset. Male Smeargle can also be used for breeding moves to other Pokémon.
| |
|
| |
| ==Weather Institute==
| |
| There is a meteorologist here that has found unusual weather patterns. On certain Routes, there will be a [[Weather conditions|downpour]] or [[Weather conditions|unusually bright sunlight]]. Routes with unusual weather are where either [[Terra Cave]] or [[Marine Cave]] will appear. The caves are where {{p|Groudon}} and {{p|Kyogre}} await, respectively. But you have to get to the Route that the cave is on very quickly. If you don't, the cave will vanish and its counterpart will be available instead! Before you start chasing these miraculously teleporting caves, keep in mind that Kyogre and Groudon are Level 70 and extremely powerful.
| |
|
| |
| ==Catching the Super-Ancient Pokémon==
| |
| ===Marine Cave===
| |
| [[File:Hoenn Marine Cave Map.png|thumb|257px|Marine Cave locations]]
| |
| [[Marine Cave]] can appear on the following routes, depending on the scientist's indication of unusually heavy rain:
| |
| * {{rt|105|Hoenn}}
| |
| * {{rt|125|Hoenn}}
| |
| * {{rt|127|Hoenn}}
| |
| * {{rt|129|Hoenn}}
| |
|
| |
| When you arrive at the route the scientist indicated, you must find and dive into a small dive square somewhere on the route. Resurface, enter the cave there, and find {{p|Kyogre}} in a pool of water at the back. It is stationary and will not disappear, so don't worry about leaving the cave to return later if you feel you can't fight it yet. You can even enter battle with it and then run away, and it will still be there. However, if you defeat it, it will disappear forever, so be careful!
| |
|
| |
| {{Pokémon
| |
| |gen=3
| |
| |game=Emerald
| |
| |ndex=382
| |
| |pokemon=Kyogre
| |
| |ability=Drizzle
| |
| |level=70
| |
| |type1=Water
| |
| |move1=Hydro Pump|move1type=Water
| |
| |move2=Rest|move2type=Psychic
| |
| |move3=Sheer Cold|move3type=Ice
| |
| |move4=Double-Edge|move4type=Normal}}
| |
|
| |
| When you feel prepared to capture Kyogre, make sure that you have 40 or more [[Net Ball]]s in your [[Bag]]. This Poké Ball variety is the one that works best on {{type|Water}}s. Anyway, navigate your way to the end of Marine Cave, '''save your game''', and talk to Kyogre to initiate a battle. Lower its HP bar to red with a good {{t|Grass}}- or {{t|Electric}}-type attack and use other moves, if necessary, to get its HP to the ideal zone. Keep throwing Net Balls until you catch it. It's important to keep in mind that Kyogre knows {{m|Rest}}, a move which completely restores its HP and removes [[status ailment]]s. However, Kyogre then has to sleep for three turns and its [[catch rate]] is increased during that time. Also, watch out for {{m|Hydro Pump}}, a powerful move which has [[STAB]] and greatly increases in power because of {{a|Drizzle|the rain}}, and the [[One-hit knockout move|One-hit KO move]] {{m|Sheer Cold}}. Remember, if you accidentally defeat Kyogre, just turn off the game and it will be as if you hadn't battled, since you saved beforehand.
| |
|
| |
| ===Terra Cave===
| |
| [[File:Hoenn Terra Cave Locations Map.png|257px|thumb|Terra Cave locations]]
| |
| [[Terra Cave]] can appear on the following routes, depending on the scientist's indication of unusually bright sunlight:
| |
| * {{rt|114|Hoenn}}
| |
| * {{rt|115|Hoenn}}
| |
| * {{rt|116|Hoenn}}
| |
| * {{rt|118|Hoenn}}
| |
|
| |
| When you arrive at the route the scientist indicated, you must find the cave bathed in bright sunlight on the route. (On Route 104, you will need {{m|Waterfall}} to access it.) Enter the cave and find {{p|Groudon}} in a pool of lava at the back. It is stationary and will not disappear, so don't worry about leaving the cave to return later if you feel you can't fight it yet. You can even enter battle with it and then run away, and it will still be there. (Don't defeat it, however, unless you are going to trade someone for it or don't plan on capturing it at all.)
| |
|
| |
| {{Pokémon
| |
| |gen=3
| |
| |game=Emerald
| |
| |ndex=383
| |
| |pokemon=Groudon
| |
| |ability=Drought
| |
| |level=70
| |
| |type1=Ground
| |
| |move1=Fire Blast|move1type=Fire
| |
| |move2=Rest|move2type=Psychic
| |
| |move3=Fissure|move3type=Ground
| |
| |move4=SolarBeam|move4type=Grass}}
| |
|
| |
|
| When you're prepared to capture Groudon, make sure that you have 40 or more [[Ultra Ball]]s in your Bag. These will provide the highest [[catch rate]] in this battle. Once you've gotten through the cave to Groudon, '''save your game''' and then talk to it to start a battle. Use a good {{t|Ice}}-, {{t|Grass}}-, or {{t|Water}}-type move and then attacks that do normal damage to get Groudon's HP bar down to red. Then, throw Ultra Balls until you catch it. Like Kyogre, Groudon knows {{m|Rest}} and can therefore heal itself, but its [[catch rate]] increases while it's sleeping. {{a|Drought|Groudon's Ability}} causes {{m|Fire Blast}}'s power to increase by 50% and allows {{m|SolarBeam}} to be used without charging, so watch out! Any Pokémon hit by {{m|Fissure}} will [[One-hit knockout move|instantly faint]]. Since you saved beforehand, you can turn off the power to reset the game if something goes wrong in this battle.
| | ==Sky Pillar== |
| | [[File:Sky Pillar after E.png|thumb|left|Sky Pillar, Exterior]] |
| | [[File:Sky Pillar 6F before E.png|thumb|Sky Pillar, 6F]] |
| | On the northern side of {{rt|131|Hoenn}}, [[Sky Pillar]] is an ancient, towering altar built for the ascension of Hoenn's ageless protector, the legendary dragon {{p|Rayquaza}}. |
|
| |
|
| ===Sky Pillar===
| | {| class="expandable" style="margin: auto; background: #{{locationcolor/med|ruins}}; {{roundy}}; border: 5px solid #{{locationcolor/light|ruins}};" |
| [[File:Sky Pillar 2F after E.png|180px|left|thumb|Sky Pillar 2F]]
| | |- align="center" |
| [[File:Sky Pillar 3F after E.png|180px|right|thumb|Sky Pillar 3F]]
| |
| [[File:Sky Pillar 4F after E.png|180px|right|thumb|Sky Pillar 4F]]
| |
| {| class="expandable" style="margin:auto; width:auto; background: #{{emerald color light}}; {{roundy|10px}}; border: 5px solid #{{emerald color}};" | |
| |- style="text-align:center" | |
| ! Available Pokémon | | ! Available Pokémon |
| |- | | |- |
| | | | | |
| {{Catch/header|ruins|no}} | | {{Catch/header|ruins|no}} |
| Line 839: |
Line 241: |
| {{Catch/entry3|042|Golbat|no|no|yes|5F|34-35|30%|type1=Poison|type2=Flying}} | | {{Catch/entry3|042|Golbat|no|no|yes|5F|34-35|30%|type1=Poison|type2=Flying}} |
| {{Catch/entry3|302|Sableye|no|no|yes|5F|33-34|30%|type1=Dark|type2=Ghost}} | | {{Catch/entry3|302|Sableye|no|no|yes|5F|33-34|30%|type1=Dark|type2=Ghost}} |
| {{Catch/entry3|334|Altaria|no|no|yes|5F|38-39|6%|type1=Dragon|type2=Flying}}
| |
| {{Catch/entry3|344|Claydol|no|no|yes|5F|36-38|19%|type1=Ground|type2=Psychic}} | | {{Catch/entry3|344|Claydol|no|no|yes|5F|36-38|19%|type1=Ground|type2=Psychic}} |
| {{Catch/entry3|354|Banette|no|no|yes|5F|37-38|15%|type1=Ghost}} | | {{Catch/entry3|354|Banette|no|no|yes|5F|37-38|15%|type1=Ghost}} |
| {{Catch/div|ruins|Special}}
| | {{Catch/entry3|334|Altaria|no|no|yes|5F|38-39|6%|type1=Dragon|type2=Flying}} |
| {{Catch/entry3|384|Rayquaza|yes|yes|yes|Special|70|One|type1=Dragon|type2=Flying}} | |
| {{Catch/footer|ruins}} | | {{Catch/footer|ruins}} |
| |} | | |} |
|
| |
|
| ''Note: Rayquaza can be caught any time after it has stopped the fight between Groudon and Kyogre.'' | | ===Exterior=== |
| | After climbing through the tunnel from the sea, you emerge on the island's upper level. [[Wallace]] approaches you from the tower, having just unlocked the door. Sudden earthquakes rock the island as the weather distortions continue to spread from {{ci|Sootopolis}}. He's worried about the city and heads back, leaving you to scale the tower on your own. |
| | |
| | ===1F-5F=== |
| | Enter the tower and climb the stairs to 4F. Step onto the cracked tiles on the north side of the floor; this causes you to fall back down to a previously-inaccessible part of 3F. Climb to 5F and take the stairs in the northeast to reach the apex. |
|
| |
|
| Rayquaza will be waiting at the top level of the Sky Pillar, which is just a short {{m|Surf}} from [[Pacifidlog Town]]. You will need a [[Mach Bike]] to ride past the [[Cracked tile#Generation III|cracked tiles]]. The tower has crumbled since you've been here last, and will be a lot harder to get through! Every other floor will have a lot of cracked tiles, but the floors with cracked tiles do not have [[wild Pokémon]].
| | ===Apex=== |
| | Upon reaching the rooftop, you find the legendary creature beyond one final flight of stairs. Approach the dragon and it awakens, before flying off with a cry loud enough to shake the tower. Follow it back to Sootopolis! |
|
| |
|
| {{Pokémon
| | ==Sootopolis City (second visit)== |
| |gen=3
| | ===Rayquaza to the Rescue=== |
| |game=Emerald
| | When you return to {{ci|Sootopolis}}, you find the two super-ancient Pokémon still locked in battle. {{p|Rayquaza}} suddenly appears in a beam of green light shining through the storm clouds, and quickly descends to the city. It hovers above the two combatants, and ends the fighting with a single, intimidating roar. {{p|Groudon}} and {{p|Kyogre}} flee, Rayquaza flies off back to [[Sky Pillar]] with another loud cry, and the weather returns to normal. With the super-ancient Pokémon gone, you can now find wild Pokémon while surfing in Sootopolis City. |
| |ndex=384
| |
| |pokemon=Rayquaza
| |
| |ability=Air Lock
| |
| |level=70
| |
| |type1=Dragon
| |
| |type2=Flying
| |
| |move1=Fly|move1type=Flying
| |
| |move2=Rest|move2type=Psychic | |
| |move3=ExtremeSpeed|move3type=Normal | |
| |move4=Outrage|move4type=Dragon}}
| |
|
| |
|
| Before talking to Rayquaza, '''save the game'''. Make sure you bring 40 or more Ultra Balls and have your party at full health. When you're ready, talk to Rayquaza. It's a {{t|Dragon}}/{{t|Flying}}-type and therefore has a 4× weakness to {{type|Ice}} moves. Use a powerful {{t|Rock}}-, {{t|Dragon}}-, or {{t|Ice}}-type move to bring it down to low health and hopefully Freeze it. Be wary of {{m|ExtremeSpeed}}, which [[Priority|always goes first]] and can possibly take your Pokémon down in a few shots before you can do much. Rayquaza also knows {{m|Fly}}, {{m|Rest}} to heal itself, and the extremely powerful attack {{m|Outrage}}. Once Rayquaza's HP bar is down to yellow or red, inflict a status condition such as {{status|sleep}} or {{status|paralysis}}. Take it down to low health with normally effective moves or {{m|False Swipe}}, then keep throwing Ultra Balls. If (and when) Rayquaza heals itself with Rest, use the opportunity to gets its HP down again and catch it while it's still sleeping.
| | {| class="expandable" style="margin: auto; background: #AFAFAF; {{roundy}}; border: 5px solid #C0C0C0;" |
| | |- align="center" |
| | ! Available Pokémon |
| | |- |
| | | |
| | {{Catch/header|water|no}} |
| | {{Catch/div|water|Surfing}} |
| | {{Catch/entry3|129|Magikarp|no|no|yes|Surf|5-35|100%|type1=Water}} |
| | {{Catch/div|water|Fishing}} |
| | {{Catch/entry3|129|Magikarp|no|no|yes|Fish Old|5-10|70%|type1=Water}} |
| | {{Catch/entry3|072|Tentacool|no|no|yes|Fish Old|5-10|30%|type1=Water|type2=Poison}} |
| | {{Catch/entry3|129|Magikarp|no|no|yes|Fish Good|10-30|100%|type1=Water}} |
| | {{Catch/entry3|129|Magikarp|no|no|yes|Fish Super|30-35|80%|type1=Water}} |
| | {{Catch/entry3|130|Gyarados|no|no|yes|Fish Super|5-45|20%|type1=Water|type2=Flying}} |
| | {{Catch/footer|water}} |
| | |} |
| | {| class="expandable" style="margin: auto; background: #AFAFAF; {{roundy}}; border: 5px solid #C0C0C0;" |
| | |- align="center" |
| | ! Items |
| | |- |
| | | |
| | {{itlisth|water}} |
| | {{catch/div|water|After calming Groudon and Kyogre and talk to Maxie and Archie}} |
| | {{itemlist|HM Water|From Wallace in front of the Gym|E=yes|display={{HM|07|Waterfall}}}} |
| | {{itemlist|TM Fighting|From the Black Belt in the northwestern-most house|E=yes|display={{TM|31|Brick Break}}}} |
| | {{catch/div|water|After defeating the Sootopolis Gym}} |
| | {{itemlist|TM Water|From Juan upon his defeat|E=yes|display={{TM|03|Water Pulse}}}} |
| | {{itemlist|None|From the girl in the house east of the Pokémon Center|E=yes|display={{DL|Decoration|Pokémon dolls 2|Wailmer Doll}}|sprite=Doll Wailmer III}} |
| | {{itemlist|Elixir| |
| | * House northeast of the Pokémon Center, from the Fisherman if shown a large {{p|Seedot}} |
| | * House northeast of the Pokémon Center, from the Hiker if shown a large {{p|Lotad}}|E=yes|display=[[Elixir]] ×2}} |
| | {{itlistfoot|water}} |
| | |} |
| | Note: If you were to return to the Sky Pillar, Rayquaza would be there, waiting to battle. |
|
| |
|
| Remember that if you knock out Rayquaza, accidentally run away, or if it defeats you, you can reset the game and try again.
| | [[Kiri]] still will not give out Berries after Rayquaza appears here in the city, you should first defeat the Gym Leader of Sootopolis City. |
|
| |
|
| ==Catching the Regis==
| | [[Maxie]], [[Archie]], {{Steven}}, and [[Wallace]] all witness these events from the Gym island. [[Kiri]] still will not give out Berries after Rayquaza appears here in the city, you should first defeat the Gym Leader of Sootopolis City. The team leaders realize and accept their mistakes, then leave for [[Mt. Pyre]] to return the [[Red Orb|Red]] and [[Blue Orb]]s. Wallace thanks you on behalf of the people of [[Hoenn]], and gives you {{HM|07|Waterfall}} as a gift. With this, a Pokémon can force its way up a waterfall, but using it requires defeating the Sootopolis Gym first! |
| ''Note: The [[Regis]] can be caught any time after you have seven [[Badge]]s.''
| |
|
| |
|
| These interesting creatures are considerably easier to catch than Kyogre or Groudon because they are each only Level 40. Each one is in a tiny cave on a different route, accessible only after the [[Sealed Chamber]]'s puzzle has been solved.
| | ===Move Tutor=== |
| | Visit the Pokémon Center to prepare for the upcoming Gym. Inside, you find a girl near the bookcase on the left side of the counter. Speak to her, and she offers to teach the move {{m|Double-Edge}} to a Pokémon, one time only. |
|
| |
|
| ===Unlocking the Sealed Chamber=== | | ===Sootopolis Gym=== |
| [[File:Sealed Chamber underwater RSE.png|100px|left|thumb|The underwater path to the Sealed Chamber]] | | [[File:Sootopolis Gym 1F E.png|thumb|Sootopolis Gym, 1F]] |
| [[File:Sealed Chamber 1R E.png|180px|right|thumb|First room of Sealed Chamber]]
| | [[File:Sootopolis Gym B1F E.png|thumb|Sootopolis Gym, B1F]] |
| [[File:Sealed Chamber 2R E.png|180px|right|thumb|Second room of Sealed Chamber]] | |
|
| |
|
| | {{sign|E|header}} |
| | {{sign|E|title|Sootopolis City Pokémon Gym<br>Leader: Juan}} |
| | {{sign|E|The Gym Leader with the beauty of pure water!}} |
| | {{sign|E|footer}} |
|
| |
|
| '''You will need {{m|Surf}}, {{m|Dive}}, a {{p|Relicanth}}, a {{p|Wailord}}, and a Pokémon knowing {{m|Dig}} to successfully open the Sealed Chamber.''' A Relicanth can be caught in underwater patches of [[seaweed]], and Wailord evolves from {{p|Wailmer}} at Level 40 and is also extremely rarely found on {{rt|129|Hoenn}}. (Evolving Wailord from Wailmer is much easier than trying to find a wild one, since it has a 1% encounter rate.)
| | The [[Sootopolis Gym]] Specializes in {{type|Water}} Pokémon. {{t|Grass}}- and {{type|Electric}} moves are best here, while {{t|Fire}}, {{t|Ground}}, and {{t|Rock}} Pokémon may struggle. The Gym features three platforms where each icy tile must be traversed once in order to defrost the next stairway. Walking over an ice tile once cracks it; passing by a second time shatters it, leaving you to fall to the Gym's snowy underbelly where plenty of Trainers await. |
|
| |
|
| On {{rt|134|Hoenn}}, there is a certain spot where you can use {{m|Dive}}. Dive there, and once you're underwater, head through the door and continue traveling south to reach a strange inscription. this inscription is coded in [[Braille]]. At the exact spot in front of the inscription, use Dive again. You will now be in a mysterious cave filled with mounds of earth. Position Wailord in the first slot of your party and Relicanth in the sixth. At the north end of the cave, there is another inscription. Use Dig right in front of it to open the door to the next room. In the second room, read the inscription in the northern part of the room and there will be an earthquake! The Regis are now unlocked.
| | The first puzzle is a 3×3 grid of ice, with two icy rocks as obstacles. Starting on the south-central tile, move ←1, ↑1, →2, ↑1 and ←1. This reveals the first stairway. |
|
| |
|
| | The second puzzle is a 7×3 grid, with two icy rocks as obstacles. From the south-central tile, move ←3, ↑2, →2, ↓1, →2, ↓1, →2, ↑2, and ←3. This reveals the second stairway. |
|
| |
|
| | The final puzzle is an 11×4 grid, with six icy rocks as obstacles. Starting on the south-central tile, move ←5, ↑3, →1, ↓1, →1, ↓1, →1, ↑2, →1, ↓1, →1, ↓1, →2, ↑1, →1, ↓1, →1, ↓1, →1, ↑3, and ←5. This reveals the stairway to the Gym Leader. |
|
| |
|
| ====Regice====
| | [[Juan]] leads with his {{p|Luvdisc}}; not much of a threat, but it may still confuse its target with {{m|Sweet Kiss}}, and further hinder male targets with {{m|Attract}}. As a {{2t|Water|Ground}} Pokémon, his {{p|Whiscash}} is only vulnerable to Grass moves; its {{m|Rain Dance}} temporarily strengthens Water moves, while {{m|Earthquake}} can deter {{type|Electric}} opponents. {{p|Sealeo}}'s {{2t|Ice|Water}} typing gives it additional weaknesses to {{t|Fighting}} and {{t|Rock}} moves; {{m|Water Pulse}} and {{m|Body Slam}} deal damage while {{m|Encore}} forces the target to repeat its previous move. His {{p|Crawdaunt}} is not a major threat, as all Water moves are [[Special move]]s and its {{stat|Special Attack}} is lower than its {{stat|Attack}}, but it can still deal damage. Finally, his {{p|Kingdra}} can inflict serious damage with Water Pulse, and use {{m|Ice Beam}} to deal with Grass types; use powerful moves to defeat it quickly, before it can regain health with {{m|Rest}}. |
| [[File:Island Cave RSE.png|180px|left|thumb|Outside of Island Cave]] | |
|
| |
|
| {{p|Regice}} awaits in the [[Island Cave]], accessible by Surf on {{rt|105|Hoenn}}. This cave also has a puzzle, but it's easy. Following the braille inscription's directions ("<sc>Stay close to the wall. Run around one lap.</sc>"), walk clockwise once around the the inside of the cave, staying as close to the wall as possible. If you do it right, the door will open. | | {| align="center" |
| | |- align="center" valign="top" |
| | | |
| | {| align="center" style="background: #{{water color}}; {{roundy}}; border: 5px solid #{{water color light}};" |
| | |- align="center" |
| | ! Sootopolis Gym<br>[[File:Rain Badge.png|35px|The Rain Badge]]<br><br> |
| | |- |
| | | |
| | {| align="center" class="expandable" style="background: #{{water color}}; {{roundy}}; border: 5px solid #{{water color light}};" |
| | |- align="center" |
| | ! Trainers |
| | |- |
| | | |
| | {{Trainerheader|Water}} |
| | {{Trainerentry|Spr RS Beauty.png|Beauty|Connie|3200|1|118|Goldeen|♀|40|}} |
| | {{Trainerdiv|Water}} |
| | {{Trainerentry|Spr RS Lass.png|Lass|Andrea|640|1|370|Luvdisc|♀|40|}} |
| | {{Trainerdiv|Water}} |
| | {{Trainerentry|Spr RS Lady.png|Lady|Daphne|7800<br><small>Potential [[Double Battle]] with Annika</small>|2|370|Luvdisc|♀|39|Nugget|370|Luvdisc|♀|39|Nugget}} |
| | {{Trainerdiv|Water}} |
| | {{Trainerentry|Spr RS Pokéfan F.png|Pokéfan|Annika|3120<br><small>Potential [[Double Battle]] with Daphne</small>|2|349|Feebas|♀|39|Oran Berry|349|Feebas|♀|39|Oran Berry}} |
| | {{Trainerdiv|Water}} |
| | {{Trainerentry|Spr RS Beauty.png|Beauty|Tiffany|3120<br><small>Potential [[Double Battle]] with Crissy</small>|2|318|Carvanha|♀|39|None|319|Sharpedo|♀|39|}} |
| | {{Trainerdiv|Water}} |
| | {{Trainerentry|Spr RS Lass.png|Lass|Crissy|624<br><small>Potential [[Double Battle]] with Tiffany</small>|2|118|Goldeen|♀|39|None|320|Wailmer|♀|39|}} |
| | {{Trainerdiv|Water}} |
| | {{Trainerentry|Spr RS Pokéfan F.png|Pokéfan|Bethany|3120<br><small>Potential [[Double Battle]] with Olivia</small>|3|298|Azurill|♀|35|Oran Berry|183|Marill|♀|37|Oran Berry|184|Azumarill|♀|39|Oran Berry}} |
| | {{Trainerdiv|Water}} |
| | {{Trainerentry|Spr RS Beauty.png|Beauty|Olivia|3120<br><small>Potential [[Double Battle]] with Bethany</small>|3|366|Clamperl|♀|35|None|341|Corphish|♀|37|None|271|Lombre|♀|39|}} |
| | {{Trainerdiv|Water}} |
| | {{Trainerentry|Spr RS Lady.png|Lady|Brianna|8000<br><small>Potential [[Double Battle]] with Bridget</small>|1|119|Seaking|♀|40|Nugget}} |
| | {{Trainerdiv|Water}} |
| | {{Trainerentry|Spr RS Beauty.png|Beauty|Bridget|3200<br><small>Potential [[Double Battle]] with Brianna</small>|1|184|Azumarill|♀|40|}} |
| | {{Trainerfooter|Water|3|inside}} |
| | |} |
|
| |
|
| Before you talk to Regice to start the battle, make sure that you have 45 or more [[Ultra Ball]]s with you. It will take 10, 20, 30, or maybe even 40 tries to catch this Pokémon. If you think you're ready, '''save your game''' and then talk to Regice. (Prepare for some interesting battle music.)
| | {| style="margin: auto;" |
| {{-}}
| | | |
| {{Pokémon
| | {{Party/Single |
| |gen=3 | | |color={{water color}}|headcolor={{water color light}}|bordercolor={{water color dark}} |
| |game=Emerald | | |sprite=Spr E Juan.png |
| |ndex=378
| | |prize={{PDollar}}4600 |
| |pokemon=Regice | | |class=Leader|classlink=Gym Leader|name={{color2|000|Juan}} |
| |type1=Ice | | |game=E|location=Sootopolis Gym |
| |level=40 | | |pokemon=5}} |
| |ability=Clear Body | |
| |move1=Icy Wind | |
| |move1type=Ice | |
| |move1cat=Special | |
| |move2=Curse | |
| |move2type=???
| |
| |move2cat=Status | |
| |move3=Superpower | |
| |move3type=Fighting | |
| |move3cat=Physical | |
| |move4=AncientPower | |
| |move4type=Rock
| |
| |move4cat=Physical}}
| |
|
| |
|
| Regice is weak to {{t|Fire}}-, {{t|Steel}}-, {{t|Rock}}-, and {{t|Fighting}}-type moves. Don't take it lightly because of all these weaknesses— its defensive stats are massive, with Special Defense in particular being truly astounding. The only one of its attacks you need to be wary of is {{m|Icy Wind}}. With Regice's abysmal Attack, {{m|Superpower}} and {{m|AncientPower}} won't do much. Get its HP down to red and then keep chucking Ultra Balls until you catch it. If something goes wrong, like if you accidentally knock Regice out or it knocks itself out with {{m|Struggle}}, simply turn off your game (if you saved beforehand as instructed) and everything will be OK again.
| | |{{Pokémon/3|game=Emerald |
| | |ndex=370|pokemon=Luvdisc |
| | |type1=Water |
| | |level=41|gender=female |
| | |ability=Swift Swim |
| | |move1=Water Pulse|move1type=Water |
| | |move2=Attract|move2type=Normal |
| | |move3=Sweet Kiss|move3type=Normal |
| | |move4=Flail|move4type=Normal}} |
|
| |
|
| ====Regirock==== | | |{{Pokémon/3|game=Emerald |
| [[File:Desert Ruins RSE.png|180px|left|thumb|Outside of Desert Ruins]]
| | |ndex=340|pokemon=Whiscash |
| {{p|Regirock}} awaits in the [[Desert Ruins]] of {{rt|111|Hoenn}}'s [[desert]]. You will need {{m|Rock Smash}}. This braille inscription says, "<sc>Left, left, down, down. Then, use Rock Smash.</sc>" Read the inscription and take two steps west and two steps south. Then, use Rock Smash and the door will open. As with Regice, before you start the battle, make sure that you have 45 or more [[Ultra Ball]]s with you. It will take 10, 20, 30, or maybe even 40 tries to catch this Pokémon. If you think you're ready, '''save your game''' and then talk to Regirock.
| | |type1=Water|type2=Ground |
| | |level=41|gender=male |
| | |ability=Oblivious |
| | |move1=Rain Dance|move1type=Water |
| | |move2=Water Pulse|move2type=Water |
| | |move3=Amnesia|move3type=Psychic |
| | |move4=Earthquake|move4type=Ground}} |
|
| |
|
| {{Pokémon | | |{{Pokémon/3|game=Emerald |
| |gen=3 | | |ndex=364|pokemon=Sealeo |
| |game=Emerald | | |type1=Ice|type2=Water |
| |ndex=377 | | |level=43|gender=male |
| |pokemon=Regirock | | |ability=Thick Fat |
| |type1=Rock | | |move1=Encore|move1type=Normal |
| |level=40 | | |move2=Body Slam|move2type=Normal |
| |ability=Clear Body | | |move3=Aurora Beam|move3type=Ice |
| |move1=Rock Throw | | |move4=Water Pulse|move4type=Water}} |
| |move1type=Rock | | {{Party/Div|color={{water color}}}} |
| |move1cat=Physical | | | style="margin:auto" |{{Pokémon/3|game=Emerald |
| |move2=Curse | | |ndex=342|pokemon=Crawdaunt |
| |move2type=??? | | |type1=Water|type2=Dark |
| |move2cat=Status | | |level=43|gender=male |
| |move3=Superpower | | |ability=Hyper Cutter |
| |move3type=Fighting | | |move1=Water Pulse|move1type=Water |
| |move3cat=Physical | | |move2=Crabhammer|move2type=Water |
| |move4=AncientPower | | |move3=Taunt|move3type=Dark |
| |move4type=Rock | | |move4=Leer|move4type=Normal}} |
| |move4cat=Physical}} | | | style="margin:auto" |{{Pokémon/3|game=Emerald |
| | |ndex=230|pokemon=Kingdra |
| | |type1=Water|type2=Dragon |
| | |level=46|gender=male |
| | |ability=Swift Swim |
| | |held=Chesto Berry |
| | |move1=Water Pulse|move1type=Water |
| | |move2=Double Team|move2type=Normal |
| | |move3=Ice Beam|move3type=Ice |
| | |move4=Rest|move4type=Psychic}} |
| | {{Party/Footer}} |
| | |} |
| | |} |
| | |} |
|
| |
|
| Regirock is weak to Fighting-, {{t|Ground}}-, {{t|Grass}}-, {{t|Steel}}-, and {{t|Water}}-type moves. Use a supereffective move or two to get Registeel's HP down to under half, and then use normally effective or "not very effective" attacks to gets its HP down to red. Then, throw Ultra Balls until you catch it, making sure to watch out for {{m|Rock Throw}}, {{m|Superpower}}, and {{m|AncientPower}}! Regirock's base Attack of 100 (which can boost with {{m|Curse}}) can be a real threat. Don't use Pokémon weak to Rock or Fighting in this battle unless they are extremely high-leveled. If things go wrong, turn off the power and things will be OK again. Always save beforehand when attempting to capture Legendary Pokémon unless you're using a [[Master Ball]].
| | Defeated, Juan awards you the {{badge|Rain}}, which ensures obedience from all Pokémon and enables the use of {{m|Waterfall}} in the field. He also gives you {{TM|03|Water Pulse}} as a prize, and registers himself in your PokéNav. With all eight Badges, your next destination is the [[Pokémon League]] in [[Ever Grande City]] to the southeast. To get there, sail southward from [[Mossdeep City]], then eastward through {{rt|128|Hoenn}}'s narrow channel. However, you may want to pick up a few more items before leaving Sootopolis. |
|
| |
|
| ====Registeel==== | | ===Competitive brothers=== |
| [[File:Ancient Tomb RSE.png|180px|left|thumb|Outside of Ancient Tomb]]
| | In the house northeast of the Pokémon Center, there are two brothers who are arguing over two different species of Pokémon. The younger brother is a Fisherman, while the older brother is a Hiker. The younger brother prefers Seedot and the older brother prefers Lotad. |
| {{p|Registeel}} awaits in the [[Ancient Tomb]] on {{rt|120|Hoenn}}. You will need {{m|Flash}}. The inscription reads "<sc>Those who inherit our will, shine in the middle.</sc>" this time. What you need to do is stand in the center of the cave and use Flash. If you do it right, the door will open. You know the drill— just like with the other two Regis, first make sure that you have 45 or more Ultra Balls with you, then save your game and then talk to Registeel.
| |
|
| |
|
| {{Pokémon
| | The brothers are arguing over the sizes of their favorite Pokémon. If a brother is shown a Pokémon of the species he prefers, he will calculate its size and give the player an Elixir if it is larger than any he has seen before. The initial record size is the average height of the species being argued over, which is 0.5 meters. |
| |gen=3
| |
| |game=Emerald
| |
| |ndex=379
| |
| |pokemon=Registeel
| |
| |type1=Steel
| |
| |level=40
| |
| |ability=Clear Body
| |
| |move1=Metal Claw
| |
| |move1type=Steel
| |
| |move1cat=Physical
| |
| |move2=Curse
| |
| |move2type=???
| |
| |move2cat=Status
| |
| |move3=Superpower
| |
| |move3type=Fighting
| |
| |move3cat=Physical
| |
| |move4=AncientPower
| |
| |move4type=Rock
| |
| |move4cat=Physical}}
| |
|
| |
|
| Registeel is weak to Fighting-, {{t|Ground}}-, and Fire-type moves. Keep in mind that its Defense and Special Defense are quite good. Use a supereffective move or two to get Registeel's HP down to under half, and then use {{type|Electric}} or {{type|Water}} attacks to gets its HP down to red. Then, throw Ultra Balls until you catch it. (Remember, if you mess up in some way, turning off the power will fix everything since you saved the game beforehand.)
| | ===A Berry A Day=== |
| | Kiri will give you two Berries each day. She gives one Berry from among the {{b|Pomeg}}, {{b|Kelpsy}}, {{b|Qualot}}, {{b|Hondew}}, {{b|Grepa}}, {{b|Tamato}}, {{b|Cornn}}, {{b|Magost}}, {{b|Rabuta}}, or {{b|Nomel}} Berries; and the other from the {{b|Figy}} or {{b|Iapapa}} specimens. |
|
| |
|
| Now that you've caught all the Legendary Pokémon in the game, there aren't any official quests left, except completing the Pokédex! With 386 Pokémon in this game, it'll be harder than it was in the past two generations, and you'll need to [[trade]] with other games to get them all, but completing the [[National Pokédex]] is an achievable goal. You can also [[PokéNav#Match Call|rematch]] the [[Gym Leader]]s and perfect your skills at the Battle Frontier. This concludes the Emerald walkthrough!
| | {| style="margin: auto; background: #{{berries color}}; {{roundy}}; border: 3px solid #{{berries color dark}};" cellspacing="2" cellpadding="6" |
| | |- |
| | ! colspan="6" style="background: #{{berries color light}}; {{roundytop|5px}};" | After defeating the Sootopolis Gym |
| | |- |
| | ! colspan="4" style="background: #{{berries color light}}; {{roundytop|5px}};" | Berry 1 |
| | ! colspan="2" style="background: #{{berries color light}}; {{roundytop|5px}};" | Berry 2 |
| | |- |
| | |- style="background: #FFF;" |
| | | {{bag|Pomeg Berry}} || [[Pomeg Berry]] || {{bag|Kelpsy Berry}} || [[Kelpsy Berry]] || {{bag|Figy Berry}} || [[Figy Berry]] |
| | |- style="background: #FFF;" |
| | | {{bag|Qualot Berry}} || [[Qualot Berry]] || {{bag|Hondew Berry}} || [[Hondew Berry]] || {{bag|Iapapa Berry}} || [[Iapapa Berry]] |
| | |- style="background: #FFF;" |
| | | {{bag|Grepa Berry}} || [[Grepa Berry]] || {{bag|Tamato Berry}} || [[Tamato Berry]] |
| | |- style="background: #FFF;" |
| | | {{bag|Cornn Berry}} || [[Cornn Berry]] || {{bag|Magost Berry}} || [[Magost Berry]] |
| | |- style="background: #FFF;" |
| | | {{bag|Rabuta Berry}} || [[Rabuta Berry]] || {{bag|Nomel Berry}} || [[Nomel Berry]] |
| | |} |
| | {{-}} |
|
| |
|
| {{WalkthroughPrevNext | | | {{WalkthroughPrevNext |
| game=Emerald | | | |game=Emerald |
| game2=Emerald |
| | |gamename=Emerald |
| gamename=Emerald| | | |prevsection=16 |
| prev=yes |
| | |prevname=Route 126, Sootopolis City, Cave of Origin, Route 129, Route 130, Route 131, Pacifidlog Town |
| next=no |
| | |nextsection=18 |
| prevsection=16 |
| | |nextname=Sky Pillar, Ever Grande City, Victory Road |
| prevname=The Pokémon League
| |
| }} | | }} |
| | |
| | <br> |
| {{Project Walkthroughs notice}} | | {{Project Walkthroughs notice}} |
|
| |
| [[Category:Emerald walkthrough]] | | [[Category:Emerald walkthrough]] |
Routes 132, 133, and 134 (optional)
The waters of Routes 132, 133, and 134 hold strong ocean currents that make travel difficult. While moving primarily westbound, these currents can send you sailing in almost any direction. This makes it necessary to revisit the area in order to explore every island.
| Trainers
|
| Route 132
|
| Trainer
|
Pokémon
|
|
|
|
|
|
|
|
|
|
|
|
|
|
|
|
|
|
|
|
|
|
|
|
|
|
|
|
|
|
|
|
|
|
|
|
|
|
|
|
|
|
|
|
|
|
|
|
|
|
|
|
|
|
|
|
|
| Trainers with a PokéNav by their names will be registered in the Trainer's Eyes or Match Call function after the first battle, and may have a rematch with the player with higher-level Pokémon.
|
|
| Route 133
|
| Trainer
|
Pokémon
|
|
|
|
|
|
|
|
|
|
|
|
|
|
|
|
|
|
|
|
|
|
|
|
|
|
|
|
|
|
|
|
|
|
|
|
|
|
|
|
|
|
| Trainers with a PokéNav by their names will be registered in the Trainer's Eyes or Match Call function after the first battle, and may have a rematch with the player with higher-level Pokémon.
|
|
| Route 134
|
| Trainer
|
Pokémon
|
|
|
|
|
|
|
|
|
|
|
|
|
|
|
|
|
|
|
|
|
|
|
|
|
|
|
|
|
|
|
|
|
|
|
|
|
|
|
|
|
|
|
|
|
|
|
|
|
|
|
|
|
|
| Trainers with a PokéNav by their names will be registered in the Trainer's Eyes or Match Call function after the first battle, and may have a rematch with the player with higher-level Pokémon.
|
|
|
| Available Pokémon
|
| Pokémon
|
Games
|
Location
|
Levels
|
Rate
|
| Surfing
|
|
|
R
|
S
|
E
|
|
5-35
|
60%
|
|
|
R
|
S
|
E
|
|
10-30
|
35%
|
|
|
R
|
S
|
E
|
|
25-30
|
5%
|
| Fishing
|
|
|
R
|
S
|
E
|
|
5-10
|
70%
|
|
|
R
|
S
|
E
|
|
5-10
|
30%
|
|
|
R
|
S
|
E
|
|
10-30
|
60%
|
|
|
R
|
S
|
E
|
|
10-30
|
20%
|
|
|
R
|
S
|
E
|
|
10-30
|
20%
|
|
|
R
|
S
|
E
|
|
30-45
|
45%
|
|
|
R
|
S
|
E
|
|
30-35
|
40%
|
|
|
R
|
S
|
E
|
|
25-30
|
15%
|
| A colored background means that the Pokémon can be found in this location in the specified game. A white background with a colored letter means that the Pokémon cannot be found here.
|
|
| Items
|
| Item
|
Location
|
Games
|
| Route 132
|

|
Rare Candy
|
North side of the northwest island
|
E
|

|
Protein
|
On the ring-shaped patch of shallow water in the southwest
|
E
|
| Route 133
|

|
Star Piece
|
North side of the northwest island
|
E
|

|
Max Revive
|
Among the rocks in the large shallow water patch in the southeast
|
E
|

|
Big Pearl
|
Southern of the two shallows in the northeast
|
E
|
| Route 134
|

|
Carbos
|
South side of the sandy part of the largest island
|
E
|
|
|
Star Piece
|
Shallows in the southwest
|
E
|
|
|
|
Northern path
Ride the central currents to Swimmer Gilbert, then sail westward to reach a Rare Candy opposite Black Belt Kiyo on the northwest island. From here, Surf westward through the northern shallows of Route 133 to reach the north side of the route's northwest island. Collect the Star Piece here, then sail west to the calm waters on Route 134's north side. Take the current south of here to reach the large, thin island. Fight Black Belt Hitoshi and Battle Girl Reyna, collect the nearby Carbos, then Surf west to reach the shallows outside Slateport City.
Central path
Ride the southern currents to the southeast island to fight Fisherman Ronald. Wade into the waters off the north end of the shallows to follow the current to Black Belt Kiyo on the northwest island. Sail westward to ride the current to the southern of two shallows on Route 133, where you'll need to fight Experts Conor and Mollie before collecting the Big Pearl there. Continue westward to reach the south side of Route 133's northwest island, and battle Bird Keeper Beck. Sail west again to battle Sailor Hudson in the shallows of the large island. Head back into the water to follow the current to Slateport City.
To the Depths
Ride the southern currents to fight Fisherman Ronald on the crescent-shaped island, then sail westward to a calm patch of water surrounded by shallows. Grab the Protein, then follow the currents westward to be funneled through a bottleneck; this leads to calm waters with two Swimmers, Debra and Franklin. Pass through the rocky southern islet, collecting the Max Revive along the way, to reach a rectangular patch of shallow water situated between Routes 133 and 134. Step into the water from the west-central side to reach a deep, dark pit of water surrounded by a ring of rocks. Dive beneath the waves and follow the underwater path southward. The markings on the nearby wall are an ancient form of writing, and translate to Go up here. Surface from this point to emerge in an ancient ruin known as the Sealed Chamber. Once you're done exploring the Sealed Chamber, surface on Route 134 where you left off and continue west and then south to a small maze of rocks. Leave the maze through its westernmost exit to Sailor Hudson's island, then Surf further west to reach the shallows outside Slateport City.
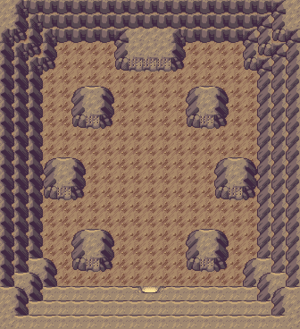
Sealed Chamber, Back Room
Sealed Chamber
The Sealed Chamber is a mysterious ruin located in the depths of Route 134. The many stone tablets positioned around the chamber feature the same mysterious writing that was found near the underwater entrance. Solving some of Hoenn's oldest mysteries hinges on deciphering this age-old system.
Entrance
The first chamber holds ten stone tablets that act as a key to decoding this ancient writing system, known as Braille. These 28 characters correspond to the 26 letters of the alphabet, as well as the comma and period. Inspect the markings on the cavern's north wall to reveal a phrase, which translates to Dig here. Using the field move causes the wall to fall away, granting you access to a second cavern.
Back Room
The central ruins are encircled by six more stone tablets which tell of a powerful Pokémon that was sealed away. The message on the north wall reads, First comes Wailord. Last comes Relicanth. Relicanth can be found only in a few underwater areas, while Wailord's pre-evolved form, Wailmer, can be found in many areas with the Good Rod or Super Rod. Position these Pokémon in their respective places in your party and examine the wall again. This causes a mighty earthquake to rock the Sealed Chamber, while the sound of doors opening echoes from somewhere far away. Three separate ruins have now been opened, and each one holds a legendary Pokémon!
Desert Ruins (optional)
The Desert Ruins lie among the dunes of Route 111. Another coded message can be found on the north wall.
Entrance
Examine the north wall to view the message, which reads, Left, left, down, down. Then, use Rock Smash. Close the message box and move exactly as instructed, two steps west and two steps south. Have a Pokémon use Rock Smash from this location, and a secret passage opens in the north wall!
Back Room
Follow the passage to the back cavern, where the legendary Pokémon Regirock awaits.
Island Cave (optional)
The Island Cave sits on a small isle in the northwest part of Route 105. Another coded message can be found on the north wall.
Entrance
Examine the north wall to view the message, which reads, Stay close to the wall. Run around one lap. Close the message box and make a lap of the chamber, staying near the walls. After doing so, a secret passage appears out of nowhere!
Back Room
Follow the passage to the back cavern, where the legendary Pokémon Regice awaits.
Ancient Tomb (optional)
The Ancient Tomb stands on the southwest plateau of Route 120. Another coded message can be found on the north wall.
Entrance
Examine the north wall to view the message, which reads, Those who inherit our will, shine in the middle. Close the message box and move to the center of the cave. Have a Pokémon use Flash from this location, and a secret passage appears out of nowhere!
Back Room
Follow the passage to the back cavern, where the legendary Pokémon Registeel awaits.
Sky Pillar
On the northern side of Route 131, Sky Pillar is an ancient, towering altar built for the ascension of Hoenn's ageless protector, the legendary dragon Rayquaza.
| Available Pokémon
|
| Pokémon
|
Games
|
Location
|
Levels
|
Rate
|
| 1F
|
|
|
R
|
S
|
E
|

|
1F
|
|
34-35
|
30%
|
|
|
R
|
S
|
E
|
|
|
1F
|
|
33-34
|
30%
|
|
|
R
|
S
|
E
|
|
|
1F
|
|
36-38
|
25%
|
|
|
R
|
S
|
E
|
|
|
1F
|
|
37-38
|
15%
|
| 3F
|
|
|
R
|
S
|
E
|
|
|
3F
|
|
34-35
|
30%
|
|
|
R
|
S
|
E
|
|
|
3F
|
|
33-34
|
30%
|
|
|
R
|
S
|
E
|
|
|
3F
|
|
36-38
|
25%
|
|
|
R
|
S
|
E
|
|
|
3F
|
|
37-38
|
15%
|
| 5F
|
|
|
R
|
S
|
E
|
|
|
5F
|
|
34-35
|
30%
|
|
|
R
|
S
|
E
|
|
|
5F
|
|
33-34
|
30%
|
|
|
R
|
S
|
E
|
|
|
5F
|
|
36-38
|
19%
|
|
|
R
|
S
|
E
|
|
|
5F
|
|
37-38
|
15%
|
|
|
R
|
S
|
E
|
|
|
5F
|
|
38-39
|
6%
|
| A colored background means that the Pokémon can be found in this location in the specified game. A white background with a colored letter means that the Pokémon cannot be found here.
|
|
Exterior
After climbing through the tunnel from the sea, you emerge on the island's upper level. Wallace approaches you from the tower, having just unlocked the door. Sudden earthquakes rock the island as the weather distortions continue to spread from Sootopolis. He's worried about the city and heads back, leaving you to scale the tower on your own.
1F-5F
Enter the tower and climb the stairs to 4F. Step onto the cracked tiles on the north side of the floor; this causes you to fall back down to a previously-inaccessible part of 3F. Climb to 5F and take the stairs in the northeast to reach the apex.
Apex
Upon reaching the rooftop, you find the legendary creature beyond one final flight of stairs. Approach the dragon and it awakens, before flying off with a cry loud enough to shake the tower. Follow it back to Sootopolis!
Sootopolis City (second visit)
Rayquaza to the Rescue
When you return to Sootopolis, you find the two super-ancient Pokémon still locked in battle. Rayquaza suddenly appears in a beam of green light shining through the storm clouds, and quickly descends to the city. It hovers above the two combatants, and ends the fighting with a single, intimidating roar. Groudon and Kyogre flee, Rayquaza flies off back to Sky Pillar with another loud cry, and the weather returns to normal. With the super-ancient Pokémon gone, you can now find wild Pokémon while surfing in Sootopolis City.
| Available Pokémon
|
| Pokémon
|
Games
|
Location
|
Levels
|
Rate
|
| Surfing
|
|
|
R
|
S
|
E
|
|
5-35
|
100%
|
| Fishing
|
|
|
R
|
S
|
E
|
|
5-10
|
70%
|
|
|
R
|
S
|
E
|
|
5-10
|
30%
|
|
|
R
|
S
|
E
|
|
10-30
|
100%
|
|
|
R
|
S
|
E
|
|
30-35
|
80%
|
|
|
R
|
S
|
E
|
|
5-45
|
20%
|
| A colored background means that the Pokémon can be found in this location in the specified game. A white background with a colored letter means that the Pokémon cannot be found here.
|
|
| Items
|
| Item
|
Location
|
Games
|
| After calming Groudon and Kyogre and talk to Maxie and Archie
|

|
HM07 (Waterfall)
|
From Wallace in front of the Gym
|
E
|

|
TM31 (Brick Break)
|
From the Black Belt in the northwestern-most house
|
E
|
| After defeating the Sootopolis Gym
|

|
TM03 (Water Pulse)
|
From Juan upon his defeat
|
E
|

|
Wailmer Doll
|
From the girl in the house east of the Pokémon Center
|
E
|

|
Elixir ×2
|
- House northeast of the Pokémon Center, from the Fisherman if shown a large Seedot
- House northeast of the Pokémon Center, from the Hiker if shown a large Lotad
|
E
|
|
|
|
Note: If you were to return to the Sky Pillar, Rayquaza would be there, waiting to battle.
Kiri still will not give out Berries after Rayquaza appears here in the city, you should first defeat the Gym Leader of Sootopolis City.
Maxie, Archie, Steven, and Wallace all witness these events from the Gym island. Kiri still will not give out Berries after Rayquaza appears here in the city, you should first defeat the Gym Leader of Sootopolis City. The team leaders realize and accept their mistakes, then leave for Mt. Pyre to return the Red and Blue Orbs. Wallace thanks you on behalf of the people of Hoenn, and gives you HM07 (Waterfall) as a gift. With this, a Pokémon can force its way up a waterfall, but using it requires defeating the Sootopolis Gym first!
Move Tutor
Visit the Pokémon Center to prepare for the upcoming Gym. Inside, you find a girl near the bookcase on the left side of the counter. Speak to her, and she offers to teach the move Double-Edge to a Pokémon, one time only.
Sootopolis Gym
Sootopolis City Pokémon Gym
Leader: Juan
The Gym Leader with the beauty of pure water!
The Sootopolis Gym Specializes in Water-type Pokémon. Grass- and Electric-type moves are best here, while Fire, Ground, and Rock Pokémon may struggle. The Gym features three platforms where each icy tile must be traversed once in order to defrost the next stairway. Walking over an ice tile once cracks it; passing by a second time shatters it, leaving you to fall to the Gym's snowy underbelly where plenty of Trainers await.
The first puzzle is a 3×3 grid of ice, with two icy rocks as obstacles. Starting on the south-central tile, move ←1, ↑1, →2, ↑1 and ←1. This reveals the first stairway.
The second puzzle is a 7×3 grid, with two icy rocks as obstacles. From the south-central tile, move ←3, ↑2, →2, ↓1, →2, ↓1, →2, ↑2, and ←3. This reveals the second stairway.
The final puzzle is an 11×4 grid, with six icy rocks as obstacles. Starting on the south-central tile, move ←5, ↑3, →1, ↓1, →1, ↓1, →1, ↑2, →1, ↓1, →1, ↓1, →2, ↑1, →1, ↓1, →1, ↓1, →1, ↑3, and ←5. This reveals the stairway to the Gym Leader.
Juan leads with his Luvdisc; not much of a threat, but it may still confuse its target with Sweet Kiss, and further hinder male targets with Attract. As a Water/Ground Pokémon, his Whiscash is only vulnerable to Grass moves; its Rain Dance temporarily strengthens Water moves, while Earthquake can deter Electric-type opponents. Sealeo's Ice/Water typing gives it additional weaknesses to Fighting and Rock moves; Water Pulse and Body Slam deal damage while Encore forces the target to repeat its previous move. His Crawdaunt is not a major threat, as all Water moves are Special moves and its Special Attack is lower than its Attack, but it can still deal damage. Finally, his Kingdra can inflict serious damage with Water Pulse, and use Ice Beam to deal with Grass types; use powerful moves to defeat it quickly, before it can regain health with Rest.
Sootopolis Gym

|
| Trainers
|
| Trainer
|
Pokémon
|
|
|
|
|
|
|
|
|
|
|
|
|
|
|
|
|
|
|
|
|
|
|
|
|
|
|
|
|
|
|
|
|
|
|
|
|
|
|
|
|
|
|
|
|
|
|
|
|
|
|
|
|
|
|
|
|
|
|
|
|
|
|
|
|
| Trainers with a PokéNav by their names will be registered in the Trainer's Eyes or Match Call function after the first battle, and may have a rematch with the player with higher-level Pokémon.
|
|

|
|
Reward: $4600
|
|
|
|
|
|
|
|
|
Defeated, Juan awards you the Rain Badge, which ensures obedience from all Pokémon and enables the use of Waterfall in the field. He also gives you TM03 (Water Pulse) as a prize, and registers himself in your PokéNav. With all eight Badges, your next destination is the Pokémon League in Ever Grande City to the southeast. To get there, sail southward from Mossdeep City, then eastward through Route 128's narrow channel. However, you may want to pick up a few more items before leaving Sootopolis.
Competitive brothers
In the house northeast of the Pokémon Center, there are two brothers who are arguing over two different species of Pokémon. The younger brother is a Fisherman, while the older brother is a Hiker. The younger brother prefers Seedot and the older brother prefers Lotad.
The brothers are arguing over the sizes of their favorite Pokémon. If a brother is shown a Pokémon of the species he prefers, he will calculate its size and give the player an Elixir if it is larger than any he has seen before. The initial record size is the average height of the species being argued over, which is 0.5 meters.
A Berry A Day
Kiri will give you two Berries each day. She gives one Berry from among the Pomeg, Kelpsy, Qualot, Hondew, Grepa, Tamato, Cornn, Magost, Rabuta, or Nomel Berries; and the other from the Figy or Iapapa specimens.


