Appendix:Diamond and Pearl walkthrough/Section 18: Difference between revisions
No edit summary |
|||
| Line 55: | Line 55: | ||
He has three Pokémon— {{p|Murkrow}}, {{p|Golbat}} and {{p|Sneasel}}. Due to their types, {{type|Rock}} moves will destroy his whole team without much effort, but {{type|Fighting}} moves are far more effective when dealing with the speedy but fragile Sneasel, which is also Cyrus' strongest Pokémon, at Level 43. You should know how to deal with Sneasel and Golbat. The first Pokémon he sends out-- Murkrow, is a {{t|Dark}}/{{t|Flying}}-type Pokemon. One of its moves {{m|Embargo}} prevents you from using items on your Pokémon, so knock Murkrow out as soon as possible. The weaknesses of Dark types are covered, so aim at the weaknesses of the Flying type. | He has three Pokémon— {{p|Murkrow}}, {{p|Golbat}} and {{p|Sneasel}}. Due to their types, {{type|Rock}} moves will destroy his whole team without much effort, but {{type|Fighting}} moves are far more effective when dealing with the speedy but fragile Sneasel, which is also Cyrus' strongest Pokémon, at Level 43. You should know how to deal with Sneasel and Golbat. The first Pokémon he sends out-- Murkrow, is a {{t|Dark}}/{{t|Flying}}-type Pokemon. One of its moves {{m|Embargo}} prevents you from using items on your Pokémon, so knock Murkrow out as soon as possible. The weaknesses of Dark types are covered, so aim at the weaknesses of the Flying type. | ||
After Cyrus is defeated, he talks again. He has known that your power comes from compassion towards Pokémon. He says that the compassion is only "wasteful illusions". He also says that he neither makes Pokémon friends or partners like you, nor uses them as tools like other Team Galactic members. Instead, he makes the power of Pokémon his own. Then he recognizes that "you are strong and courageous to come alone". He also gives you the ultimate version of the Poke Ball— the [[Master Ball]], which he doesn't need, as the reward. He steps to the right and tells you to "take the warp panel ahead" and save the Lake guardians. He also says that he is "off to [[Mt. Coronet]]". Not sure? He confirms once more— | After Cyrus is defeated, he talks again. He has known that your power comes from compassion towards Pokémon. He says that the compassion is only "wasteful illusions". He also says that he neither makes Pokémon friends or partners like you, nor uses them as tools like other Team Galactic members. Instead, he makes the power of Pokémon his own. Then he recognizes that "you are strong and courageous to come alone". He also gives you the ultimate version of the Poke Ball— the [[Master Ball]], which he doesn't need, as the reward. He steps to the right and tells you to "take the warp panel ahead" and save the Lake guardians. He also says that he is "off to [[Mt. Coronet]]". Not sure? He confirms once more— ''"That's correct. Mt. Coronet. Where you and I first met."'' He also says that he will ascend the mountain to its peak, not only to put an end to everything, but also bring about a new beginning for everything. He then leaves. | ||
Now collect the hidden [[Nugget]] with the help of your Pokétch App Dowsing Machine, check the computer and head back to the Nap Room to heal your Pokémon. | |||
===VS Saturn, Rescuing the Lake Guardians=== | ===VS Saturn, Rescuing the Lake Guardians=== | ||
'''Again, make sure that you go back to Team Galactic Nap Room and heal your Pokémon by taking a nap before proceeding!''' | '''Again, make sure that you go back to Team Galactic Nap Room and heal your Pokémon by taking a nap before proceeding!''' | ||
| Line 154: | Line 151: | ||
**'''If your Pokémon are at or below Level 40, don't even dare to proceed to the mountainside of Mt. Coronet!''' | **'''If your Pokémon are at or below Level 40, don't even dare to proceed to the mountainside of Mt. Coronet!''' | ||
==Oreburgh | Once you know you're ready, it's time to go save the world! | ||
==Oreburgh City— Route 207 / Hearthome City— Route 208== | |||
Fly to either [[Oreburgh City]] or [[Hearthome City]] when you are ready. Go through {{rt|207|Sinnoh}} or {{rt|208|Sinnoh}} and enter [[Mt. Coronet]]. | Fly to either [[Oreburgh City]] or [[Hearthome City]] when you are ready. Go through {{rt|207|Sinnoh}} or {{rt|208|Sinnoh}} and enter [[Mt. Coronet]]. | ||
==Mt. Coronet (Southern Area Part 2)== | ==Mt. Coronet (Southern Area Part 2)== | ||
=== | ===1F=== | ||
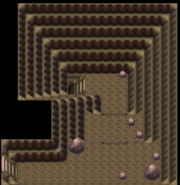
Surf across the northern pond, climb up the wall, then go up the stairs. | [[File:Mt Coronet 1F south Pt.png|180px|left|thumb|1F]] | ||
=== | Surf across the northern pond, {{m|Rock Climb|climb up the wall}}, then go up the stairs. | ||
===2F=== | |||
[[File:Mt Coronet 2F Pt.png|275px|right|thumb|2F]] | |||
{| class="expandable" align="center" style="background: #{{Pearl color light}}; -moz-border-radius: 1em; border: 5px solid #{{Diamond color light}};" | {| class="expandable" align="center" style="background: #{{Pearl color light}}; -moz-border-radius: 1em; border: 5px solid #{{Diamond color light}};" | ||
|- align="center" | |- align="center" | ||
! Available Pokémon ( | ! Available Pokémon (2F, 3F) | ||
|- | |- | ||
| | | | ||
| Line 177: | Line 178: | ||
{{catch/footer|cave}} | {{catch/footer|cave}} | ||
|} | |} | ||
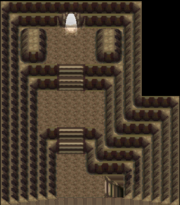
If you went here to [[Appendix:Diamond and Pearl walkthrough/Section 17#Mt. Coronet (southern area)|collect items]] after beating the [[Snowpoint Gym]], then just head straight to the cavern that was previously blocked. If you haven't, explore 2F before heading deeper into the mountain. Now that the "cave painting" is removed, you can proceed into another room. Go through this "doorway" and up the stairs. | |||
| | |||
===3F=== | |||
[[File:Mt Coronet 3F Pt.png|180px|left|thumb|3F]] | |||
{| class="expandable" align="center" style="background: #{{Pearl color light}}; -moz-border-radius: 1em; border: 5px solid #{{Diamond color light}};" | {| class="expandable" align="center" style="background: #{{Pearl color light}}; -moz-border-radius: 1em; border: 5px solid #{{Diamond color light}};" | ||
|- align="center" | |- align="center" | ||
! Item ( | ! Item (3F) | ||
|- | |- | ||
| | | | ||
| Line 207: | Line 193: | ||
{| class="expandable" align="center" style="background: #{{Pearl color light}}; -moz-border-radius: 1em; border: 5px solid #{{Diamond color light}};" | {| class="expandable" align="center" style="background: #{{Pearl color light}}; -moz-border-radius: 1em; border: 5px solid #{{Diamond color light}};" | ||
|- align="center" | |- align="center" | ||
! Trainers ( | ! Trainers (3F) | ||
|- | |- | ||
| | | | ||
| Line 216: | Line 202: | ||
{{Trainerfooter|cave|1}} | {{Trainerfooter|cave|1}} | ||
|} | |} | ||
Go down the stairs on the east. You can get a hidden [[Max Revive]] out of the rock in the center of the room. After getting it, go back up the stairs. | |||
After this is done, you'll need to start fighting Galactic Grunts again. Head north, grab the hidden [[Super Repel]], fight the grunts, follow the path, then go outside when you are ready to brace the snow. | |||
'''If your Pokémon are at or below Level 40, do not head outside! It will greatly benefit you to train here until they are above Level 40.''' | |||
==Mt. Coronet (Mountainside and Upper Caverns)== | ==Mt. Coronet (Mountainside and Upper Caverns)== | ||
When you get to the mountainside and upper caverns, the background music completely changes. | [[File:Mt Coronet snowy area DPPt.png|right|thumb|275px|Snowy Areas]] | ||
When you get to the mountainside and upper caverns, the background music completely changes. It is snowing on the mountainside, just like Route 216 and Acuity Lakefront. In battles, the snow will change into hail that damages all Pokémon that are not at least partially {{type|Ice}}. | |||
There are many caverns to enter. Some of them let you proceed, and some of them are dead ends (for now). As the Town Map is malfunctioning, it only displays where you enter Mt. Coronet. Therefore, you will need to be very careful not to get lost. Most of the items you can get are hidden, so make sure that your Poketch App Dowsing Machine is ready. | |||
===Southern Mountainside=== | ===Southern Mountainside=== | ||
Head east and follow the path. Grab the hidden [[Full Heal]] in the grass. Follow the elevated path to avoid wild battles. Use Rock Climb twice to get above the eastern entrance of | Head east and follow the path. Grab the hidden [[Full Heal]] in the grass. Follow the elevated path to avoid wild battles. Use Rock Climb twice to get above the eastern entrance of 4F. Grab the hidden [[Nugget]], then climb down once and go east. Get inside. | ||
{| class="expandable" align="center" style="background: #{{Pearl color light}}; -moz-border-radius: 1em; border: 5px solid #{{Diamond color light}};" | {| class="expandable" align="center" style="background: #{{Pearl color light}}; -moz-border-radius: 1em; border: 5px solid #{{Diamond color light}};" | ||
|- align="center" | |- align="center" | ||
! Items ( | ! Items (Southern Mountainside 1) | ||
|- | |- | ||
| | | | ||
| Line 253: | Line 244: | ||
{{Catch/footer|snow}} | {{Catch/footer|snow}} | ||
|} | |} | ||
=== | |||
===4F (Part 1)=== | |||
[[File:Mt Coronet 4F DPPt.png|left|thumb|275px|4F]] | |||
Use Rock Smash to collect the hidden [[PP Up]] and [[TinyMushroom]]. Ignore the waterfall and the cave above for now -- without {{HM|7|Waterfall}}, you cannot gain access. Go up the stairs to get the hidden [[Ultra Ball]]. Then head back outside. | Use Rock Smash to collect the hidden [[PP Up]] and [[TinyMushroom]]. Ignore the waterfall and the cave above for now -- without {{HM|7|Waterfall}}, you cannot gain access. Go up the stairs to get the hidden [[Ultra Ball]]. Then head back outside. | ||
{| class="expandable" align="center" style="background: #{{Pearl color light}}; -moz-border-radius: 1em; border: 5px solid #{{Diamond color light}};" | {| class="expandable" align="center" style="background: #{{Pearl color light}}; -moz-border-radius: 1em; border: 5px solid #{{Diamond color light}};" | ||
| Line 268: | Line 261: | ||
{| class="expandable" align="center" style="background: #{{Pearl color light}}; -moz-border-radius: 1em; border: 5px solid #{{Diamond color light}};" | {| class="expandable" align="center" style="background: #{{Pearl color light}}; -moz-border-radius: 1em; border: 5px solid #{{Diamond color light}};" | ||
|- align="center" | |- align="center" | ||
! Available Pokémon ( | ! Available Pokémon (4F, below waterfall) | ||
|- | |- | ||
| | | | ||
| Line 289: | Line 282: | ||
===Back to Southern Mountainside=== | ===Back to Southern Mountainside=== | ||
This time, go all the way west until you see | This time, go all the way west until you see two paths. Take the lower path, push the boulder with Strength, smash the rock, and get the hidden [[Max Potion]]. Then go west and follow the path without grass, and go through the western entrance of 4F. Nothing is on the higher path except wild Pokémon. | ||
{| class="expandable" align="center" style="background: #{{Pearl color light}}; -moz-border-radius: 1em; border: 5px solid #{{Diamond color light}};" | {| class="expandable" align="center" style="background: #{{Pearl color light}}; -moz-border-radius: 1em; border: 5px solid #{{Diamond color light}};" | ||
|- align="center" | |- align="center" | ||
| Line 299: | Line 292: | ||
{{itlistfoot|snow}} | {{itlistfoot|snow}} | ||
|} | |} | ||
=== | ===4F (Part 2)=== | ||
Climb up the wall, and you will fight the grunts again. Beat them, grab the items (all of them are hidden, and one of them requires you to smash a rock), follow the path all the way to the east, then head outside. | Climb up the wall, and you will fight the grunts again. Beat them, grab the items (all of them are hidden, and one of them requires you to smash a rock), follow the path all the way to the east, then head outside. | ||
{| class="expandable" align="center" style="background: #{{Pearl color light}}; -moz-border-radius: 1em; border: 5px solid #{{Diamond color light}};" | {| class="expandable" align="center" style="background: #{{Pearl color light}}; -moz-border-radius: 1em; border: 5px solid #{{Diamond color light}};" | ||
|- align="center" | |- align="center" | ||
! Items ( | ! Items (4F Part 2) | ||
|- | |- | ||
| | | | ||
| Line 314: | Line 307: | ||
{| class="expandable" align="center" style="background: #{{Pearl color light}}; -moz-border-radius: 1em; border: 5px solid #{{Diamond color light}};" | {| class="expandable" align="center" style="background: #{{Pearl color light}}; -moz-border-radius: 1em; border: 5px solid #{{Diamond color light}};" | ||
|- align="center" | |- align="center" | ||
! Available Pokémon ( | ! Available Pokémon (4F, above waterfall) | ||
|- | |- | ||
| | | | ||
| Line 330: | Line 323: | ||
{| class="expandable" align="center" style="background: #{{Pearl color light}}; -moz-border-radius: 1em; border: 5px solid #{{Diamond color light}};" | {| class="expandable" align="center" style="background: #{{Pearl color light}}; -moz-border-radius: 1em; border: 5px solid #{{Diamond color light}};" | ||
|- align="center" | |- align="center" | ||
! Trainers ( | ! Trainers (4F) | ||
|- | |- | ||
| | | | ||
| Line 344: | Line 337: | ||
{| class="expandable" align="center" style="background: #{{Pearl color light}}; -moz-border-radius: 1em; border: 5px solid #{{Diamond color light}};" | {| class="expandable" align="center" style="background: #{{Pearl color light}}; -moz-border-radius: 1em; border: 5px solid #{{Diamond color light}};" | ||
|- align="center" | |- align="center" | ||
! Item ( | ! Item (Northern Mountainside 1) | ||
|- | |- | ||
| | | | ||
| Line 351: | Line 344: | ||
{{itlistfoot|snow}} | {{itlistfoot|snow}} | ||
|} | |} | ||
===Tunnel=== | ===Tunnel=== | ||
[[File:Mt Coronet 1F tunnel Pt.png|right|thumb|275px|Tunnel]] | |||
There are three grunts for you to fight, a few items for you to get and a grunt which blocks the cave inside, saying that he is "totally lost". Where the grunt blocks is a quick exit that you can access after Team Galactic is gone. Fight the grunts, grab all the items, then get out again. | There are three grunts for you to fight, a few items for you to get and a grunt which blocks the cave inside, saying that he is "totally lost". Where the grunt blocks is a quick exit that you can access after Team Galactic is gone. Fight the grunts, grab all the items, then get out again. | ||
{| class="expandable" align="center" style="background: #{{Pearl color light}}; -moz-border-radius: 1em; border: 5px solid #{{Diamond color light}};" | {| class="expandable" align="center" style="background: #{{Pearl color light}}; -moz-border-radius: 1em; border: 5px solid #{{Diamond color light}};" | ||
| Line 396: | Line 391: | ||
|} | |} | ||
===Back to Northern Mountainside=== | ===Back to Northern Mountainside=== | ||
Climb up to the north to get a hidden [[Rare Candy]], then climb back down. Immediately afterwards, climb to the west. Any of the 2 paths will take you to the far west. On the northernmost ledge, you can grab a hidden [[Big Mushroom]]. East of the entrance | Climb up to the north to get a hidden [[Rare Candy]], then climb back down. Immediately afterwards, climb to the west. Any of the 2 paths will take you to the far west. On the northernmost ledge, you can grab a hidden [[Big Mushroom]]. East of the entrance to 5F, there is a hidden TinyMushroom. Now, go inside 5F. | ||
{| class="expandable" align="center" style="background: #{{Pearl color light}}; -moz-border-radius: 1em; border: 5px solid #{{Diamond color light}};" | {| class="expandable" align="center" style="background: #{{Pearl color light}}; -moz-border-radius: 1em; border: 5px solid #{{Diamond color light}};" | ||
|- align="center" | |- align="center" | ||
! Items ( | ! Items (Northern Mountainside 2) | ||
|- | |- | ||
| | | | ||
| Line 408: | Line 404: | ||
{{itlistfoot|snow}} | {{itlistfoot|snow}} | ||
|} | |} | ||
=== | |||
===5F=== | |||
[[File:Mt Coronet 5F Pt.png|180px|left|thumb|5F]] | |||
Follow the path, grab the TinyMushroom hidden in one of the rocks along the way, then go up the stairs. (There are really a lot of mushrooms in this mountain!) | Follow the path, grab the TinyMushroom hidden in one of the rocks along the way, then go up the stairs. (There are really a lot of mushrooms in this mountain!) | ||
{| class="expandable" align="center" style="background: #{{Pearl color light}}; -moz-border-radius: 1em; border: 5px solid #{{Diamond color light}};" | {| class="expandable" align="center" style="background: #{{Pearl color light}}; -moz-border-radius: 1em; border: 5px solid #{{Diamond color light}};" | ||
|- align="center" | |- align="center" | ||
! Items ( | ! Items (5F) | ||
|- | |- | ||
| | | | ||
| Line 421: | Line 419: | ||
{| class="expandable" align="center" style="background: #{{Pearl color light}}; -moz-border-radius: 1em; border: 5px solid #{{Diamond color light}};" | {| class="expandable" align="center" style="background: #{{Pearl color light}}; -moz-border-radius: 1em; border: 5px solid #{{Diamond color light}};" | ||
|- align="center" | |- align="center" | ||
! Available Pokémon ( | ! Available Pokémon (5F) | ||
|- | |- | ||
| | | | ||
| Line 435: | Line 433: | ||
{{catch/footer|cave}} | {{catch/footer|cave}} | ||
|} | |} | ||
=== | ===6F=== | ||
[[File:Mt Coronet 6F DPPt.png|left|thumb|180px|6F]] | |||
Follow the path, grab the 2 hidden items, fight the grunts, then go up the stairs again. (There are items hidden everywhere!) | Follow the path, grab the 2 hidden items, fight the grunts, then go up the stairs again. (There are items hidden everywhere!) | ||
{| class="expandable" align="center" style="background: #{{Pearl color light}}; -moz-border-radius: 1em; border: 5px solid #{{Diamond color light}};" | {| class="expandable" align="center" style="background: #{{Pearl color light}}; -moz-border-radius: 1em; border: 5px solid #{{Diamond color light}};" | ||
|- align="center" | |- align="center" | ||
! Items ( | ! Items (6F) | ||
|- | |- | ||
| | | | ||
| Line 449: | Line 448: | ||
{| class="expandable" align="center" style="background: #{{Pearl color light}}; -moz-border-radius: 1em; border: 5px solid #{{Diamond color light}};" | {| class="expandable" align="center" style="background: #{{Pearl color light}}; -moz-border-radius: 1em; border: 5px solid #{{Diamond color light}};" | ||
|- align="center" | |- align="center" | ||
! Trainers ( | ! Trainers (6F) | ||
|- | |- | ||
| | | | ||
| Line 458: | Line 457: | ||
{{Trainerfooter|cave|1}} | {{Trainerfooter|cave|1}} | ||
|} | |} | ||
=== | ===7F=== | ||
[[File:Mt Coronet 7F DPPt.png|right|thumb|180px]] | |||
Follow the path and fight the final grunt in the caverns. This grunt is very determined to render your effort completely wasted, so be careful! You came all the way here and now you cannot lose! | Follow the path and fight the final grunt in the caverns. This grunt is very determined to render your effort completely wasted, so be careful! You came all the way here and now you cannot lose! | ||
{| class="expandable" align="center" style="background: #{{Pearl color light}}; -moz-border-radius: 1em; border: 5px solid #{{Diamond color light}};" | {| class="expandable" align="center" style="background: #{{Pearl color light}}; -moz-border-radius: 1em; border: 5px solid #{{Diamond color light}};" | ||
|- align="center" | |- align="center" | ||
! Available Pokémon (6- | ! Available Pokémon (6-7F) | ||
|- | |- | ||
| | | | ||
| Line 477: | Line 477: | ||
{| class="expandable" align="center" style="background: #{{Pearl color light}}; -moz-border-radius: 1em; border: 5px solid #{{Diamond color light}};" | {| class="expandable" align="center" style="background: #{{Pearl color light}}; -moz-border-radius: 1em; border: 5px solid #{{Diamond color light}};" | ||
|- align="center" | |- align="center" | ||
! Trainers ( | ! Trainers (7F) | ||
|- | |- | ||
| | | | ||
| Line 485: | Line 485: | ||
|} | |} | ||
The grunt failed, after all. Now follow the path and head outside for the last time. | The grunt failed, after all. Now follow the path and head outside for the last time. | ||
==Spear Pillar== | ==Spear Pillar== | ||
This is it! You are at the peak of Mt. Coronet | This is it! You are at the peak of Mt. Coronet: [[Spear Pillar]]! Go up the stairs and fight the last two grunts in a [[Double Battle]]. | ||
{| class="expandable" align="center" style="background: #{{Pearl color light}}; -moz-border-radius: 1em; border: 5px solid #{{Diamond color light}};" | {| class="expandable" align="center" style="background: #{{Pearl color light}}; -moz-border-radius: 1em; border: 5px solid #{{Diamond color light}};" | ||
|- align="center" | |- align="center" | ||
| Line 499: | Line 501: | ||
Afterwards, the grunts will let you pass. Don't step forward yet -- '''about 10 more steps, and you can no longer leave until the event is over.''' Check that if you still have '''at least 30 or more Ultra Balls'''{{sup/4|D}}, '''Net Balls'''{{sup/4|P}} '''or Dusk Balls'''{{sup/t|Night}}. If you don't have, immediately retreat and buy some!''' | Afterwards, the grunts will let you pass. Don't step forward yet -- '''about 10 more steps, and you can no longer leave until the event is over.''' Check that if you still have '''at least 30 or more Ultra Balls'''{{sup/4|D}}, '''Net Balls'''{{sup/4|P}} '''or Dusk Balls'''{{sup/t|Night}}. If you don't have, immediately retreat and buy some!''' | ||
If you are ready, step forward for the most dangerous sight ever | If you are ready, step forward for the most dangerous sight ever: Commanders [[Mars]] and [[Jupiter]], as well as Boss Cyrus, are ready to destroy the world! | ||
{{WalkthroughPrevNext | | {{WalkthroughPrevNext | | ||
game=Diamond | | game=Diamond | | ||
Revision as of 02:18, 15 February 2013
Back to Galactic HQ (Part 2)
VS Galactic Boss
Make sure that you go back to Team Galactic Nap Room and heal your Pokémon by taking a nap before proceeding!
Now that you have healed up, go to the door again. Step forward. Guess who? The boss is Cyrus, the man that you met in Mt. Coronet and Celestic Town! Remember that he was seeking a power that can make a new world? He says that he already knows that you are coming to rescue the Lake guardians Uxie, Mesprit and Azelf. Then he turns around, and continues, saying that you are remarkable and your emotions are "pitifully useless". He swears, "I will make you regret paying heed to your heart!" Then he steps forward, challenging you to a battle!
|
||||||||||||||||||||||||||||||||||||||||||||||||||||||||||||||||||||||||||||||||||||||||||||||||||||||||||
| ||||||||||||||||||||||||||||||||||||||||||||||||||||||||||||||||||||||||||||||||||||||||||||||||||||||||||
He has three Pokémon— Murkrow, Golbat and Sneasel. Due to their types, Rock-type moves will destroy his whole team without much effort, but Fighting-type moves are far more effective when dealing with the speedy but fragile Sneasel, which is also Cyrus' strongest Pokémon, at Level 43. You should know how to deal with Sneasel and Golbat. The first Pokémon he sends out-- Murkrow, is a Dark/Flying-type Pokemon. One of its moves Embargo prevents you from using items on your Pokémon, so knock Murkrow out as soon as possible. The weaknesses of Dark types are covered, so aim at the weaknesses of the Flying type.
After Cyrus is defeated, he talks again. He has known that your power comes from compassion towards Pokémon. He says that the compassion is only "wasteful illusions". He also says that he neither makes Pokémon friends or partners like you, nor uses them as tools like other Team Galactic members. Instead, he makes the power of Pokémon his own. Then he recognizes that "you are strong and courageous to come alone". He also gives you the ultimate version of the Poke Ball— the Master Ball, which he doesn't need, as the reward. He steps to the right and tells you to "take the warp panel ahead" and save the Lake guardians. He also says that he is "off to Mt. Coronet". Not sure? He confirms once more— "That's correct. Mt. Coronet. Where you and I first met." He also says that he will ascend the mountain to its peak, not only to put an end to everything, but also bring about a new beginning for everything. He then leaves.
Now collect the hidden Nugget with the help of your Pokétch App Dowsing Machine, check the computer and head back to the Nap Room to heal your Pokémon.
VS Saturn, Rescuing the Lake Guardians
Again, make sure that you go back to Team Galactic Nap Room and heal your Pokémon by taking a nap before proceeding!
Now go to where you have battled Cyrus. Head to where Cyrus leaves. There are two "bottles" that blocked the one-way exit, so don't think about going out— don't forget that you still haven't rescued the Lake Guardians. Go through the warp panel. You will be teleported to a mysterious laboratory. Head all the way east, talk to the scientists along the way (don't worry— they won't fight you), then head inside.
You'll find that the Uxie, Mesprit and Azelf are sealed in machines, showing you that they are suffering. Go to the machine between Mesprit and Azelf. You'll find Commander Saturn. Talk to him, then he tells you that he can't believe his boss (i.e. Cyrus) "let a kid like you come and go freely". He then says, "You've taken the trouble to come. Let me welcome you! Consider it payback for insulting me at the lake." He then challenges you to a battle as the revenge for his defeat in Valor Cavern.
|
||||||||||||||||||||||||||||||||||||||||||||||||||||||||||||||||||||||||||||||||||||||||||||||||||||||||
| ||||||||||||||||||||||||||||||||||||||||||||||||||||||||||||||||||||||||||||||||||||||||||||||||||||||||
Saturn's team has only gained a few levels. If you can beat Cyrus, Saturn's team will not be a big threat (unless you were stupid enough that did not heal your Pokemon) because his team is weaker than Cyrus' by two to three levels. But Saturn's Pokémon don't have a common weakness, unlike Cyrus' Pokémon, and Saturn's Toxicroak can use a Bug-type move X-Scissor to counter Psychic-type Pokémon.
After beating Saturn again, he steps aside and tells you to press the button. Now press it to free Uxie, Mesprit and Azelf. He then tells you that Cyrus crafted a Red Chain from crystals he took from those three Pokémon. That Red Chain is what Cyrus needs to "shackle and create something on Mt. Coronet". But this is all Saturn knows. He doesn't know what Cyrus is going to do up there.
Now head back to where Cyrus left. The two "bottles" are gone. Go there, and a green one-way warp panel will take you directly to the ground floor. The exit is only a few steps away from you. Get out from the exit, and you'll find yourself coming out from the door on the right.
The next place you need to go to will be Mt. Coronet-- the highest mountain in Sinnoh, as well as where you and Cyrus first met. Before proceeding, you must do some very serious preparation— more serious than the one you did before going to Lake Acuity.
Before proceeding......
Make sure that you are fully prepared! A tough and long journey is up ahead. You'll also face a legendary Pokémon very soon.
This time, you'll need to go all the way up to the peak of Mt. Coronet. The mountainside is snowing, like Route 216 and Acuity Lakefront, and you should know what will happen during battles. The wild Pokémon are also stronger, reaching Level 40. Also, the Town Map will malfunction and only display where you enter Mt. Coronet.
Make sure that you have done the following things before going on:
- Buy a lot of medicines.
- Buy at least 20 for each necessary medicines. (excluding different versions of Potions)
- Buying 25 to 30 for each is recommended.
- To save money, don't buy Super Potions. Also, buy as few Potions and Hyper Potions as possible.
- Buy the Drinks such as bottles of Fresh Water, Soda Pop, Moomoo Milk and cans of Lemonade instead of different versions of Potions. By now, you should know where to buy the drinks.
- Buy at least 20 for each necessary medicines. (excluding different versions of Potions)
- Buy many stronger versions of Poke Balls.
- If you are playing Pokémon Diamond Version, buy at least 40 Ultra Balls.
- If you are playing Pokémon Pearl Version, buy at least 40 Net Balls.
- If you are playing at night, you may also consider about using Dusk Balls instead. Buy at least 40 if you are using them.
- Heal your Pokémon.
- Bring Pokémon with the following HM moves.
- Train your Pokémon until they are at above Level 40.
- Having your Pokémon at around Level 45 is recommended.
- If your Pokémon are at or below Level 40, don't even dare to proceed to the mountainside of Mt. Coronet!
Once you know you're ready, it's time to go save the world!
Oreburgh City— Route 207 / Hearthome City— Route 208
Fly to either Oreburgh City or Hearthome City when you are ready. Go through Route 207 or Route 208 and enter Mt. Coronet.
Mt. Coronet (Southern Area Part 2)
1F
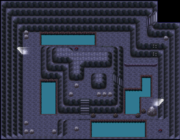
Surf across the northern pond, climb up the wall, then go up the stairs.
2F
| Available Pokémon (2F, 3F) | |||||||||||||||||||||||||||||||||||||||||||||||||||||||||||||||||||||||||||||||||||||||||||||||||||||||||||||||||||||||||||||||||||||||||||||||||||||||||||||
|---|---|---|---|---|---|---|---|---|---|---|---|---|---|---|---|---|---|---|---|---|---|---|---|---|---|---|---|---|---|---|---|---|---|---|---|---|---|---|---|---|---|---|---|---|---|---|---|---|---|---|---|---|---|---|---|---|---|---|---|---|---|---|---|---|---|---|---|---|---|---|---|---|---|---|---|---|---|---|---|---|---|---|---|---|---|---|---|---|---|---|---|---|---|---|---|---|---|---|---|---|---|---|---|---|---|---|---|---|---|---|---|---|---|---|---|---|---|---|---|---|---|---|---|---|---|---|---|---|---|---|---|---|---|---|---|---|---|---|---|---|---|---|---|---|---|---|---|---|---|---|---|---|---|---|---|---|---|
| |||||||||||||||||||||||||||||||||||||||||||||||||||||||||||||||||||||||||||||||||||||||||||||||||||||||||||||||||||||||||||||||||||||||||||||||||||||||||||||
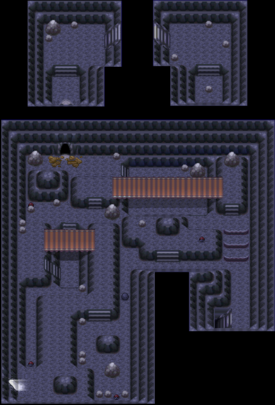
If you went here to collect items after beating the Snowpoint Gym, then just head straight to the cavern that was previously blocked. If you haven't, explore 2F before heading deeper into the mountain. Now that the "cave painting" is removed, you can proceed into another room. Go through this "doorway" and up the stairs.
3F
| Item (3F) | ||||||||
|---|---|---|---|---|---|---|---|---|
| ||||||||
| Trainers (3F) | ||||||||||||||||||||||||||||||||
|---|---|---|---|---|---|---|---|---|---|---|---|---|---|---|---|---|---|---|---|---|---|---|---|---|---|---|---|---|---|---|---|---|
| ||||||||||||||||||||||||||||||||
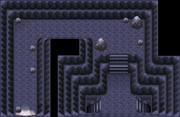
Go down the stairs on the east. You can get a hidden Max Revive out of the rock in the center of the room. After getting it, go back up the stairs.
After this is done, you'll need to start fighting Galactic Grunts again. Head north, grab the hidden Super Repel, fight the grunts, follow the path, then go outside when you are ready to brace the snow.
If your Pokémon are at or below Level 40, do not head outside! It will greatly benefit you to train here until they are above Level 40.
Mt. Coronet (Mountainside and Upper Caverns)
When you get to the mountainside and upper caverns, the background music completely changes. It is snowing on the mountainside, just like Route 216 and Acuity Lakefront. In battles, the snow will change into hail that damages all Pokémon that are not at least partially Ice-type.
There are many caverns to enter. Some of them let you proceed, and some of them are dead ends (for now). As the Town Map is malfunctioning, it only displays where you enter Mt. Coronet. Therefore, you will need to be very careful not to get lost. Most of the items you can get are hidden, so make sure that your Poketch App Dowsing Machine is ready.
Southern Mountainside
Head east and follow the path. Grab the hidden Full Heal in the grass. Follow the elevated path to avoid wild battles. Use Rock Climb twice to get above the eastern entrance of 4F. Grab the hidden Nugget, then climb down once and go east. Get inside.
| Items (Southern Mountainside 1) | ||||||||
|---|---|---|---|---|---|---|---|---|
| ||||||||
| Available Pokémon (Mountainside) | |||||||||||||||||||||||||||||||||||||||||||||||||||||||||||||||||||||||||||||||||||||||||||||||||||||||||||||||||||||||||||||||||||||||||||||||||||||||||||||||||||||||||||||
|---|---|---|---|---|---|---|---|---|---|---|---|---|---|---|---|---|---|---|---|---|---|---|---|---|---|---|---|---|---|---|---|---|---|---|---|---|---|---|---|---|---|---|---|---|---|---|---|---|---|---|---|---|---|---|---|---|---|---|---|---|---|---|---|---|---|---|---|---|---|---|---|---|---|---|---|---|---|---|---|---|---|---|---|---|---|---|---|---|---|---|---|---|---|---|---|---|---|---|---|---|---|---|---|---|---|---|---|---|---|---|---|---|---|---|---|---|---|---|---|---|---|---|---|---|---|---|---|---|---|---|---|---|---|---|---|---|---|---|---|---|---|---|---|---|---|---|---|---|---|---|---|---|---|---|---|---|---|---|---|---|---|---|---|---|---|---|---|---|---|---|---|---|---|
| |||||||||||||||||||||||||||||||||||||||||||||||||||||||||||||||||||||||||||||||||||||||||||||||||||||||||||||||||||||||||||||||||||||||||||||||||||||||||||||||||||||||||||||
4F (Part 1)
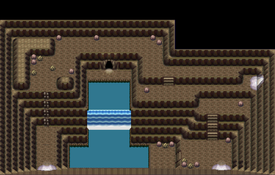
Use Rock Smash to collect the hidden PP Up and TinyMushroom. Ignore the waterfall and the cave above for now -- without HM7 (Waterfall), you cannot gain access. Go up the stairs to get the hidden Ultra Ball. Then head back outside.
| Items (4/F Part 1) | ||||||||
|---|---|---|---|---|---|---|---|---|
| ||||||||
| Available Pokémon (4F, below waterfall) | ||||||||||||||||||||||||||||||||||||||||||||||||||||||||||||||||||||||||||||||||||||||||||||||||||||||||||||||||||||||||||||||||||||||||||||||||||||||||||||||||||||||||||||||||||||||||||||||||||||||||||||||||||||||||||||||||||||||||||||
|---|---|---|---|---|---|---|---|---|---|---|---|---|---|---|---|---|---|---|---|---|---|---|---|---|---|---|---|---|---|---|---|---|---|---|---|---|---|---|---|---|---|---|---|---|---|---|---|---|---|---|---|---|---|---|---|---|---|---|---|---|---|---|---|---|---|---|---|---|---|---|---|---|---|---|---|---|---|---|---|---|---|---|---|---|---|---|---|---|---|---|---|---|---|---|---|---|---|---|---|---|---|---|---|---|---|---|---|---|---|---|---|---|---|---|---|---|---|---|---|---|---|---|---|---|---|---|---|---|---|---|---|---|---|---|---|---|---|---|---|---|---|---|---|---|---|---|---|---|---|---|---|---|---|---|---|---|---|---|---|---|---|---|---|---|---|---|---|---|---|---|---|---|---|---|---|---|---|---|---|---|---|---|---|---|---|---|---|---|---|---|---|---|---|---|---|---|---|---|---|---|---|---|---|---|---|---|---|---|---|---|---|---|---|---|---|---|---|---|---|---|---|---|---|---|---|---|---|---|---|---|---|---|---|---|---|---|
| ||||||||||||||||||||||||||||||||||||||||||||||||||||||||||||||||||||||||||||||||||||||||||||||||||||||||||||||||||||||||||||||||||||||||||||||||||||||||||||||||||||||||||||||||||||||||||||||||||||||||||||||||||||||||||||||||||||||||||||
Back to Southern Mountainside
This time, go all the way west until you see two paths. Take the lower path, push the boulder with Strength, smash the rock, and get the hidden Max Potion. Then go west and follow the path without grass, and go through the western entrance of 4F. Nothing is on the higher path except wild Pokémon.
| Item (S. Mountainside 2) | ||||||||
|---|---|---|---|---|---|---|---|---|
| ||||||||
4F (Part 2)
Climb up the wall, and you will fight the grunts again. Beat them, grab the items (all of them are hidden, and one of them requires you to smash a rock), follow the path all the way to the east, then head outside.
| Items (4F Part 2) | ||||||||
|---|---|---|---|---|---|---|---|---|
| ||||||||
| Available Pokémon (4F, above waterfall) | |||||||||||||||||||||||||||||||||||||||||||||||||||||||||||||||||||||||||||||||||||||||||||||||||||||||||||||||||||||||||||||||||||||||||||||||||||||||||||||
|---|---|---|---|---|---|---|---|---|---|---|---|---|---|---|---|---|---|---|---|---|---|---|---|---|---|---|---|---|---|---|---|---|---|---|---|---|---|---|---|---|---|---|---|---|---|---|---|---|---|---|---|---|---|---|---|---|---|---|---|---|---|---|---|---|---|---|---|---|---|---|---|---|---|---|---|---|---|---|---|---|---|---|---|---|---|---|---|---|---|---|---|---|---|---|---|---|---|---|---|---|---|---|---|---|---|---|---|---|---|---|---|---|---|---|---|---|---|---|---|---|---|---|---|---|---|---|---|---|---|---|---|---|---|---|---|---|---|---|---|---|---|---|---|---|---|---|---|---|---|---|---|---|---|---|---|---|---|
| |||||||||||||||||||||||||||||||||||||||||||||||||||||||||||||||||||||||||||||||||||||||||||||||||||||||||||||||||||||||||||||||||||||||||||||||||||||||||||||
| Trainers (4F) | ||||||||||||||||||||||||||||||||||||||||||||||||||
|---|---|---|---|---|---|---|---|---|---|---|---|---|---|---|---|---|---|---|---|---|---|---|---|---|---|---|---|---|---|---|---|---|---|---|---|---|---|---|---|---|---|---|---|---|---|---|---|---|---|---|
| ||||||||||||||||||||||||||||||||||||||||||||||||||
Northern Mountainside
You're now at another part of the mountainside. Smash the rock south of the exit from 4/F, grab the hidden Stardust, then head north. Get down the stairs, and you'll find a cave. It doesn't look like where you need to proceed, but head inside anyway.
| Item (Northern Mountainside 1) | ||||||||
|---|---|---|---|---|---|---|---|---|
| ||||||||
Tunnel
There are three grunts for you to fight, a few items for you to get and a grunt which blocks the cave inside, saying that he is "totally lost". Where the grunt blocks is a quick exit that you can access after Team Galactic is gone. Fight the grunts, grab all the items, then get out again.
| Items (Tunnel) | ||||||||
|---|---|---|---|---|---|---|---|---|
| ||||||||
| Available Pokémon (Tunnel) | |||||||||||||||||||||||||||||||||||||||||||||||||||||||||||||||||||||||||||||||||||||||||||||||||||||||||||||||||||||||||||||||||||||||||||||
|---|---|---|---|---|---|---|---|---|---|---|---|---|---|---|---|---|---|---|---|---|---|---|---|---|---|---|---|---|---|---|---|---|---|---|---|---|---|---|---|---|---|---|---|---|---|---|---|---|---|---|---|---|---|---|---|---|---|---|---|---|---|---|---|---|---|---|---|---|---|---|---|---|---|---|---|---|---|---|---|---|---|---|---|---|---|---|---|---|---|---|---|---|---|---|---|---|---|---|---|---|---|---|---|---|---|---|---|---|---|---|---|---|---|---|---|---|---|---|---|---|---|---|---|---|---|---|---|---|---|---|---|---|---|---|---|---|---|---|---|---|---|
| |||||||||||||||||||||||||||||||||||||||||||||||||||||||||||||||||||||||||||||||||||||||||||||||||||||||||||||||||||||||||||||||||||||||||||||
| Trainers (Tunnel) | |||||||||||||||||||||||||||||||||||||||||||||||||||||||||||||||||||||||
|---|---|---|---|---|---|---|---|---|---|---|---|---|---|---|---|---|---|---|---|---|---|---|---|---|---|---|---|---|---|---|---|---|---|---|---|---|---|---|---|---|---|---|---|---|---|---|---|---|---|---|---|---|---|---|---|---|---|---|---|---|---|---|---|---|---|---|---|---|---|---|---|
| |||||||||||||||||||||||||||||||||||||||||||||||||||||||||||||||||||||||
Back to Northern Mountainside
Climb up to the north to get a hidden Rare Candy, then climb back down. Immediately afterwards, climb to the west. Any of the 2 paths will take you to the far west. On the northernmost ledge, you can grab a hidden Big Mushroom. East of the entrance to 5F, there is a hidden TinyMushroom. Now, go inside 5F.
| Items (Northern Mountainside 2) | ||||||||
|---|---|---|---|---|---|---|---|---|
| ||||||||
5F
Follow the path, grab the TinyMushroom hidden in one of the rocks along the way, then go up the stairs. (There are really a lot of mushrooms in this mountain!)
| Items (5F) | ||||||||
|---|---|---|---|---|---|---|---|---|
| ||||||||
| Available Pokémon (5F) | |||||||||||||||||||||||||||||||||||||||||||||||||||||||||||||||||||||||||||||||||||||||||||||||||||||||||||||||||||||||||||||||||||||||||||||||||||||||||||||
|---|---|---|---|---|---|---|---|---|---|---|---|---|---|---|---|---|---|---|---|---|---|---|---|---|---|---|---|---|---|---|---|---|---|---|---|---|---|---|---|---|---|---|---|---|---|---|---|---|---|---|---|---|---|---|---|---|---|---|---|---|---|---|---|---|---|---|---|---|---|---|---|---|---|---|---|---|---|---|---|---|---|---|---|---|---|---|---|---|---|---|---|---|---|---|---|---|---|---|---|---|---|---|---|---|---|---|---|---|---|---|---|---|---|---|---|---|---|---|---|---|---|---|---|---|---|---|---|---|---|---|---|---|---|---|---|---|---|---|---|---|---|---|---|---|---|---|---|---|---|---|---|---|---|---|---|---|---|
| |||||||||||||||||||||||||||||||||||||||||||||||||||||||||||||||||||||||||||||||||||||||||||||||||||||||||||||||||||||||||||||||||||||||||||||||||||||||||||||
6F
Follow the path, grab the 2 hidden items, fight the grunts, then go up the stairs again. (There are items hidden everywhere!)
| Items (6F) | ||||||||
|---|---|---|---|---|---|---|---|---|
| ||||||||
| Trainers (6F) | ||||||||||||||||||||||||||||||||||||||||||||
|---|---|---|---|---|---|---|---|---|---|---|---|---|---|---|---|---|---|---|---|---|---|---|---|---|---|---|---|---|---|---|---|---|---|---|---|---|---|---|---|---|---|---|---|---|
| ||||||||||||||||||||||||||||||||||||||||||||
7F
Follow the path and fight the final grunt in the caverns. This grunt is very determined to render your effort completely wasted, so be careful! You came all the way here and now you cannot lose!
| Available Pokémon (6-7F) | |||||||||||||||||||||||||||||||||||||||||||||||||||||||||||||||||||||||||||||||||||||||||||||||||||||||||||||||||||||||||||||||||||||||||||||
|---|---|---|---|---|---|---|---|---|---|---|---|---|---|---|---|---|---|---|---|---|---|---|---|---|---|---|---|---|---|---|---|---|---|---|---|---|---|---|---|---|---|---|---|---|---|---|---|---|---|---|---|---|---|---|---|---|---|---|---|---|---|---|---|---|---|---|---|---|---|---|---|---|---|---|---|---|---|---|---|---|---|---|---|---|---|---|---|---|---|---|---|---|---|---|---|---|---|---|---|---|---|---|---|---|---|---|---|---|---|---|---|---|---|---|---|---|---|---|---|---|---|---|---|---|---|---|---|---|---|---|---|---|---|---|---|---|---|---|---|---|---|
| |||||||||||||||||||||||||||||||||||||||||||||||||||||||||||||||||||||||||||||||||||||||||||||||||||||||||||||||||||||||||||||||||||||||||||||
| Trainers (7F) | |||||||||||||||||||||||||||||
|---|---|---|---|---|---|---|---|---|---|---|---|---|---|---|---|---|---|---|---|---|---|---|---|---|---|---|---|---|---|
| |||||||||||||||||||||||||||||
The grunt failed, after all. Now follow the path and head outside for the last time.
Spear Pillar
This is it! You are at the peak of Mt. Coronet: Spear Pillar! Go up the stairs and fight the last two grunts in a Double Battle.
| Trainers | ||||||||||||||||||||||||||||||||||||||||||
|---|---|---|---|---|---|---|---|---|---|---|---|---|---|---|---|---|---|---|---|---|---|---|---|---|---|---|---|---|---|---|---|---|---|---|---|---|---|---|---|---|---|---|
| ||||||||||||||||||||||||||||||||||||||||||
Afterwards, the grunts will let you pass. Don't step forward yet -- about 10 more steps, and you can no longer leave until the event is over. Check that if you still have at least 30 or more Ultra BallsD, Net BallsP or Dusk BallsNight. If you don't have, immediately retreat and buy some!
If you are ready, step forward for the most dangerous sight ever: Commanders Mars and Jupiter, as well as Boss Cyrus, are ready to destroy the world!

|
This article is part of Project Walkthroughs, a Bulbapedia project that aims to write comprehensive step-by-step guides on each Pokémon game. |


