Appendix:Black and White walkthrough/Section 14: Difference between revisions
Lady Ariel (talk | contribs) |
mNo edit summary |
||
| (9 intermediate revisions by 6 users not shown) | |||
| Line 1: | Line 1: | ||
== Cheren's Training == | ==Cheren's Training== | ||
When you visit {{rt|5|Unova}} again, you'll find [[Cheren]] standing near the trailer. | When you visit {{rt|5|Unova}} again, you'll find [[Cheren]] standing near the trailer. After thinking about what [[Alder]] taught him, he announces his plan to evaluate himself at [[Victory Road (Black and White)|Victory Road]], and leaves. From now on, you can battle him once a day on Victory Road's seventh floor. | ||
{| align="center" | {| align="center" | ||
| Line 7: | Line 7: | ||
! {{MS|501|Oshawott (Pokémon)}} If the {{player}} chose {{p|Oshawott}}: | ! {{MS|501|Oshawott (Pokémon)}} If the {{player}} chose {{p|Oshawott}}: | ||
|- | |- | ||
|{{Party | |{{Party/Single | ||
|color={{black color}} | |color={{black color}} | ||
|headcolor={{black color light}} | |headcolor={{black color light}} | ||
| Line 16: | Line 16: | ||
|name=Cheren | |name=Cheren | ||
|game=BW | |game=BW | ||
|location=Victory Road ( | |location=Victory Road (Black and White) | ||
|locationname=Victory Road | |locationname=Victory Road | ||
|pokemon=6 | |pokemon=6 | ||
| | }}|{{Pokémon/5 | ||
|game=Black | |game=Black | ||
|ndex=510 | |ndex=510 | ||
| Line 33: | Line 32: | ||
|move3=Shadow Claw|move3type=Ghost|move3cat=Physical | |move3=Shadow Claw|move3type=Ghost|move3cat=Physical | ||
|move4=Night Slash|move4type=Dark|move4cat=Physical | |move4=Night Slash|move4type=Dark|move4cat=Physical | ||
}} | }} | ||
| | |{{Pokémon/5 | ||
|game=Black | |game=Black | ||
|ndex=512 | |ndex=512 | ||
| Line 50: | Line 47: | ||
|move2=Rock Slide|move2type=Rock|move2cat=Physical | |move2=Rock Slide|move2type=Rock|move2cat=Physical | ||
}} | }} | ||
| | |{{Pokémon/5 | ||
|game=Black | |game=Black | ||
|ndex=521_m | |ndex=521_m | ||
| Line 66: | Line 62: | ||
|move4=Facade|move4type=Normal|move4cat=Physical | |move4=Facade|move4type=Normal|move4cat=Physical | ||
}} | }} | ||
| | {{Party/Div|color={{black color}}}} | ||
|{{Pokémon/5 | |||
|game=Black | |game=Black | ||
|ndex=526 | |ndex=526 | ||
| Line 81: | Line 77: | ||
|move4=Stealth Rock|move4type=Rock|move4cat=Status | |move4=Stealth Rock|move4type=Rock|move4cat=Status | ||
}} | }} | ||
| | |{{Pokémon/5 | ||
|game=Black | |game=Black | ||
|ndex=612 | |ndex=612 | ||
| Line 96: | Line 91: | ||
|move4=Surf|move4type=Water|move4cat=Special | |move4=Surf|move4type=Water|move4cat=Special | ||
}} | }} | ||
| | |{{Pokémon/5 | ||
|game=Black | |game=Black | ||
|ndex=500 | |ndex=500 | ||
| Line 112: | Line 106: | ||
|move4=Wild Charge|move4type=Electric|move4cat=Physical | |move4=Wild Charge|move4type=Electric|move4cat=Physical | ||
}} | }} | ||
}} | {{Party/Footer}} | ||
|{{Party | |{{Party/Single | ||
|color={{black color}} | |color={{black color}} | ||
|headcolor={{black color light}} | |headcolor={{black color light}} | ||
| Line 123: | Line 117: | ||
|name=Cheren | |name=Cheren | ||
|game=BW | |game=BW | ||
|location=Victory Road ( | |location=Victory Road (Black and White) | ||
|locationname=Victory Road | |locationname=Victory Road | ||
|pokemon=6 | |pokemon=6 | ||
| | }}|{{Pokémon/5 | ||
|game=Black | |game=Black | ||
|ndex=510 | |ndex=510 | ||
| Line 141: | Line 134: | ||
|move2=Aerial Ace|move2type=Flying|move2cat=Physical | |move2=Aerial Ace|move2type=Flying|move2cat=Physical | ||
}} | }} | ||
| | |{{Pokémon/5 | ||
|game=Black | |game=Black | ||
|ndex=514 | |ndex=514 | ||
| Line 156: | Line 148: | ||
|move2=Rock Slide|move2type=Rock|move2cat=Physical | |move2=Rock Slide|move2type=Rock|move2cat=Physical | ||
}} | }} | ||
| | |{{Pokémon/5 | ||
|game=Black | |game=Black | ||
|ndex=521_m | |ndex=521_m | ||
| Line 172: | Line 163: | ||
|move1=U-turn|move1type=Bug|move1cat=Physical | |move1=U-turn|move1type=Bug|move1cat=Physical | ||
}} | }} | ||
| | {{Party/Div|color={{black color}}}} | ||
|{{Pokémon/5 | |||
|game=Black | |game=Black | ||
|ndex=526 | |ndex=526 | ||
| Line 187: | Line 178: | ||
|move4=Stealth Rock|move4type=Rock|move4cat=Status | |move4=Stealth Rock|move4type=Rock|move4cat=Status | ||
}} | }} | ||
| | |{{Pokémon/5 | ||
|game=Black | |game=Black | ||
|ndex=612 | |ndex=612 | ||
| Line 202: | Line 192: | ||
|move4=Surf|move4type=Water|move4cat=Special | |move4=Surf|move4type=Water|move4cat=Special | ||
}} | }} | ||
| | |{{Pokémon/5 | ||
|game=Black | |game=Black | ||
|ndex=503 | |ndex=503 | ||
| Line 217: | Line 206: | ||
|move4=Aqua Jet|move4type=Water|move4cat=Physical | |move4=Aqua Jet|move4type=Water|move4cat=Physical | ||
}} | }} | ||
}} | {{Party/Footer}} | ||
|{{Party | |{{Party/Single | ||
|color={{black color}} | |color={{black color}} | ||
|headcolor={{black color light}} | |headcolor={{black color light}} | ||
| Line 228: | Line 217: | ||
|name=Cheren | |name=Cheren | ||
|game=BW | |game=BW | ||
|location=Victory Road ( | |location=Victory Road (Black and White) | ||
|locationname=Victory Road | |locationname=Victory Road | ||
|pokemon=6 | |pokemon=6 | ||
| | }}|{{Pokémon/5 | ||
|game=Black | |game=Black | ||
|ndex=510 | |ndex=510 | ||
| Line 246: | Line 234: | ||
|move2=Aerial Ace|move2type=Flying|move2cat=Physical | |move2=Aerial Ace|move2type=Flying|move2cat=Physical | ||
}} | }} | ||
| | |{{Pokémon/5 | ||
|game=Black | |game=Black | ||
|ndex=516 | |ndex=516 | ||
| Line 261: | Line 248: | ||
|move2=Rock Slide|move2type=Rock|move2cat=Physical | |move2=Rock Slide|move2type=Rock|move2cat=Physical | ||
}} | }} | ||
| | |{{Pokémon/5 | ||
|game=Black | |game=Black | ||
|ndex=521_m | |ndex=521_m | ||
| Line 277: | Line 263: | ||
|move1=U-turn|move1type=Bug|move1cat=Physical | |move1=U-turn|move1type=Bug|move1cat=Physical | ||
}} | }} | ||
| | {{Party/Div|color={{black color}}}} | ||
|{{Pokémon/5 | |||
|game=Black | |game=Black | ||
|ndex=526 | |ndex=526 | ||
| Line 292: | Line 278: | ||
|move4=Stealth Rock|move4type=Rock|move4cat=Status | |move4=Stealth Rock|move4type=Rock|move4cat=Status | ||
}} | }} | ||
| | |{{Pokémon/5 | ||
|game=Black | |game=Black | ||
|ndex=612 | |ndex=612 | ||
| Line 307: | Line 292: | ||
|move4=Surf|move4type=Water|move4cat=Special | |move4=Surf|move4type=Water|move4cat=Special | ||
}} | }} | ||
| | |{{Pokémon/5 | ||
|game=Black | |game=Black | ||
|ndex=497 | |ndex=497 | ||
| Line 322: | Line 306: | ||
|move2=Dragon Tail|move2type=Dragon|move2cat=Physical | |move2=Dragon Tail|move2type=Dragon|move2cat=Physical | ||
}} | }} | ||
}} | {{Party/Footer}} | ||
|} | |} | ||
| Line 328: | Line 312: | ||
{{clear}} | {{clear}} | ||
== Driftveil City == | ==Driftveil City== | ||
=== Driftveil Market === | ===Driftveil Market=== | ||
The {{DL|Driftveil City|Market|Driftveil Market}} now has a new vendor, a former member of [[Team Plasma]], who offers different types of [[incense]]. | The {{DL|Driftveil City|Market|Driftveil Market}} now has a new vendor, a former member of [[Team Plasma]], who offers different types of [[incense]]. Each one sells for {{pdollar}}9600, but many are useful in battle. Save money and make sure to buy some. | ||
{| align="center" | {| align="center" | ||
| Line 344: | Line 328: | ||
=== Cold Storage === | ===Cold Storage=== | ||
When you enter the [[Cold Storage]], check the refrigerated container in the back to find Zinzolin of the [[Seven Sages]]. | When you enter the [[Cold Storage]], check the refrigerated container in the back to find Zinzolin of the [[Seven Sages]]. Zinzolin talks about how working with [[Ghetsis]] made him feel alive, and gives you {{TM|01|Hone Claws}}. After that, he is arrested by [[Looker]]. | ||
== Route 6 == | ==Route 6== | ||
=== Chargestone Cave === | ===Chargestone Cave=== | ||
The next of the [[Seven Sages]] is hiding out in [[Chargestone Cave]]. | The next of the [[Seven Sages]] is hiding out in [[Chargestone Cave]]. Make your way to the bottom floor and head south to find Bronius. He attempts to evade capture by calling two Grunts to attack you. Their Pokémon are high-leveled, but defeat them and Bronius will give you {{TM|69|Rock Polish}}. [[Looker]] then arrives to take the trio into custody. | ||
{| align="center" | {| align="center" | ||
| Line 362: | Line 346: | ||
== Route 7 == | ==Route 7== | ||
=== Celestial Tower === | ===Celestial Tower=== | ||
Climb to the roof of the [[Celestial Tower]] to find [[Alder]]. | Climb to the roof of the [[Celestial Tower]] to find [[Alder]]. He tells you about his old friend, who is resting inside the tower, and the reason he left on his journey. He says that he will be waiting for you in the {{un|Pokémon League}}, and flies off. You can now challenge the Elite Four again, and fight the Champion without interruption. | ||
== Twist Mountain == | ==Twist Mountain== | ||
Talk to the {{tc|Worker}} on the lowest level of [[Twist Mountain]] to get a [[Fossil]] once every day. | Talk to the {{tc|Worker}} on the lowest level of [[Twist Mountain]] to get a [[Fossil]] once every day. The Fossil you receive is random, so you may end up with multiples of each. Visit him every day to get all seven Fossils. The ancient Pokémon can be revived at the Nacrene City Museum. | ||
{| align="center" style="background: #{{kanto color dark}}; {{roundy}}; border: 5px solid #{{kanto color}}" | {| align="center" style="background: #{{kanto color dark}}; {{roundy}}; border: 5px solid #{{kanto color}}" | ||
| Line 398: | Line 382: | ||
== Route 9 == | ==Route 9== | ||
Across the road from [[Shopping Mall Nine]] is [[Challenger's Cave]]. | Across the road from [[Shopping Mall Nine]] is [[Challenger's Cave]]. The Black Belt that once blocked the entrance has moved aside, allowing you to enter. To be well-prepared, bring along Pokémon that know {{m|Flash}} and {{m|Surf}}. | ||
===Challenger's Cave=== | |||
=== Challenger's Cave === | |||
{| class="expandable" align="center" style="background: #{{white color}}; {{roundy}}; border: 5px solid #{{black color}};" | {| class="expandable" align="center" style="background: #{{white color}}; {{roundy}}; border: 5px solid #{{black color}};" | ||
|- align="center" | |- align="center" | ||
| Line 443: | Line 425: | ||
{{catch/entry5|447|Riolu|yes|yes|no|Cave|49-50|all=5%|type1=Fighting}} | {{catch/entry5|447|Riolu|yes|yes|no|Cave|49-50|all=5%|type1=Fighting}} | ||
{{catch/div|cave|Dust clouds}} | {{catch/div|cave|Dust clouds}} | ||
{{catch/entry5|530|Excadrill|yes|yes|no| | {{catch/entry5|530|Excadrill|yes|yes|no|Dust|47-50|all=100%|type1=Ground|type2=Steel}} | ||
{{catch/div|water|Surfing}} | {{catch/div|water|Surfing}} | ||
{{catch/entry5|550|Basculin|yes|no|no|Surf|5-55|all=100%|type1=Water}} | {{catch/entry5|550|Basculin|yes|no|no|Surf|5-55|all=100%|type1=Water}} | ||
{{catch/entry5|550B|Basculin|no|yes|no|Surf|5-55|all=100%|type1=Water}} | {{catch/entry5|550B|Basculin|no|yes|no|Surf|5-55|all=100%|type1=Water}} | ||
{{catch/div|water|Rippling Water}} | {{catch/div|water|Rippling Water}} | ||
{{catch/entry5|550|Basculin|no|yes|no| | {{catch/entry5|550|Basculin|no|yes|no|Rippling|5-55|all=100%|type1=Water}} | ||
{{catch/entry5|550B|Basculin|yes|no|no| | {{catch/entry5|550B|Basculin|yes|no|no|Rippling|5-55|all=100%|type1=Water}} | ||
{{catch/div|water|Fishing}} | {{catch/div|water|Fishing}} | ||
{{catch/entry5|060|Poliwag|yes|yes|no|Fish Super|35-55|all=60%|type1=Water}} | {{catch/entry5|060|Poliwag|yes|yes|no|Fish Super|35-55|all=60%|type1=Water}} | ||
| Line 456: | Line 438: | ||
{{catch/entry5|550B|Basculin|no|yes|no|Fish Super|35-55|all=30%|type1=Water}} | {{catch/entry5|550B|Basculin|no|yes|no|Fish Super|35-55|all=30%|type1=Water}} | ||
{{catch/div|water|Rippling water}} | {{catch/div|water|Rippling water}} | ||
{{catch/entry5|061|Poliwhirl|yes|yes|no| | {{catch/entry5|061|Poliwhirl|yes|yes|no|Rippling|35-55|all=65%|type1=Water}} | ||
{{catch/entry5|062|Poliwrath|yes|yes|no| | {{catch/entry5|062|Poliwrath|yes|yes|no|Rippling|35-60|all=5%|type1=Water|type2=Fighting}} | ||
{{catch/entry5|550|Basculin|no|yes|no| | {{catch/entry5|550|Basculin|no|yes|no|Rippling|35-60|all=30%|type1=Water}} | ||
{{catch/entry5|550B|Basculin|yes|no|no| | {{catch/entry5|550B|Basculin|yes|no|no|Rippling|35-60|all=30%|type1=Water}} | ||
{{catch/footer|cave|}} | {{catch/footer|cave|}} | ||
|} | |} | ||
| Line 469: | Line 451: | ||
{{itlisth|cave}} | {{itlisth|cave}} | ||
{{catch/div|cave|B1F}} | {{catch/div|cave|B1F}} | ||
{{ | {{Itemlist|Ether|On a rock near Ace Trainer Terry (hidden)|Bl=yes|W=yes}} | ||
{{ | {{Itemlist|PP Up|In the far northwest corner|Bl=yes|W=yes|display={{DL|Vitamin|PP Up}}}} | ||
{{ | {{Itemlist|Nugget|South end of the bridge|Bl=yes|W=yes|display={{DL|Valuable item|Nugget}}}} | ||
{{ | {{Itemlist|Max Potion|On the wall, north of the stairs to B2F (hidden)|Bl=yes|W=yes|display={{DL|Potion|Max Potion}}}} | ||
{{catch/div|cave|B2F}} | {{catch/div|cave|B2F}} | ||
{{ | {{Itemlist|Full Restore|On a rock near the northeast corner (hidden)|Bl=yes|W=yes|display={{DL|Potion|Full Restore}}}} | ||
{{ | {{Itemlist|Max Ether|On a rock near the southeast corner (hidden)|Bl=yes|W=yes}} | ||
{{ | {{Itemlist|Timer Ball|Near the southeast corner, east of the central bridge|Bl=yes|W=yes|display={{DL|Poké Ball|Timer Ball}}}} | ||
{{ | {{Itemlist|Star Piece|On a rock in the southwest corner (hidden)|Bl=yes|W=yes|display={{DL|Valuable item|Star Piece}}}} | ||
{{ | {{Itemlist|Protein|In the pit to the west of Veteran Julia|Bl=yes|W=yes|display={{DL|Vitamin|Protein}}}} | ||
{{ | {{Itemlist|Rare Candy|On a rock west of Veteran Julia (hidden)|Bl=yes|W=yes}} | ||
{{ | {{Itemlist|TM Rock|South of the stairs, beyond the ledge|Bl=yes|W=yes|display={{TM|71|Stone Edge}}}} | ||
{{ | {{Itemlist|Heart Scale|On the south end of the island (hidden)|Bl=yes|W=yes|display={{DL|Exchangeable item|Heart Scale}}}} | ||
{{ | {{Itemlist|Black Belt|Northeast of the central bridge|Bl=yes|W=yes|display={{DL|Type-enhancing item|Black Belt}}}} | ||
{{ | {{Itemlist|Oval Stone|On the northern part of the island|Bl=yes|W=yes}} | ||
{{itlistfoot|cave}} | {{itlistfoot|cave}} | ||
|} | |} | ||
{| class="expandable" align="center" style="background: #{{white color}}; {{roundy}}; border: 5px solid #{{black color}};" | |||
|- align="center" | |||
! Layout | |||
|- | |||
| | |||
{| class="roundy" style="margin:auto; background: #000; border: 3px solid #{{locationcolor/dark|cave}}" | |||
|- | |||
! style="background:#{{locationcolor/light|cave}}; {{roundytl|5px}}" | 1F | |||
! style="background:#{{locationcolor/light|cave}}" | B1F | |||
! style="background:#{{locationcolor/light|cave}}; {{roundytr|5px}}" | B2F | |||
|- | |||
|[[File:Challengers Cave 1F BW.png|201px]] | |||
|[[File:Challengers Cave B1F BW.png|201px]] | |||
|[[File:Challengers Cave B2F BW.png|201px]]} | |||
|- | |||
| colspan="3" style="background:#{{locationcolor/light|cave}}; {{roundybottom|5px}}" | | |||
|} | |||
|} | |||
Fight Backpacker Toru and climb down the stairs to B1F. | Fight Backpacker Toru and climb down the stairs to B1F. | ||
Check the rock near Ace Trainer Terry for a hidden [[Ether]], then go east. | Check the rock near Ace Trainer Terry for a hidden [[Ether]], then go east. Head to the far northwest corner to find a {{DL|Vitamin|PP Up}}, then walk across the bridge near Ace Trainer Beverly to get a {{DL|Valuable item|Nugget}}. Climb down and go west to reach a hidden {{DL|Potion|Max Potion}} and the stairs to B2F. | ||
A one-way ledge forces you to go north. {{m|Surf}} to the east and land on the south shore to reach a hidden {{DL|Potion|Full Restore}}. Loop around and follow the group of bridges to the south, past Veteran Shaun. Check the rock in the far southeast for a [[Max Ether]], then pick up the {{DL|Poké Ball|Timer Ball}} from the lower level. Head west across the large central bridge and inspect the rock in the far southwest to find a {{DL|Valuable item|Star Piece}}. Go north to find a {{DL|Vitamin|Protein}}, a hidden {{DL|Vitamin|Rare Candy}}, and {{TM|71|Stone Edge}}, then use {{m|Surf}} near Veteran Julia. Search the south end of the island for a {{DL|Exchangeable item|Heart Scale}}, and sail to the east to find a {{DL|Type-enhancing item|Black Belt}}. Surf north to get an [[Oval Stone]] on the center island, then you can use an [[Escape Rope]] to leave the cave. | |||
== Opelucid City == | ==Opelucid City== | ||
Visit [[Drayden]]'s house to have either he{{sup|Wh}} or [[Iris]]{{sup|Bl}} teach your Pokémon {{m|Draco Meteor}}, the strongest {{type|Dragon}} attack. | Visit [[Drayden]]'s house to have either he{{sup/5|Wh}} or [[Iris]]{{sup/5|Bl}} teach your Pokémon {{m|Draco Meteor}}, the strongest {{type|Dragon}} attack. Teach it to a Dragon-type with [[Friendship|high friendship]]. | ||
Now it's time to face the Elite Four again. | Now it's time to face the Elite Four again. The four and the Champion await your challenge. | ||
Revision as of 06:09, 28 April 2017
Cheren's Training
When you visit Route 5 again, you'll find Cheren standing near the trailer. After thinking about what Alder taught him, he announces his plan to evaluate himself at Victory Road, and leaves. From now on, you can battle him once a day on Victory Road's seventh floor.


Driftveil City
Driftveil Market
The Driftveil Market now has a new vendor, a former member of Team Plasma, who offers different types of incense. Each one sells for $9600, but many are useful in battle. Save money and make sure to buy some.
| |||||||||||||||||||||||||||||||||||||||
Cold Storage
When you enter the Cold Storage, check the refrigerated container in the back to find Zinzolin of the Seven Sages. Zinzolin talks about how working with Ghetsis made him feel alive, and gives you TM01 (Hone Claws). After that, he is arrested by Looker.
Route 6
Chargestone Cave
The next of the Seven Sages is hiding out in Chargestone Cave. Make your way to the bottom floor and head south to find Bronius. He attempts to evade capture by calling two Grunts to attack you. Their Pokémon are high-leveled, but defeat them and Bronius will give you TM69 (Rock Polish). Looker then arrives to take the trio into custody.
| ||||||||||||||||||||||||||||||||||||||||||||||||||


Route 7
Celestial Tower
Climb to the roof of the Celestial Tower to find Alder. He tells you about his old friend, who is resting inside the tower, and the reason he left on his journey. He says that he will be waiting for you in the Pokémon League, and flies off. You can now challenge the Elite Four again, and fight the Champion without interruption.
Twist Mountain
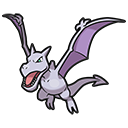
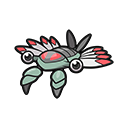
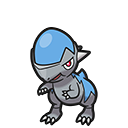
Talk to the Worker on the lowest level of Twist Mountain to get a Fossil once every day. The Fossil you receive is random, so you may end up with multiples of each. Visit him every day to get all seven Fossils. The ancient Pokémon can be revived at the Nacrene City Museum.

|

|
|
| Helix Fossil → Omanyte | Dome Fossil → Kabuto | Old Amber → Aerodactyl |

|
|
| Root Fossil → Lileep | Claw Fossil → Anorith |
|

|
| Skull Fossil → Cranidos | Armor Fossil → Shieldon |
Route 9
Across the road from Shopping Mall Nine is Challenger's Cave. The Black Belt that once blocked the entrance has moved aside, allowing you to enter. To be well-prepared, bring along Pokémon that know Flash and Surf.
Challenger's Cave
| Trainers | ||||||||||||||||||||||||||||||||||||||||||||||||||||||||||||||||||||||||||||||||||||||||||||||||||||||||||||||||||||||||||||||||||||||||||||||||||||||||||||||||||||||||||||||||||||||||||||||||||||
|---|---|---|---|---|---|---|---|---|---|---|---|---|---|---|---|---|---|---|---|---|---|---|---|---|---|---|---|---|---|---|---|---|---|---|---|---|---|---|---|---|---|---|---|---|---|---|---|---|---|---|---|---|---|---|---|---|---|---|---|---|---|---|---|---|---|---|---|---|---|---|---|---|---|---|---|---|---|---|---|---|---|---|---|---|---|---|---|---|---|---|---|---|---|---|---|---|---|---|---|---|---|---|---|---|---|---|---|---|---|---|---|---|---|---|---|---|---|---|---|---|---|---|---|---|---|---|---|---|---|---|---|---|---|---|---|---|---|---|---|---|---|---|---|---|---|---|---|---|---|---|---|---|---|---|---|---|---|---|---|---|---|---|---|---|---|---|---|---|---|---|---|---|---|---|---|---|---|---|---|---|---|---|---|---|---|---|---|---|---|---|---|---|---|---|---|---|
| ||||||||||||||||||||||||||||||||||||||||||||||||||||||||||||||||||||||||||||||||||||||||||||||||||||||||||||||||||||||||||||||||||||||||||||||||||||||||||||||||||||||||||||||||||||||||||||||||||||


| Available Pokémon | ||||||||||||||||||||||||||||||||||||||||||||||||||||||||||||||||||||||||||||||||||||||||||||||||||||||||||||||||||||||||||||||||||||||||||||||||||||||||||||||||||||||||||||||||||||||||||||||||||||||||||||||||||||||||||||||||||||||||||||||||||||||||||||||||||||||||||||||||||||||||||||||||||||||||||||||||||||||||||||||||||||||||||||||||||||||||||||||||||||||||||||||||||||||||||||||||||||||||||||||||||||||||||||||||||||||||||||||||||||||||||||||||||||||||||||||||||||||||||||||||||||||||||||||||||||||||||||||||||||||||||||||||||||||||||||||||||||||||||||||||||||||||||||||||
|---|---|---|---|---|---|---|---|---|---|---|---|---|---|---|---|---|---|---|---|---|---|---|---|---|---|---|---|---|---|---|---|---|---|---|---|---|---|---|---|---|---|---|---|---|---|---|---|---|---|---|---|---|---|---|---|---|---|---|---|---|---|---|---|---|---|---|---|---|---|---|---|---|---|---|---|---|---|---|---|---|---|---|---|---|---|---|---|---|---|---|---|---|---|---|---|---|---|---|---|---|---|---|---|---|---|---|---|---|---|---|---|---|---|---|---|---|---|---|---|---|---|---|---|---|---|---|---|---|---|---|---|---|---|---|---|---|---|---|---|---|---|---|---|---|---|---|---|---|---|---|---|---|---|---|---|---|---|---|---|---|---|---|---|---|---|---|---|---|---|---|---|---|---|---|---|---|---|---|---|---|---|---|---|---|---|---|---|---|---|---|---|---|---|---|---|---|---|---|---|---|---|---|---|---|---|---|---|---|---|---|---|---|---|---|---|---|---|---|---|---|---|---|---|---|---|---|---|---|---|---|---|---|---|---|---|---|---|---|---|---|---|---|---|---|---|---|---|---|---|---|---|---|---|---|---|---|---|---|---|---|---|---|---|---|---|---|---|---|---|---|---|---|---|---|---|---|---|---|---|---|---|---|---|---|---|---|---|---|---|---|---|---|---|---|---|---|---|---|---|---|---|---|---|---|---|---|---|---|---|---|---|---|---|---|---|---|---|---|---|---|---|---|---|---|---|---|---|---|---|---|---|---|---|---|---|---|---|---|---|---|---|---|---|---|---|---|---|---|---|---|---|---|---|---|---|---|---|---|---|---|---|---|---|---|---|---|---|---|---|---|---|---|---|---|---|---|---|---|---|---|---|---|---|---|---|---|---|---|---|---|---|---|---|---|---|---|---|---|---|---|---|---|---|---|---|---|---|---|---|---|---|---|---|---|---|---|---|---|---|---|---|---|---|---|---|---|---|---|---|---|---|---|---|---|---|---|---|---|---|---|---|---|---|---|---|---|---|---|---|---|---|---|---|---|---|---|---|---|---|---|---|---|---|---|---|---|---|---|---|---|---|---|---|---|---|---|---|---|---|---|---|---|---|---|---|---|---|---|---|---|---|---|---|---|---|---|---|---|---|---|---|---|---|---|---|---|---|---|---|---|---|---|---|---|---|---|---|---|---|---|---|---|---|---|---|---|---|---|---|---|---|---|---|---|---|---|---|---|---|---|---|---|---|---|---|---|---|---|---|---|---|---|---|---|---|---|---|---|---|---|---|---|---|---|---|---|---|---|---|---|---|---|---|---|---|---|
| ||||||||||||||||||||||||||||||||||||||||||||||||||||||||||||||||||||||||||||||||||||||||||||||||||||||||||||||||||||||||||||||||||||||||||||||||||||||||||||||||||||||||||||||||||||||||||||||||||||||||||||||||||||||||||||||||||||||||||||||||||||||||||||||||||||||||||||||||||||||||||||||||||||||||||||||||||||||||||||||||||||||||||||||||||||||||||||||||||||||||||||||||||||||||||||||||||||||||||||||||||||||||||||||||||||||||||||||||||||||||||||||||||||||||||||||||||||||||||||||||||||||||||||||||||||||||||||||||||||||||||||||||||||||||||||||||||||||||||||||||||||||||||||||||

| Items | ||||||||||||||||||||||||||||||||||||||||||||||||||||||||||||||||||||||||||||||||||||||||||||||
|---|---|---|---|---|---|---|---|---|---|---|---|---|---|---|---|---|---|---|---|---|---|---|---|---|---|---|---|---|---|---|---|---|---|---|---|---|---|---|---|---|---|---|---|---|---|---|---|---|---|---|---|---|---|---|---|---|---|---|---|---|---|---|---|---|---|---|---|---|---|---|---|---|---|---|---|---|---|---|---|---|---|---|---|---|---|---|---|---|---|---|---|---|---|---|
| ||||||||||||||||||||||||||||||||||||||||||||||||||||||||||||||||||||||||||||||||||||||||||||||
| Layout | |||||||||
|---|---|---|---|---|---|---|---|---|---|
| |||||||||


Fight Backpacker Toru and climb down the stairs to B1F.
Check the rock near Ace Trainer Terry for a hidden Ether, then go east. Head to the far northwest corner to find a PP Up, then walk across the bridge near Ace Trainer Beverly to get a Nugget. Climb down and go west to reach a hidden Max Potion and the stairs to B2F.
A one-way ledge forces you to go north. Surf to the east and land on the south shore to reach a hidden Full Restore. Loop around and follow the group of bridges to the south, past Veteran Shaun. Check the rock in the far southeast for a Max Ether, then pick up the Timer Ball from the lower level. Head west across the large central bridge and inspect the rock in the far southwest to find a Star Piece. Go north to find a Protein, a hidden Rare Candy, and TM71 (Stone Edge), then use Surf near Veteran Julia. Search the south end of the island for a Heart Scale, and sail to the east to find a Black Belt. Surf north to get an Oval Stone on the center island, then you can use an Escape Rope to leave the cave.
Opelucid City
Visit Drayden's house to have either heW or IrisB teach your Pokémon Draco Meteor, the strongest Dragon-type attack. Teach it to a Dragon-type with high friendship.
Now it's time to face the Elite Four again. The four and the Champion await your challenge.
|
Black and White walkthrough |
|
| This article is part of Project Walkthroughs, a Bulbapedia project that aims to write comprehensive step-by-step guides on each Pokémon game. |