Alola Route 3: Difference between revisions
m (→Trainers) |
m (→Trainers) |
||
| (29 intermediate revisions by 17 users not shown) | |||
| Line 1: | Line 1: | ||
{{Route infobox | {{Route infobox | ||
|number=3 | |number=3 | ||
|size= | |size=240 | ||
|generation=7 | |generation=7 | ||
|image=Alola Route 3.png | |image=Alola Route 3.png | ||
| Line 19: | Line 18: | ||
==Route description== | ==Route description== | ||
The route begins near the {{rt|2|Alola}} entrance and splits into two paths. The northern path curves along the cliff overlooking the sea, with a patch of tall grass on a smaller cliff protruding outward along the way. The southern path is divided into yet two more, smaller paths by a mass of rock, around which {{t|Flying}}-type Pokémon circle in a clockwise direction. There is a small indent on the northern side of the rock mass in which the player can find a hidden [[Stardust]]. Both paths converge in front of the entrance to [[Melemele Meadow]]. South of the entrance is a wooden bridge as well as a side path that leads to a cliff overlooking [[Kala'e Bay]]. At the northern end of this cliff are a few breakable rocks, behind which the player can find {{tm|83|Infestation}}. The player can also find {{tc|Ace Trainer}} Makana, who will only battle the player after defeating every other trainer in the area, right before crossing the bridge to the southern portion of the route. | |||
South of the bridge is a straight path to {{rt|1|Alola}}. Along the way the player can find a [[Sightseer (Trainer class)|Sightseer]] who asks the player to register {{p|Rockruff}}{{sup/7|SM}} or {{p|Sableye}}{{sup/7|USUM}} in their Pokédex. Just before the exit to [[Alola Route 1|Route 1]] is another side path that leads to another, lower cliff overlooking [[Kala'e Bay]], with a [[Berry pile|Berry tree]] at its northern end. | |||
==Items== | ==Items== | ||
| Line 40: | Line 42: | ||
{{Itemlist|Chesto Berry|From the pile of Berries by the Berry tree (''random'', ''daily'')|Su=yes|M=yes|US=yes|UM=yes}} | {{Itemlist|Chesto Berry|From the pile of Berries by the Berry tree (''random'', ''daily'')|Su=yes|M=yes|US=yes|UM=yes}} | ||
{{Itemlist|Pecha Berry|From the pile of Berries by the Berry tree (''random'', ''daily'')|Su=yes|M=yes|US=yes|UM=yes}} | {{Itemlist|Pecha Berry|From the pile of Berries by the Berry tree (''random'', ''daily'')|Su=yes|M=yes|US=yes|UM=yes}} | ||
{{Itemlist|Leppa Berry|From the pile of Berries by the Berry tree (''random'', ''daily'')|Su=yes|M=yes}} | {{Itemlist|Leppa Berry|From the pile of Berries by the Berry tree (''random'', ''daily'')|Su=yes|M=yes|US=yes|UM=yes}} | ||
{{Itemlist|Sitrus Berry|From the pile of Berries by the Berry tree (''random'', ''daily'')|Su=yes|M=yes|US=yes|UM=yes}} | {{Itemlist|Sitrus Berry|From the pile of Berries by the Berry tree (''random'', ''daily'')|Su=yes|M=yes|US=yes|UM=yes}} | ||
{{Itemlist|Sitrus Berry|The first Berry from a large pile of Berries by the Berry tree (''random'', ''daily'')|Su=yes|M=yes|US=yes|UM=yes}} | {{Itemlist|Sitrus Berry|The first Berry from a large pile of Berries by the Berry tree (''random'', ''daily'')|Su=yes|M=yes|US=yes|UM=yes}} | ||
| Line 50: | Line 52: | ||
{{Itemlist|Pretty Wing|Sometimes dropped by Pokémon from flying shadows|Su=yes|M=yes|US=yes|UM=yes}} | {{Itemlist|Pretty Wing|Sometimes dropped by Pokémon from flying shadows|Su=yes|M=yes|US=yes|UM=yes}} | ||
{{Itemlist|Sharp Beak|Sometimes dropped by Spearow from flying shadows|Su=yes|M=yes|US=yes|UM=yes}} | {{Itemlist|Sharp Beak|Sometimes dropped by Spearow from flying shadows|Su=yes|M=yes|US=yes|UM=yes}} | ||
{{Itlistfoot|mountain}} | |||
===Found in smashed rocks=== | |||
Sometimes, after smashing [[breakable rock]]s with [[Poké Ride|Tauros Charge]], items can be found in the debris. | |||
{{Itlisth|mountain}} | |||
{{Itemlist|Stardust|Sometimes found in smashed rocks|Su=yes|M=yes|US=yes|UM=yes}} | |||
{{Itlistfoot|mountain}} | {{Itlistfoot|mountain}} | ||
| Line 62: | Line 70: | ||
{{Catch/header/dn|mountain}} | {{Catch/header/dn|mountain}} | ||
{{Catch/div|mountain|Two fields of grass north of bridge}} | {{Catch/div|mountain|Two fields of grass north of bridge}} | ||
{{Catch/entry7|019A|Rattata|yes|yes|Grass|9-12|-|10%|type1=Dark|type2=Normal}} | {{Catch/entry7|019A|Rattata|yes|yes|Grass|9-12|-|10%|type1=Dark|type2=Normal|form=Alolan Form}} | ||
{{Catch/entry7|021|Spearow|yes|yes|Grass|9-12|all=40%|type1=Normal|type2=Flying}} | {{Catch/entry7|021|Spearow|yes|yes|Grass|9-12|all=40%|type1=Normal|type2=Flying}} | ||
{{Catch/entry7|056|Mankey|yes|yes|Grass|9-12|all=20%|type1=Fighting}} | {{Catch/entry7|056|Mankey|yes|yes|Grass|9-12|all=20%|type1=Fighting}} | ||
| Line 69: | Line 77: | ||
{{Catch/entry7|742|Cutiefly|yes|yes|Grass|9-12|all=20%|type1=Bug|type2=Fairy}} | {{Catch/entry7|742|Cutiefly|yes|yes|Grass|9-12|all=20%|type1=Bug|type2=Fairy}} | ||
{{Catch/div|mountain|Field of grass south of bridge}} | {{Catch/div|mountain|Field of grass south of bridge}} | ||
{{Catch/entry7|019A|Rattata|yes|yes|Grass|9-12|-|10%|type1=Dark|type2=Normal}} | {{Catch/entry7|019A|Rattata|yes|yes|Grass|9-12|-|10%|type1=Dark|type2=Normal|form=Alolan Form}} | ||
{{Catch/entry7|021|Spearow|yes|yes|Grass|9-12|all=49%|type1=Normal|type2=Flying}} | {{Catch/entry7|021|Spearow|yes|yes|Grass|9-12|all=49%|type1=Normal|type2=Flying}} | ||
{{Catch/entry7|056|Mankey|yes|yes|Grass|9-12|all=20%|type1=Fighting}} | {{Catch/entry7|056|Mankey|yes|yes|Grass|9-12|all=20%|type1=Fighting}} | ||
{{Catch/entry7|371|Bagon|yes|yes|Grass|9-12|all=1%|type1=Dragon|allies={{ | {{Catch/entry7|371|Bagon|yes|yes|Grass|9-12|all=1%|type1=Dragon|allies={{MSN|371|Bagon}}<br>{{MSN|373|Salamence}}}} | ||
{{Catch/entry7|734|Yungoos|yes|yes|Grass|9-12|10%|-|type1=Normal}} | {{Catch/entry7|734|Yungoos|yes|yes|Grass|9-12|10%|-|type1=Normal}} | ||
{{Catch/entry7|742|Cutiefly|yes|yes|Grass|9-12|all=20%|type1=Bug|type2=Fairy}} | {{Catch/entry7|742|Cutiefly|yes|yes|Grass|9-12|all=20%|type1=Bug|type2=Fairy}} | ||
| Line 95: | Line 103: | ||
{{Catch/entryusum|021|Spearow|yes|yes|Grass|9-12|all=29%|type1=Normal|type2=Flying}} | {{Catch/entryusum|021|Spearow|yes|yes|Grass|9-12|all=29%|type1=Normal|type2=Flying}} | ||
{{Catch/entryusum|056|Mankey|yes|yes|Grass|9-12|all=30%|type1=Fighting}} | {{Catch/entryusum|056|Mankey|yes|yes|Grass|9-12|all=30%|type1=Fighting}} | ||
{{Catch/entryusum|371|Bagon|yes|yes|Grass|9-12|all=1%|type1=Dragon|allies={{MSN|371|Bagon}}<br>{{MSN|373|Salamence}}}} | |||
{{Catch/entryusum|701|Hawlucha|yes|yes|Grass|9-12|all=10%|type1=Fighting|type2=Flying}} | {{Catch/entryusum|701|Hawlucha|yes|yes|Grass|9-12|all=10%|type1=Fighting|type2=Flying}} | ||
{{Catch/entryusum|742|Cutiefly|yes|yes|Grass|9-12|all=30%|type1=Bug|type2=Fairy}} | {{Catch/entryusum|742|Cutiefly|yes|yes|Grass|9-12|all=30%|type1=Bug|type2=Fairy}} | ||
{{Catch/div|mountain|Ambush encounters}} | {{Catch/div|mountain|Ambush encounters}} | ||
| Line 104: | Line 112: | ||
{{Catch/div|mountain|Pile of Berries by Berry tree}} | {{Catch/div|mountain|Pile of Berries by Berry tree}} | ||
{{Catch/entryusum|739|Crabrawler|yes|yes|Berry pile|10-13|all=100%|type1=Fighting}} | {{Catch/entryusum|739|Crabrawler|yes|yes|Berry pile|10-13|all=100%|type1=Fighting}} | ||
{{Catch/div|mountain|Exclusively from {{color2|000|QR Scanner#Island Scan|Island Scan}}}} | |||
{{Catch/entryusum|004|Charmander|yes|yes|Grass|12|all={{tt|One|Knows Counter}}{{dotw|Su}}|type1=Fire|alliesna=N/A}} | |||
{{Catch/footer|mountain}} | {{Catch/footer|mountain}} | ||
| Line 109: | Line 119: | ||
===Pokémon Sun and Moon=== | ===Pokémon Sun and Moon=== | ||
{{trainerheader|mountain}} | {{trainerheader|mountain}} | ||
{{Trainerentry|VSRising Star M SM.png{{!}}150px|Rising Star|Ian|624|1|054|Psyduck|♂|13|None|36=ユウマ|37=Yūma}} | {{Trainerentry|VSRising Star M SM.png{{!}}150px|game=7|Rising Star|Ian|624|1|054|Psyduck|♂|13|None|36=ユウマ|37=Yūma}} | ||
{{trainerdiv|mountain}} | {{trainerdiv|mountain}} | ||
{{Trainerentry|VSRising Star F SM.png{{!}}150px|Rising Star|Tatiana|624|1|548|Petilil|♀|13|None|36=コノミ|37=Konomi}} | {{Trainerentry|VSRising Star F SM.png{{!}}150px|game=7|Rising Star|Tatiana|624|1|548|Petilil|♀|13|None|36=コノミ|37=Konomi}} | ||
{{trainerdiv|mountain}} | {{trainerdiv|mountain}} | ||
{{Trainerentry|VSRising Star M SM.png{{!}}150px|Rising Star|Joshua|624|1|058|Growlithe|♂|13|None|36=タクミ|37=Takumi}} | {{Trainerentry|VSRising Star M SM.png{{!}}150px|game=7|Rising Star|Joshua|624|1|058|Growlithe|♂|13|None|36=タクミ|37=Takumi}} | ||
{{trainerdiv|mountain|After defeating all other regular Trainers on the route}} | {{trainerdiv|mountain|After defeating all other regular Trainers on the route}} | ||
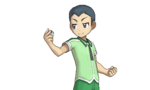
{{Trainerentry|VSAce Trainer M SM.png{{!}}150px|Ace Trainer|Makana|952|2|744|Rockruff|♂|13|Red Card|079|Slowpoke|♂|14|Red Card|36=タクヤ|37=Takuya}}<!--has 1 Potion--> | {{Trainerentry|VSAce Trainer M SM.png{{!}}150px|game=7|Ace Trainer|Makana|952|2|744|Rockruff|♂|13|Red Card|079|Slowpoke|♂|14|Red Card|36=タクヤ|37=Takuya}}<!--has 1 Potion--> | ||
{{trainerfooter|mountain|7}} | {{trainerfooter|mountain|7}} | ||
{{MSP|722|Rowlet}} If the {{player}} chose {{p|Rowlet}}: | {{MSP/6|722|Rowlet}} If the {{player}} chose {{p|Rowlet}}: | ||
{{Party/Single | {{Party/Single | ||
|color={{sun color}} | |color={{sun color}} | ||
| Line 157: | Line 167: | ||
{{Party/Footer}} | {{Party/Footer}} | ||
{{MSP|725|Litten}} If the {{player}} chose {{p|Litten}}: | {{MSP/6|725|Litten}} If the {{player}} chose {{p|Litten}}: | ||
{{Party/Single | {{Party/Single | ||
|color={{sun color}} | |color={{sun color}} | ||
| Line 196: | Line 206: | ||
{{Party/Footer}} | {{Party/Footer}} | ||
{{MSP|728|Popplio}} If the {{player}} chose {{p|Popplio}}: | {{MSP/6|728|Popplio}} If the {{player}} chose {{p|Popplio}}: | ||
{{Party/Single | {{Party/Single | ||
|color={{sun color}} | |color={{sun color}} | ||
| Line 237: | Line 247: | ||
===Pokémon Ultra Sun and Ultra Moon=== | ===Pokémon Ultra Sun and Ultra Moon=== | ||
{{trainerheader|mountain}} | {{trainerheader|mountain}} | ||
{{Trainerentry|VSRising Star M SM.png{{!}}150px|Rising Star|Ian|576|1|054|Psyduck|♂|12|None|36=ユウマ|37=Yūma}} | {{Trainerentry|VSRising Star M SM.png{{!}}150px|game=7|Rising Star|Ian|576|1|054|Psyduck|♂|12|None|36=ユウマ|37=Yūma}} | ||
{{trainerdiv|mountain}} | {{trainerdiv|mountain}} | ||
{{Trainerentry|VSRising Star F SM.png{{!}}150px|Rising Star|Tatiana|576|1|546|Cottonee|♀|12|None|36=コノミ|37=Konomi}} | {{Trainerentry|VSRising Star F SM.png{{!}}150px|game=7|Rising Star|Tatiana|576|1|546|Cottonee|♀|12|None|36=コノミ|37=Konomi}} | ||
{{trainerdiv|mountain}} | {{trainerdiv|mountain}} | ||
{{Trainerentry|VSRising Star M SM.png{{!}}150px|Rising Star|Joshua|576|1|058|Growlithe|♂|12|None|36=タクミ|37=Takumi}} | {{Trainerentry|VSRising Star M SM.png{{!}}150px|game=7|Rising Star|Joshua|576|1|058|Growlithe|♂|12|None|36=タクミ|37=Takumi}} | ||
{{trainerdiv|mountain|After defeating all other regular Trainers on the route}} | {{trainerdiv|mountain|After defeating all other regular Trainers on the route}} | ||
{{Trainerentry|VSAce Trainer M SM.png{{!}}150px|Ace Trainer|Makana|952|2|079|Slowpoke|♂|14|None|012|Butterfree|♂|14|None|36=タクヤ|37=Takuya}}<!--has 1 Potion-->{{trainerfooter|mountain|7}} | {{Trainerentry|VSAce Trainer M SM.png{{!}}150px|game=7|Ace Trainer|Makana|952|2|079|Slowpoke|♂|14|None|012|Butterfree|♂|14|None|36=タクヤ|37=Takuya}}<!--has 1 Potion-->{{trainerfooter|mountain|7}} | ||
{{MSP|722|Rowlet}} If the {{player}} chose {{p|Rowlet}}: | {{MSP/6|722|Rowlet}} If the {{player}} chose {{p|Rowlet}}: | ||
{{Party/Single | {{Party/Single | ||
|color={{sun color}} | |color={{sun color}} | ||
| Line 263: | Line 273: | ||
|ndex=728 | |ndex=728 | ||
|pokemon=Popplio | |pokemon=Popplio | ||
|gender= | |gender=female | ||
|type1=Water | |type1=Water | ||
|ability=Torrent | |ability=Torrent | ||
| Line 290: | Line 300: | ||
|ability=Static | |ability=Static | ||
|level=12 | |level=12 | ||
|move1= | |move1=Thunder Shock|move1type=Electric|move1cat=Special | ||
|move2=Growl|move2type=Normal|move2cat=Status | |move2=Growl|move2type=Normal|move2cat=Status | ||
|move3=Play Nice|move3type=Normal|move3cat=Status | |move3=Play Nice|move3type=Normal|move3cat=Status | ||
| Line 296: | Line 306: | ||
{{Party/Footer}} | {{Party/Footer}} | ||
{{MSP|725|Litten}} If the {{player}} chose {{p|Litten}}: | {{MSP/6|725|Litten}} If the {{player}} chose {{p|Litten}}: | ||
{{Party/Single | {{Party/Single | ||
|color={{sun color}} | |color={{sun color}} | ||
| Line 341: | Line 351: | ||
|ability=Static | |ability=Static | ||
|level=12 | |level=12 | ||
|move1= | |move1=Thunder Shock|move1type=Electric|move1cat=Special | ||
|move2=Growl|move2type=Normal|move2cat=Status | |move2=Growl|move2type=Normal|move2cat=Status | ||
|move3=Play Nice|move3type=Normal|move3cat=Status | |move3=Play Nice|move3type=Normal|move3cat=Status | ||
| Line 347: | Line 357: | ||
{{Party/Footer}} | {{Party/Footer}} | ||
{{MSP|728|Popplio}} If the {{player}} chose {{p|Popplio}}: | {{MSP/6|728|Popplio}} If the {{player}} chose {{p|Popplio}}: | ||
{{Party/Single | {{Party/Single | ||
|color={{sun color}} | |color={{sun color}} | ||
| Line 392: | Line 402: | ||
|ability=Static | |ability=Static | ||
|level=12 | |level=12 | ||
|move1= | |move1=Thunder Shock|move1type=Electric|move1cat=Special | ||
|move2=Growl|move2type=Normal|move2cat=Status | |move2=Growl|move2type=Normal|move2cat=Status | ||
|move3=Play Nice|move3type=Normal|move3cat=Status | |move3=Play Nice|move3type=Normal|move3cat=Status | ||
|move4=Quick Attack|move4type=Normal|move4cat=Physical}} | |move4=Quick Attack|move4type=Normal|move4cat=Physical}} | ||
{{Party/Footer}} | {{Party/Footer}} | ||
==In the anime== | |||
[[File:Alola Route 3 anime.png|thumb|250px|Route 3 in the {{pkmn|anime}}]] | |||
Route 3 appeared in ''[[SM078|Twirling with a Bang!]]'', where the [[Ultra Guardians]] were dispatched there after being informed of the presence of an [[Ultra Beast]] in the area. Initially, they assumed that it was the {{p|Blacephalon}} they had met the night before, but upon arriving, they discovered that the Ultra Beast was actually a {{p|Xurkitree}}, which was absorbing electricity from a power line. The Ultra Guardians attempted to {{pkmn2|caught|capture}} Xurkitree, but were interrupted when Blacephalon suddenly appeared. The two Ultra Beasts then started a performance showdown, with both of them trying to outdo each other in their display of [[move]]s. | |||
The [[Beast Ball]]s that the Ultra Guardians attempted to throw at the combatting Ultra Beasts were deflected by the air pressure caused by their moves, so they needed to figure out another way of dealing with them before their performance battle would escalate too much. Eventually, {{Ash}} came up with the idea of the group using their Pokémon to create an even more spectacular performance to distract the Ultra Beasts, which would give him an opening to use his {{AP|Lycanroc}}'s [[Z-Move]] on them. The plan was successfully executed, and while Blacephalon and Xurkitree were still recovering from Lycanroc's {{m|Splintered Stormshards}}, {{an|Lana}} and {{an|Lillie}} seized the chance and successfully captured the two Ultra Beasts, allowing them to be safely returned to their respective homeworlds the next day. | |||
== Trivia == | |||
* This is the earliest location in any game where it is possible to find fully evolved [[pseudo-legendary Pokémon]], with {{p|Bagon}} being capable of calling up {{p|Salamence}} as [[SOS Battle|SOS]] allies. | |||
{{-}} | {{-}} | ||
{{Alola}}<br> | {{Alola}}<br> | ||
{{Project Routes notice}} | {{Project Routes notice}} | ||
| Line 408: | Line 427: | ||
[[de:Route 3 (Alola)]] | [[de:Route 3 (Alola)]] | ||
[[es:Ruta 3 (Alola)]] | |||
[[fr:Route 3 (Alola)]] | [[fr:Route 3 (Alola)]] | ||
[[it:Percorso 3 (Alola)]] | [[it:Percorso 3 (Alola)]] | ||
[[ja:3ばんどうろ (アローラ地方)]] | [[ja:3ばんどうろ (アローラ地方)]] | ||
[[zh:3號道路(阿羅拉)]] | [[zh:3號道路(阿羅拉)]] | ||
Latest revision as of 05:04, 26 August 2022
| ||||||||||
| ||||||||||
Map description
| ||||||||||
Connecting locations
| ||||||||||
Location  Location of Route 3 in Alola. | ||||||||||
Pokémon world routes
| ||||||||||

Route 3 (Japanese: 3番道路 Route 3) is a route on Alola's Melemele Island, connecting Route 2 and Route 1.
Route description
The route begins near the Route 2 entrance and splits into two paths. The northern path curves along the cliff overlooking the sea, with a patch of tall grass on a smaller cliff protruding outward along the way. The southern path is divided into yet two more, smaller paths by a mass of rock, around which Flying-type Pokémon circle in a clockwise direction. There is a small indent on the northern side of the rock mass in which the player can find a hidden Stardust. Both paths converge in front of the entrance to Melemele Meadow. South of the entrance is a wooden bridge as well as a side path that leads to a cliff overlooking Kala'e Bay. At the northern end of this cliff are a few breakable rocks, behind which the player can find TM83 (Infestation). The player can also find Ace Trainer Makana, who will only battle the player after defeating every other trainer in the area, right before crossing the bridge to the southern portion of the route.
South of the bridge is a straight path to Route 1. Along the way the player can find a Sightseer who asks the player to register RockruffSM or SableyeUSUM in their Pokédex. Just before the exit to Route 1 is another side path that leads to another, lower cliff overlooking Kala'e Bay, with a Berry tree at its northern end.
Items
| Item | Location | Games | |
|---|---|---|---|
| Sharp Beak | In the middle of the lower path through the rocky area | S M US UM | |
| Heal Ball | East of the northern grassy area | S M US UM | |
| Stardust | In the recess on the north side of the rocky outcrop that the flying-Pokémon shadows circle (hidden) | S M US UM | |
| Soothe Bell | From the Pokémon Breeder next to the eastern grass patch on the north side of the bridge | S M US UM | |
| TM83 (Infestation) | North of the Pokémon Breeder (requires Tauros Charge) | S M US UM | |
| Red Card | From Ace Trainer Makana for defeating him | S M | |
| TM19 (Roost) | From Ace Trainer Makana for defeating him | US UM | |
| Super Potion | South of the bridge, next to the rock | S M US UM | |
| Nest Ball | Next to the eastern grass patch on the south side of the bridge | S M US UM | |
| $3,000 | From a Sightseer near the Route 1 connection if the player has RockruffSM/SableyeUSUM registered in their Pokédex | S M US UM | |
Berry pile
The Berry pile can have two sizes: a small pile that yields three random Berries or a large pile that yields four to five Berries. The first Berry in a large pile is fixed. In large piles, the player will always find a high level Crabrawler hiding among the Berries that the player must defeat in order to collect them; small piles only occasionally have low level Crabrawler hiding among the Berries. The Berry pile regenerates daily.
| Item | Location | Games | |
|---|---|---|---|
| Cheri Berry | From the pile of Berries by the Berry tree (random, daily) | S M US UM | |
| Chesto Berry | From the pile of Berries by the Berry tree (random, daily) | S M US UM | |
| Pecha Berry | From the pile of Berries by the Berry tree (random, daily) | S M US UM | |
| Leppa Berry | From the pile of Berries by the Berry tree (random, daily) | S M US UM | |
| Sitrus Berry | From the pile of Berries by the Berry tree (random, daily) | S M US UM | |
| Sitrus Berry | The first Berry from a large pile of Berries by the Berry tree (random, daily) | S M US UM | |
Dropped after ambush encounters
Sometimes, after a flying Pokémon from a shadow is defeated or caught, it will drop an item.
| Item | Location | Games | |
|---|---|---|---|
| Pretty Wing | Sometimes dropped by Pokémon from flying shadows | S M US UM | |
| Sharp Beak | Sometimes dropped by Spearow from flying shadows | S M US UM | |
Found in smashed rocks
Sometimes, after smashing breakable rocks with Tauros Charge, items can be found in the debris.
| Item | Location | Games | |
|---|---|---|---|
| Stardust | Sometimes found in smashed rocks | S M US UM | |
Zygarde Cube
| Item | Location | Games | |
|---|---|---|---|
| Zygarde Cell | South of the entrance to Melemele MeadowDay | S M | |
| Zygarde Cell | Next to the tree to the west of the Berry tree | S M | |
Pokémon
Pokémon Sun and Moon
| Pokémon | Allies | Games | Location | Levels | Rate | ||||||||||
|---|---|---|---|---|---|---|---|---|---|---|---|---|---|---|---|
| Two fields of grass north of bridge | |||||||||||||||
|
S | M |
|
9-12 | - | 10% | |||||||||
|
S | M |
|
9-12 | 40% | ||||||||||
|
S | M |
|
9-12 | 20% | ||||||||||
|
S | M |
|
9-12 | 10% | ||||||||||
|
S | M |
|
9-12 | 10% | - | |||||||||
|
S | M |
|
9-12 | 20% | ||||||||||
| Field of grass south of bridge | |||||||||||||||
|
S | M |
|
9-12 | - | 10% | |||||||||
|
S | M |
|
9-12 | 49% | ||||||||||
|
S | M |
|
9-12 | 20% | ||||||||||
|
S | M |
|
9-12 | 1% | ||||||||||
|
S | M |
|
9-12 | 10% | - | |||||||||
|
S | M |
|
9-12 | 20% | ||||||||||
| Ambush encounters | |||||||||||||||
|
S | M |
|
11-12 | 70% | ||||||||||
|
S | M |
|
11-12 | 30% | ||||||||||
|
S | M |
|
11-12 | 30% | ||||||||||
| Pile of Berries by Berry tree | |||||||||||||||
|
S | M |
|
9-12 | 100% | ||||||||||
| Exclusively from Island Scan | |||||||||||||||
|
N/A | S | M |
|
12 | OneSu | |||||||||
| A colored background means that the Pokémon can be found in this location in the specified game. A white background with a colored letter means that the Pokémon cannot be found here. | |||||||||||||||
Pokémon Ultra Sun and Ultra Moon
| Pokémon | Allies | Games | Location | Levels | Rate | ||||||||||
|---|---|---|---|---|---|---|---|---|---|---|---|---|---|---|---|
| Two fields of grass north of bridge | |||||||||||||||
|
US | UM |
|
9-12 | 30% | ||||||||||
|
US | UM |
|
9-12 | 30% | ||||||||||
|
US | UM |
|
9-12 | 10% | ||||||||||
|
US | UM |
|
9-12 | 30% | ||||||||||
| Field of grass south of bridge | |||||||||||||||
|
US | UM |
|
9-12 | 29% | ||||||||||
|
US | UM |
|
9-12 | 30% | ||||||||||
|
US | UM |
|
9-12 | 1% | ||||||||||
|
US | UM |
|
9-12 | 10% | ||||||||||
|
US | UM |
|
9-12 | 30% | ||||||||||
| Ambush encounters | |||||||||||||||
|
US | UM |
|
10-13 | 70% | ||||||||||
|
US | UM |
|
10-13 | 30% | ||||||||||
|
US | UM |
|
10-13 | 30% | ||||||||||
| Pile of Berries by Berry tree | |||||||||||||||
|
US | UM |
|
10-13 | 100% | ||||||||||
| Exclusively from Island Scan | |||||||||||||||
|
N/A | US | UM |
|
12 | OneSu | |||||||||
| A colored background means that the Pokémon can be found in this location in the specified game. A white background with a colored letter means that the Pokémon cannot be found here. | |||||||||||||||
Trainers
Pokémon Sun and Moon
| Trainer | Pokémon | |||||||||||
|---|---|---|---|---|---|---|---|---|---|---|---|---|
|
| |||||||||||
|
| |||||||||||
|
| |||||||||||
| After defeating all other regular Trainers on the route | ||||||||||||
|
| |||||||||||
| ||||||||||||

|
|||||||||||||||||||||||||||||||||||||||||||||||||||||||||||||||||||
| |||||||||||||||||||||||||||||||||||||||||||||||||||||||||||||||||||


|
|||||||||||||||||||||||||||||||||||||||||||||||||||||||||||||||||||||
| |||||||||||||||||||||||||||||||||||||||||||||||||||||||||||||||||||||

|
|||||||||||||||||||||||||||||||||||||||||||||||||||||||||||||||||||
| |||||||||||||||||||||||||||||||||||||||||||||||||||||||||||||||||||

Pokémon Ultra Sun and Ultra Moon
| Trainer | Pokémon | |||||||||||
|---|---|---|---|---|---|---|---|---|---|---|---|---|
|
| |||||||||||
|
| |||||||||||
|
| |||||||||||
| After defeating all other regular Trainers on the route | ||||||||||||
|
| |||||||||||
| ||||||||||||
|
||||||||||||||||||||||||||||||||||||||||||||||||||||||||||||||||||||||||||||||||||||||||||||||||||||||
| ||||||||||||||||||||||||||||||||||||||||||||||||||||||||||||||||||||||||||||||||||||||||||||||||||||||

|
||||||||||||||||||||||||||||||||||||||||||||||||||||||||||||||||||||||||||||||||||||||||||||||||||||||||
| ||||||||||||||||||||||||||||||||||||||||||||||||||||||||||||||||||||||||||||||||||||||||||||||||||||||||
|
||||||||||||||||||||||||||||||||||||||||||||||||||||||||||||||||||||||||||||||||||||||||||||||||||||||
| ||||||||||||||||||||||||||||||||||||||||||||||||||||||||||||||||||||||||||||||||||||||||||||||||||||||
In the anime

Route 3 appeared in Twirling with a Bang!, where the Ultra Guardians were dispatched there after being informed of the presence of an Ultra Beast in the area. Initially, they assumed that it was the Blacephalon they had met the night before, but upon arriving, they discovered that the Ultra Beast was actually a Xurkitree, which was absorbing electricity from a power line. The Ultra Guardians attempted to capture Xurkitree, but were interrupted when Blacephalon suddenly appeared. The two Ultra Beasts then started a performance showdown, with both of them trying to outdo each other in their display of moves.
The Beast Balls that the Ultra Guardians attempted to throw at the combatting Ultra Beasts were deflected by the air pressure caused by their moves, so they needed to figure out another way of dealing with them before their performance battle would escalate too much. Eventually, Ash came up with the idea of the group using their Pokémon to create an even more spectacular performance to distract the Ultra Beasts, which would give him an opening to use his Lycanroc's Z-Move on them. The plan was successfully executed, and while Blacephalon and Xurkitree were still recovering from Lycanroc's Splintered Stormshards, Lana and Lillie seized the chance and successfully captured the two Ultra Beasts, allowing them to be safely returned to their respective homeworlds the next day.
Trivia
- This is the earliest location in any game where it is possible to find fully evolved pseudo-legendary Pokémon, with Bagon being capable of calling up Salamence as SOS allies.


| This article is part of Project Routes, a Bulbapedia project that aims to write comprehensive articles on every route in the Pokémon world. |