Viridian Gym: Difference between revisions
No edit summary |
|||
| (33 intermediate revisions by 15 users not shown) | |||
| Line 5: | Line 5: | ||
|image=Viridian Gym AG132.png | |image=Viridian Gym AG132.png | ||
|location=Viridian City | |location=Viridian City | ||
|leader= | |leader=[[Giovanni]]{{sup/1|RBY}}{{sup/3|FRLG}}<br>{{ga|Blue}}{{sup/2|GSC}}{{sup/4|HGSS}}<br>[[Team Rocket trio|Jessie, James, and Meowth]] (temporary, {{pkmn|anime}} only)<br>[[Agatha]] (replacement, {{pkmn|anime}} only) | ||
|badge=Earth Badge | |badge=Earth Badge | ||
|type=Ground | |type=Ground | ||
| Line 13: | Line 13: | ||
|colorlight=9FC0B5 | |colorlight=9FC0B5 | ||
}} | }} | ||
The '''Viridian Gym''' (Japanese: '''トキワジム''' ''Tokiwa Gym'') is the official [[Gym]] of [[Viridian City]]. During the events of [[Generation]]s {{Gen|I}} and {{Gen|III}}, it is based on {{type|Ground}} {{OBP|Pokémon|species}} and the [[Gym Leader]] is [[Giovanni]], the head of [[Team Rocket]]. After Team Rocket is disbanded at the end of Generations I and III, {{ga|Blue}} takes over as the Leader, | The '''Viridian Gym''' (Japanese: '''トキワジム''' ''Tokiwa Gym'') is the official [[Gym]] of [[Viridian City]]. During the events of [[Generation]]s {{Gen|I}} and {{Gen|III}}, it is based on {{type|Ground}} {{OBP|Pokémon|species}} and the [[Gym Leader]] is [[Giovanni]], the head of [[Team Rocket]]. After Team Rocket is disbanded at the end of Generations I and III, {{ga|Blue}} takes over as the Leader during Generations II and IV; under his direction, the Gym no longer concentrates on any particular [[type]]. | ||
[[Agatha]] of the [[Elite Four]] serves as a temporary Gym Leader in the anime. | [[Agatha]] of the [[Elite Four]] serves as a temporary Gym Leader in the {{pkmn|anime}}. | ||
{{pkmn|Trainer}}s who earn a win at the Viridian Gym receive the {{Badge|Earth}}. | {{pkmn|Trainer}}s who earn a win at the Viridian Gym receive the {{Badge|Earth}}. | ||
| Line 41: | Line 41: | ||
{{sign|DPcity|title|Viridian City Pokémon Gym}} | {{sign|DPcity|title|Viridian City Pokémon Gym}} | ||
{{sign|DPcity|title|Leader: ...}} | {{sign|DPcity|title|Leader: ...}} | ||
{{sign|DPcity | {{sign|DPcity|The rest of the text is illegible...}} | ||
{{sign|DPcity|footer}} | {{sign|DPcity|footer}} | ||
| Line 48: | Line 48: | ||
In Generations {{Gen|II}} and {{Gen|IV}}, {{ga|Blue}} takes over the Gym. In Generation II, the Gym can be challenged as soon as Blue is spoken to on [[Cinnabar Island]]. In Generation IV, however, Blue will stay on Cinnabar Island and will not return to his Gym until the player speaks to him after obtaining the other seven Kanto Gym Badges. | In Generations {{Gen|II}} and {{Gen|IV}}, {{ga|Blue}} takes over the Gym. In Generation II, the Gym can be challenged as soon as Blue is spoken to on [[Cinnabar Island]]. In Generation IV, however, Blue will stay on Cinnabar Island and will not return to his Gym until the player speaks to him after obtaining the other seven Kanto Gym Badges. | ||
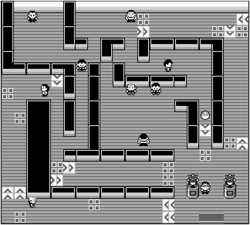
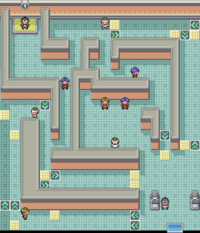
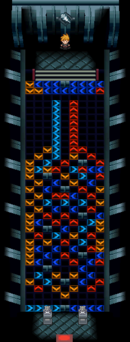
Inside the Gym, the floor uses the same [[ | Inside the Gym, the floor uses the same [[spin tile|transporting tiles]] as are used in the [[Rocket Hideout]]. The player must use these tiles to navigate through the Gym to reach the Gym Leader. In Generation II, the Gym is completely remodeled and the tiles are gone; in Generation IV, the tiles are put back up, now covering almost the entire floor of the Gym. | ||
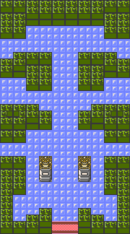
A field based on the Gym also appears in {{ | A field based on the Gym also appears in {{eng|Pokémon Stadium}}'s [[Gym Leader Castle]] and {{pkmn|Stadium 2}}'s Kanto Gym Leader Castle. | ||
===Appearance=== | ===Appearance=== | ||
| Line 67: | Line 67: | ||
===Trainers=== | ===Trainers=== | ||
==== | ====Core series==== | ||
====={{game2|Red|Blue|Yellow}}===== | ====={{game2|Red|Blue|Yellow}}===== | ||
{{trainerheader|Ground}} | {{trainerheader|Ground}} | ||
{{trainerentry|Spr RG Tamer.png|Tamer||1560|2|024|Arbok||39|None|128|Tauros||39|None|}} | {{trainerentry|Spr RG Tamer.png|Tamer||1560|2|024|Arbok||39|None|128|Tauros||39|None|}} | ||
{{trainerdiv|Ground}} | {{trainerdiv|Ground}} | ||
{{trainerentry|Spr RG Blackbelt.png| | {{trainerentry|Spr RG Blackbelt.png|Blackbelt||1075|1|067|Machoke||43|None|}} | ||
{{trainerdiv|Ground}} | {{trainerdiv|Ground}} | ||
{{trainerentry|Spr RG Cooltrainer M.png|Cooltrainer||1365|2|033|Nidorino||39|None|034|Nidoking||39|None|}} | {{trainerentry|Spr RG Cooltrainer M.png|Cooltrainer||1365|2|033|Nidorino||39|None|034|Nidoking||39|None|}} | ||
| Line 78: | Line 78: | ||
{{trainerentry|Spr RG Tamer.png|Tamer||1720|1|111|Rhyhorn||43|None|}} | {{trainerentry|Spr RG Tamer.png|Tamer||1720|1|111|Rhyhorn||43|None|}} | ||
{{trainerdiv|Ground}} | {{trainerdiv|Ground}} | ||
{{trainerentry|Spr RG Blackbelt.png| | {{trainerentry|Spr RG Blackbelt.png|Blackbelt||1000|2|066|Machop||40|None|067|Machoke||40|None|}} | ||
{{trainerdiv|Ground}} | {{trainerdiv|Ground}} | ||
{{trainerentry|Spr RG Cooltrainer M.png|Cooltrainer||1365|2|028|Sandslash||39|None|051|Dugtrio||39|None|}} | {{trainerentry|Spr RG Cooltrainer M.png|Cooltrainer||1365|2|028|Sandslash||39|None|051|Dugtrio||39|None|}} | ||
| Line 84: | Line 84: | ||
{{trainerentry|Spr RG Cooltrainer M.png|Cooltrainer||1505|1|111|Rhyhorn||43|None|}} | {{trainerentry|Spr RG Cooltrainer M.png|Cooltrainer||1505|1|111|Rhyhorn||43|None|}} | ||
{{trainerdiv|Ground}} | {{trainerdiv|Ground}} | ||
{{trainerentry|Spr RG Blackbelt.png| | {{trainerentry|Spr RG Blackbelt.png|Blackbelt||950|3|067|Machoke||38|None|066|Machop||38|None|067|Machoke||38|None|}} | ||
{{trainerfooter|Ground|1|inside}} | {{trainerfooter|Ground|1|inside}} | ||
======{{game|Red and Blue|s}}====== | ======{{game|Red and Blue|s}}====== | ||
{{ | {{Party/Single | ||
|color={{ground color}} | |color={{ground color}} | ||
|headcolor={{ground color light}} | |headcolor={{ground color light}} | ||
| Line 98: | Line 98: | ||
|game=RGB | |game=RGB | ||
|location=Viridian Gym | |location=Viridian Gym | ||
|pokemon=5 | |pokemon=5}} | ||
| | |{{Pokémon/1 | ||
|game=Blue | |game=Blue | ||
|ndex=111 | |ndex=111 | ||
| Line 109: | Line 109: | ||
|move3=Fury Attack|move3type=Normal | |move3=Fury Attack|move3type=Normal | ||
|move4=Horn Attack|move4type=Normal}} | |move4=Horn Attack|move4type=Normal}} | ||
| | |{{Pokémon/1 | ||
|game=Blue | |game=Blue | ||
|ndex=051 | |ndex=051 | ||
| Line 119: | Line 119: | ||
|move3=Sand-Attack|move3type=Normal | |move3=Sand-Attack|move3type=Normal | ||
|move4=Slash|move4type=Normal}} | |move4=Slash|move4type=Normal}} | ||
| | |{{Pokémon/1 | ||
|game=Blue | |game=Blue | ||
|ndex=031 | |ndex=031 | ||
| Line 127: | Line 127: | ||
|move1=Scratch|move1type=Normal | |move1=Scratch|move1type=Normal | ||
|move2=Tail Whip|move2type=Normal | |move2=Tail Whip|move2type=Normal | ||
|move3= | |move3=Body Slam|move3type=Normal | ||
|move4= | |move4=Poison Sting|move4type=Poison}} | ||
| | {{Party/Div|color={{ground color}}}} | ||
| style="margin:auto" |{{Pokémon/1 | |||
|game=Blue | |game=Blue | ||
|ndex=034 | |ndex=034 | ||
| Line 139: | Line 140: | ||
|move3=Poison Sting|move3type=Poison | |move3=Poison Sting|move3type=Poison | ||
|move4=Thrash|move4type=Normal}} | |move4=Thrash|move4type=Normal}} | ||
| | | style="margin:auto" |{{Pokémon/1 | ||
|game=Blue | |game=Blue | ||
|ndex=112 | |ndex=112 | ||
| Line 149: | Line 150: | ||
|move3=Fissure|move3type=Ground | |move3=Fissure|move3type=Ground | ||
|move4=Horn Drill|move4type=Normal}} | |move4=Horn Drill|move4type=Normal}} | ||
}} | {{Party/Footer}} | ||
======{{game|Yellow}}====== | ======{{game|Yellow}}====== | ||
{{ | {{Party/Single | ||
|color={{ground color}} | |color={{ground color}} | ||
|headcolor={{ground color light}} | |headcolor={{ground color light}} | ||
| Line 162: | Line 163: | ||
|game=Y | |game=Y | ||
|location=Viridian Gym | |location=Viridian Gym | ||
|pokemon=5 | |pokemon=5}} | ||
| | |{{Pokémon/1 | ||
|game=Yellow | |game=Yellow | ||
|ndex=051 | |ndex=051 | ||
| Line 173: | Line 174: | ||
|move3=Fissure|move3type=Ground | |move3=Fissure|move3type=Ground | ||
|move4=Earthquake|move4type=Ground}} | |move4=Earthquake|move4type=Ground}} | ||
| | |{{Pokémon/1 | ||
|game=Yellow | |game=Yellow | ||
|ndex=053 | |ndex=053 | ||
| Line 183: | Line 184: | ||
|move3=Fury Swipes|move3type=Normal | |move3=Fury Swipes|move3type=Normal | ||
|move4=Double Team|move4type=Normal}} | |move4=Double Team|move4type=Normal}} | ||
| | |{{Pokémon/1 | ||
|game=Yellow | |game=Yellow | ||
|ndex=031 | |ndex=031 | ||
| Line 193: | Line 194: | ||
|move3=Double Kick|move3type=Fighting | |move3=Double Kick|move3type=Fighting | ||
|move4=Thunder|move4type=Electric}} | |move4=Thunder|move4type=Electric}} | ||
| | {{Party/Div|color={{ground color}}}} | ||
| style="margin:auto" |{{Pokémon/1 | |||
|game=Yellow | |game=Yellow | ||
|ndex=034 | |ndex=034 | ||
| Line 203: | Line 205: | ||
|move3=Earthquake|move3type=Ground | |move3=Earthquake|move3type=Ground | ||
|move4=Double Kick|move4type=Fighting}} | |move4=Double Kick|move4type=Fighting}} | ||
| | | style="margin:auto" |{{Pokémon/1 | ||
|game=Yellow | |game=Yellow | ||
|ndex=112 | |ndex=112 | ||
| Line 213: | Line 215: | ||
|move3=Earthquake|move3type=Ground | |move3=Earthquake|move3type=Ground | ||
|move4=Horn Drill|move4type=Normal}} | |move4=Horn Drill|move4type=Normal}} | ||
}} | {{Party/Footer}} | ||
====={{game2|Gold|Silver|Crystal}}===== | ====={{game2|Gold|Silver|Crystal}}===== | ||
{{ | {{Party/Single | ||
|color={{blue color}} | |color={{blue color}} | ||
|headcolor={{blue color light}} | |headcolor={{blue color light}} | ||
| Line 223: | Line 225: | ||
|prize={{Pdollar}}5800 | |prize={{Pdollar}}5800 | ||
|class=Leader | |class=Leader | ||
|classlink=Gym Leader | |||
|name={{color2|000000|Blue (game)|Blue}} | |name={{color2|000000|Blue (game)|Blue}} | ||
|game=GSC | |game=GSC | ||
|location=Viridian Gym | |location=Viridian Gym | ||
|pokemon=6 | |pokemon=6}} | ||
| | |{{Pokémon/2 | ||
|game=Crystal | |game=Crystal | ||
|ndex=018 | |ndex=018 | ||
| Line 238: | Line 241: | ||
|move3=Wing Attack|move3type=Flying | |move3=Wing Attack|move3type=Flying | ||
|move4=Mirror Move|move4type=Flying}} | |move4=Mirror Move|move4type=Flying}} | ||
| | |{{Pokémon/2 | ||
|game=Crystal | |||
|ndex=065 | |||
|pokemon=Alakazam | |||
|gender=male | |||
|level=54 | |||
|type1=Psychic | |||
|move1=Disable|move1type=Normal | |||
|move2=Recover|move2type=Normal | |||
|move3=Psychic|move3type=Psychic | |||
|move4=Reflect|move4type=Psychic}} | |||
|{{Pokémon/2 | |||
|game=Crystal | |game=Crystal | ||
|ndex=112 | |ndex=112 | ||
| Line 249: | Line 263: | ||
|move3=Rock Slide|move3type=Rock | |move3=Rock Slide|move3type=Rock | ||
|move4=Earthquake|move4type=Ground}} | |move4=Earthquake|move4type=Ground}} | ||
{{Party/Div|color={{blue color}}}} | |||
| | |{{Pokémon/2 | ||
| | |||
|game=Crystal | |game=Crystal | ||
|ndex=130 | |ndex=130 | ||
| Line 271: | Line 275: | ||
|move3=Rain Dance|move3type=Water | |move3=Rain Dance|move3type=Water | ||
|move4=Hyper Beam|move4type=Normal}} | |move4=Hyper Beam|move4type=Normal}} | ||
| | |{{Pokémon/2 | ||
|game=Crystal | |game=Crystal | ||
|ndex=103 | |ndex=103 | ||
| Line 282: | Line 286: | ||
|move3=Egg Bomb|move3type=Normal | |move3=Egg Bomb|move3type=Normal | ||
|move4=SolarBeam|move4type=Grass}} | |move4=SolarBeam|move4type=Grass}} | ||
| | |{{Pokémon/2 | ||
|game=Crystal | |game=Crystal | ||
|ndex=059 | |ndex=059 | ||
| Line 293: | Line 297: | ||
|move3=Flamethrower|move3type=Fire | |move3=Flamethrower|move3type=Fire | ||
|move4=ExtremeSpeed|move4type=Normal}} | |move4=ExtremeSpeed|move4type=Normal}} | ||
}} | {{Party/Footer}} | ||
====={{game|FireRed and LeafGreen|s}}===== | ====={{game|FireRed and LeafGreen|s}}===== | ||
| Line 314: | Line 318: | ||
{{trainerfooter|Ground|inside}} | {{trainerfooter|Ground|inside}} | ||
{{ | {{Party/Single | ||
|color={{ground color}} | |color={{ground color}} | ||
|headcolor={{ground color light}} | |headcolor={{ground color light}} | ||
| Line 321: | Line 325: | ||
|prize={{Pdollar}}5000 | |prize={{Pdollar}}5000 | ||
|class=Leader | |class=Leader | ||
|classlink=Gym Leader | |||
|name={{color2|000000|Giovanni}} | |name={{color2|000000|Giovanni}} | ||
|game=FRLG | |game=FRLG | ||
|location=Viridian Gym | |location=Viridian Gym | ||
|pokemon=5 | |pokemon=5}} | ||
| | |{{Pokémon/3 | ||
|game=FireRed | |game=FireRed | ||
|ndex=111 | |ndex=111 | ||
| Line 337: | Line 342: | ||
|move3=Scary Face|move3type=Normal | |move3=Scary Face|move3type=Normal | ||
|move4=Earthquake|move4type=Ground}} | |move4=Earthquake|move4type=Ground}} | ||
| | |{{Pokémon/3 | ||
|game=FireRed | |game=FireRed | ||
|ndex=051 | |ndex=051 | ||
| Line 349: | Line 354: | ||
|move3=Mud-Slap|move3type=Ground | |move3=Mud-Slap|move3type=Ground | ||
|move4=Earthquake|move4type=Ground}} | |move4=Earthquake|move4type=Ground}} | ||
| | |{{Pokémon/3 | ||
|game=FireRed | |game=FireRed | ||
|ndex=031 | |ndex=031 | ||
| Line 361: | Line 366: | ||
|move3=Poison Sting|move3type=Poison | |move3=Poison Sting|move3type=Poison | ||
|move4=Body Slam|move4type=Normal}} | |move4=Body Slam|move4type=Normal}} | ||
| | {{Party/Div|color={{ground color}}}} | ||
| style="margin:auto" |{{Pokémon/3 | |||
|game=FireRed | |game=FireRed | ||
|ndex=034 | |ndex=034 | ||
| Line 373: | Line 379: | ||
|move3=Poison Sting|move3type=Poison | |move3=Poison Sting|move3type=Poison | ||
|move4=Thrash|move4type=Normal}} | |move4=Thrash|move4type=Normal}} | ||
| | | style="margin:auto" |{{Pokémon/3 | ||
|game=FireRed | |game=FireRed | ||
|ndex=111 | |ndex=111 | ||
| Line 385: | Line 391: | ||
|move3=Scary Face|move3type=Normal | |move3=Scary Face|move3type=Normal | ||
|move4=Earthquake|move4type=Ground}} | |move4=Earthquake|move4type=Ground}} | ||
}} | {{Party/Footer}} | ||
====={{game|HeartGold and SoulSilver|s}}===== | ====={{game|HeartGold and SoulSilver|s}}===== | ||
| Line 398: | Line 404: | ||
{{trainerfooter|blue|2=inside}} | {{trainerfooter|blue|2=inside}} | ||
{{ | {{Party/Single | ||
|color={{blue color}} | |color={{blue color}} | ||
|headcolor={{blue color light}} | |headcolor={{blue color light}} | ||
| Line 405: | Line 411: | ||
|prize={{Pdollar}}9600 | |prize={{Pdollar}}9600 | ||
|class=Leader | |class=Leader | ||
|classlink=Gym Leader | |||
|name={{color2|000000|Blue (game)|Blue}} | |name={{color2|000000|Blue (game)|Blue}} | ||
|game=HGSS | |game=HGSS | ||
|location=Viridian Gym | |location=Viridian Gym | ||
|pokemon=6 | |pokemon=6}} | ||
| | |{{Pokémon/4 | ||
|game=HeartGold | |game=HeartGold | ||
|ndex=103 | |ndex=103 | ||
| Line 421: | Line 428: | ||
|move3=Leaf Storm|move3type=Grass|move3cat=Special | |move3=Leaf Storm|move3type=Grass|move3cat=Special | ||
|move4=Trick Room|move4type=Psychic|move4cat=Status}} | |move4=Trick Room|move4type=Psychic|move4cat=Status}} | ||
| | |{{Pokémon/4 | ||
|game=SoulSilver | |game=SoulSilver | ||
|ndex=112 m | |ndex=112 m | ||
| Line 433: | Line 440: | ||
|move3=Megahorn|move3type=Bug|move3cat=Physical | |move3=Megahorn|move3type=Bug|move3cat=Physical | ||
|move4=Thunder Fang|move4type=Electric|move4cat=Physical}} | |move4=Thunder Fang|move4type=Electric|move4cat=Physical}} | ||
| | |{{Pokémon/4 | ||
|game=HeartGold | |game=HeartGold | ||
|ndex=068 | |ndex=068 | ||
| Line 445: | Line 452: | ||
|move3=Stone Edge|move3type=Rock|move3cat=Physical | |move3=Stone Edge|move3type=Rock|move3cat=Physical | ||
|move4=Earthquake|move4type=Ground|move4cat=Physical}} | |move4=Earthquake|move4type=Ground|move4cat=Physical}} | ||
| | {{Party/Div|color={{blue color}}}} | ||
|{{Pokémon/4 | |||
|game=SoulSilver | |game=SoulSilver | ||
|ndex=130 m | |ndex=130 m | ||
| Line 457: | Line 465: | ||
|move3=Dragon Dance|move3type=Dragon|move3cat=Status | |move3=Dragon Dance|move3type=Dragon|move3cat=Status | ||
|move4=Return|move4type=Normal|move4cat=Physical}} | |move4=Return|move4type=Normal|move4cat=Physical}} | ||
| | |{{Pokémon/4 | ||
|game=SoulSilver | |game=SoulSilver | ||
|ndex=059 | |ndex=059 | ||
| Line 469: | Line 477: | ||
|move3=Dragon Pulse|move3type=Dragon|move3cat=Special | |move3=Dragon Pulse|move3type=Dragon|move3cat=Special | ||
|move4=Roar|move4type=Normal|move4cat=Status}} | |move4=Roar|move4type=Normal|move4cat=Status}} | ||
| | |{{Pokémon/4 | ||
|game=HeartGold | |game=HeartGold | ||
|ndex=018 | |ndex=018 | ||
| Line 481: | Line 489: | ||
|move2=Mirror Move|move2type=Flying|move2cat=Status | |move2=Mirror Move|move2type=Flying|move2cat=Status | ||
|move3=Return|move3type=Normal|move3cat=Physical | |move3=Return|move3type=Normal|move3cat=Physical | ||
|move4=Air Slash|move4type=Flying|move4cat=Special}}}} | |move4=Air Slash|move4type=Flying|move4cat=Special}} | ||
{{Party/Footer}} | |||
====Side series==== | ====Side series==== | ||
| Line 488: | Line 497: | ||
{{Trainerheader|Ground}} | {{Trainerheader|Ground}} | ||
{{Trainerentry|SJP Rocket.png|Rocket||N/A|6|042|Golbat||50-100|None|020|Raticate||50-100|None|053|Persian||50-100|None|146|Moltres||50-100|None|085|Dodrio||50-100|None|047|Parasect||50-100|None}} | {{Trainerentry|SJP Rocket.png|Rocket||N/A|6|042|Golbat||50-100|None|020|Raticate||50-100|None|053|Persian||50-100|None|146|Moltres||50-100|None|085|Dodrio||50-100|None|047|Parasect||50-100|None}} | ||
{{trainerdiv|Ground}} | |||
{{Trainerentry|S2 Scientist.png|Lab Man||N/A|6|141|Kabutops||50-100|None|082|Magneton||50-100|None|022|Fearow||50-100|None|107|Hitmonchan||50-100|None|062|Poliwrath||50-100|None|108|Lickitung||50-100|None}} | {{Trainerentry|S2 Scientist.png|Lab Man||N/A|6|141|Kabutops||50-100|None|082|Magneton||50-100|None|022|Fearow||50-100|None|107|Hitmonchan||50-100|None|062|Poliwrath||50-100|None|108|Lickitung||50-100|None}} | ||
{{trainerdiv|Ground}} | |||
{{Trainerentry|SJP Cool M.png|Cool♂||N/A|6|139|Omastar||50-100|None|085|Dodrio||50-100|None|073|Tentacruel||50-100|None|036|Clefable||50-100|None|145|Zapdos||50-100|None|127|Pinsir||50-100|None}} | {{Trainerentry|SJP Cool M.png|Cool♂||N/A|6|139|Omastar||50-100|None|085|Dodrio||50-100|None|073|Tentacruel||50-100|None|036|Clefable||50-100|None|145|Zapdos||50-100|None|127|Pinsir||50-100|None}} | ||
{{Trainerfooter|Ground|1|Inside}} | {{Trainerfooter|Ground|1|Inside}} | ||
{{Party|color={{ground color}}|headcolor={{ground color light}}|bordercolor={{ground color dark}} | {{Party/Single | ||
|color={{ground color}} | |||
|headcolor={{ground color light}} | |||
|bordercolor={{ground color dark}} | |||
|sprite=Giovanni Stadium.png | |sprite=Giovanni Stadium.png | ||
|prize=N/A | |prize=N/A | ||
| Line 499: | Line 513: | ||
|game=Pokémon Stadium | |game=Pokémon Stadium | ||
|location=Gym Leader Castle | |location=Gym Leader Castle | ||
|pokemon=6 | |pokemon=6}} | ||
| | |{{Pokémon/1 | ||
|ndex=053 | |ndex=053 | ||
|pokemon=Persian | |pokemon=Persian | ||
| Line 509: | Line 523: | ||
|move3=Thunderbolt|move3type=Electric | |move3=Thunderbolt|move3type=Electric | ||
|move4=BubbleBeam|move4type=Water}} | |move4=BubbleBeam|move4type=Water}} | ||
| | |{{Pokémon/1 | ||
|ndex=051 | |ndex=051 | ||
|pokemon=Dugtrio | |pokemon=Dugtrio | ||
| Line 518: | Line 532: | ||
|move3=Dig|move3type=Ground | |move3=Dig|move3type=Ground | ||
|move4=Rock Slide|move4type=Rock}} | |move4=Rock Slide|move4type=Rock}} | ||
| | |{{Pokémon/1 | ||
|ndex=031 | |ndex=031 | ||
|pokemon=Nidoqueen | |pokemon=Nidoqueen | ||
| Line 527: | Line 541: | ||
|move3=Surf|move3type=Water | |move3=Surf|move3type=Water | ||
|move4=Earthquake|move4type=Ground}} | |move4=Earthquake|move4type=Ground}} | ||
| | {{Party/Div|color={{ground color}}}} | ||
|{{Pokémon/1 | |||
|ndex=034 | |ndex=034 | ||
|pokemon=Nidoking | |pokemon=Nidoking | ||
| Line 536: | Line 551: | ||
|move3=Blizzard|move3type=Ice | |move3=Blizzard|move3type=Ice | ||
|move4=Toxic|move4type=Poison}} | |move4=Toxic|move4type=Poison}} | ||
| | |{{Pokémon/1 | ||
|ndex=112 | |ndex=112 | ||
|pokemon=Rhydon | |pokemon=Rhydon | ||
| Line 545: | Line 560: | ||
|move3=Body Slam|move3type=Normal | |move3=Body Slam|move3type=Normal | ||
|move4=Fissure|move4type=Ground}} | |move4=Fissure|move4type=Ground}} | ||
| | |{{Pokémon/1 | ||
|ndex=128 | |ndex=128 | ||
|pokemon=Tauros | |pokemon=Tauros | ||
| Line 554: | Line 569: | ||
|move3=Blizzard|move3type=Ice | |move3=Blizzard|move3type=Ice | ||
|move4=Stomp|move4type=Normal}} | |move4=Stomp|move4type=Normal}} | ||
}} | {{Party/Footer}} | ||
======Round 2====== | ======Round 2====== | ||
{{Trainerheader|Ground}} | {{Trainerheader|Ground}} | ||
{{Trainerentry|SJP Rocket.png|Rocket||N/A|6|042|Golbat||50-100|None|020|Raticate||50-100|None|053|Persian||50-100|None|115|Kangaskhan||50-100|None|085|Dodrio||50-100|None|047|Parasect||50-100|None}} | {{Trainerentry|SJP Rocket.png|Rocket||N/A|6|042|Golbat||50-100|None|020|Raticate||50-100|None|053|Persian||50-100|None|115|Kangaskhan||50-100|None|085|Dodrio||50-100|None|047|Parasect||50-100|None}} | ||
{{trainerdiv|Ground}} | |||
{{Trainerentry|S2 Scientist.png|Lab Man||N/A|6|141|Kabutops||50-100|None|082|Magneton||50-100|None|022|Fearow||50-100|None|107|Hitmonchan||50-100|None|062|Poliwrath||50-100|None|108|Lickitung||50-100|None}} | {{Trainerentry|S2 Scientist.png|Lab Man||N/A|6|141|Kabutops||50-100|None|082|Magneton||50-100|None|022|Fearow||50-100|None|107|Hitmonchan||50-100|None|062|Poliwrath||50-100|None|108|Lickitung||50-100|None}} | ||
{{trainerdiv|Ground}} | |||
{{Trainerentry|SJP Cool M.png|Cool♂||N/A|6|139|Omastar||50-100|None|085|Dodrio||50-100|None|073|Tentacruel||50-100|None|036|Clefable||50-100|None|145|Zapdos||50-100|None|127|Pinsir||50-100|None}} | {{Trainerentry|SJP Cool M.png|Cool♂||N/A|6|139|Omastar||50-100|None|085|Dodrio||50-100|None|073|Tentacruel||50-100|None|036|Clefable||50-100|None|145|Zapdos||50-100|None|127|Pinsir||50-100|None}} | ||
{{Trainerfooter|Ground|1|Inside}} | {{Trainerfooter|Ground|1|Inside}} | ||
{{Party|color={{ground color}}|headcolor={{ground color light}}|bordercolor={{ground color dark}} | {{Party/Single | ||
|color={{ground color}} | |||
|headcolor={{ground color light}} | |||
|bordercolor={{ground color dark}} | |||
|sprite=Giovanni Stadium.png | |sprite=Giovanni Stadium.png | ||
|prize=N/A | |prize=N/A | ||
| Line 570: | Line 590: | ||
|game=Pokémon Stadium | |game=Pokémon Stadium | ||
|location=Gym Leader Castle | |location=Gym Leader Castle | ||
|pokemon=6 | |pokemon=6}} | ||
| | |{{Pokémon/1 | ||
|ndex=053 | |ndex=053 | ||
|pokemon=Persian | |pokemon=Persian | ||
| Line 580: | Line 600: | ||
|move3=Thunderbolt|move3type=Electric | |move3=Thunderbolt|move3type=Electric | ||
|move4=BubbleBeam|move4type=Water}} | |move4=BubbleBeam|move4type=Water}} | ||
| | |{{Pokémon/1 | ||
|ndex=128 | |ndex=128 | ||
|pokemon=Tauros | |pokemon=Tauros | ||
| Line 589: | Line 609: | ||
|move3=Blizzard|move3type=Ice | |move3=Blizzard|move3type=Ice | ||
|move4=Earthquake|move4type=Ground}} | |move4=Earthquake|move4type=Ground}} | ||
| | |{{Pokémon/1 | ||
|ndex=031 | |ndex=031 | ||
|pokemon=Nidoqueen | |pokemon=Nidoqueen | ||
| Line 598: | Line 618: | ||
|move3=Thunderbolt|move3type=Electric | |move3=Thunderbolt|move3type=Electric | ||
|move4=Blizzard|move4type=Ice}} | |move4=Blizzard|move4type=Ice}} | ||
| | {{Party/Div|color={{ground color}}}} | ||
|{{Pokémon/1 | |||
|ndex=034 | |ndex=034 | ||
|pokemon=Nidoking | |pokemon=Nidoking | ||
| Line 607: | Line 628: | ||
|move3=Surf|move3type=Water | |move3=Surf|move3type=Water | ||
|move4=Earthquake|move4type=Ground}} | |move4=Earthquake|move4type=Ground}} | ||
| | |{{Pokémon/1 | ||
|ndex=094 | |ndex=094 | ||
|pokemon=Gengar | |pokemon=Gengar | ||
| Line 616: | Line 637: | ||
|move3=Night Shade|move3type=Ghost | |move3=Night Shade|move3type=Ghost | ||
|move4=Explosion|move4type=Normal}} | |move4=Explosion|move4type=Normal}} | ||
| | |{{Pokémon/1 | ||
|ndex=146 | |ndex=146 | ||
|pokemon=Moltres | |pokemon=Moltres | ||
| Line 625: | Line 646: | ||
|move3=Fly|move3type=Flying | |move3=Fly|move3type=Flying | ||
|move4=Double-Edge|move4type=Normal}} | |move4=Double-Edge|move4type=Normal}} | ||
}} | {{Party/Footer}} | ||
====={{g|Stadium 2}}===== | ====={{g|Stadium 2}}===== | ||
======Round 1====== | ======Round 1====== | ||
{{Party|color={{blue color}}|headcolor={{blue color light}}|bordercolor={{blue color dark}}|sprite=S2 Leader Blue.png|prize=N/A|class=Gym Leader|name={{color2|000000|Blue (game)|Blue}}|game=Pokémon Stadium 2|location=Gym Leader Castle|pokemon=6| | {{Party/Single | ||
|color={{blue color}} | |||
|headcolor={{blue color light}} | |||
|bordercolor={{blue color dark}} | |||
|sprite=S2 Leader Blue.png | |||
|prize=N/A | |||
|class=Gym Leader | |||
}} | |classlink=Gym Leader | ||
|name={{color2|000000|Blue (game)|Blue}} | |||
|game=Pokémon Stadium 2 | |||
|location=Gym Leader Castle | |||
|locationname=Kanto Gym Leader Castle | |||
|pokemon=6}} | |||
|{{Pokémon/2 | |||
|ndex=018 | |||
|pokemon=Pidgeot | |||
|level=50-100 | |||
|gender=female | |||
|type1=Normal|type2=Flying | |||
|held=PRZCureBerry | |||
|move1=Whirlwind|move1type=Normal | |||
|move2=Steel Wing|move2type=Steel | |||
|move3=Wing Attack|move3type=Flying | |||
|move4=Mirror Move|move4type=Flying}} | |||
|{{Pokémon/2 | |||
|ndex=059 | |||
|pokemon=Arcanine | |||
|level=50-100 | |||
|gender=male | |||
|type1=Fire | |||
|held=King's Rock | |||
|move1=Flamethrower|move1type=Fire | |||
|move2=Bite|move2type=Dark | |||
|move3=Dig|move3type=Ground | |||
|move4=ExtremeSpeed|move4type=Normal}} | |||
|{{Pokémon/2 | |||
|ndex=065 | |||
|pokemon=Alakazam | |||
|level=50-100 | |||
|gender=male | |||
|type1=Psychic | |||
|held=MiracleBerry | |||
|move1=Psychic|move1type=Psychic | |||
|move2=Reflect|move2type=Psychic | |||
|move3=Recover|move3type=Normal | |||
|move4=Fire Punch|move4type=Fire}} | |||
{{Party/Div|color={{blue color}}}} | |||
|{{Pokémon/2 | |||
|ndex=103 | |||
|pokemon=Exeggutor | |||
|level=50-100 | |||
|gender=female | |||
|type1=Grass|type2=Psychic | |||
|held=Quick Claw | |||
|move1=Giga Drain|move1type=Grass | |||
|move2=Psychic|move2type=Psychic | |||
|move3=Sludge Bomb|move3type=Poison | |||
|move4=Nightmare|move4type=Ghost}} | |||
|{{Pokémon/2 | |||
|ndex=112 | |||
|pokemon=Rhydon | |||
|level=50-100 | |||
|gender=male | |||
|type1=Ground|type2=Rock | |||
|held=Focus Band | |||
|move1=Rollout|move1type=Rock | |||
|move2=Earthquake|move2type=Ground | |||
|move3=Iron Tail|move3type=Steel | |||
|move4=DynamicPunch|move4type=Fighting}} | |||
|{{Pokémon/2 | |||
|ndex=130 | |||
|pokemon=Gyarados | |||
|level=50-100 | |||
|gender=female | |||
|type1=Water|type2=Flying | |||
|held=Scope Lens | |||
|move1=Surf|move1type=Water | |||
|move2=Flail|move2type=Normal | |||
|move3=Bite|move3type=Dark | |||
|move4=DragonBreath|move4type=Dragon}} | |||
{{Party/Footer}} | |||
======Round 2====== | ======Round 2====== | ||
{{Party|color={{blue color}}|headcolor={{blue color light}}|bordercolor={{blue color dark}}|sprite=S2 Leader Blue.png|prize=N/A|class=Gym Leader|name={{color2|000000|Blue (game)|Blue}}|game=Pokémon Stadium 2|location=Gym Leader Castle|pokemon=6| | {{Party/Single | ||
|color={{blue color}} | |||
|headcolor={{blue color light}} | |||
|bordercolor={{blue color dark}} | |||
|sprite=S2 Leader Blue.png | |||
|prize=N/A | |||
|class=Gym Leader | |||
}} | |classlink=Gym Leader | ||
|name={{color2|000000|Blue (game)|Blue}} | |||
|game=Pokémon Stadium 2 | |||
|location=Gym Leader Castle | |||
|locationname=Kanto Gym Leader Castle | |||
|pokemon=6}} | |||
|{{Pokémon/2 | |||
|ndex=094 | |||
|pokemon=Gengar | |||
|level=50-100 | |||
|gender=male | |||
|type1=Ghost|type2=Poison | |||
|held=King's Rock | |||
|move1=Psychic|move1type=Psychic | |||
|move2=Ice Punch|move2type=Ice | |||
|move3=Fire Punch|move3type=Fire | |||
|move4=ThunderPunch|move4type=Electric}} | |||
|{{Pokémon/2 | |||
|ndex=123 | |||
|pokemon=Scyther | |||
|level=50-100 | |||
|gender=male | |||
|type1=Bug|type2=Flying | |||
|held=BrightPowder | |||
|move1=Agility|move1type=Psychic | |||
|move2=Baton Pass|move2type=Normal | |||
|move3=Wing Attack|move3type=Flying | |||
|move4=Swords Dance|move4type=Normal}} | |||
|{{Pokémon/2 | |||
|ndex=221 | |||
|pokemon=Piloswine | |||
|level=50-100 | |||
|gender=male | |||
|type1=Ice|type2=Ground | |||
|held=Quick Claw | |||
|move1=Roar|move1type=Normal | |||
|move2=Ice Beam|move2type=Ice | |||
|move3=Earthquake|move3type=Ground | |||
|move4=Rock Slide|move4type=Rock}} | |||
{{Party/Div|color={{blue color}}}} | |||
|{{Pokémon/2 | |||
|ndex=229 | |||
|pokemon=Houndoom | |||
|level=50-100 | |||
|gender=male | |||
|type1=Dark|type2=Fire | |||
|held=Focus Band | |||
|move1=Flamethrower|move1type=Fire | |||
|move2=Crunch|move2type=Dark | |||
|move3=Iron Tail|move3type=Steel | |||
|move4=Reversal|move4type=Fighting}} | |||
|{{Pokémon/2 | |||
|ndex=230 | |||
|pokemon=Kingdra | |||
|level=50-100 | |||
|gender=female | |||
|type1=Water|type2=Dragon | |||
|held=Scope Lens | |||
|move1=Surf|move1type=Water | |||
|move2=DragonBreath|move2type=Dragon | |||
|move3=Ice Beam|move3type=Ice | |||
|move4=Flail|move4type=Normal}} | |||
|{{Pokémon/2 | |||
|ndex=241 | |||
|pokemon=Miltank | |||
|level=50-100 | |||
|gender=female | |||
|type1=Normal | |||
|held=MiracleBerry | |||
|move1=Body Slam|move1type=Normal | |||
|move2=Reversal|move2type=Fighting | |||
|move3=Earthquake|move3type=Ground | |||
|move4=Shadow Ball|move4type=Ghost}} | |||
{{Party/Footer}} | |||
===Items=== | ===Items=== | ||
| Line 653: | Line 820: | ||
{{Itemlist|TM Ground|Reward for defeating Giovanni|FR=yes|LG=yes|display={{TM|26|Earthquake}}}} | {{Itemlist|TM Ground|Reward for defeating Giovanni|FR=yes|LG=yes|display={{TM|26|Earthquake}}}} | ||
{{Itemlist|TM Psychic|Reward for defeating Blue|HG=yes|SS=yes|display={{TM|92|Trick Room}}}} | {{Itemlist|TM Psychic|Reward for defeating Blue|HG=yes|SS=yes|display={{TM|92|Trick Room}}}} | ||
{{Itemlist|Revive|Behind the [[ | {{Itemlist|Revive|Behind the [[spin tile]] north of the doorway|R=yes|B=yes|Y=yes|display={{DL|Revive|Revive}}}} | ||
{{Itemlist|Macho Brace|Where Giovanni stood | {{Itemlist|Macho Brace|Where Giovanni stood ''{{tt|(hidden)|Requires using Itemfinder on the spot where he stood, causing the item to be automatically obtained}}''|FR=yes|LG=yes|display={{DL|EV-enhancing item|Macho Brace}}}} | ||
{{Itlistfoot|Ground}} | {{Itlistfoot|Ground}} | ||
==In the anime== | ==In the anime== | ||
[[File:Viridian Gym anime.png|thumb|The Viridian Gym in its | ===In the main series=== | ||
[[File:Viridian Gym Battlefield.png|thumb|The | [[File:Viridian Gym anime.png|thumb|left|200px|The Viridian Gym in its debut]] | ||
[[File:Viridian Gym Battlefield.png|thumb|210px|The Viridian Gym battlefield in its debut]] | |||
The Viridian Gym was led by {{an|Giovanni}}, as it was in [[Generation I]]. The Gym features Roman architecture, stately pillars, and an old mural depicting the proud tradition of this most prestigious Gym. The predominant brownish color suggests the Gym's affiliation with the {{type|Ground}}. | The Viridian Gym was led by {{an|Giovanni}}, as it was in [[Generation I]]. The Gym features Roman architecture, stately pillars, and an old mural depicting the proud tradition of this most prestigious Gym. The predominant brownish color suggests the Gym's affiliation with the {{type|Ground}}. | ||
The Viridian Gym first made an appearance in ''[[EP063|The Battle of the Badge]]''. Before {{Ash}} could challenge him however, [[Gary Oak]] appeared, taunting him with ten Badges, and insisting on challenging the Viridian Gym for fun. Gary faced Giovanni, though his confidence was quickly eroded after Giovanni brought out {{ | The Viridian Gym first made an appearance in ''[[EP063|The Battle of the Badge]]''. Before {{Ash}} could challenge him however, [[Gary Oak]] appeared, taunting him with ten Badges, and insisting on challenging the Viridian Gym for fun. Gary faced Giovanni, though his confidence was quickly eroded after Giovanni brought out {{OBP|Mewtwo|original series}}, who defeated each of Gary's Pokémon, even when Giovanni allowed him to use more than one Pokémon at a time against Mewtwo. | ||
Ash Ketchum challenged the Gym soon after, but after Gary and his Pokémon had recovered. However, as the Team Rocket boss had unmentioned business to attend to, he left the Gym in the care of none other than [[Jessie]], [[James]], and {{MTR}}. Giovanni also left them with several Pokémon that they could use against any challengers. Ash had a hard time beating them initially as the new Gym Leaders had rigged the Gym to shock anyone whose Pokémon took damage. Eventually, Ash overcame the borrowed Pokémon's power and defeated all of them, causing Team Rocket to rely on their usual duo of {{TP|Jessie|Arbok}} and {{TP|James|Weezing}}. Ash quickly dispatched the two, shocking the trio due to the Gym's rigging. They blasted off, dropping an Earth | Ash Ketchum challenged the Gym soon after, but after Gary and his Pokémon had recovered. However, as the Team Rocket boss had unmentioned business to attend to, he left the Gym in the care of none other than [[Jessie]], [[James]], and {{MTR}}. Giovanni also left them with several Pokémon that they could use against any challengers. Ash had a hard time beating them initially as the new Gym Leaders had rigged the Gym to shock anyone whose Pokémon took damage. Eventually, Ash overcame the borrowed Pokémon's power and defeated all of them, causing Team Rocket to rely on their usual duo of {{TP|Jessie|Arbok}} and {{TP|James|Weezing}}. Ash quickly dispatched the two, shocking the trio due to the Gym's rigging. They blasted off, dropping an {{badge|Earth}} in their daze. Ash caught it, but he, Gary, [[Gary's cheerleaders]], Brock, and Misty had to escape the Gym quickly, as it was collapsing. | ||
The Gym appeared again (presumably rebuilt) when Ash returned to [[Kanto]] from [[Hoenn]] in ''[[AG132|The Scheme Team]]'', where [[Agatha]] was now the temporary Gym Leader. Ash challenged her to an {{wp|exhibition game|exhibition match}}, but lost. | The Gym appeared again (presumably rebuilt) when Ash returned to [[Kanto]] from [[Hoenn]] in ''[[AG132|The Scheme Team]]'', where [[Agatha]] was now the temporary Gym Leader. Ash challenged her to an {{wp|exhibition game|exhibition match}}, but lost. | ||
Giovanni abdicating his position as Gym Leader is similar to the case in the Generation I games; however, in the anime, he is still in charge of Team Rocket, while in the games he disbands the team. | Giovanni abdicating his position as Gym Leader is similar to the case in the Generation I games; however, in the anime, he is still in charge of Team Rocket, while in the games he disbands the team. | ||
===Pokémon used in Gym=== | |||
====Used by Giovanni==== | |||
{{TrainerPoké | |||
|main=Giovanni's Mewtwo | |||
|trainer=Giovanni | |||
|pkmn=Mewtwo | |||
|type1=Psychic | |||
|img=Giovanni and Mewtwo.png | |||
|epnum=EP063 | |||
|epname=The Battle of the Badge | |||
|vajp=List of Japanese voice actors{{!}}Masachika Ichimura | |||
|vaen=Philip Bartlett | |||
|desc=Giovanni held control of this {{p|Mewtwo}} created by [[Team Rocket scientists|his scientists]] for some time, until it learned that Giovanni had meant its purpose to be fighting for him, and escaped. | |||
While controlling Mewtwo, Giovanni used its overwhelming {{t|Psychic}} powers to capture new Pokémon for Team Rocket and in his Gym battles, where it defeated all of his challengers effortlessly. When Mewtwo discovered Giovanni's real intentions for it, Mewtwo broke out of his bonds and escaped.}} | |||
{{TrainerPoké | |||
|trainer=Giovanni | |||
|pkmn=Golem | |||
|type1=Rock | |||
|type2=Ground | |||
|img=Giovanni Golem.png | |||
|epnum=EP063 | |||
|epname=The Battle of the Badge | |||
|vajp= | |||
|vaen=Eric Stuart | |||
|desc={{p|Golem}} was first seen in its cage while Giovanni went to see Mewtwo. It was the first Pokémon that Giovanni used in his Gym battle with {{Gary}}, sending it against Gary's {{p|Nidoking}}. The Megaton Pokémon was easily defeated. | |||
Golem's only known move is {{m|Tackle}}.}} | |||
====Used by Giovanni and the Team Rocket trio==== | |||
{{TrainerPoké | |||
|trainer=Giovanni | |||
|pkmn=Kingler | |||
|type1=Water | |||
|img=Giovanni Kingler.png | |||
|epnum=EP063 | |||
|epname=The Battle of the Badge | |||
|vajp=Rikako Aikawa | |||
|vaen=Rikako Aikawa | |||
|desc=Giovanni used his {{p|Kingler}} in his Gym battle with Gary, sending it to battle against Gary's Nidoking. Gary, however, quickly withdraws his Pokémon and calls out {{TP|Gary|Arcanine}}. Despite having a type advantage, Kingler proved to be no match for the Legendary Pokémon, and was finally taken out by {{p|Arcanine}}'s {{m|Fire Blast}}. | |||
Kingler was also later loaned to [[Jessie]] for Ash's Gym battle. She used it to battle against {{AP|Bulbasaur}}, but lost, although not before dealing heavy damage to Bulbasaur with its Bubble attack, and by consequence, Ash experienced its pain. | |||
Kingler was seen again in a flashback in ''[[EP073|Bad to the Bone]]'', where it was defeated in a Gym battle by [[Otoshi]]'s {{p|Marowak}}. | |||
The known moves of the Kingler Jessie used are {{m|Crabhammer}}, {{m|Harden}}, and {{m|Bubble}}.}} | |||
{{TrainerPoké | |||
|trainer=Giovanni | |||
|pkmn=Machamp | |||
|type1=Fighting | |||
|img=Giovanni Machamp.png | |||
|epnum=EP063 | |||
|epname=The Battle of the Badge | |||
|vajp= | |||
|vaen=Eric Stuart | |||
|desc=Giovanni loaned his {{p|Machamp}} to Jessie for her Gym battle against Ash. It battled against [[Ash's Squirtle]], but lost, although not before dealing heavy damage to Squirtle with its Karate Chop attack, and by consequence, Ash experienced its pain. | |||
Machamp's only known move is {{m|Karate Chop}}.}} | |||
{{TrainerPoké | |||
|trainer=Giovanni | |||
|pkmn=Rhydon | |||
|type1=Ground | |||
|type2=Rock | |||
|img=Giovanni Rhydon.png | |||
|epnum=EP063 | |||
|epname=The Battle of the Badge | |||
|vajp=Katsuyuki Konishi | |||
|vaen=Katsuyuki Konishi | |||
|desc=Giovanni loaned his {{p|Rhydon}} to Jessie for Ash's Gym battle. It was defeated by [[Ash's Pidgeotto]]'s {{m|Double-Edge}}. | |||
Rhydon was seen again in a flashback in ''[[EP073|Bad to the Bone]]'', where it was defeated in a Gym battle by [[Otoshi]]'s {{p|Marowak}}. | |||
None of Rhydon's moves are known.}} | |||
====Used by Jessie and James==== | |||
{{TrainerPoké | |||
|main=Jessie's Arbok | |||
|trainer=Jessie | |||
|pkmn=Arbok | |||
|type1=Poison | |||
|img=Jessie Arbok.png | |||
|epnum=EP002 | |||
|epname=Pokémon Emergency! | |||
|desc={{p|Arbok}} was used when Jessie and James were the temporary Gym Leaders.}} | |||
{{TrainerPoké | |||
|main=James's Weezing | |||
|trainer=James | |||
|pkmn=Weezing | |||
|type1=Poison | |||
|img=James Weezing.png | |||
|epnum=EP002 | |||
|epname=Pokémon Emergency! | |||
|desc={{p|Weezing}} was used when Jessie and James were the temporary Gym Leaders.}} | |||
====Used by Agatha==== | |||
{{TrainerPoké | |||
|trainer=Agatha | |||
|pkmn=Gengar | |||
|main=Agatha's Gengar | |||
|mainlink=Agatha's Gengar#In the anime | |||
|type1=Ghost | |||
|type2=Poison | |||
|img=Agatha Gengar.png | |||
|epnum=AG132 | |||
|epname=The Scheme Team | |||
|vajp=Katsuyuki Konishi | |||
|vaen=Ed Paul | |||
|desc={{p|Gengar}} is Agatha's main Pokémon which she used in battle against [[Ash's Pikachu]].}} | |||
===In Pokémon Origins=== | |||
[[File:Viridian Gym PO.png|200px|left|thumb|The Viridian Gym in Pokémon Origins]] | |||
[[File:Viridian Gym battlefield PO.png|200px|thumb|The Viridian Gym battlefield in Pokémon Origins]] | |||
The Viridian Gym was featured in the [[Pokémon Origins]] episode ''[[PO03|File 3: Giovanni]]''. Once {{OBP|Red|Origins}} arrived in Viridian City in order to challenge the Gym, he encountered {{OBP|Blue|Origins}}, who was revealed to have defeated the newly returned Gym Leader just the day before. | |||
Once Red entered the Gym, he right away noticed the different atmosphere it had compared to the other Gyms he had previously visited. The reason for this was revealed soon enough, as Red then found out that the Gym Leader was none other than the Team Rocket Boss, Giovanni. Red refused to believe that a man who treated Pokémon as tools for business, like Giovanni, could be the strongest Gym Leader of all. Giovanni, however, ignored this, simply stating that he didn't need his acceptance to make it true. As he asked whether Red wanted to battle him or not, Red replied that he ''was'' challenging him, but not as a Gym Leader, but as an enemy of all Pokémon. Seeing Red's arrogant attitude, Giovanni put away his usual Gym Leader [[party|team]] and took out two {{ball|Ultra}}s, containing his strongest Pokémon. The first one was Rhyhorn, which, surprisingly, was able to defeat four of Red's Pokémon, despite two of them ({{p|Victreebel}} and {{p|Kabutops}}) having a tremendous [[damage modification|type advantage]] over it. | |||
Eventually, Red's {{p|Hitmonlee}} was able to tie with the Spikes Pokémon, leaving both Trainers with one Pokémon remaining. Knowing that Red was going to use his {{TP|Red|Charizard}}, Giovanni revealed his other Pokémon being Rhydon, and said that Red made a mistake by saving Charizard as his last Pokémon. Red, however, told that he had intended it to be so right from the start, wanting to give the whole match a meaning by winning it with his Charizard. At first, Giovanni intended to crush Red's pride along with his Charizard, but when he sent out his [[starter Pokémon]], Giovanni realized that the pose that he had taken and the way he threw his [[Poké Ball]] reminded him of his childhood, when he had also battled just for fun and excitement. After a climactic clash between Charizard and Rhydon, which ended with Charizard defeating the Drill Pokémon with {{m|Seismic Toss}}, Giovanni was ready to give the Earth Badge as a sign of his defeat, but Red refused to take a Badge from the Boss of Team Rocket. With his childhood passion for battling revitalized, Giovanni told his {{tc|Team Rocket Grunt|minions}} that Team Rocket was now disbanded, before turning back to Red and presenting the Earth Badge to him as the Viridian Gym Leader instead of as the Boss of Team Rocket. | |||
Once Red left the Gym and headed for the [[Indigo Plateau|Pokémon League]], Giovanni decided that it was time for him to find a new path for himself and {{cat|Giovanni's Pokémon|his Pokémon}}, indicating that, much like in the games, he was going to leave the Gym and train on his own. | |||
==In the manga== | ==In the manga== | ||
===In the [[Pokémon Adventures]] | ===In the Pokémon Adventures manga=== | ||
The Viridian Gym | <!--[[File:Viridian Gym Adventures.png|thumb|200px|Viridian Gym in Pokémon Adventures]]--> | ||
The Viridian Gym was first visited in ''[[PS002|Bulbasaur, Come Home!]]'' in the {{chap|Red, Green & Blue}}, where {{adv|Red}} and {{adv|Professor Oak}} entered it, following a {{p|Bulbasaur}} escaped from [[Professor Oak's Laboratory]]. At the Gym, they are attacked by a wild {{p|Machoke}}, but Red managed to defeat it with [[Saur|Bulbasaur]]'s {{m|Solar Beam}}. | |||
The Viridian Gym made a brief appearance in at the end of ''[[PS022|A Hollow Victreebel]]'' and at the beginning of ''[[PS023|Make Way For Magmar]]'' | The Viridian Gym made a brief appearance in at the end of ''[[PS022|A Hollow Victreebel]]'' and at the beginning of ''[[PS023|Make Way For Magmar]]'', where citizens of Viridian City were asking questions about {{adv|Giovanni}}. | ||
Red revisited the Gym after the incident with {{adv|Mewtwo}}. There he met Giovanni, who challenged him into a battle. During the battle, Giovanni's {{p|Nidoking}}'s {{m|Earthquake}} caused the Gym to collapse. Eventually Red emerged victorious. | |||
In the {{chap|Gold, Silver & Crystal}}, Red's Gym Leader test was held in the Gym. Even though he won rather easily, Red declined the position, due to still not having completely recovered from injuries inflicted on him by [[Lorelei]] during the {{chap|Yellow}}. Thus {{adv|Blue}} was appointed as the Viridian Gym Leader instead. | |||
In the {{chap|FireRed & LeafGreen}}, {{adv|Yellow}} | In the {{chap|FireRed & LeafGreen}}, {{adv|Yellow}} went to the Viridian Gym, looking for Blue, but only found his hologram, set there in case for a challenger coming while he was not present. An automated system then brought out Blue's Pokémon, which, even without their Trainer giving them commands, defeated Yellow's [[Chuchu]] in a battle easily. Soon {{adv|Silver}} arrived at the site as well, looking for his roots. | ||
[[File:Viridian Gym JBA.png|thumb|200px|Viridian Gym in Pocket Monsters HGSS Jō's Big Adventure]] | |||
[[File:Viridian Gym PM.png|thumb|200px|left|Viridian Gym in Pokémon Pocket Monsters]] | |||
===In the Pocket Monsters HGSS Jō's Big Adventure manga=== | |||
Viridian Gym appeared in [[JBA6]]. | |||
{{sectionstub}} | |||
=== | ===In the Pokémon Pocket Monsters manga=== | ||
Viridian Gym appeared in ''[[PM031|Get The Last Badge!!]]''. | |||
{{sectionstub}} | |||
{{-}} | {{-}} | ||
| Line 700: | Line 991: | ||
==Trivia== | ==Trivia== | ||
* [[Agatha]]'s temporary position as Leader of the Viridian Gym when {{Ash}} returns to [[Kanto]] may be an anime reference to the fact that Giovanni quit Team Rocket and his status as Gym Leader after being defeated by {{ga|Red}}. What this possibly means for [[Gary Oak]], whose game counterpart {{ga|Blue}} eventually assumed the title of leader in [[Generation II]], is disputed. | * [[Agatha]]'s temporary position as Leader of the Viridian Gym when {{Ash}} returns to [[Kanto]] may be an anime reference to the fact that Giovanni quit Team Rocket and his status as Gym Leader after being defeated by {{ga|Red}}. What this possibly means for [[Gary Oak]], whose game counterpart {{ga|Blue}} eventually assumed the title of leader in [[Generation II]], is disputed. | ||
* In [[Generation II]], it is possible to challenge Blue before beating any other Kanto Gym Leader by talking to him on [[Cinnabar Island]]. In {{game|HeartGold and SoulSilver|s}}, Blue can only be challenged when the player has seven Badges from Kanto. | |||
* In [[Generation II]], it is possible to challenge Blue before beating any | |||
* In {{2v2|HeartGold|SoulSilver}}, the exterior coloring of each Gym is based on the colors most associated with the type that the Gym specializes in. Viridian Gym, however, is both green and blue, likely referring to its Gym Leader's name. | * In {{2v2|HeartGold|SoulSilver}}, the exterior coloring of each Gym is based on the colors most associated with the type that the Gym specializes in. Viridian Gym, however, is both green and blue, likely referring to its Gym Leader's name. | ||
* In HeartGold and SoulSilver, two male {{tc|Ace Trainer}}s in this Gym are named '''Arabella''' and '''Bonita''', both being typically feminine names. | * In HeartGold and SoulSilver, two male {{tc|Ace Trainer}}s in this Gym are named '''Arabella''' and '''Bonita''', both being typically feminine names. | ||
| Line 713: | Line 1,002: | ||
[[Category:Kanto Gyms]] | [[Category:Kanto Gyms]] | ||
[[Category:Team Rocket]] | [[Category:Team Rocket]] | ||
[[Category:Villainous team bases]] | |||
[[de:Pokémon-Arena von Vertania City]] | [[de:Pokémon-Arena von Vertania City]] | ||
Revision as of 12:24, 10 January 2016
| Viridian Gym トキワジム Tokiwa Gym | |
| |
| Location | Viridian City |
| Gym Leader | GiovanniRBYFRLG BlueGSCHGSS Jessie, James, and Meowth (temporary, anime only) Agatha (replacement, anime only) |
| Badge | Earth Badge |
| Dominant Type | Ground |
| Region | Kanto |
| |
| Battlefield | |
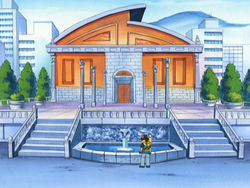
The Viridian Gym (Japanese: トキワジム Tokiwa Gym) is the official Gym of Viridian City. During the events of Generations I and III, it is based on Ground-type Pokémon and the Gym Leader is Giovanni, the head of Team Rocket. After Team Rocket is disbanded at the end of Generations I and III, Blue takes over as the Leader during Generations II and IV; under his direction, the Gym no longer concentrates on any particular type.
Agatha of the Elite Four serves as a temporary Gym Leader in the anime.
Trainers who earn a win at the Viridian Gym receive the Earth Badge.
In the games
Viridian City
Pokémon Gym
Viridian City
Pokémon Gym
Leader: ...
The rest of the
text is illegible...
Viridian Gym appears in all games set in the Kanto region. In Generations I and III, when the player first reaches the Gym, it is locked due to the absence of the Gym Leader. With this acknowledged, the player journeys off to other Gyms to challenge them. Once the player has collected the other seven Gym Badges, the Viridian Gym reopens.
In Generations II and IV, Blue takes over the Gym. In Generation II, the Gym can be challenged as soon as Blue is spoken to on Cinnabar Island. In Generation IV, however, Blue will stay on Cinnabar Island and will not return to his Gym until the player speaks to him after obtaining the other seven Kanto Gym Badges.
Inside the Gym, the floor uses the same transporting tiles as are used in the Rocket Hideout. The player must use these tiles to navigate through the Gym to reach the Gym Leader. In Generation II, the Gym is completely remodeled and the tiles are gone; in Generation IV, the tiles are put back up, now covering almost the entire floor of the Gym.
A field based on the Gym also appears in Pokémon Stadium's Gym Leader Castle and Stadium 2's Kanto Gym Leader Castle.
Appearance
|
Trainers
Core series
Pokémon Red, Blue, and Yellow
| Trainer | Pokémon | |||||||||||
|---|---|---|---|---|---|---|---|---|---|---|---|---|
|
| |||||||||||
| ||||||||||||
|
| |||||||||||
|
| |||||||||||
| ||||||||||||
|
| |||||||||||
|
| |||||||||||
| ||||||||||||
|
| |||||||||||
| ||||||||||||
|
| |||||||||||
|
| |||||||||||
| ||||||||||||
| ||||||||||||
Pokémon Red and Blue
|
||||||||||||||||||||||||||||||||||||||||||||||||||||||||||||||||||||||||||||||||||||||||||||||||||||||||||||||||||
| ||||||||||||||||||||||||||||||||||||||||||||||||||||||||||||||||||||||||||||||||||||||||||||||||||||||||||||||||||
Pokémon Yellow
|
||||||||||||||||||||||||||||||||||||||||||||||||||||||||||||||||||||||||||||||||||||||||||||||||||||||||||||||||
| ||||||||||||||||||||||||||||||||||||||||||||||||||||||||||||||||||||||||||||||||||||||||||||||||||||||||||||||||
Pokémon Gold, Silver, and Crystal
|
|||||||||||||||||||||||||||||||||||||||||||||||||||||||||||||||||||||||||||||||||||||||||||||||||||||||||||||||||||||||||||||||||||||||||||||||||||
| |||||||||||||||||||||||||||||||||||||||||||||||||||||||||||||||||||||||||||||||||||||||||||||||||||||||||||||||||||||||||||||||||||||||||||||||||||
Pokémon FireRed and LeafGreen
| Trainer | Pokémon | |||||||||||
|---|---|---|---|---|---|---|---|---|---|---|---|---|
|
| |||||||||||
| ||||||||||||
|
| |||||||||||
|
| |||||||||||
|
| |||||||||||
| ||||||||||||
|
| |||||||||||
| ||||||||||||
| ||||||||||||
| ||||||||||||
| ||||||||||||
|
| |||||||||||
| ||||||||||||
| ||||||||||||
|
| |||||||||||
| ||||||||||||
| ||||||||||||
| ||||||||||||
| ||||||||||||
|
| |||||||||||
| ||||||||||||
| ||||||||||||
| ||||||||||||
| ||||||||||||
|
||||||||||||||||||||||||||||||||||||||||||||||||||||||||||||||||||||||||||||||||||||||||||||||||||||||||||||||||||||||||||||||||||||||
| ||||||||||||||||||||||||||||||||||||||||||||||||||||||||||||||||||||||||||||||||||||||||||||||||||||||||||||||||||||||||||||||||||||||
Pokémon HeartGold and SoulSilver
| Trainer | Pokémon | |||||||||||
|---|---|---|---|---|---|---|---|---|---|---|---|---|
|
| |||||||||||
| ||||||||||||
|
| |||||||||||
| ||||||||||||
|
| |||||||||||
| ||||||||||||
|
| |||||||||||
| ||||||||||||
Side series
Pokémon Stadium
Round 1
| Trainer | Pokémon | |||||||||||
|---|---|---|---|---|---|---|---|---|---|---|---|---|
|
| |||||||||||
| ||||||||||||
| ||||||||||||
| ||||||||||||
| ||||||||||||
| ||||||||||||
|
| |||||||||||
| ||||||||||||
| ||||||||||||
| ||||||||||||
| ||||||||||||
| ||||||||||||
|
| |||||||||||
| ||||||||||||
| ||||||||||||
| ||||||||||||
| ||||||||||||
| ||||||||||||
|
|||||||||||||||||||||||||||||||||||||||||||||||||||||||||||||||||||||||||||||||||||||||||||||||||||||||||||||||||||||||||||||||||||||
| |||||||||||||||||||||||||||||||||||||||||||||||||||||||||||||||||||||||||||||||||||||||||||||||||||||||||||||||||||||||||||||||||||||
Round 2
| Trainer | Pokémon | |||||||||||
|---|---|---|---|---|---|---|---|---|---|---|---|---|
|
| |||||||||||
| ||||||||||||
| ||||||||||||
| ||||||||||||
| ||||||||||||
| ||||||||||||
|
| |||||||||||
| ||||||||||||
| ||||||||||||
| ||||||||||||
| ||||||||||||
| ||||||||||||
|
| |||||||||||
| ||||||||||||
| ||||||||||||
| ||||||||||||
| ||||||||||||
| ||||||||||||
|
|||||||||||||||||||||||||||||||||||||||||||||||||||||||||||||||||||||||||||||||||||||||||||||||||||||||||||||||||||||||||||||||||||||||
| |||||||||||||||||||||||||||||||||||||||||||||||||||||||||||||||||||||||||||||||||||||||||||||||||||||||||||||||||||||||||||||||||||||||
Pokémon Stadium 2
Round 1
|
|||||||||||||||||||||||||||||||||||||||||||||||||||||||||||||||||||||||||||||||||||||||||||||||||||||||||||||||||||||||||||||||||||||||||||||||||||
| |||||||||||||||||||||||||||||||||||||||||||||||||||||||||||||||||||||||||||||||||||||||||||||||||||||||||||||||||||||||||||||||||||||||||||||||||||
Round 2
|
|||||||||||||||||||||||||||||||||||||||||||||||||||||||||||||||||||||||||||||||||||||||||||||||||||||||||||||||||||||||||||||||||||||||||||||||||||||
| |||||||||||||||||||||||||||||||||||||||||||||||||||||||||||||||||||||||||||||||||||||||||||||||||||||||||||||||||||||||||||||||||||||||||||||||||||||
Items
| Item | Location | Games | |
|---|---|---|---|
| TM27 (Fissure) | Reward for defeating Giovanni | R B Y | |
| TM26 (Earthquake) | Reward for defeating Giovanni | FR LG | |
| TM92 (Trick Room) | Reward for defeating Blue | HG SS | |
| Revive | Behind the spin tile north of the doorway | R B Y | |
| Macho Brace | Where Giovanni stood (hidden) | FR LG | |
In the anime
In the main series
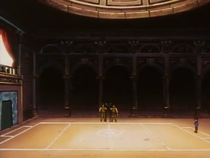
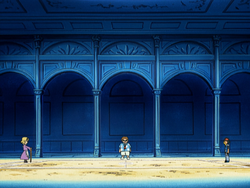
The Viridian Gym was led by Giovanni, as it was in Generation I. The Gym features Roman architecture, stately pillars, and an old mural depicting the proud tradition of this most prestigious Gym. The predominant brownish color suggests the Gym's affiliation with the Ground-type.
The Viridian Gym first made an appearance in The Battle of the Badge. Before Ash could challenge him however, Gary Oak appeared, taunting him with ten Badges, and insisting on challenging the Viridian Gym for fun. Gary faced Giovanni, though his confidence was quickly eroded after Giovanni brought out Mewtwo, who defeated each of Gary's Pokémon, even when Giovanni allowed him to use more than one Pokémon at a time against Mewtwo.
Ash Ketchum challenged the Gym soon after, but after Gary and his Pokémon had recovered. However, as the Team Rocket boss had unmentioned business to attend to, he left the Gym in the care of none other than Jessie, James, and Meowth. Giovanni also left them with several Pokémon that they could use against any challengers. Ash had a hard time beating them initially as the new Gym Leaders had rigged the Gym to shock anyone whose Pokémon took damage. Eventually, Ash overcame the borrowed Pokémon's power and defeated all of them, causing Team Rocket to rely on their usual duo of Arbok and Weezing. Ash quickly dispatched the two, shocking the trio due to the Gym's rigging. They blasted off, dropping an Earth Badge in their daze. Ash caught it, but he, Gary, Gary's cheerleaders, Brock, and Misty had to escape the Gym quickly, as it was collapsing.
The Gym appeared again (presumably rebuilt) when Ash returned to Kanto from Hoenn in The Scheme Team, where Agatha was now the temporary Gym Leader. Ash challenged her to an exhibition match, but lost.
Giovanni abdicating his position as Gym Leader is similar to the case in the Generation I games; however, in the anime, he is still in charge of Team Rocket, while in the games he disbands the team.
Pokémon used in Gym
Used by Giovanni
|
||
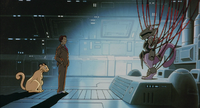
Giovanni held control of this Mewtwo created by his scientists for some time, until it learned that Giovanni had meant its purpose to be fighting for him, and escaped. While controlling Mewtwo, Giovanni used its overwhelming Psychic powers to capture new Pokémon for Team Rocket and in his Gym battles, where it defeated all of his challengers effortlessly. When Mewtwo discovered Giovanni's real intentions for it, Mewtwo broke out of his bonds and escaped. | ||
| Debut | The Battle of the Badge | |
|---|---|---|
| Voice actors | ||
| Japanese | Masachika Ichimura | |
| English | Philip Bartlett | |
|
||
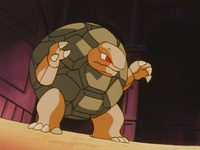
| Golem was first seen in its cage while Giovanni went to see Mewtwo. It was the first Pokémon that Giovanni used in his Gym battle with Gary, sending it against Gary's Nidoking. The Megaton Pokémon was easily defeated.
Golem's only known move is Tackle. | ||
| Debut | The Battle of the Badge | |
|---|---|---|
| Voice actors | ||
| Japanese | ||
| English | Eric Stuart | |
Used by Giovanni and the Team Rocket trio
|
||
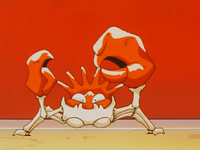
| Giovanni used his Kingler in his Gym battle with Gary, sending it to battle against Gary's Nidoking. Gary, however, quickly withdraws his Pokémon and calls out Arcanine. Despite having a type advantage, Kingler proved to be no match for the Legendary Pokémon, and was finally taken out by Arcanine's Fire Blast.
Kingler was also later loaned to Jessie for Ash's Gym battle. She used it to battle against Bulbasaur, but lost, although not before dealing heavy damage to Bulbasaur with its Bubble attack, and by consequence, Ash experienced its pain. Kingler was seen again in a flashback in Bad to the Bone, where it was defeated in a Gym battle by Otoshi's Marowak. The known moves of the Kingler Jessie used are Crabhammer, Harden, and Bubble. | ||
| Debut | The Battle of the Badge | |
|---|---|---|
| Voice actors | ||
| Japanese | Rikako Aikawa | |
| English | Rikako Aikawa | |
|
||
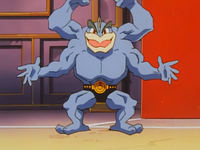
| Giovanni loaned his Machamp to Jessie for her Gym battle against Ash. It battled against Ash's Squirtle, but lost, although not before dealing heavy damage to Squirtle with its Karate Chop attack, and by consequence, Ash experienced its pain.
Machamp's only known move is Karate Chop. | ||
| Debut | The Battle of the Badge | |
|---|---|---|
| Voice actors | ||
| Japanese | ||
| English | Eric Stuart | |
|
||
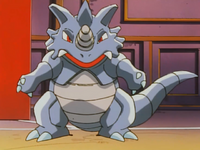
| Giovanni loaned his Rhydon to Jessie for Ash's Gym battle. It was defeated by Ash's Pidgeotto's Double-Edge.
Rhydon was seen again in a flashback in Bad to the Bone, where it was defeated in a Gym battle by Otoshi's Marowak. None of Rhydon's moves are known. | ||
| Debut | The Battle of the Badge | |
|---|---|---|
| Voice actors | ||
| Japanese | Katsuyuki Konishi | |
| English | Katsuyuki Konishi | |
Used by Jessie and James
|
||
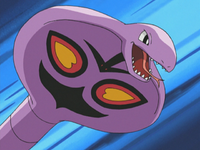
Arbok was used when Jessie and James were the temporary Gym Leaders. | ||
| Debut | Pokémon Emergency! | |
|---|---|---|
|
||
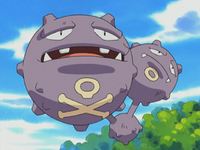
Weezing was used when Jessie and James were the temporary Gym Leaders. | ||
| Debut | Pokémon Emergency! | |
|---|---|---|
Used by Agatha
|
||
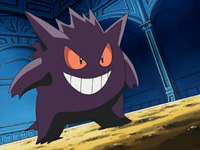
Gengar is Agatha's main Pokémon which she used in battle against Ash's Pikachu. | ||
| Debut | The Scheme Team | |
|---|---|---|
| Voice actors | ||
| Japanese | Katsuyuki Konishi | |
| English | Ed Paul | |
In Pokémon Origins
The Viridian Gym was featured in the Pokémon Origins episode File 3: Giovanni. Once Red arrived in Viridian City in order to challenge the Gym, he encountered Blue, who was revealed to have defeated the newly returned Gym Leader just the day before.
Once Red entered the Gym, he right away noticed the different atmosphere it had compared to the other Gyms he had previously visited. The reason for this was revealed soon enough, as Red then found out that the Gym Leader was none other than the Team Rocket Boss, Giovanni. Red refused to believe that a man who treated Pokémon as tools for business, like Giovanni, could be the strongest Gym Leader of all. Giovanni, however, ignored this, simply stating that he didn't need his acceptance to make it true. As he asked whether Red wanted to battle him or not, Red replied that he was challenging him, but not as a Gym Leader, but as an enemy of all Pokémon. Seeing Red's arrogant attitude, Giovanni put away his usual Gym Leader team and took out two Ultra Balls, containing his strongest Pokémon. The first one was Rhyhorn, which, surprisingly, was able to defeat four of Red's Pokémon, despite two of them (Victreebel and Kabutops) having a tremendous type advantage over it.
Eventually, Red's Hitmonlee was able to tie with the Spikes Pokémon, leaving both Trainers with one Pokémon remaining. Knowing that Red was going to use his Charizard, Giovanni revealed his other Pokémon being Rhydon, and said that Red made a mistake by saving Charizard as his last Pokémon. Red, however, told that he had intended it to be so right from the start, wanting to give the whole match a meaning by winning it with his Charizard. At first, Giovanni intended to crush Red's pride along with his Charizard, but when he sent out his starter Pokémon, Giovanni realized that the pose that he had taken and the way he threw his Poké Ball reminded him of his childhood, when he had also battled just for fun and excitement. After a climactic clash between Charizard and Rhydon, which ended with Charizard defeating the Drill Pokémon with Seismic Toss, Giovanni was ready to give the Earth Badge as a sign of his defeat, but Red refused to take a Badge from the Boss of Team Rocket. With his childhood passion for battling revitalized, Giovanni told his minions that Team Rocket was now disbanded, before turning back to Red and presenting the Earth Badge to him as the Viridian Gym Leader instead of as the Boss of Team Rocket.
Once Red left the Gym and headed for the Pokémon League, Giovanni decided that it was time for him to find a new path for himself and his Pokémon, indicating that, much like in the games, he was going to leave the Gym and train on his own.
In the manga
In the Pokémon Adventures manga
The Viridian Gym was first visited in Bulbasaur, Come Home! in the Red, Green & Blue arc, where Red and Professor Oak entered it, following a Bulbasaur escaped from Professor Oak's Laboratory. At the Gym, they are attacked by a wild Machoke, but Red managed to defeat it with Bulbasaur's Solar Beam.
The Viridian Gym made a brief appearance in at the end of A Hollow Victreebel and at the beginning of Make Way For Magmar, where citizens of Viridian City were asking questions about Giovanni.
Red revisited the Gym after the incident with Mewtwo. There he met Giovanni, who challenged him into a battle. During the battle, Giovanni's Nidoking's Earthquake caused the Gym to collapse. Eventually Red emerged victorious.
In the Gold, Silver & Crystal arc, Red's Gym Leader test was held in the Gym. Even though he won rather easily, Red declined the position, due to still not having completely recovered from injuries inflicted on him by Lorelei during the Yellow arc. Thus Blue was appointed as the Viridian Gym Leader instead.
In the FireRed & LeafGreen arc, Yellow went to the Viridian Gym, looking for Blue, but only found his hologram, set there in case for a challenger coming while he was not present. An automated system then brought out Blue's Pokémon, which, even without their Trainer giving them commands, defeated Yellow's Chuchu in a battle easily. Soon Silver arrived at the site as well, looking for his roots.
In the Pocket Monsters HGSS Jō's Big Adventure manga
Viridian Gym appeared in JBA6.
In the Pokémon Pocket Monsters manga
Viridian Gym appeared in Get The Last Badge!!.
In the TCG
The Viridian Gym was featured in the TCG. The following is a list of cards named Viridian City Gym.
| Related cards Cards listed with a blue background are only legal to use in the current Expanded format. Cards listed with a green background are legal to use in both the current Standard and Expanded formats. | |||||||
|---|---|---|---|---|---|---|---|
| Card | Type | English Expansion |
Rarity | # | Japanese Expansion |
Rarity | # |
| Viridian City Gym | T [St] | Gym Challenge | 123/132 | Challenge from the Darkness | |||
Trivia
- Agatha's temporary position as Leader of the Viridian Gym when Ash returns to Kanto may be an anime reference to the fact that Giovanni quit Team Rocket and his status as Gym Leader after being defeated by Red. What this possibly means for Gary Oak, whose game counterpart Blue eventually assumed the title of leader in Generation II, is disputed.
- In Generation II, it is possible to challenge Blue before beating any other Kanto Gym Leader by talking to him on Cinnabar Island. In Pokémon HeartGold and SoulSilver, Blue can only be challenged when the player has seven Badges from Kanto.
- In HeartGold and SoulSilver, the exterior coloring of each Gym is based on the colors most associated with the type that the Gym specializes in. Viridian Gym, however, is both green and blue, likely referring to its Gym Leader's name.
- In HeartGold and SoulSilver, two male Ace Trainers in this Gym are named Arabella and Bonita, both being typically feminine names.
| Gym Leaders of the Kanto region | |||||||||||||||||||||||||
|---|---|---|---|---|---|---|---|---|---|---|---|---|---|---|---|---|---|---|---|---|---|---|---|---|---|
|
|
|
| ||||||||||||||||||||||
|
|
|
| ||||||||||||||||||||||

|
This article is part of Project Locations, a Bulbapedia project that aims to write comprehensive articles on every location in the Pokémon world. |
