Vast Poni Canyon: Difference between revisions
Lady Ariel (talk | contribs) No edit summary |
(→Grand trial: poni island color) |
||
| (140 intermediate revisions by 54 users not shown) | |||
| Line 1: | Line 1: | ||
{{incomplete|2= | {{incomplete|2=Layout section with images}} | ||
{{Infobox location | {{Infobox location | ||
|image=Vast Poni Canyon.png | |image=Vast Poni Canyon SM.png | ||
|type=mountain | |type=mountain | ||
|location_name=Vast Poni Canyon | |location_name=Vast Poni Canyon | ||
| Line 9: | Line 8: | ||
|location=[[Poni Island]] | |location=[[Poni Island]] | ||
|slogan=The path to pay homage at the shrine. | |slogan=The path to pay homage at the shrine. | ||
|mapdesc=The most challenging path on | |mapdesc=The most challenging path on Poni Island. The ups and downs of this canyon are beyond any other. | ||
|region=Alola | |region=Alola | ||
|generation={{gen|VII}} | |generation={{gen|VII}} | ||
|map=Alola Vast Poni Canyon Map.png | |map=Alola Vast Poni Canyon Map.png | ||
|mapsize=250px | |||
}} | }} | ||
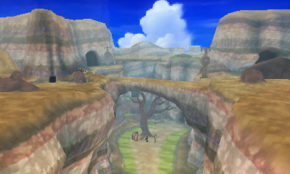
'''Vast Poni Canyon''' (Japanese: '''ポニの{{tt|大峡谷|だいきょうこく}}''' ''Great Canyon of Poni'') is a location on [[Poni Island]] in [[Alola]] | '''Vast Poni Canyon''' (Japanese: '''ポニの{{tt|大峡谷|だいきょうこく}}''' ''Great Canyon of Poni'') is a location on [[Poni Island]] in [[Alola]]. It connects to the [[Ancient Poni Path]] in the south and to the [[Altar of the Sunne]]{{sup/7|SUS}}/[[Altar of the Moone]]{{sup/7|MUM}}. It is the location of a natural trial site, and in [[Pokémon Sun and Moon]], it is also where the {{player}} battles [[Hapu]] in her [[island challenge|grand trial]]{{sup/7|SM}} and meets [[Mina]], the sole [[Trial Captain|captain]] of Poni Island. | ||
The area produces a special magnetic field that allows {{p|Magneton}}, {{p|Nosepass}}, and {{p|Charjabug}} to [[Evolution|evolve]] when [[level]]ed up here. | The area produces a [[special magnetic field]] that allows {{p|Magneton}}, {{p|Nosepass}}, and {{p|Charjabug}} to [[Evolution|evolve]] when [[level]]ed up here. | ||
==Trial== | ==Trial== | ||
The trial site is located at the north end of the canyon. The trial begins once the player enters the trial site; they can leave the way they came in at any time, although this will reset the trial. If the player loses the battle against the [[Totem Pokémon]], when they attempt the trial again they will only need to battle the Totem Pokémon; however, if they then leave after this, the trial will be reset. The player cannot use [[Poké Ride|Charizard Glide]] during the trial. | |||
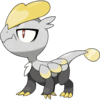
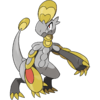
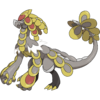
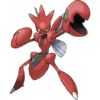
This is a natural trial that has no [[Trial Captain]], said to be the first ever trial. A tablet at the entrance of the trial site explains the trial. The {{player}} proceeds forward through the trial site, being attacked by a wild {{p|Jangmo-o}} and a wild {{p|Hakamo-o}} that leap from up high as the player proceeds toward a Z-Crystal pedestal. If the player tries to proceed out of the passageway behind the pedestal, they will be forced to turn back due to the fear that the Totem Pokémon will attack them from behind. When the player attempts to take the Z-Crystal from the pedestal, they are unable to retrieve the [[Dragonium Z]] before being attacked by the trial's [[Totem Pokémon]], a {{p|Kommo-o}}. | |||
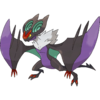
In the battle with Totem Kommo-o, it will call {{p|Hakamo-o}}{{sup/7|SM}}/{{p|Noivern}}{{sup/7|USUM}} on its first turn, and call {{p|Scizor}} if its HP is below 2/3 (if the ally Hakamo-o{{sup/7|SM}}/Noivern{{sup/7|USUM}} has been defeated). If its HP drops below 2/3 before it has a chance to call an ally, it will call Scizor first, then call Hakamo-o{{sup/7|SM}}/Noivern{{sup/7|USUM}} at the first opportunity after Scizor has fainted. Once an ally is defeated, Totem Kommo-o cannot call it again. | |||
After completing the trial, the player collects the Dragonium Z from the pedestal. | |||
===Pokémon Sun and Moon=== | |||
===Trial Pokémon=== | ===Trial Pokémon=== | ||
{| | {| | ||
|- | |- style="vertical-align:top" | ||
| | |{{Pokémon/7 | ||
{{Pokémon/7 | |||
|ndex=782 | |ndex=782 | ||
|pokemon=Jangmo-o | |pokemon=Jangmo-o | ||
| Line 32: | Line 38: | ||
|ability=Bulletproof | |ability=Bulletproof | ||
|level=40 | |level=40 | ||
|move1= | |move1=Bide|move1type=Normal|move1cat=Physical | ||
|move2= | |move2=Tackle|move2type=Normal|move2cat=Physical | ||
|move3= | |move3=Leer|move3type=Normal|move3cat=Status | ||
| | |move4=Headbutt|move4type=Normal|move4cat=Physical}} | ||
{{Pokémon/7 | |{{Pokémon/7 | ||
|ndex=783 | |ndex=783 | ||
|pokemon=Hakamo-o | |pokemon=Hakamo-o | ||
|gender=both | |gender=both | ||
|type1=Dragon | |type1=Dragon|type2=Fighting | ||
|type2=Fighting | |||
|ability=Bulletproof | |ability=Bulletproof | ||
|level=40 | |level=40 | ||
|move1= | |move1=Headbutt|move1type=Normal|move1cat=Physical | ||
|move2= | |move2=Autotomize|move2type=Steel|move2cat=Status | ||
|move3=Work Up|move3type=Normal|move3cat=Status | |move3=Work Up|move3type=Normal|move3cat=Status | ||
|move4= | |move4=Sky Uppercut|move4type=Fighting|move4cat=Physical}} | ||
|} | |} | ||
====Totem Pokémon==== | ====Totem Pokémon==== | ||
{| | {| | ||
! Totem Kommo-o | |||
! Ally Hakamo-o | |||
! Ally Scizor | |||
|- | |- | ||
| | | Aura: +1 {{stat|Attack|Atk}}, {{stat|Defense|Def}}, {{stat|Special Attack|Sp. Atk}}, {{stat|Special Defense|Sp. Def}}, {{stat|Speed|Speed}} | ||
|- style="vertical-align:top" | |||
| | |{{Pokémon/7 | ||
| | |||
{{Pokémon/7 | |||
|ndex=784 | |ndex=784 | ||
|pokemon=Kommo-o | |pokemon=Kommo-o | ||
| Line 66: | Line 72: | ||
|level=45 | |level=45 | ||
|held=Mental Herb | |held=Mental Herb | ||
|move1=Clanging Scales|move1type=Dragon|move1cat=Special | |||
|move2=Sky Uppercut|move2type=Fighting|move2cat=Physical | |||
|move3=Flash Cannon|move3type=Steel|move3cat=Special | |||
|move4=Protect|move4type=Normal|move4cat=Status}} | |||
|{{Pokémon/7 | |||
|ndex=783 | |||
|pokemon=Hakamo-o | |||
|gender=both | |||
|type1=Dragon | |||
|type2=Fighting | |||
|ability=Bulletproof | |||
|level=32 | |||
|move1=Sky Uppercut|move1type=Fighting|move1cat=Physical | |move1=Sky Uppercut|move1type=Fighting|move1cat=Physical | ||
|move2= | |move2=Autotomize|move2type=Steel|move2cat=Status | ||
|move3= | |move3=Work Up|move3type=Normal|move3cat=Status | ||
|move4= | |move4=Bide|move4type=Normal|move4cat=Physical}} | ||
| | |{{Pokémon/7 | ||
{{Pokémon/7 | |||
|ndex=212 | |ndex=212 | ||
|pokemon=Scizor | |pokemon=Scizor | ||
| Line 77: | Line 94: | ||
|type1=Bug | |type1=Bug | ||
|type2=Steel | |type2=Steel | ||
|ability= | |ability=Technician | ||
|level=32 | |level=32 | ||
|move1=Fury Cutter|move1type= | |move1=Metal Claw|move1type=Steel|move1cat=Physical | ||
|move2= | |move2=Pursuit|move2type=Dark|move2cat=Physical | ||
|move3= | |move3=Leer|move3type=Normal|move3cat=Status | ||
|move4= | |move4=Fury Cutter|move4type=Bug|move4cat=Physical}} | ||
| | |} | ||
{{Pokémon/7 | |||
===Pokémon Ultra Sun and Ultra Moon=== | |||
===Trial Pokémon=== | |||
{| | |||
|- style="vertical-align:top" | |||
|{{Pokémon/7 | |||
|ndex=782 | |||
|pokemon=Jangmo-o | |||
|gender=both | |||
|type1=Dragon | |||
|ability=Bulletproof | |||
|level=42 | |||
|move1=Bide|move1type=Normal|move1cat=Physical | |||
|move2=Tackle|move2type=Normal|move2cat=Physical | |||
|move3=Leer|move3type=Normal|move3cat=Status | |||
|move4=Headbutt|move4type=Normal|move4cat=Physical}} | |||
|{{Pokémon/7 | |||
|ndex=783 | |ndex=783 | ||
|pokemon=Hakamo-o | |pokemon=Hakamo-o | ||
|gender=both | |gender=both | ||
|type1=Dragon|type2=Fighting | |||
|ability=Bulletproof | |||
|level=44 | |||
|move1=Headbutt|move1type=Normal|move1cat=Physical | |||
|move2=Autotomize|move2type=Steel|move2cat=Status | |||
|move3=Work Up|move3type=Normal|move3cat=Status | |||
|move4=Sky Uppercut|move4type=Fighting|move4cat=Physical}} | |||
|} | |||
====Totem Pokémon==== | |||
{| | |||
! Totem Kommo-o | |||
! Ally Noivern | |||
! Ally Scizor | |||
|- | |||
| Aura: +1 {{stat|Attack|Atk}}, {{stat|Defense|Def}}, {{stat|Special Attack|Sp. Atk}}, {{stat|Special Defense|Sp. Def}}, {{stat|Speed|Speed}} | |||
|- style="vertical-align:top" | |||
|{{Pokémon/7 | |||
|ndex=784 | |||
|pokemon=Kommo-o | |||
|gender=male | |||
|type1=Dragon | |type1=Dragon | ||
|type2=Fighting | |type2=Fighting | ||
|ability= | |ability=Soundproof | ||
|level= | |level=49 | ||
|move1= | |held=Roseli Berry | ||
|move2= | |move1=Drain Punch|move1type=Fighting|move1cat=Physical | ||
|move3= | |move2=Dragon Claw|move2type=Dragon|move2cat=Physical | ||
|move4= | |move3=Thunder Punch|move3type=Electric|move3cat=Physical | ||
|move4=Poison Jab|move4type=Poison|move4cat=Physical}} | |||
|{{Pokémon/7 | |||
|ndex=715 | |||
|pokemon=Noivern | |||
|gender=both | |||
|type1=Flying | |||
|type2=Dragon | |||
|ability=Infiltrator | |||
|level=48 | |||
|move1=Boomburst|move1type=Normal|move1cat=Special | |||
|move2=Screech|move2type=Normal|move2cat=Status | |||
|move3=Dragon Pulse|move3type=Dragon|move3cat=Special | |||
|move4=Air Slash|move4type=Flying|move4cat=Special}} | |||
|{{Pokémon/7 | |||
|ndex=212 | |||
|pokemon=Scizor | |||
|gender=both | |||
|type1=Bug | |||
|type2=Steel | |||
|ability=Technician | |||
|level=46 | |||
|move1=Light Screen|move1type=Psychic|move1cat=Status | |||
|move2=Pursuit|move2type=Dark|move2cat=Physical | |||
|move3=Bullet Punch|move3type=Steel|move3cat=Physical | |||
|move4=X-Scissor|move4type=Bug|move4cat=Physical}} | |||
|} | |} | ||
==Items== | ==Items== | ||
{{Itlisth|mountain}} | {{Itlisth|mountain}} | ||
{{Itemlist|Groundium Z|Canyon | {{Itemlist|Groundium Z|Canyon, from [[Hapu]] after defeating her in the [[island challenge|grand trial]]|Su=yes|M=yes}} | ||
{{Itemlist|Max Revive|Canyon | {{Itemlist|Max Revive|Canyon, from [[Lillie]] after defeating Hapu in the grand trial|Su=yes|M=yes}} | ||
{{Itemlist|Max Potion| | {{Itemlist|Max Revive| | ||
*Canyon, from Lillie after defeating [[Dulse]]{{sup/7|US}}/[[Soliera]]{{sup/7|UM}} | |||
*Canyon, after the first cave, in the bare spot in the middle of the grass by the first cave's exit|US=yes|UM=yes|display=[[Max Revive]] ×2}} | |||
{{Itemlist| | {{Itemlist|Max Potion|Canyon, behind the fallen tree next to the cave entrance|Su=yes|M=yes}} | ||
{{Itemlist|Nugget| | {{Itemlist|TM Electric VI|Canyon, behind the fallen tree next to the cave entrance|US=yes|UM=yes|display={{TM|93|Wild Charge}}}} | ||
{{Itemlist| | {{Itemlist|Elixir|First cave, through a hole behind {{tc|Backpacker}} Perdy (requires [[Poké Ride|Tauros Charge]])|Su=yes|M=yes}} | ||
{{Itemlist|X Attack| | {{Itemlist|Protein|First cave, through a hole behind {{tc|Backpacker}} Perdy (requires [[Poké Ride|Tauros Charge]])|US=yes|UM=yes}} | ||
{{Itemlist|Escape Rope| | {{Itemlist|Nugget|First cave, in front of a small rock at the top of the ramp past Backpacker Perdy ''(hidden)''|Su=yes|M=yes|US=yes|UM=yes}} | ||
{{Itemlist|TM Fairy| | {{Itemlist|Max Potion|First cave, behind [[breakable rock]]s at the top of the ramp past Backpacker Perdy (requires [[Poké Ride|Tauros Charge]])|Su=yes|M=yes|US=yes|UM=yes}} | ||
{{Itemlist|X Sp. Atk| | {{Itemlist|Revive|Canyon, after the first cave, in the bare spot in the middle of the grass by the first cave's exit|Su=yes|M=yes}} | ||
{{Itemlist|Full Restore| | {{Itemlist|X Attack|Canyon, after the first cave, in front of a rock around the corner of the entrance to the second cave ''(hidden)''|Su=yes|M=yes|US=yes|UM=yes}} | ||
{{Itemlist|Dusk Ball|Outside | {{Itemlist|X Defense|Second cave, behind a rock near the entrance|US=yes|UM=yes}} | ||
{{Itemlist|Fairium Z| | {{Itemlist|Escape Rope|Second cave, southern half, north of {{tc|Veteran}} Lynn|Su=yes|M=yes|US=yes|UM=yes}} | ||
{{Itemlist|PP Max| | {{Itemlist|TM Fairy|Canyon, south of the second cave, in the clearing accessed by traversing the southern half of the second cave (requires [[Poké Ride|Mudsdale Gallop]])|Su=yes|M=yes|US=yes|UM=yes|display={{TM|99|Dazzling Gleam}}}} | ||
{{Itemlist|Full Heal| | {{Itemlist|X Sp. Atk|Canyon, south of the second cave, on the south side of the rock in the clearing accessed by traversing the southern half of the second cave (requires [[Poké Ride|Mudsdale Gallop]]) ''(hidden)''|Su=yes|M=yes}} | ||
{{Itemlist|X Defense| | {{Itemlist|X Sp. Def|Canyon, south of the second cave, on the south side of the rock in the clearing accessed by traversing the southern half of the second cave (requires [[Poké Ride|Mudsdale Gallop]]) ''(hidden)''|US=yes|UM=yes}} | ||
{{Itemlist|Rare Candy| | {{Itemlist|Nugget|Third cave, between the two holes where dirt clouds come out|US=yes|UM=yes}} | ||
{{Itemlist|TM Fire VI| | {{Itemlist|Full Restore|Third cave, on the west side of the Machamp Shove puzzle (requires [[Poké Ride|Machamp Shove]])|Su=yes|M=yes|US=yes|UM=yes}} | ||
{{Itemlist|TM Dragon VI|Trial site | {{Itemlist|Dusk Ball|Outside the third cave, mid-level, on the cliff accessed through the exit south of the Machamp Shove puzzle (requires [[Poké Ride|Machamp Shove]])|Su=yes|M=yes|US=yes|UM=yes}} | ||
{{Itemlist|Dragonium Z|Trial site | {{Itemlist|Fairium Z|Canyon, after the third cave, from [[Mina]] on the bridge|Su=yes|M=yes}} | ||
{{Itemlist|PP Max|Canyon, after the third cave, on the cliffs, between the rock and the wall at the end of the third bridge ''(hidden)''|Su=yes|M=yes|US=yes|UM=yes}} | |||
{{Itemlist|Full Heal|Canyon, after the third cave, on the ground level, south of the vines providing a ramp down from the cliffs|Su=yes|M=yes|US=yes|UM=yes}} | |||
{{Itemlist|X Defense|Canyon, after the third cave, on the ground level, between the group of four rocks in the area behind the fallen tree south of the trial site on the west side ''(hidden)''|Su=yes|M=yes|US=yes|UM=yes}} | |||
{{Itemlist|Rare Candy|Third cave, bottom level, on the second shelf of land (requires [[Poké Ride|Lapras Paddle]] or [[Poké Ride|Sharpedo Jet]])|Su=yes|M=yes|US=yes|UM=yes}} | |||
{{Itemlist|TM Fire VI|Third cave, bottom level, on the third shelf of land (requires [[Poké Ride|Lapras Paddle]] or [[Poké Ride|Sharpedo Jet]])|Su=yes|M=yes|US=yes|UM=yes|display={{TM|35|Flamethrower}}}} | |||
{{Itemlist|TM Dragon VI|Trial site, in a crevice on the east side of the path|Su=yes|M=yes|US=yes|UM=yes|display={{TM|02|Dragon Claw}}}} | |||
{{Itemlist|Dragonium Z|Trial site, obtained after completing the trial|Su=yes|M=yes|US=yes|UM=yes}} | |||
{{Itlistfoot|mountain}} | {{Itlistfoot|mountain}} | ||
===Found in smashed rocks=== | ===Found in smashed rocks=== | ||
Sometimes, after smashing | Sometimes, after smashing [[breakable rock]]s with [[Poké Ride|Tauros Charge]] or [[Poké Ride|Sharpedo Jet]], items can be found in the debris. | ||
{{Itlisth|mountain}} | |||
{{Itemlist|Stardust|Sometimes found in smashed rocks|Su=yes|M=yes|US=yes|UM=yes}} | |||
{{Itemlist|Star Piece|Sometimes found in smashed rocks|Su=yes|M=yes|US=yes|UM=yes}} | |||
{{Itemlist|Comet Shard|Sometimes found in smashed rocks|Su=yes|M=yes|US=yes|UM=yes}} | |||
{{Itlistfoot|mountain}} | |||
===Dropped after ambush encounters=== | |||
Sometimes, after a {{p|Dugtrio}} from a dirt cloud is defeated or caught, it will drop an item. | |||
{{Itlisth|mountain}} | |||
{{Itemlist|Soft Sand|Sometimes dropped by Dugtrio from dirt clouds|Su=yes|M=yes|US=yes|UM=yes}} | |||
{{Itemlist|Big Root|Sometimes dropped by Dugtrio from dirt clouds|Su=yes|M=yes|US=yes|UM=yes}} | |||
{{Itlistfoot|mountain}} | |||
Sometimes, after a Pokémon from a flying shadow at the trial site is defeated, it will drop an item. | |||
{{Itlisth|mountain}} | {{Itlisth|mountain}} | ||
{{Itemlist| | {{Itemlist|Heart Scale|Sometimes dropped by Pokémon from flying shadows|Su=yes|M=yes|US=yes|UM=yes}} | ||
{{Itlistfoot|mountain}} | {{Itlistfoot|mountain}} | ||
===Fishing=== | |||
Sometimes when [[fishing]], an item will be reeled in instead of a Pokémon. | |||
{{Itlisth|water}} | |||
{{Itemlist|Pearl|Randomly reeled in when fishing|Su=yes|M=yes|US=yes|UM=yes|display={{i|Pearl}}}} | |||
{{Itemlist|Sticky Barb|Randomly reeled in when fishing|Su=yes|M=yes|US=yes|UM=yes}} | |||
{{Itemlist|Bottle Cap|Randomly reeled in when fishing|Su=yes|M=yes|US=yes|UM=yes}} | |||
{{Itlistfoot|water}} | |||
===Zygarde Cube=== | ===Zygarde Cube=== | ||
{{Itlisth|mountain}} | {{Itlisth|mountain}} | ||
{{Itemlist|Zygarde Cell| | {{Itemlist||sprite=Key Zygarde Cell Sprite|size=40px|First cave, north of the Machamp Shove block near the entrance, accessed from the south of the canyon area after the third cave|Su=yes|M=yes|display=[[Zygarde Cube|Zygarde Cell]]}} | ||
{{Itemlist|Zygarde Cell| | {{Itemlist||sprite=Key Zygarde Cell Sprite|size=40px|Second cave, behind a small rock near the east entrance|Su=yes|M=yes|display=[[Zygarde Cube|Zygarde Cell]]}} | ||
{{Itemlist|Zygarde Cell| | {{Itemlist||sprite=Key Zygarde Cell Sprite|size=40px|Third cave, by the dens on the western wall|Su=yes|M=yes|display=[[Zygarde Cube|Zygarde Cell]]}} | ||
{{Itemlist|Zygarde Cell| | {{Itemlist||sprite=Key Zygarde Cell Sprite|size=40px|Outside the third cave, mid-level, on the west end of the cliff accessed through the exit south of the Machamp Shove puzzle (requires [[Poké Ride|Machamp Shove]])|Su=yes|M=yes|display=[[Zygarde Cube|Zygarde Cell]]}} | ||
{{Itlistfoot|mountain}} | {{Itlistfoot|mountain}} | ||
==Pokémon== | ==Pokémon== | ||
===Pokémon Sun and Moon=== | |||
== | ====Canyon==== | ||
{{Catch/header/dn|land}} | {{Catch/header/dn|land}} | ||
{{Catch/entry7|067|Machoke|yes|yes| | {{Catch/entry7|067|Machoke|yes|yes|Brown grass|41-44|all=30%|type1=Fighting}} | ||
{{Catch/entry7|198|Murkrow|yes|yes| | {{Catch/entry7|198|Murkrow|yes|yes|Brown grass|41-44|all=10%|type1=Dark|type2=Flying}} | ||
{{Catch/entry7|227|Skarmory|yes|yes| | {{Catch/entry7|227|Skarmory|yes|yes|Brown grass|41-44|all=10%|type1=Steel|type2=Flying}} | ||
{{Catch/entry7|525|Boldore|yes|yes| | {{Catch/entry7|525|Boldore|yes|yes|Brown grass|41-44|all=10%|type1=Rock}} | ||
{{Catch/entry7|703|Carbink|yes|yes| | {{Catch/entry7|703|Carbink|yes|yes|Brown grass|41-44|all=15%|type1=Rock|type2=Fairy}} | ||
{{Catch/entry7|745|Lycanroc|yes|yes| | {{Catch/entry7|745|Lycanroc|yes|yes|Brown grass|41-44|20%|-|type1=Rock|form=Midday Form}} | ||
{{Catch/entry7|745Mn|Lycanroc|yes|yes| | {{Catch/entry7|745Mn|Lycanroc|yes|yes|Brown grass|41-44|-|20%|type1=Rock|form=Midnight Form}} | ||
{{Catch/entry7|782|Jangmo-o|yes|yes| | {{Catch/entry7|782|Jangmo-o|yes|yes|Brown grass|41-44|all=5%|type1=Dragon|allies={{MSN|784|Kommo-o}}<br>{{MSN|783|Hakamo-o}}}} | ||
{{Catch/footer|land}} | {{Catch/footer|land}} | ||
== | ====Caves==== | ||
{{Catch/header| | {{Catch/header/7|cave}} | ||
{{Catch/entry7|042|Golbat|yes|yes| | {{Catch/entry7|042|Golbat|yes|yes|Cave|41-44|all=30%|type1=Poison|type2=Flying}} | ||
{{Catch/entry7|051A|Dugtrio|yes|yes| | {{Catch/entry7|051A|Dugtrio|yes|yes|Cave|41-44|all=20%|type1=Ground|type2=Steel|form=Alolan Form}} | ||
{{Catch/entry7|525|Boldore|yes|yes| | {{Catch/entry7|525|Boldore|yes|yes|Cave|41-44|all=30%|type1=Rock}} | ||
{{Catch/entry7|703|Carbink|yes|yes| | {{Catch/entry7|703|Carbink|yes|yes|Cave|41-44|all=20%|type1=Rock|type2=Fairy|allies={{MSN|703|Carbink}}<br>{{MSN|302|Sableye}}}} | ||
{{Catch/div|cave|Ambush encounters}} | |||
{{Catch/entry7|051A|Dugtrio|yes|yes|Dirt cloud|41-44|all=100%|type1=Ground|type2=Steel|form=Alolan Form}} | |||
{{Catch/div|water|Surfing}} | |||
{{Catch/entry7|042|Golbat|yes|yes|Surf|41-44|all=80%|type1=Poison|type2=Flying}} | |||
{{Catch/entry7|055|Golduck|yes|yes|Surf|41-44|all=20%|type1=Water}} | |||
{{Catch/div|water|Fishing}} | |||
{{Catch/entry7|129|Magikarp|yes|yes|Fish|10-44|all=59%|type1=Water|allies={{MSN|129|Magikarp}}<br>{{MSN|130|Gyarados}}}} | |||
{{Catch/entry7|147|Dratini|yes|yes|Fish|10-44|all=1%|type1=Dragon|allies={{MSN|147|Dratini}}<br>{{MSN|148|Dragonair}}}} | |||
{{Catch/entry7|339|Barboach|yes|yes|Fish|10-44|all=40%|type1=Water|type2=Ground|allies={{MSN|339|Barboach}}<br>{{MSN|340|Whiscash}}}} | |||
{{Catch/div|water|Fishing at the bubbling spot}} | |||
{{Catch/entry7|129|Magikarp|yes|yes|Fish|10-44|all=50%|type1=Water|allies={{MSN|129|Magikarp}}<br>{{MSN|130|Gyarados}}}} | |||
{{Catch/entry7|147|Dratini|yes|yes|Fish|10-44|all=10%|type1=Dragon|allies={{MSN|147|Dratini}}<br>{{MSN|148|Dragonair}}}} | |||
{{Catch/entry7|339|Barboach|yes|yes|Fish|10-44|all=40%|type1=Water|type2=Ground|allies={{MSN|339|Barboach}}<br>{{MSN|340|Whiscash}}}} | |||
{{Catch/footer|cave}} | |||
===Pokémon Ultra Sun and Ultra Moon=== | |||
====Canyon==== | |||
{{Catch/header/dn|land}} | |||
{{Catch/entryusum|067|Machoke|yes|yes|Brown grass|43-46|all=20%|type1=Fighting}} | |||
{{Catch/entryusum|227|Skarmory|yes|yes|Brown grass|43-46|all=10%|type1=Steel|type2=Flying}} | |||
{{Catch/entryusum|525|Boldore|yes|yes|Brown grass|43-46|all=10%|type1=Rock}} | |||
{{Catch/entryusum|619|Mienfoo|yes|yes|Brown grass|43-46|all=20%|type1=Fighting}} | |||
{{Catch/entryusum|703|Carbink|yes|yes|Brown grass|43-46|all=15%|type1=Rock|type2=Fairy}} | |||
{{Catch/entryusum|745|Lycanroc|yes|yes|Brown grass|43-46|20%|-|type1=Rock|form=Midday Form}} | |||
{{Catch/entryusum|745Mn|Lycanroc|yes|yes|Brown grass|43-46|-|20%|type1=Rock|form=Midnight Form}} | |||
{{Catch/entryusum|782|Jangmo-o|yes|yes|Brown grass|43-46|all=5%|type1=Dragon|allies={{MSN|784|Kommo-o}}<br>{{MSN|783|Hakamo-o}}}} | |||
{{Catch/footer|land}} | {{Catch/footer|land}} | ||
== | ====Caves==== | ||
{{Catch/header| | {{Catch/header/7|cave}} | ||
{{Catch/ | {{Catch/entryusum|042|Golbat|yes|yes|Cave|42-45|all=30%|type1=Poison|type2=Flying}} | ||
{{Catch/ | {{Catch/entryusum|051A|Dugtrio|yes|yes|Cave|42-45|all=20%|type1=Ground|type2=Steel|form=Alolan Form}} | ||
{{Catch/ | {{Catch/entryusum|525|Boldore|yes|yes|Cave|42-45|all=30%|type1=Rock}} | ||
{{Catch/ | {{Catch/entryusum|703|Carbink|yes|yes|Cave|42-45|all=20%|type1=Rock|type2=Fairy|allies={{MSN|302|Sableye}}<br>{{MSN|703|Carbink}}}} | ||
{{Catch/div|cave|Ambush encounters}} | |||
{{Catch/div| | {{Catch/entryusum|051A|Dugtrio|yes|yes|Dirt cloud|42-45|all=100%|type1=Ground|type2=Steel|form=Alolan Form}} | ||
{{Catch/div|water|Surfing}} | |||
{{Catch/entryusum|042|Golbat|yes|yes|Surf|42-45|all=80%|type1=Poison|type2=Flying}} | |||
{{Catch/ | {{Catch/entryusum|055|Golduck|yes|yes|Surf|42-45|all=20%|type1=Water}} | ||
{{Catch/div|water|Fishing}} | |||
{{Catch/div| | {{Catch/entryusum|129|Magikarp|yes|yes|Fish|10-46|all=45%|type1=Water|allies={{MSN|129|Magikarp}}<br>{{MSN|130|Gyarados}}}} | ||
{{Catch/entryusum|339|Barboach|yes|yes|Fish|10-46|all=25%|type1=Water|type2=Ground|allies={{MSN|339|Barboach}}<br>{{MSN|340|Whiscash}}}} | |||
{{Catch/ | {{Catch/entryusum|341|Corphish|yes|yes|Fish|10-46|all=5%|type1=Water|type2=Ground|allies={{MSN|341|Corphish}}<br>{{MSN|342|Crawdaunt}}}} | ||
{{Catch/ | {{Catch/entryusum|550|Basculin|yes|no|Fish|10-46|all=25%|type1=Water|form=Red-Striped}} | ||
{{Catch/entryusum|550B|Basculin|no|yes|Fish|10-46|all=25%|type1=Water|alliesna=N/A|allies=N/A|form=Blue-Striped}} | |||
{{Catch/div| | {{Catch/div|water|Fishing at the bubbling spot}} | ||
{{Catch/entryusum|129|Magikarp|yes|yes|Fish|10-51|all=25%|type1=Water|allies={{MSN|129|Magikarp}}<br>{{MSN|130|Gyarados}}}} | |||
{{Catch/entryusum|339|Barboach|yes|yes|Fish|10-51|all=20%|type1=Water|type2=Ground|allies={{MSN|339|Barboach}}<br>{{MSN|340|Whiscash}}}} | |||
{{Catch/ | {{Catch/entryusum|341|Corphish|yes|yes|Fish|10-51|all=35%|type1=Water|type2=Ground|allies={{MSN|341|Corphish}}<br>{{MSN|342|Crawdaunt}}}} | ||
{{Catch/ | {{Catch/entryusum|550|Basculin|yes|no|Fish|10-51|all=20%|type1=Water|form=Red-Striped}} | ||
{{Catch/ | {{Catch/entryusum|550B|Basculin|no|yes|Fish|10-51|all=20%|type1=Water|alliesna=N/A|allies=N/A|form=Blue-Striped}} | ||
{{Catch/footer|cave}} | |||
{{Catch/div| | |||
{{Catch/ | |||
{{Catch/ | |||
{{Catch/ | |||
{{Catch/ | |||
-- | |||
==Trainers== | ==Trainers== | ||
===Pokémon Sun and Moon=== | |||
====Grand trial==== | |||
=== | |||
{{Party/Single | {{Party/Single | ||
|color={{ | |color={{TCG Pokémon Tool color}} | ||
|bordercolor={{ | |bordercolor={{TCG Pokémon Tool color dark}} | ||
|headcolor={{ | |headcolor={{TCG Pokémon Tool color light}} | ||
|sprite=VSHapu.png | |sprite=VSHapu.png | ||
|size=150px | |size=150px | ||
|prize={{pdollar}}7,680 | |prize={{pdollar}}7,680 | ||
|class=Island Kahuna | |class=Island Kahuna | ||
|classlink=Island | |classlink=Island kahuna | ||
|name={{color2|000|Hapu}} | |name={{color2|000|Hapu}} | ||
|game=SM | |game=SM | ||
|location=Vast Poni Canyon | |location=Vast Poni Canyon | ||
|pokemon=4 | |pokemon=4}} | ||
}} | |||
|{{Pokémon/7 | |{{Pokémon/7 | ||
|game=SM | |game=SM | ||
| Line 253: | Line 348: | ||
|move2=Earthquake|move2type=Ground|move2cat=Physical | |move2=Earthquake|move2type=Ground|move2cat=Physical | ||
|move3=Sucker Punch|move3type=Dark|move3cat=Physical | |move3=Sucker Punch|move3type=Dark|move3cat=Physical | ||
|move4=Sandstorm|move4type=Rock|move4cat=Status | |move4=Sandstorm|move4type=Rock|move4cat=Status}} | ||
}} | |||
|{{Pokémon/7 | |{{Pokémon/7 | ||
|game=SM | |game=SM | ||
| Line 267: | Line 361: | ||
|move1=Muddy Water|move1type=Water|move1cat=Special | |move1=Muddy Water|move1type=Water|move1cat=Special | ||
|move2=Mud Bomb|move2type=Ground|move2cat=Special | |move2=Mud Bomb|move2type=Ground|move2cat=Special | ||
|move3=Recover|move3type=Normal|move3cat=Status | |move3=Recover|move3type=Normal|move3cat=Status}} | ||
}} | {{Party/Div|color={{TCG Pokémon Tool color}}}} | ||
{{Party/Div|color={{ | |||
|{{Pokémon/7 | |{{Pokémon/7 | ||
|game=SM | |game=SM | ||
| Line 280: | Line 373: | ||
|type2=Dragon | |type2=Dragon | ||
|move1=Earth Power|move1type=Ground|move1cat=Special | |move1=Earth Power|move1type=Ground|move1cat=Special | ||
|move2=Dragon Breath|move2type=Dragon|move2cat=Special | |move2=Dragon Breath|move2type=Dragon|move2cat=Special}} | ||
}} | |||
| style="margin:auto" |{{Pokémon/7 | | style="margin:auto" |{{Pokémon/7 | ||
|game=SM | |game=SM | ||
| Line 294: | Line 386: | ||
|move2=Earthquake|move2type=Ground|move2cat=Physical | |move2=Earthquake|move2type=Ground|move2cat=Physical | ||
|move3=Double Kick|move3type=Fighting|move3cat=Physical | |move3=Double Kick|move3type=Fighting|move3cat=Physical | ||
|move4=Counter|move4type=Fighting|move4cat=Physical | |move4=Counter|move4type=Fighting|move4cat=Physical}} | ||
}} | {{Party/Footer}} | ||
====After defeating Hapu==== | |||
{{trainerheader|mountain}} | |||
{{trainerdiv|mountain|First cave}} | |||
{{Trainerentry|VSVeteran M SM.png{{!}}150px|game=7|Veteran|Harry|4,048|2|324|Torkoal|♂|46|None|059|Arcanine|♂|46|None|36=ヒロカズ|37=Hirokazu}} | |||
{{trainerdiv|mountain}} | |||
{{Trainerentry|VSBackpacker F SM.png{{!}}150px|game=7|Backpacker|Perdy|1,056|1|547|Whimsicott|♀|44|None|36=マヨイ|37=Mayoi}} | |||
{{trainerdiv|mountain}} | |||
{{Trainerentry|VSAce Duo SM.png{{!}}150px|game=7|Ace Duo|Kent and Aimee|6,256|2|028A|Sandslash|♂|46|None|038A|Ninetales|♀|46|None|36=ケント と アイミ|37=Kent and Aimee}} | |||
{{trainerdiv|mountain|Second cave}} | |||
{{Trainerentry|VSHiker SM.png{{!}}150px|game=7|Hiker|Zachary|1,408|2|567|Archeops|♂|44|None|409|Rampardos|♂|44|None|36=ユウイチロウ|37=Yūichirō}} | |||
{{trainerdiv|mountain}} | |||
{{Trainerentry|VSVeteran F SM.png{{!}}150px|game=7|Veteran|Lynn|4,048|3|121|Starmie||46|None|756|Shiinotic|♀|46|None|663|Talonflame|♀|46|None|36=ヤヨイ|37=Yayoi}} | |||
{{trainerdiv|mountain}} | |||
{{Trainerentry|VSAce Trainer F SM.png{{!}}150px|game=7|Ace Trainer|Junko|3,128<br><small>Requires [[Poké Ride|Mudsdale Gallop]]</small>|2|549|Lilligant|♀|45|None|461|Weavile|♀|46|None|36=ショウコ|37=Shōko}} | |||
{{trainerdiv|mountain|Third cave}} | |||
{{Trainerentry|VSScientist SM.png{{!}}150px|game=7|Scientist|Ikaika|2,112|2|089A|Muk|♂|43|None|462|Magnezone||44|None|36=ヒロユキ|37=Hiroyuki}} | |||
{{trainerdiv|mountain|Canyon after third cave}} | |||
{{Trainerentry|VSPunk Girl SM.png{{!}}150px|game=7|Punk Girl|Anna|1,408|2|053A|Persian|♀|44|None|430|Honchkrow|♀|44|None|36=アンナ|37=Anna}} | |||
{{trainerdiv|mountain}} | |||
{{Trainerentry|VSPunk Guy SM.png{{!}}150px|game=7|Punk Guy|Adam|1,408|1|675|Pangoro|♂|44|None|36=アキオ|37=Akio}} | |||
{{trainerdiv|mountain}} | |||
{{Trainerentry|VSBlack Belt SM.png{{!}}150px|game=7|Black Belt|Earl|1,472|1|062|Poliwrath|♂|46|None|36=イワオ|37=Iwao}} | |||
{{trainerdiv|mountain}} | |||
{{Trainerentry|VSAce Trainer M SM.png{{!}}150px|game=7|Ace Trainer|Hiroshi|3,196|2|359|Absol|♂|46|None|131|Lapras|♂|47|None|36=ヒロシ|37=Hiroshi}} | |||
{{trainerdiv|mountain}} | |||
{{Trainerentry|VSVeteran F SM.png{{!}}150px|game=7|Veteran|Heather|4,136|3|508|Stoutland|♀|47|None|707|Klefki|♀|47|None|763|Tsareena|♀|47|None|36=ヒトミ|37=Hitomi}} | |||
{{trainerdiv|mountain}} | |||
{{Trainerentry|VSVeteran M SM.png{{!}}150px|game=7|Veteran|Eric|4,136|4|210|Granbull|♀|47|None|091|Cloyster|♂|47|None|076A|Golem|♂|47|None|094|Gengar|♂|47|None|36=エイジ|37=Eiji}} | |||
{{trainerdiv|mountain|Third cave (bottom level)}} | |||
{{Trainerentry|VSBlack Belt SM.png{{!}}150px|game=7|Black Belt|Terry|1,472|1|068|Machamp|♂|46|None|36=タダシ|37=Tadashi}} | |||
{{trainerfooter|mountain|7}} | |||
===Pokémon Ultra Sun and Ultra Moon=== | |||
====Pokémon Ultra Sun==== | |||
{{Party/Single | |||
|color={{night color light}} | |||
|headcolor={{items color dark}} | |||
|bordercolor={{night color}} | |||
|sprite=VSDulse.png | |||
|size=150px | |||
|prize={{Pdollar}}588 | |||
|class=Ultra Recon Squad | |||
|name={{color2|000|Dulse}} | |||
|game=US | |||
|location=Vast Poni Canyon | |||
|pokemon=1}} | |||
|style="margin:auto"|{{Pokémon/6 | |||
|game=USUM | |||
|ndex=803 | |||
|pokemon=Poipole | |||
|gender=None | |||
|level=49 | |||
|type1=Poison | |||
|ability=Beast Boost | |||
|move1=Nasty Plot|move1type=Dark|move1cat=Status | |||
|move2=Poison Jab|move2type=Poison|move2cat=Physical | |||
|move3=Toxic|move3type=Poison|move3cat=Status | |||
|move4=Fell Stinger|move4type=Bug|move4cat=Physical}} | |||
{{Party/Footer}} | |||
====Pokémon Ultra Moon==== | |||
{{Party/Single | |||
|color={{night color light}} | |||
|headcolor={{ultra moon color light}} | |||
|bordercolor={{night color}} | |||
|sprite=VSSoliera.png | |||
|size=150px | |||
|prize={{Pdollar}}588 | |||
|class=Ultra Recon Squad | |||
|name={{color2|000|Soliera}} | |||
|game=UM | |||
|location=Vast Poni Canyon | |||
|pokemon=1}} | |||
|style="margin:auto"|{{Pokémon/6 | |||
|game=USUM | |||
|ndex=803 | |||
|pokemon=Poipole | |||
|gender=None | |||
|level=49 | |||
|type1=Poison | |||
|ability=Beast Boost | |||
|move1=Nasty Plot|move1type=Dark|move1cat=Status | |||
|move2=Poison Jab|move2type=Poison|move2cat=Physical | |||
|move3=Toxic|move3type=Poison|move3cat=Status | |||
|move4=Fell Stinger|move4type=Bug|move4cat=Physical}} | |||
{{Party/Footer}} | {{Party/Footer}} | ||
====After defeating Dulse{{sup/7|US}}/Soliera{{sup/7|UM}}==== | |||
{{trainerheader|mountain}} | |||
{{trainerdiv|mountain|First cave}} | |||
{{Trainerentry|VSVeteran M SM.png{{!}}150px|game=7|Veteran|Harry|4,136|2|606|Beheeyem|♂|47|None|354|Banette|♂|47|None|36=ヒロカズ|37=Hirokazu}} | |||
{{trainerdiv|mountain}} | |||
{{Trainerentry|VSBackpacker F SM.png{{!}}150px|game=7|Backpacker|Perdy|1,080|1|327|Spinda|♀|45|None|36=マヨイ|37=Mayoi}} | |||
{{trainerdiv|mountain}} | |||
{{Trainerentry|VSAce Duo SM.png{{!}}150px|game=7|Ace Duo|Kent and Aimee|6,392|2|028A|Sandslash|♂|47|None|038A|Ninetales|♀|47|None|36=ケント と アイミ|37=Kent and Aimee}} | |||
{{trainerdiv|mountain|Second cave}} | |||
{{Trainerentry|VSHiker SM.png{{!}}150px|game=7|Hiker|Zachary|1,472|2|141|Kabutops|♂|46|None|697|Tyrantrum|♂|46|None|36=ユウイチロウ|37=Yūichirō}} | |||
{{trainerdiv|mountain}} | |||
{{Trainerentry|VSVeteran F SM.png{{!}}150px|game=7|Veteran|Lynn|4,224|3|178|Xatu|♀|48|None|115|Kangaskhan|♀|48|None|087|Dewgong|♀|48|None|36=ヤヨイ|37=Yayoi}} | |||
{{trainerdiv|mountain}} | |||
{{Trainerentry|VSAce Trainer F SM.png{{!}}150px|game=7|Ace Trainer|Junko|3,264<br><small>Requires [[Poké Ride|Mudsdale Gallop]]</small>|2|303|Mawile|♀|47|None|461|Weavile|♀|48|None|36=ショウコ|37=Shōko}} | |||
{{trainerdiv|mountain|Third cave}} | |||
{{Trainerentry|VSScientist SM.png{{!}}150px|game=7|Scientist|Ikaika|2,208|1|462|Magnezone||46|None|36=ヒロユキ|37=Hiroyuki}} | |||
{{trainerdiv|mountain|Canyon after third cave}} | |||
{{Trainerentry|VSPunk Girl SM.png{{!}}150px|game=7|Punk Girl|Anna|1,472|1|560|Scrafty|♀|46|None|36=アンナ|37=Anna}} | |||
{{trainerdiv|mountain}} | |||
{{Trainerentry|VSPunk Guy SM.png{{!}}150px|game=7|Punk Guy|Adam|1,472|2|675|Pangoro|♂|46|None|342|Crawdaunt|♂|46|36=アキオ|37=Akio}} | |||
{{trainerdiv|mountain}} | |||
{{Trainerentry|VSBlack Belt SM.png{{!}}150px|game=7|Black Belt|Curtis|1,504|1|062|Poliwrath|♂|47|None|36=トキオ|37=Tokio}} | |||
{{trainerdiv|mountain}} | |||
{{Trainerentry|VSTeam Skull Grunt M.png{{!}}150px|game=7|Team Skull Grunt||1,472|1|624|Pawniard|♂|46|None}} | |||
{{trainerdiv|mountain}} | |||
{{Trainerentry|VSAce Trainer M SM.png{{!}}150px|game=7|Ace Trainer|Hiroshi|3,264|2|075A|Graveler|♂|47|None|131|Lapras|♂|48|None|36=ヒロシ|37=Hiroshi}} | |||
{{trainerdiv|mountain}} | |||
{{Trainerentry|VSVeteran F SM.png{{!}}150px|game=7|Veteran|Heather|4,224|3|663|Talonflame|♀|48|None|321|Wailord|♀|48|None|471|Glaceon|♂|48|None|36=ヒトミ|37=Hitomi}} | |||
{{trainerdiv|mountain}} | |||
{{Trainerentry|VSVeteran M SM.png{{!}}150px|game=7|Veteran|Eric|4,224|4|164|Noctowl|♂|48|None|330|Flygon|♂|48|None|199|Slowking|♂|48|None|094|Gengar|♂|48|None|36=エイジ|37=Eiji}} | |||
{{trainerdiv|mountain|Third cave (bottom level)}} | |||
{{Trainerentry|VSBlack Belt SM.png{{!}}150px|game=7|Black Belt|Terry|1,504|1|740|Crabominable|♂|47|None|36=タダシ|37=Tadashi}} | |||
{{trainerdiv|mountain}} | |||
{{Trainerentry|VSSurfer.png{{!}}150px|game=7|Surfer|Joshah|1,128|1|055|Golduck|♂|47|None|36=ヨウヘイ|37=Youhei}} | |||
{{trainerfooter|mountain|7}} | |||
==In the anime== | |||
[[File:Vast Poni Canyon anime.png|thumb|250px|Vast Poni Canyon in the {{pkmn|anime}}]] | |||
Vast Poni Canyon first appeared in ''[[SM051|Family Determination!]]'', where {{an|Lillie}} and {{an|Gladion}} traveled through it on their way to the [[Altar of the Sunne]]. Along the way, Lillie constantly kept seeing obstacles in their way, such as thinking that two cliff-sides would have an invisible bridge in between them, and thinking up ways to solve said obstacles, only for her assumptions to be proven wrong by Gladion. In the final cave before reaching the altar, Lillie and Gladion came face to face with a {{pkmn2|Totem}} {{p|Kommo-o}} and its army of ally {{p|Jangmo-o}} and {{p|Hakamo-o}}. However, with Gladion {{a|RKS System|changing}} his {{TP|Gladion|Silvally}} into a {{t|Fairy}} type, the Totem Pokémon was quickly defeated. Soon after, the two were joined by {{Ash}}, the rest of {{ashcl|Lillie's classmates}}, and {{an|Professor Kukui}}. | |||
The canyon reappeared in ''[[SM052|Revealing the Stuff of Legend!]]'', where Professor Kukui went back there to save {{an|Professor Burnet}} from the Jangmo-o and Hakamo-o. With his {{p|Braviary}}, Kukui was easily able to defeat the group of {{t|Dragon}}/{{t|Fighting}} Pokémon, allowing him to bring Burnet safely to the altar. | |||
The canyon reappeared again in ''[[SM106|Evolving Research!]]'', where {{an|Sophocles}} traveled there in order to [[evolution|evolve]] his {{TP|Sophocles|Charjabug}}. In the canyon, he encountered [[Horacio]], who was also trying to evolve his {{Shiny}} {{TP|Horacio|Charjabug}}. Horacio claimed that there was a special [[Evolution stone]] in the canyon called the "Bug Stone" that could evolve any {{type|Bug}} Pokémon. Sophocles subsequently challenged Horacio to a contest to see which one of them could evolve their Charjabug first. When Horacio tried to cross a plank bridge to get to the Bug Stone, the old bridge broke under his feet, leaving him hanging for dear life on one side of the canyon. Sophocles's Charjabug then evolved into {{TP|Sophocles|Vikavolt}}, saved Horacio, and retrieved the Bug Stone, which Sophocles gave to Horacio, since his Charjabug had already evolved. However, much to Horacio's dismay, the stone had no effect on his Charjabug whatsoever, and Sophocles revealed that it was actually the [[special magnetic field]] present in the canyon that causes Charjabug to evolve. Afterwards, Horacio swore to evolve his Charjabug through {{pkmn|training}} and then challenge Sophocles to a [[Vikavolt race]] [[SM119|once he had done so]]. | |||
===Pokémon seen at Vast Poni Canyon=== | |||
{| width=250px | |||
|- | |||
| {{ActivePoké|Vast Poni Canyon|Murkrow|Vast Poni Canyon Murkrow.png|Dark|Flying|link=no}} | |||
| {{ActivePoké|Vast Poni Canyon|Hakamo-o|Vast Poni Canyon Hakamo-o.png|Dragon|Fighting|link=no}} | |||
| {{ActivePoké|Vast Poni Canyon|Boldore|Vast Poni Canyon Boldore.png|Rock|link=no}} | |||
| {{ActivePoké|Vast Poni Canyon|Golduck|Vast Poni Canyon Golduck.png|Water|link=no}} | |||
|- | |||
| {{ActivePoké|Vast Poni Canyon|Golbat|Vast Poni Canyon Golbat.png|nick=Golbat (multiple)|Poison|Flying|link=no}} | |||
|} | |||
====Trial site==== | |||
{| width=250px | |||
|- | |||
| {{ActivePoké|Totem Pokémon|Totem Kommo-o|Totem Kommo-o.png|Dragon|Fighting|link=Totem Pokémon#Totem Kommo-o}} | |||
| {{ActivePoké|Totem Pokémon|Ally Jangmo-o (multiple)|Ally Jangmo-o.png|Dragon|link=Totem Pokémon#Ally Jangmo-o}} | |||
| {{ActivePoké|Totem Pokémon|Ally Hakamo-o (multiple)|Ally Hakamo-o.png|Dragon|Fighting|link=Totem Pokémon#Ally Hakamo-o}} | |||
|- | |||
|} | |||
==In the manga== | |||
[[File:Vast Poni Canyon Adventures.png|thumb|200px|Vast Poni Canyon in [[Pokémon Adventures]]]] | |||
===Pokémon Adventures=== | |||
===={{MangaArc|Sun, Moon, Ultra Sun & Ultra Moon}}==== | |||
Vast Poni Canyon first appeared in ''[[PASM23|Battle in Vast Poni Canyon]]''. It is the site where [[Hapu]]'s deceased grandfather was buried. After becoming the [[Island kahuna|kahuna]] of [[Poni Island]], Hapu set off to visit her grandfather's grave and show him that she succeeded him as the next kahuna. After seeing how much Hapu loved her grandfather, {{adv|Sun}} decided to join her. | |||
Later, [[Faba]] and a group of {{tc|Aether Foundation Employee}}s arrived at Vast Poni Canyon. Faba sent some Employees off to capture Hapu so he could interogate her while he and the remaining Employees went to the [[Poni Altar]]. There, Faba was attacked by [[Plumeria]], who demanded that he tell her where [[Guzma]] was taken to after being kidnapped by a {{p|Nihilego}}. Afterward, Faba was approached by {{adv|Moon}} and [[Anabel]], who wished to know about the [[Aether Foundation]]'s involvement with the [[Ultra Beast]]s that had appeared in Alola. Faba sent the Employees to attack them while heading to the Poni Altar himself. | |||
{{-}} | |||
==In the TCG== | |||
This listing is of cards mentioning or featuring Vast Poni Canyon in the [[Pokémon Trading Card Game]]. | |||
{{cardlist/header|Related cards|Supporter|char=yes}} | |||
{{cardlist/entry|cardname={{TCG ID|Crimson Invasion|Cubone|52}}|type=Fighting|enset=Crimson Invasion|enrarity=Common|ennum=52/111|jpset=Awakened Heroes|jprarity=C|jpnum=028/050|enset2=McDonald's Collection 2018|ennum2=7/12}} | |||
{{cardlist/footer|Supporter}} | |||
==Trivia== | |||
* Before being battled, {{tc|Scientist}} Ikaika [[List of cross-generational references|mentions]] that his idol is [[Professor Birch]]. | |||
* The [[Poké Ride]] music does not play here. | |||
* Despite {{p|Murkrow}} not being found here in [[Pokémon Ultra Sun and Ultra Moon]], a group of them still appears during the cutscene of [[Lillie]] crossing a bridge. | |||
==In other languages== | ==In other languages== | ||
{{langtable|color={{locationcolor/light|mountain}}|bordercolor={{locationcolor/dark|mountain}} | {{langtable|color={{locationcolor/light|mountain}}|bordercolor={{locationcolor/dark|mountain}} | ||
|zh_yue=波尼大峽谷 | |zh_yue=波尼大峽谷 ''{{tt|Bōnèih Daaihhaahpgūk|Poni Grand Canyon}}'' | ||
|zh_cmn=波尼大峡谷 | |zh_cmn=波尼大峡谷 ''{{tt|Bōní Dàxiágǔ|Poni Grand Canyon}}'' | ||
|fi=Valtava Poni-kanjoni | |||
|fr=Grand Canyon de Poni | |fr=Grand Canyon de Poni | ||
|de=Canyon von Poni | |de=Canyon von Poni | ||
|it=Canyon di Poni | |it=Canyon di Poni | ||
|ko=포니대협곡 | |ko=포니대협곡 ''{{tt|Poni Daehyeopgok|Great Canyon of Poni}}'' | ||
|pl=Wielki Kanion Poni | |||
|pt_br=Grande Cânion de Poni | |||
|es=Cañón de Poni | |es=Cañón de Poni | ||
}} | }} | ||
{{Special magnetic field}} | |||
{{Alola}}<br> | {{Alola}}<br> | ||
{{Project Locations notice}} | {{Project Locations notice}} | ||
[[Category:Sun and Moon locations]] | [[Category:Sun and Moon locations]] | ||
[[Category: | [[Category:Ultra Sun and Ultra Moon locations]] | ||
[[Category: | [[Category:Canyons]] | ||
[[Category:Trial sites]] | |||
[[de:Canyon von Poni]] | |||
[[es:Cañón de Poni]] | |||
[[fr:Grand Canyon de Poni]] | |||
[[it:Canyon di Poni]] | |||
[[ja:ポニのだいきょうこく]] | |||
[[zh:波尼大峽谷]] | |||
Latest revision as of 04:34, 16 April 2024

|
This article is incomplete. Please feel free to edit this article to add missing information and complete it. Reason: Layout section with images |
| |||||
| |||||
| Map description: | The most challenging path on Poni Island. The ups and downs of this canyon are beyond any other. | ||||
|---|---|---|---|---|---|
| Location: | Poni Island | ||||
| Region: | Alola | ||||
| Generations: | VII | ||||
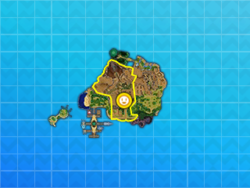 Location of Vast Poni Canyon in Alola. | |||||
| Pokémon world locations | |||||
Vast Poni Canyon (Japanese: ポニの大峡谷 Great Canyon of Poni) is a location on Poni Island in Alola. It connects to the Ancient Poni Path in the south and to the Altar of the SunneSUS/Altar of the MooneMUM. It is the location of a natural trial site, and in Pokémon Sun and Moon, it is also where the player battles Hapu in her grand trialSM and meets Mina, the sole captain of Poni Island.
The area produces a special magnetic field that allows Magneton, Nosepass, and Charjabug to evolve when leveled up here.
Trial
The trial site is located at the north end of the canyon. The trial begins once the player enters the trial site; they can leave the way they came in at any time, although this will reset the trial. If the player loses the battle against the Totem Pokémon, when they attempt the trial again they will only need to battle the Totem Pokémon; however, if they then leave after this, the trial will be reset. The player cannot use Charizard Glide during the trial.
This is a natural trial that has no Trial Captain, said to be the first ever trial. A tablet at the entrance of the trial site explains the trial. The player proceeds forward through the trial site, being attacked by a wild Jangmo-o and a wild Hakamo-o that leap from up high as the player proceeds toward a Z-Crystal pedestal. If the player tries to proceed out of the passageway behind the pedestal, they will be forced to turn back due to the fear that the Totem Pokémon will attack them from behind. When the player attempts to take the Z-Crystal from the pedestal, they are unable to retrieve the Dragonium Z before being attacked by the trial's Totem Pokémon, a Kommo-o.
In the battle with Totem Kommo-o, it will call Hakamo-oSM/NoivernUSUM on its first turn, and call Scizor if its HP is below 2/3 (if the ally Hakamo-oSM/NoivernUSUM has been defeated). If its HP drops below 2/3 before it has a chance to call an ally, it will call Scizor first, then call Hakamo-oSM/NoivernUSUM at the first opportunity after Scizor has fainted. Once an ally is defeated, Totem Kommo-o cannot call it again.
After completing the trial, the player collects the Dragonium Z from the pedestal.
Pokémon Sun and Moon
Trial Pokémon
|
| ||||||||||||||||||||||||||||||||||||||||||||||||||||||||||||||||||
Totem Pokémon
| Totem Kommo-o | Ally Hakamo-o | Ally Scizor | ||||||||||||||||||||||||||||||||||||||||||||||||||||||||||||||||||||||||||||||||||||||||||||||||||||||
|---|---|---|---|---|---|---|---|---|---|---|---|---|---|---|---|---|---|---|---|---|---|---|---|---|---|---|---|---|---|---|---|---|---|---|---|---|---|---|---|---|---|---|---|---|---|---|---|---|---|---|---|---|---|---|---|---|---|---|---|---|---|---|---|---|---|---|---|---|---|---|---|---|---|---|---|---|---|---|---|---|---|---|---|---|---|---|---|---|---|---|---|---|---|---|---|---|---|---|---|---|---|---|---|---|
| Aura: +1 Atk, Def, Sp. Atk, Sp. Def, Speed | ||||||||||||||||||||||||||||||||||||||||||||||||||||||||||||||||||||||||||||||||||||||||||||||||||||||||
|
|
| ||||||||||||||||||||||||||||||||||||||||||||||||||||||||||||||||||||||||||||||||||||||||||||||||||||||
Pokémon Ultra Sun and Ultra Moon
Trial Pokémon
|
| ||||||||||||||||||||||||||||||||||||||||||||||||||||||||||||||||||
Totem Pokémon
| Totem Kommo-o | Ally Noivern | Ally Scizor | ||||||||||||||||||||||||||||||||||||||||||||||||||||||||||||||||||||||||||||||||||||||||||||||||||||||
|---|---|---|---|---|---|---|---|---|---|---|---|---|---|---|---|---|---|---|---|---|---|---|---|---|---|---|---|---|---|---|---|---|---|---|---|---|---|---|---|---|---|---|---|---|---|---|---|---|---|---|---|---|---|---|---|---|---|---|---|---|---|---|---|---|---|---|---|---|---|---|---|---|---|---|---|---|---|---|---|---|---|---|---|---|---|---|---|---|---|---|---|---|---|---|---|---|---|---|---|---|---|---|---|---|
| Aura: +1 Atk, Def, Sp. Atk, Sp. Def, Speed | ||||||||||||||||||||||||||||||||||||||||||||||||||||||||||||||||||||||||||||||||||||||||||||||||||||||||
|
|
| ||||||||||||||||||||||||||||||||||||||||||||||||||||||||||||||||||||||||||||||||||||||||||||||||||||||
Items
| Item | Location | Games | |
|---|---|---|---|
| Groundium Z | Canyon, from Hapu after defeating her in the grand trial | S M | |
| Max Revive | Canyon, from Lillie after defeating Hapu in the grand trial | S M | |
| Max Revive ×2 | US UM | ||
| Max Potion | Canyon, behind the fallen tree next to the cave entrance | S M | |
| TM93 (Wild Charge) | Canyon, behind the fallen tree next to the cave entrance | US UM | |
| Elixir | First cave, through a hole behind Backpacker Perdy (requires Tauros Charge) | S M | |
| Protein | First cave, through a hole behind Backpacker Perdy (requires Tauros Charge) | US UM | |
| Nugget | First cave, in front of a small rock at the top of the ramp past Backpacker Perdy (hidden) | S M US UM | |
| Max Potion | First cave, behind breakable rocks at the top of the ramp past Backpacker Perdy (requires Tauros Charge) | S M US UM | |
| Revive | Canyon, after the first cave, in the bare spot in the middle of the grass by the first cave's exit | S M | |
| X Attack | Canyon, after the first cave, in front of a rock around the corner of the entrance to the second cave (hidden) | S M US UM | |
| X Defense | Second cave, behind a rock near the entrance | US UM | |
| Escape Rope | Second cave, southern half, north of Veteran Lynn | S M US UM | |
| TM99 (Dazzling Gleam) | Canyon, south of the second cave, in the clearing accessed by traversing the southern half of the second cave (requires Mudsdale Gallop) | S M US UM | |
| X Sp. Atk | Canyon, south of the second cave, on the south side of the rock in the clearing accessed by traversing the southern half of the second cave (requires Mudsdale Gallop) (hidden) | S M | |
| X Sp. Def | Canyon, south of the second cave, on the south side of the rock in the clearing accessed by traversing the southern half of the second cave (requires Mudsdale Gallop) (hidden) | US UM | |
| Nugget | Third cave, between the two holes where dirt clouds come out | US UM | |
| Full Restore | Third cave, on the west side of the Machamp Shove puzzle (requires Machamp Shove) | S M US UM | |
| Dusk Ball | Outside the third cave, mid-level, on the cliff accessed through the exit south of the Machamp Shove puzzle (requires Machamp Shove) | S M US UM | |
| Fairium Z | Canyon, after the third cave, from Mina on the bridge | S M | |
| PP Max | Canyon, after the third cave, on the cliffs, between the rock and the wall at the end of the third bridge (hidden) | S M US UM | |
| Full Heal | Canyon, after the third cave, on the ground level, south of the vines providing a ramp down from the cliffs | S M US UM | |
| X Defense | Canyon, after the third cave, on the ground level, between the group of four rocks in the area behind the fallen tree south of the trial site on the west side (hidden) | S M US UM | |
| Rare Candy | Third cave, bottom level, on the second shelf of land (requires Lapras Paddle or Sharpedo Jet) | S M US UM | |
| TM35 (Flamethrower) | Third cave, bottom level, on the third shelf of land (requires Lapras Paddle or Sharpedo Jet) | S M US UM | |
| TM02 (Dragon Claw) | Trial site, in a crevice on the east side of the path | S M US UM | |
| Dragonium Z | Trial site, obtained after completing the trial | S M US UM | |
Found in smashed rocks
Sometimes, after smashing breakable rocks with Tauros Charge or Sharpedo Jet, items can be found in the debris.
| Item | Location | Games | |
|---|---|---|---|
| Stardust | Sometimes found in smashed rocks | S M US UM | |
| Star Piece | Sometimes found in smashed rocks | S M US UM | |
| Comet Shard | Sometimes found in smashed rocks | S M US UM | |
Dropped after ambush encounters
Sometimes, after a Dugtrio from a dirt cloud is defeated or caught, it will drop an item.
| Item | Location | Games | |
|---|---|---|---|
| Soft Sand | Sometimes dropped by Dugtrio from dirt clouds | S M US UM | |
| Big Root | Sometimes dropped by Dugtrio from dirt clouds | S M US UM | |
Sometimes, after a Pokémon from a flying shadow at the trial site is defeated, it will drop an item.
| Item | Location | Games | |
|---|---|---|---|
| Heart Scale | Sometimes dropped by Pokémon from flying shadows | S M US UM | |
Fishing
Sometimes when fishing, an item will be reeled in instead of a Pokémon.
| Item | Location | Games | |
|---|---|---|---|
| Pearl | Randomly reeled in when fishing | S M US UM | |
| Sticky Barb | Randomly reeled in when fishing | S M US UM | |
| Bottle Cap | Randomly reeled in when fishing | S M US UM | |
Zygarde Cube
| Item | Location | Games | |
|---|---|---|---|
| Zygarde Cell | First cave, north of the Machamp Shove block near the entrance, accessed from the south of the canyon area after the third cave | S M | |
| Zygarde Cell | Second cave, behind a small rock near the east entrance | S M | |
| Zygarde Cell | Third cave, by the dens on the western wall | S M | |
| Zygarde Cell | Outside the third cave, mid-level, on the west end of the cliff accessed through the exit south of the Machamp Shove puzzle (requires Machamp Shove) | S M | |
Pokémon
Pokémon Sun and Moon
Canyon
| Pokémon | Allies | Games | Location | Levels | Rate | ||||||||||
|---|---|---|---|---|---|---|---|---|---|---|---|---|---|---|---|
|
S | M |
|
41-44 | 30% | ||||||||||
|
S | M |
|
41-44 | 10% | ||||||||||
|
S | M |
|
41-44 | 10% | ||||||||||
|
S | M |
|
41-44 | 10% | ||||||||||
|
S | M |
|
41-44 | 15% | ||||||||||
|
S | M |
|
41-44 | 20% | - | |||||||||
|
S | M |
|
41-44 | - | 20% | |||||||||
|
S | M |
|
41-44 | 5% | ||||||||||
| A colored background means that the Pokémon can be found in this location in the specified game. A white background with a colored letter means that the Pokémon cannot be found here. | |||||||||||||||
Caves
| Pokémon | Allies | Games | Location | Levels | Rate | ||||||||||
|---|---|---|---|---|---|---|---|---|---|---|---|---|---|---|---|
|
S | M |
|
41-44 | 30% | ||||||||||
|
S | M |
|
41-44 | 20% | ||||||||||
|
S | M |
|
41-44 | 30% | ||||||||||
|
S | M |
|
41-44 | 20% | ||||||||||
| Ambush encounters | |||||||||||||||
|
S | M |
|
41-44 | 100% | ||||||||||
| Surfing | |||||||||||||||
|
S | M |
|
41-44 | 80% | ||||||||||
|
S | M |
|
41-44 | 20% | ||||||||||
| Fishing | |||||||||||||||
|
S | M |
|
10-44 | 59% | ||||||||||
|
S | M |
|
10-44 | 1% | ||||||||||
|
S | M |
|
10-44 | 40% | ||||||||||
| Fishing at the bubbling spot | |||||||||||||||
|
S | M |
|
10-44 | 50% | ||||||||||
|
S | M |
|
10-44 | 10% | ||||||||||
|
S | M |
|
10-44 | 40% | ||||||||||
| A colored background means that the Pokémon can be found in this location in the specified game. A white background with a colored letter means that the Pokémon cannot be found here. | |||||||||||||||
Pokémon Ultra Sun and Ultra Moon
Canyon
| Pokémon | Allies | Games | Location | Levels | Rate | ||||||||||
|---|---|---|---|---|---|---|---|---|---|---|---|---|---|---|---|
|
US | UM |
|
43-46 | 20% | ||||||||||
|
US | UM |
|
43-46 | 10% | ||||||||||
|
US | UM |
|
43-46 | 10% | ||||||||||
|
US | UM |
|
43-46 | 20% | ||||||||||
|
US | UM |
|
43-46 | 15% | ||||||||||
|
US | UM |
|
43-46 | 20% | - | |||||||||
|
US | UM |
|
43-46 | - | 20% | |||||||||
|
US | UM |
|
43-46 | 5% | ||||||||||
| A colored background means that the Pokémon can be found in this location in the specified game. A white background with a colored letter means that the Pokémon cannot be found here. | |||||||||||||||
Caves
| Pokémon | Allies | Games | Location | Levels | Rate | ||||||||||
|---|---|---|---|---|---|---|---|---|---|---|---|---|---|---|---|
|
US | UM |
|
42-45 | 30% | ||||||||||
|
US | UM |
|
42-45 | 20% | ||||||||||
|
US | UM |
|
42-45 | 30% | ||||||||||
|
US | UM |
|
42-45 | 20% | ||||||||||
| Ambush encounters | |||||||||||||||
|
US | UM |
|
42-45 | 100% | ||||||||||
| Surfing | |||||||||||||||
|
US | UM |
|
42-45 | 80% | ||||||||||
|
US | UM |
|
42-45 | 20% | ||||||||||
| Fishing | |||||||||||||||
|
US | UM |
|
10-46 | 45% | ||||||||||
|
US | UM |
|
10-46 | 25% | ||||||||||
|
US | UM |
|
10-46 | 5% | ||||||||||
|
US | UM |
|
10-46 | 25% | ||||||||||
|
N/A | US | UM |
|
10-46 | 25% | |||||||||
| Fishing at the bubbling spot | |||||||||||||||
|
US | UM |
|
10-51 | 25% | ||||||||||
|
US | UM |
|
10-51 | 20% | ||||||||||
|
US | UM |
|
10-51 | 35% | ||||||||||
|
US | UM |
|
10-51 | 20% | ||||||||||
|
N/A | US | UM |
|
10-51 | 20% | |||||||||
| A colored background means that the Pokémon can be found in this location in the specified game. A white background with a colored letter means that the Pokémon cannot be found here. | |||||||||||||||
Trainers
Pokémon Sun and Moon
Grand trial
|
||||||||||||||||||||||||||||||||||||||||||||||||||||||||||||||||||||||||||||||||||||||||||||||||||||||||||||||||||||||||||||||||||||||||||||||
| ||||||||||||||||||||||||||||||||||||||||||||||||||||||||||||||||||||||||||||||||||||||||||||||||||||||||||||||||||||||||||||||||||||||||||||||
After defeating Hapu
| Trainer | Pokémon | |||||||||||
|---|---|---|---|---|---|---|---|---|---|---|---|---|
| First cave | ||||||||||||
|
| |||||||||||
| ||||||||||||
|
| |||||||||||
|
| |||||||||||
| ||||||||||||
| Second cave | ||||||||||||
|
| |||||||||||
| ||||||||||||
|
| |||||||||||
| ||||||||||||
| ||||||||||||
|
| |||||||||||
| ||||||||||||
| Third cave | ||||||||||||
|
| |||||||||||
| ||||||||||||
| Canyon after third cave | ||||||||||||
|
| |||||||||||
| ||||||||||||
|
| |||||||||||
|
| |||||||||||
|
| |||||||||||
| ||||||||||||
|
| |||||||||||
| ||||||||||||
| ||||||||||||
|
| |||||||||||
| ||||||||||||
| ||||||||||||
| ||||||||||||
| Third cave (bottom level) | ||||||||||||
|
| |||||||||||
Pokémon Ultra Sun and Ultra Moon
Pokémon Ultra Sun
|
||||||||||||||||||||||||||||||||||
| ||||||||||||||||||||||||||||||||||
Pokémon Ultra Moon
|
||||||||||||||||||||||||||||||||||
| ||||||||||||||||||||||||||||||||||
After defeating DulseUS/SolieraUM
| Trainer | Pokémon | |||||||||||
|---|---|---|---|---|---|---|---|---|---|---|---|---|
| First cave | ||||||||||||
|
| |||||||||||
| ||||||||||||
|
| |||||||||||
|
| |||||||||||
| ||||||||||||
| Second cave | ||||||||||||
|
| |||||||||||
| ||||||||||||
|
| |||||||||||
| ||||||||||||
| ||||||||||||
|
| |||||||||||
| ||||||||||||
| Third cave | ||||||||||||
|
| |||||||||||
| Canyon after third cave | ||||||||||||
|
| |||||||||||
|
| |||||||||||
| ||||||||||||
|
| |||||||||||
|
| |||||||||||
|
| |||||||||||
| ||||||||||||
|
| |||||||||||
| ||||||||||||
| ||||||||||||
|
| |||||||||||
| ||||||||||||
| ||||||||||||
| ||||||||||||
| Third cave (bottom level) | ||||||||||||
|
| |||||||||||
|
| |||||||||||
In the anime
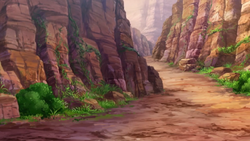
Vast Poni Canyon first appeared in Family Determination!, where Lillie and Gladion traveled through it on their way to the Altar of the Sunne. Along the way, Lillie constantly kept seeing obstacles in their way, such as thinking that two cliff-sides would have an invisible bridge in between them, and thinking up ways to solve said obstacles, only for her assumptions to be proven wrong by Gladion. In the final cave before reaching the altar, Lillie and Gladion came face to face with a Totem Kommo-o and its army of ally Jangmo-o and Hakamo-o. However, with Gladion changing his Silvally into a Fairy type, the Totem Pokémon was quickly defeated. Soon after, the two were joined by Ash, the rest of Lillie's classmates, and Professor Kukui.
The canyon reappeared in Revealing the Stuff of Legend!, where Professor Kukui went back there to save Professor Burnet from the Jangmo-o and Hakamo-o. With his Braviary, Kukui was easily able to defeat the group of Dragon/Fighting Pokémon, allowing him to bring Burnet safely to the altar.
The canyon reappeared again in Evolving Research!, where Sophocles traveled there in order to evolve his Charjabug. In the canyon, he encountered Horacio, who was also trying to evolve his Shiny Charjabug. Horacio claimed that there was a special Evolution stone in the canyon called the "Bug Stone" that could evolve any Bug-type Pokémon. Sophocles subsequently challenged Horacio to a contest to see which one of them could evolve their Charjabug first. When Horacio tried to cross a plank bridge to get to the Bug Stone, the old bridge broke under his feet, leaving him hanging for dear life on one side of the canyon. Sophocles's Charjabug then evolved into Vikavolt, saved Horacio, and retrieved the Bug Stone, which Sophocles gave to Horacio, since his Charjabug had already evolved. However, much to Horacio's dismay, the stone had no effect on his Charjabug whatsoever, and Sophocles revealed that it was actually the special magnetic field present in the canyon that causes Charjabug to evolve. Afterwards, Horacio swore to evolve his Charjabug through training and then challenge Sophocles to a Vikavolt race once he had done so.
Pokémon seen at Vast Poni Canyon
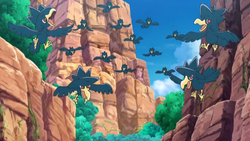 Murkrow |
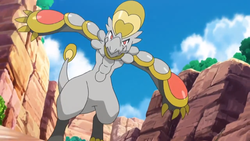 Hakamo-o |
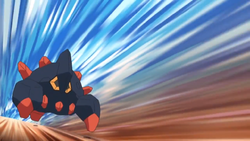 Boldore |
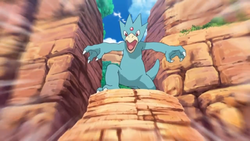 Golduck |
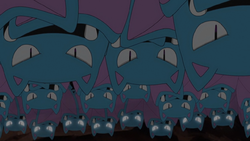 Golbat (multiple) |
Trial site
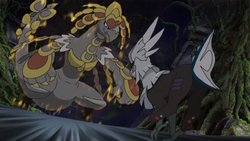 Totem Kommo-o |
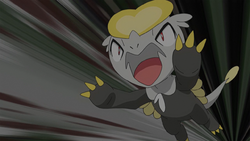 Ally Jangmo-o (multiple) |
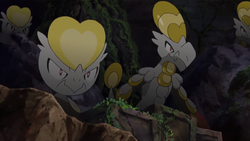 Ally Hakamo-o (multiple) |
In the manga

Pokémon Adventures
Sun, Moon, Ultra Sun & Ultra Moon arc
Vast Poni Canyon first appeared in Battle in Vast Poni Canyon. It is the site where Hapu's deceased grandfather was buried. After becoming the kahuna of Poni Island, Hapu set off to visit her grandfather's grave and show him that she succeeded him as the next kahuna. After seeing how much Hapu loved her grandfather, Sun decided to join her.
Later, Faba and a group of Aether Foundation Employees arrived at Vast Poni Canyon. Faba sent some Employees off to capture Hapu so he could interogate her while he and the remaining Employees went to the Poni Altar. There, Faba was attacked by Plumeria, who demanded that he tell her where Guzma was taken to after being kidnapped by a Nihilego. Afterward, Faba was approached by Moon and Anabel, who wished to know about the Aether Foundation's involvement with the Ultra Beasts that had appeared in Alola. Faba sent the Employees to attack them while heading to the Poni Altar himself.
In the TCG
This listing is of cards mentioning or featuring Vast Poni Canyon in the Pokémon Trading Card Game.
| Related cards Cards listed with a blue background are only legal to use in the current Expanded format. Cards listed with a green background are legal to use in both the current Standard and Expanded formats. | |||||||
|---|---|---|---|---|---|---|---|
| Card | Type | English Expansion |
Rarity | # | Japanese Expansion |
Rarity | # |
| Cubone | Crimson Invasion | 52/111 | Awakened Heroes | 028/050 | |||
| McDonald's Collection 2018 | 7/12 | ||||||
Trivia
- Before being battled, Scientist Ikaika mentions that his idol is Professor Birch.
- The Poké Ride music does not play here.
- Despite Murkrow not being found here in Pokémon Ultra Sun and Ultra Moon, a group of them still appears during the cutscene of Lillie crossing a bridge.
In other languages
| |||||||||||||||||||||||||||||||||||
| |||||

|
This article is part of Project Locations, a Bulbapedia project that aims to write comprehensive articles on every location in the Pokémon world. |
