Turnback Cave: Difference between revisions
m (→Intro) |
(→In the manga: added images) |
||
| (17 intermediate revisions by 10 users not shown) | |||
| Line 1: | Line 1: | ||
{{Infobox location | {{Infobox location | ||
|image= | |image=Turnback Cave Giratina Pt.png | ||
|image_size=256 | |image_size=256 | ||
|type= | |type=cave | ||
|location_name=Turnback Cave | |location_name=Turnback Cave | ||
|japanese_name=もどりのどうくつ | |japanese_name=もどりのどうくつ | ||
| Line 12: | Line 11: | ||
}} | }} | ||
'''Turnback Cave''' (Japanese: '''もどりのどうくつ''' ''Returning Cave'') is a maze-like cave filled with dense | '''Turnback Cave''' (Japanese: '''もどりのどうくつ''' ''Returning Cave'') is a maze-like cave filled with dense [[fog]] which is home to the [[legendary Pokémon]], {{p|Giratina}}. Turnback Cave is located at the north-central region of [[Sendoff Spring]], which itself may only be accessed through the [[Spring Path]]. In Diamond and Pearl, in the room Giratina resides in is an inscription that implies the cave is a location where the separation between the real world and the [[Distortion World]] is weaker. This is more or less confirmed in Platinum, where a portal to the Distortion World appears in front of the inscription. It reads: | ||
: ''This is... That where life sparkles... That where life has faded... A place where two worlds overlap...'' | : ''This is... That where life sparkles... That where life has faded... A place where two worlds overlap...'' | ||
The only way to locate Giratina is to pass the three pillars before passing through thirty rooms as the inscription says: | The only way to locate Giratina is to pass the three pillars before passing through thirty rooms as the inscription in the entrance says: | ||
: ''...Past three pillars | : ''...Past three pillars...to the sleeping... ...before 30 is surpassed...'' | ||
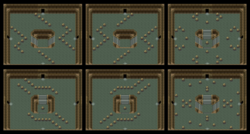
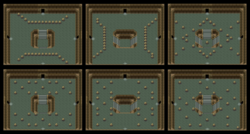
There is no way to consistently traverse the cave as rooms are always randomized upon entry, but the best hint to navigate the puzzle is to look at the pattern of rocks on the floor of each room, and enter the door out of the three which has the odd pattern. When the three pillars have been encountered the first time, Giratina will be in the next room. [[Escape Rope]]s and {{m|Dig}} cannot be used to escape, but if one turns back and leaves through the door from which they entered, it will warp them directly to the first room. When the player reaches a pillar and examines it two numbers will appear: the top number indicates which pillar the player is looking at, and the bottom indicates how many rooms have been passed through on the way to it. | There is no way to consistently traverse the cave as rooms are always randomized upon entry, but the best hint to navigate the puzzle is to look at the pattern of rocks on the floor of each room, and enter the door out of the three which has the odd pattern. When the three pillars have been encountered the first time, Giratina will be in the next room. [[Escape Rope]]s and {{m|Dig}} cannot be used to escape, but if one turns back and leaves through the door from which they entered, it will warp them directly to the first room. When the player reaches a pillar and examines it two numbers will appear: the top number indicates which pillar the player is looking at, and the bottom indicates how many rooms have been passed through on the way to it. | ||
| Line 24: | Line 23: | ||
==Geography== | ==Geography== | ||
===Rooms and pillars=== | ===Rooms and pillars=== | ||
[[File:Turnback Cave Pillar Room DPPt.png|thumb|256px|right|A pillar]] | |||
There is much mystery shrouding Turnback Cave, in relation to getting consistently to {{p|Giratina}}'s room. Rooms occur randomly when the player goes through an entrance. The only way to locate Giratina is to pass the three pillars before passing through thirty rooms. The best hint to navigate the puzzle is to look at the pattern of rocks on the floor of each room, and enter the door out of the three which has the odd pattern. Riding the Bicycle also seems to help | There is much mystery shrouding Turnback Cave, in relation to getting consistently to {{p|Giratina}}'s room. Rooms occur randomly when the player goes through an entrance. The only way to locate Giratina is to pass the three pillars before passing through thirty rooms. The best hint to navigate the puzzle is to look at the pattern of rocks on the floor of each room, and enter the door out of the three which has the odd pattern. Riding the Bicycle also seems to help. When the three pillars have been encountered the first time, Giratina will be in the next room. Each pillar has two numbers on it: the top number indicates which pillar the player is looking at, and the bottom indicates how many rooms have been passed through on the way to it. | ||
==Items== | ==Items== | ||
{{Itlisth| | {{Itlisth|cave}} | ||
{{ | {{Itemlist|Reaper Cloth|Giratina's room, if the player reached it by passing through only 3 rooms (reappears each time)|D=yes|P=yes|Pt=yes|display={{DL|Evolution-inducing held item|Reaper Cloth}}}} | ||
{{ | {{Itemlist|Rare Bone|Giratina's room, if the player reached it by passing through 4-15 rooms (reappears each time)|D=yes|P=yes|Pt=yes|display={{DL|Valuable item|Rare Bone}}}} | ||
{{ | {{Itemlist|Stardust|Giratina's room, if the player reached it by passing through 16-30 rooms (reappears each time)|D=yes|P=yes|Pt=yes|display={{DL|Valuable item|Stardust}}}} | ||
{{Itlistfoot| | {{Itlistfoot|cave}} | ||
==Pokémon== | ==Pokémon== | ||
[[File:Giratina | [[File:Altered Forme Giratina Encounter Pt.png|thumb|200px|right|Altered Forme Giratina at Turnback Cave in Platinum]] | ||
===Before encountering a pillar=== | ===Before encountering a pillar=== | ||
{{catch/header| | {{catch/header|cave}} | ||
{{catch/entry4|042|Golbat|yes|yes|no|Cave|45-46|all=30%|type1=Poison|type2=Flying}} | {{catch/entry4|042|Golbat|yes|yes|no|Cave|45-46|all=30%|type1=Poison|type2=Flying}} | ||
{{catch/entry4|042|Golbat|no|no|yes|Cave|17-18|all=25%|type1=Poison|type2=Flying}} | {{catch/entry4|042|Golbat|no|no|yes|Cave|17-18|all=25%|type1=Poison|type2=Flying}} | ||
| Line 74: | Line 49: | ||
{{catch/entry4|436|Bronzor|no|no|yes|Cave|15|all=20%|type1=Steel|type2=Psychic}} | {{catch/entry4|436|Bronzor|no|no|yes|Cave|15|all=20%|type1=Steel|type2=Psychic}} | ||
{{catch/entry4|437|Bronzong|yes|yes|no|Cave|45-46|all=35%|type1=Steel|type2=Psychic}} | {{catch/entry4|437|Bronzong|yes|yes|no|Cave|45-46|all=35%|type1=Steel|type2=Psychic}} | ||
{{catch/div| | {{catch/div|cave|Special}} | ||
{{catch/entry4|337|Lunatone|yes|yes|no|S|44, 46|all=8%|type1=Rock|type2=Psychic}} | {{catch/entry4|337|Lunatone|yes|yes|no|S|44, 46|all=8%|type1=Rock|type2=Psychic}} | ||
{{catch/entry4|337|Lunatone|no|no|yes|S|18|all=8%|type1=Rock|type2=Psychic}} | {{catch/entry4|337|Lunatone|no|no|yes|S|18|all=8%|type1=Rock|type2=Psychic}} | ||
{{catch/entry4|338|Solrock|yes|yes|no|R|44, 46|all=8%|type1=Rock|type2=Psychic}} | {{catch/entry4|338|Solrock|yes|yes|no|R|44, 46|all=8%|type1=Rock|type2=Psychic}} | ||
{{catch/entry4|338|Solrock|no|no|yes|R|18|all=8%|type1=Rock|type2=Psychic}} | {{catch/entry4|338|Solrock|no|no|yes|R|18|all=8%|type1=Rock|type2=Psychic}} | ||
{{catch/footer| | {{catch/footer|cave}} | ||
===First pillar room=== | ===First pillar room=== | ||
{{catch/header| | {{catch/header|cave}} | ||
{{catch/entry4|042|Golbat|yes|yes|no|Cave|55-56|all=30%|type1=Poison|type2=Flying}} | {{catch/entry4|042|Golbat|yes|yes|no|Cave|55-56|all=30%|type1=Poison|type2=Flying}} | ||
{{catch/entry4|042|Golbat|no|no|yes|Cave|17-18|all=25%|type1=Poison|type2=Flying}} | {{catch/entry4|042|Golbat|no|no|yes|Cave|17-18|all=25%|type1=Poison|type2=Flying}} | ||
| Line 95: | Line 70: | ||
{{catch/entry4|436|Bronzor|no|no|yes|Cave|15|all=20%|type1=Steel|type2=Psychic}} | {{catch/entry4|436|Bronzor|no|no|yes|Cave|15|all=20%|type1=Steel|type2=Psychic}} | ||
{{catch/entry4|437|Bronzong|yes|yes|no|Cave|55-56|all=35%|type1=Steel|type2=Psychic}} | {{catch/entry4|437|Bronzong|yes|yes|no|Cave|55-56|all=35%|type1=Steel|type2=Psychic}} | ||
{{catch/div| | {{catch/div|cave|Special}} | ||
{{catch/entry4|337|Lunatone|yes|yes|no|S|54, 56|all=8%|type1=Rock|type2=Psychic}} | {{catch/entry4|337|Lunatone|yes|yes|no|S|54, 56|all=8%|type1=Rock|type2=Psychic}} | ||
{{catch/entry4|337|Lunatone|no|no|yes|S|18|all=8%|type1=Rock|type2=Psychic}} | {{catch/entry4|337|Lunatone|no|no|yes|S|18|all=8%|type1=Rock|type2=Psychic}} | ||
{{catch/entry4|338|Solrock|yes|yes|no|R|54, 56|all=8%|type1=Rock|type2=Psychic}} | {{catch/entry4|338|Solrock|yes|yes|no|R|54, 56|all=8%|type1=Rock|type2=Psychic}} | ||
{{catch/entry4|338|Solrock|no|no|yes|R|18|all=8%|type1=Rock|type2=Psychic}} | {{catch/entry4|338|Solrock|no|no|yes|R|18|all=8%|type1=Rock|type2=Psychic}} | ||
{{catch/footer| | {{catch/footer|cave}} | ||
===Between first and second pillars=== | ===Between first and second pillars=== | ||
{{catch/header| | {{catch/header|cave}} | ||
{{catch/entry4|042|Golbat|yes|yes|no|Cave|55-56|all=30%|type1=Poison|type2=Flying}} | {{catch/entry4|042|Golbat|yes|yes|no|Cave|55-56|all=30%|type1=Poison|type2=Flying}} | ||
{{catch/entry4|042|Golbat|no|no|yes|Cave|25, 27|all=25%|type1=Poison|type2=Flying}} | {{catch/entry4|042|Golbat|no|no|yes|Cave|25, 27|all=25%|type1=Poison|type2=Flying}} | ||
| Line 116: | Line 91: | ||
{{catch/entry4|436|Bronzor|no|no|yes|Cave|25|all=20%|type1=Steel|type2=Psychic}} | {{catch/entry4|436|Bronzor|no|no|yes|Cave|25|all=20%|type1=Steel|type2=Psychic}} | ||
{{catch/entry4|437|Bronzong|yes|yes|no|Cave|55-56|all=35%|type1=Steel|type2=Psychic}} | {{catch/entry4|437|Bronzong|yes|yes|no|Cave|55-56|all=35%|type1=Steel|type2=Psychic}} | ||
{{catch/div| | {{catch/div|cave|Special}} | ||
{{catch/entry4|337|Lunatone|yes|yes|no|S|54, 56|all=8%|type1=Rock|type2=Psychic}} | {{catch/entry4|337|Lunatone|yes|yes|no|S|54, 56|all=8%|type1=Rock|type2=Psychic}} | ||
{{catch/entry4|337|Lunatone|no|no|yes|S|28|all=8%|type1=Rock|type2=Psychic}} | {{catch/entry4|337|Lunatone|no|no|yes|S|28|all=8%|type1=Rock|type2=Psychic}} | ||
{{catch/entry4|338|Solrock|yes|yes|no|R|54, 56|all=8%|type1=Rock|type2=Psychic}} | {{catch/entry4|338|Solrock|yes|yes|no|R|54, 56|all=8%|type1=Rock|type2=Psychic}} | ||
{{catch/entry4|338|Solrock|no|no|yes|R|28|all=8%|type1=Rock|type2=Psychic}} | {{catch/entry4|338|Solrock|no|no|yes|R|28|all=8%|type1=Rock|type2=Psychic}} | ||
{{catch/footer| | {{catch/footer|cave}} | ||
===Second pillar room=== | ===Second pillar room=== | ||
{{catch/header| | {{catch/header|cave}} | ||
{{catch/entry4|042|Golbat|yes|yes|no|Cave|55-56|all=30%|type1=Poison|type2=Flying}} | {{catch/entry4|042|Golbat|yes|yes|no|Cave|55-56|all=30%|type1=Poison|type2=Flying}} | ||
{{catch/entry4|042|Golbat|no|no|yes|Cave|37-38|all=25%|type1=Poison|type2=Flying}} | {{catch/entry4|042|Golbat|no|no|yes|Cave|37-38|all=25%|type1=Poison|type2=Flying}} | ||
| Line 137: | Line 112: | ||
{{catch/entry4|437|Bronzong|yes|yes|no|Cave|55-56|all=35%|type1=Steel|type2=Psychic}} | {{catch/entry4|437|Bronzong|yes|yes|no|Cave|55-56|all=35%|type1=Steel|type2=Psychic}} | ||
{{catch/entry4|437|Bronzong|no|no|yes|Cave|35|all=20%|type1=Steel|type2=Psychic}} | {{catch/entry4|437|Bronzong|no|no|yes|Cave|35|all=20%|type1=Steel|type2=Psychic}} | ||
{{catch/div| | {{catch/div|cave|Special}} | ||
{{catch/entry4|337|Lunatone|yes|yes|no|S|54, 56|all=8%|type1=Rock|type2=Psychic}} | {{catch/entry4|337|Lunatone|yes|yes|no|S|54, 56|all=8%|type1=Rock|type2=Psychic}} | ||
{{catch/entry4|337|Lunatone|no|no|yes|S|38|all=8%|type1=Rock|type2=Psychic}} | {{catch/entry4|337|Lunatone|no|no|yes|S|38|all=8%|type1=Rock|type2=Psychic}} | ||
{{catch/entry4|338|Solrock|yes|yes|no|R|54, 56|all=8%|type1=Rock|type2=Psychic}} | {{catch/entry4|338|Solrock|yes|yes|no|R|54, 56|all=8%|type1=Rock|type2=Psychic}} | ||
{{catch/entry4|338|Solrock|no|no|yes|R|38|all=8%|type1=Rock|type2=Psychic}} | {{catch/entry4|338|Solrock|no|no|yes|R|38|all=8%|type1=Rock|type2=Psychic}} | ||
{{catch/footer| | {{catch/footer|cave}} | ||
===Between second and third pillars=== | ===Between second and third pillars=== | ||
{{catch/header| | {{catch/header|cave}} | ||
{{catch/entry4|042|Golbat|yes|yes|no|Cave|65-66|all=30%|type1=Poison|type2=Flying}} | {{catch/entry4|042|Golbat|yes|yes|no|Cave|65-66|all=30%|type1=Poison|type2=Flying}} | ||
{{catch/entry4|042|Golbat|no|no|yes|Cave|37-38|all=25%|type1=Poison|type2=Flying}} | {{catch/entry4|042|Golbat|no|no|yes|Cave|37-38|all=25%|type1=Poison|type2=Flying}} | ||
| Line 158: | Line 133: | ||
{{catch/entry4|437|Bronzong|yes|yes|no|Cave|65-66|all=35%|type1=Steel|type2=Psychic}} | {{catch/entry4|437|Bronzong|yes|yes|no|Cave|65-66|all=35%|type1=Steel|type2=Psychic}} | ||
{{catch/entry4|437|Bronzong|no|no|yes|Cave|35|all=20%|type1=Steel|type2=Psychic}} | {{catch/entry4|437|Bronzong|no|no|yes|Cave|35|all=20%|type1=Steel|type2=Psychic}} | ||
{{catch/div| | {{catch/div|cave|Special}} | ||
{{catch/entry4|337|Lunatone|yes|yes|no|S|64, 66|all=8%|type1=Rock|type2=Psychic}} | {{catch/entry4|337|Lunatone|yes|yes|no|S|64, 66|all=8%|type1=Rock|type2=Psychic}} | ||
{{catch/entry4|337|Lunatone|no|no|yes|S|38|all=8%|type1=Rock|type2=Psychic}} | {{catch/entry4|337|Lunatone|no|no|yes|S|38|all=8%|type1=Rock|type2=Psychic}} | ||
{{catch/entry4|338|Solrock|yes|yes|no|R|64, 66|all=8%|type1=Rock|type2=Psychic}} | {{catch/entry4|338|Solrock|yes|yes|no|R|64, 66|all=8%|type1=Rock|type2=Psychic}} | ||
{{catch/entry4|338|Solrock|no|no|yes|R|38|all=8%|type1=Rock|type2=Psychic}} | {{catch/entry4|338|Solrock|no|no|yes|R|38|all=8%|type1=Rock|type2=Psychic}} | ||
{{catch/footer| | {{catch/footer|cave}} | ||
===Third pillar room=== | ===Third pillar room=== | ||
{{catch/header| | {{catch/header|cave}} | ||
{{catch/entry4|042|Golbat|yes|yes|no|Cave|55-56|all=30%|type1=Poison|type2=Flying}} | {{catch/entry4|042|Golbat|yes|yes|no|Cave|55-56|all=30%|type1=Poison|type2=Flying}} | ||
{{catch/entry4|042|Golbat|no|no|yes|Cave|37-38|all=25%|type1=Poison|type2=Flying}} | {{catch/entry4|042|Golbat|no|no|yes|Cave|37-38|all=25%|type1=Poison|type2=Flying}} | ||
| Line 179: | Line 154: | ||
{{catch/entry4|437|Bronzong|yes|yes|no|Cave|55-56|all=35%|type1=Steel|type2=Psychic}} | {{catch/entry4|437|Bronzong|yes|yes|no|Cave|55-56|all=35%|type1=Steel|type2=Psychic}} | ||
{{catch/entry4|437|Bronzong|no|no|yes|Cave|35|all=20%|type1=Steel|type2=Psychic}} | {{catch/entry4|437|Bronzong|no|no|yes|Cave|35|all=20%|type1=Steel|type2=Psychic}} | ||
{{catch/div| | {{catch/div|cave|Special}} | ||
{{catch/entry4|337|Lunatone|yes|yes|no|S|54, 56|all=8%|type1=Rock|type2=Psychic}} | {{catch/entry4|337|Lunatone|yes|yes|no|S|54, 56|all=8%|type1=Rock|type2=Psychic}} | ||
{{catch/entry4|337|Lunatone|no|no|yes|S|37|all=8%|type1=Rock|type2=Psychic}} | {{catch/entry4|337|Lunatone|no|no|yes|S|37|all=8%|type1=Rock|type2=Psychic}} | ||
{{catch/entry4|338|Solrock|yes|yes|no|R|54, 56|all=8%|type1=Rock|type2=Psychic}} | {{catch/entry4|338|Solrock|yes|yes|no|R|54, 56|all=8%|type1=Rock|type2=Psychic}} | ||
{{catch/entry4|338|Solrock|no|no|yes|R|37|all=8%|type1=Rock|type2=Psychic}} | {{catch/entry4|338|Solrock|no|no|yes|R|37|all=8%|type1=Rock|type2=Psychic}} | ||
{{catch/footer| | {{catch/footer|cave}} | ||
===After the third pillar=== | ===After the third pillar=== | ||
{{catch/header| | {{catch/header|cave}} | ||
{{catch/entry4|042|Golbat|yes|yes|no|Cave|55-56|all=30%|type1=Poison|type2=Flying}} | {{catch/entry4|042|Golbat|yes|yes|no|Cave|55-56|all=30%|type1=Poison|type2=Flying}} | ||
{{catch/entry4|042|Golbat|no|no|yes|Cave|45-47|all=25%|type1=Poison|type2=Flying}} | {{catch/entry4|042|Golbat|no|no|yes|Cave|45-47|all=25%|type1=Poison|type2=Flying}} | ||
| Line 200: | Line 175: | ||
{{catch/entry4|437|Bronzong|yes|yes|no|Cave|55-56|all=35%|type1=Steel|type2=Psychic}} | {{catch/entry4|437|Bronzong|yes|yes|no|Cave|55-56|all=35%|type1=Steel|type2=Psychic}} | ||
{{catch/entry4|437|Bronzong|no|no|yes|Cave|45|all=20%|type1=Steel|type2=Psychic}} | {{catch/entry4|437|Bronzong|no|no|yes|Cave|45|all=20%|type1=Steel|type2=Psychic}} | ||
{{catch/div| | {{catch/div|cave|Special}} | ||
{{catch/entry4|337|Lunatone|yes|yes|no|S|54, 56|all=8%|type1=Rock|type2=Psychic}} | {{catch/entry4|337|Lunatone|yes|yes|no|S|54, 56|all=8%|type1=Rock|type2=Psychic}} | ||
{{catch/entry4|337|Lunatone|no|no|yes|S|45, 47|all=8%|type1=Rock|type2=Psychic}} | {{catch/entry4|337|Lunatone|no|no|yes|S|45, 47|all=8%|type1=Rock|type2=Psychic}} | ||
| Line 207: | Line 182: | ||
{{catch/entry4|487|Giratina|yes|yes|no|Special|70|all=One|type1=Ghost|type2=Dragon}} | {{catch/entry4|487|Giratina|yes|yes|no|Special|70|all=One|type1=Ghost|type2=Dragon}} | ||
{{catch/entry4|487|Giratina|no|no|yes|Special|47|all={{tt|One|If KO'd in the Distortion World}}|type1=Ghost|type2=Dragon}} | {{catch/entry4|487|Giratina|no|no|yes|Special|47|all={{tt|One|If KO'd in the Distortion World}}|type1=Ghost|type2=Dragon}} | ||
{{catch/footer| | {{catch/footer|cave}} | ||
==Layout== | |||
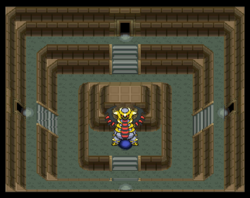
===Entrance, pillar room, and Giratina's room=== | |||
{| class="roundy" style="margin:auto; background: #000; border: 3px solid #{{locationcolor/dark|cave}}" | |||
|- | |||
! style="background:#{{locationcolor/light|cave}}; {{roundytl|5px}}" | Version | |||
! style="background:#{{locationcolor/light|cave}}" | Entrance | |||
! style="background:#{{locationcolor/light|cave}}" | Pillar room | |||
! style="background:#{{locationcolor/light|cave}}; {{roundytr|5px}}" | Giratina's room | |||
|- | |||
! style="background:#{{diamond color}}" | {{color2|000|Pokémon Diamond and Pearl Versions|Diamond}} | |||
| rowspan="2" | [[File:Turnback Cave Entrance DP.png|250px]] | |||
| rowspan="3" | [[File:Turnback Cave Pillar Room DPPt.png|250px]] | |||
| rowspan="2" | [[File:Turnback Cave Giratina DP.png|250px]] | |||
|- | |||
! style="background:#{{pearl color}}" | {{color2|000|Pokémon Diamond and Pearl Versions|Pearl}} | |||
|- | |||
! style="background:#{{platinum color}}" | {{color2|000|Pokémon Platinum Version|Platinum}} | |||
| [[File:Turnback Cave Entrance Pt.png|250px]] | |||
| [[File:Turnback Cave Giratina Pt.png|250px]] | |||
|- | |||
| colspan="4" style="background:#{{locationcolor/light|cave}}; {{roundybottom|5px}}" | | |||
|} | |||
===Random rooms=== | |||
{| class="roundy" style="margin:auto; background: #000; border: 3px solid #{{locationcolor/dark|cave}}" | |||
|- | |||
! style="background:#{{locationcolor/light|cave}}; {{roundytl|5px}}" | Version | |||
! style="background:#{{locationcolor/light|cave}}" | Between entrance and first pillar | |||
! style="background:#{{locationcolor/light|cave}}" | Between first and second pillars | |||
! style="background:#{{locationcolor/light|cave}}; {{roundytr|5px}}" | Between second and third pillars | |||
|- | |||
! style="background:#{{diamond color}}" | {{color2|000|Pokémon Diamond and Pearl Versions|Diamond}} | |||
| rowspan="3" | [[File:Turnback Cave No Pillar Random Rooms DPPt.png|250px]] | |||
| rowspan="3" | [[File:Turnback Cave One Pillar Random Rooms DPPt.png|250px]] | |||
| rowspan="3" | [[File:Turnback Cave Two Pillar Random Rooms DPPt.png|250px]] | |||
|- | |||
! style="background:#{{pearl color}}" | {{color2|000|Pokémon Diamond and Pearl Versions|Pearl}} | |||
|- | |||
! style="background:#{{platinum color}}" | {{color2|000|Pokémon Platinum Version|Platinum}} | |||
|- | |||
| colspan="4" style="background:#{{locationcolor/light|cave}}; {{roundybottom|5px}}" | | |||
|} | |||
==In the manga== | |||
[[File:Turnback Cave Adventures.png|thumb|130px|Turnback Cave in Pokémon Adventures]] | |||
[[File:Turnback Cave portal Adventures.png|thumb|left|200px|The Distortion World portal in Pokémon Adventures]] | |||
===In the Pokémon Adventures manga=== | |||
In the {{chap|Platinum}}, {{EF|Flint}} and [[Volkner]] entered the [[Distortion World]] through the cave. They were later followed by {{adv|Platinum}}, {{FB|Tower Tycoon|Palmer}}, [[Cheryl]], [[Riley]], [[Mira]], [[Marley]], and the [[Advanced level Grunt]]. After leading the group to the portal, the Grunt was about to head out, but he was stopped by Platinum, who voiced her distrust towards him. She, however, promised to protect him from [[Team Galactic]], to which the Grunt agreed and led them through the portal. | |||
{{-}} | |||
==Trivia== | ==Trivia== | ||
* In {{game|Diamond and Pearl|s}}, the item that can be obtained in the last room can be found right behind Giratina, hidden out of sight. Giratina does not have to be battled to obtain the item. | * In {{game|Diamond and Pearl|s}}, the item that can be obtained in the last room can be found right behind Giratina, hidden out of sight. Giratina does not have to be battled to obtain the item. | ||
* In {{game|Platinum}}, if {{p|Giratina}} is not caught in the [[Distortion World]] then it will appear here, in the final room | * In {{game|Platinum}}, if {{p|Giratina}} is not caught in the [[Distortion World]] then it will appear here, in the final room on top of the portal to the [[Distortion World]]. After it has been battled, the portal will be accessible. | ||
* Turnback Cave is similar to locations in [[Kanto]] and [[Hoenn]]. | * Turnback Cave is similar to locations in [[Kanto]] and [[Hoenn]]. | ||
** In Kanto, [[Cerulean Cave]] can only be visited after defeating the [[Elite Four]] (Generation I) or obtaining the National Pokédex (Generations III and IV), and is home to high-level [[wild Pokémon]] and a {{p|Mewtwo|level 70 legendary Pokémon}}. | ** In Kanto, [[Cerulean Cave]] can only be visited after defeating the [[Elite Four]] (Generation I) or obtaining the National Pokédex (Generations III and IV), and is home to high-level [[wild Pokémon]] and a {{p|Mewtwo|level 70 legendary Pokémon}}. | ||
| Line 219: | Line 244: | ||
==In other languages== | ==In other languages== | ||
{{langtable|color={{locationcolor/light| | {{langtable|color={{locationcolor/light|cave}}|bordercolor={{locationcolor/dark|cave}} | ||
|zh_cmn=歸途洞窟 ''{{tt|Guītú Dòngkū|Wayback Cave}}'' | |zh_cmn=歸途洞窟 ''{{tt|Guītú Dòngkū|Wayback Cave}}'' | ||
|fr_eu=Grotte Retour | |fr_eu=Grotte Retour | ||
|de=Höhle der Umkehr | |de=Höhle der Umkehr | ||
|it=Grotta Ritorno | |it=Grotta Ritorno | ||
| | |ko=귀혼동굴 ''Gwihon Donggul'' | ||
|es_eu=Cueva Retorno}} | |es_eu=Cueva Retorno}} | ||
| Line 234: | Line 258: | ||
{{Sinnoh}} | {{Sinnoh}} | ||
{{legendarylocations|sinnoh}}<br> | {{legendarylocations|sinnoh}}<br/> | ||
{{Project Locations notice}} | {{Project Locations notice}} | ||
[[Category:Sinnoh locations]] | [[Category:Sinnoh locations]] | ||
[[Category:Diamond and Pearl locations]] | [[Category:Diamond and Pearl locations]] | ||
[[Category:Platinum locations]] | [[Category:Platinum locations]] | ||
[[Category:Caves]] | [[Category:Caves]] | ||
[[de:Höhle der Umkehr]] | [[de:Höhle der Umkehr]] | ||
| Line 247: | Line 270: | ||
[[it:Grotta Ritorno]] | [[it:Grotta Ritorno]] | ||
[[ja:もどりのどうくつ]] | [[ja:もどりのどうくつ]] | ||
[[pt:Turnback Cave]] | |||
[[zh:归途洞窟]] | |||
Revision as of 08:02, 13 February 2015
| ||||
| ||||
| Location: | Sendoff Spring | |||
|---|---|---|---|---|
| Region: | Sinnoh | |||
| Generations: | IV | |||
 Location of Turnback Cave in Sinnoh. | ||||
| Pokémon world locations | ||||
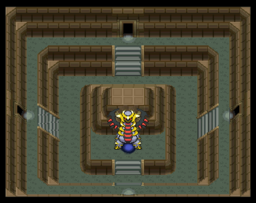
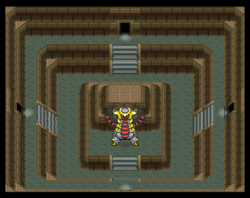
Turnback Cave (Japanese: もどりのどうくつ Returning Cave) is a maze-like cave filled with dense fog which is home to the legendary Pokémon, Giratina. Turnback Cave is located at the north-central region of Sendoff Spring, which itself may only be accessed through the Spring Path. In Diamond and Pearl, in the room Giratina resides in is an inscription that implies the cave is a location where the separation between the real world and the Distortion World is weaker. This is more or less confirmed in Platinum, where a portal to the Distortion World appears in front of the inscription. It reads:
- This is... That where life sparkles... That where life has faded... A place where two worlds overlap...
The only way to locate Giratina is to pass the three pillars before passing through thirty rooms as the inscription in the entrance says:
- ...Past three pillars...to the sleeping... ...before 30 is surpassed...
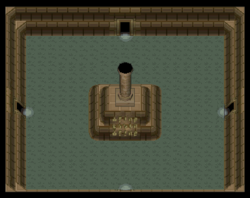
There is no way to consistently traverse the cave as rooms are always randomized upon entry, but the best hint to navigate the puzzle is to look at the pattern of rocks on the floor of each room, and enter the door out of the three which has the odd pattern. When the three pillars have been encountered the first time, Giratina will be in the next room. Escape Ropes and Dig cannot be used to escape, but if one turns back and leaves through the door from which they entered, it will warp them directly to the first room. When the player reaches a pillar and examines it two numbers will appear: the top number indicates which pillar the player is looking at, and the bottom indicates how many rooms have been passed through on the way to it.
After catching Giratina, one can return through the cave to obtain a rare item, depending on how many rooms it takes to reach Giratina's room again. In just 3 rooms, the item will be a Reaper Cloth; 4 to 15 will earn a Rare Bone; 16 to 30 will earn a Stardust. Over 30 rooms, of course, will return the player to the entrance. Riding the Bicycle seems to increase the chance of next entering a pillar room. Rare items regenerate by returning to the cave each time, and they can even be received with Giratina still in the room. In Pokémon Platinum, it will have an item and the portal to the Distortion World.
Geography
Rooms and pillars
There is much mystery shrouding Turnback Cave, in relation to getting consistently to Giratina's room. Rooms occur randomly when the player goes through an entrance. The only way to locate Giratina is to pass the three pillars before passing through thirty rooms. The best hint to navigate the puzzle is to look at the pattern of rocks on the floor of each room, and enter the door out of the three which has the odd pattern. Riding the Bicycle also seems to help. When the three pillars have been encountered the first time, Giratina will be in the next room. Each pillar has two numbers on it: the top number indicates which pillar the player is looking at, and the bottom indicates how many rooms have been passed through on the way to it.
Items
| Item | Location | Games | |
|---|---|---|---|
| Reaper Cloth | Giratina's room, if the player reached it by passing through only 3 rooms (reappears each time) | D P Pt | |
| Rare Bone | Giratina's room, if the player reached it by passing through 4-15 rooms (reappears each time) | D P Pt | |
| Stardust | Giratina's room, if the player reached it by passing through 16-30 rooms (reappears each time) | D P Pt | |
Pokémon
Before encountering a pillar
| Pokémon | Games | Location | Levels | Rate | |||||||||||
|---|---|---|---|---|---|---|---|---|---|---|---|---|---|---|---|
|
D | P | Pt |
|
45-46 | 30% | |||||||||
|
D | P | Pt |
|
17-18 | 25% | |||||||||
|
D | P | Pt |
|
15, 17 | 30% | |||||||||
|
D | P | Pt |
|
16 | 10% | 10% | 0% | |||||||
|
D | P | Pt |
|
44-46 | 30% | |||||||||
|
D | P | Pt |
|
18 | 5% | |||||||||
|
D | P | Pt |
|
16 | 0% | 0% | 10% | |||||||
|
D | P | Pt |
|
18 | 4% | |||||||||
|
D | P | Pt |
|
16, 18 | 10% | |||||||||
|
D | P | Pt |
|
44 | 5% | |||||||||
|
D | P | Pt |
|
15 | 20% | |||||||||
|
D | P | Pt |
|
45-46 | 35% | |||||||||
| Special Pokémon | |||||||||||||||
|
D | P | Pt |
|
44, 46 | 8% | |||||||||
|
D | P | Pt |
|
18 | 8% | |||||||||
|
D | P | Pt |
|
44, 46 | 8% | |||||||||
|
D | P | Pt |
|
18 | 8% | |||||||||
| A colored background means that the Pokémon can be found in this location in the specified game. A white background with a colored letter means that the Pokémon cannot be found here. | |||||||||||||||
First pillar room
| Pokémon | Games | Location | Levels | Rate | |||||||||||
|---|---|---|---|---|---|---|---|---|---|---|---|---|---|---|---|
|
D | P | Pt |
|
55-56 | 30% | |||||||||
|
D | P | Pt |
|
17-18 | 25% | |||||||||
|
D | P | Pt |
|
15, 17 | 30% | |||||||||
|
D | P | Pt |
|
16 | 10% | 10% | 0% | |||||||
|
D | P | Pt |
|
54-56 | 30% | |||||||||
|
D | P | Pt |
|
18 | 5% | |||||||||
|
D | P | Pt |
|
16 | 0% | 0% | 10% | |||||||
|
D | P | Pt |
|
18 | 4% | |||||||||
|
D | P | Pt |
|
16, 18 | 10% | |||||||||
|
D | P | Pt |
|
54 | 5% | |||||||||
|
D | P | Pt |
|
15 | 20% | |||||||||
|
D | P | Pt |
|
55-56 | 35% | |||||||||
| Special Pokémon | |||||||||||||||
|
D | P | Pt |
|
54, 56 | 8% | |||||||||
|
D | P | Pt |
|
18 | 8% | |||||||||
|
D | P | Pt |
|
54, 56 | 8% | |||||||||
|
D | P | Pt |
|
18 | 8% | |||||||||
| A colored background means that the Pokémon can be found in this location in the specified game. A white background with a colored letter means that the Pokémon cannot be found here. | |||||||||||||||
Between first and second pillars
| Pokémon | Games | Location | Levels | Rate | |||||||||||
|---|---|---|---|---|---|---|---|---|---|---|---|---|---|---|---|
|
D | P | Pt |
|
55-56 | 30% | |||||||||
|
D | P | Pt |
|
25, 27 | 25% | |||||||||
|
D | P | Pt |
|
54-56 | 30% | |||||||||
|
D | P | Pt |
|
25,27 | 30% | |||||||||
|
D | P | Pt |
|
26 | 10% | 10% | 0% | |||||||
|
D | P | Pt |
|
28 | 4% | |||||||||
|
D | P | Pt |
|
26 | 0% | 0% | 10% | |||||||
|
D | P | Pt |
|
28 | 5% | |||||||||
|
D | P | Pt |
|
26, 28 | 10% | |||||||||
|
D | P | Pt |
|
54 | 5% | |||||||||
|
D | P | Pt |
|
25 | 20% | |||||||||
|
D | P | Pt |
|
55-56 | 35% | |||||||||
| Special Pokémon | |||||||||||||||
|
D | P | Pt |
|
54, 56 | 8% | |||||||||
|
D | P | Pt |
|
28 | 8% | |||||||||
|
D | P | Pt |
|
54, 56 | 8% | |||||||||
|
D | P | Pt |
|
28 | 8% | |||||||||
| A colored background means that the Pokémon can be found in this location in the specified game. A white background with a colored letter means that the Pokémon cannot be found here. | |||||||||||||||
Second pillar room
| Pokémon | Games | Location | Levels | Rate | |||||||||||
|---|---|---|---|---|---|---|---|---|---|---|---|---|---|---|---|
|
D | P | Pt |
|
55-56 | 30% | |||||||||
|
D | P | Pt |
|
37-38 | 25% | |||||||||
|
D | P | Pt |
|
54-56 | 30% | |||||||||
|
D | P | Pt |
|
35, 37 | 30% | |||||||||
|
D | P | Pt |
|
36 | 10% | 10% | 0% | |||||||
|
D | P | Pt |
|
28 | 4% | |||||||||
|
D | P | Pt |
|
36 | 0% | 0% | 10% | |||||||
|
D | P | Pt |
|
38 | 5% | |||||||||
|
D | P | Pt |
|
36, 38 | 10% | |||||||||
|
D | P | Pt |
|
54 | 5% | |||||||||
|
D | P | Pt |
|
55-56 | 35% | |||||||||
|
D | P | Pt |
|
35 | 20% | |||||||||
| Special Pokémon | |||||||||||||||
|
D | P | Pt |
|
54, 56 | 8% | |||||||||
|
D | P | Pt |
|
38 | 8% | |||||||||
|
D | P | Pt |
|
54, 56 | 8% | |||||||||
|
D | P | Pt |
|
38 | 8% | |||||||||
| A colored background means that the Pokémon can be found in this location in the specified game. A white background with a colored letter means that the Pokémon cannot be found here. | |||||||||||||||
Between second and third pillars
| Pokémon | Games | Location | Levels | Rate | |||||||||||
|---|---|---|---|---|---|---|---|---|---|---|---|---|---|---|---|
|
D | P | Pt |
|
65-66 | 30% | |||||||||
|
D | P | Pt |
|
37-38 | 25% | |||||||||
|
D | P | Pt |
|
64-66 | 30% | |||||||||
|
D | P | Pt |
|
35, 37 | 30% | |||||||||
|
D | P | Pt |
|
36 | 10% | 10% | 0% | |||||||
|
D | P | Pt |
|
28 | 4% | |||||||||
|
D | P | Pt |
|
36 | 0% | 0% | 10% | |||||||
|
D | P | Pt |
|
38 | 5% | |||||||||
|
D | P | Pt |
|
36,38 | 10% | |||||||||
|
D | P | Pt |
|
64 | 5% | |||||||||
|
D | P | Pt |
|
65-66 | 35% | |||||||||
|
D | P | Pt |
|
35 | 20% | |||||||||
| Special Pokémon | |||||||||||||||
|
D | P | Pt |
|
64, 66 | 8% | |||||||||
|
D | P | Pt |
|
38 | 8% | |||||||||
|
D | P | Pt |
|
64, 66 | 8% | |||||||||
|
D | P | Pt |
|
38 | 8% | |||||||||
| A colored background means that the Pokémon can be found in this location in the specified game. A white background with a colored letter means that the Pokémon cannot be found here. | |||||||||||||||
Third pillar room
| Pokémon | Games | Location | Levels | Rate | |||||||||||
|---|---|---|---|---|---|---|---|---|---|---|---|---|---|---|---|
|
D | P | Pt |
|
55-56 | 30% | |||||||||
|
D | P | Pt |
|
37-38 | 25% | |||||||||
|
D | P | Pt |
|
54-56 | 30% | |||||||||
|
D | P | Pt |
|
35, 37 | 30% | |||||||||
|
D | P | Pt |
|
36 | 10% | 10% | 0% | |||||||
|
D | P | Pt |
|
28 | 4% | |||||||||
|
D | P | Pt |
|
36 | 0% | 0% | 10% | |||||||
|
D | P | Pt |
|
37 | 5% | |||||||||
|
D | P | Pt |
|
36-37 | 10% | |||||||||
|
D | P | Pt |
|
54 | 5% | |||||||||
|
D | P | Pt |
|
55-56 | 35% | |||||||||
|
D | P | Pt |
|
35 | 20% | |||||||||
| Special Pokémon | |||||||||||||||
|
D | P | Pt |
|
54, 56 | 8% | |||||||||
|
D | P | Pt |
|
37 | 8% | |||||||||
|
D | P | Pt |
|
54, 56 | 8% | |||||||||
|
D | P | Pt |
|
37 | 8% | |||||||||
| A colored background means that the Pokémon can be found in this location in the specified game. A white background with a colored letter means that the Pokémon cannot be found here. | |||||||||||||||
After the third pillar
| Pokémon | Games | Location | Levels | Rate | |||||||||||
|---|---|---|---|---|---|---|---|---|---|---|---|---|---|---|---|
|
D | P | Pt |
|
55-56 | 30% | |||||||||
|
D | P | Pt |
|
45-47 | 25% | |||||||||
|
D | P | Pt |
|
54-56 | 30% | |||||||||
|
D | P | Pt |
|
45, 47 | 30% | |||||||||
|
D | P | Pt |
|
46 | 10% | 10% | 0% | |||||||
|
D | P | Pt |
|
28 | 4% | |||||||||
|
D | P | Pt |
|
46 | 0% | 0% | 10% | |||||||
|
D | P | Pt |
|
47-48 | 5% | |||||||||
|
D | P | Pt |
|
45-47 | 10% | |||||||||
|
D | P | Pt |
|
54 | 5% | |||||||||
|
D | P | Pt |
|
55-56 | 35% | |||||||||
|
D | P | Pt |
|
45 | 20% | |||||||||
| Special Pokémon | |||||||||||||||
|
D | P | Pt |
|
54, 56 | 8% | |||||||||
|
D | P | Pt |
|
45, 47 | 8% | |||||||||
|
D | P | Pt |
|
54, 56 | 8% | |||||||||
|
D | P | Pt |
|
45, 47 | 8% | |||||||||
|
D | P | Pt |
|
70 | One | |||||||||
|
D | P | Pt |
|
47 | One | |||||||||
| A colored background means that the Pokémon can be found in this location in the specified game. A white background with a colored letter means that the Pokémon cannot be found here. | |||||||||||||||
Layout
Entrance, pillar room, and Giratina's room
| Version | Entrance | Pillar room | Giratina's room |
|---|---|---|---|
| Diamond | 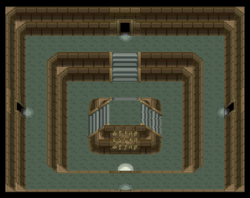
|
|
|
| Pearl | |||
| Platinum | 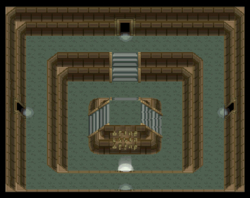
|
| |
Random rooms
| Version | Between entrance and first pillar | Between first and second pillars | Between second and third pillars |
|---|---|---|---|
| Diamond | 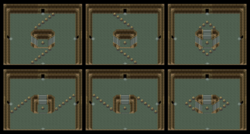
|
|
|
| Pearl | |||
| Platinum | |||
In the manga
In the Pokémon Adventures manga
In the Platinum arc, Flint and Volkner entered the Distortion World through the cave. They were later followed by Platinum, Palmer, Cheryl, Riley, Mira, Marley, and the Advanced level Grunt. After leading the group to the portal, the Grunt was about to head out, but he was stopped by Platinum, who voiced her distrust towards him. She, however, promised to protect him from Team Galactic, to which the Grunt agreed and led them through the portal.
Trivia
- In Pokémon Diamond and Pearl, the item that can be obtained in the last room can be found right behind Giratina, hidden out of sight. Giratina does not have to be battled to obtain the item.
- In Pokémon Platinum, if Giratina is not caught in the Distortion World then it will appear here, in the final room on top of the portal to the Distortion World. After it has been battled, the portal will be accessible.
- Turnback Cave is similar to locations in Kanto and Hoenn.
- In Kanto, Cerulean Cave can only be visited after defeating the Elite Four (Generation I) or obtaining the National Pokédex (Generations III and IV), and is home to high-level wild Pokémon and a level 70 legendary Pokémon.
- In Hoenn, the Sky Pillar is home to high level Pokémon and a level 70 legendary Pokémon, and in the third version it can be visited before the Elite Four.
- Turnback Cave's system of seemingly random room layout may be an advanced version of the system used in Lost Cave in the Sevii Islands in Pokémon FireRed and LeafGreen.
- Turnback Cave and the Distortion World may draw some inspiration from the Japanese underworld, Yomi. Giratina itself can be seen as a parallel to the kami Izanami.
In other languages
| ||||||||||||||||||||||||
See also
| Game locations of Legendary and Mythical Pokémon | ||||||||||||||||||||||||||
|---|---|---|---|---|---|---|---|---|---|---|---|---|---|---|---|---|---|---|---|---|---|---|---|---|---|---|
| ||||||||||||||||||||||||||

|
This article is part of Project Locations, a Bulbapedia project that aims to write comprehensive articles on every location in the Pokémon world. |
