Trick House: Difference between revisions
Mijzelffan (talk | contribs) |
No edit summary |
||
| (188 intermediate revisions by 69 users not shown) | |||
| Line 1: | Line 1: | ||
{{Infobox location | {{Infobox location | ||
|japanese_name= | |japanese_name=カラクリ{{tt|屋敷|やしき}} | ||
|translated_name=Trick House | |translated_name=Trick House | ||
|image=Trick | |image=Trick House ORAS.png | ||
|type= | |type=building | ||
|location_name=Trick House | |location_name=Trick House | ||
|location= | |location={{rt|110|Hoenn}} | ||
|region=Hoenn | |region=Hoenn | ||
|generation={{gen|III}} | |generation={{gen|III}}, {{gen|VI}} | ||
| | |||
}} | }} | ||
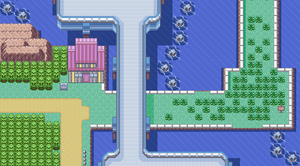
The '''Trick House''' is located on {{rt|110|Hoenn}} in [[Hoenn]]. It is owned by the [[Trick Master]], who poses puzzling challenges to travelers. Those who wish to play his game must find their way through a | [[File:Trick House RSE.png|thumb|The Trick House in Generation III.]] | ||
The '''Trick House''' (Japanese: '''カラクリ{{tt|屋敷|やしき}}''' ''Trick House'') is located on {{rt|110|Hoenn}} in [[Hoenn]]. It is owned by the [[Trick Master]], who poses puzzling challenges to travelers. Those who wish to play his game must find their way through a maze-like puzzle at the back of his house. If successful, they will be rewarded. | |||
==Description== | ==Description== | ||
The puzzles for Trick House are divided into three parts. First, the Trick Master is hiding somewhere in the first room of the house. | The puzzles for Trick House are divided into three parts. First, the Trick Master is hiding somewhere in the first room of the house. In the Generation III games, the first three times the {{player}} enters the house, a small twinkle indicates the Trick Master's hiding place right away, but in later challenges and the Generation VI games the player must find him without any help. | ||
Once the Trick Master is found, the player may enter the larger rear room through a passageway hidden behind the scroll on the wall. The rooms consist of some sort of maze with a gimmick to each of them, and each room also has items | Once the Trick Master is found, the player may enter the larger rear room through a passageway hidden behind the scroll on the wall. The rooms consist of some sort of maze with a gimmick to each of them, and each room also has Trainers and items ([[Mail]] in Generation III, locational specialties in Generation VI). The player must navigate through the maze to a second scroll, where they will obtain a secret code. Finally, the player must find the door to the Trick Master's room and write the code on it to gain access. Upon being found, the Trick Master will reward the player, and the player may take a shortcut passage out of the Trick House. | ||
In Emerald, while the rooms in Trick House use mostly the same gimmicks in as in Ruby and Sapphire, the layouts of the rooms are each changed slightly. Trainers, items and the password scrolls are in different locations, and the maze's course changes as well. However, it is only their locations that differ; the items and Trainers in each room are the same in all versions except for the seventh puzzle (although the English name of one of the Trainers does differ in the fourth and eighth rooms). | |||
In Ruby, Sapphire, and Emerald, players can take the challenges as they earn new [[Gym]] [[Badge]]s, but the final challenge cannot be taken until they defeat the {{pkmn|Champion}}. In {{g|Omega Ruby and Alpha Sapphire}}, there are only six puzzles; Badges are no longer required to start each puzzle, but some puzzles require specific [[HM]] moves to be used, which require specific Badges to use. | |||
{| {| | Each puzzle is only available once, and the puzzles must be completed in order. After all challenges are completed, the Trick Master disappears, leaving behind only a note saying he has gone on a journey to search for new tricks. In Omega Ruby and Alpha Sapphire, Mechadoll 5 also remains, taking off after the player interacts with it. | ||
| | |||
| | ==Items== | ||
{| | ===Entrance=== | ||
{{Itlisth|building}} | |||
! | {{itemlist|Escape Rope|From the [[Trick Master]] upon finding him for the first time|OR=yes|AS=yes}} | ||
! | {{Itlistfoot|building}} | ||
! | |||
! | ===Prize room=== | ||
|- style="background: # | All of these items (excluding the prizes) are [[permanently missable items|permanently missable]]. | ||
{{Itlisth|building}} | |||
{{itemlist|Expert Belt|At the back of the prize room after completing Puzzle 1<!--Remains there if not picked up?-->|OR=yes|AS=yes}} | |||
{{itemlist|Nugget|Under the [[Trick Master]]'s cushion after completing Puzzle 8 ''(hidden)''|Ru=yes|Sa=yes|E=yes}} | |||
{{itemlist|Big Nugget|Under the [[Trick Master]]'s cushion after completing Puzzle 6 ''(hidden)''|OR=yes|AS=yes}} | |||
{{Itlistfoot|building}} | |||
====Trick Master's prizes==== | |||
:''[[#Puzzle overview|→Puzzle overview]]'' | |||
===Puzzle rooms=== | |||
:''[[#Puzzle 1|→Puzzle 1]]'' | |||
:''[[#Puzzle 2|→Puzzle 2]]'' | |||
:''[[#Puzzle 3|→Puzzle 3]]'' | |||
:''[[#Puzzle 4|→Puzzle 4]]'' | |||
:''[[#Puzzle 5|→Puzzle 5]]'' | |||
:''[[#Puzzle 6|→Puzzle 6]]'' | |||
:''[[#Puzzle 7|→Puzzle 7]]'' | |||
:''[[#Puzzle 8|→Puzzle 8]]'' | |||
====Mechadolls==== | |||
In {{pkmn|Omega Ruby and Alpha Sapphire}}, the Trick Master's Mechadoll 3 appears at the start of some puzzle rooms. Mechadoll 3 sells [[Escape Rope]]s to the player at regular price. Escape Ropes can be used to exit the Trick House. | |||
Mechadoll 3 only sells the player Escape Ropes in puzzle rooms 2, 3, 4, and 6. Once the player completes the sixth and last puzzle, they will no longer be able to purchase Escape Ropes from Mechadoll 3. | |||
{{shop|Mechadoll 3}} | |||
{{shoprow|{{shopitem|Escape Rope|550|PD}}}} | |||
{{shopfooter}} | |||
In [[Generation III]], if the player is unable to accept the [[Red Tent]] or [[Blue Tent]] due to lack of space to store [[decorations]] in the PC, Mechadoll 5 will wait in the front room to hand over the reward on the player's subsequent visit, as the Trick Master himself has gone on a journey. | |||
==Puzzle overview== | |||
==={{game2|Ruby|Sapphire|Emerald}}=== | |||
{| class="roundy" style="margin:auto; background:#{{Locationcolor/med|building}}; border: 3px solid #{{Locationcolor/dark|building}}" | |||
! style="background:#{{Locationcolor/light|building}}; {{roundytl|5px}}" | Puzzle | |||
! style="background:#{{Locationcolor/light|building}}" | Required accomplishment | |||
! style="background:#{{Locationcolor/light|building}}" | Hiding spot | |||
! style="background:#{{Locationcolor/light|building}}" | Prize | |||
! style="background:#{{Locationcolor/light|building}}" | Password | |||
! style="background:#{{Locationcolor/light|building}}" | Field move required | |||
|- style="background: #fff" | |||
| Puzzle 1 | | Puzzle 1 | ||
| | | None | ||
| Under the desk | |||
| {{ | | {{Bag|Rare Candy}} [[Rare Candy]] | ||
|- style="background: # | | "<sc>Trick Master</sc> is fabulous." | ||
| {{m|Cut}} | |||
|- style="background: #fff" | |||
| Puzzle 2 | | Puzzle 2 | ||
| [[File: | | [[File:Dynamo Badge.png|40px]]{{Badge|Dynamo}} | ||
| [[ | | Behind the right tree | ||
| {{Bag|Timer Ball}} [[Timer Ball]] | |||
| "<sc>Trick Master</sc> is smart." | |||
| None | | None | ||
|- style="background: # | |- style="background: #fff" | ||
| Puzzle 3 | | Puzzle 3 | ||
| [[File: | | [[File:Heat Badge.png|40px]]{{badge|Heat}} | ||
| [[ | | In the right dresser | ||
| {{ | | {{Bag|Hard Stone}} [[Hard Stone]] | ||
|- style="background: # | | "<sc>Trick Master</sc> is coveted." | ||
| {{m|Rock Smash}} | |||
|- style="background: #fff" | |||
| Puzzle 4 | | Puzzle 4 | ||
| [[File: | | [[File:Balance Badge.png|40px]]{{badge|Balance}} | ||
| [[ | | Behind the left window | ||
| {{ | | {{Bag|Smoke Ball}} [[Smoke Ball]] | ||
|- style="background: # | | "<sc>Trick Master</sc> is cool." | ||
| {{m|Strength}} | |||
|- style="background: #fff" | |||
| Puzzle 5 | | Puzzle 5 | ||
| [[File: | | [[File:Feather Badge.png|40px]]{{badge|Feather}} | ||
| In the left planter | |||
| {{TMic|Dark|12|Taunt}} {{tm|12|Taunt}} | | {{TMic|Dark|12|Taunt}} {{tm|12|Taunt}} | ||
| "<sc>Trick Master</sc> is a genius." | |||
| None | | None | ||
|- style="background: # | |- style="background: #fff" | ||
| Puzzle 6 | | Puzzle 6 | ||
| [[File: | | [[File:Mind Badge.png|40px]]{{badge|Mind}} | ||
| [[ | | Inside the right cupboard | ||
| {{Bag|Magnet}} [[Magnet]] | |||
| "<sc>Trick Master</sc> is my life." | |||
| None | | None | ||
|- style="background: # | |- style="background: #fff" | ||
| Puzzle 7 | | Puzzle 7 | ||
| [[File: | | [[File:Rain Badge.png|40px]] {{badge|Rain}} | ||
| [[ | | Behind the right window | ||
| {{Bag|PP Max}} [[PP Max]] | |||
| "<sc>Trick Master</sc> is huggable." | |||
| None | | None | ||
|- style="background: #{{ | |- | ||
| rowspan="2" | | | rowspan="2" style="background: #fff; {{roundybl|5px}}" | Puzzle 8 | ||
| rowspan="2" | | | rowspan="2" style="background: #fff" | Defeat {{pkmn|Champion}} | ||
| [[File: | | rowspan="2" style="background: #fff" | Under first left cushion | ||
| rowspan="2" | | | style="background: #fff" | [[File:RedTentSprite.png|24px]] {{DL|Ornament|Tents|Red Tent}}{{sup/3|Ru}}{{sup/3|E}} | ||
| | | rowspan="2" style="background: #fff" | "<sc>Trick Master</sc> I love." | ||
| [[File: | | rowspan="2" style="background: #fff; {{roundybr|5px}}" | None | ||
|- style="background: #fff" | |||
| [[File:BlueTentSprite.png|24px]] {{DL|Ornament|Tents|Blue Tent}}{{sup/3|Sa}}{{sup/3|E}} | |||
|} | |} | ||
After completing the final puzzle in {{game|Emerald}}, players may choose between either tent, but may only take one. | After completing the final puzzle in {{game|Emerald}}, players may choose between either tent, but may only take one. | ||
==={{g|Omega Ruby and Alpha Sapphire}}=== | |||
{| class="roundy" style="margin:auto; background:#{{Locationcolor/med|building}}; border: 3px solid #{{Locationcolor/dark|building}}" | |||
! style="background:#{{Locationcolor/light|building}}; {{roundytl|5px}}" | Puzzle | |||
! style="background:#{{Locationcolor/light|building}}" | Hiding spot | |||
! style="background:#{{Locationcolor/light|building}}" | Prize | |||
! style="background:#{{Locationcolor/light|building}}" | Password | |||
! style="background:#{{Locationcolor/light|building}}; {{roundytr|5px}}" | Field move used | |||
|- style="background: #fff" | |||
| Puzzle 1 | |||
| Under the desk | |||
| {{Bag|TM Dark VI}} {{TM|12|Taunt}} | |||
| "Trick Master is wonderful." | |||
| {{m|Cut}} | |||
|- style="background: #fff" | |||
| Puzzle 2 | |||
| Inside the right tree pot | |||
| {{Bag|Hard Stone}} [[Hard Stone]] | |||
| "I adore Trick Master." | |||
| {{m|Rock Smash}} | |||
|- style="background: #fff" | |||
| Puzzle 3 | |||
| Inside the left dresser | |||
| {{Bag|TM Psychic VI}} {{TM|92|Trick Room}} | |||
| "Trick Master is cool." | |||
| {{m|Flash}}{{tt|*|Not required, but makes puzzle easier}} | |||
|- style="background: #fff" | |||
| Puzzle 4 | |||
| Behind the left window | |||
| {{Bag|Smoke Ball}} [[Smoke Ball]] | |||
| "Trick Master is a genius." | |||
| {{m|Strength}} | |||
|- style="background: #fff" | |||
| Puzzle 5 | |||
| Inside the right cupboard | |||
| {{Bag|Magnet}} [[Magnet]] | |||
| "I want to hug Trick Master." | |||
| None | |||
|- | |||
| style="background: #fff; {{roundybl|5px}}" | Puzzle 6 | |||
| style="background: #fff" | Under the first right cushion | |||
| style="background: #fff" | [[File:Red Tent VI.png|24px]] {{DL|Ornament|Tents|Red Tent}}{{sup/6|OR}}<br>[[File:Blue Tent VI.png|24px]] {{DL|Ornament|Tents|Blue Tent}}{{sup/6|AS}} | |||
| style="background: #fff" | "I love Trick Master." | |||
| style="background: #fff; {{roundybr|5px}}" | None | |||
|} | |||
==Puzzles== | ==Puzzles== | ||
===Puzzle 1=== | ===Puzzle 1=== | ||
{| | {| class="roundy" style="float:right; background: #000; border: 3px solid #{{fighting color dark}}" | ||
|- | |- | ||
! style="background:#{{fighting color light}}; | ! style="background:#{{fighting color light}}; {{roundytl|5px}}" | Version | ||
! style="background:#{{fighting color light}} | ! style="background:#{{fighting color light}}; {{roundytr|5px}}" | 1F | ||
|- | |- | ||
! | ! style="background:#{{ruby color}}" | {{color2|fff|Pokémon Ruby and Sapphire Versions|Ruby}} | ||
| rowspan="2" | [[File:Trick House puzzle room 1 RS.png|180px]] | |||
|- | |- | ||
! | ! style="background:#{{sapphire color}}" | {{color2|fff|Pokémon Ruby and Sapphire Versions|Sapphire}} | ||
|- | |- | ||
| colspan=" | ! style="background:#{{emerald color}}" | {{color2|fff|Pokémon Emerald Version|Emerald}} | ||
|[[File:Trick House puzzle room 1 E.png|180px]] | |||
|- | |||
! style="background:#{{omega ruby color}}" | {{color2|fff|Pokémon Omega Ruby and Alpha Sapphire|Omega Ruby}} | |||
| rowspan="2" | [[File:Trick House puzzle room 1 ORAS.png|180px]] | |||
|- | |||
! style="background:#{{alpha sapphire color}}" | {{color2|fff|Pokémon Omega Ruby and Alpha Sapphire|Alpha Sapphire}} | |||
|- | |||
| colspan="2" style="background:#{{fighting color light}}; {{roundybottom|5px}}" | | |||
|} | |} | ||
The first puzzle is a straightforward maze. The rooms | The first puzzle is a straightforward maze. The rooms are separated by [[Cuttable plant|trees]] that must be {{m|cut}} down to proceed. | ||
====Items==== | ====Items==== | ||
{{Itlisth|fighting}} | {{Itlisth|fighting}} | ||
{{ | {{itemlist|Orange Mail|In middle area of the maze (requires {{m|Cut}})|Ru=yes|Sa=yes}} | ||
{{itemlist|Orange Mail|In the north part of the maze, west of the exit (requires {{m|Cut}})|E=yes}} | |||
{{itemlist|Lava Cookie| | |||
* In middle-left area of the maze (requires {{m|Cut}}) | |||
* In top-left part of the maze (requires {{m|Cut}})|OR=yes|AS=yes|display=[[Lava Cookie]] ×2}} | |||
{{Itlistfoot|fighting}} | {{Itlistfoot|fighting}} | ||
====Trainers==== | ====Trainers==== | ||
=====Pokémon Ruby, Sapphire, and Emerald===== | |||
{{trainerheader|fighting}} | {{trainerheader|fighting}} | ||
{{Trainerentry| | {{Trainerentry|Spr RS Lass.png|Lass|Sally|256<br><small>Requires {{m|Cut}}{{sup/3|RS}}</small>|1|043|Oddish|♀|16|36=ミナ|37=Mina}} | ||
{{Trainerdiv|fighting|Requires Cut}} | |||
{{Trainerentry|Spr RS Lass.png|Lass|Robin|224|3|300|Skitty|♀|14||285|Shroomish|♀|14||183|Marill|♀|14||36=シホ|37=Shiho}} | |||
{{Trainerdiv|fighting}} | {{Trainerdiv|fighting}} | ||
{{Trainerentry| | {{Trainerentry|Spr RS Youngster.png|Youngster|Eddie|256|2|263|Zigzagoon|♂|14||263|Zigzagoon|♂|16|36=ヤスユキ|37=Yasuyuki}} | ||
{{Trainerfooter|fighting|3}} | |||
=====Pokémon Omega Ruby and Alpha Sapphire===== | |||
{{trainerheader|fighting}} | |||
{{Trainerdiv|fighting|Requires Cut}} | |||
{{Trainerentry|VSLass ORAS.png{{!}}150px|game=6|Lass|Sally|256|1|316|Gulpin|♀|16|36=ミナ|37=Mina}} | |||
{{Trainerdiv|fighting}} | {{Trainerdiv|fighting}} | ||
{{Trainerentry| | {{Trainerentry|VSBattle Girl ORAS.png{{!}}150px|game=6|Battle Girl|Cora|544|1|307|Meditite|♀|17|36=フウカ|37=Fūka}} | ||
{{Trainerdiv|fighting}} | {{Trainerdiv|fighting}} | ||
{{Trainerfooter|fighting| | {{Trainerentry|VSYoungster ORAS.png{{!}}150px|game=6|Youngster|Eddie|224|2|290|Nincada|♂|14||074|Geodude|♂|14|36=ヤスユキ|37=Yasuyuki}} | ||
{{Trainerfooter|fighting|3}} | |||
===Puzzle 2=== | ===Puzzle 2=== | ||
{| | {| class="roundy" style="float:right; background: #000; border: 3px solid #{{electric color dark}}" | ||
|- | |||
! style="background:#{{electric color light}}; {{roundytl|5px}}" | Version | |||
! style="background:#{{electric color light}}; {{roundytr|5px}}" | 1F | |||
|- | |||
! style="background:#{{ruby color}}" | {{color2|fff|Pokémon Ruby and Sapphire Versions|Ruby}} | |||
| rowspan="2" | [[File:Trick House puzzle room 2 RS.png|180px]] | |||
|- | |||
! style="background:#{{sapphire color}}" | {{color2|fff|Pokémon Ruby and Sapphire Versions|Sapphire}} | |||
|- | |- | ||
! style="background:#{{ | ! style="background:#{{emerald color}}" | {{color2|fff|Pokémon Emerald Version|Emerald}} | ||
|[[File:Trick House puzzle room 2 E.png|180px]] | |||
|- | |- | ||
! | ! style="background:#{{omega ruby color}}" | {{color2|fff|Pokémon Omega Ruby and Alpha Sapphire|Omega Ruby}} | ||
| rowspan="2" | [[File:Trick House puzzle room 2 ORAS.png|180px]] | |||
|- | |- | ||
! | ! style="background:#{{alpha sapphire color}}" | {{color2|fff|Pokémon Omega Ruby and Alpha Sapphire|Alpha Sapphire}} | ||
|- | |- | ||
| colspan=" | | colspan="2" style="background:#{{electric color light}}; {{roundybottom|5px}}" | | ||
|} | |} | ||
The second puzzle is | |||
The second puzzle is a maze, but with a more confusing layout. | |||
In Ruby, Sapphire, and Emerald, there are holes in the ground cannot be passed until the player hits a switch to extend a platform over them. However, the player cannot tell which switches cover which holes. | |||
In Omega Ruby and Alpha Sapphire, the maze contains a large number of [[breakable rock]]s. No [[wild Pokémon]] or [[item]]s will appear when smashing these rocks. | |||
====Items==== | ====Items==== | ||
{{Itlisth|electric}} | {{Itlisth|electric}} | ||
{{ | {{itemlist|Wave Mail|Near entrance|Ru=yes|Sa=yes|E=yes}} | ||
{{ | {{itemlist|Harbor Mail|Far northwest corner of room|Ru=yes|Sa=yes}} | ||
{{itemlist|Harbor Mail|Middle area of room, past the second hole|E=yes}} | |||
{{itemlist|Rage Candy Bar| | |||
* Far southeast corner of the room, past {{tc|School Kid|Schoolkid}} Georgie (requires {{m|Rock Smash}}) | |||
* Near {{tc|Black Belt}} Yuji after defeating him in battle|OR=yes|AS=yes|display=[[Rage Candy Bar]] ×2}} | |||
{{Itlistfoot|electric}} | {{Itlistfoot|electric}} | ||
====Trainers==== | ====Trainers==== | ||
=====Pokémon Ruby, Sapphire, and Emerald===== | |||
{{trainerheader|electric}} | {{trainerheader|electric}} | ||
{{Trainerentry| | {{Trainerentry|Spr RS School Kid M.png|School Kid|Ted|340|1|280|Ralts|♂|17|36=ノブヒサ|37=Nobuhisa}} | ||
{{Trainerdiv|electric}} | {{Trainerdiv|electric}} | ||
{{Trainerentry| | {{Trainerentry|Spr RS School Kid M.png|School Kid|Paul|300|3|322|Numel|♂|15||043|Oddish|♂|15||278|Wingull|♂|15|36=カツトシ|37=Katsutoshi}} | ||
{{Trainerdiv|electric}} | {{Trainerdiv|electric}} | ||
{{Trainerentry| | {{Trainerentry|Spr RS School Kid F.png|School Kid|Georgia|320|2|285|Shroomish|♀|16||267|Beautifly|♀|16|36=ミキエ|37=Mikie}} | ||
{{Trainerfooter|electric|3}} | |||
=====Pokémon Omega Ruby and Alpha Sapphire===== | |||
{{trainerheader|electric}} | |||
{{Trainerentry|VSBlack Belt.png{{!}}150px|game=6|Black Belt|Yuji|576|2|296|Makuhita|♂|16||066|Machop|♂|18|36=カズシ|37=Kazushi}} | |||
{{Trainerdiv|electric|Requires Rock Smash}} | |||
{{Trainerentry|VSSchoolkid F.png{{!}}150px|game=6|Schoolkid|Georgie<!--Yes, Georgie. Her name is changed.-->|320|2|285|Shroomish|♀|16||267|Beautifly|♀|16|36=ミエコ|37=Mieko}} | |||
{{Trainerdiv|electric}} | {{Trainerdiv|electric}} | ||
{{Trainerfooter|electric| | {{Trainerentry|VSPokémon Ranger M ORAS.png{{!}}150px|game=6|Pokémon Ranger|Sebastian|1080|2|331|Cacnea|♂|16||304|Aron|♂|18|36=ケイスケ|37=Keisuke}} | ||
{{trainerdiv|electric}} | |||
{{Trainerentry|VSPokémon Ranger F ORAS.png{{!}}150px|game=6|Pokémon Ranger|Sophia|1020|2|333|Swablu|♀|17||315|Roselia|♀|17|36=チアキ|37=Chiaki}} | |||
{{Trainerfooter|electric|3}} | |||
===Puzzle 3=== | ===Puzzle 3=== | ||
{| | {| class="roundy" style="float:right; background: #000; border: 3px solid #{{fire color dark}}" | ||
|- | |||
! style="background:#{{fire color light}}; {{roundytl|5px}}" | Version | |||
! style="background:#{{fire color light}}; {{roundytr|5px}}" | 1F | |||
|- | |||
! style="background:#{{ruby color}}" | {{color2|fff|Pokémon Ruby and Sapphire Versions|Ruby}} | |||
| rowspan="2" | [[File:Trick House puzzle room 3 RS.png|180px]] | |||
|- | |||
! style="background:#{{sapphire color}}" | {{color2|fff|Pokémon Ruby and Sapphire Versions|Sapphire}} | |||
|- | |- | ||
! style="background:#{{ | ! style="background:#{{emerald color}}" | {{color2|fff|Pokémon Emerald Version|Emerald}} | ||
|[[File:Trick House puzzle room 3 E.png|180px]] | |||
|- | |- | ||
! | ! style="background:#{{omega ruby color}}" | {{color2|fff|Pokémon Omega Ruby and Alpha Sapphire|Omega Ruby}} | ||
| rowspan="2" | [[File:Trick House puzzle room 3 ORAS.png|180px]] | |||
|- | |- | ||
! | ! style="background:#{{alpha sapphire color}}" | {{color2|fff|Pokémon Omega Ruby and Alpha Sapphire|Alpha Sapphire}} | ||
|- | |- | ||
| colspan=" | | colspan="2" style="background:#{{fire color light}}; {{roundybottom|5px}}" | | ||
|} | |} | ||
In Ruby, Sapphire, and Emerald, the third puzzle is a room full of alternating red and blue doors. Stepping on a switch opens all red doors and closes all blue doors, and stepping on a switch again will open all blue doors and close all red doors. The entrance to the room, and some switches, are covered by [[Breakable rock|rocks]] that can be shattered with {{m|Rock Smash}}. No [[wild Pokémon]] can appear from these rocks. | |||
In Omega Ruby and Alpha Sapphire, the room is [[Darkness|dark]] maze that can be illuminated using {{m|Flash}}, but it isn't necessary to use the move to proceed. At the tail end of the maze is a stairway hidden by the maze walls. Using the stairway will allow the player to move south underneath the maze to a small area where the password scroll is hidden. | |||
====Items==== | ====Items==== | ||
{{Itlisth|fire}} | {{Itlisth|fire}} | ||
{{ | {{itemlist|Wood Mail|Near {{tc|Picnicker}} Martha (requires {{m|Rock Smash}})|Ru=yes|Sa=yes}} | ||
{{ | {{itemlist|Wood Mail|Far northwest corner, past sliding door (requires {{m|Rock Smash}})|E=yes}} | ||
{{itemlist|Shadow Mail|Near {{tc|Hiker}} Alan (requires {{m|Rock Smash}})|Ru=yes|Sa=yes}} | |||
{{itemlist|Shadow Mail|Behind {{tc|Picnicker}} Martha (requires {{m|Rock Smash}})|E=yes}} | |||
{{itemlist|Lumiose Galette| | |||
* Behind the wall beyond {{tc|Ace Duo}} Pike & Shiel | |||
* North of the password scroll|OR=yes|AS=yes|display=[[Lumiose Galette]] ×2}} | |||
{{Itlistfoot|fire}} | {{Itlistfoot|fire}} | ||
====Trainers==== | ====Trainers==== | ||
=====Pokémon Ruby, Sapphire, and Emerald===== | |||
{{trainerheader|fire}} | {{trainerheader|fire}} | ||
{{Trainerentry| | {{Trainerdiv|fire|Requires Rock Smash}} | ||
{{Trainerentry|Spr RS Camper.png|Camper|Justin|384|1|352|Kecleon|♂|24|36=マサミチ|37=Masamichi}} | |||
{{Trainerdiv|fire}} | {{Trainerdiv|fire}} | ||
{{Trainerentry| | {{Trainerentry|Spr RS Picnicker.png|Picnicker|Martha|368|2|300|Skitty|♀|23||333|Swablu|♀|23|36=トモコ|37=Tomoko}} | ||
{{Trainerdiv|fire}} | {{Trainerdiv|fire}} | ||
{{Trainerentry| | {{Trainerentry|Spr RS Hiker.png|Hiker|Alan|880|3|074|Geodude|♂|22||299|Nosepass|♂|22||075|Graveler|♂|22||36=マサノリ|37=Masanori}} | ||
{{Trainerfooter|fire|3}} | |||
=====Pokémon Omega Ruby and Alpha Sapphire===== | |||
{{trainerheader|fire}} | |||
{{Trainerentry|VSLass ORAS.png{{!}}150px|game=6|Lass|Robin|288|2|043|Oddish|♀|16||118|Goldeen|♀|18|36=シホ|37=Shiho}} | |||
{{Trainerdiv|fire}} | {{Trainerdiv|fire}} | ||
{{Trainerfooter|fire| | {{Trainerentry|VSAce Duo ORAS.png{{!}}150px|game=6|Ace Duo|Pike & Shiel|1260|2|318|Carvanha|♂|21||322|Numel|♂|21|36=コホとテタ|37=Koho and Teta}} | ||
{{Trainerdiv|fire}} | |||
{{Trainerentry|VSSchoolkid M.png{{!}}150px|game=6|Schoolkid|Ted|380|1|280|Ralts|♂|19|36=ノブヒサ|37=Nobuhisa}} | |||
{{Trainerfooter|fire|3}} | |||
===Puzzle 4=== | ===Puzzle 4=== | ||
{| | {| class="roundy" style="float:right; background: #000; border: 3px solid #{{normal color dark}}" | ||
|- | |||
! style="background:#{{normal color light}}; {{roundytl|5px}}" | Version | |||
! style="background:#{{normal color light}}; {{roundytr|5px}}" | 1F | |||
|- | |- | ||
! | ! style="background:#{{ruby color}}" | {{color2|fff|Pokémon Ruby and Sapphire Versions|Ruby}} | ||
| rowspan="2" | [[File:Trick House puzzle room 4 RS.png|180px]] | |||
| rowspan="2" | [[ | |||
|- | |- | ||
! | ! style="background:#{{sapphire color}}" | {{color2|fff|Pokémon Ruby and Sapphire Versions|Sapphire}} | ||
|- | |- | ||
! | ! style="background:#{{emerald color}}" | {{color2|fff|Pokémon Emerald Version|Emerald<br>(Japanese)}} | ||
|[[ | |[[File:Trick House puzzle room 4 E JP.png|180px]] | ||
|- | |- | ||
| colspan=" | ! style="background:#{{emerald color}}" | {{color2|fff|Pokémon Emerald Version|Emerald<br>(international)}} | ||
|[[File:Trick House puzzle room 4 E.png|180px]] | |||
|- | |||
! style="background:#{{omega ruby color}}" | {{color2|fff|Pokémon Omega Ruby and Alpha Sapphire|Omega Ruby}} | |||
| rowspan="2" | [[File:Trick House puzzle room 4 ORAS.png|180px]] | |||
|- | |||
! style="background:#{{alpha sapphire color}}" | {{color2|fff|Pokémon Omega Ruby and Alpha Sapphire|Alpha Sapphire}} | |||
|- | |||
| colspan="2" style="background:#{{normal color light}}; {{roundybottom|5px}}" | | |||
|} | |} | ||
The fourth puzzle is a room full of boulders that must be pushed aside using {{m|Strength}}. However, due to the close quarters, pushing boulders the wrong way can block certain paths. | |||
The fourth puzzle is a room full of [[Movable boulder|boulders]] that must be pushed aside using {{m|Strength}}. However, due to the close quarters, pushing boulders the wrong way can block certain paths. In Japanese Emerald, two passageways were narrower.<ref>[https://tcrf.net/Pokémon_Emerald#Trick_House_Puzzle_Room_4 Pokémon Emerald → Trick House Puzzle Room 4 | The Cutting Room Floor]</ref> In Omega Ruby and Alpha Sapphire, there are no Trainers in this room. | |||
====Items==== | ====Items==== | ||
{{Itlisth|normal}} | {{Itlisth|normal}} | ||
{{ | {{itemlist|Mech Mail|Near {{tc|Black Belt}} Yuji (requires {{m|Strength}})|Ru=yes|Sa=yes}} | ||
{{itemlist|Mech Mail|Near {{tc|Battle Girl}} Cora (requires {{m|Strength}})|E=yes}} | |||
{{itemlist|Casteliacone| | |||
* North of the entrance (requires {{m|Strength}}) | |||
* South of the exit, next to a three-boulder {{m|Strength}} puzzle (requires {{m|Strength}})|OR=yes|AS=yes|display=[[Casteliacone]] ×2}} | |||
{{Itlistfoot|normal}} | {{Itlistfoot|normal}} | ||
====Trainers==== | ====Trainers==== | ||
=====Pokémon Ruby, Sapphire, and Emerald===== | |||
{{trainerheader|normal}} | {{trainerheader|normal}} | ||
{{Trainerentry| | {{Trainerdiv|normal|Requires Strength}} | ||
{{Trainerentry|Spr RS Black Belt.png|Black Belt|Yuji|832|2|296|Makuhita|♂|26||067|Machoke|♂|26|36=カズシ|37=Kazushi}} | |||
{{Trainerdiv|normal}} | {{Trainerdiv|normal}} | ||
{{Trainerentry| | {{Trainerentry|Spr RS Battle Girl.png|Battle Girl|Cora|648|1|307|Meditite|♀|27|36=フウカ|37=Fūka}} | ||
{{Trainerdiv|normal}} | {{Trainerdiv|normal}} | ||
{{Trainerentry| | {{Trainerentry|Spr RS Battle Girl.png|Battle Girl|Jill{{sup/3|RuSa}}/Paula{{sup/3|E}}|648|1|286|Breloom|♀|27|36=ヒイナ|37=Hiina}} | ||
{{Trainerfooter|normal|3}} | |||
{{Trainerfooter|normal| | |||
===Puzzle 5=== | ===Puzzle 5=== | ||
{| | The fifth puzzle is a room with a sequence of five Mechadolls that will ask the player questions of escalating difficulty. They each react to seeing the player or being interacted with as if they were Trainers, but instead of challenging the player to a battle they ask a question. Answering correctly allows the player to continue; answering incorrectly sends the player back to the start of the room, such that the player has to answer each of the Mechadolls' questions again. Each Mechadoll will ask the player one question from a pool of three randomly. | ||
{| class="roundy" style="float:right; background: #000; border: 3px solid #{{flying color dark}}" | |||
|- | |||
! style="background:#{{flying color light}}; {{roundytl|5px}}" | Version | |||
! style="background:#{{flying color light}}; {{roundytr|5px}}" | 1F | |||
|- | |||
! style="background:#{{ruby color}}" | {{color2|fff|Pokémon Ruby and Sapphire Versions|Ruby}} | |||
| rowspan="2" | [[File:Trick House puzzle room 5 RS.png|180px]] | |||
|- | |||
! style="background:#{{sapphire color}}" | {{color2|fff|Pokémon Ruby and Sapphire Versions|Sapphire}} | |||
|- | |- | ||
! style="background:#{{ | ! style="background:#{{emerald color}}" | {{color2|fff|Pokémon Emerald Version|Emerald}} | ||
|[[File:Trick House puzzle room 5 E.png|180px]] | |||
|- | |- | ||
! | ! style="background:#{{omega ruby color}}" | {{color2|fff|Pokémon Omega Ruby and Alpha Sapphire|Omega Ruby}} | ||
| rowspan="2" | [[File:Trick House puzzle room 5 ORAS.png|180px]] | |||
|- | |- | ||
! | ! style="background:#{{alpha sapphire color}}" | {{color2|fff|Pokémon Omega Ruby and Alpha Sapphire|Alpha Sapphire}} | ||
|[[ | |- | ||
| colspan="2" style="background:#{{flying color light}}; {{roundybottom|5px}}" | | |||
|} | |||
In Ruby, Sapphire, Omega Ruby, and Alpha Sapphire, the room is shaped like a question mark. In Emerald, the room is shaped like a pair of exclamation marks. | |||
There are no Trainers in this room. In the Generation III games, there are no items in this room. | |||
====Items==== | |||
{{Itlisth|flying}} | |||
{{itemlist|Old Gateau| | |||
* Between Mechadoll 2 and Mechadoll 3 | |||
* Next to door to prize room|OR=yes|AS=yes|display=[[Old Gateau]] ×2}} | |||
{{itemlist|Escape Rope|From Mechadoll 3 after answering its question correctly for the first time|OR=yes|AS=yes}} | |||
{{Itlistfoot|flying}} | |||
====Questions==== | |||
The correct answer to each question is in '''bold'''. | |||
=====Pokémon Ruby and Sapphire===== | |||
{| class="roundy" style="margin:auto; background:#{{flying color}}; border: 3px solid #{{flying color dark}}" | |||
|- | |- | ||
| | ! style="background:#{{flying color light}}; {{roundytl|5px}}" | Mechadoll | ||
! style="background:#{{flying color light}}" | Question | |||
! style="background:#{{flying color light}}; {{roundytr|5px}}" colspan=3 | Choices | |||
|- style="background:#FFF" | |||
| rowspan=3 | Mechadoll 1 | |||
| One of these <sc>Pok</sc>é<sc>mon</sc> is not found on <sc>{{rt|103|Hoenn}}</sc>. Which one is it? | |||
| <sc>{{p|Zigzagoon}}</sc> | |||
| '''<sc>{{p|Nincada}}</sc>''' | |||
| <sc>{{p|Poochyena}}</sc> | |||
|- style="background:#FFF" | |||
| One of these <sc>Pok</sc>é<sc>mon</sc> is not of the <sc>{{t|Grass}}</sc> type. Which one is it? | |||
| '''<sc>{{p|Nincada}}</sc>''' | |||
| <sc>{{p|Lotad}}</sc> | |||
| <sc>{{p|Roselia}}</sc> | |||
|- style="background:#FFF" | |||
| One of these <sc>Pok</sc>é<sc>mon</sc> uses <sc>{{m|Scratch}}</sc>. Which one is it? | |||
| <sc>{{p|Shroomish}}</sc> | |||
| '''<sc>{{p|Nincada}}</sc>''' | |||
| <sc>{{p|Surskit}}</sc> | |||
|- style="background:#FFF" | |||
| rowspan=3 | Mechadoll 2 | |||
| In <sc>[[Professor Birch|Prof. Birch]]</sc>'s [[Bag]], there were three <sc>Pok</sc>é<sc>mon</sc>. Which one was at the right? | |||
| <sc>{{p|Treecko}}</sc> | |||
| <sc>{{p|Torchic}}</sc> | |||
| '''<sc>{{p|Mudkip}}</sc>''' | |||
|- style="background:#FFF" | |||
| Which <sc>Pok</sc>é<sc>mon</sc> was offered for a trade at the <sc>[[Pokémon Trainers' School|Pokémon Trainer's School]]</sc>? | |||
| '''<sc>{{p|Seedot}}</sc>''' | |||
| <sc>{{p|Shroomish}}</sc> | |||
| <sc>{{p|Spinda}}</sc> | |||
|- style="background:#FFF" | |||
| The <sc>[[Devon Corporation|Devon]] Researcher</sc> was looking for what <sc>Pok</sc>é<sc>mon</sc> in <sc>[[Petalburg Woods]]</sc>? | |||
| '''<sc>{{p|Shroomish}}</sc>''' | |||
| <sc>{{p|Zigzagoon}}</sc> | |||
| <sc>{{p|Wurmple}}</sc> | |||
|- style="background:#FFF" | |||
| rowspan=3 | Mechadoll 3 | |||
| Which costs more? Three {{i|Poké Ball|<sc>Pok</sc>é <sc>Balls</sc>}} or one <sc>[[Super Potion]]</sc>? | |||
| <sc>Pok</sc>é <sc>Ball</sc> | |||
| '''<sc>Super Potion</sc>''' | |||
| Same price | |||
|- style="background:#FFF" | |||
| Sell one <sc>[[Escape Rope]]</sc> and buy one <sc>[[Antidote]]</sc>. How much [[Pokémon Dollar|money]] remains? | |||
| {{PDollar}}135 | |||
| {{PDollar}}155 | |||
| '''{{PDollar}}175''' | |||
|- style="background:#FFF" | |||
| Do one <sc>[[Full Heal]]</sc> and <sc>[[Great Ball]]</sc> cost more than one <sc>[[Revive]]</sc>? | |||
| They will cost more. | |||
| '''They will cost less.''' | |||
| Same price | |||
|- style="background:#FFF" | |||
| rowspan=3 | Mechadoll 4 | |||
| <sc>{{ci|Rustboro}} [[Gym Leader]] [[Roxanne]]</sc> used a <sc>{{p|Geodude}}</sc>. Was it male or female? | |||
| Male | |||
| '''Female''' | |||
| Neither | |||
|- style="background:#FFF" | |||
| In <sc>{{DL|Dewford Town|Dewford Hall}}</sc>, were there more men or women? | |||
| '''Males''' | |||
| Females | |||
| Same number | |||
|- style="background:#FFF" | |||
| The first <sc>Trainer</sc> in <sc>[[Dewford Gym]]</sc> was male or female? | |||
| Male | |||
| '''Female''' | |||
| It depends | |||
|- style="background:#FFF" | |||
| rowspan=3 | Mechadoll 5 | |||
| How many <sc>[[Bicycle|Bikes]]</sc> does <sc>[[Rydel]]</sc> have on display outside <sc>[[Rydel's Cycles|his cycle shop]]</sc>? | |||
| 6 | |||
| '''8''' | |||
| 10 | |||
|- style="background:#FFF" | |||
| How many people give you <sc>{{Berries}}</sc> at the [[Pretty Petal Flower Shop|<sc>Pretty Petal</sc> flower shop]]? | |||
| '''1''' | |||
| 2 | |||
| 3 | |||
|- style="background:#FFF" | |||
| How many signs are there in <sc>[[Lilycove City]]</sc>? | |||
| 6 | |||
| 7 | |||
| '''8''' | |||
|} | |} | ||
=====Pokémon Emerald===== | |||
{| class="roundy" style="margin:auto; background:#{{flying color}}; border: 3px solid #{{flying color dark}}" | |||
|- | |||
! style="background:#{{flying color light}}; {{roundytl|5px}}" | Mechadoll | |||
! style="background:#{{flying color light}}" | Question | |||
! style="background:#{{flying color light}}; {{roundytr|5px}}" colspan=3 | Choices | |||
|- style="background:#FFF" | |||
| rowspan=3 | Mechadoll 1 | |||
| One of these <sc>Pok</sc>é<sc>mon</sc> is not found on <sc>{{rt|110|Hoenn}}</sc>. Which one is it? | |||
| <sc>{{p|Oddish}}</sc> | |||
| <sc>{{p|Poochyena}}</sc> | |||
| '''<sc>{{p|Taillow}}</sc>''' | |||
|- style="background:#FFF" | |||
| One of these <sc>Pok</sc>é<sc>mon</sc> is not of the <sc>{{t|Water}}</sc> type. Which one is it? | |||
| '''<sc>{{p|Azurill}}</sc>''' | |||
| <sc>{{p|Lotad}}</sc> | |||
| <sc>{{p|Wingull}}</sc> | |||
|- style="background:#FFF" | |||
| One of these <sc>Pok</sc>é<sc>mon</sc> does not use <sc>{{m|Leech Life}}</sc>. Which one is it? | |||
| '''<sc>{{p|Dustox}}</sc>''' | |||
| <sc>{{p|Zubat}}</sc> | |||
| <sc>{{p|Nincada}}</sc> | |||
|- style="background:#FFF" | |||
| rowspan=3 | Mechadoll 2 | |||
| Which of these <sc>Pok</sc>é<sc>mon</sc> did <sc>[[Wally]]</sc> borrow from your father? | |||
| <sc>{{p|Ralts}}</sc> | |||
| '''<sc>{{p|Zigzagoon}}</sc>''' | |||
| <sc>{{p|Slakoth}}</sc> | |||
|- style="background:#FFF" | |||
| Which of these <sc>Pok</sc>é<sc>mon</sc> was chasing <sc>[[Professor Birch|Prof. Birch]]</sc>? | |||
| <sc>{{p|Poochyena}}</sc> | |||
| <sc>{{p|Shroomish}}</sc> | |||
| '''<sc>{{p|Zigzagoon}}</sc>''' | |||
|- style="background:#FFF" | |||
| Which of these <sc>Pok</sc>é<sc>mon</sc> did <sc>[[Team Aqua]]</sc> use in <sc>[[Petalburg Woods|Petalburg Forest]]</sc>? | |||
| '''<sc>{{p|Poochyena}}</sc>''' | |||
| <sc>{{p|Zubat}}</sc> | |||
| <sc>{{p|Carvanha}}</sc> | |||
|- style="background:#FFF" | |||
| rowspan=3 | Mechadoll 3 | |||
| Which costs more? Three <sc>[[Harbor Mail]]s</sc> or one <sc>[[Burn Heal]]</sc>? | |||
| '''<sc>Burn Heal</sc>''' | |||
| <sc>Harbor Mail</sc> | |||
| Same price | |||
|- style="background:#FFF" | |||
| Sell one <sc>[[Great Ball]]</sc> and buy one <sc>[[Potion]]</sc>. How much money remains? | |||
| {{PDollar}}60 | |||
| {{PDollar}}55 | |||
| '''Nothing''' | |||
|- style="background:#FFF" | |||
| Do one <sc>[[Repel]]</sc> and <sc>[[Soda Pop]]</sc> cost more than one <sc>[[Super Potion]]</sc>? | |||
| They will cost more. | |||
| '''They will cost less.''' | |||
| Same price | |||
|- style="background:#FFF" | |||
| rowspan=3 | Mechadoll 4 | |||
| In <sc>{{DL|Hoenn Route 109|Seashore House}}</sc>, were there more men or women? | |||
| '''Male''' | |||
| Female | |||
| Neither | |||
|- style="background:#FFF" | |||
| In <sc>[[Lavaridge Town]]</sc>, were there more elderly men or elderly women? | |||
| '''Elderly men''' | |||
| Elderly ladies | |||
| Same number | |||
|- style="background:#FFF" | |||
| In the <sc>[[Pokémon Trainers' School|Trainer's School]]</sc>, how many girl students were there? | |||
| None | |||
| '''1''' | |||
| 2 | |||
|- style="background:#FFF" | |||
| rowspan=3 | Mechadoll 5 | |||
| In <sc>{{ci|Slateport}}</sc>'s <sc>[[Pokémon Fan Club]]</sc>, how many <sc>Pok</sc>é<sc>mon</sc> were there? | |||
| 2 | |||
| '''3''' | |||
| 4 | |||
|- style="background:#FFF" | |||
| In <sc>[[Fortree City]]</sc>, how many tree houses were there? | |||
| '''6''' | |||
| 7 | |||
| 8 | |||
|- style="background:#FFF" | |||
| On the <sc>[[Seaside Cycling Road|Cycling Road]]</sc>, how many <sc>{{tc|Triathlete}}s</sc> were there? | |||
| 6 | |||
| 7 | |||
| '''8''' | |||
|} | |||
=====Pokémon Omega Ruby and Alpha Sapphire===== | |||
{| class="roundy" style="margin:auto; background:#{{flying color}}; border: 3px solid #{{flying color dark}}" | |||
|- | |||
! style="background:#{{flying color light}}; {{roundytl|5px}}" | Mechadoll | |||
! style="background:#{{flying color light}}" | Question | |||
! style="background:#{{flying color light}}; {{roundytr|5px}}" colspan=3 | Choices | |||
|- style="background:#FFF" | |||
| rowspan=3 | Mechadoll 1 | |||
| One of these Pokémon is not found on {{rt|103|Hoenn}}. Which one is it? | |||
| {{p|Zigzagoon}} | |||
| '''{{p|Nincada}}''' | |||
| {{p|Poochyena}} | |||
|- style="background:#FFF" | |||
| One of these Pokémon is not of the {{t|Grass}} type. Which one is it? | |||
| '''{{p|Nincada}}''' | |||
| {{p|Lotad}} | |||
| {{p|Roselia}} | |||
|- style="background:#FFF" | |||
| One of these Pokémon uses {{m|Scratch}}. Which one is it? | |||
| {{p|Shroomish}} | |||
| '''{{p|Nincada}}''' | |||
| {{p|Surskit}} | |||
|- style="background:#FFF" | |||
| rowspan=3 | Mechadoll 2 | |||
| In [[Professor Birch]]'s [[Bag]], there were three Pokémon. Which one was at the right? | |||
| {{p|Treecko}} | |||
| {{p|Torchic}} | |||
| '''{{p|Mudkip}}''' | |||
|- style="background:#FFF" | |||
| Which Pokémon was offered for a trade at the [[Pokémon Trainers' School]]? | |||
| '''{{p|Seedot}}''' | |||
| {{p|Shroomish}} | |||
| {{p|Spinda}} | |||
|- style="background:#FFF" | |||
| What Pokémon was the [[Devon Corporation|Devon]] researcher looking for in [[Petalburg Woods]]? | |||
| '''{{p|Shroomish}}''' | |||
| {{p|Zigzagoon}} | |||
| {{p|Wurmple}} | |||
|- style="background:#FFF" | |||
| rowspan=3 | Mechadoll 3 | |||
| Which costs more? Three {{i|Poké Ball}}s or one [[Super Potion]]? | |||
| The Poké Balls | |||
| '''The Super Potion''' | |||
| They're the same price | |||
|- style="background:#FFF" | |||
| Sell one [[Escape Rope]] and buy one [[Antidote]]. How much [[Pokémon Dollar|money]] remains? | |||
| {{PDollar}}135 | |||
| {{PDollar}}155 | |||
| '''{{PDollar}}175''' | |||
|- style="background:#FFF" | |||
| Which would cost more, a [[Full Heal]] plus a [[Great Ball]], or one [[Revive]]? | |||
| Full Heal plus Great Ball | |||
| '''Revive''' | |||
| They cost the same | |||
|- style="background:#FFF" | |||
| rowspan=3 | Mechadoll 4 | |||
| {{ci|Rustboro}} [[Gym Leader]] [[Roxanne]] used a {{p|Geodude}}. Was it female or male? | |||
| '''Female''' | |||
| Male | |||
| Neither | |||
|- style="background:#FFF" | |||
| In {{DL|Dewford Town|Dewford Hall}}, were there more men or women? | |||
| '''More men''' | |||
| More women | |||
| The same number | |||
|- style="background:#FFF" | |||
| Was the first Trainer in [[Dewford Gym]] male or female? | |||
| Male | |||
| '''Female''' | |||
| Random | |||
|- style="background:#FFF" | |||
| rowspan=3 | Mechadoll 5 | |||
| How many [[Bicycle|Bikes]] does [[Rydel]] have on display outside [[Rydel's Cycles|his cycle shop]]? | |||
| One | |||
| '''Two''' | |||
| Three | |||
|- style="background:#FFF" | |||
| How many people give you {{Berries}} at the [[Pretty Petal Flower Shop|Pretty Petal flower shop]]? | |||
| '''One''' | |||
| Two | |||
| Three | |||
|- style="background:#FFF" | |||
| How many signs are there in [[Lilycove City]]? | |||
| Six | |||
| Seven | |||
| '''Eight''' | |||
|} | |||
===Puzzle 6=== | ===Puzzle 6=== | ||
{| | {| class="roundy" style="float:right; background: #000; border: 3px solid #{{psychic color dark}}" | ||
|- | |- | ||
! style="background:#{{psychic color light}}; | ! style="background:#{{psychic color light}}; {{roundytl|5px}}" | Version | ||
! style="background:#{{psychic color light}} | ! style="background:#{{psychic color light}}; {{roundytr|5px}}" | 1F | ||
|- | |- | ||
! | ! style="background:#{{ruby color}}" | {{color2|fff|Pokémon Ruby and Sapphire Versions|Ruby}} | ||
| rowspan="2" | [[File:Trick House puzzle room 6 RS.png|180px]] | |||
|- | |- | ||
! | ! style="background:#{{sapphire color}}" | {{color2|fff|Pokémon Ruby and Sapphire Versions|Sapphire}} | ||
|- | |- | ||
| colspan=" | ! style="background:#{{emerald color}}" | {{color2|fff|Pokémon Emerald Version|Emerald}} | ||
|[[File:Trick House puzzle room 6 E.png|180px]] | |||
|- | |||
! style="background:#{{omega ruby color}}" | {{color2|fff|Pokémon Omega Ruby and Alpha Sapphire|Omega Ruby}} | |||
| rowspan="2" | [[File:Trick House puzzle room 6 ORAS.png|180px]] | |||
|- | |||
! style="background:#{{alpha sapphire color}}" | {{color2|fff|Pokémon Omega Ruby and Alpha Sapphire|Alpha Sapphire}} | |||
|- | |||
| colspan="2" style="background:#{{psychic color light}}; {{roundybottom|5px}}" | | |||
|} | |} | ||
In Ruby, Sapphire, and Emerald, the sixth puzzle is a room full of rotating gates like those found in [[Fortree Gym]], but arranged in a more confusing pattern. As with Fortree, the player must walk through the gates in certain combinations to advance through the room. There are several Trainers in this room. | |||
In Pokémon Omega Ruby and Alpha Sapphire, the room is full of [[spin tile]]s (like puzzle 7 in the Generation III games). This is also the final puzzle in these games. There are no Trainers in this room. | |||
====Items==== | ====Items==== | ||
{{Itlisth|psychic}} | {{Itlisth|psychic}} | ||
{{ | {{itemlist|Glitter Mail|Near exit of room|Ru=yes|Sa=yes}} | ||
{{itemlist|Glitter Mail|In the southeast part of the maze|E=yes}} | |||
{{itemlist|Shalour Sable| | |||
* Northwestern corner of the room | |||
* Southeastern corner of the room|OR=yes|AS=yes|display=[[Shalour Sable]] ×2}} | |||
{{Itlistfoot|psychic}} | {{Itlistfoot|psychic}} | ||
====Trainers==== | ====Trainers==== | ||
=====Pokémon Ruby, Sapphire, and Emerald===== | |||
{{trainerheader|psychic}} | {{trainerheader|psychic}} | ||
{{Trainerentry| | {{Trainerentry|Spr RS Pokémon Ranger F.png|Pokémon Ranger|Sophia|1824|2|333|Swablu|♀|38||315|Roselia|♀|38|36=チアキ|37=Chiaki}} | ||
{{Trainerdiv|psychic}} | {{Trainerdiv|psychic}} | ||
{{Trainerentry| | {{Trainerentry|Spr RS Pokémon Ranger M.png|Pokémon Ranger|Sebastian|1872|1|332|Cacturne|♂|39|36=ケイスケ|37=Keisuke}} | ||
{{Trainerdiv|psychic}} | {{Trainerdiv|psychic}} | ||
{{Trainerentry| | {{Trainerentry|Spr RS Bird Keeper.png|Bird Keeper|Benny|1152|3|277|Swellow|♂|36||279|Pelipper|♂|36||178|Xatu|♂|36|36=アキマサ|37=Akimasa}} | ||
{{Trainerfooter|psychic|3}} | |||
{{Trainerfooter|psychic| | |||
===Puzzle 7=== | ===Puzzle 7=== | ||
{| | {| class="roundy" style="float:right; background: #000; border: 3px solid #{{water color dark}}" | ||
|- | |||
! style="background:#{{water color light}}; {{roundytl|5px}}" | Version | |||
! style="background:#{{water color light}}; {{roundytr|5px}}" | 1F | |||
|- | |- | ||
! | ! style="background:#{{ruby color}}" | {{color2|fff|Pokémon Ruby and Sapphire Versions|Ruby}} | ||
| rowspan="2" | [[File:Trick House puzzle room 7 RS.png|180px]] | |||
| rowspan="2" | [[ | |||
|- | |- | ||
! | ! style="background:#{{sapphire color}}" | {{color2|fff|Pokémon Ruby and Sapphire Versions|Sapphire}} | ||
|- | |- | ||
! | ! style="background:#{{emerald color}}" | {{color2|fff|Pokémon Emerald Version|Emerald}} | ||
|[[ | |[[File:Trick House puzzle room 7 E.png|180px]] | ||
|- | |- | ||
| colspan=" | | colspan="2" style="background:#{{water color light}}; {{roundybottom|5px}}" | | ||
|} | |} | ||
In Ruby and Sapphire, the seventh puzzle is a room filled with [[spin tile]]s, similar to those in [[Mossdeep Gym]]. The player must navigate the maze of spin tiles and pull switches to change their directions to advance through the room. | |||
In Emerald, the seventh puzzle is a room full of Trainers standing on spin tiles that rotate when switches are triggered. | |||
The difference between the puzzles is likely due to Mossdeep Gym being redesigned in Pokémon Emerald. | |||
This puzzle does not appear in Pokémon Omega Ruby and Alpha Sapphire. | |||
====Items==== | ====Items==== | ||
{{Itlisth|water}} | {{Itlisth|water}} | ||
{{ | {{itemlist|Tropic Mail|To the right of {{tc|Hex Maniac}} Patricia|Ru=yes|Sa=yes}} | ||
{{itemlist|Tropic Mail|In center of room, via transport tile|E=yes}} | |||
{{Itlistfoot|water}} | {{Itlistfoot|water}} | ||
====Trainers==== | ====Trainers==== | ||
=====Pokémon Ruby and Sapphire===== | |||
{{trainerheader|water}} | {{trainerheader|water}} | ||
{{Trainerentry| | {{Trainerentry|Spr RS Psychic M.png|Psychic|Joshua|984|2|064|Kadabra|♂|41||338|Solrock||41|36=シュウイチ|37=Shūichi}} | ||
{{Trainerdiv|water}} | {{Trainerdiv|water}} | ||
{{Trainerentry| | {{Trainerentry|Spr RS Hex Maniac.png|Hex Maniac|Patricia|1008|1|354|Banette|♀|42||36=コトネ|37=Kotone}} | ||
{{Trainerdiv|water}} | {{Trainerdiv|water}} | ||
{{Trainerfooter|water| | {{Trainerentry|Spr RS Psychic F.png|Psychic|Alexis|960|3|281|Kirlia|♀|40||178|Xatu|♀|40||064|Kadabra|♂|40|36=ナナコ|37=Nanako}} | ||
{{Trainerfooter|water|3}} | |||
=====Pokémon Emerald===== | |||
{{trainerheader|water}} | {{trainerheader|water}} | ||
{{Trainerentry| | {{Trainerentry|Spr RS Psychic M.png|Psychic|Joshua|984<br/><small>{{tt|Potential|Single Battle only if the player has only one Pokémon in their party}} [[Double Battle]] with Patricia</small>|2|064|Kadabra|♂|41||338|Solrock||41|36=シュウイチ|37=Shūichi}} | ||
{{Trainerentry|Spr RS Hex Maniac.png|Hex Maniac|Patricia|984<br/><small>{{tt|Potential|Single Battle only if the player has only one Pokémon in their party}} [[Double Battle]] with Joshua</small>|2|354|Banette|♀|41||337|Lunatone||41|36=コトネ|37=Kotone}} | |||
{{Trainerdiv|water}} | {{Trainerdiv|water}} | ||
{{Trainerentry| | {{Trainerentry|Spr RS Psychic F.png|Psychic|Mariela|984<br/><small>{{tt|Potential|Single Battle only if the player has only one Pokémon in their party}} [[Double Battle]] with Everett</small>|1|358|Chimecho|♀|41|36=ミハネ|37=Mihane}} | ||
{{Trainerentry|Spr RS Gentleman.png|Gentleman|Everett|3280<br/><small>{{tt|Potential|Single Battle only if the player has only one Pokémon in their party}} [[Double Battle]] with Mariela</small>|1|202|Wobbuffet|♂|41|36=ダグ|37=Dag}} | |||
{{Trainerdiv|water}} | {{Trainerdiv|water}} | ||
{{Trainerentry| | {{Trainerentry|Spr RS Psychic F.png|Psychic|Alexis|984<br/><small>Potential [[Double Battle]] with Alvaro</small>|2|281|Kirlia|♀|41||178|Xatu|♀|41|36=ナナコ|37=Nanako}} | ||
{{Trainerfooter|water| | {{Trainerentry|Spr RS Psychic M.png|Psychic|Alvaro|984<br/><small>Potential [[Double Battle]] with Alexis</small>|2|354|Banette|♂|41||064|Kadabra|♂|41|36=シンヤ|37=Shinya}} | ||
{{Trainerfooter|water|3}} | |||
===Puzzle 8=== | ===Puzzle 8=== | ||
{| | {| class="roundy" style="float:right; background: #000; border: 3px solid #{{steel color dark}}" | ||
|- | |||
! style="background:#{{steel color light}}; {{roundytl|5px}}" | Version | |||
! style="background:#{{steel color light}}; {{roundytr|5px}}" | 1F | |||
|- | |- | ||
! | ! style="background:#{{ruby color}}" | {{color2|fff|Pokémon Ruby and Sapphire Versions|Ruby}} | ||
| rowspan="2" | [[File:Trick House puzzle room 8 RS.png|180px]] | |||
| rowspan="2" | [[ | |||
|- | |- | ||
! | ! style="background:#{{sapphire color}}" | {{color2|fff|Pokémon Ruby and Sapphire Versions|Sapphire}} | ||
|- | |- | ||
! | ! style="background:#{{emerald color}}" | {{color2|fff|Pokémon Emerald Version|Emerald}} | ||
|[[ | |[[File:Trick House puzzle room 8 E.png|180px]] | ||
|- | |- | ||
| colspan=" | | colspan="2" style="background:#{{steel color light}}; {{roundybottom|5px}}" | | ||
|} | |} | ||
In Ruby, Sapphire, and Emerald, the eighth puzzle is a room is divided into two areas, an upper and lower area. Both are made up primarily of polished floors lined with pots. Similar to [[ice tile]]s, stepping on the polished floor will send the player sliding across it until they hit an obstacle. The player must navigate their way across both floors to advance. This is the final puzzle. | |||
This puzzle does not appear in Pokémon Omega Ruby and Alpha Sapphire. | |||
====Items==== | ====Items==== | ||
{{Itlisth|steel}} | {{Itlisth|steel}} | ||
{{ | {{itemlist|Bead Mail|Between the upper and lower area|Ru=yes|Sa=yes}} | ||
{{ | {{itemlist|Bead Mail|Two squares east of the northwestern-most square|E=yes}} | ||
{{Itlistfoot|steel}} | {{Itlistfoot|steel}} | ||
====Trainers==== | ====Trainers==== | ||
=====Pokémon Ruby, Sapphire, and Emerald===== | |||
{{trainerheader|steel}} | {{trainerheader|steel}} | ||
{{Trainerentry| | {{Trainerentry|Spr RS Cooltrainer F.png|Cool Trainer|Elaine{{sup/3|RuSa}}/Keira{{sup/3|E}}|2160|2|305|Lairon|♀|45||310|Manectric|♀|45|36=アンナ|37=Anna}} | ||
{{Trainerdiv|steel}} | {{Trainerdiv|steel}} | ||
{{Trainerentry| | {{Trainerentry|Spr RS Cooltrainer M.png|Cool Trainer|Vincent|2112|3|302|Sableye|♂|44||308|Medicham|♂|44||319|Sharpedo|♂|44|36=ユウト|37=Yūto}} | ||
{{Trainerdiv|steel}} | {{Trainerdiv|steel}} | ||
{{Trainerentry| | {{Trainerentry|Spr RS Cooltrainer M.png|Cool Trainer|Leroy|2208|2|303|Mawile|♂|46||121|Starmie||46|36=マコト|37=Makoto}} | ||
{{Trainerfooter|steel|3}} | |||
{{Trainerfooter|steel| | |||
==Layout== | ==Layout== | ||
{| class="roundy" style="margin:auto; background: #000; border: 3px solid #{{Locationcolor/dark|building}}" | |||
{| | |||
|- | |- | ||
! style="background:#{{Locationcolor/light|building}}; | ! style="background:#{{Locationcolor/light|building}}; {{roundytl|5px}}" | Version | ||
! style="background:#{{Locationcolor/light|building}}" | Entrance | ! style="background:#{{Locationcolor/light|building}}" | Entrance | ||
! style="background:#{{Locationcolor/light|building}}" | End | ! style="background:#{{Locationcolor/light|building}}" | End | ||
! style="background:#{{Locationcolor/light|building}}; | ! style="background:#{{Locationcolor/light|building}}; {{roundytr|5px}}" | Hallway | ||
|- | |- | ||
! | ! style="background:#{{Ruby color}}" | {{color2|fff|Pokémon Ruby and Sapphire Versions|Ruby}} | ||
| rowspan="2" | [[File:Trick House | | rowspan="2" | [[File:Trick House entrance RS.png|120px]] | ||
| rowspan="2" | [[File: | | rowspan="2" | [[File:Trick House goal RS.png|120px]] | ||
| rowspan="2" | [[File:Trick House exit RS.png|120px]] | |||
|- | |||
! style="background:#{{Sapphire color}}" | {{color2|fff|Pokémon Ruby and Sapphire Versions|Sapphire}} | |||
|- | |||
! style="background:#{{Emerald color}}" | {{color2|fff|Pokémon Emerald Version|Emerald}} | |||
| [[File:Trick House entrance E.png|120px]] | |||
| [[File:Trick House goal E.png|120px]] | |||
| [[File:Trick House exit E.png|120px]] | |||
|- | |- | ||
! | ! style="background:#{{Omega Ruby color}}" | {{color2|fff|Pokémon Omega Ruby and Alpha Sapphire|Omega Ruby}} | ||
| rowspan="2" | [[File:Trick House entrance ORAS.png|120px]] | |||
| rowspan="2" | [[File:Trick House goal ORAS.png|120px]] | |||
| | |||
|- | |- | ||
! | ! style="background:#{{Alpha Sapphire color}}" | {{color2|fff|Pokémon Omega Ruby and Alpha Sapphire|Alpha Sapphire}} | ||
|- | |- | ||
| colspan=" | | colspan="4" style="background:#{{Locationcolor/light|building}}; {{roundybottom|5px}}" | | ||
|} | |} | ||
== | ===Puzzle rooms=== | ||
{| class="roundy" style="margin:auto; background: #000; border: 3px solid #{{Locationcolor/dark|building}}" | |||
|- | |||
! style="background:#{{Locationcolor/light|building}}; {{roundytl|5px}}" | Version | |||
! style="background:#{{Ruby color}}" | {{color2|fff|Pokémon Ruby and Sapphire Versions|Ruby}} | |||
! style="background:#{{Sapphire color}}" | {{color2|fff|Pokémon Ruby and Sapphire Versions|Sapphire}} | |||
! style="background:#{{Emerald color}}" | {{color2|fff|Pokémon Emerald Version|Emerald}} | |||
! style="background:#{{Omega Ruby color}}" | {{color2|fff|Pokémon Omega Ruby and Alpha Sapphire|Omega Ruby}} | |||
! style="background:#{{Alpha Sapphire color}}; {{roundytr|5px}}" | {{color2|fff|Pokémon Omega Ruby and Alpha Sapphire|Alpha Sapphire}} | |||
|- | |||
! style="background:#{{Locationcolor/light|building}}" | Room 1 | |||
| colspan="2" | [[File:Trick House puzzle room 1 RS.png|120px]] | |||
| [[File:Trick House puzzle room 1 E.png|120px]] | |||
| colspan="2" class="c" | [[File:Trick House puzzle room 1 ORAS.png|120px]] | |||
|- | |||
! style="background:#{{Locationcolor/light|building}}" | Room 2 | |||
| colspan="2" | [[File:Trick House puzzle room 2 RS.png|120px]] | |||
| [[File:Trick House puzzle room 2 E.png|120px]] | |||
| colspan="2" class="c" | [[File:Trick House puzzle room 2 ORAS.png|120px]] | |||
|- | |||
! style="background:#{{Locationcolor/light|building}}" | Room 3 | |||
| colspan="2" | [[File:Trick House puzzle room 3 RS.png|120px]] | |||
| [[File:Trick House puzzle room 3 E.png|120px]] | |||
| colspan="2" class="c" | [[File:Trick House puzzle room 3 ORAS.png|120px]] | |||
|- | |||
! style="background:#{{Locationcolor/light|building}}" | Room 4 | |||
| colspan="2" | [[File:Trick House puzzle room 4 RS.png|120px]] | |||
| [[File:Trick House puzzle room 4 E.png|120px]] | |||
| colspan="2" class="c" | [[File:Trick House puzzle room 4 ORAS.png|120px]] | |||
|- | |||
! style="background:#{{Locationcolor/light|building}}" | Room 5 | |||
| colspan="2" | [[File:Trick House puzzle room 5 RS.png|120px]] | |||
| [[File:Trick House puzzle room 5 E.png|120px]] | |||
| colspan="2" class="c" | [[File:Trick House puzzle room 5 ORAS.png|120px]] | |||
|- | |||
! style="background:#{{Locationcolor/light|building}}" | Room 6 | |||
| colspan="2" | [[File:Trick House puzzle room 6 RS.png|120px]] | |||
| [[File:Trick House puzzle room 6 E.png|120px]] | |||
| colspan="2" class="c" | [[File:Trick House puzzle room 6 ORAS.png|120px]] | |||
|- | |||
! style="background:#{{Locationcolor/light|building}}" | Room 7 | |||
| colspan="2" | [[File:Trick House puzzle room 7 RS.png|120px]] | |||
| [[File:Trick House puzzle room 7 E.png|120px]] | |||
| colspan="2" | | |||
|- | |||
! style="background:#{{Locationcolor/light|building}}" | Room 8 | |||
| colspan="2" | [[File:Trick House puzzle room 8 RS.png|120px]] | |||
| [[File:Trick House puzzle room 8 E.png|120px]] | |||
| colspan="2" | | |||
|- | |||
| colspan="6" style="background:#{{Locationcolor/light|building}}; {{roundybottom|5px}}" | | |||
|} | |||
{{Hoenn}} | ==In the anime== | ||
[[File:Trick House anime.png|thumb|250px|The Trick House in the {{pkmn|anime}}]] | |||
The [[Trick Master|King of Tricks]] hosts an annual contest at his Trick House in [[Mauville City]]. The competitor who overcomes the Trick House's various rooms receives a year's supply of [[Pokéblock]]s. These obstacles vary each year, and they include rope swings, log walks, and confusing mazes. | |||
{{Ash}} and {{ashfr}} visited the Trick House in ''[[AG039|A Poké-BLOCK Party!]]'', where they navigated the areas with fellow competitor [[Alanna]]. However, their progress was constantly impeded by {{TRT}} and {{an|Jigglypuff}}. In the end, [[Ivan]] ended up winning. | |||
{{-}} | |||
==In other languages== | |||
{{langtable|color={{locationcolor/light|building}}|bordercolor={{locationcolor/dark|building}} | |||
|zh_yue=戲法屋 ''{{tt|Heifaat Ūk|Trick House}}'' | |||
|zh_cmn=戲法屋 ''{{tt|Xìfǎ Wū|Trick House}}'' | |||
|da=Hurlumhejhus | |||
|fr=Maison des Pièges | |||
|de=Rätselhaus | |||
|it=Quizzoteca | |||
|ko=미궁의 대저택 ''{{tt|Migungui Daejeotaek|Maze House}}'' | |||
|pl=Dom Sztuczek | |||
|es=Casa Treta | |||
|sv=Trickhus | |||
}} | |||
{{Hoenn}}<br/> | |||
{{anime competitions|hoenn}}<br> | |||
{{Project Locations notice}} | {{Project Locations notice}} | ||
[[Category:Hoenn locations]] | [[Category:Hoenn locations]] | ||
[[Category:Ruby and Sapphire locations]] | |||
[[Category:Emerald locations]] | |||
[[Category:Omega Ruby and Alpha Sapphire locations]] | |||
[[Category:Buildings]] | [[Category:Buildings]] | ||
[[de:Rätselhaus]] | [[de:Rätselhaus]] | ||
[[es:Casa Treta]] | |||
[[fr:Maison des Pièges]] | |||
[[it:Quizzoteca]] | |||
[[ja:カラクリやしき]] | [[ja:カラクリやしき]] | ||
[[zh:戏法屋]] | |||
Latest revision as of 02:41, 22 April 2024
| ||||
| ||||
| Location: | Route 110 | |||
|---|---|---|---|---|
| Region: | Hoenn | |||
| Generations: | III, VI | |||
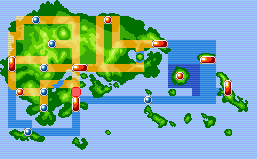 Location of Trick House in Hoenn. | ||||
| Pokémon world locations | ||||
The Trick House (Japanese: カラクリ屋敷 Trick House) is located on Route 110 in Hoenn. It is owned by the Trick Master, who poses puzzling challenges to travelers. Those who wish to play his game must find their way through a maze-like puzzle at the back of his house. If successful, they will be rewarded.
Description
The puzzles for Trick House are divided into three parts. First, the Trick Master is hiding somewhere in the first room of the house. In the Generation III games, the first three times the player enters the house, a small twinkle indicates the Trick Master's hiding place right away, but in later challenges and the Generation VI games the player must find him without any help.
Once the Trick Master is found, the player may enter the larger rear room through a passageway hidden behind the scroll on the wall. The rooms consist of some sort of maze with a gimmick to each of them, and each room also has Trainers and items (Mail in Generation III, locational specialties in Generation VI). The player must navigate through the maze to a second scroll, where they will obtain a secret code. Finally, the player must find the door to the Trick Master's room and write the code on it to gain access. Upon being found, the Trick Master will reward the player, and the player may take a shortcut passage out of the Trick House.
In Emerald, while the rooms in Trick House use mostly the same gimmicks in as in Ruby and Sapphire, the layouts of the rooms are each changed slightly. Trainers, items and the password scrolls are in different locations, and the maze's course changes as well. However, it is only their locations that differ; the items and Trainers in each room are the same in all versions except for the seventh puzzle (although the English name of one of the Trainers does differ in the fourth and eighth rooms).
In Ruby, Sapphire, and Emerald, players can take the challenges as they earn new Gym Badges, but the final challenge cannot be taken until they defeat the Champion. In Pokémon Omega Ruby and Alpha Sapphire, there are only six puzzles; Badges are no longer required to start each puzzle, but some puzzles require specific HM moves to be used, which require specific Badges to use.
Each puzzle is only available once, and the puzzles must be completed in order. After all challenges are completed, the Trick Master disappears, leaving behind only a note saying he has gone on a journey to search for new tricks. In Omega Ruby and Alpha Sapphire, Mechadoll 5 also remains, taking off after the player interacts with it.
Items
Entrance
| Item | Location | Games | |
|---|---|---|---|
| Escape Rope | From the Trick Master upon finding him for the first time | OR AS | |
Prize room
All of these items (excluding the prizes) are permanently missable.
| Item | Location | Games | |
|---|---|---|---|
| Expert Belt | At the back of the prize room after completing Puzzle 1 | OR AS | |
| Nugget | Under the Trick Master's cushion after completing Puzzle 8 (hidden) | R S E | |
| Big Nugget | Under the Trick Master's cushion after completing Puzzle 6 (hidden) | OR AS | |
Trick Master's prizes
Puzzle rooms
Mechadolls
In Omega Ruby and Alpha Sapphire, the Trick Master's Mechadoll 3 appears at the start of some puzzle rooms. Mechadoll 3 sells Escape Ropes to the player at regular price. Escape Ropes can be used to exit the Trick House.
Mechadoll 3 only sells the player Escape Ropes in puzzle rooms 2, 3, 4, and 6. Once the player completes the sixth and last puzzle, they will no longer be able to purchase Escape Ropes from Mechadoll 3.
| Mechadoll 3 | ||||
|---|---|---|---|---|
|
||||
In Generation III, if the player is unable to accept the Red Tent or Blue Tent due to lack of space to store decorations in the PC, Mechadoll 5 will wait in the front room to hand over the reward on the player's subsequent visit, as the Trick Master himself has gone on a journey.
Puzzle overview
Pokémon Ruby, Sapphire, and Emerald
| Puzzle | Required accomplishment | Hiding spot | Prize | Password | Field move required |
|---|---|---|---|---|---|
| Puzzle 1 | None | Under the desk | "Trick Master is fabulous." | Cut | |
| Puzzle 2 | Behind the right tree | "Trick Master is smart." | None | ||
| Puzzle 3 | In the right dresser | "Trick Master is coveted." | Rock Smash | ||
| Puzzle 4 | Behind the left window | "Trick Master is cool." | Strength | ||
| Puzzle 5 | In the left planter | "Trick Master is a genius." | None | ||
| Puzzle 6 | Inside the right cupboard | "Trick Master is my life." | None | ||
| Puzzle 7 | Behind the right window | "Trick Master is huggable." | None | ||
| Puzzle 8 | Defeat Champion | Under first left cushion | "Trick Master I love." | None | |
After completing the final puzzle in Pokémon Emerald, players may choose between either tent, but may only take one.
Pokémon Omega Ruby and Alpha Sapphire
| Puzzle | Hiding spot | Prize | Password | Field move used |
|---|---|---|---|---|
| Puzzle 1 | Under the desk | "Trick Master is wonderful." | Cut | |
| Puzzle 2 | Inside the right tree pot | "I adore Trick Master." | Rock Smash | |
| Puzzle 3 | Inside the left dresser | "Trick Master is cool." | Flash* | |
| Puzzle 4 | Behind the left window | "Trick Master is a genius." | Strength | |
| Puzzle 5 | Inside the right cupboard | "I want to hug Trick Master." | None | |
| Puzzle 6 | Under the first right cushion | "I love Trick Master." | None |
Puzzles
Puzzle 1
| Version | 1F |
|---|---|
| Ruby | 
|
| Sapphire | |
| Emerald | 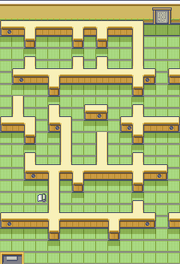
|
| Omega Ruby | 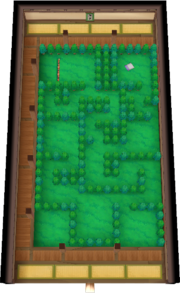
|
| Alpha Sapphire | |
The first puzzle is a straightforward maze. The rooms are separated by trees that must be cut down to proceed.
Items
| Item | Location | Games | |
|---|---|---|---|
| Orange Mail | In middle area of the maze (requires Cut) | R S | |
| Orange Mail | In the north part of the maze, west of the exit (requires Cut) | E | |
| Lava Cookie ×2 | OR AS | ||
Trainers
Pokémon Ruby, Sapphire, and Emerald
| Trainer | Pokémon | |||||||||||
|---|---|---|---|---|---|---|---|---|---|---|---|---|
|
| |||||||||||
| Requires Cut | ||||||||||||
|
| |||||||||||
| ||||||||||||
| ||||||||||||
|
| |||||||||||
| ||||||||||||
| Trainers with a PokéNav by their names will be registered in the Trainer's Eyes or Match Call function after the first battle, and may have a rematch with the player with higher-level Pokémon. | ||||||||||||
Pokémon Omega Ruby and Alpha Sapphire
| Trainer | Pokémon | |||||||||||
|---|---|---|---|---|---|---|---|---|---|---|---|---|
| Requires Cut | ||||||||||||
|
| |||||||||||
|
| |||||||||||
|
| |||||||||||
| ||||||||||||
| Trainers with a PokéNav by their names will be registered in the Trainer's Eyes or Match Call function after the first battle, and may have a rematch with the player with higher-level Pokémon. | ||||||||||||
Puzzle 2
| Version | 1F |
|---|---|
| Ruby | 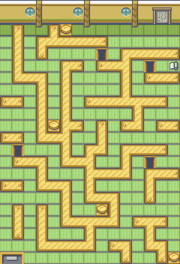
|
| Sapphire | |
| Emerald | 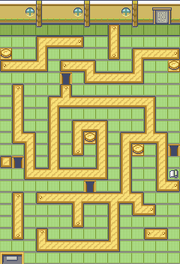
|
| Omega Ruby | 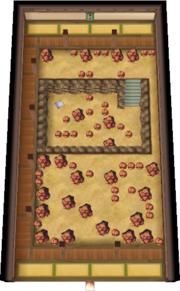
|
| Alpha Sapphire | |
The second puzzle is a maze, but with a more confusing layout.
In Ruby, Sapphire, and Emerald, there are holes in the ground cannot be passed until the player hits a switch to extend a platform over them. However, the player cannot tell which switches cover which holes.
In Omega Ruby and Alpha Sapphire, the maze contains a large number of breakable rocks. No wild Pokémon or items will appear when smashing these rocks.
Items
| Item | Location | Games | |
|---|---|---|---|
| Wave Mail | Near entrance | R S E | |
| Harbor Mail | Far northwest corner of room | R S | |
| Harbor Mail | Middle area of room, past the second hole | E | |
| Rage Candy Bar ×2 |
|
OR AS | |
Trainers
Pokémon Ruby, Sapphire, and Emerald
| Trainer | Pokémon | |||||||||||
|---|---|---|---|---|---|---|---|---|---|---|---|---|
|
| |||||||||||
|
| |||||||||||
| ||||||||||||
| ||||||||||||
|
| |||||||||||
| ||||||||||||
| Trainers with a PokéNav by their names will be registered in the Trainer's Eyes or Match Call function after the first battle, and may have a rematch with the player with higher-level Pokémon. | ||||||||||||
Pokémon Omega Ruby and Alpha Sapphire
| Trainer | Pokémon | |||||||||||
|---|---|---|---|---|---|---|---|---|---|---|---|---|
|
| |||||||||||
| ||||||||||||
| Requires Rock Smash | ||||||||||||
|
| |||||||||||
| ||||||||||||
|
| |||||||||||
| ||||||||||||
|
| |||||||||||
| ||||||||||||
| Trainers with a PokéNav by their names will be registered in the Trainer's Eyes or Match Call function after the first battle, and may have a rematch with the player with higher-level Pokémon. | ||||||||||||
Puzzle 3
| Version | 1F |
|---|---|
| Ruby | 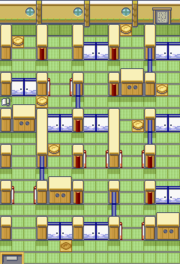
|
| Sapphire | |
| Emerald | 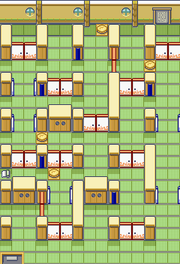
|
| Omega Ruby | 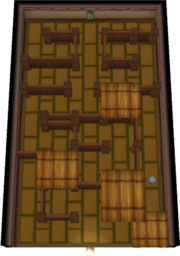
|
| Alpha Sapphire | |
In Ruby, Sapphire, and Emerald, the third puzzle is a room full of alternating red and blue doors. Stepping on a switch opens all red doors and closes all blue doors, and stepping on a switch again will open all blue doors and close all red doors. The entrance to the room, and some switches, are covered by rocks that can be shattered with Rock Smash. No wild Pokémon can appear from these rocks.
In Omega Ruby and Alpha Sapphire, the room is dark maze that can be illuminated using Flash, but it isn't necessary to use the move to proceed. At the tail end of the maze is a stairway hidden by the maze walls. Using the stairway will allow the player to move south underneath the maze to a small area where the password scroll is hidden.
Items
| Item | Location | Games | |
|---|---|---|---|
| Wood Mail | Near Picnicker Martha (requires Rock Smash) | R S | |
| Wood Mail | Far northwest corner, past sliding door (requires Rock Smash) | E | |
| Shadow Mail | Near Hiker Alan (requires Rock Smash) | R S | |
| Shadow Mail | Behind Picnicker Martha (requires Rock Smash) | E | |
| Lumiose Galette ×2 |
|
OR AS | |
Trainers
Pokémon Ruby, Sapphire, and Emerald
| Trainer | Pokémon | |||||||||||
|---|---|---|---|---|---|---|---|---|---|---|---|---|
| Requires Rock Smash | ||||||||||||
|
| |||||||||||
|
| |||||||||||
| ||||||||||||
|
| |||||||||||
| ||||||||||||
| ||||||||||||
| Trainers with a PokéNav by their names will be registered in the Trainer's Eyes or Match Call function after the first battle, and may have a rematch with the player with higher-level Pokémon. | ||||||||||||
Pokémon Omega Ruby and Alpha Sapphire
| Trainer | Pokémon | |||||||||||
|---|---|---|---|---|---|---|---|---|---|---|---|---|
|
| |||||||||||
| ||||||||||||
|
| |||||||||||
| ||||||||||||
|
| |||||||||||
| Trainers with a PokéNav by their names will be registered in the Trainer's Eyes or Match Call function after the first battle, and may have a rematch with the player with higher-level Pokémon. | ||||||||||||
Puzzle 4
| Version | 1F |
|---|---|
| Ruby | 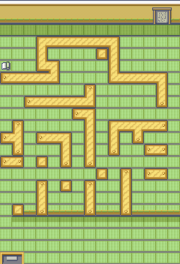
|
| Sapphire | |
| Emerald (Japanese) |
|
| Emerald (international) |
|
| Omega Ruby | 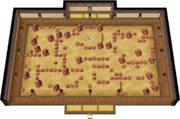
|
| Alpha Sapphire | |
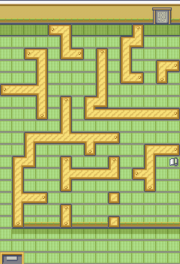
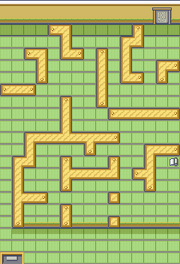
The fourth puzzle is a room full of boulders that must be pushed aside using Strength. However, due to the close quarters, pushing boulders the wrong way can block certain paths. In Japanese Emerald, two passageways were narrower.[1] In Omega Ruby and Alpha Sapphire, there are no Trainers in this room.
Items
| Item | Location | Games | |
|---|---|---|---|
| Mech Mail | Near Black Belt Yuji (requires Strength) | R S | |
| Mech Mail | Near Battle Girl Cora (requires Strength) | E | |
| Casteliacone ×2 | OR AS | ||
Trainers
Pokémon Ruby, Sapphire, and Emerald
| Trainer | Pokémon | |||||||||||
|---|---|---|---|---|---|---|---|---|---|---|---|---|
| Requires Strength | ||||||||||||
|
| |||||||||||
| ||||||||||||
|
| |||||||||||
|
| |||||||||||
| Trainers with a PokéNav by their names will be registered in the Trainer's Eyes or Match Call function after the first battle, and may have a rematch with the player with higher-level Pokémon. | ||||||||||||
Puzzle 5
The fifth puzzle is a room with a sequence of five Mechadolls that will ask the player questions of escalating difficulty. They each react to seeing the player or being interacted with as if they were Trainers, but instead of challenging the player to a battle they ask a question. Answering correctly allows the player to continue; answering incorrectly sends the player back to the start of the room, such that the player has to answer each of the Mechadolls' questions again. Each Mechadoll will ask the player one question from a pool of three randomly.
| Version | 1F |
|---|---|
| Ruby | 
|
| Sapphire | |
| Emerald | 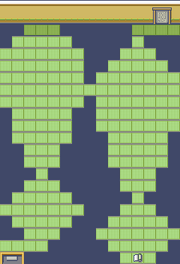
|
| Omega Ruby | 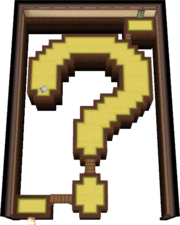
|
| Alpha Sapphire | |
In Ruby, Sapphire, Omega Ruby, and Alpha Sapphire, the room is shaped like a question mark. In Emerald, the room is shaped like a pair of exclamation marks.
There are no Trainers in this room. In the Generation III games, there are no items in this room.
Items
| Item | Location | Games | |
|---|---|---|---|
| Old Gateau ×2 |
|
OR AS | |
| Escape Rope | From Mechadoll 3 after answering its question correctly for the first time | OR AS | |
Questions
The correct answer to each question is in bold.
Pokémon Ruby and Sapphire
| Mechadoll | Question | Choices | ||
|---|---|---|---|---|
| Mechadoll 1 | One of these Pokémon is not found on Route 103. Which one is it? | Zigzagoon | Nincada | Poochyena |
| One of these Pokémon is not of the Grass type. Which one is it? | Nincada | Lotad | Roselia | |
| One of these Pokémon uses Scratch. Which one is it? | Shroomish | Nincada | Surskit | |
| Mechadoll 2 | In Prof. Birch's Bag, there were three Pokémon. Which one was at the right? | Treecko | Torchic | Mudkip |
| Which Pokémon was offered for a trade at the Pokémon Trainer's School? | Seedot | Shroomish | Spinda | |
| The Devon Researcher was looking for what Pokémon in Petalburg Woods? | Shroomish | Zigzagoon | Wurmple | |
| Mechadoll 3 | Which costs more? Three Poké Balls or one Super Potion? | Poké Ball | Super Potion | Same price |
| Sell one Escape Rope and buy one Antidote. How much money remains? | $135 | $155 | $175 | |
| Do one Full Heal and Great Ball cost more than one Revive? | They will cost more. | They will cost less. | Same price | |
| Mechadoll 4 | Rustboro Gym Leader Roxanne used a Geodude. Was it male or female? | Male | Female | Neither |
| In Dewford Hall, were there more men or women? | Males | Females | Same number | |
| The first Trainer in Dewford Gym was male or female? | Male | Female | It depends | |
| Mechadoll 5 | How many Bikes does Rydel have on display outside his cycle shop? | 6 | 8 | 10 |
| How many people give you Berries at the Pretty Petal flower shop? | 1 | 2 | 3 | |
| How many signs are there in Lilycove City? | 6 | 7 | 8 | |
Pokémon Emerald
| Mechadoll | Question | Choices | ||
|---|---|---|---|---|
| Mechadoll 1 | One of these Pokémon is not found on Route 110. Which one is it? | Oddish | Poochyena | Taillow |
| One of these Pokémon is not of the Water type. Which one is it? | Azurill | Lotad | Wingull | |
| One of these Pokémon does not use Leech Life. Which one is it? | Dustox | Zubat | Nincada | |
| Mechadoll 2 | Which of these Pokémon did Wally borrow from your father? | Ralts | Zigzagoon | Slakoth |
| Which of these Pokémon was chasing Prof. Birch? | Poochyena | Shroomish | Zigzagoon | |
| Which of these Pokémon did Team Aqua use in Petalburg Forest? | Poochyena | Zubat | Carvanha | |
| Mechadoll 3 | Which costs more? Three Harbor Mails or one Burn Heal? | Burn Heal | Harbor Mail | Same price |
| Sell one Great Ball and buy one Potion. How much money remains? | $60 | $55 | Nothing | |
| Do one Repel and Soda Pop cost more than one Super Potion? | They will cost more. | They will cost less. | Same price | |
| Mechadoll 4 | In Seashore House, were there more men or women? | Male | Female | Neither |
| In Lavaridge Town, were there more elderly men or elderly women? | Elderly men | Elderly ladies | Same number | |
| In the Trainer's School, how many girl students were there? | None | 1 | 2 | |
| Mechadoll 5 | In Slateport's Pokémon Fan Club, how many Pokémon were there? | 2 | 3 | 4 |
| In Fortree City, how many tree houses were there? | 6 | 7 | 8 | |
| On the Cycling Road, how many Triathletes were there? | 6 | 7 | 8 | |
Pokémon Omega Ruby and Alpha Sapphire
| Mechadoll | Question | Choices | ||
|---|---|---|---|---|
| Mechadoll 1 | One of these Pokémon is not found on Route 103. Which one is it? | Zigzagoon | Nincada | Poochyena |
| One of these Pokémon is not of the Grass type. Which one is it? | Nincada | Lotad | Roselia | |
| One of these Pokémon uses Scratch. Which one is it? | Shroomish | Nincada | Surskit | |
| Mechadoll 2 | In Professor Birch's Bag, there were three Pokémon. Which one was at the right? | Treecko | Torchic | Mudkip |
| Which Pokémon was offered for a trade at the Pokémon Trainers' School? | Seedot | Shroomish | Spinda | |
| What Pokémon was the Devon researcher looking for in Petalburg Woods? | Shroomish | Zigzagoon | Wurmple | |
| Mechadoll 3 | Which costs more? Three Poké Balls or one Super Potion? | The Poké Balls | The Super Potion | They're the same price |
| Sell one Escape Rope and buy one Antidote. How much money remains? | $135 | $155 | $175 | |
| Which would cost more, a Full Heal plus a Great Ball, or one Revive? | Full Heal plus Great Ball | Revive | They cost the same | |
| Mechadoll 4 | Rustboro Gym Leader Roxanne used a Geodude. Was it female or male? | Female | Male | Neither |
| In Dewford Hall, were there more men or women? | More men | More women | The same number | |
| Was the first Trainer in Dewford Gym male or female? | Male | Female | Random | |
| Mechadoll 5 | How many Bikes does Rydel have on display outside his cycle shop? | One | Two | Three |
| How many people give you Berries at the Pretty Petal flower shop? | One | Two | Three | |
| How many signs are there in Lilycove City? | Six | Seven | Eight | |
Puzzle 6
| Version | 1F |
|---|---|
| Ruby | 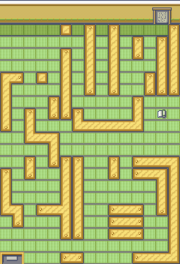
|
| Sapphire | |
| Emerald | 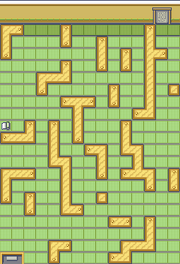
|
| Omega Ruby | 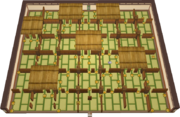
|
| Alpha Sapphire | |
In Ruby, Sapphire, and Emerald, the sixth puzzle is a room full of rotating gates like those found in Fortree Gym, but arranged in a more confusing pattern. As with Fortree, the player must walk through the gates in certain combinations to advance through the room. There are several Trainers in this room.
In Pokémon Omega Ruby and Alpha Sapphire, the room is full of spin tiles (like puzzle 7 in the Generation III games). This is also the final puzzle in these games. There are no Trainers in this room.
Items
| Item | Location | Games | |
|---|---|---|---|
| Glitter Mail | Near exit of room | R S | |
| Glitter Mail | In the southeast part of the maze | E | |
| Shalour Sable ×2 |
|
OR AS | |
Trainers
Pokémon Ruby, Sapphire, and Emerald
| Trainer | Pokémon | |||||||||||
|---|---|---|---|---|---|---|---|---|---|---|---|---|
|
| |||||||||||
| ||||||||||||
|
| |||||||||||
|
| |||||||||||
| ||||||||||||
| ||||||||||||
| Trainers with a PokéNav by their names will be registered in the Trainer's Eyes or Match Call function after the first battle, and may have a rematch with the player with higher-level Pokémon. | ||||||||||||
Puzzle 7
| Version | 1F |
|---|---|
| Ruby | 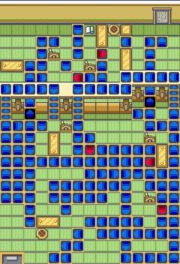
|
| Sapphire | |
| Emerald | 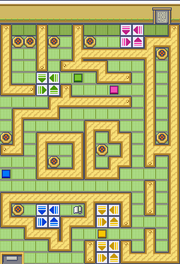
|
In Ruby and Sapphire, the seventh puzzle is a room filled with spin tiles, similar to those in Mossdeep Gym. The player must navigate the maze of spin tiles and pull switches to change their directions to advance through the room.
In Emerald, the seventh puzzle is a room full of Trainers standing on spin tiles that rotate when switches are triggered.
The difference between the puzzles is likely due to Mossdeep Gym being redesigned in Pokémon Emerald.
This puzzle does not appear in Pokémon Omega Ruby and Alpha Sapphire.
Items
| Item | Location | Games | |
|---|---|---|---|
| Tropic Mail | To the right of Hex Maniac Patricia | R S | |
| Tropic Mail | In center of room, via transport tile | E | |
Trainers
Pokémon Ruby and Sapphire
| Trainer | Pokémon | |||||||||||
|---|---|---|---|---|---|---|---|---|---|---|---|---|
|
| |||||||||||
| ||||||||||||
|
| |||||||||||
|
| |||||||||||
| ||||||||||||
| ||||||||||||
| Trainers with a PokéNav by their names will be registered in the Trainer's Eyes or Match Call function after the first battle, and may have a rematch with the player with higher-level Pokémon. | ||||||||||||
Pokémon Emerald
| Trainer | Pokémon | |||||||||||
|---|---|---|---|---|---|---|---|---|---|---|---|---|
|
| |||||||||||
| ||||||||||||
|
| |||||||||||
| ||||||||||||
|
| |||||||||||
|
| |||||||||||
|
| |||||||||||
| ||||||||||||
|
| |||||||||||
| ||||||||||||
| Trainers with a PokéNav by their names will be registered in the Trainer's Eyes or Match Call function after the first battle, and may have a rematch with the player with higher-level Pokémon. | ||||||||||||
Puzzle 8
| Version | 1F |
|---|---|
| Ruby | 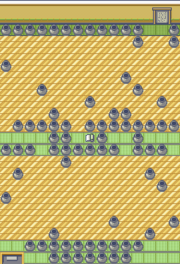
|
| Sapphire | |
| Emerald | 
|
In Ruby, Sapphire, and Emerald, the eighth puzzle is a room is divided into two areas, an upper and lower area. Both are made up primarily of polished floors lined with pots. Similar to ice tiles, stepping on the polished floor will send the player sliding across it until they hit an obstacle. The player must navigate their way across both floors to advance. This is the final puzzle.
This puzzle does not appear in Pokémon Omega Ruby and Alpha Sapphire.
Items
| Item | Location | Games | |
|---|---|---|---|
| Bead Mail | Between the upper and lower area | R S | |
| Bead Mail | Two squares east of the northwestern-most square | E | |
Trainers
Pokémon Ruby, Sapphire, and Emerald
| Trainer | Pokémon | |||||||||||
|---|---|---|---|---|---|---|---|---|---|---|---|---|
|
| |||||||||||
| ||||||||||||
|
| |||||||||||
| ||||||||||||
| ||||||||||||
|
| |||||||||||
| ||||||||||||
| Trainers with a PokéNav by their names will be registered in the Trainer's Eyes or Match Call function after the first battle, and may have a rematch with the player with higher-level Pokémon. | ||||||||||||
Layout
| Version | Entrance | End | Hallway |
|---|---|---|---|
| Ruby | 
|

|
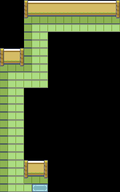
|
| Sapphire | |||
| Emerald | 
|

|
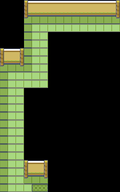
|
| Omega Ruby | 
|

|
|
| Alpha Sapphire | |||
Puzzle rooms
| Version | Ruby | Sapphire | Emerald | Omega Ruby | Alpha Sapphire |
|---|---|---|---|---|---|
| Room 1 | 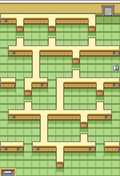
|

|
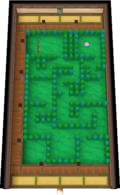
| ||
| Room 2 | 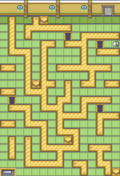
|

|

| ||
| Room 3 | 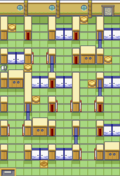
|
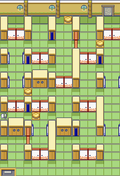
|
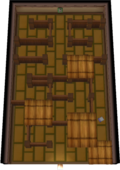
| ||
| Room 4 | 
|

|

| ||
| Room 5 | 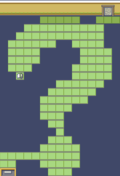
|
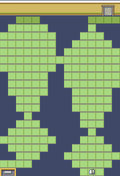
|

| ||
| Room 6 | 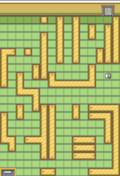
|
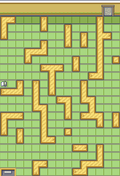
|

| ||
| Room 7 | 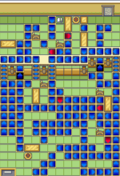
|
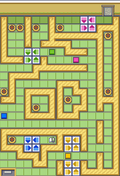
|
|||
| Room 8 | 
|
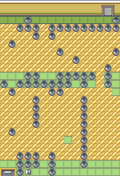
|
|||
In the anime
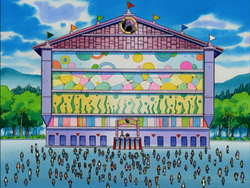
The King of Tricks hosts an annual contest at his Trick House in Mauville City. The competitor who overcomes the Trick House's various rooms receives a year's supply of Pokéblocks. These obstacles vary each year, and they include rope swings, log walks, and confusing mazes.
Ash and his friends visited the Trick House in A Poké-BLOCK Party!, where they navigated the areas with fellow competitor Alanna. However, their progress was constantly impeded by Team Rocket and Jigglypuff. In the end, Ivan ended up winning.
In other languages
| |||||||||||||||||||||||||||||||||||
| Anime-exclusive Pokémon competitions | ||||||||||||||||||||||
|---|---|---|---|---|---|---|---|---|---|---|---|---|---|---|---|---|---|---|---|---|---|---|
| ||||||||||||||||||||||

|
This article is part of Project Locations, a Bulbapedia project that aims to write comprehensive articles on every location in the Pokémon world. |

