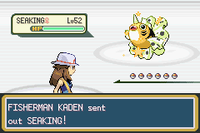
Trainer Tower: Difference between revisions
Jeangabin666 (talk | contribs) (→Trivia) |
Apopheniac (talk | contribs) (→In the manga: removing starter mention) |
||
| (66 intermediate revisions by 23 users not shown) | |||
| Line 5: | Line 5: | ||
|japanese_name=トレーナータワー | |japanese_name=トレーナータワー | ||
|translated_name=Trainer Tower | |translated_name=Trainer Tower | ||
|location=North of | |location=North of {{OBP|Seven Island|town}} | ||
|region=Sevii Islands | |region=Sevii Islands | ||
|generation={{Gen|III}} | |generation={{Gen|III}} | ||
}} | }} | ||
'''Trainer Tower''' (Japanese: '''トレーナータワー''' ''Trainer Tower'') is a facility in {{game|FireRed and LeafGreen|s}} located to north of [[Seven Island]] in the [[Sevii Islands]]. The area where it is located is the most northern location in Seven Island. It is similar to [[Battle Tower]]s in that {{pkmn|Trainer}}s can be challenged in a variety of different {{pkmn|battle}} types consecutively over a number of floors to reach the top; though the key concept of Trainer Tower is speed. Each battle mode has a default time and if beaten, offers a rare in-game item as a reward. Unlike Battle Towers, the {{player}}'s {{OBP|Pokémon|species}} will not be healed between battles, though recovery items such as | '''Trainer Tower''' (Japanese: '''トレーナータワー''' ''Trainer Tower'') is a [[Battle facility|facility]] in {{game|FireRed and LeafGreen|s}} located to north of [[Seven Island]] in the [[Sevii Islands]]. The area where it is located is the most northern location in Seven Island. It is similar to [[Battle Tower]]s in that {{pkmn|Trainer}}s can be challenged in a variety of different {{pkmn|battle}} types consecutively over a number of floors to reach the top; though the key concept of Trainer Tower is speed. Each battle mode has a default time and if beaten, offers a rare in-game item as a reward that can be obtained repeatedly by challenging the Tower again. Unlike Battle Towers, the {{player}}'s {{OBP|Pokémon|species}} will not be healed between battles, though recovery items such as [[Revive]]s and {{cat|Potions}} can be used both during and between battles. If necessary, the player can return to the entrance to heal their party at the [[Pokémon Center]], though this will waste more time in comparison to using items. | ||
Battles conducted in Trainer Tower do not award [[experience]] or [[Pokémon Dollar|money]]. The [[level]] of the Pokémon used by Trainers will also match the player's highest-leveled Pokémon. | Battles conducted in Trainer Tower do not award [[experience]] or [[Pokémon Dollar|money]]. The [[level]] of the Pokémon used by Trainers will also match the player's highest-leveled Pokémon. {{m|Thief}} and {{m|Covet}} cannot steal items, while {{m|Trick}} always fails. | ||
In the original Japanese releases of Pokémon FireRed and LeafGreen, Trainer Tower serves as a facility compatible with the [[e-Reader]], in which cards from the [[Pokémon Battle e FireRed & LeafGreen]] set can be used to modify the Trainers the player can battle, as well as the prizes they can earn. The default layout of Trainer Tower in the Japanese versions has four floors with the same Trainers on each floor for each playthrough. Scanning cards can increase this to a maximum of eight floors with multiple combinations of opponents. The standard eight-floor layout and different battle types as featured in the localizations incorporate the majority of the Trainers from these cards. | In the original Japanese releases of Pokémon FireRed and LeafGreen, Trainer Tower serves as a facility compatible with the [[e-Reader]], in which cards from the [[Pokémon Battle e FireRed & LeafGreen]] set can be used to modify the Trainers the player can battle, as well as the prizes they can earn. The default layout of Trainer Tower in the Japanese versions has four floors with the same Trainers on each floor for each playthrough. Scanning cards can increase this to a maximum of eight floors with multiple combinations of opponents. The standard eight-floor layout and different battle types as featured in the localizations incorporate the majority of the Trainers from these cards. | ||
[[Trainer Hill]], a location that shares many similarities with Trainer Tower, was later featured in {{game|Emerald}}. | [[Trainer Hill]], a location that shares many similarities with Trainer Tower, was later featured in {{game|Emerald}}. | ||
==Modes (Japanese versions)== | ==Modes (Japanese versions)== | ||
| Line 76: | Line 22: | ||
====1F==== | ====1F==== | ||
{{trainerheader|building}} | {{trainerheader|building}} | ||
{{trainerentry|Spr FRLG Youngster.png|Youngster|| | {{trainerentry|Spr FRLG Youngster.png|Youngster||none|2|020|Raticate|♂|1-100||042|Golbat|♀|1-100||36=ショウキチ|37=Shōkichi}} | ||
{{trainerfooter|building}} | {{trainerfooter|building}} | ||
====2F==== | ====2F==== | ||
{{trainerheader|building}} | {{trainerheader|building}} | ||
{{trainerentry|Spr FRLG Young Couple.png|Young Couple|| | {{trainerentry|Spr FRLG Young Couple.png|Young Couple||none|2|105|Marowak|♂|1-100||080|Slowbro|♀|1-100||36=マホとトシ|37=Maho and Toshi}} | ||
{{trainerfooter|building}} | {{trainerfooter|building}} | ||
====3F==== | ====3F==== | ||
{{trainerheader|building}} | {{trainerheader|building}} | ||
{{trainerentry|Spr FRLG Camper.png|Camper|| | {{trainerentry|Spr FRLG Camper.png|Camper||none|1|057|Primeape|♂|1-100||36=ジュンタ|37=Junta}} | ||
{{trainerdiv|building}} | {{trainerdiv|building}} | ||
{{trainerentry|Spr FRLG Picnicker.png|Picnicker|| | {{trainerentry|Spr FRLG Picnicker.png|Picnicker||none|1|049|Venomoth|♀|1-100||36=シホリ|37=Shihori}} | ||
{{trainerdiv|building}} | {{trainerdiv|building}} | ||
{{trainerentry|Spr FRLG Bird Keeper.png|Bird Keeper|| | {{trainerentry|Spr FRLG Bird Keeper.png|Bird Keeper||none|1|085|Dodrio|♂|1-100||36=ヒビキ|37=Hibiki}} | ||
{{trainerfooter|building}} | {{trainerfooter|building}} | ||
====4F==== | ====4F==== | ||
{{trainerheader|building}} | {{trainerheader|building}} | ||
{{trainerentry|Spr FRLG Tamer.png|Tamer|| | {{trainerentry|Spr FRLG Tamer.png|Tamer||none|2|028|Sandslash|♂|1-100||024|Arbok|♂|1-100||36=ヨシナリ|37=Yoshinari}} | ||
{{trainerfooter|building}} | {{trainerfooter|building}} | ||
==Modes (international versions)== | ==Modes (international versions)== | ||
===Single Mode=== | ===Single Mode=== | ||
This mode features | This mode features one Single Battle per floor, with two Pokémon per Trainer. If the tower is cleared within the target time, players will receive an [[Upgrade|Up-Grade]]. | ||
The tower layout in this mode can be replicated in the Japanese version by scanning cards #19, 11, 25, 01, 09, 17, 02, and 10 in order. | |||
====1F==== | ====1F==== | ||
{{trainerheader|building}} | {{trainerheader|building}} | ||
{{trainerentry|Spr FRLG Sailor.png|Sailor|Alberto| | {{trainerentry|Spr FRLG Sailor.png|Sailor|Alberto|none|2|160|Feraligatr|♂|1-100|Focus Band|115|Kangaskhan|♀|1-100|Quick Claw|36=サトフミ|37=Satofumi}} | ||
{{trainerfooter|building}} | {{trainerfooter|building}} | ||
====2F==== | ====2F==== | ||
{{trainerheader|building}} | {{trainerheader|building}} | ||
{{trainerentry|Spr FRLG Bug Catcher.png|Bug Catcher|Brandon| | {{trainerentry|Spr FRLG Bug Catcher.png|Bug Catcher|Brandon|none|2|015|Beedrill|♂|1-100|BrightPowder|193|Yanma|♂|1-100|BrightPowder|36=ミキオ|37=Mikio}} | ||
{{trainerfooter|building}} | {{trainerfooter|building}} | ||
====3F==== | ====3F==== | ||
{{trainerheader|building}} | {{trainerheader|building}} | ||
{{trainerentry|Spr FRLG Juggler.png|Juggler|Jarrett| | {{trainerentry|Spr FRLG Juggler.png|Juggler|Jarrett|none|2|110|Weezing|♀|1-100|Salac Berry|102|Exeggcute|♀|1-100|Quick Claw|36=マイケル|37=Michael}} | ||
{{trainerfooter|building}} | {{trainerfooter|building}} | ||
====4F==== | ====4F==== | ||
{{trainerheader|building}} | {{trainerheader|building}} | ||
{{trainerentry|Spr FRLG Youngster.png|Youngster|Cole| | {{trainerentry|Spr FRLG Youngster.png|Youngster|Cole|none|2|057|Primeape|♂|1-100|Sitrus Berry|080|Slowbro|♀|1-100|Sitrus Berry|36=アキラ|37=Akira}} | ||
{{trainerfooter|building}} | {{trainerfooter|building}} | ||
====5F==== | ====5F==== | ||
{{trainerheader|building}} | {{trainerheader|building}} | ||
{{trainerentry|Spr FRLG Camper.png|Camper|Joey| | {{trainerentry|Spr FRLG Camper.png|Camper|Joey|none|2|034|Nidoking|♂|1-100|Soft Sand|128|Tauros|♂|1-100|Silk Scarf|36=タケオ|37=Takeo}} | ||
{{trainerfooter|building}} | {{trainerfooter|building}} | ||
====6F==== | ====6F==== | ||
{{trainerheader|building}} | {{trainerheader|building}} | ||
{{trainerentry|Spr FRLG Swimmer M.png|Swimmer|Braden| | {{trainerentry|Spr FRLG Swimmer M.png|Swimmer|Braden|none|2|206|Dunsparce|♂|1-100|Persim Berry|186|Politoed|♂|1-100|Chesto Berry|36=シンジ|37=Shinji}} | ||
{{trainerfooter|building}} | {{trainerfooter|building}} | ||
====7F==== | ====7F==== | ||
{{trainerheader|building}} | {{trainerheader|building}} | ||
{{trainerentry|Spr FRLG Burglar.png|Burglar|Jac| | {{trainerentry|Spr FRLG Burglar.png|Burglar|Jac|none|2|052|Meowth|♂|1-100{{shinystar|FRLG}}|Liechi Berry|113|Chansey|♀|1-100|Lucky Punch|36=ジュウゾウ|37=Jūzō}} | ||
{{trainerfooter|building}} | {{trainerfooter|building}} | ||
====8F==== | ====8F==== | ||
{{trainerheader|building}} | {{trainerheader|building}} | ||
{{trainerentry|Spr FRLG Pokémon Breeder.png|Pokémon Breeder|Lily| | {{trainerentry|Spr FRLG Pokémon Breeder.png|Pokémon Breeder|Lily|none|2|175|Togepi|♀|1-100|Sitrus Berry|143|Snorlax|♂|1-100|Leftovers|36=シズカ|37=Shizuka}} | ||
{{trainerfooter|building}} | {{trainerfooter|building}} | ||
===Double Mode=== | ===Double Mode=== | ||
This mode features | This mode features one [[Double Battle]] per floor, with one Pokémon for each of the Trainers (two Pokémon total per battle). If the tower is cleared within the target time, players will receive a [[Dragon Scale]]. | ||
The tower layout in this mode can be replicated in the Japanese version by scanning cards #13, 06, 12, 14, 04, 05, 29, and 21 in order. | |||
====1F==== | ====1F==== | ||
{{trainerheader|building}} | {{trainerheader|building}} | ||
{{trainerentry|Spr FRLG Twins.png|Twins|Jen & Kira| | {{trainerentry|Spr FRLG Twins.png|Twins|Jen & Kira|none|2|135|Jolteon|♂|1-100|Quick Claw|196|Espeon|♀|1-100{{shinystar|FRLG}}|BrightPowder|36=カコとトコ|37=Kako and Toko}} | ||
{{trainerfooter|building}} | {{trainerfooter|building}} | ||
====2F==== | ====2F==== | ||
{{trainerheader|building}} | {{trainerheader|building}} | ||
{{trainerentry|Spr FRLG Crush Kin.png|Crush Kin|Jo & Haley| | {{trainerentry|Spr FRLG Crush Kin.png|Crush Kin|Jo & Haley|none|2|065|Alakazam|♀|1-100|Salac Berry|229|Houndoom|♂|1-100|Focus Band|36=カジとマキ|37=Kaji and Maki}} | ||
{{trainerfooter|building}} | {{trainerfooter|building}} | ||
====3F==== | ====3F==== | ||
{{trainerheader|building}} | {{trainerheader|building}} | ||
{{trainerentry|Spr FRLG Crush Kin.png|Crush Kin|Ric & Rene| | {{trainerentry|Spr FRLG Crush Kin.png|Crush Kin|Ric & Rene|none|2|076|Golem|♀|1-100|Scope Lens|068|Machamp|♂|1-100|Scope Lens|36=リクとハナ|37=Ric and Hana}} | ||
{{trainerfooter|building}} | {{trainerfooter|building}} | ||
====4F==== | ====4F==== | ||
{{trainerheader|building}} | {{trainerheader|building}} | ||
{{trainerentry|Spr FRLG Cool Couple.png|Cool Couple|Isac & Mag| | {{trainerentry|Spr FRLG Cool Couple.png|Cool Couple|Isac & Mag|none|2|221|Piloswine|♂|1-100|Soft Sand|169|Crobat|♀|1-100|King's Rock|36=ヨウとユリ|37=Yō and Yuri}} | ||
{{trainerfooter|building}} | {{trainerfooter|building}} | ||
====5F==== | ====5F==== | ||
{{trainerheader|building}} | {{trainerheader|building}} | ||
{{trainerentry|Spr FRLG Cool Couple.png|Cool Couple|Jos & Anne| | {{trainerentry|Spr FRLG Cool Couple.png|Cool Couple|Jos & Anne|none|2|242|Blissey|♀|1-100|Leftovers|059|Arcanine|♂|1-100|Charcoal|36=トモとカナ|37=Tomo and Kana}} | ||
{{trainerfooter|building}} | {{trainerfooter|building}} | ||
====6F==== | ====6F==== | ||
{{trainerheader|building}} | {{trainerheader|building}} | ||
{{trainerentry|Spr FRLG Young Couple.png|Young Couple|Alek & Emy| | {{trainerentry|Spr FRLG Young Couple.png|Young Couple|Alek & Emy|none|2|217|Ursaring|♂|1-100|Lum Berry|162|Furret|♀|1-100|Shell Bell|36=スズとタク|37=Suzu and Taku}} | ||
{{trainerfooter|building}} | {{trainerfooter|building}} | ||
====7F==== | ====7F==== | ||
{{trainerheader|building}} | {{trainerheader|building}} | ||
{{trainerentry|Spr FRLG Sis and Bro.png|Sis and Bro|Axe & Ren| | {{trainerentry|Spr FRLG Sis and Bro.png|Sis and Bro|Axe & Ren|none|2|171|Lanturn|♀|1-100|BrightPowder|148|Dragonair|♀|1-100|Shell Bell|36=ヒデとヒロ|37=Hide and Hiro}} | ||
{{trainerfooter|building}} | {{trainerfooter|building}} | ||
====8F==== | ====8F==== | ||
{{trainerheader|building}} | {{trainerheader|building}} | ||
{{trainerentry|Spr FRLG Cool Couple.png|Cool Couple|Geb & Megan| | {{trainerentry|Spr FRLG Cool Couple.png|Cool Couple|Geb & Megan|none|2|130|Gyarados|♂|1-100|Salac Berry|112|Rhydon|♂|1-100|Quick Claw|36=マサとマミ|37=Masa and Mami}} | ||
{{trainerfooter|building}} | {{trainerfooter|building}} | ||
===Knockout Mode=== | ===Knockout Mode=== | ||
This mode features three | This mode features three Single Battles per floor, with one Pokémon per Trainer and each Trainer challenging the player consecutively. If the tower is cleared within the target time, players will receive a [[Metal Coat]]. | ||
The tower layout in this mode can be replicated in the Japanese version by scanning cards #07, 08, 16, 24, 32, 31, 23, and 15 in order. | |||
====1F==== | ====1F==== | ||
{{trainerheader|building}} | {{trainerheader|building}} | ||
{{trainerentry|Spr FRLG Biker.png|Biker|Jordy| | {{trainerentry|Spr FRLG Biker.png|Biker|Jordy|none|1|240|Magby|♂|1-100|Lax Incense|36=リュウ|37=Ryū}} | ||
{{trainerdiv|building}} | {{trainerdiv|building}} | ||
{{trainerentry|Spr FRLG Biker.png|Biker|Ernest| | {{trainerentry|Spr FRLG Biker.png|Biker|Ernest|none|1|175|Togepi|♂|1-100|Quick Claw|36=ジロウ|37=Jirō}} | ||
{{trainerdiv|building}} | {{trainerdiv|building}} | ||
{{trainerentry|Spr FRLG Cue Ball.png|Cue Ball|Gabriel| | {{trainerentry|Spr FRLG Cue Ball.png|Cue Ball|Gabriel|none|1|238|Smoochum|♀|1-100|BrightPowder|36=ノブヤ|37=Nobuya}} | ||
{{trainerfooter|building}} | {{trainerfooter|building}} | ||
====2F==== | ====2F==== | ||
{{trainerheader|building}} | {{trainerheader|building}} | ||
{{trainerentry|Spr FRLG Hiker.png|Hiker|Mike| | {{trainerentry|Spr FRLG Hiker.png|Hiker|Mike|none|1|006|Charizard|♂|1-100|Scope Lens|36=ノボル|37=Noboru}} | ||
{{trainerdiv|building}} | {{trainerdiv|building}} | ||
{{trainerentry|Spr FRLG Crush Girl.png|Crush Girl|Rebecca| | {{trainerentry|Spr FRLG Crush Girl.png|Crush Girl|Rebecca|none|1|136|Flareon|♂|1-100|Silk Scarf|36=マナカ|37=Manaka}} | ||
{{trainerdiv|building}} | {{trainerdiv|building}} | ||
{{trainerentry|Spr FRLG Black Belt.png|Black Belt|Nicolas| | {{trainerentry|Spr FRLG Black Belt.png|Black Belt|Nicolas|none|1|062|Poliwrath|♀|1-100|King's Rock|36=タケル|37=Takeru}} | ||
{{trainerfooter|building}} | {{trainerfooter|building}} | ||
====3F==== | ====3F==== | ||
{{trainerheader|building}} | {{trainerheader|building}} | ||
{{trainerentry|Spr FRLG Picnicker.png|Picnicker|Camryn| | {{trainerentry|Spr FRLG Picnicker.png|Picnicker|Camryn|none|1|241|Miltank|♀|1-100|Silk Scarf|36=モエ|37=Moe}} | ||
{{trainerdiv|building}} | {{trainerdiv|building}} | ||
{{trainerentry|Spr FRLG Aroma Lady.png|Aroma Lady|Natalia| | {{trainerentry|Spr FRLG Aroma Lady.png|Aroma Lady|Natalia|none|1|045|Vileplume|♀|1-100|Persim Berry|36=カオリ|37=Kaori}} | ||
{{trainerdiv|building}} | {{trainerdiv|building}} | ||
{{trainerentry|Spr FRLG Cooltrainer F.png|Cool Trainer|Kathleen| | {{trainerentry|Spr FRLG Cooltrainer F.png|Cool Trainer|Kathleen|none|1|131|Lapras|♀|1-100|Lum Berry|36=イクヨ|37=Ikuyo}} | ||
{{trainerfooter|building}} | {{trainerfooter|building}} | ||
====4F==== | ====4F==== | ||
{{trainerheader|building}} | {{trainerheader|building}} | ||
{{trainerentry|Spr FRLG Sailor.png|Sailor|Brennan| | {{trainerentry|Spr FRLG Sailor.png|Sailor|Brennan|none|1|113|Chansey|♀|1-100|Oran Berry|36=ユキマサ|37=Yukimasa}} | ||
{{trainerdiv|building}} | {{trainerdiv|building}} | ||
{{trainerentry|Spr FRLG Fisherman.png|Fisherman|Kaden| | {{trainerentry|Spr FRLG Fisherman.png|Fisherman|Kaden|none|1|119|Seaking|♀|1-100{{shinystar|FRLG}}|Cheri Berry|36=モトヒコ|37=Motohiko}} | ||
{{trainerdiv|building}} | {{trainerdiv|building}} | ||
{{trainerentry|Spr FRLG Gentleman.png|Gentleman|Emanuel| | {{trainerentry|Spr FRLG Gentleman.png|Gentleman|Emanuel|none|1|134|Vaporeon|♀|1-100|Shell Bell|36=ヘンリー|37=Henry}} | ||
{{trainerfooter|building}} | {{trainerfooter|building}} | ||
====5F==== | ====5F==== | ||
{{trainerheader|building}} | {{trainerheader|building}} | ||
{{trainerentry|Spr FRLG Beauty.png|Beauty|Maura| | {{trainerentry|Spr FRLG Beauty.png|Beauty|Maura|none|1|029|Nidoran♀||1-100|Sitrus Berry|36=ヒカリ|37=Hikari}} | ||
{{trainerdiv|building}} | {{trainerdiv|building}} | ||
{{trainerentry|Spr FRLG Lass.png|Lass|Mikaela| | {{trainerentry|Spr FRLG Lass.png|Lass|Mikaela|none|1|030|Nidorina|♀|1-100|Choice Band|36=アカリ|37=Akari}} | ||
{{trainerdiv|building}} | {{trainerdiv|building}} | ||
{{trainerentry|Spr FRLG Engineer.png|Engineer|Flint| | {{trainerentry|Spr FRLG Engineer.png|Engineer|Flint|none|1|031|Nidoqueen|♀|1-100|Choice Band|36=テルオ|37=Teruo}} | ||
{{trainerfooter|building}} | {{trainerfooter|building}} | ||
====6F==== | ====6F==== | ||
{{trainerheader|building}} | {{trainerheader|building}} | ||
{{trainerentry|Spr FRLG Rocker.png|Rocker|Ben| | {{trainerentry|Spr FRLG Rocker.png|Rocker|Ben|none|1|181|Ampharos|♀|1-100|Shell Bell|36=ヒロト|37=Hiroto}} | ||
{{trainerdiv|building}} | {{trainerdiv|building}} | ||
{{trainerentry|Spr FRLG Engineer.png|Engineer|Camden| | {{trainerentry|Spr FRLG Engineer.png|Engineer|Camden|none|1|210|Granbull|♀|1-100|Choice Band|36=ヨウスケ|37=Yōsuke}} | ||
{{trainerdiv|building}} | {{trainerdiv|building}} | ||
{{trainerentry|Spr FRLG Scientist.png|Scientist|Zackery| | {{trainerentry|Spr FRLG Scientist.png|Scientist|Zackery|none|1|200|Misdreavus|♀|1-100|Salac Berry|36=ミツオ|37=Mitsuo}} | ||
{{trainerfooter|building}} | {{trainerfooter|building}} | ||
====7F==== | ====7F==== | ||
{{trainerheader|building}} | {{trainerheader|building}} | ||
{{trainerentry|Spr FRLG Tuber.png|Tuber|Priscilla| | {{trainerentry|Spr FRLG Tuber.png|Tuber|Priscilla|none|1|118|Goldeen|♂|1-100|Apicot Berry|36=ヒナコ|37=Hinako}} | ||
{{trainerdiv|building}} | {{trainerdiv|building}} | ||
{{trainerentry|Spr FRLG Lady.png|Lady|Charlotte| | {{trainerentry|Spr FRLG Lady.png|Lady|Charlotte|none|1|211|Qwilfish|♂|1-100|Persim Berry|36=カオルコ|37=Kaoruko}} | ||
{{trainerdiv|building}} | {{trainerdiv|building}} | ||
{{trainerentry|Spr FRLG Swimmer F.png|Swimmer|Shania| | {{trainerentry|Spr FRLG Swimmer F.png|Swimmer|Shania|none|1|226|Mantine|♀|1-100|Mental Herb|36=ミナミ|37=Minami}} | ||
{{trainerfooter|building}} | {{trainerfooter|building}} | ||
====8F==== | ====8F==== | ||
{{trainerheader|building}} | {{trainerheader|building}} | ||
{{trainerentry|Spr FRLG Pokémon Ranger F.png|Pokémon Ranger|Chelsea| | {{trainerentry|Spr FRLG Pokémon Ranger F.png|Pokémon Ranger|Chelsea|none|1|121|Starmie||1-100|Petaya Berry|36=フタバ|37=Futaba}} | ||
{{trainerdiv|building}} | {{trainerdiv|building}} | ||
{{trainerentry|Spr FRLG Pokémon Ranger M.png|Pokémon Ranger|Trenton| | {{trainerentry|Spr FRLG Pokémon Ranger M.png|Pokémon Ranger|Trenton|none|1|059|Arcanine|♂|1-100|Sitrus Berry|36=ユキヒコ|37=Yukihiko}} | ||
{{trainerdiv|building}} | {{trainerdiv|building}} | ||
{{trainerentry|Spr FRLG Cooltrainer M.png|Cool Trainer|Albert| | {{trainerentry|Spr FRLG Cooltrainer M.png|Cool Trainer|Albert|none|1|003|Venusaur|♂|1-100|Salac Berry|36=シュウ|37=Shū}} | ||
{{trainerfooter|building}} | {{trainerfooter|building}} | ||
===Mixed Mode=== | ===Mixed Mode=== | ||
This mode features a combination of the battles seen in the other three modes. If the tower is cleared within the target time players will receive a | This mode features a combination of the battles seen in the other three modes. If the tower is cleared within the target time, players will receive a [[King's Rock]]. | ||
The tower layout in this mode can be replicated in the Japanese version by scanning cards #18, 27, 26, 21, 20, 15, 12, and 08 in order. | |||
====1F==== | ====1F==== | ||
{{trainerheader|building}} | {{trainerheader|building}} | ||
{{trainerentry|Spr FRLG Cooltrainer F.png|Cooltrainer|Allyson| | {{trainerentry|Spr FRLG Cooltrainer F.png|Cooltrainer|Allyson|none|2|121|Starmie||1-100|Lum Berry|230|Kingdra|♂|1-100|Chesto Berry|36=チハル|37=Chiharu}} | ||
{{trainerfooter|building}} | {{trainerfooter|building}} | ||
====2F==== | ====2F==== | ||
{{trainerheader|building}} | {{trainerheader|building}} | ||
{{trainerentry|Spr FRLG Psychic M.png|Psychic|Lorenzo| | {{trainerentry|Spr FRLG Psychic M.png|Psychic|Lorenzo|none|2|097|Hypno|♂|1-100|Salac Berry|094|Gengar|♂|1-100|Leftovers|36=シュン|37=Shun}} | ||
{{trainerfooter|building}} | {{trainerfooter|building}} | ||
====3F==== | ====3F==== | ||
{{trainerheader|building}} | {{trainerheader|building}} | ||
{{trainerentry|Spr FRLG Super Nerd.png|Super Nerd|Owen| | {{trainerentry|Spr FRLG Super Nerd.png|Super Nerd|Owen|none|2|135|Jolteon|♂|1-100|BrightPowder|233|Porygon2||1-100|Salac Berry|36=カケル|37=Kakeru}} | ||
{{trainerfooter|building}} | {{trainerfooter|building}} | ||
====4F==== | ====4F==== | ||
{{trainerheader|building}} | {{trainerheader|building}} | ||
{{trainerentry|Spr FRLG Cool Couple.png|Cool Couple|Geb & Megan| | {{trainerentry|Spr FRLG Cool Couple.png|Cool Couple|Geb & Megan|none|2|034|Nidoking|♂|1-100|Focus Band|031|Nidoqueen|♀|1-100|Focus Band|36=マサとマミ|37=Masa and Mami}} | ||
{{trainerfooter|building}} | {{trainerfooter|building}} | ||
====5F==== | ====5F==== | ||
{{trainerheader|building}} | {{trainerheader|building}} | ||
{{trainerentry|Spr FRLG Sis and Bro.png|Sis and Bro|Kat & Kipp| | {{trainerentry|Spr FRLG Sis and Bro.png|Sis and Bro|Kat & Kipp|none|2|222|Corsola|♀|1-100|Quick Claw|099|Kingler|♂|1-100|Quick Claw|36=ナツとカイ|37=Natsu and Kai}} | ||
{{trainerfooter|building}} | {{trainerfooter|building}} | ||
====6F==== | ====6F==== | ||
{{trainerheader|building}} | {{trainerheader|building}} | ||
{{trainerentry|Spr FRLG Pokémon Ranger F.png|Pokémon Ranger|Chelsea| | {{trainerentry|Spr FRLG Pokémon Ranger F.png|Pokémon Ranger|Chelsea|none|1|166|Ledian|♀|1-100|Liechi Berry|36=フタバ|37=Futaba}} | ||
{{trainerdiv|building}} | {{trainerdiv|building}} | ||
{{trainerentry|Spr FRLG Pokémon Ranger M.png|Pokémon Ranger|Trenton| | {{trainerentry|Spr FRLG Pokémon Ranger M.png|Pokémon Ranger|Trenton|none|1|130|Gyarados|♂|1-100|Sitrus Berry|36=ユキヒコ|37=Yukihiko}} | ||
{{trainerdiv|building}} | {{trainerdiv|building}} | ||
{{trainerentry|Spr FRLG Cooltrainer M.png|Cool Trainer|Albert| | {{trainerentry|Spr FRLG Cooltrainer M.png|Cool Trainer|Albert|none|1|248|Tyranitar|♂|1-100|Salac Berry|36=シュウ|37=Shū}} | ||
{{trainerfooter|building}} | {{trainerfooter|building}} | ||
====7F==== | ====7F==== | ||
{{trainerheader|building}} | {{trainerheader|building}} | ||
{{trainerentry|Spr FRLG Crush Kin.png|Crush Kin|Ric & Rene| | {{trainerentry|Spr FRLG Crush Kin.png|Crush Kin|Ric & Rene|none|2|107|Hitmonchan|♂|1-100|Scope Lens|106|Hitmonlee|♂|1-100|Scope Lens|36=リクとハナ|37=Ric and Hana}} | ||
{{trainerfooter|building}} | {{trainerfooter|building}} | ||
====8F==== | ====8F==== | ||
{{trainerheader|building}} | {{trainerheader|building}} | ||
{{trainerentry|Spr FRLG Hiker.png|Hiker|Mike| | {{trainerentry|Spr FRLG Hiker.png|Hiker|Mike|none|1|006|Charizard|♂|1-100|Scope Lens|36=ノボル|37=Noboru}} | ||
{{trainerdiv|building}} | {{trainerdiv|building}} | ||
{{trainerentry|Spr FRLG Crush Girl.png|Crush Girl|Rebecca| | {{trainerentry|Spr FRLG Crush Girl.png|Crush Girl|Rebecca|none|1|031|Nidoqueen|♀|1-100|Silk Scarf|36=マナカ|37=Manaka}} | ||
{{trainerdiv|building}} | {{trainerdiv|building}} | ||
{{trainerentry|Spr FRLG Black Belt.png|Black Belt|Nicolas| | {{trainerentry|Spr FRLG Black Belt.png|Black Belt|Nicolas|none|1|062|Poliwrath|♀|1-100|King's Rock|36=タケル|37=Takeru}} | ||
{{trainerfooter|building}} | {{trainerfooter|building}} | ||
The prizes that would be received for clearing each mode are items that can be found elsewhere in the game, and if the Bag is full, the prize will not be accepted. | The prizes that would be received for clearing each mode are items that can be found elsewhere in the game, and if the Bag is full, the prize will not be accepted. | ||
==Poké Mart== | |||
{{shop|}} | |||
{{shoprow|{{shopitem|Ultra Ball|1200}}|{{shopitem|Great Ball|600}}}} | |||
{{shoprow|{{shopitem|Full Restore|3000}}|{{shopitem|Max Potion|2500}}}} | |||
{{shoprow|{{shopitem|Hyper Potion|1200}}|{{shopitem|Revive|1500}}}} | |||
{{shoprow|{{shopitem|Full Heal|600}}|{{shopitem|Escape Rope|550}}}} | |||
{{shoprow|{{shopitem|Max Repel|700}}|}} | |||
{{shopfooter}} | |||
==Items== | |||
===Exterior=== | |||
{{itlisth|building}} | |||
{{itemlist|Nanab Berry III|Southeast of {{tc|Psychic}} Rodette, on a marked square ''(hidden)''|FR=yes|LG=yes|display=[[Nanab Berry]]}} | |||
{{itemlist|Pearl|On the beach, three squares west of the sign ''(hidden [[Recurring item|recurring item]]; group B)''|FR=yes|LG=yes|display={{i|Pearl}}}} | |||
{{itemlist|Big Pearl|On the beach, north of the sign ''(hidden [[Recurring item|recurring item]]; group C)''|FR=yes|LG=yes}} | |||
{{itlistfoot|building}} | |||
===Interior=== | |||
{{incomplete|section|needs=What times are required?}} | |||
{{itlisth|building}} | |||
{{itemlist|Up-Grade|Reward for defeating Single Mode (repeatable)|FR=yes|LG=yes|display=[[Upgrade|Up-Grade]]}} | |||
{{itemlist|Dragon Scale|Reward for defeating Double Mode (repeatable)|FR=yes|LG=yes}} | |||
{{itemlist|Metal Coat|Reward for defeating Knockout Mode (repeatable)|FR=yes|LG=yes}} | |||
{{itemlist|King's Rock|Reward for defeating Mixed Mode (repeatable)|FR=yes|LG=yes}} | |||
{{itlistfoot|building}} | |||
==Pokémon== | |||
{{catch/header|building|no}} | |||
{{catch/div|ocean|Surfing}} | |||
{{catch/entryfl|072|Tentacool|yes|no|Surf|5-40|95%|type1=water|type2=poison}} | |||
{{catch/entryfl|072|Tentacool|no|yes|Surf|5-35|90%|type1=water|type2=poison}} | |||
{{catch/entryfl|073|Tentacruel|yes|yes|Surf|35-40|5%|type1=water|type2=poison}} | |||
{{catch/entryfl|226|Mantine|no|yes|Surf|35-40|5%|type1=water|type2=flying}} | |||
{{catch/div|ocean|Fishing}} | |||
{{catch/entryfl|129|Magikarp|yes|yes|Fish Old|5|100%|type1=Water}} | |||
{{catch/entryfl|116|Horsea|yes|no|Fish Good|5-15|80%|type1=Water}} | |||
{{catch/entryfl|098|Krabby|no|yes|Fish Good|5-15|80%|type1=Water}} | |||
{{catch/entryfl|129|Magikarp|yes|yes|Fish Good|5-15|20%|type1=Water}} | |||
{{Catch/entryfl|116|Horsea|yes|no|Fish Super|15-25|40%|type1=Water}} | |||
{{Catch/entryfl|211|Qwilfish|yes|no|Fish Super|15-25|40%|type1=Water|type2=Poison}} | |||
{{Catch/entryfl|098|Krabby|no|yes|Fish Super|15-25|40%|type1=Water}} | |||
{{Catch/entryfl|223|Remoraid|no|yes|Fish Super|15-25|40%|type1=Water}} | |||
{{Catch/entryfl|130|Gyarados|yes|yes|Fish Super|15-25|15%|type1=Water|type2=Flying}} | |||
{{Catch/entryfl|117|Seadra|yes|no|Fish Super|25-35|4%|type1=Water}} | |||
{{Catch/entryfl|099|Kingler|no|yes|Fish Super|25-35|4%|type1=Water}} | |||
{{Catch/entryfl|054|Psyduck|yes|no|Fish Super|25-35|1%|type1=Water}} | |||
{{Catch/entryfl|079|Slowpoke|no|yes|Fish Super|25-35|1%|type1=Water|type2=Psychic}} | |||
{{catch/footer|building}} | |||
==Trainers== | |||
{{trainerheader|building}} | |||
{{trainerentry|Spr FRLG Psychic F.png|Psychic|Rodette|1000|3|177|Natu|♀|48||096|Drowzee|♀|48||097|Hypno|♀|50||36=マヤ|37=Maya|38=Vs. Seeker}} | |||
{{trainerdiv|building}} | |||
{{trainerentry|Spr FRLG Psychic M.png|Psychic|Dario|1040|1|203|Girafarig|♂|52||36=レイ|37=Rei|38=Vs. Seeker}} | |||
{{trainerdiv|building|Rematch}} | |||
{{trainerentry|Spr FRLG Psychic F.png|Psychic|Rodette|1060|notes=After delivering the {{i|Sapphire}} to [[Celio]]|3|177|Natu|♀|53||097|Hypno|♀|53||097|Hypno|♀|53||36=マヤ|37=Maya|38=Vs. Seeker}} | |||
{{trainerdiv|building}} | |||
{{trainerentry|Spr FRLG Psychic M.png|Psychic|Dario|1120|notes=After delivering the {{i|Sapphire}} to [[Celio]]|1|203|Girafarig|♂|56||36=レイ|37=Rei|38=Vs. Seeker}} | |||
{{trainerfooter|building}} | |||
==Layout== | ==Layout== | ||
| Line 336: | Line 350: | ||
|} | |} | ||
{{-}} | {{-}} | ||
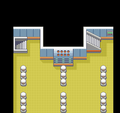
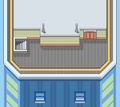
===5F-8F and Roof=== | ===5F-8F and Roof=== | ||
{| class="roundy" style="margin:auto; background: #000; border: 3px solid #{{locationcolor/dark|building}}" | {| class="roundy" style="margin:auto; background: #000; border: 3px solid #{{locationcolor/dark|building}}" | ||
| Line 358: | Line 373: | ||
|} | |} | ||
{{-}} | {{-}} | ||
==In the manga== | ==In the manga== | ||
[[File:Trainer Tower Adventures.png|thumb|left| | [[File:Trainer Tower Adventures.png|thumb|left|200px|Trainer Tower in Pokémon Adventures]] | ||
[[File:Trainer Tower R.png|thumb|200px|Computer R]] | [[File:Trainer Tower R.png|thumb|200px|Computer R]] | ||
=== | ===Pokémon Adventures=== | ||
In | In [[Pokémon Adventures]], Trainer Tower is a [[Team Rocket]] base controlled by '''R''' (Japanese: '''r'''), a computer created by [[Carr]]. It is equipped with 3D projectors, different sorts of weapons, and a restraint system that is almost completely immune to all kinds of Pokémon [[move]]s. | ||
===={{MangaArc|FireRed & LeafGreen}}==== | |||
Trainer Tower first appeared in ''[[PS280|Some Things Are Better Left Unown]]'', where [[Sird]] contacted {{adv|Giovanni}} after defeating [[Lorelei]]. Sird retrieved the {{i|Ruby}} and the {{i|Sapphire}} from the tower before heading to {{OBP|Five Island|town}}, where the {{adv|Deoxys}} named "Organism No. 2" was currently located. | |||
In ''[[PS285|Once More into the Unown]]'', R held {{adv|Professor Oak}} and [[Green's parents]] captive in order to lure {{adv|Red}}, {{adv|Blue}}, and {{adv|Green}} to it. After being insulted by Blue, R angrily attacked him and held {{cat|Blue's Pokémon|his Pokémon}} off. However, Blue had his last Pokémon, {{TP|Blue|Porygon2}}, infiltrate its network from the inside and shut it down with {{m|Zap Cannon}}, freeing Professor Oak and Green's parents. | |||
After Giovanni succeeded in trapping {{adv|Mewtwo}} with the M2 Bind restraint armor, R came back online to explain its use and prevent Porygon2 from moving with a virtual lock. As it gloated, Giovanni noted that it was created by Carr, which explains its rude, crass, and arrogant personality. He then left the building to rendezvous with the [[Team Rocket airship]], leaving the [[Pokédex holder]]s to battle Organism No. 2's duplicates. | |||
Eventually, Red, Blue, and Green freed Mewtwo from the M2 Bind by using [[Saur]]'s, [[Blasty]]'s, and [[Blue's Charizard]]'s ultimate attacks: {{m|Frenzy Plant}}, {{m|Blast Burn}}, and {{m|Hydro Cannon}}. Like they had planned, these powerful attacks were able to break the armor that R had claimed to be immune to any kind of Pokémon attacks, and then cancel each other out before they could reach and hurt Mewtwo. Once freed, Mewtwo used its {{m|Psywave|spoon}} to slice the tower in two, destroying it and trapping the Deoxys Duplicates inside. | |||
In ''[[PS292|Bested by Banette]]'', it was revealed that [[Ultima]], who had come to fight Team Rocket as well, had stolen some items that the [[Villainous team|evil team]] had been keeping at the tower, including the [[Old Sea Map]] and an ancient manuscript about {{adv|Jirachi}}. | |||
==Trivia== | ==Trivia== | ||
[[File:KadenSeaking.png|thumb|200px|Fisherman Kaden's Shiny Seaking]] | |||
[[File:KadenSeaking.png | * The map of this area is large and is mostly made up of unreachable water to either side of the navigable [[route]]. | ||
* The map of this area is | * The Trainer Tower has three {{pkmn|Trainer}}s who use [[Shiny Pokémon]]: {{tc|Burglar}} Jac has a Shiny {{p|Meowth}}, {{tc|Twins}} Jen and Kira have a Shiny {{p|Espeon}}, and {{tc|Fisherman}} Kaden has a Shiny {{p|Seaking}}. | ||
* The Trainer Tower has three {{pkmn|Trainer}}s who use | |||
{{-}} | {{-}} | ||
==In other languages== | ==In other languages== | ||
{{Langtable|color={{locationcolor/light|building}}|bordercolor={{locationcolor/dark|building}} | {{Langtable|color={{locationcolor/light|building}}|bordercolor={{locationcolor/dark|building}} | ||
|zh_yue=寵物小精靈訓練員塔 ''{{tt|Chúngmaht | |zh_yue=寵物小精靈訓練員塔 ''{{tt|Chúngmaht Síujīnglìhng Fanlihnyùhn Taap|Pocket Monster Trainer Tower}}'' {{tt|*|Manga}} | ||
|zh_cmn=訓練家之塔 / 训练家之塔 ''{{tt|Xùnliànjiā-zhī Tǎ|Trainer's Tower}}'' {{tt|*|Manga (Taiwan and mainland China new Jilin edition)}}<br>训练师之塔 ''{{tt|Xùnliànshī-zhī Tǎ|Trainer's Tower}}'' {{tt|*|Manga (mainland China old Jilin edition)}} | |zh_cmn=訓練家之塔 / 训练家之塔 ''{{tt|Xùnliànjiā-zhī Tǎ|Trainer's Tower}}'' {{tt|*|Manga (Taiwan and mainland China new Jilin edition)}}<br>训练师之塔 ''{{tt|Xùnliànshī-zhī Tǎ|Trainer's Tower}}'' {{tt|*|Manga (mainland China old Jilin edition)}} | ||
| | |fr=Tour Dresseurs | ||
|de=Trainerturm | |de=Trainerturm | ||
|it=Torre Allenatori | |it=Torre Allenatori | ||
|ko={{tt|트레이너 타워|Teureineo Tawo}} ''Trainer Tower'' | |ko={{tt|트레이너 타워|Teureineo Tawo}} ''Trainer Tower'' | ||
| | |pt_br=Torre dos Treinadores | ||
|es=Torre Desafío | |||
|sv=Pokémontränartorn | |||
|vi=Tháp Huấn Luyện Viên | |vi=Tháp Huấn Luyện Viên | ||
}} | }} | ||
| Line 397: | Line 415: | ||
[[Category:Towers]] | [[Category:Towers]] | ||
[[Category:Battle | [[Category:Battle facilities]] | ||
[[Category:Villainous team bases]] | [[Category:Villainous team bases]] | ||
[[Category:FireRed and LeafGreen locations]] | [[Category:FireRed and LeafGreen locations]] | ||
[[de:Trainerturm]] | [[de:Trainerturm]] | ||
[[es:Torre Desafío]] | |||
[[fr:Tour Dresseurs]] | [[fr:Tour Dresseurs]] | ||
[[it:Torre Allenatori]] | [[it:Torre Allenatori]] | ||
[[ja:トレーナータワー]] | [[ja:トレーナータワー]] | ||
[[zh: | [[zh:训练家塔]] | ||
Latest revision as of 01:40, 15 March 2024
| ||||
| ||||
| Location: | North of Seven Island | |||
|---|---|---|---|---|
| Region: | Sevii Islands | |||
| Generations: | III | |||
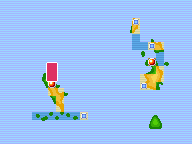 Location of Trainer Tower in Sevii Islands. | ||||
| Pokémon world locations | ||||
Trainer Tower (Japanese: トレーナータワー Trainer Tower) is a facility in Pokémon FireRed and LeafGreen located to north of Seven Island in the Sevii Islands. The area where it is located is the most northern location in Seven Island. It is similar to Battle Towers in that Trainers can be challenged in a variety of different battle types consecutively over a number of floors to reach the top; though the key concept of Trainer Tower is speed. Each battle mode has a default time and if beaten, offers a rare in-game item as a reward that can be obtained repeatedly by challenging the Tower again. Unlike Battle Towers, the player's Pokémon will not be healed between battles, though recovery items such as Revives and Potions can be used both during and between battles. If necessary, the player can return to the entrance to heal their party at the Pokémon Center, though this will waste more time in comparison to using items.
Battles conducted in Trainer Tower do not award experience or money. The level of the Pokémon used by Trainers will also match the player's highest-leveled Pokémon. Thief and Covet cannot steal items, while Trick always fails.
In the original Japanese releases of Pokémon FireRed and LeafGreen, Trainer Tower serves as a facility compatible with the e-Reader, in which cards from the Pokémon Battle e FireRed & LeafGreen set can be used to modify the Trainers the player can battle, as well as the prizes they can earn. The default layout of Trainer Tower in the Japanese versions has four floors with the same Trainers on each floor for each playthrough. Scanning cards can increase this to a maximum of eight floors with multiple combinations of opponents. The standard eight-floor layout and different battle types as featured in the localizations incorporate the majority of the Trainers from these cards.
Trainer Hill, a location that shares many similarities with Trainer Tower, was later featured in Pokémon Emerald.
Modes (Japanese versions)
Default
1F
| Trainer | Pokémon | |||||||||||
|---|---|---|---|---|---|---|---|---|---|---|---|---|
|
| |||||||||||
| ||||||||||||
| Trainers with a Vs. Seeker by their names, when alerted for a rematch using the item, may use higher-level Pokémon. | ||||||||||||
2F
| Trainer | Pokémon | |||||||||||
|---|---|---|---|---|---|---|---|---|---|---|---|---|
|
| |||||||||||
| ||||||||||||
| Trainers with a Vs. Seeker by their names, when alerted for a rematch using the item, may use higher-level Pokémon. | ||||||||||||
3F
| Trainer | Pokémon | |||||||||||
|---|---|---|---|---|---|---|---|---|---|---|---|---|
|
| |||||||||||
|
| |||||||||||
|
| |||||||||||
| Trainers with a Vs. Seeker by their names, when alerted for a rematch using the item, may use higher-level Pokémon. | ||||||||||||
4F
| Trainer | Pokémon | |||||||||||
|---|---|---|---|---|---|---|---|---|---|---|---|---|
|
| |||||||||||
| ||||||||||||
| Trainers with a Vs. Seeker by their names, when alerted for a rematch using the item, may use higher-level Pokémon. | ||||||||||||
Modes (international versions)
Single Mode
This mode features one Single Battle per floor, with two Pokémon per Trainer. If the tower is cleared within the target time, players will receive an Up-Grade.
The tower layout in this mode can be replicated in the Japanese version by scanning cards #19, 11, 25, 01, 09, 17, 02, and 10 in order.
1F
| Trainer | Pokémon | |||||||||||
|---|---|---|---|---|---|---|---|---|---|---|---|---|
|
| |||||||||||
| ||||||||||||
| Trainers with a Vs. Seeker by their names, when alerted for a rematch using the item, may use higher-level Pokémon. | ||||||||||||
2F
| Trainer | Pokémon | |||||||||||
|---|---|---|---|---|---|---|---|---|---|---|---|---|
|
| |||||||||||
| ||||||||||||
| Trainers with a Vs. Seeker by their names, when alerted for a rematch using the item, may use higher-level Pokémon. | ||||||||||||
3F
| Trainer | Pokémon | |||||||||||
|---|---|---|---|---|---|---|---|---|---|---|---|---|
|
| |||||||||||
| ||||||||||||
| Trainers with a Vs. Seeker by their names, when alerted for a rematch using the item, may use higher-level Pokémon. | ||||||||||||
4F
| Trainer | Pokémon | |||||||||||
|---|---|---|---|---|---|---|---|---|---|---|---|---|
|
| |||||||||||
| ||||||||||||
| Trainers with a Vs. Seeker by their names, when alerted for a rematch using the item, may use higher-level Pokémon. | ||||||||||||
5F
| Trainer | Pokémon | |||||||||||
|---|---|---|---|---|---|---|---|---|---|---|---|---|
|
| |||||||||||
| ||||||||||||
| Trainers with a Vs. Seeker by their names, when alerted for a rematch using the item, may use higher-level Pokémon. | ||||||||||||
6F
| Trainer | Pokémon | |||||||||||
|---|---|---|---|---|---|---|---|---|---|---|---|---|
|
| |||||||||||
| ||||||||||||
| Trainers with a Vs. Seeker by their names, when alerted for a rematch using the item, may use higher-level Pokémon. | ||||||||||||
7F
| Trainer | Pokémon | |||||||||||
|---|---|---|---|---|---|---|---|---|---|---|---|---|
|
| |||||||||||
| ||||||||||||
| Trainers with a Vs. Seeker by their names, when alerted for a rematch using the item, may use higher-level Pokémon. | ||||||||||||
8F
| Trainer | Pokémon | |||||||||||
|---|---|---|---|---|---|---|---|---|---|---|---|---|
|
| |||||||||||
| ||||||||||||
| Trainers with a Vs. Seeker by their names, when alerted for a rematch using the item, may use higher-level Pokémon. | ||||||||||||
Double Mode
This mode features one Double Battle per floor, with one Pokémon for each of the Trainers (two Pokémon total per battle). If the tower is cleared within the target time, players will receive a Dragon Scale.
The tower layout in this mode can be replicated in the Japanese version by scanning cards #13, 06, 12, 14, 04, 05, 29, and 21 in order.
1F
| Trainer | Pokémon | |||||||||||
|---|---|---|---|---|---|---|---|---|---|---|---|---|
|
| |||||||||||
| ||||||||||||
| Trainers with a Vs. Seeker by their names, when alerted for a rematch using the item, may use higher-level Pokémon. | ||||||||||||
2F
| Trainer | Pokémon | |||||||||||
|---|---|---|---|---|---|---|---|---|---|---|---|---|
|
| |||||||||||
| ||||||||||||
| Trainers with a Vs. Seeker by their names, when alerted for a rematch using the item, may use higher-level Pokémon. | ||||||||||||
3F
| Trainer | Pokémon | |||||||||||
|---|---|---|---|---|---|---|---|---|---|---|---|---|
|
| |||||||||||
| ||||||||||||
| Trainers with a Vs. Seeker by their names, when alerted for a rematch using the item, may use higher-level Pokémon. | ||||||||||||
4F
| Trainer | Pokémon | |||||||||||
|---|---|---|---|---|---|---|---|---|---|---|---|---|
|
| |||||||||||
| ||||||||||||
| Trainers with a Vs. Seeker by their names, when alerted for a rematch using the item, may use higher-level Pokémon. | ||||||||||||
5F
| Trainer | Pokémon | |||||||||||
|---|---|---|---|---|---|---|---|---|---|---|---|---|
|
| |||||||||||
| ||||||||||||
| Trainers with a Vs. Seeker by their names, when alerted for a rematch using the item, may use higher-level Pokémon. | ||||||||||||
6F
| Trainer | Pokémon | |||||||||||
|---|---|---|---|---|---|---|---|---|---|---|---|---|
|
| |||||||||||
| ||||||||||||
| Trainers with a Vs. Seeker by their names, when alerted for a rematch using the item, may use higher-level Pokémon. | ||||||||||||
7F
| Trainer | Pokémon | |||||||||||
|---|---|---|---|---|---|---|---|---|---|---|---|---|
|
| |||||||||||
| ||||||||||||
| Trainers with a Vs. Seeker by their names, when alerted for a rematch using the item, may use higher-level Pokémon. | ||||||||||||
8F
| Trainer | Pokémon | |||||||||||
|---|---|---|---|---|---|---|---|---|---|---|---|---|
|
| |||||||||||
| ||||||||||||
| Trainers with a Vs. Seeker by their names, when alerted for a rematch using the item, may use higher-level Pokémon. | ||||||||||||
Knockout Mode
This mode features three Single Battles per floor, with one Pokémon per Trainer and each Trainer challenging the player consecutively. If the tower is cleared within the target time, players will receive a Metal Coat.
The tower layout in this mode can be replicated in the Japanese version by scanning cards #07, 08, 16, 24, 32, 31, 23, and 15 in order.
1F
| Trainer | Pokémon | |||||||||||
|---|---|---|---|---|---|---|---|---|---|---|---|---|
|
| |||||||||||
|
| |||||||||||
|
| |||||||||||
| Trainers with a Vs. Seeker by their names, when alerted for a rematch using the item, may use higher-level Pokémon. | ||||||||||||
2F
| Trainer | Pokémon | |||||||||||
|---|---|---|---|---|---|---|---|---|---|---|---|---|
|
| |||||||||||
|
| |||||||||||
|
| |||||||||||
| Trainers with a Vs. Seeker by their names, when alerted for a rematch using the item, may use higher-level Pokémon. | ||||||||||||
3F
| Trainer | Pokémon | |||||||||||
|---|---|---|---|---|---|---|---|---|---|---|---|---|
|
| |||||||||||
|
| |||||||||||
|
| |||||||||||
| Trainers with a Vs. Seeker by their names, when alerted for a rematch using the item, may use higher-level Pokémon. | ||||||||||||
4F
| Trainer | Pokémon | |||||||||||
|---|---|---|---|---|---|---|---|---|---|---|---|---|
|
| |||||||||||
|
| |||||||||||
|
| |||||||||||
| Trainers with a Vs. Seeker by their names, when alerted for a rematch using the item, may use higher-level Pokémon. | ||||||||||||
5F
| Trainer | Pokémon | |||||||||||
|---|---|---|---|---|---|---|---|---|---|---|---|---|
|
| |||||||||||
|
| |||||||||||
|
| |||||||||||
| Trainers with a Vs. Seeker by their names, when alerted for a rematch using the item, may use higher-level Pokémon. | ||||||||||||
6F
| Trainer | Pokémon | |||||||||||
|---|---|---|---|---|---|---|---|---|---|---|---|---|
|
| |||||||||||
|
| |||||||||||
|
| |||||||||||
| Trainers with a Vs. Seeker by their names, when alerted for a rematch using the item, may use higher-level Pokémon. | ||||||||||||
7F
| Trainer | Pokémon | |||||||||||
|---|---|---|---|---|---|---|---|---|---|---|---|---|
|
| |||||||||||
|
| |||||||||||
|
| |||||||||||
| Trainers with a Vs. Seeker by their names, when alerted for a rematch using the item, may use higher-level Pokémon. | ||||||||||||
8F
| Trainer | Pokémon | |||||||||||
|---|---|---|---|---|---|---|---|---|---|---|---|---|
|
| |||||||||||
|
| |||||||||||
|
| |||||||||||
| Trainers with a Vs. Seeker by their names, when alerted for a rematch using the item, may use higher-level Pokémon. | ||||||||||||
Mixed Mode
This mode features a combination of the battles seen in the other three modes. If the tower is cleared within the target time, players will receive a King's Rock.
The tower layout in this mode can be replicated in the Japanese version by scanning cards #18, 27, 26, 21, 20, 15, 12, and 08 in order.
1F
| Trainer | Pokémon | |||||||||||
|---|---|---|---|---|---|---|---|---|---|---|---|---|
|
| |||||||||||
| ||||||||||||
| Trainers with a Vs. Seeker by their names, when alerted for a rematch using the item, may use higher-level Pokémon. | ||||||||||||
2F
| Trainer | Pokémon | |||||||||||
|---|---|---|---|---|---|---|---|---|---|---|---|---|
|
| |||||||||||
| ||||||||||||
| Trainers with a Vs. Seeker by their names, when alerted for a rematch using the item, may use higher-level Pokémon. | ||||||||||||
3F
| Trainer | Pokémon | |||||||||||
|---|---|---|---|---|---|---|---|---|---|---|---|---|
|
| |||||||||||
| ||||||||||||
| Trainers with a Vs. Seeker by their names, when alerted for a rematch using the item, may use higher-level Pokémon. | ||||||||||||
4F
| Trainer | Pokémon | |||||||||||
|---|---|---|---|---|---|---|---|---|---|---|---|---|
|
| |||||||||||
| ||||||||||||
| Trainers with a Vs. Seeker by their names, when alerted for a rematch using the item, may use higher-level Pokémon. | ||||||||||||
5F
| Trainer | Pokémon | |||||||||||
|---|---|---|---|---|---|---|---|---|---|---|---|---|
|
| |||||||||||
| ||||||||||||
| Trainers with a Vs. Seeker by their names, when alerted for a rematch using the item, may use higher-level Pokémon. | ||||||||||||
6F
| Trainer | Pokémon | |||||||||||
|---|---|---|---|---|---|---|---|---|---|---|---|---|
|
| |||||||||||
|
| |||||||||||
|
| |||||||||||
| Trainers with a Vs. Seeker by their names, when alerted for a rematch using the item, may use higher-level Pokémon. | ||||||||||||
7F
| Trainer | Pokémon | |||||||||||
|---|---|---|---|---|---|---|---|---|---|---|---|---|
|
| |||||||||||
| ||||||||||||
| Trainers with a Vs. Seeker by their names, when alerted for a rematch using the item, may use higher-level Pokémon. | ||||||||||||
8F
| Trainer | Pokémon | |||||||||||
|---|---|---|---|---|---|---|---|---|---|---|---|---|
|
| |||||||||||
|
| |||||||||||
|
| |||||||||||
| Trainers with a Vs. Seeker by their names, when alerted for a rematch using the item, may use higher-level Pokémon. | ||||||||||||
The prizes that would be received for clearing each mode are items that can be found elsewhere in the game, and if the Bag is full, the prize will not be accepted.
Poké Mart
|
| ||||||
|
| ||||||
|
| ||||||
|
| ||||||
|
|||||||
Items
Exterior
| Item | Location | Games | |
|---|---|---|---|
| Nanab Berry | Southeast of Psychic Rodette, on a marked square (hidden) | FR LG | |
| Pearl | On the beach, three squares west of the sign (hidden recurring item; group B) | FR LG | |
| Big Pearl | On the beach, north of the sign (hidden recurring item; group C) | FR LG | |
Interior

|
This section is incomplete. Please feel free to edit this section to add missing information and complete it. Reason: What times are required? |
| Item | Location | Games | |
|---|---|---|---|
| Up-Grade | Reward for defeating Single Mode (repeatable) | FR LG | |
| Dragon Scale | Reward for defeating Double Mode (repeatable) | FR LG | |
| Metal Coat | Reward for defeating Knockout Mode (repeatable) | FR LG | |
| King's Rock | Reward for defeating Mixed Mode (repeatable) | FR LG | |
Pokémon
| Pokémon | Games | Location | Levels | Rate | |||||||||||
|---|---|---|---|---|---|---|---|---|---|---|---|---|---|---|---|
| Surfing | |||||||||||||||
|
FR | LG |
|
5-40 | 95% | ||||||||||
|
FR | LG |
|
5-35 | 90% | ||||||||||
|
FR | LG |
|
35-40 | 5% | ||||||||||
|
FR | LG |
|
35-40 | 5% | ||||||||||
| Fishing | |||||||||||||||
|
FR | LG |
|
5 | 100% | ||||||||||
|
FR | LG |
|
5-15 | 80% | ||||||||||
|
FR | LG |
|
5-15 | 80% | ||||||||||
|
FR | LG |
|
5-15 | 20% | ||||||||||
|
FR | LG |
|
15-25 | 40% | ||||||||||
|
FR | LG |
|
15-25 | 40% | ||||||||||
|
FR | LG |
|
15-25 | 40% | ||||||||||
|
FR | LG |
|
15-25 | 40% | ||||||||||
|
FR | LG |
|
15-25 | 15% | ||||||||||
|
FR | LG |
|
25-35 | 4% | ||||||||||
|
FR | LG |
|
25-35 | 4% | ||||||||||
|
FR | LG |
|
25-35 | 1% | ||||||||||
|
FR | LG |
|
25-35 | 1% | ||||||||||
| A colored background means that the Pokémon can be found in this location in the specified game. A white background with a colored letter means that the Pokémon cannot be found here. | |||||||||||||||
Trainers
| Trainer | Pokémon | |||||||||||
|---|---|---|---|---|---|---|---|---|---|---|---|---|
|
| |||||||||||
| ||||||||||||
| ||||||||||||
|
| |||||||||||
| Rematch | ||||||||||||
|
| |||||||||||
| ||||||||||||
| ||||||||||||
|
| |||||||||||
| Trainers with a Vs. Seeker by their names, when alerted for a rematch using the item, may use higher-level Pokémon. | ||||||||||||
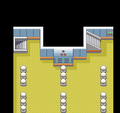
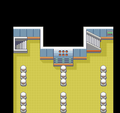
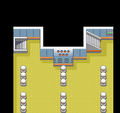
Layout
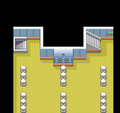
Entrance and 1F-4F
| Version | Entrance | 1F | 2F | 3F | 4F |
|---|---|---|---|---|---|
| FireRed | 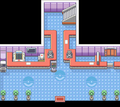
|
|

|
|

|
| LeafGreen | |||||
5F-8F and Roof
| Version | 5F | 6F | 7F | 8F | Roof |
|---|---|---|---|---|---|
| FireRed | 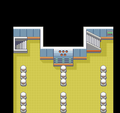
|
|
|
|
|
| LeafGreen | |||||
In the manga
Pokémon Adventures
In Pokémon Adventures, Trainer Tower is a Team Rocket base controlled by R (Japanese: r), a computer created by Carr. It is equipped with 3D projectors, different sorts of weapons, and a restraint system that is almost completely immune to all kinds of Pokémon moves.
FireRed & LeafGreen arc
Trainer Tower first appeared in Some Things Are Better Left Unown, where Sird contacted Giovanni after defeating Lorelei. Sird retrieved the Ruby and the Sapphire from the tower before heading to Five Island, where the Deoxys named "Organism No. 2" was currently located.
In Once More into the Unown, R held Professor Oak and Green's parents captive in order to lure Red, Blue, and Green to it. After being insulted by Blue, R angrily attacked him and held his Pokémon off. However, Blue had his last Pokémon, Porygon2, infiltrate its network from the inside and shut it down with Zap Cannon, freeing Professor Oak and Green's parents.
After Giovanni succeeded in trapping Mewtwo with the M2 Bind restraint armor, R came back online to explain its use and prevent Porygon2 from moving with a virtual lock. As it gloated, Giovanni noted that it was created by Carr, which explains its rude, crass, and arrogant personality. He then left the building to rendezvous with the Team Rocket airship, leaving the Pokédex holders to battle Organism No. 2's duplicates.
Eventually, Red, Blue, and Green freed Mewtwo from the M2 Bind by using Saur's, Blasty's, and Blue's Charizard's ultimate attacks: Frenzy Plant, Blast Burn, and Hydro Cannon. Like they had planned, these powerful attacks were able to break the armor that R had claimed to be immune to any kind of Pokémon attacks, and then cancel each other out before they could reach and hurt Mewtwo. Once freed, Mewtwo used its spoon to slice the tower in two, destroying it and trapping the Deoxys Duplicates inside.
In Bested by Banette, it was revealed that Ultima, who had come to fight Team Rocket as well, had stolen some items that the evil team had been keeping at the tower, including the Old Sea Map and an ancient manuscript about Jirachi.
Trivia
- The map of this area is large and is mostly made up of unreachable water to either side of the navigable route.
- The Trainer Tower has three Trainers who use Shiny Pokémon: Burglar Jac has a Shiny Meowth, Twins Jen and Kira have a Shiny Espeon, and Fisherman Kaden has a Shiny Seaking.
In other languages
| |||||||||||||||||||||||||||||||||||
| Sevii Islands | |||||||||
|---|---|---|---|---|---|---|---|---|---|
|
| |||||||||
| |||||||||

|
This article is part of Project Locations, a Bulbapedia project that aims to write comprehensive articles on every location in the Pokémon world. |


