Terminus Cave: Difference between revisions
From Bulbapedia, the community-driven Pokémon encyclopedia.
Jump to navigationJump to search
(I think this was supposed to be the implication.) |
|||
| (43 intermediate revisions by 21 users not shown) | |||
| Line 1: | Line 1: | ||
{{Infobox location | {{Infobox location | ||
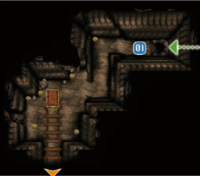
|image= | |image=Terminus Cave 1F Entrance XY.png | ||
|image_size= | |image_size=200 | ||
|type=cave | |type=cave | ||
|location_name=Terminus Cave | |location_name=Terminus Cave | ||
|japanese_name={{tt|終の洞窟|ついのどうくつ}} | |japanese_name={{tt|終の洞窟|ついのどうくつ}} | ||
|translated_name= | |translated_name=Terminus Cave | ||
|location={{rt|18|Kalos}} | |location={{rt|18|Kalos}} | ||
|region=Kalos | |region=Kalos | ||
|mapdesc=A coal mine that was closed a few years ago due to rumors of a monster living deep within it. | |mapdesc=A coal mine that was closed a few years ago due to rumors of [[Zygarde (Pokémon)|a monster]] living deep within it. | ||
|generation={{Gen|VI}} | |generation={{Gen|VI}} | ||
}} | }} | ||
'''Terminus Cave''' (Japanese: '''{{tt|終の洞窟|ついのどうくつ}}''' '' | '''Terminus Cave''' (Japanese: '''{{tt|終の洞窟|ついのどうくつ}}''' ''Terminus Cave'') is a [[cave]] in eastern [[Kalos]] on {{rt|18|Kalos}}. | ||
Terminus Cave is the location of the [[Legendary Pokémon]] {{p|Zygarde}} in {{g|X and Y}}. Although the {{player}} can enter the cave as soon as they reach Route 18, they are not allowed to enter Zygarde's chamber until after entering the [[Hall of Fame]], due to an {{tc|Ace Trainer}} who is blocking the way. | |||
==Items== | ==Items== | ||
===Small | ===Small chamber one=== | ||
This chamber is accessible via the entrance at the base of the elevated tracks on {{rt|18|Kalos}}. {{m|Rock Smash}} is required to reach the entrance. | |||
{{itlisth|cave}} | {{itlisth|cave}} | ||
{{Itemlist|Normal Gem| | {{Itemlist|Normal Gem|On the stalagmite at the back of the chamber ''(hidden, reappears occasionally)''|X=yes|y=yes|display={{DL|Gem|Normal Gem}}}} | ||
{{Itemlist|Dragon Scale|In the | {{Itemlist|Dragon Scale|In the middle of the chamber|X=yes|y=yes|display={{DL|Evolution-inducing held item|Dragon Scale}}}} | ||
{{itlistfoot|cave}} | {{itlistfoot|cave}} | ||
===Small | ===Small chamber two=== | ||
This chamber is accessible via the entrance at the end of the east branch of the elevated tracks on Route 18. | |||
{{itlisth|cave}} | {{itlisth|cave}} | ||
{{Itemlist|TM Fighting|In the | {{Itemlist|TM Fighting VI|In the back of the chamber|X=yes|y=yes|display={{TM|31|Brick Break}}}} | ||
{{itlistfoot|cave}} | {{itlistfoot|cave}} | ||
===B1F=== | ===B1F=== | ||
{{itlisth|cave}} | {{itlisth|cave}} | ||
{{Itemlist|Star Piece| | {{Itemlist|Star Piece|At the end of the narrow bridge, on the east branch of the first fork in the path (requires {{m|Rock Smash}})|X=yes|y=yes|display={{DL|Valuable item|Star Piece}}}} | ||
{{Itemlist|Dusk Ball| | {{Itemlist|Dusk Ball|On a small rock just past and southwest of the two ledges on the west branch of the first fork in the path ''(hidden)''|X=yes|y=yes|display={{ball|Dusk}}}} | ||
{{Itemlist|Hyper Potion| | {{Itemlist|Hyper Potion|On a rock northwest of the bridge that crosses the west branch of the first fork in the path ''(hidden)''|X=yes|y=yes|display={{DL|Potion|Hyper Potion}}}} | ||
{{Itemlist|Escape Rope|West of Hiker | {{Itemlist|Escape Rope|West of the two ledges south of the bridge that {{tc|Hiker}} Aaron is walking on|X=yes|y=yes}} | ||
{{Itemlist|Heat Rock| | {{Itemlist|Heat Rock|In the southwestern-most corner (requires {{m|Rock Smash}})|X=yes|y=yes|display={{DL|In-battle effect item|Heat Rock}}}} | ||
{{Itemlist|Moon Stone| | {{Itemlist|Moon Stone|In the far north at the end of a narrow path on the east side of the cave (requires {{m|Rock Smash}}) ''(hidden)''|X=yes|y=yes|display={{evostone|Moon Stone}}}} | ||
{{Itemlist|Max Repel| | {{Itemlist|Max Repel|In the area accessible via the stairs in the southeast of B2F, on a stalagmite in the northeast ''(hidden)''|X=yes|y=yes|display={{DL|Repel|Max Repel}}}} | ||
{{Itemlist|Reaper Cloth| | {{Itemlist|Reaper Cloth|In the area accessible via the stairs in the southeast of B2F, between the two ledges on the east side|X=yes|y=yes|display={{DL|Evolution-inducing held item|Reaper Cloth}}}} | ||
{{itlistfoot|cave}} | {{itlistfoot|cave}} | ||
===B2F=== | ===B2F=== | ||
{{itlisth|cave}} | {{itlisth|cave}} | ||
{{Itemlist|Iron| | {{Itemlist|Iron|On a stalagmite on the west side of the cave, just west of the maze-like area north of the entrance from B1F ''(hidden)''|X=yes|y=yes|display={{DL|Vitamin|Iron}}}} | ||
{{Itemlist|Dusk Stone| | {{Itemlist|Dusk Stone|On the far west side, west of the Iron|X=yes|y=yes|display={{evostone|Dusk Stone}}}} | ||
{{Itemlist|X Attack| | {{Itemlist|X Attack|In the northwestern-most corner, past {{tc|Black Belt}} Gunnar who is due north of the entrance from B1F|X=yes|y=yes|display={{DL|Battle item|X Attack}}}} | ||
{{Itemlist|Elixir| | {{Itemlist|Elixir|In the far north, after sliding down the east slope northeast of {{tc|Black Belt}} Gunnar who is due north of the entrance from B1F (requires {{m|Rock Smash}})|X=yes|y=yes|display={{DL|Ether|Elixir}}}} | ||
{{Itemlist|Full Heal| | {{Itemlist|Full Heal|In the far east, east of {{tc|Black Belt}} Gunnar who is due north of the entrance from B1F|X=yes|y=yes|display={{DL|Status ailment healing item|Full Heal}}}} | ||
{{Itemlist|TM Ghost| | {{Itemlist|TM Ghost VI|By the mine cart in the pit area in the middle of the cave (requires {{m|Rock Smash}})|X=yes|y=yes|display={{TM|30|Shadow Ball}}}} | ||
{{Itemlist|Max Potion|Southeast of {{TM|30|Shadow Ball}} at the corner ''(hidden)''|X=yes|y=yes|display={{DL|Potion|Max Potion}}}} | {{Itemlist|Max Potion|Southeast of {{TM|30|Shadow Ball}} at the corner of the pit one tier above the mine cart (requires {{m|Rock Smash}}) ''(hidden)''|X=yes|y=yes|display={{DL|Potion|Max Potion}}}} | ||
{{Itemlist|Dire Hit| | {{Itemlist|Dire Hit|On the stalagmite behind {{tc|Ranger}} Lee, southeast of the pit area ''(hidden)''|X=yes|y=yes|display={{DL|Battle item|Dire Hit}}}} | ||
{{Itemlist|Iron Plate| | {{Itemlist|Iron Plate|East of the entrance from B1F, via the path around the pit in the middle of the cave|X=yes|y=yes|display={{DL|Plate|Iron Plate}}}} | ||
{{itlistfoot|cave}} | {{itlistfoot|cave}} | ||
===Zygarde's | ===Zygarde's chamber (1F)=== | ||
{{itlisth|cave}} | {{itlisth|cave}} | ||
{{Itemlist|Griseous Orb| | {{Itemlist|Griseous Orb|Down the northwest path of the chamber|X=yes|y=yes|display={{DL|Timespace orbs|Griseous Orb}}}} | ||
{{Itemlist|Lustrous Orb| | {{Itemlist|Lustrous Orb|Down the southeast path of the chamber|X=yes|y=yes|display={{DL|Timespace orbs|Lustrous Orb}}}} | ||
{{Itemlist|Adamant Orb| | {{Itemlist|Adamant Orb|Down the southwest path of the chamber|X=yes|y=yes|display={{DL|Timespace orbs|Adamant Orb}}}} | ||
{{Itemlist|Big Nugget| | {{Itemlist|Big Nugget|Down the northeast path of the chamber, in the middle of the grassy area ''(hidden)''|X=yes|y=yes|display={{DL|Valuable item|Big Nugget}}}} | ||
{{itlistfoot|cave}} | {{itlistfoot|cave}} | ||
===Rock Smash=== | |||
{{Itlisth|cave}} | |||
{{Itemlist|Big Pearl|Randomly found by {{m|Rock Smash|smashing rocks}}|X=yes|y=yes|display={{DL|Valuable item|Big Pearl}}}} | |||
{{Itemlist|Ether|Randomly found by {{m|Rock Smash|smashing rocks}}|X=yes|y=yes|display={{DL|Ether|Ether}}}} | |||
{{Itemlist|Hard Stone|Randomly found by {{m|Rock Smash|smashing rocks}}|X=yes|y=yes|display={{DL|Type-enhancing item|Hard Stone}}}} | |||
{{Itemlist|Heart Scale|Randomly found by {{m|Rock Smash|smashing rocks}}|X=yes|y=yes|display={{DL|Exchangeable item|Heart Scale}}}} | |||
{{Itemlist|Max Ether|Randomly found by {{m|Rock Smash|smashing rocks}}|X=yes|y=yes|display={{DL|Ether|Max Ether}}}} | |||
{{Itemlist|Max Revive|Randomly found by {{m|Rock Smash|smashing rocks}}|X=yes|y=yes|display={{DL|Revive|Max Revive}}}} | |||
{{Itemlist|Pearl|Randomly found by {{m|Rock Smash|smashing rocks}}|X=yes|y=yes|display={{DL|Valuable item|Pearl}}}} | |||
{{Itemlist|Revive|Randomly found by {{m|Rock Smash|smashing rocks}}|X=yes|y=yes|display={{DL|Revive|Revive}}}} | |||
{{Itemlist|Soft Sand|Randomly found by {{m|Rock Smash|smashing rocks}}|X=yes|y=yes|display={{DL|Type-enhancing item|Soft Sand}}}} | |||
{{Itemlist|Star Piece|Randomly found by {{m|Rock Smash|smashing rocks}}|X=yes|y=yes|display={{DL|Valuable item|Star Piece}}}} | |||
{{Itlistfoot|cave}} | |||
===Natural objects=== | |||
{{Itlisth|cave}} | |||
{{Itemlist|Hard Stone|Randomly found by using {{m|Hyper Voice}} or {{m|Rock Slide}} on a [[natural objects|spiky rock]] during a battle|X=yes|y=yes|display={{DL|Type-enhancing item|Hard Stone}}}} | |||
{{Itemlist|Float Stone|Randomly found by using {{m|Hyper Voice}} or {{m|Rock Slide}} on a [[natural objects|spiky rock]] during a battle|X=yes|y=yes|display={{DL|In-battle effect item|Float Stone}}}} | |||
{{Itemlist|Damp Rock|Found by using {{m|Muddy Water}}, {{m|Surf}}, or {{m|Water Spout}} on a [[natural objects|thin rock]] during a battle|X=yes|y=yes|display={{DL|In-battle effect item|Damp Rock}}}} | |||
{{Itlistfoot|cave}} | |||
==Pokémon== | ==Pokémon== | ||
{{ | {{Catch/header|cave|4}} | ||
{{ | {{Catch/entry6|028|Sandslash|yes|yes|Cave|45-46|all=20%|type1=ground}} | ||
{{ | {{Catch/entry6|075|Graveler|yes|yes|Cave|44-46|all=20%|type1=rock|type2=ground}} | ||
{{ | {{Catch/entry6|247|Pupitar|no|yes|Cave|45-46|all=20%|type1=Rock|type2=ground}} | ||
{{ | {{Catch/entry6|305|Lairon|yes|no|Cave|45-46|all=20%|type1=steel|type2=rock}} | ||
{{ | {{Catch/entry6|632|Durant|yes|yes|Cave|44-46|all=40%|type1=bug|type2=steel}} | ||
{{ | {{Catch/div|cave|{{color2|000|Horde Encounter}}}} | ||
{{ | {{Catch/entry6|074|Geodude|yes|yes|Horde Encounter|23|all=35%|type1=rock|type2=ground}} | ||
{{ | {{Catch/entry6|246|Larvitar|no|yes|Horde Encounter|24|all=5%|type1=Rock|type2=ground}} | ||
{{ | {{Catch/entry6|304|Aron|yes|no|Horde Encounter|24|all=5%|type1=steel|type2=rock}} | ||
{{ | {{Catch/entry6|632|Durant|yes|yes|Horde Encounter|23|all=60%|type1=bug|type2=steel}} | ||
{{ | {{Catch/div|cave|{{mcolor|Rock Smash|000}}}} | ||
{{ | {{Catch/entry6|075|Graveler|yes|yes|Rock Smash|44-46|all=95%|type1=rock|type2=ground}} | ||
{{ | {{Catch/entry6|213|Shuckle|yes|yes|Rock Smash|44, 46|all=5%|type1=bug|type2=rock}} | ||
{{Catch/div|cave|Drops from the ceiling}} | {{Catch/div|cave|Drops from the ceiling}} | ||
{{ | {{Catch/entry6|168|Ariados|yes|yes|Ceiling|44-46|all=Common|type1=bug|type2=poison}} | ||
{{ | {{Catch/entry6|714|Noibat|yes|yes|Ceiling|44-46|all=Common|type1=flying|type2=dragon}} | ||
{{ | {{Catch/div|cave|Special}} | ||
{{ | {{Catch/entry6|718|Zygarde|yes|yes|Special|70|all=One|type1=Dragon|type2=Ground}} | ||
{{ | {{Catch/footer|cave}} | ||
==Trainers== | ==Trainers== | ||
{{trainerheader|cave}} | {{trainerheader|cave}} | ||
{{Trainerentry|VSBattle Girl.png{{!}}150px|Battle Girl|Andrea| | {{trainerdiv|cave|B1F}} | ||
{{Trainerentry|VSBlack Belt.png{{!}}150px|Black Belt|Gunnar| | {{Trainerentry|VSWorker A.png{{!}}150px|Worker|Narek|3,072|3|075|Graveler|♂|46|None|075|Graveler|♂|47|None|076|Golem|♂|48|None|36=ジェローム|37=Jerome}} | ||
{{Trainerentry|VSBattle Girl.png{{!}}150px|Battle Girl|Hailey| | {{trainerdiv|cave}} | ||
{{Trainerentry|VSBlack Belt.png{{!}}150px|Black Belt|Ricardo| | {{Trainerentry|VSHiker.png{{!}}150px|Hiker|Aaron|2,800|1|112|Rhydon|♂|50|None|36=ガクジ|37=Gakuji}} | ||
{{Trainerentry|VSRangers.png{{!}}150px|Rangers|Fern & Lee| | {{trainerdiv|cave}} | ||
{{Trainerentry|VSHiker.png{{!}}150px|Hiker|Bergin|2,688|2|525|Boldore|♂|48|None|208|Steelix|♂|48|None|36=ケイスケ|37=Keisuke}} | |||
{{trainerdiv|cave}} | |||
{{Trainerentry|VSWorker A.png{{!}}150px|Worker|Dimitri|3,200|1|224|Octillery|♂|50|None|36=マサヒコ|37=Masahiko}} | |||
{{trainerdiv|cave}} | |||
{{Trainerentry|VSWorker B.png{{!}}150px|Worker|Yusif|3,200|1|476|Probopass|♂|50|None|36=ナガノリ|37=Nakanori}} | |||
{{trainerdiv|cave|B2F}} | |||
{{Trainerentry|VSBattle Girl.png{{!}}150px|Battle Girl|Andrea|2,400|2|538|Throh|♂|49|None|534|Conkeldurr|♂|50|None|36=チアキ|37=Chiaki}} | |||
{{trainerdiv|cave}} | |||
{{Trainerentry|VSBlack Belt.png{{!}}150px|Black Belt|Gunnar|2,400|2|454|Toxicroak|♂|49|None|539|Sawk|♂|50|None|36=アラシ|37=Arashi}} | |||
{{trainerdiv|cave}} | |||
{{Trainerentry|VSBattle Girl.png{{!}}150px|Battle Girl|Hailey|2,448|2|308|Medicham|♀|48|None|701|Hawlucha|♀|51|None|36=ランコ|37=Ranko}} | |||
{{trainerdiv|cave}} | |||
{{Trainerentry|VSBlack Belt.png{{!}}150px|Black Belt|Ricardo|2,496|1|297|Hariyama|♂|52|None|36=タダシ|37=Tadashi}} | |||
{{trainerdiv|cave}} | |||
{{Trainerentry|VSRangers.png{{!}}150px|Rangers|Fern & Lee|8,160|2|031|Nidoqueen|♀|51|None|034|Nidoking|♂|51|None|36=マキ と ミキト|37=Maki and Mikito}} | |||
{{trainerfooter|cave|6}} | {{trainerfooter|cave|6}} | ||
==Layout== | ==Layout== | ||
===1F=== | ===1F=== | ||
{| class=roundy style="margin:auto; border: | {| class=roundy style="margin:auto; ; background:#000; border:3px solid #{{locationcolor/dark|cave}}" | ||
|- style="background:#{{locationcolor/light|cave}}" | |- | ||
! style="{{ | ! style="background:#{{locationcolor/light|cave}}; {{roundytl|5px}}" | Game | ||
! style="background:#{{locationcolor/light|cave}}" | Entrance | |||
! Zygarde's Chamber | ! style="background:#{{locationcolor/light|cave}}; {{roundytr|5px}}" | Zygarde's Chamber | ||
|- style="background:#000" | |- style="background:#000" | ||
! style="background:#{{x color}}" | {{color2|000|Pokémon X and Y|X}} | ! style="background:#{{x color}}" | {{color2|000|Pokémon X and Y|X}} | ||
| Line 120: | Line 148: | ||
===B1F=== | ===B1F=== | ||
{| class=roundy style="margin:auto; border: | {| class=roundy style="margin:auto; ; background:#000; border:3px solid #{{locationcolor/dark|cave}}" | ||
|- style="background:#{{locationcolor/light|cave}}" | |- | ||
! style="{{ | ! style="background:#{{locationcolor/light|cave}}; {{roundytl|5px}}" | Game | ||
! style="background:#{{locationcolor/light|cave}}" | Center | |||
! | ! style="background:#{{locationcolor/light|cave}}; {{roundytr|5px}}" | East | ||
|- | |||
! style="background:#{{x color}}" | {{color2|000|Pokémon X and Y|X}} | ! style="background:#{{x color}}" | {{color2|000|Pokémon X and Y|X}} | ||
! rowspan="2" | [[File:Terminus Cave B1F Center XY.png|184px]] | ! rowspan="2" | [[File:Terminus Cave B1F Center XY.png|184px]] | ||
| Line 136: | Line 164: | ||
===B2F=== | ===B2F=== | ||
{| class=roundy style="margin:auto; border: | {| class=roundy style="margin:auto; ; background:#000; border:3px solid #{{locationcolor/dark|cave}}" | ||
|- style="background:#{{locationcolor/light|cave}}" | |- | ||
! style="{{ | ! style="background:#{{locationcolor/light|cave}}; {{roundytl|5px}}" | Game | ||
! style="background:#{{locationcolor/light|cave}}; {{roundytr|5px}}" | B2F | |||
|- | |- | ||
! style="background:#{{x color}}" | {{color2|000|Pokémon X and Y|X}} | ! style="background:#{{x color}}" | {{color2|000|Pokémon X and Y|X}} | ||
! rowspan="2" | [[File:Terminus Cave B2F XY.png|184px]] | ! rowspan="2" | [[File:Terminus Cave B2F XY.png|184px]] | ||
| Line 156: | Line 184: | ||
|de=Omega-Höhle | |de=Omega-Höhle | ||
|it=Grotta Climax | |it=Grotta Climax | ||
|ko=끝의동굴 | |ko={{tt|끝의동굴|Kkeut-yi Donggul}} ''Terminus Cave'' | ||
}} | }} | ||
{{legendarylocations|Kalos}} | {{legendarylocations|Kalos}} | ||
{{Kalos}}<br> | {{Kalos}}<br/> | ||
{{Project Routes notice}} | {{Project Routes notice}} | ||
| Line 168: | Line 196: | ||
[[de:Omega-Höhle]] | [[de:Omega-Höhle]] | ||
[[fr:Grotte Coda]] | [[fr:Grotte Coda]] | ||
[[it:Grotta Climax]] | |||
[[ja:ついのどうくつ]] | [[ja:ついのどうくつ]] | ||
[[zh:終端洞窟]] | [[zh:終端洞窟]] | ||
Revision as of 04:04, 5 June 2015
| ||||
| ||||
| Map description: | A coal mine that was closed a few years ago due to rumors of a monster living deep within it. | |||
|---|---|---|---|---|
| Location: | Route 18 | |||
| Region: | Kalos | |||
| Generations: | VI | |||
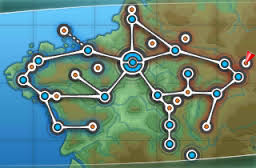 Location of Terminus Cave in Kalos. | ||||
| Pokémon world locations | ||||
Terminus Cave (Japanese: 終の洞窟 Terminus Cave) is a cave in eastern Kalos on Route 18.
Terminus Cave is the location of the Legendary Pokémon Zygarde in Pokémon X and Y. Although the player can enter the cave as soon as they reach Route 18, they are not allowed to enter Zygarde's chamber until after entering the Hall of Fame, due to an Ace Trainer who is blocking the way.
Items
Small chamber one
This chamber is accessible via the entrance at the base of the elevated tracks on Route 18. Rock Smash is required to reach the entrance.
| Item | Location | Games | |
|---|---|---|---|
| Normal Gem | On the stalagmite at the back of the chamber (hidden, reappears occasionally) | X Y | |
| Dragon Scale | In the middle of the chamber | X Y | |
Small chamber two
This chamber is accessible via the entrance at the end of the east branch of the elevated tracks on Route 18.
| Item | Location | Games | |
|---|---|---|---|
| TM31 (Brick Break) | In the back of the chamber | X Y | |
B1F
| Item | Location | Games | |
|---|---|---|---|
| Star Piece | At the end of the narrow bridge, on the east branch of the first fork in the path (requires Rock Smash) | X Y | |
| Dusk Ball | On a small rock just past and southwest of the two ledges on the west branch of the first fork in the path (hidden) | X Y | |
| Hyper Potion | On a rock northwest of the bridge that crosses the west branch of the first fork in the path (hidden) | X Y | |
| Escape Rope | West of the two ledges south of the bridge that Hiker Aaron is walking on | X Y | |
| Heat Rock | In the southwestern-most corner (requires Rock Smash) | X Y | |
| Moon Stone | In the far north at the end of a narrow path on the east side of the cave (requires Rock Smash) (hidden) | X Y | |
| Max Repel | In the area accessible via the stairs in the southeast of B2F, on a stalagmite in the northeast (hidden) | X Y | |
| Reaper Cloth | In the area accessible via the stairs in the southeast of B2F, between the two ledges on the east side | X Y | |
B2F
| Item | Location | Games | |
|---|---|---|---|
| Iron | On a stalagmite on the west side of the cave, just west of the maze-like area north of the entrance from B1F (hidden) | X Y | |
| Dusk Stone | On the far west side, west of the Iron | X Y | |
| X Attack | In the northwestern-most corner, past Black Belt Gunnar who is due north of the entrance from B1F | X Y | |
| Elixir | In the far north, after sliding down the east slope northeast of Black Belt Gunnar who is due north of the entrance from B1F (requires Rock Smash) | X Y | |
| Full Heal | In the far east, east of Black Belt Gunnar who is due north of the entrance from B1F | X Y | |
| TM30 (Shadow Ball) | By the mine cart in the pit area in the middle of the cave (requires Rock Smash) | X Y | |
| Max Potion | Southeast of TM30 (Shadow Ball) at the corner of the pit one tier above the mine cart (requires Rock Smash) (hidden) | X Y | |
| Dire Hit | On the stalagmite behind Ranger Lee, southeast of the pit area (hidden) | X Y | |
| Iron Plate | East of the entrance from B1F, via the path around the pit in the middle of the cave | X Y | |
Zygarde's chamber (1F)
| Item | Location | Games | |
|---|---|---|---|
| Griseous Orb | Down the northwest path of the chamber | X Y | |
| Lustrous Orb | Down the southeast path of the chamber | X Y | |
| Adamant Orb | Down the southwest path of the chamber | X Y | |
| Big Nugget | Down the northeast path of the chamber, in the middle of the grassy area (hidden) | X Y | |
Rock Smash
| Item | Location | Games | |
|---|---|---|---|
| Big Pearl | Randomly found by smashing rocks | X Y | |
| Ether | Randomly found by smashing rocks | X Y | |
| Hard Stone | Randomly found by smashing rocks | X Y | |
| Heart Scale | Randomly found by smashing rocks | X Y | |
| Max Ether | Randomly found by smashing rocks | X Y | |
| Max Revive | Randomly found by smashing rocks | X Y | |
| Pearl | Randomly found by smashing rocks | X Y | |
| Revive | Randomly found by smashing rocks | X Y | |
| Soft Sand | Randomly found by smashing rocks | X Y | |
| Star Piece | Randomly found by smashing rocks | X Y | |
Natural objects
| Item | Location | Games | |
|---|---|---|---|
| Hard Stone | Randomly found by using Hyper Voice or Rock Slide on a spiky rock during a battle | X Y | |
| Float Stone | Randomly found by using Hyper Voice or Rock Slide on a spiky rock during a battle | X Y | |
| Damp Rock | Found by using Muddy Water, Surf, or Water Spout on a thin rock during a battle | X Y | |
Pokémon
| Pokémon | Games | Location | Levels | Rate | |||||||||||
|---|---|---|---|---|---|---|---|---|---|---|---|---|---|---|---|
|
X | Y |
|
45-46 | 20% | ||||||||||
|
X | Y |
|
44-46 | 20% | ||||||||||
|
X | Y |
|
45-46 | 20% | ||||||||||
|
X | Y |
|
45-46 | 20% | ||||||||||
|
X | Y |
|
44-46 | 40% | ||||||||||
| Horde Encounter | |||||||||||||||
|
X | Y |
|
23 | 35% | ||||||||||
|
X | Y |
|
24 | 5% | ||||||||||
|
X | Y |
|
24 | 5% | ||||||||||
|
X | Y |
|
23 | 60% | ||||||||||
| Rock Smash | |||||||||||||||
|
X | Y |
|
44-46 | 95% | ||||||||||
|
X | Y |
|
44, 46 | 5% | ||||||||||
| Drops from the ceiling | |||||||||||||||
|
X | Y |
|
44-46 | Common | ||||||||||
|
X | Y |
|
44-46 | Common | ||||||||||
| Special Pokémon | |||||||||||||||
|
X | Y |
|
70 | One | ||||||||||
| A colored background means that the Pokémon can be found in this location in the specified game. A white background with a colored letter means that the Pokémon cannot be found here. | |||||||||||||||
Trainers
| Trainer | Pokémon | |||||||||||
|---|---|---|---|---|---|---|---|---|---|---|---|---|
| B1F | ||||||||||||
|
| |||||||||||
| ||||||||||||
| ||||||||||||
|
| |||||||||||
|
| |||||||||||
| ||||||||||||
|
| |||||||||||
|
| |||||||||||
| B2F | ||||||||||||
|
| |||||||||||
| ||||||||||||
|
| |||||||||||
| ||||||||||||
|
| |||||||||||
| ||||||||||||
|
| |||||||||||
|
| |||||||||||
| ||||||||||||
Layout
1F
| Game | Entrance | Zygarde's Chamber |
|---|---|---|
| X | 
|
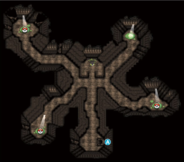
|
| Y | ||
B1F
| Game | Center | East |
|---|---|---|
| X | 
|
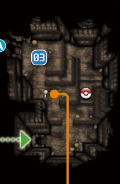
|
| Y | ||
B2F
| Game | B2F |
|---|---|
| X | 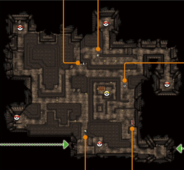
|
| Y | |
In other languages
| |||||||||||||||||||||
| Kalos | ||||||||
|---|---|---|---|---|---|---|---|---|
| ||||||||
|

|
This article is part of Project Routes, a Bulbapedia project that aims to write comprehensive articles on every route in the Pokémon world. |
