Terminus Cave: Difference between revisions
mNo edit summary |
No edit summary |
||
| (52 intermediate revisions by 28 users not shown) | |||
| Line 9: | Line 9: | ||
|location={{rt|18|Kalos}} | |location={{rt|18|Kalos}} | ||
|region=Kalos | |region=Kalos | ||
|mapdesc=A coal mine that was closed a few years ago due to rumors of | |mapdesc=A coal mine that was closed a few years ago due to rumors of a monster living deep within it. | ||
|generation={{Gen|VI}} | |generation={{Gen|VI}} | ||
}} | }} | ||
'''Terminus Cave''' (Japanese: '''{{tt|終の洞窟|ついのどうくつ}}''' ''Terminus Cave'') is a [[cave]] in eastern [[Kalos]] on {{rt|18|Kalos}}. | '''Terminus Cave''' (Japanese: '''{{tt|終の洞窟|ついのどうくつ}}''' ''Terminus Cave'') is a [[cave]] in eastern [[Kalos]] on {{rt|18|Kalos}}. It is the location of the [[Legendary Pokémon]] {{p|Zygarde}} in {{g|X and Y}}. Although the {{player}} can enter the cave as soon as they reach {{rt|18|Kalos}}, they are not allowed to enter Zygarde's chamber until after entering the [[Hall of Fame]], due to an {{tc|Ace Trainer}} who is blocking the way. | ||
==Items== | ==Items== | ||
| Line 21: | Line 19: | ||
This chamber is accessible via the entrance at the base of the elevated tracks on {{rt|18|Kalos}}. {{m|Rock Smash}} is required to reach the entrance. | This chamber is accessible via the entrance at the base of the elevated tracks on {{rt|18|Kalos}}. {{m|Rock Smash}} is required to reach the entrance. | ||
{{itlisth|cave}} | {{itlisth|cave}} | ||
{{Itemlist|Normal Gem|On the stalagmite at the back of the chamber ''(hidden, reappears occasionally)''|X=yes|y=yes | {{Itemlist|Normal Gem|On the stalagmite at the back of the chamber ''(hidden, reappears occasionally)''|X=yes|y=yes}} | ||
{{Itemlist|Dragon Scale|In the middle of the chamber|X=yes|y=yes | {{Itemlist|Dragon Scale|In the middle of the chamber|X=yes|y=yes}} | ||
{{itlistfoot|cave}} | {{itlistfoot|cave}} | ||
| Line 33: | Line 31: | ||
===B1F (main)=== | ===B1F (main)=== | ||
{{itlisth|cave}} | {{itlisth|cave}} | ||
{{Itemlist|Star Piece|At the end of the narrow bridge, on the east branch of the first fork in the path (requires {{m|Rock Smash}})|X=yes|y=yes | {{Itemlist|Star Piece|At the end of the narrow bridge, on the east branch of the first fork in the path (requires {{m|Rock Smash}})|X=yes|y=yes}} | ||
{{Itemlist|Dusk Ball|On the small rock just past and southwest of the two ledges on the west branch of the first fork in the path ''(hidden)''|X=yes|y=yes | {{Itemlist|Dusk Ball|On the small rock just past and southwest of the two ledges on the west branch of the first fork in the path ''(hidden)''|X=yes|y=yes}} | ||
{{Itemlist|Hyper Potion|On the stalagmite northwest of the bridge that crosses the west branch of the first fork in the path ''(hidden)''|X=yes|y=yes | {{Itemlist|Hyper Potion|On the stalagmite northwest of the bridge that crosses the west branch of the first fork in the path ''(hidden)''|X=yes|y=yes}} | ||
{{Itemlist|Escape Rope|West of the two ledges south of the bridge that {{tc|Hiker}} Aaron is walking on|X=yes|y=yes}} | {{Itemlist|Escape Rope|West of the two ledges south of the bridge that {{tc|Hiker}} Aaron is walking on|X=yes|y=yes}} | ||
{{Itemlist|Heat Rock|In the southwestern-most corner (requires {{m|Rock Smash}})|X=yes|y=yes | {{Itemlist|Heat Rock|In the southwestern-most corner (requires {{m|Rock Smash}})|X=yes|y=yes}} | ||
{{Itemlist|Moon Stone|In the far north at the end of a narrow path on the east side of the cave, on the north wall (requires {{m|Rock Smash}}) ''(hidden)''|X=yes|y=yes | {{Itemlist|Moon Stone|In the far north at the end of a narrow path on the east side of the cave, on the north wall (requires {{m|Rock Smash}}) ''(hidden)''|X=yes|y=yes}} | ||
{{itlistfoot|cave}} | {{itlistfoot|cave}} | ||
===B2F=== | ===B2F=== | ||
{{itlisth|cave}} | {{itlisth|cave}} | ||
{{Itemlist|Iron|On a stalagmite on the west side of the cave, just west of the maze-like area north of the entrance from B1F ''(hidden)''|X=yes|y=yes | {{Itemlist|Iron|On a stalagmite on the west side of the cave, just west of the maze-like area north of the entrance from B1F ''(hidden)''|X=yes|y=yes}} | ||
{{Itemlist|Dusk Stone|In the far west, west from the maze-like area north of the entrance from B1F|X=yes|y=yes | {{Itemlist|Dusk Stone|In the far west, west from the maze-like area north of the entrance from B1F|X=yes|y=yes}} | ||
{{Itemlist|X Attack|In the northwestern-most corner, past {{tc|Black Belt}} Gunnar who is due north of the entrance from B1F|X=yes|y=yes | {{Itemlist|X Attack|In the northwestern-most corner, past {{tc|Black Belt}} Gunnar who is due north of the entrance from B1F|X=yes|y=yes}} | ||
{{Itemlist|Elixir|In the far north, after sliding down the east slope northeast of {{tc|Black Belt}} Gunnar who is due north of the entrance from B1F (requires {{m|Rock Smash}})|X=yes|y=yes | {{Itemlist|Elixir|In the far north, after sliding down the east slope northeast of {{tc|Black Belt}} Gunnar who is due north of the entrance from B1F (requires {{m|Rock Smash}})|X=yes|y=yes}} | ||
{{Itemlist|Full Heal|In the far east, east of {{tc|Black Belt}} Gunnar who is due north of the entrance from B1F|X=yes|y=yes | {{Itemlist|Full Heal|In the far east, east of {{tc|Black Belt}} Gunnar who is due north of the entrance from B1F|X=yes|y=yes}} | ||
{{Itemlist|TM Ghost VI|By the mine cart in the pit area in the middle of the cave (requires {{m|Rock Smash}})|X=yes|y=yes|display={{TM|30|Shadow Ball}}}} | {{Itemlist|TM Ghost VI|By the mine cart in the pit area in the middle of the cave (requires {{m|Rock Smash}})|X=yes|y=yes|display={{TM|30|Shadow Ball}}}} | ||
{{Itemlist|Max Potion|Southeast of {{TM|30|Shadow Ball}} at the corner of the pit one tier above the mine cart (requires {{m|Rock Smash}}) ''(hidden)''|X=yes|y=yes | {{Itemlist|Max Potion|Southeast of {{TM|30|Shadow Ball}} at the corner of the pit one tier above the mine cart (requires {{m|Rock Smash}}) ''(hidden)''|X=yes|y=yes}} | ||
{{Itemlist|Dire Hit|On the stalagmite behind {{tc|Pokémon Ranger}} Lee, southeast of the pit area ''(hidden)''|X=yes|y=yes | {{Itemlist|Dire Hit|On the stalagmite behind {{tc|Pokémon Ranger}} Lee, southeast of the pit area ''(hidden)''|X=yes|y=yes}} | ||
{{Itemlist|Iron Plate|East of the entrance from B1F, via the path around the pit in the middle of the cave|X=yes|y=yes | {{Itemlist|Iron Plate|East of the entrance from B1F, via the path around the pit in the middle of the cave|X=yes|y=yes}} | ||
{{itlistfoot|cave}} | {{itlistfoot|cave}} | ||
===B1F (east)=== | ===B1F (east)=== | ||
{{itlisth|cave}} | {{itlisth|cave}} | ||
{{Itemlist|Max Repel|On the stalagmite in the northeast ''(hidden)''|X=yes|y=yes | {{Itemlist|Max Repel|On the stalagmite in the northeast ''(hidden)''|X=yes|y=yes}} | ||
{{Itemlist|Reaper Cloth|Between the two ledges on the east side|X=yes|y=yes | {{Itemlist|Reaper Cloth|Between the two ledges on the east side|X=yes|y=yes}} | ||
{{itlistfoot|cave}} | {{itlistfoot|cave}} | ||
===Zygarde's chamber (1F)=== | ===Zygarde's chamber (1F)=== | ||
{{itlisth|cave}} | {{itlisth|cave}} | ||
{{Itemlist|Griseous Orb|Down the northwest path of the chamber|X=yes|y=yes | {{Itemlist|Griseous Orb|Down the northwest path of the chamber|X=yes|y=yes}} | ||
{{Itemlist|Lustrous Orb|Down the southeast path of the chamber|X=yes|y=yes | {{Itemlist|Lustrous Orb|Down the southeast path of the chamber|X=yes|y=yes}} | ||
{{Itemlist|Adamant Orb|Down the southwest path of the chamber|X=yes|y=yes | {{Itemlist|Adamant Orb|Down the southwest path of the chamber|X=yes|y=yes}} | ||
{{Itemlist|Big Nugget|Down the northeast path of the chamber, in the middle of the grassy area ''(hidden)''|X=yes|y=yes | {{Itemlist|Big Nugget|Down the northeast path of the chamber, in the middle of the grassy area ''(hidden)''|X=yes|y=yes}} | ||
{{itlistfoot|cave}} | {{itlistfoot|cave}} | ||
===Rock Smash=== | ===Rock Smash=== | ||
{{Itlisth|cave}} | {{Itlisth|cave}} | ||
{{Itemlist|Big Pearl|Randomly found by | {{Itemlist|Big Pearl|Randomly found by smashing [[breakable rock]]s|X=yes|y=yes}} | ||
{{Itemlist|Ether|Randomly found by | {{Itemlist|Ether|Randomly found by smashing [[breakable rock]]s|X=yes|y=yes}} | ||
{{Itemlist|Hard Stone|Randomly found by | {{Itemlist|Hard Stone|Randomly found by smashing [[breakable rock]]s|X=yes|y=yes}} | ||
{{Itemlist|Heart Scale|Randomly found by | {{Itemlist|Heart Scale|Randomly found by smashing [[breakable rock]]s|X=yes|y=yes}} | ||
{{Itemlist|Max Ether|Randomly found by | {{Itemlist|Max Ether|Randomly found by smashing [[breakable rock]]s|X=yes|y=yes}} | ||
{{Itemlist|Max Revive|Randomly found by | {{Itemlist|Max Revive|Randomly found by smashing [[breakable rock]]s|X=yes|y=yes}} | ||
{{Itemlist|Pearl|Randomly found by | {{Itemlist|Pearl|Randomly found by smashing [[breakable rock]]s|X=yes|y=yes|display={{i|Pearl}}}} | ||
{{Itemlist|Revive|Randomly found by | {{Itemlist|Revive|Randomly found by smashing [[breakable rock]]s|X=yes|y=yes}} | ||
{{Itemlist|Soft Sand|Randomly found by | {{Itemlist|Soft Sand|Randomly found by smashing [[breakable rock]]s|X=yes|y=yes}} | ||
{{Itemlist|Star Piece|Randomly found by | {{Itemlist|Star Piece|Randomly found by smashing [[breakable rock]]s|X=yes|y=yes}} | ||
{{Itlistfoot|cave}} | {{Itlistfoot|cave}} | ||
===Natural objects=== | ===Natural objects=== | ||
{{Itlisth|cave}} | {{Itlisth|cave}} | ||
{{Itemlist|Hard Stone|Randomly found by using {{m|Hyper Voice}} or {{m|Rock Slide}} on a [[natural objects|spiky rock]] during a battle|X=yes|y=yes | {{Itemlist|Hard Stone|Randomly found by using {{m|Hyper Voice}} or {{m|Rock Slide}} on a [[natural objects|spiky rock]] during a battle|X=yes|y=yes}} | ||
{{Itemlist|Float Stone|Randomly found by using {{m|Hyper Voice}} or {{m|Rock Slide}} on a [[natural objects|spiky rock]] during a battle|X=yes|y=yes | {{Itemlist|Float Stone|Randomly found by using {{m|Hyper Voice}} or {{m|Rock Slide}} on a [[natural objects|spiky rock]] during a battle|X=yes|y=yes}} | ||
{{Itemlist|Damp Rock|Found by using {{m|Muddy Water}}, {{m|Surf}}, or {{m|Water Spout}} on a [[natural objects|thin rock]] during a battle|X=yes|y=yes | {{Itemlist|Damp Rock|Found by using {{m|Muddy Water}}, {{m|Surf}}, or {{m|Water Spout}} on a [[natural objects|thin rock]] during a battle|X=yes|y=yes}} | ||
{{Itlistfoot|cave}} | {{Itlistfoot|cave}} | ||
==Pokémon== | ==Pokémon== | ||
{{Catch/header|cave|4}} | {{Catch/header|cave|4}} | ||
{{Catch/entry6|028|Sandslash|yes|yes|Cave|45-46| | {{Catch/entry6|028|Sandslash|yes|yes|Cave|45-46|20%|type1=ground}} | ||
{{Catch/entry6|075|Graveler|yes|yes|Cave|44-46| | {{Catch/entry6|075|Graveler|yes|yes|Cave|44-46|20%|type1=rock|type2=ground}} | ||
{{Catch/entry6|247|Pupitar|no|yes|Cave|45-46| | {{Catch/entry6|247|Pupitar|no|yes|Cave|45-46|20%|type1=Rock|type2=ground}} | ||
{{Catch/entry6|305|Lairon|yes|no|Cave|45-46| | {{Catch/entry6|305|Lairon|yes|no|Cave|45-46|20%|type1=steel|type2=rock}} | ||
{{Catch/entry6|632|Durant|yes|yes|Cave|44-46| | {{Catch/entry6|632|Durant|yes|yes|Cave|44-46|40%|type1=bug|type2=steel}} | ||
{{Catch/div|cave|{{color2|000|Horde Encounter}}}} | {{Catch/div|cave|{{color2|000|Horde Encounter}}}} | ||
{{Catch/entry6|074|Geodude|yes|yes|Horde Encounter|23| | {{Catch/entry6|074|Geodude|yes|yes|Horde Encounter|23|35%|type1=rock|type2=ground}} | ||
{{Catch/entry6|246|Larvitar|no|yes|Horde Encounter|24| | {{Catch/entry6|246|Larvitar|no|yes|Horde Encounter|24|5%|type1=Rock|type2=ground}} | ||
{{Catch/entry6|304|Aron|yes|no|Horde Encounter|24| | {{Catch/entry6|304|Aron|yes|no|Horde Encounter|24|5%|type1=steel|type2=rock}} | ||
{{Catch/entry6|632|Durant|yes|yes|Horde Encounter|23| | {{Catch/entry6|632|Durant|yes|yes|Horde Encounter|23|60%|type1=bug|type2=steel}} | ||
{{Catch/div|cave|{{mcolor|Rock Smash|000}}}} | {{Catch/div|cave|{{mcolor|Rock Smash|000}}}} | ||
{{Catch/entry6|075|Graveler|yes|yes|Rock Smash|44-46| | {{Catch/entry6|075|Graveler|yes|yes|Rock Smash|44-46|95%|type1=rock|type2=ground}} | ||
{{Catch/entry6|213|Shuckle|yes|yes|Rock Smash|44, 46| | {{Catch/entry6|213|Shuckle|yes|yes|Rock Smash|44, 46|5%|type1=bug|type2=rock}} | ||
{{Catch/div|cave|Drops from the ceiling}} | {{Catch/div|cave|Drops from the ceiling}} | ||
{{Catch/entry6|168|Ariados|yes|yes|Ceiling|44-46| | {{Catch/entry6|168|Ariados|yes|yes|Ceiling|44-46|~80%|type1=bug|type2=poison}} | ||
{{Catch/entry6|714|Noibat|yes|yes|Ceiling|44-46| | {{Catch/entry6|714|Noibat|yes|yes|Ceiling|44-46|~20%|type1=flying|type2=dragon}} | ||
{{Catch/footer|cave}} | {{Catch/footer|cave}} | ||
==Special encounters== | |||
A {{p|Zygarde}} appears here after entering the [[Hall of Fame]]. If defeated or run from, it respawns after entering the Hall of Fame again. It is coded to never be {{Shiny}}. | |||
{| | |||
|- style="vertical-align:top" | |||
|{{Pokémon/6 | |||
|ndex=718 | |||
|pokemon=Zygarde | |||
|type1=Dragon | |||
|type2=Ground | |||
|ability=Aura Break | |||
|level=70 | |||
|move1=Crunch|move1type=Dark|move1cat=Physical | |||
|move2=Earthquake|move2type=Ground|move2cat=Physical | |||
|move3=Camouflage|move3type=Normal|move3cat=Status | |||
|move4=Dragon Pulse|move4type=Dragon|move4cat=Special}} | |||
|} | |||
==Trainers== | ==Trainers== | ||
===B1F=== | |||
{{trainerheader|cave}} | {{trainerheader|cave}} | ||
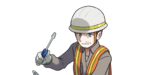
{{Trainerentry|VSWorker A.png{{!}}150px|game=6|Worker|Narek|3,072|3|075|Graveler|♂|46|None|075|Graveler|♂|47|None|076|Golem|♂|48|None|36=ジェローム|37=Jerome}} | |||
{{Trainerentry|VSWorker A.png{{!}}150px|Worker|Narek|3,072|3|075|Graveler|♂|46|None|075|Graveler|♂|47|None|076|Golem|♂|48|None|36=ジェローム|37=Jerome}} | |||
{{trainerdiv|cave}} | {{trainerdiv|cave}} | ||
{{Trainerentry|VSHiker.png{{!}}150px|Hiker|Aaron|2,800|1|112|Rhydon|♂|50|None|36=ガクジ|37=Gakuji}} | {{Trainerentry|VSHiker.png{{!}}150px|game=6|Hiker|Aaron|2,800|1|112|Rhydon|♂|50|None|36=ガクジ|37=Gakuji}} | ||
{{trainerdiv|cave}} | {{trainerdiv|cave}} | ||
{{Trainerentry|VSHiker.png{{!}}150px|Hiker|Bergin|2,688|2|525|Boldore|♂|48|None| | {{Trainerentry|VSHiker.png{{!}}150px|game=6|Hiker|Bergin|2,688|2|525|Boldore|♂|48|None|208XY|Steelix|♂|48|None|36=ケイスケ|37=Keisuke}} | ||
{{trainerdiv|cave}} | {{trainerdiv|cave}} | ||
{{Trainerentry|VSWorker A.png{{!}}150px|Worker|Dimitri|3,200|1|224|Octillery|♂|50|None|36=マサヒコ|37=Masahiko}} | {{Trainerentry|VSWorker A.png{{!}}150px|game=6|Worker|Dimitri|3,200|1|224|Octillery|♂|50|None|36=マサヒコ|37=Masahiko}} | ||
{{trainerdiv|cave}} | {{trainerdiv|cave}} | ||
{{Trainerentry|VSWorker B.png{{!}}150px|Worker|Yusif|3,200|1|476|Probopass|♂|50|None|36=ナガノリ|37=Nakanori}} | {{trainerdiv|cave|Accessed via B2F}} | ||
{{ | {{Trainerentry|VSWorker B.png{{!}}150px|game=6|Worker|Yusif|3,200|1|476|Probopass|♂|50|None|36=ナガノリ|37=Nakanori}} | ||
{{Trainerentry|VSBattle Girl.png{{!}}150px|Battle Girl|Andrea|2,400|2|538|Throh|♂|49|None|534|Conkeldurr|♂|50|None|36=チアキ|37=Chiaki}} | {{trainerfooter|cave|6}} | ||
===B2F=== | |||
{{trainerheader|cave}} | |||
{{Trainerentry|VSBattle Girl.png{{!}}150px|game=6|Battle Girl|Andrea|2,400|2|538|Throh|♂|49|None|534|Conkeldurr|♂|50|None|36=チアキ|37=Chiaki}} | |||
{{trainerdiv|cave}} | {{trainerdiv|cave}} | ||
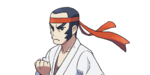
{{Trainerentry|VSBlack Belt.png{{!}}150px|Black Belt|Gunnar|2,400|2|454|Toxicroak|♂|49|None|539|Sawk|♂|50|None|36=アラシ|37=Arashi}} | {{Trainerentry|VSBlack Belt.png{{!}}150px|game=6|Black Belt|Gunnar|2,400|2|454|Toxicroak|♂|49|None|539|Sawk|♂|50|None|36=アラシ|37=Arashi}} | ||
{{trainerdiv|cave}} | {{trainerdiv|cave}} | ||
{{Trainerentry|VSBattle Girl.png{{!}}150px|Battle Girl|Hailey|2,448|2|308|Medicham|♀|48|None|701|Hawlucha|♀|51|None|36=ランコ|37=Ranko}} | {{Trainerentry|VSBattle Girl.png{{!}}150px|game=6|Battle Girl|Hailey|2,448<br><small>Requires {{m|Rock Smash}}</small>|2|308|Medicham|♀|48|None|701|Hawlucha|♀|51|None|36=ランコ|37=Ranko}} | ||
{{trainerdiv|cave}} | {{trainerdiv|cave}} | ||
{{Trainerentry|VSBlack Belt.png{{!}}150px|Black Belt|Ricardo|2,496|1|297|Hariyama|♂|52|None|36=タダシ|37=Tadashi}} | {{Trainerentry|VSBlack Belt.png{{!}}150px|game=6|Black Belt|Ricardo|2,496|1|297|Hariyama|♂|52|None|36=タダシ|37=Tadashi}} | ||
{{trainerdiv|cave}} | {{trainerdiv|cave}} | ||
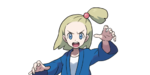
{{Trainerentry|VSRangers.png{{!}}150px|Rangers|Fern & Lee|8,160|2|031|Nidoqueen|♀|51|None|034|Nidoking|♂|51|None|36=マキ と ミキト|37=Maki and Mikito}} | {{Trainerentry|VSRangers.png{{!}}150px|game=6|Rangers|Fern & Lee|8,160|2|031|Nidoqueen|♀|51|None|034|Nidoking|♂|51|None|36=マキ と ミキト|37=Maki and Mikito}} | ||
{{trainerfooter|cave|6}} | {{trainerfooter|cave|6}} | ||
==Layout== | ==Layout== | ||
= | <div class="scrollbox"> | ||
{| class="roundy" style="margin:auto; background:#000; border:3px solid #{{locationcolor/dark|cave}}" | {| class="roundy" style="margin:auto; background:#000; border:3px solid #{{locationcolor/dark|cave}}" | ||
|- | |- | ||
! style="background:#{{locationcolor/light|cave}}; {{roundytl|5px}}" | Game | ! style="background:#{{locationcolor/light|cave}}; {{roundytl|5px}}" | Game | ||
! style="background:#{{locationcolor/light|cave}}" | | ! style="background:#{{locationcolor/light|cave}}" | 1F | ||
! style="background:#{{locationcolor/light|cave}}; {{roundytr|5px}}" | Zygarde's | ! colspan="2" style="background:#{{locationcolor/light|cave}}" | B1F | ||
! style="background:#{{locationcolor/light|cave}}" | B2F | |||
! style="background:#{{locationcolor/light|cave}}; {{roundytr|5px}}" | Zygarde's chamber | |||
|- style="background:#000" | |- style="background:#000" | ||
! style="background:#{{x color}}" | {{color2|fff|Pokémon X and Y|X}} | ! style="background:#{{x color}}" | {{color2|fff|Pokémon X and Y|X}} | ||
! rowspan="2" | [[File:Terminus Cave 1F Entrance XY.png|184px]] | ! rowspan="2" | [[File:Terminus Cave 1F Entrance XY.png|184px]] | ||
! rowspan="2" | [[File:Terminus Cave B1F Center XY.png|184px]] | ! rowspan="2" | [[File:Terminus Cave B1F Center XY.png|184px]] | ||
! rowspan="2" | [[File:Terminus Cave B1F East XY.png]] | ! rowspan="2" | [[File:Terminus Cave B1F East XY.png]] | ||
! rowspan="2" | [[File:Terminus Cave B2F XY.png|184px]] | ! rowspan="2" | [[File:Terminus Cave B2F XY.png|184px]] | ||
! rowspan="2" | [[File:Terminus Cave 1F Zygarde chamber XY.png|184px]] | |||
|- | |- | ||
! style="background:#{{y color}}" | {{color2|000|Pokémon X and Y|Y}} | ! style="background:#{{y color}}" | {{color2|000|Pokémon X and Y|Y}} | ||
|- | |- | ||
| colspan=" | | colspan="6" style="{{roundybottom|5px}} background:#{{locationcolor/light|cave}}" | | ||
|} | |} | ||
</div> | |||
==In the anime== | ==In the anime== | ||
[[File:Terminus Cave anime.png|thumb| | [[File:Terminus Cave anime.png|thumb|250px|Terminus Cave in the {{pkmn|anime}}]] | ||
Terminus Cave first appeared in ''[[XY094|From A to Z!]]'', where several {{tc|Team Flare Grunt}}s led by [[Mable]] tried to capture | ===Main series=== | ||
Terminus Cave first appeared in ''[[XY094|From A to Z!]]'', where several {{tc|Team Flare Grunt}}s led by [[Mable]] tried to capture [[Z2|Zygarde]], but were quickly overpowered by the [[Legendary Pokémon]]. | |||
Later in the same episode, [[Sawyer]] told {{Ash}} and {{ashfr}} about the cave, and they decided to visit it on their way to [[Snowbelle City]]. | Later in the same episode, [[Sawyer]] told {{Ash}} and {{ashfr}} about the cave, and they decided to visit it on their way to [[Snowbelle City]]. | ||
Ash and his friends arrived at Terminus Cave in ''[[XY102|Meeting at Terminus Cave!]]'', where they had another encounter with [[Team Flare]]. During the confrontation, [[Squishy]] was separated from the group, although it was reunited with them in the [[XY103|next episode]]. | Ash and his friends arrived at Terminus Cave in ''[[XY102|Meeting at Terminus Cave!]]'', where they had another encounter with [[Team Flare]]. During the confrontation, [[Squishy]] was separated from the group, although it was reunited with them in the [[XY103|next episode]]. | ||
[[File:Terminus Cave PG.png|thumb|left|250px|Terminus Cave in [[Pokémon Generations]]]] | |||
===Pokémon Generations=== | |||
Terminus Cave appeared in ''[[PG01|The Adventure]]'', where {{ga|Red}} and his {{ga|Red's Pikachu|Pikachu}} were seen riding a mine cart through the cave while being chased by a {{pkmn2|wild}} {{p|Noivern}}. After a brief battle, Pikachu managed to defeat Noivern, allowing it and Red to safely reach the end of the cave, where they encountered a {{DL|List of Pokémon with form differences|Zygarde|Complete Forme}} {{p|Zygarde}}. | |||
{{-}} | {{-}} | ||
==Trivia== | |||
* In [[Alola]], the layout of [[Resolution Cave]]'s B1F is identical to Zygarde's chamber's layout in Terminus Cave. In addition, four orb-like items can be found in both caves, with one of them being a hidden [[Big Nugget]]. A possible translation for Terminus Cave's Japanese name is "End Cave", Resolution Cave's Japanese name. | |||
* The [[Pokémon X & Pokémon Y: The Official Kalos Region Guidebook|official Pokémon X and Y guidebook]] marks the rooms as going downwards (1F, B1F, B2F), but the [[Pokémon X & Pokémon Y: The Official Kalos Region Pokédex & Postgame Adventure Guide|postgame guide]] marks the same rooms as going upwards (1F, 2F, 3F). | |||
==In other languages== | ==In other languages== | ||
{{langtable|color={{locationcolor/light|cave}}|bordercolor={{locationcolor/dark|cave}} | {{langtable|color={{locationcolor/light|cave}}|bordercolor={{locationcolor/dark|cave}} | ||
|zh_cmn=終結洞窟 ''{{tt|Zhōngjié Dòngkū|Terminus Cave}}'' | |zh_yue=終結洞窟 ''{{tt|Jūnggit Duhngfāt|Terminus Cave}}'' | ||
|zh_cmn=終結洞窟 / 终结洞窟 ''{{tt|Zhōngjié Dòngkū|Terminus Cave}}'' | |||
|da=Terminus-grotten | |da=Terminus-grotten | ||
|nl=Terminus-grot | |nl=Terminus-grot | ||
| Line 200: | Line 203: | ||
|de=Omega-Höhle | |de=Omega-Höhle | ||
|it=Grotta Climax | |it=Grotta Climax | ||
|ko={{tt | |ko=끝의 동굴 ''{{tt|Kkeut-ui Donggul|Terminus Cave}}'' | ||
|no=Terminusgrotten | |no=Terminusgrotten | ||
|pt_br=Caverna Terminus | |pt_br=Caverna Terminus<br>Caverna de Terminus ([[XY094]] blurb) | ||
| | |pt_eu=Gruta Terminus | ||
|ru=Пещера Терминус ''Peshchera Terminius'' | |||
|es_la=Cueva Terminus | |||
|es_eu=Cueva Desenlace | |||
|pl=Jaskinia Terminus | |||
|sv=Terminus-grottan | |sv=Terminus-grottan | ||
|tr=Terminus Mağara | |||
}} | }} | ||
| Line 216: | Line 224: | ||
[[de:Omega-Höhle]] | [[de:Omega-Höhle]] | ||
[[es:Cueva Desenlace]] | |||
[[fr:Grotte Coda]] | [[fr:Grotte Coda]] | ||
[[it:Grotta Climax]] | [[it:Grotta Climax]] | ||
[[ja:ついのどうくつ]] | [[ja:ついのどうくつ]] | ||
[[zh: | [[zh:終結洞窟(卡洛斯)]] | ||
Latest revision as of 14:24, 7 March 2024

|
This article is incomplete. Please feel free to edit this article to add missing information and complete it. Reason: Need layout maps for the small chambers off the other Route 18 entrances |
| ||||
| ||||
| Map description: | A coal mine that was closed a few years ago due to rumors of a monster living deep within it. | |||
|---|---|---|---|---|
| Location: | Route 18 | |||
| Region: | Kalos | |||
| Generations: | VI | |||
 Location of Terminus Cave in Kalos. | ||||
| Pokémon world locations | ||||

Terminus Cave (Japanese: 終の洞窟 Terminus Cave) is a cave in eastern Kalos on Route 18. It is the location of the Legendary Pokémon Zygarde in Pokémon X and Y. Although the player can enter the cave as soon as they reach Route 18, they are not allowed to enter Zygarde's chamber until after entering the Hall of Fame, due to an Ace Trainer who is blocking the way.
Items
Small chamber one
This chamber is accessible via the entrance at the base of the elevated tracks on Route 18. Rock Smash is required to reach the entrance.
| Item | Location | Games | |
|---|---|---|---|
| Normal Gem | On the stalagmite at the back of the chamber (hidden, reappears occasionally) | X Y | |
| Dragon Scale | In the middle of the chamber | X Y | |
Small chamber two
This chamber is accessible via the entrance at the end of the east branch of the elevated tracks on Route 18.
| Item | Location | Games | |
|---|---|---|---|
| TM31 (Brick Break) | In the back of the chamber | X Y | |
B1F (main)
| Item | Location | Games | |
|---|---|---|---|
| Star Piece | At the end of the narrow bridge, on the east branch of the first fork in the path (requires Rock Smash) | X Y | |
| Dusk Ball | On the small rock just past and southwest of the two ledges on the west branch of the first fork in the path (hidden) | X Y | |
| Hyper Potion | On the stalagmite northwest of the bridge that crosses the west branch of the first fork in the path (hidden) | X Y | |
| Escape Rope | West of the two ledges south of the bridge that Hiker Aaron is walking on | X Y | |
| Heat Rock | In the southwestern-most corner (requires Rock Smash) | X Y | |
| Moon Stone | In the far north at the end of a narrow path on the east side of the cave, on the north wall (requires Rock Smash) (hidden) | X Y | |
B2F
| Item | Location | Games | |
|---|---|---|---|
| Iron | On a stalagmite on the west side of the cave, just west of the maze-like area north of the entrance from B1F (hidden) | X Y | |
| Dusk Stone | In the far west, west from the maze-like area north of the entrance from B1F | X Y | |
| X Attack | In the northwestern-most corner, past Black Belt Gunnar who is due north of the entrance from B1F | X Y | |
| Elixir | In the far north, after sliding down the east slope northeast of Black Belt Gunnar who is due north of the entrance from B1F (requires Rock Smash) | X Y | |
| Full Heal | In the far east, east of Black Belt Gunnar who is due north of the entrance from B1F | X Y | |
| TM30 (Shadow Ball) | By the mine cart in the pit area in the middle of the cave (requires Rock Smash) | X Y | |
| Max Potion | Southeast of TM30 (Shadow Ball) at the corner of the pit one tier above the mine cart (requires Rock Smash) (hidden) | X Y | |
| Dire Hit | On the stalagmite behind Pokémon Ranger Lee, southeast of the pit area (hidden) | X Y | |
| Iron Plate | East of the entrance from B1F, via the path around the pit in the middle of the cave | X Y | |
B1F (east)
| Item | Location | Games | |
|---|---|---|---|
| Max Repel | On the stalagmite in the northeast (hidden) | X Y | |
| Reaper Cloth | Between the two ledges on the east side | X Y | |
Zygarde's chamber (1F)
| Item | Location | Games | |
|---|---|---|---|
| Griseous Orb | Down the northwest path of the chamber | X Y | |
| Lustrous Orb | Down the southeast path of the chamber | X Y | |
| Adamant Orb | Down the southwest path of the chamber | X Y | |
| Big Nugget | Down the northeast path of the chamber, in the middle of the grassy area (hidden) | X Y | |
Rock Smash
| Item | Location | Games | |
|---|---|---|---|
| Big Pearl | Randomly found by smashing breakable rocks | X Y | |
| Ether | Randomly found by smashing breakable rocks | X Y | |
| Hard Stone | Randomly found by smashing breakable rocks | X Y | |
| Heart Scale | Randomly found by smashing breakable rocks | X Y | |
| Max Ether | Randomly found by smashing breakable rocks | X Y | |
| Max Revive | Randomly found by smashing breakable rocks | X Y | |
| Pearl | Randomly found by smashing breakable rocks | X Y | |
| Revive | Randomly found by smashing breakable rocks | X Y | |
| Soft Sand | Randomly found by smashing breakable rocks | X Y | |
| Star Piece | Randomly found by smashing breakable rocks | X Y | |
Natural objects
| Item | Location | Games | |
|---|---|---|---|
| Hard Stone | Randomly found by using Hyper Voice or Rock Slide on a spiky rock during a battle | X Y | |
| Float Stone | Randomly found by using Hyper Voice or Rock Slide on a spiky rock during a battle | X Y | |
| Damp Rock | Found by using Muddy Water, Surf, or Water Spout on a thin rock during a battle | X Y | |
Pokémon
| Pokémon | Games | Location | Levels | Rate | |||||||||||
|---|---|---|---|---|---|---|---|---|---|---|---|---|---|---|---|
|
X | Y |
|
45-46 | 20% | ||||||||||
|
X | Y |
|
44-46 | 20% | ||||||||||
|
X | Y |
|
45-46 | 20% | ||||||||||
|
X | Y |
|
45-46 | 20% | ||||||||||
|
X | Y |
|
44-46 | 40% | ||||||||||
| Horde Encounter | |||||||||||||||
|
X | Y |
|
23 | 35% | ||||||||||
|
X | Y |
|
24 | 5% | ||||||||||
|
X | Y |
|
24 | 5% | ||||||||||
|
X | Y |
|
23 | 60% | ||||||||||
| Rock Smash | |||||||||||||||
|
X | Y |
|
44-46 | 95% | ||||||||||
|
X | Y |
|
44, 46 | 5% | ||||||||||
| Drops from the ceiling | |||||||||||||||
|
X | Y |
|
44-46 | ~80% | ||||||||||
|
X | Y |
|
44-46 | ~20% | ||||||||||
| A colored background means that the Pokémon can be found in this location in the specified game. A white background with a colored letter means that the Pokémon cannot be found here. | |||||||||||||||
Special encounters
A Zygarde appears here after entering the Hall of Fame. If defeated or run from, it respawns after entering the Hall of Fame again. It is coded to never be Shiny.
| ||||||||||||||||||||||||||||||||||

Trainers
B1F
| Trainer | Pokémon | |||||||||||
|---|---|---|---|---|---|---|---|---|---|---|---|---|
|
| |||||||||||
| ||||||||||||
| ||||||||||||
|
| |||||||||||
|
| |||||||||||
| ||||||||||||
|
| |||||||||||
| Accessed via B2F | ||||||||||||
|
| |||||||||||


B2F
| Trainer | Pokémon | |||||||||||
|---|---|---|---|---|---|---|---|---|---|---|---|---|
|
| |||||||||||
| ||||||||||||
|
| |||||||||||
| ||||||||||||
|
| |||||||||||
| ||||||||||||
|
| |||||||||||
|
| |||||||||||
| ||||||||||||

Layout


In the anime

Main series
Terminus Cave first appeared in From A to Z!, where several Team Flare Grunts led by Mable tried to capture Zygarde, but were quickly overpowered by the Legendary Pokémon.
Later in the same episode, Sawyer told Ash and his friends about the cave, and they decided to visit it on their way to Snowbelle City.
Ash and his friends arrived at Terminus Cave in Meeting at Terminus Cave!, where they had another encounter with Team Flare. During the confrontation, Squishy was separated from the group, although it was reunited with them in the next episode.

Pokémon Generations
Terminus Cave appeared in The Adventure, where Red and his Pikachu were seen riding a mine cart through the cave while being chased by a wild Noivern. After a brief battle, Pikachu managed to defeat Noivern, allowing it and Red to safely reach the end of the cave, where they encountered a Complete Forme Zygarde.
Trivia
- In Alola, the layout of Resolution Cave's B1F is identical to Zygarde's chamber's layout in Terminus Cave. In addition, four orb-like items can be found in both caves, with one of them being a hidden Big Nugget. A possible translation for Terminus Cave's Japanese name is "End Cave", Resolution Cave's Japanese name.
- The official Pokémon X and Y guidebook marks the rooms as going downwards (1F, B1F, B2F), but the postgame guide marks the same rooms as going upwards (1F, 2F, 3F).
In other languages
| |||||||||||||||||||||||||||||||||||||||||||||||||||||||||
| Kalos | ||||||||
|---|---|---|---|---|---|---|---|---|
|
| ||||||||
|
| This article is part of Project Routes, a Bulbapedia project that aims to write comprehensive articles on every route in the Pokémon world. |