Snagem Hideout: Difference between revisions
(I'll go get the 2nd one right now.) |
(→Role) |
||
| (41 intermediate revisions by 17 users not shown) | |||
| Line 1: | Line 1: | ||
{{incomplete|2=Missing | {{incomplete|2=Missing layout images from Colosseum; needs correct trainer sprites}} | ||
{{Infobox location | {{Infobox location | ||
|location_name=Snagem Hideout | |location_name=Snagem Hideout | ||
| Line 5: | Line 5: | ||
|translated_name=Team Snatch Hideout | |translated_name=Team Snatch Hideout | ||
|location=Eastern Orre | |location=Eastern Orre | ||
|mapdesc=The former base of Team Snagem that was completely destroyed in a catastrophic explosion.{{sup/ss|Colo}}<br>The base where Team Snagem dreams of regaining its former glory.{{sup/ss|XD}} | |mapdesc=The former base of <sc>Team Snagem</sc> that was completely destroyed in a catastrophic explosion.{{sup/ss|Colo}}<br><sc>Team Snagem</sc>'s base is apparently still in use even after it was destroyed.{{sup/ss|XD}}<br>The base where <sc>Team Snagem</sc> dreams of regaining its former glory.{{sup/ss|XD}} | ||
|image= | |image=Snagem Hideout XD.png | ||
|image_size=300px | |||
|region=Orre | |region=Orre | ||
|generation={{gen|III}} | |generation={{gen|III}} | ||
|type=ruins | |type=ruins | ||
|mapsize=300px | |||
}} | }} | ||
'''Snagem Hideout''' (Japanese: '''スナッチ団のアジト''' ''Team Snatch Hideout'') is a location in [[Orre]]. It is, quite obviously, the main base of the criminal syndicate [[Team Snagem]]. According to an early news report in [[Pokémon Colosseum]], it is located in a part of Orre known as [[Eclo Canyon]]. | '''Snagem Hideout''' (Japanese: '''スナッチ団のアジト''' ''Team Snatch Hideout'') is a location in [[Orre]]. It is, quite obviously, the main base of the criminal syndicate [[Team Snagem]]. According to an early news report in [[Pokémon Colosseum]], it is located in a part of Orre known as [[Eclo Canyon]]. | ||
| Line 25: | Line 26: | ||
The {{player}} goes to the hideout after receiving intelligence regarding its location from [[Hordel]], with the intent of retrieving his stolen [[Snag Machine]]. After walking through the entrance, he is attacked by [[Agrev]], who wants to see if the player has what it takes to join Team Snagem. As the player progresses, he finds that Team Snagem is holding a recruitment drive to find new members and restore Team Snagem to its former glory. | The {{player}} goes to the hideout after receiving intelligence regarding its location from [[Hordel]], with the intent of retrieving his stolen [[Snag Machine]]. After walking through the entrance, he is attacked by [[Agrev]], who wants to see if the player has what it takes to join Team Snagem. As the player progresses, he finds that Team Snagem is holding a recruitment drive to find new members and restore Team Snagem to its former glory. | ||
As the player approaches Gonzap's office, he battles another returning Snagem member from Colosseum | As the player approaches Gonzap's office, he battles another returning Snagem member from Colosseum, [[Biden]], who was one of the members the player met at the ruins of the [[S.S. Libra]]. After defeating him, the player proceeds to the office, where he overhears Gonzap yelling at [[Wakin]], complaining the Snag Machine is too small to fit his large arms. The two soon notice the player, and Wakin attacks. After fending his crony off, an impressed Gonzap tries to recruit the player into Team Snagem to take on [[Cipher]] together. He reveals his plan was to steal all of Cipher's Shadow Pokémon, causing it to collapse. When the player refuses, Gonzap offers to give back the Snag Machine if he can beat him. | ||
The player defeats Gonzap, and as promised, the head of Team Snagem returns the Snag Machine to him, concluding that the two of them are fighting for the same goal. He also gives the player | The player defeats Gonzap, and as promised, the head of Team Snagem returns the Snag Machine to him, concluding that the two of them are fighting for the same goal. He also gives the player {{key|Orre|Gonzap's Key|a key}}, which unlocks an item chest containing {{TM|30|Shadow Ball}}. | ||
After [[Credits|completing the main storyline]], the Snagem Hideout can be entered two ways: through the hole in the front left wall or through the main entrance. Inside the building is an assortment of debris presumed to be from Wes' activities several years earlier. Entering through the main entrance the player is met by Agrev who mentions that Gonzap and Wakin came back but left again without informing him where they were headed. Past Agrev and to the right is a room with a Healing Machine in it and the door to continue on. Going through this door leads the player to an item box and the staircase to the second floor. | After [[Credits|completing the main storyline]], the Snagem Hideout can be entered two ways: through the hole in the front left wall or through the main entrance. Inside the building is an assortment of debris presumed to be from Wes' activities several years earlier. Entering through the main entrance the player is met by Agrev who mentions that Gonzap and Wakin came back but left again without informing him where they were headed. Past Agrev and to the right is a room with a Healing Machine in it and the door to continue on. Going through this door leads the player to an item box and the staircase to the second floor. | ||
| Line 34: | Line 35: | ||
Back on the first floor one finds a hallway going to the front of the building, a staircase back to the second floor and an item box behind that staircase. Following that staircase leads to what once was Gonzap's office but is now abandoned and an item box. | Back on the first floor one finds a hallway going to the front of the building, a staircase back to the second floor and an item box behind that staircase. Following that staircase leads to what once was Gonzap's office but is now abandoned and an item box. | ||
On the third floor are three Trainers and two item boxes and eventually back to the left entrance to the Snagem Hideout. On the way back outside there are three Trainers and two item boxes. | On the third floor are three Trainers and two item boxes and eventually back to the left entrance to the Snagem Hideout. On the way back outside there are three Trainers and two item boxes. | ||
==Items== | ==Items== | ||
{{itlisth|ruins}} | {{itlisth|ruins}} | ||
{{itemlist|Max Elixir|1F | {{itemlist|Max Elixir|1F, in the center of the hallway|Colo=yes|display={{DL|Ether|Max Elixir}}}} | ||
{{itemlist|Max Revive|1F | {{itemlist|Max Revive|1F, next to Niver|Colo=yes|display={{DL|Revive|Max Revive}} ×2}} | ||
{{itemlist|Elixir| | {{itemlist|Elixir|2F, east of the northern staircase|Colo=yes|display={{DL|Ether|Elixir}}}} | ||
{{itemlist|Max Potion|3F | {{itemlist|Max Potion|3F, inside the northeast room|Colo=yes|display={{DL|Potion|Max Potion}} ×3}} | ||
{{itemlist|PP Up|3F | {{itemlist|PP Up|3F, inside the southwest room|Colo=yes|display={{DL|Vitamin|PP Up}} ×3}} | ||
{{itemlist|Max Ether|2F | {{itemlist|Max Ether|2F, inside the southwest room|Colo=yes|display={{DL|Ether|Max Ether}} ×2}} | ||
{{itemlist|Ultra Ball|1F | {{itemlist|Ultra Ball|1F, inside the southwest room|Colo=yes|display={{ball|Ultra}} ×5}} | ||
{{itemlist|None|On the table in [[Gonzap]]'s office after defeating him | {{itemlist|None|On the table in [[Gonzap]]'s office after defeating him|Colo=yes|display={{key|Orre|D-Disk}}}} | ||
{{itemlist|Rare Candy|Inside Gonzap's office | {{itemlist|Rare Candy|Inside Gonzap's office|Colo=yes|display={{DL|Vitamin|Rare Candy}} ×3}} | ||
{{itemlist|Ultra Ball|1F | {{itemlist|Ultra Ball|1F, north of the healing machine|XD=yes|display={{ball|Ultra}} ×3}} | ||
{{itemlist|Hyper Potion|2F | {{itemlist|Hyper Potion|2F, behind the northern staircase|XD=yes|display={{DL|Potion|Hyper Potion}} ×2}} | ||
{{itemlist|Revive|3F | {{itemlist|Revive|3F, in the southern part of the hallway|XD=yes|display={{DL|Revive|Revive}} ×2}} | ||
{{itemlist|Rare Candy|3F | {{itemlist|Rare Candy|3F, to the left of Golit|XD=yes|display={{DL|Vitamin|Rare Candy}}}} | ||
{{itemlist|PP Up|2F | {{itemlist|PP Up|2F, inside the jail cell|XD=yes|display={{DL|Vitamin|PP Up}}}} | ||
{{itemlist|TM Psychic|1F | {{itemlist|TM Psychic|1F, behind the southeast staircase, near [[Biden]]|XD=yes|display={{TM|29|Psychic}}}} | ||
{{itemlist| | {{itemlist||sprite=Snag Machine XD|size=40|2F, retrieved from Gonzap after defeating him|XD=yes|display=[[Snag Machine]]}} | ||
{{itemlist|Full Heal|Inside Gonzap's | {{itemlist|None|2F, reward for defeating Gonzap|XD=yes|display={{key|Orre|Gonzap's Key}}}} | ||
{{itemlist|TM Ghost|1F | {{itemlist|Full Heal|Inside Gonzap's office|XD=yes|display={{DL|Status condition healing item|Full Heal}} ×2}} | ||
{{itemlist|TM Ghost|1F, near the alternate exit (requires Gonzap's Key)|XD=yes|display={{TM|30|Shadow Ball}}}} | |||
{{itlistfoot|ruins}} | {{itlistfoot|ruins}} | ||
==Trainers== | ==Trainers== | ||
===Pokémon Colosseum=== | ===Pokémon Colosseum=== | ||
The | The Trainers encountered here may have Shadow Pokémon if the player failed to catch one before. The six Cipher Peons will stop appearing once their Shadow Pokémon have been snagged and they have all been beaten at least once. | ||
The | |||
{{trainerheader|ruins}} | {{trainerheader|ruins}} | ||
{{trainerentry|Colo Cipher Peon m.png{{!}}100px|Cipher Peon|Nore|2,200|4|291|Ninjask|M|55|None|267|Beautifly|F|54|None|205|Forretress|F|51|None|284|Masquerain|F|52|None|game=colo}} | {{trainerentry|Colo Cipher Peon m.png{{!}}100px|Cipher Peon|Nore|2,200|4|291|Ninjask|M|55|None|267|Beautifly|F|54|None|205|Forretress|F|51|None|284|Masquerain|F|52|None|game=colo|36=ワイルド|37=Wild}} | ||
{{trainerentry|Colo Skrub.png{{!}}96px|Cipher Peon|[[Skrub]]|2,120|4|367|Huntail|F|51|None|202|Wobbuffet|F|53|None|308|Medicham|F|50|None|076|Golem|M|52|game=colo}} | {{trainerdiv|ruins}} | ||
{{trainerentry|Colo Cipher Peon f.png{{!}}80px|Cipher Peon|Kloak|2,120|3|314|Illumise|F|53|None|313|Volbeat|M|53|None|168|Ariados|F|52|None|game=colo}} | {{trainerentry|Colo Skrub.png{{!}}96px|Cipher Peon|[[Skrub]]|2,120|4|367|Huntail|F|51|None|202|Wobbuffet|F|53|None|308|Medicham|F|50|None|076|Golem|M|52|game=colo|36=コワップ|37=Kowappu}} | ||
{{trainerentry|Colo Cipher Peon f.png{{!}}80px|Cipher Peon|Baila|2,120|3|189|Jumpluff|F|53|None|315|Roselia|F|52|None|045|Vileplume|M|51|None|game=colo}} | {{trainerdiv|ruins}} | ||
{{trainerentry|Colo Cipher Peon m.png{{!}}100px|Cipher Peon|Arton|2,200|3|364|Sealeo|M|50|None|221|Piloswine|F|55|None|362|Glalie|M|54|None|game=colo}} | {{trainerentry|Colo Cipher Peon f.png{{!}}80px|Cipher Peon|Kloak|2,120|3|314|Illumise|F|53|None|313|Volbeat|M|53|None|168|Ariados|F|52|None|game=colo|36=コルガ|37=Koruga}} | ||
{{trainerentry|Colo Cipher Peon m.png{{!}}100px|Cipher Peon|Dioge|2,120|3|205|Forretress|M|51|None|284|Masquerain|M|53|None|269|Dustox|F|50|game=colo | {{trainerdiv|ruins}} | ||
{{trainerentry|Colo Cipher Peon f.png{{!}}80px|Cipher Peon|Baila|2,120|3|189|Jumpluff|F|53|None|315|Roselia|F|52|None|045|Vileplume|M|51|None|game=colo|36=ジニー|37=Ginny}} | |||
{{trainerdiv|ruins}} | |||
{{ | {{trainerentry|Colo Cipher Peon m.png{{!}}100px|Cipher Peon|Arton|2,200|3|364|Sealeo|M|50|None|221|Piloswine|F|55|None|362|Glalie|M|54|None|game=colo|36=ザイル|37=Zairu}} | ||
{{trainerentry|Colo Snagem 1. | {{trainerdiv|ruins}} | ||
{{trainerentry|Colo Cipher Peon m.png{{!}}100px|Cipher Peon|Dioge|2,120|3|205|Forretress|M|51|None|284|Masquerain|M|53|None|269|Dustox|F|50|game=colo|36=ポトン|37=Poton}} | |||
{{trainerdiv|ruins}} | |||
{{trainerentry|Colo Snagem 1.png{{!}}96px|Team Snagem|Driton|550|4|117|Seadra|M|55|None|279|Pelipper|M|53|None|171|Lanturn|M|50|None|121|Starmie||52|None|game=colo|36=ベイル|37=Vail}} | |||
{{trainerdiv|ruins}} | |||
{{trainerentry|Colo Bodybuilder m 1.png{{!}}96px|Bodybuilder|Colas|1,296|4|247|Pupitar|M|54|None|327|Spinda|M|51|None|372|Shelgon|F|54|None|318|Carvanha|M|51|None|game=colo|36=メンド|37=Mend}} | |||
{{trainerdiv|ruins}} | |||
{{trainerentry|Colo Bandana Guy.png{{!}}96px|Bandana Guy|Crudo|880|4|028|Sandslash|M|53|None|264|Linoone|M|55|None|110|Weezing|M|52|None|317|Swalot|M|51|None|game=colo|36=チェント|37=Chento}} | |||
{{trainerdiv|ruins}} | |||
{{trainerentry|Colo Snagem 1.png{{!}}96px|Team Snagem|Niver|530|4|253|Grovyle|M|52|None|111|Rhyhorn|M|52|None|288|Vigoroth|F|52|None|335|Zangoose|M|53|None|game=colo|36=バクサ|37=Bakusa}} | |||
{{trainerdiv|ruins}} | {{trainerdiv|ruins}} | ||
{{trainerentry|Colo | {{trainerentry|Colo Rider m.png{{!}}96px|Rider|Rions|540|4|261|Poochyena|M|54|None|064|Kadabra|F|53|None|262|Mightyena|F|50|None|264|Linoone|M|53|None|game=colo|36=リカル|37=Rikaru}} | ||
{{trainerdiv|ruins}} | {{trainerdiv|ruins}} | ||
{{trainerentry|Colo | {{trainerentry|Colo Snagem 1.png{{!}}96px|Team Snagem|Fuston|540|4|267|Beautifly|M|53|None|225|Delibird|M|54|None|277|Swellow|M|54|None|042|Golbat|F|53|None|game=colo|36=デジタス|37=Dejitasu}} | ||
{{trainerdiv|ruins}} | {{trainerdiv|ruins}} | ||
{{trainerentry|Colo Snagem | {{trainerentry|Colo Snagem 2.png{{!}}96px|Team Snagem|[[Biden]]|520|4|235|Smeargle|M|52|None|235|Smeargle|M|51|None|235|Smeargle|M|50|None|235|Smeargle|B|45|None|game=colo|shadow=4|36=ザブ|37=Zabu}} | ||
{{trainerdiv|ruins}} | {{trainerdiv|ruins}} | ||
{{trainerentry|Colo | {{trainerentry|Colo Snagem 3.png{{!}}96px|Team Snagem|[[Agrev]]|550|4|259|Marshtomp|M|55|None|067|Machoke|F|52|None|275|Shiftry|F|50|None|217|Ursaring|B|45|None|game=colo|shadow=4|36=ミサンゴ|37=Misango}} | ||
{{trainerdiv|ruins|After receiving Bitt's e-mail about Shadow Ursaring and Smeargle}} | |||
{{trainerentry|Colo Bodybuilder f.png{{!}}96px|Bodybuilder|Lonia|1,320|4|180|Flaaffy|F|55|None|206|Dunsparce|M|51|None|224|Octillery|M|54|None|365|Walrein|F|52|None|game=colo|36=ウィス|37=Wisu}} | |||
{{trainerdiv|ruins}} | {{trainerdiv|ruins}} | ||
{{trainerentry|Colo | {{trainerentry|Colo Rider f.png{{!}}96px|Rider|Nelis|540|4|222|Corsola|F|51|None|294|Loudred|M|54|None|336|Seviper|M|52|None|319|Sharpedo|F|50|None|game=colo|36=ラル|37=Lal}} | ||
{{trainerdiv|ruins}} | {{trainerdiv|ruins}} | ||
{{trainerentry|Colo | {{trainerentry|Colo Hunter F.png{{!}}96px|Hunter|Frena|848|4|039|Jigglypuff|F|52|None|285|Shroomish|M|53|None|303|Mawile|F|53|None|232|Donphan|F|51|None|game=colo|36=ヘシティ|37=Heshiti}} | ||
{{trainerdiv|ruins}} | {{trainerdiv|ruins}} | ||
{{trainerentry|Colo | {{trainerentry|Colo Chaser f 2.png{{!}}96px|Chaser|Liaks|1,080|4|044|Gloom|M|53|None|055|Golduck|F|54|None|189|Jumpluff|M|53|None|164|Noctowl|F|52|game=colo|36=シャイナ|37=Shaina}} | ||
{{trainerfooter|ruins|Colo}} | {{trainerfooter|ruins|Colo}} | ||
{{MSP|156|Quilava}} If [[Rosso]] was battled in [[Phenac City]]: | |||
{{Party/Single | |||
|color={{green color}} | |||
|bordercolor={{green color dark}} | |||
|headcolor={{shadow color light}} | |||
|sprite=Colo Verde.png | |||
|size=75px | |||
|prize={{pdollar}}2,520 | |||
|class=Cipher Peon | |||
|name={{color2|000|Verde}} | |||
|game=Colo | |||
|location=Snagem Hideout | |||
|pokemon=4}} | |||
|{{Pokémon/3 | |||
|ndex=089 | |||
|pokemon=Muk | |||
|game=Colo | |||
|gender=male | |||
|level=63 | |||
|ability=Sticky Hold | |||
|type1=Poison | |||
|move1=Sludge Bomb|move1type=Poison | |||
|move2=Frustration|move2type=Normal | |||
|move3=Brick Break|move3type=Fighting | |||
|move4=Minimize|move4type=Normal}} | |||
|{{Pokémon/3 | |||
|ndex=326 | |||
|pokemon=Grumpig | |||
|game=Colo | |||
|gender=female | |||
|level=62 | |||
|ability=Thick Fat | |||
|type1=Psychic | |||
|move1=Psychic|move1type=Psychic | |||
|move2=Shadow Ball|move2type=Ghost | |||
|move3=Psych Up|move3type=Normal | |||
|move4=Confuse Ray|move4type=Ghost}} | |||
{{Party/Div|color={{green color}}}} | |||
|{{Pokémon/3 | |||
|ndex=319 | |||
|pokemon=Sharpedo | |||
|game=Colo | |||
|level=61 | |||
|gender=male | |||
|ability=Rough Skin | |||
|type1=Water|type2=Dark | |||
|move1=Waterfall|move1type=Water | |||
|move2=Hydro Pump|move2type=Water | |||
|move3=Crunch|move3type=Dark}} | |||
|{{Pokémon/3/Shadow | |||
|ndex=153 | |||
|pokemon=Bayleef | |||
|game=Colo | |||
|held=Miracle Seed | |||
|level=30 | |||
|ability=Overgrow | |||
|type1=Grass | |||
|move1=Shadow Rush|move1type=Shadow | |||
|move2=Synthesis|move2type=Grass | |||
|move3=Razor Leaf|move3type=Grass | |||
|move4=Body Slam|move4type=Normal}} | |||
{{Party/Footer}} | |||
{{ | {{MSP|153|Bayleef}} If [[Verde]] was battled in [[Phenac City]]: | ||
{{ | {{Party/Single | ||
|color={{blue color}} | |||
{{ | |headcolor={{shadow color light}} | ||
|bordercolor={{blue color dark}} | |||
{{ | |sprite=Colo Bluno.png | ||
|size=75px | |||
|prize={{pdollar}}2,520 | |||
|class=Cipher Peon | |||
|name={{color2|000|Bluno}} | |||
|game=Colo | |||
|location=Snagem Hideout | |||
|pokemon=4}} | |||
|{{Pokémon/3 | |||
|ndex=089 | |||
|pokemon=Muk | |||
|game=Colo | |||
|gender=male | |||
|level=63 | |||
|ability=Sticky Hold | |||
|type1=Poison | |||
|move1=Sludge Bomb|move1type=Poison | |||
|move2=Frustration|move2type=Normal | |||
|move3=Brick Break|move3type=Fighting | |||
|move4=Minimize|move4type=Normal}} | |||
|{{Pokémon/3 | |||
|ndex=326 | |||
|pokemon=Grumpig | |||
|game=Colo | |||
|gender=female | |||
|level=62 | |||
|ability=Thick Fat | |||
|type1=Psychic | |||
|move1=Psychic|move1type=Psychic | |||
|move2=Shadow Ball|move2type=Ghost | |||
|move3=Psych Up|move3type=Normal | |||
|move4=Confuse Ray|move4type=Ghost}} | |||
{{Party/Div|color={{blue color}}}} | |||
|{{Pokémon/3 | |||
|pokemon=Camerupt | |||
|game=Colo | |||
|type1=Fire|type2=Ground | |||
|ndex=323 | |||
|level=61 | |||
|gender=male | |||
|ability=Magma Armor | |||
|move1=Flamethrower|move1type=Fire | |||
|move2=Earthquake|move2type=Ground | |||
|move3=Take Down|move3type=Normal | |||
|move4=Howl|move4type=Normal}} | |||
|{{Pokémon/3/Shadow | |||
|pokemon=Croconaw | |||
|game=Colo | |||
|type1=Water | |||
|ndex=159 | |||
|level=30 | |||
|ability=Torrent | |||
|held=Mystic Water | |||
|move1=Shadow Rush|move1type=Shadow | |||
|move2=Scary Face|move2type=Normal | |||
|move3=Bite|move3type=Dark | |||
|move4=Surf|move4type=Water}} | |||
{{Party/Footer}} | |||
{{MSP|159|Croconaw}} If [[Bluno]] was battled in [[Phenac City]]: | |||
{{Party/Single | |||
|color={{ruby color}} | |||
|headcolor={{shadow color light}} | |||
|bordercolor={{shadow color dark}} | |||
|sprite=Colo Rosso.png | |||
|size=75px | |||
|prize={{pdollar}}2,520 | |||
|class=Cipher Peon | |||
|name={{color2|000|Rosso}} | |||
|game=Colo | |||
|location=Snagem Hideout | |||
|pokemon=4}} | |||
|{{Pokémon/3 | |||
|ndex=089 | |||
|pokemon=Muk | |||
|game=Colo | |||
|gender=male | |||
|level=63 | |||
|ability=Sticky Hold | |||
|type1=Poison | |||
|move1=Sludge Bomb|move1type=Poison | |||
|move2=Frustration|move2type=Normal | |||
|move3=Brick Break|move3type=Fighting | |||
|move4=Minimize|move4type=Normal}} | |||
|{{Pokémon/3 | |||
|ndex=326 | |||
|pokemon=Grumpig | |||
|game=Colo | |||
|gender=female | |||
|level=62 | |||
|ability=Thick Fat | |||
|type1=Psychic | |||
|move1=Psychic|move1type=Psychic | |||
|move2=Shadow Ball|move2type=Ghost | |||
|move3=Psych Up|move3type=Normal | |||
|move4=Confuse Ray|move4type=Ghost}} | |||
{{Party/Div|color={{red color}}}} | |||
|{{Pokémon/3 | |||
|ndex=286 | |||
|pokemon=Breloom | |||
|game=Colo | |||
|gender=male | |||
|level=61 | |||
|ability=Effect Spore | |||
|type1=Grass|type2=Fighting | |||
|move1=Mind Reader|move1type=Normal | |||
|move2=DynamicPunch|move2type=Fighting | |||
|move3=Iron Tail|move3type=Steel | |||
|move4=Swagger|move4type=Normal}} | |||
|{{Pokémon/3/Shadow | |||
|ndex=156 | |||
|pokemon=Quilava | |||
|game=Colo | |||
|level=30 | |||
|held=Charcoal | |||
|ability=Blaze | |||
|type1=Fire | |||
|move1=Shadow Rush|move1type=Shadow | |||
|move2=SmokeScreen|move2type=Normal | |||
|move3=Dig|move3type=Ground | |||
|move4=Flame Wheel|move4type=Fire}} | |||
{{Party/Footer}} | |||
{{MSP|227|Skarmory}} If {{p|Skarmory}} was not snagged at [[Realgam Tower]], it will replace Gonzap's Gyarados here. This battle can be repeated until Skarmory is snagged. | |||
If {{ | |||
{{Party/Single | {{Party/Single | ||
|color={{cologne color}} | |color={{cologne color}} | ||
| Line 112: | Line 301: | ||
|sprite=Colo Gonzap.png | |sprite=Colo Gonzap.png | ||
|size=80px | |size=80px | ||
|prize=6,400 | |prize={{pdollar}}6,400 | ||
|class=Snagem Head | |class=Snagem Head | ||
|name=Gonzap | |classlink=Gonzap | ||
|name={{color2|000|Gonzap}} | |||
|game=Colo | |game=Colo | ||
|location=Snagem Hideout | |location=Snagem Hideout | ||
|pokemon=6 | |pokemon=6}} | ||
}} | |||
|{{Pokémon/3 | |{{Pokémon/3 | ||
|ndex=286 | |ndex=286 | ||
| Line 196: | Line 385: | ||
===Pokémon XD: Gale of Darkness=== | ===Pokémon XD: Gale of Darkness=== | ||
{{trainerheader|ruins}} | {{trainerheader|ruins}} | ||
{{trainerentry|Colo Snagem 1. | {{trainerentry|Colo Snagem 1.png{{!}}96px|Team Snagem|[[Agrev]]|540|4|198|Murkrow|F|26|None|043|Oddish|M|26|None|042|Golbat|F|26|None|359|Absol|F|27|None|game=xd|36=ミサンゴ|37=Misango}} | ||
{{trainerdiv|ruins}} | {{trainerdiv|ruins}} | ||
{{trainerentry|Colo Snagem 1. | {{trainerentry|Colo Snagem 1.png{{!}}96px|Team Snagem|Jedo|520|4|109|Koffing|F|26|None|043|Oddish|F|26|None|269|Dustox|M|26|None|211|Qwilfish|F|25|None|game=xd|36=チマイナ|37=Chimaina}} | ||
{{trainerdiv|ruins}} | {{trainerdiv|ruins}} | ||
{{trainerentry|Colo Snagem 1. | {{trainerentry|Colo Snagem 1.png{{!}}96px|Team Snagem|Hobble|560|4|203|Girafarig|F|26|None|235|Smeargle|M|27|None|279|Pelipper|F|25|None|067|Machoke|M|28|None|game=xd|36=テキラ|37=Tekira}} | ||
{{trainerdiv|ruins}} | {{trainerdiv|ruins}} | ||
{{trainerentry|Colo Snagem 1. | {{trainerentry|Colo Snagem 1.png{{!}}96px|Team Snagem|Golit|640|5|223|Remoraid|F|25|None|224|Octillery|F|26|None|028|Sandslash|M|27|None|294|Loudred|F|26|None|342|Crawdaunt|M|32|None|game=xd|36=ラクゼ|37=Rakuze}} | ||
{{trainerdiv|ruins}} | {{trainerdiv|ruins}} | ||
{{trainerentry|Colo Snagem 1. | {{trainerentry|Colo Snagem 1.png{{!}}96px|Team Snagem|Jinok|520|4|352|Kecleon|F|25|None|190|Aipom|F|26|None|313|Volbeat|M|25|None|193|Yanma|F|25|None|game=xd|36=カラト|37=Karato}} | ||
{{trainerdiv|ruins}} | {{trainerdiv|ruins}} | ||
{{trainerentry|Colo Snagem 1. | {{trainerentry|Colo Snagem 1.png{{!}}96px|Team Snagem|Gaply|560|5|168|Ariados|F|26|None|267|Beautifly|F|28|None|215|Sneasel|M|28|None|225|Delibird|F|28|None|178|Xatu|F|27|None|game=xd|36=ネバン|37=Neban}} | ||
{{trainerdiv|ruins}} | {{trainerdiv|ruins}} | ||
{{trainerentry|Colo Snagem 1. | {{trainerentry|Colo Snagem 1.png{{!}}96px|Team Snagem|Fudlo|560|5|075|Graveler|F|25|None|111|Rhyhorn|F|26|None|234|Stantler|M|28|None|200|Misdreavus|F|28|None|357|Tropius|M|27|None|game=xd|36=ラウニ|37=Rauni}} | ||
{{trainerdiv|ruins}} | {{trainerdiv|ruins}} | ||
{{trainerentry|Colo Snagem 2. | {{trainerentry|Colo Snagem 2.png{{!}}96px|Team Snagem|[[Biden]]|540|4|043|Oddish|F|27|None|169|Crobat|F|26|None|324|Torkoal|M|26|None|182|Bellossom|M|26|None|game=xd|36=ザブ|37=Zabu}} | ||
{{trainerdiv|ruins}} | {{trainerdiv|ruins}} | ||
{{trainerentry|Colo Snagem 3. | {{trainerentry|Colo Snagem 3.png{{!}}96px|Team Snagem|[[Wakin]]|640|5|044|Gloom|M|28|None|044|Gloom|F|28|None|226|Mantine|M|28|None|205|Forretress|M|31|None|326|Grumpig|F|32|None|game=xd|36=ヤッチーノ|37=Yaccino}} | ||
{{trainerfooter|ruins|XD}} | {{trainerfooter|ruins|XD}} | ||
{{Party/Single | {{Party/Single | ||
|color={{cologne color}} | |color={{cologne color}} | ||
| Line 224: | Line 412: | ||
|prize={{pdollar}}3,200 | |prize={{pdollar}}3,200 | ||
|class=Snagem Head | |class=Snagem Head | ||
|name=Gonzap | |classlink=Gonzap | ||
|name={{color2|000|Gonzap}} | |||
|game=XD | |game=XD | ||
|location=Snagem Hideout | |location=Snagem Hideout | ||
|pokemon=5 | |pokemon=5}} | ||
}} | |||
|{{Pokémon/3 | |{{Pokémon/3 | ||
|ndex=101 | |ndex=101 | ||
| Line 236: | Line 424: | ||
|ability=Static | |ability=Static | ||
|level=30 | |level=30 | ||
|move1= | |move1=SonicBoom|move1type=Normal | ||
|move2= | |move2=Spark|move2type=Electric | ||
|move3=Facade|move3type=Normal | |move3=Facade|move3type=Normal | ||
|move4=Thief|move4type=Dark}} | |move4=Thief|move4type=Dark}} | ||
| Line 245: | Line 433: | ||
|game=XD | |game=XD | ||
|type1=Grass|type2=Dark | |type1=Grass|type2=Dark | ||
|ability= | |ability=Early Bird | ||
|level=32 | |level=32 | ||
|gender=male | |gender=male | ||
|move1=Fake Out|move1type=Normal | |move1=Fake Out|move1type=Normal | ||
|move2=Aerial Ace| | |move2=Faint Attack|move2type=Dark | ||
| | |move3=Aerial Ace|move3type=Flying | ||
|move4=Hyper Beam|move4type=Normal}} | |||
|{{Pokémon/3 | |{{Pokémon/3 | ||
|ndex=045 | |ndex=045 | ||
| Line 258: | Line 447: | ||
|type1=Grass|type2=Poison | |type1=Grass|type2=Poison | ||
|level=30|gender=male | |level=30|gender=male | ||
|move1= | |move1=Sleep Powder|move1type=Grass | ||
|move2= | |move2=Giga Drain|move2type=Grass | ||
|move3= | |move3=Sweet Scent|move3type=Normal | ||
|move4= | |move4=Hyper Beam|move4type=Normal}} | ||
{{Party/Div|color={{cologne color}}}} | {{Party/Div|color={{cologne color}}}} | ||
| style="margin:auto" |{{Pokémon/3 | | style="margin:auto" |{{Pokémon/3 | ||
| Line 267: | Line 456: | ||
|pokemon=Whiscash | |pokemon=Whiscash | ||
|game=XD | |game=XD | ||
|type1=Water|type2=Ground | |type1=Water|type2=Ground | ||
|ability=Oblivious | |ability=Oblivious | ||
|level=31 | |level=31 | ||
|gender=male | |gender=male | ||
|move1= | |move1=Water Pulse|move1type=Water | ||
|move2= | |move2=Rock Tomb|move2type=Rock | ||
|move3= | |move3=Spark|move3type=Electric | ||
|move4= | |move4=Hyper Beam|move4type=Normal}} | ||
| style="margin:auto" |{{Pokémon/3 | | style="margin:auto" |{{Pokémon/3 | ||
|ndex=227 | |ndex=227 | ||
| Line 281: | Line 469: | ||
|game=XD | |game=XD | ||
|type1=Steel|type2=Flying | |type1=Steel|type2=Flying | ||
|ability= | |ability=Keen Eye | ||
|level=32 | |level=32 | ||
|gender=female | |gender=female | ||
|move1= | |move1=Steel Wing|move1type=Steel | ||
| | |move2=Swift|move2type=Normal | ||
|move3=Aerial Ace|move3type=Flying | |||
|move4=Hyper Beam|move4type=Normal}} | |||
{{Party/Footer}} | {{Party/Footer}} | ||
==Layout== | ==Layout== | ||
{| class="roundy" style="margin:auto; background: #000; border: | {| class="roundy" style="margin:auto; background: #000; border: 3px solid #{{Locationcolor/dark|ruins}}" | ||
|- style="background:#{{Locationcolor/light|ruins}}" | |- | ||
! style="{{ | ! style="background:#{{Locationcolor/light|ruins}}; {{roundytl|5px}}" | Game | ||
! style="background:#{{Locationcolor/light|ruins}}" | Entrance | |||
! 1F | ! style="background:#{{Locationcolor/light|ruins}}" | 1F | ||
! 2F | ! style="background:#{{Locationcolor/light|ruins}}" | 2F | ||
! style="{{roundytr|5px}}" | 3F | ! style="background:#{{Locationcolor/light|ruins}}; {{roundytr|5px}}" | 3F | ||
|- | |- | ||
! style="background:#{{colo color}}" | {{color2|000|Pokémon Colosseum|Colo}} | ! style="background:#{{colo color}}" | {{color2|000|Pokémon Colosseum|Colo}} | ||
| | | | ||
| | | | ||
| | |||
| | |||
|- | |||
! style="background:#{{xd color}}" | {{color2|fff|Pokémon XD: Gale of Darkness|XD}} | |||
| [[File:Snagem Hideout XD.png|200px]] | |||
| [[File:Snagem Hideout 1F XD.png|200px]] | |||
| [[File:Snagem Hideout 2F XD.png|200px]] | |||
| [[File:Snagem Hideout 3F XD.png|200px]] | |||
|- | |- | ||
| colspan="5" style="background:#{{Locationcolor/light|ruins}}; {{roundybottom|5px}}" | | | colspan="5" style="background:#{{Locationcolor/light|ruins}}; {{roundybottom|5px}}" | | ||
|} | |} | ||
==Trivia== | |||
* Upon defeating Cipher Peon Baila here in Colosseum, the colon separating her name from her defeat speech is missing. | |||
==In other languages== | ==In other languages== | ||
{{langtable|color={{locationcolor/light|ruins}}|bordercolor={{locationcolor/dark|ruins}} | {{langtable|color={{locationcolor/light|ruins}}|bordercolor={{locationcolor/dark|ruins}} | ||
|fr_eu=Repaire Snatch | |fr_eu=Repaire Team Snatch | ||
|de=Team | |de=Team Krall-Versteck | ||
|it=Rifugio Clepto | |it=Rifugio Team Clepto | ||
|es_eu=Guarida del Equipo Cepo | |es_eu=Guarida de Cepo<br>Guarida del Equipo Cepo | ||
}} | }} | ||
{{-}} | {{-}} | ||
| Line 331: | Line 524: | ||
[[de:Team Krall-Versteck]] | [[de:Team Krall-Versteck]] | ||
[[fr:Repaire Snatch]] | [[fr:Repaire Snatch]] | ||
[[it:Rifugio Clepto]] | |||
Revision as of 19:24, 19 June 2016

|
This article is incomplete. Please feel free to edit this article to add missing information and complete it. Reason: Missing layout images from Colosseum; needs correct trainer sprites |
| ||||
| ||||
| Map description: | The former base of Team Snagem that was completely destroyed in a catastrophic explosion.Colo Team Snagem's base is apparently still in use even after it was destroyed.XD The base where Team Snagem dreams of regaining its former glory.XD | |||
|---|---|---|---|---|
| Location: | Eastern Orre | |||
| Region: | Orre | |||
| Generations: | III | |||
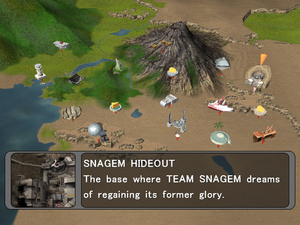 Location of Snagem Hideout in Orre. | ||||
| Pokémon world locations | ||||
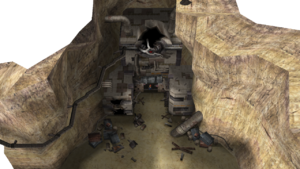
Snagem Hideout (Japanese: スナッチ団のアジト Team Snatch Hideout) is a location in Orre. It is, quite obviously, the main base of the criminal syndicate Team Snagem. According to an early news report in Pokémon Colosseum, it is located in a part of Orre known as Eclo Canyon.
At the start of Pokémon Colosseum, the base is partly destroyed by Wes in a series of explosions, destroying a large Snag Machine and wrecking much of the base. Gonzap's office seems to be the least affected area. Later in the game, some remnants of both Cipher and Team Snagem, as well some other Trainers, gather at the Hideout. A Shadow Smeargle and a Shadow Ursaring can be snagged here from two Team Snagem members after defeating the boss of Cipher.
In Pokémon XD: Gale of Darkness, the Snagem Hideout is still in severe disrepair from Wes's sabotage five years ago, but is still in use by Team Snagem. Michael goes here to retrieve his Snag Machine from Gonzap after it gets stolen from him by Snagem members.
Role
In Pokémon Colosseum
After defeating Evice and completing the main storyline, Wes returns to the Snagem Hideout to defeat the remaining Team Snagem members and snag more of their Shadow Pokémon. Wes's ultimate goal is to defeat Gonzap to finish his quest to stop Cipher and Team Snagem for good. After his defeat, Gonzap retreats and is not seen again until Pokémon XD: Gale of Darkness.
In Pokémon XD: Gale of Darkness
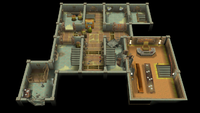
The player goes to the hideout after receiving intelligence regarding its location from Hordel, with the intent of retrieving his stolen Snag Machine. After walking through the entrance, he is attacked by Agrev, who wants to see if the player has what it takes to join Team Snagem. As the player progresses, he finds that Team Snagem is holding a recruitment drive to find new members and restore Team Snagem to its former glory.
As the player approaches Gonzap's office, he battles another returning Snagem member from Colosseum, Biden, who was one of the members the player met at the ruins of the S.S. Libra. After defeating him, the player proceeds to the office, where he overhears Gonzap yelling at Wakin, complaining the Snag Machine is too small to fit his large arms. The two soon notice the player, and Wakin attacks. After fending his crony off, an impressed Gonzap tries to recruit the player into Team Snagem to take on Cipher together. He reveals his plan was to steal all of Cipher's Shadow Pokémon, causing it to collapse. When the player refuses, Gonzap offers to give back the Snag Machine if he can beat him.
The player defeats Gonzap, and as promised, the head of Team Snagem returns the Snag Machine to him, concluding that the two of them are fighting for the same goal. He also gives the player a key, which unlocks an item chest containing TM30 (Shadow Ball).
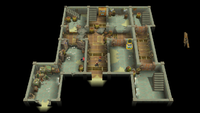
After completing the main storyline, the Snagem Hideout can be entered two ways: through the hole in the front left wall or through the main entrance. Inside the building is an assortment of debris presumed to be from Wes' activities several years earlier. Entering through the main entrance the player is met by Agrev who mentions that Gonzap and Wakin came back but left again without informing him where they were headed. Past Agrev and to the right is a room with a Healing Machine in it and the door to continue on. Going through this door leads the player to an item box and the staircase to the second floor.
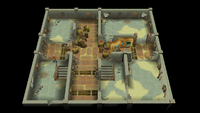
On the second floor going south from the stairs, the hall forks. To the right leads the player to a set of stairs going back down and to the south leads to a staircase to the third floor.
Back on the first floor one finds a hallway going to the front of the building, a staircase back to the second floor and an item box behind that staircase. Following that staircase leads to what once was Gonzap's office but is now abandoned and an item box.
On the third floor are three Trainers and two item boxes and eventually back to the left entrance to the Snagem Hideout. On the way back outside there are three Trainers and two item boxes.
Items
| Item | Location | Games | |
|---|---|---|---|
| Max Elixir | 1F, in the center of the hallway | Colo | |
| Max Revive ×2 | 1F, next to Niver | Colo | |
| Elixir | 2F, east of the northern staircase | Colo | |
| Max Potion ×3 | 3F, inside the northeast room | Colo | |
| PP Up ×3 | 3F, inside the southwest room | Colo | |
| Max Ether ×2 | 2F, inside the southwest room | Colo | |
| Ultra Ball ×5 | 1F, inside the southwest room | Colo | |
| D-Disk | On the table in Gonzap's office after defeating him | Colo | |
| Rare Candy ×3 | Inside Gonzap's office | Colo | |
| Ultra Ball ×3 | 1F, north of the healing machine | XD | |
| Hyper Potion ×2 | 2F, behind the northern staircase | XD | |
| Revive ×2 | 3F, in the southern part of the hallway | XD | |
| Rare Candy | 3F, to the left of Golit | XD | |
| PP Up | 2F, inside the jail cell | XD | |
| TM29 (Psychic) | 1F, behind the southeast staircase, near Biden | XD | |
| Snag Machine | 2F, retrieved from Gonzap after defeating him | XD | |
| Gonzap's Key | 2F, reward for defeating Gonzap | XD | |
| Full Heal ×2 | Inside Gonzap's office | XD | |
| TM30 (Shadow Ball) | 1F, near the alternate exit (requires Gonzap's Key) | XD | |
Trainers
Pokémon Colosseum
The Trainers encountered here may have Shadow Pokémon if the player failed to catch one before. The six Cipher Peons will stop appearing once their Shadow Pokémon have been snagged and they have all been beaten at least once.
| Trainer | Pokémon | |||||||||||
|---|---|---|---|---|---|---|---|---|---|---|---|---|
|
| |||||||||||
| ||||||||||||
| ||||||||||||
| ||||||||||||
|
| |||||||||||
| ||||||||||||
| ||||||||||||
| ||||||||||||
|
| |||||||||||
| ||||||||||||
| ||||||||||||
|
| |||||||||||
| ||||||||||||
| ||||||||||||
|
| |||||||||||
| ||||||||||||
| ||||||||||||
|
| |||||||||||
| ||||||||||||
| ||||||||||||
|
| |||||||||||
| ||||||||||||
| ||||||||||||
| ||||||||||||
|
| |||||||||||
| ||||||||||||
| ||||||||||||
| ||||||||||||
|
| |||||||||||
| ||||||||||||
| ||||||||||||
| ||||||||||||
|
| |||||||||||
| ||||||||||||
| ||||||||||||
| ||||||||||||
|
| |||||||||||
| ||||||||||||
| ||||||||||||
| ||||||||||||
|
| |||||||||||
| ||||||||||||
| ||||||||||||
| ||||||||||||
|
| |||||||||||
| ||||||||||||
| ||||||||||||
| ||||||||||||
|
| |||||||||||
| ||||||||||||
| ||||||||||||
| ||||||||||||
| After receiving Bitt's e-mail about Shadow Ursaring and Smeargle | ||||||||||||
|
| |||||||||||
| ||||||||||||
| ||||||||||||
| ||||||||||||
|
| |||||||||||
| ||||||||||||
| ||||||||||||
| ||||||||||||
|
| |||||||||||
| ||||||||||||
| ||||||||||||
| ||||||||||||
|
| |||||||||||
| ||||||||||||
| ||||||||||||
| ||||||||||||
| Trainers with a Poké Ball by their names may be challenged for a rematch after defeating certain bosses. In a rematch they may have higher-level Pokémon, and any Shadow Pokémon previously caught will be replaced. | ||||||||||||
 If Rosso was battled in Phenac City:
|
|||||||||||||||||||||||||||||||||||||||||||||||||||||||||||||||||||||||||||||||||||||||||||||||||||||||||||||
| |||||||||||||||||||||||||||||||||||||||||||||||||||||||||||||||||||||||||||||||||||||||||||||||||||||||||||||
 If Verde was battled in Phenac City:
|
||||||||||||||||||||||||||||||||||||||||||||||||||||||||||||||||||||||||||||||||||||||||||||||||||||||||||
| ||||||||||||||||||||||||||||||||||||||||||||||||||||||||||||||||||||||||||||||||||||||||||||||||||||||||||
 If Bluno was battled in Phenac City:
|
||||||||||||||||||||||||||||||||||||||||||||||||||||||||||||||||||||||||||||||||||||||||||||||||||||||||||
| ||||||||||||||||||||||||||||||||||||||||||||||||||||||||||||||||||||||||||||||||||||||||||||||||||||||||||
 If Skarmory was not snagged at Realgam Tower, it will replace Gonzap's Gyarados here. This battle can be repeated until Skarmory is snagged.
|
|||||||||||||||||||||||||||||||||||||||||||||||||||||||||||||||||||||||||||||||||||||||||||||||||||||||||||||||||||||||||||||||||||||||||||||||||||||||||||||||
| |||||||||||||||||||||||||||||||||||||||||||||||||||||||||||||||||||||||||||||||||||||||||||||||||||||||||||||||||||||||||||||||||||||||||||||||||||||||||||||||
Pokémon XD: Gale of Darkness
| Trainer | Pokémon | |||||||||||
|---|---|---|---|---|---|---|---|---|---|---|---|---|
|
| |||||||||||
| ||||||||||||
| ||||||||||||
| ||||||||||||
|
| |||||||||||
| ||||||||||||
| ||||||||||||
| ||||||||||||
|
| |||||||||||
| ||||||||||||
| ||||||||||||
| ||||||||||||
|
| |||||||||||
| ||||||||||||
| ||||||||||||
| ||||||||||||
| ||||||||||||
|
| |||||||||||
| ||||||||||||
| ||||||||||||
| ||||||||||||
|
| |||||||||||
| ||||||||||||
| ||||||||||||
| ||||||||||||
| ||||||||||||
|
| |||||||||||
| ||||||||||||
| ||||||||||||
| ||||||||||||
| ||||||||||||
|
| |||||||||||
| ||||||||||||
| ||||||||||||
| ||||||||||||
|
| |||||||||||
| ||||||||||||
| ||||||||||||
| ||||||||||||
| ||||||||||||
| Trainers with a Poké Ball by their names may be challenged for a rematch after defeating certain bosses. In a rematch they may have higher-level Pokémon, and any Shadow Pokémon previously caught will be replaced. | ||||||||||||
|
||||||||||||||||||||||||||||||||||||||||||||||||||||||||||||||||||||||||||||||||||||||||||||||||||||||||||||||||||||||||||||||||||||||
| ||||||||||||||||||||||||||||||||||||||||||||||||||||||||||||||||||||||||||||||||||||||||||||||||||||||||||||||||||||||||||||||||||||||
Layout
| Game | Entrance | 1F | 2F | 3F |
|---|---|---|---|---|
| Colo | ||||
| XD | 
|
|
|
|
Trivia
- Upon defeating Cipher Peon Baila here in Colosseum, the colon separating her name from her defeat speech is missing.
In other languages
| ||||||||||||||||||
| Orre | ||||
|---|---|---|---|---|
| ||||

|
This article is part of Project Locations, a Bulbapedia project that aims to write comprehensive articles on every location in the Pokémon world. |
