|
|
| (23 intermediate revisions by 16 users not shown) |
| Line 1: |
Line 1: |
| {{search|location in Kanto|location with the Japanese name of Rock Tunnel|Rock Path}}
| | ''If you were looking for the Mystery Dungeons whose Japanese names are Rock Tunnel, see [[Rock Path (Red and Blue Rescue Team)]] and [[Rock Path (Explorers of Time, Darkness, and Sky)]]'' |
| ---- | | ---- |
| {{Infobox location | | {{Infobox location |
| Line 5: |
Line 5: |
| |image_size=256 | | |image_size=256 |
| |type=cave | | |type=cave |
| |mapdesc=A naturally formed underground tunnel. Because it has not been developed, it is inky dark inside. A light is needed to get through.{{sup/3|FRLG}}<br>A dark tunnel that begins in Lavender Town and comes out in Cerulean City.{{sup/4|HGSS}} | | |mapdesc=A naturally formed underground tunnel. Because it has not been developed, it is inky dark inside. A light is needed to get through.{{sup/3|FRLG}}<br/>A dark tunnel that begins in Lavender Town and comes out in Cerulean City.{{sup/4|HGSS}} |
| |location_name=Rock Tunnel | | |location_name=Rock Tunnel |
| |japanese_name=イワヤマトンネル | | |japanese_name=イワヤマトンネル |
| Line 20: |
Line 20: |
| {{rt|10|Kanto}} leads from [[Cerulean City]] to Rock Tunnel. At the northern entrance of the cave is a convenient [[Pokémon Center]]. The roof of the [[Kanto Power Plant]] can also be seen from here (excluding Generation III). The southern entrance exits onto the remainder of Route 10, leading to [[Lavender Town]]. | | {{rt|10|Kanto}} leads from [[Cerulean City]] to Rock Tunnel. At the northern entrance of the cave is a convenient [[Pokémon Center]]. The roof of the [[Kanto Power Plant]] can also be seen from here (excluding Generation III). The southern entrance exits onto the remainder of Route 10, leading to [[Lavender Town]]. |
|
| |
|
| In FireRed and LeafGreen, there is [[Move Tutor]] who will teach the move {{m|Rock Slide}} to a Pokémon. | | In FireRed and LeafGreen, there is a [[Move Tutor]] who will teach the move {{m|Rock Slide}} to a Pokémon. |
|
| |
|
| ==Items== | | ==Items== |
| {{itlisth|cave}} | | {{itlisth|cave}} |
| {{Itemlist|TM Steel|1F; center platform|display={{TM|47|Steel Wing}}|G=yes|S=yes|C=yes}} | | {{Itemlist|TM Steel|1F; center platform|display={{TM|47|Steel Wing}}|G=yes|S=yes|C=yes}} |
| {{Itemlist|Elixir|1F; southwest|G=yes|S=yes|C=yes|display={{DL|Ether|Elixir}}}} | | {{Itemlist|Elixir|1F; southwest|G=yes|S=yes|C=yes|display=[[Elixir|Elixer]]}} |
| {{Itemlist|X Defend|1F; east of TM47 ''(hidden)''|G=yes|S=yes|C=yes|display={{DL|Battle item|X Defend}}}} | | {{Itemlist|X Defend|1F; east of TM47 ''(hidden)''|G=yes|S=yes|C=yes|display={{DL|Battle item|X Defend}}}} |
| {{Itemlist|Max Potion|B1F; northwest of PP Up ''(hidden)''|G=yes|S=yes|C=yes|display={{DL|Potion|Max Potion}}}} | | {{Itemlist|Max Potion|B1F; northwest of PP Up ''(hidden)''|G=yes|S=yes|C=yes|display={{DL|Potion|Max Potion}}}} |
| Line 33: |
Line 33: |
| {{Itemlist|X Accuracy|1F; northeast ''(hidden)''|G=yes|S=yes|C=yes|display={{DL|Battle item|X Accuracy}}}} | | {{Itemlist|X Accuracy|1F; northeast ''(hidden)''|G=yes|S=yes|C=yes|display={{DL|Battle item|X Accuracy}}}} |
| {{Itemlist|Repel|1F; northeast corner|FR=yes|LG=yes|display={{DL|Repel|Repel}}}} | | {{Itemlist|Repel|1F; northeast corner|FR=yes|LG=yes|display={{DL|Repel|Repel}}}} |
| {{Itemlist|Escape Rope|Southeast of Hiker Lucas|FR=yes|LG=yes}}
| |
| {{Itemlist|Revive|B1F; southwest corner|FR=yes|LG=yes|display={{DL|Revive|Revive}}}} | | {{Itemlist|Revive|B1F; southwest corner|FR=yes|LG=yes|display={{DL|Revive|Revive}}}} |
| {{Itemlist|Max Ether|North of Picnicker Sofia and Hiker Dudley|FR=yes|LG=yes|display={{DL|Ether|Max Ether}}}} | | {{Itemlist|Escape Rope|1F; Southeast of Hiker Lucas|FR=yes|LG=yes}} |
| {{Itemlist|Pearl|North of Picnicker Dana|FR=yes|LG=yes|display={{DL|Valuable item|Pearl}}}} | | {{Itemlist|Max Ether|B1F; North of Picnicker Sofia and Hiker Dudley|FR=yes|LG=yes}} |
| | {{Itemlist|Pearl|1F; North of Picnicker Dana|FR=yes|LG=yes|display={{DL|Valuable item|Pearl}}}} |
| {{Itemlist|Max Potion|B1F; near south-east corner (requires {{m|Rock Smash}}) ''(hidden)''|HG=yes|SS=yes|display={{DL|Potion|Max Potion}}}} | | {{Itemlist|Max Potion|B1F; near south-east corner (requires {{m|Rock Smash}}) ''(hidden)''|HG=yes|SS=yes|display={{DL|Potion|Max Potion}}}} |
| {{Itemlist|PP Up|B1F; southwest of ladder from northern entrance|HG=yes|SS=yes|display={{DL|Vitamin|PP Up}}}} | | {{Itemlist|PP Up|B1F; southwest of ladder from northern entrance|HG=yes|SS=yes|display={{DL|Vitamin|PP Up}}}} |
| Line 43: |
Line 43: |
| {{Itemlist|Iron|B1F; far-right Rock Climb chamber (requires {{m|Rock Climb}})|HG=yes|SS=yes|display={{DL|Vitamin|Iron}}}} | | {{Itemlist|Iron|B1F; far-right Rock Climb chamber (requires {{m|Rock Climb}})|HG=yes|SS=yes|display={{DL|Vitamin|Iron}}}} |
| {{Itemlist|HP Up|B1F; second-to-the-left Rock Climb chamber (requires {{m|Rock Climb}}) ''(hidden)''|HG=yes|SS=yes|display={{DL|Vitamin|HP Up}}}} | | {{Itemlist|HP Up|B1F; second-to-the-left Rock Climb chamber (requires {{m|Rock Climb}}) ''(hidden)''|HG=yes|SS=yes|display={{DL|Vitamin|HP Up}}}} |
| {{Itemlist|Oval Stone|B1F; far-left Rock Climb chamber (requires {{m|Rock Climb}})|HG=yes|SS=yes|display={{DL|Evolution-inducing held item|Oval Stone}}}} | | {{Itemlist|Oval Stone|B1F; far-left Rock Climb chamber (requires {{m|Rock Climb}})|HG=yes|SS=yes}} |
| {{Itemlist|Elixir|1F; north of south-west ladder|HG=yes|SS=yes|display={{DL|Ether|Elixir}}}} | | {{Itemlist|Elixir|1F; north of south-west ladder|HG=yes|SS=yes}} |
| {{Itemlist|X Defend|1F; on a stalagmite north-east of the southern entrance ''(hidden)''|HG=yes|SS=yes|display={{DL|Battle item|X Defend}}}} | | {{Itemlist|X Defend|1F; on a stalagmite north-east of the southern entrance ''(hidden)''|HG=yes|SS=yes|display={{DL|Battle item|X Defend}}}} |
| {{Itemlist|TM Dark|1F; on second raised area north of southern entrance|display={{TM|56|Fling}}|HG=yes|SS=yes}} | | {{Itemlist|TM Dark|1F; on second raised area north of southern entrance|display={{TM|56|Fling}}|HG=yes|SS=yes}} |
| Line 57: |
Line 57: |
| {{Itemlist|Heart Scale|Randomly found by {{m|Rock Smash|smashing rocks}}|HG=yes|SS=yes|display={{DL|Exchangeable item|Heart Scale}}}} | | {{Itemlist|Heart Scale|Randomly found by {{m|Rock Smash|smashing rocks}}|HG=yes|SS=yes|display={{DL|Exchangeable item|Heart Scale}}}} |
| {{Itemlist|Revive|Randomly found by {{m|Rock Smash|smashing rocks}}|HG=yes|SS=yes|display={{DL|Revive|Revive}}}} | | {{Itemlist|Revive|Randomly found by {{m|Rock Smash|smashing rocks}}|HG=yes|SS=yes|display={{DL|Revive|Revive}}}} |
| {{Itemlist|Max Ether|Randomly found by {{m|Rock Smash|smashing rocks}}|HG=yes|SS=yes|display={{DL|Ether|Max Ether}}}} | | {{Itemlist|Max Ether|Randomly found by {{m|Rock Smash|smashing rocks}}|HG=yes|SS=yes}} |
| {{Itemlist|Star Piece|Randomly found by {{m|Rock Smash|smashing rocks}}|HG=yes|SS=yes|display={{DL|Valuable item|Star Piece}}}} | | {{Itemlist|Star Piece|Randomly found by {{m|Rock Smash|smashing rocks}}|HG=yes|SS=yes|display={{DL|Valuable item|Star Piece}}}} |
| {{itlistfoot|cave}} | | {{itlistfoot|cave}} |
| Line 66: |
Line 66: |
| {{catch/header|cave|no}} | | {{catch/header|cave|no}} |
| {{catch/entry1|041|Zubat|yes|yes|no|Cave|15-18|55%|type1=Poison|type2=Flying}} | | {{catch/entry1|041|Zubat|yes|yes|no|Cave|15-18|55%|type1=Poison|type2=Flying}} |
| {{catch/entry1|041|Zubat|no|no|yes|Cave|15-21|50%|type1=Poison|type2=Flying}} | | {{catch/entry1|041|Zubat|no|no|yes|Cave|15, 17, 19, 21|55%|type1=Poison|type2=Flying}} |
| {{catch/entry1|074|Geodude|yes|yes|no|Cave|16-17|25%|type1=Rock|type2=Ground}} | | {{catch/entry1|074|Geodude|yes|yes|no|Cave|16-17|25%|type1=Rock|type2=Ground}} |
| {{catch/entry1|074|Geodude|no|no|yes|Cave|16-20|40%|type1=Rock|type2=Ground}} | | {{catch/entry1|074|Geodude|no|no|yes|Cave|16, 18, 20|35%|type1=Rock|type2=Ground}} |
| {{catch/entry1|066|Machop|yes|yes|no|Cave|15-17|15%|type1=Fighting}} | | {{catch/entry1|066|Machop|yes|yes|no|Cave|15, 17|15%|type1=Fighting}} |
| {{catch/entry1|066|Machop|no|no|yes|Cave|17-21|10%|type1=Fighting}} | | {{catch/entry1|066|Machop|no|no|yes|Cave|17, 19, 21|10%|type1=Fighting}} |
| {{catch/entry1|095|Onix|yes|yes|no|Cave|13-15|5%|type1=Rock|type2=Ground}} | | {{catch/entry1|095|Onix|yes|yes|no|Cave|13, 15|5%|type1=Rock|type2=Ground}} |
| {{catch/footer|cave}} | | {{catch/footer|cave}} |
|
| |
|
| Line 77: |
Line 77: |
| {{catch/header|cave|no}} | | {{catch/header|cave|no}} |
| {{catch/entry1|041|Zubat|yes|yes|no|Cave|16-18|50%|type1=Poison|type2=Flying}} | | {{catch/entry1|041|Zubat|yes|yes|no|Cave|16-18|50%|type1=Poison|type2=Flying}} |
| {{catch/entry1|041|Zubat|no|no|yes|Cave|20-22|40%|type1=Poison|type2=Flying}} | | {{catch/entry1|041|Zubat|no|no|yes|Cave|20-22|45%|type1=Poison|type2=Flying}} |
| | {{catch/entry1|066|Machop|yes|yes|no|Cave|15, 17|15%|type1=Fighting}} |
| | {{catch/entry1|066|Machop|no|no|yes|Cave|18, 20|20%|type1=Fighting}} |
| {{catch/entry1|074|Geodude|yes|yes|no|Cave|16-18|26%|type1=Rock|type2=Ground}} | | {{catch/entry1|074|Geodude|yes|yes|no|Cave|16-18|26%|type1=Rock|type2=Ground}} |
| {{catch/entry1|074|Geodude|no|no|yes|Cave|17-21|30%|type1=Rock|type2=Ground}} | | {{catch/entry1|074|Geodude|no|no|yes|Cave|17, 21|25%|type1=Rock|type2=Ground}} |
| {{catch/entry1|066|Machop|yes|yes|no|Cave|15-17|15%|type1=Fighting}}
| | {{catch/entry1|095|Onix|yes|yes|no|Cave|13, 17|9%|type1=Rock|type2=Ground}} |
| {{catch/entry1|066|Machop|no|no|yes|Cave|18-20|20%|type1=Fighting}}
| | {{catch/entry1|095|Onix|no|no|yes|Cave|14, 18, 22|10%|type1=Rock|type2=Ground}} |
| {{catch/entry1|095|Onix|yes|yes|no|Cave|13-17|9%|type1=Rock|type2=Ground}} | |
| {{catch/entry1|095|Onix|no|no|yes|Cave|14-22|10%|type1=Rock|type2=Ground}} | |
| {{catch/footer|cave}} | | {{catch/footer|cave}} |
|
| |
|
| Line 130: |
Line 130: |
| {{catch/entryfl|056|Mankey|yes|yes|Cave|16-17|15%|type1=Fighting}} | | {{catch/entryfl|056|Mankey|yes|yes|Cave|16-17|15%|type1=Fighting}} |
| {{catch/entryfl|066|Machop|yes|yes|Cave|16-17|15%|type1=Fighting}} | | {{catch/entryfl|066|Machop|yes|yes|Cave|16-17|15%|type1=Fighting}} |
| {{catch/entryfl|095|Onix|yes|yes|Cave|13-15|5%|type1=Rock|type2=Ground}} | | {{catch/entryfl|095|Onix|yes|yes|Cave|13, 15|5%|type1=Rock|type2=Ground}} |
| {{catch/footer|cave}} | | {{catch/footer|cave}} |
|
| |
|
| Line 139: |
Line 139: |
| {{catch/entryfl|056|Mankey|yes|yes|Cave|16-17|15%|type1=Fighting}} | | {{catch/entryfl|056|Mankey|yes|yes|Cave|16-17|15%|type1=Fighting}} |
| {{catch/entryfl|066|Machop|yes|yes|Cave|17|10%|type1=Fighting}} | | {{catch/entryfl|066|Machop|yes|yes|Cave|17|10%|type1=Fighting}} |
| {{catch/entryfl|095|Onix|yes|yes|Cave|13-17|10%|type1=Rock|type2=Ground}} | | {{catch/entryfl|095|Onix|yes|yes|Cave|13, 15, 17|10%|type1=Rock|type2=Ground}} |
| {{Catch/div|cave|Rock Smash}} | | {{Catch/div|cave|Rock Smash}} |
| {{catch/entryfl|074|Geodude|yes|yes|Rock Smash|5-30|90%|type1=Rock|type2=Ground}} | | {{catch/entryfl|074|Geodude|yes|yes|Rock Smash|5-30|90%|type1=Rock|type2=Ground}} |
| Line 242: |
Line 242: |
| {{Trainerdiv|cave}} | | {{Trainerdiv|cave}} |
| {{Trainerentry|Spr FRLG_Picnicker.png|Picnicker|Dana|400|3|052|Meowth|♀|20|None|043|Oddish|♀|20|None|016|Pidgey|♀|20|None|36=ミユキ|37=Miyuki}} | | {{Trainerentry|Spr FRLG_Picnicker.png|Picnicker|Dana|400|3|052|Meowth|♀|20|None|043|Oddish|♀|20|None|016|Pidgey|♀|20|None|36=ミユキ|37=Miyuki}} |
| {{Trainerfooter|cave|1}} | | {{Trainerfooter|cave|FRLG}} |
|
| |
|
| ==Layout== | | ==Layout== |
| {| style="margin:auto; background: #000; {{roundy|10px}}; border: 5px solid #{{Locationcolor/med|cave}}" | | {| class="roundy" style="margin:auto; background: #000; border: 5px solid #{{Locationcolor/med|cave}}" |
| |- | | |- |
| ! style="background:#{{Locationcolor/light|cave}}; {{roundytl|5px}};" | Version | | ! style="background:#{{Locationcolor/light|cave}}; {{roundytl|5px}};" | Version |
| ! style="background:#{{Locationcolor/light|cave}}" | 1st floor | | ! style="background:#{{Locationcolor/light|cave}}" | 1F |
| ! style="background:#{{Locationcolor/light|cave}}; {{roundytr|5px}};" | 2nd floor | | ! style="background:#{{Locationcolor/light|cave}}; {{roundytr|5px}};" | B1F |
| |- style="background:#000" | | |- style="background:#000" |
| ! style="background:#{{red color}}" | {{color2|000|Pokémon Red and Blue Versions|Red}} | | ! style="background:#{{red color}}" | {{color2|000|Pokémon Red and Blue Versions|Red}} |
| Line 279: |
Line 279: |
| ! style="background:#{{soulsilver color}}" | {{color2|000|Pokémon HeartGold and SoulSilver Versions|SoulSilver}} | | ! style="background:#{{soulsilver color}}" | {{color2|000|Pokémon HeartGold and SoulSilver Versions|SoulSilver}} |
| |- | | |- |
| | colspan="3" style="background:#{{Locationcolor/light|cave}}; {{roundybl|5px}}; {{roundybr|5px}};" | | | | colspan="3" style="background:#{{Locationcolor/light|cave}}; {{roundybottom|5px}}" | |
| |} | | |} |
|
| |
|
| Line 286: |
Line 286: |
| In {{g|Pinball}}, Rock Tunnel appears on the Red and Blue tables; catchable {{OBP|Pokémon|species}} include {{p|Ekans}}, {{p|Diglett}}, {{p|Machop}}, {{p|Geodude}}, {{p|Slowpoke}}, {{p|Onix}}, {{p|Voltorb}} and {{p|Mr. Mime}}. | | In {{g|Pinball}}, Rock Tunnel appears on the Red and Blue tables; catchable {{OBP|Pokémon|species}} include {{p|Ekans}}, {{p|Diglett}}, {{p|Machop}}, {{p|Geodude}}, {{p|Slowpoke}}, {{p|Onix}}, {{p|Voltorb}} and {{p|Mr. Mime}}. |
|
| |
|
| ==Eyecatch== | | ==[[Location preview|Preview]]== |
| <gallery> | | <gallery> |
| File:HGSS Rock Tunnel-Morning.png|Morning (Kangaskhan) | | File:HGSS Rock Tunnel-Morning.png|Morning (Kangaskhan) |
| Line 297: |
Line 297: |
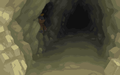
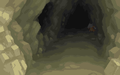
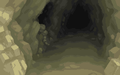
| [[File:Rock Tunnel PO.png|200px|thumb|Rock Tunnel in Pokémon Origins]] | | [[File:Rock Tunnel PO.png|200px|thumb|Rock Tunnel in Pokémon Origins]] |
| ===In Pokémon Origins=== | | ===In Pokémon Origins=== |
| Rock Tunnel was briefly shown in the beginning of the [[Pokémon Origins]] episode ''[[PO02|File 2 - Cubone]]'' when {{OBP|Red|Origins}} exited it on his way to [[Lavender Town]]. | | Rock Tunnel was briefly shown in the beginning of the [[Pokémon Origins]] episode ''[[PO02|File 2: Cubone]]'' when {{OBP|Red|Origins}} exited it on his way to [[Lavender Town]]. |
| {{right clear}} | | {{right clear}} |
|
| |
|
| Line 303: |
Line 303: |
| * One of the {{tc|Hiker}}s in the tunnel makes a reference to the song ''{{wp|Hit Me with Your Best Shot}}'' by {{wp|Pat Benatar}}, saying "Hit me with your best shot!" prior to battle, and "Fired away!" after being defeated. | | * One of the {{tc|Hiker}}s in the tunnel makes a reference to the song ''{{wp|Hit Me with Your Best Shot}}'' by {{wp|Pat Benatar}}, saying "Hit me with your best shot!" prior to battle, and "Fired away!" after being defeated. |
| * One of the {{tc|Poké Maniac}}s in the tunnel makes a reference to ''{{wp|Mobile Fighter G Gundam}}'', saying "Pokémon Fight! Ready, Go!" prior to battle. Official Gundam Fights in the series began with both participants declaring "Gundam Fight! Ready, Go!" | | * One of the {{tc|Poké Maniac}}s in the tunnel makes a reference to ''{{wp|Mobile Fighter G Gundam}}'', saying "Pokémon Fight! Ready, Go!" prior to battle. Official Gundam Fights in the series began with both participants declaring "Gundam Fight! Ready, Go!" |
| | * Rock Tunnel is the only one of Kanto's caves to appear in each of the first four [[Generation|generations]] with the same background music. |
|
| |
|
| ==In other languages== | | ==In other languages== |
| {{Langtable|color={{kanto color}}|bordercolor={{kanto color dark}} | | {{Langtable|color={{locationcolor/light|cave}}|bordercolor={{locationcolor/dark|cave}} |
| |fr_eu=Grotte Sombre | | |fr=Grotte |
| |de=Felstunnel | | |de=Felstunnel |
| |it=Tunnel Roccioso | | |it=Tunnel Roccioso |
| |es_eu=Túnel Roca}} | | |ko={{tt|돌산 터널 ''Dolsan Teoneol''|Rock Mountain Tunnel}} |
| | |es=Túnel Roca}} |
| {{-}} | | {{-}} |
|
| |
|
| {{-}} | | {{-}} |
| {{Kanto}}<br> | | {{Kanto}}<br/> |
| {{Project Locations notice}} | | {{Project Locations notice}} |
|
| |
|
| Line 329: |
Line 331: |
| [[ja:イワヤマトンネル]] | | [[ja:イワヤマトンネル]] |
| [[pl:Skalny Tunel]] | | [[pl:Skalny Tunel]] |
| [[pt:Rock Tunnel]]
| |
| [[zh:岩山隧道]] | | [[zh:岩山隧道]] |