Pokémon Storage System: Difference between revisions
Tiddlywinks (talk | contribs) m (→Selection modes: Try to be careful about the assumptions you make... It's only Em and FRLG) |
|||
| (33 intermediate revisions by 18 users not shown) | |||
| Line 7: | Line 7: | ||
Different Pokémon Storage Systems are used in different [[region]]s. The original Pokémon Storage System was developed by [[Bill]], and the systems used in other regions have all derived either directly or indirectly from Bill's system. | Different Pokémon Storage Systems are used in different [[region]]s. The original Pokémon Storage System was developed by [[Bill]], and the systems used in other regions have all derived either directly or indirectly from Bill's system. | ||
There are | There are six Pokémon Storage Systems used in the [[core series]] regions: | ||
* [[Bill]]'s Pokémon Storage System, used in [[Kanto]] and [[Johto]]. | * [[Bill]]'s Pokémon Storage System, used in [[Kanto]] and [[Johto]]. | ||
* [[Lanette]]'s Pokémon Storage System, used in [[Hoenn]]. | * [[Lanette]]'s Pokémon Storage System, used in [[Hoenn]]. | ||
| Line 13: | Line 13: | ||
* [[Amanita]]'s Pokémon Storage System, used in [[Unova]]. | * [[Amanita]]'s Pokémon Storage System, used in [[Unova]]. | ||
* [[Cassius]]'s Pokémon Storage System, used in [[Kalos]]. | * [[Cassius]]'s Pokémon Storage System, used in [[Kalos]]. | ||
In the [[PC]], these systems are | * In [[Alola]], the Pokémon Storage System is maintained by [[Molayne]]. | ||
In the [[PC]], these systems are usually referred to as "Someone's PC" initially, but when the player meets the person responsible for creating or maintaining the region's Pokémon Storage System, the entry will change from "Someone" to the person's name (e.g., "Bill's PC"). | |||
There is arguably little to no canonical difference in the games between any of these systems, however. Those Pokémon Storage Systems that have appeared in multiple generations have not demonstrated a strict fidelity in any particular to their previous incarnations. Rather, Pokémon Storage System features tend to more closely follow the features of other contemporaneous games, regardless of the region or administrator. This is exemplified by Bill's PC and Lanette's PC, which have both seen major or moderate changes over their appearances in multiple generations. | There is arguably little to no canonical difference in the games between any of these systems, however. Those Pokémon Storage Systems that have appeared in multiple generations have not demonstrated a strict fidelity in any particular to their previous incarnations. Rather, Pokémon Storage System features tend to more closely follow the features of other contemporaneous games, regardless of the region or administrator. This is exemplified by Bill's PC and Lanette's PC, which have both seen major or moderate changes over their appearances in multiple generations. | ||
| Line 28: | Line 29: | ||
One was the Box interface, which was a simple scrollable list of names in [[Generation I]], to which [[Generation II]] only added a picture of the currently selected Pokémon. In Generation III, however, the Box interface was upgraded to a full visual representation of the currently selected Box with each Pokémon therein represented by a miniature sprite. | One was the Box interface, which was a simple scrollable list of names in [[Generation I]], to which [[Generation II]] only added a picture of the currently selected Pokémon. In Generation III, however, the Box interface was upgraded to a full visual representation of the currently selected Box with each Pokémon therein represented by a miniature sprite. | ||
Another significant limitation was a requirement to [[save]] when changing from one Box to another or when organizing Boxes (in Generation II). Generation III | Another significant limitation was a requirement to [[save]] when changing from one Box to another or when organizing Boxes (in Generation II). In Generation III, the game no longer needs to be saved when changing Boxes, so that Boxes can be switched and organized freely. | ||
Another limitation in Generations I and II was the inability to catch [[wild Pokémon]] if the current Box | Another limitation in Generations I and II was the inability to catch [[wild Pokémon]] if both their party and the current Box are full. Until the player's current Box is a Box that is not full or the player's party is not full, the game prevents the player from even throwing a [[Poké Ball]]. From Generation III onward, if the current Box is full, when a new Pokémon is caught while the player's party is full, the game will simply send it to the next open Box. | ||
There was also a minor change between Generations I and II. In Generation I, a Pokémon that was sent to the Pokémon Storage System | There was also a minor change between Generations I and II. In Generation I, a Pokémon that was sent to the Pokémon Storage System retains its current HP value. From Generation II onward, a Pokémon that is sent to the Pokémon Storage System has it current HP reset to its maximum HP and is cured of any [[status condition]]. | ||
==Features== | ==Features== | ||
| Line 51: | Line 52: | ||
|- style="background:#fff" | |- style="background:#fff" | ||
| {{gen|VI}} || 7/15/23/30/31 || 30 || 930 | | {{gen|VI}} || 7/15/23/30/31 || 30 || 930 | ||
|- style="background:#fff" | |||
| {{gen|VII}} || 8/16/24/32 || 30 || 960 | |||
|} | |} | ||
Starting in [[Generation V]], the number of Boxes in the Pokémon Storage System is initially limited, with only a few Boxes available. | Starting in [[Generation V]], the number of Boxes in the Pokémon Storage System is initially limited, with only a few Boxes available. To unlock the next set of additional Boxes, each currently available Box must have at least one Pokémon in it. This makes [[save|saving]] the game quicker initially, as data belonging to locked boxes does not have to be touched. If the player is currently using the Storage System and has placed Pokémon in every Box to unlock more Boxes, the PC must be turned off and on again for the new Boxes to appear. In [[Generation VI]], the unlock requirements may be bypassed by using [[Pokémon Bank]]. | ||
In Generation VI, a final Box is only unlocked after | In Generation VI, a final Box is only unlocked after catching a certain [[Legendary Pokémon]]. | ||
* {{g|X and Y}}: after capturing {{p|Xerneas}} or {{p|Yveltal}}. | * {{g|X and Y}}: after capturing {{p|Xerneas}} or {{p|Yveltal}}. | ||
* {{g|Omega Ruby and Alpha Sapphire}}: after capturing {{p|Rayquaza}} during the finale of the [[Delta Episode]]. | * {{g|Omega Ruby and Alpha Sapphire}}: after capturing {{p|Rayquaza}} during the finale of the [[Delta Episode]]. | ||
This requirement ensures that the player will be able to (and forced to) catch it, unlike in Generation V where the otherwise mandatory catching of {{p|Reshiram}}/{{p|Zekrom}} could be bypassed by completely filling all 720 spaces in the Storage System beforehand. | |||
==== | ====Side series games==== | ||
{| class="roundy" style="margin: auto; text-align: center; background: #ddf; border: 3px solid #ccf" | {| class="roundy" style="margin: auto; text-align: center; background: #ddf; border: 3px solid #ccf" | ||
! Games !! Boxes !! Box capacity !! Total capacity | ! Games !! Boxes !! Box capacity !! Total capacity | ||
|- style="background:#fff" | |- style="background:#fff" | ||
| {{ | | {{gameabbrevss|Colo}} || 3 || 30 || 90 | ||
|- style="background:#fff" | |- style="background:#fff" | ||
| {{ | | {{gameabbrevss|XD}} || 8 || 30 || 240 | ||
|- style="background:#fff" | |- style="background:#fff" | ||
| [[Pokémon Box Ruby & Sapphire|Box RS]] || 25 || 60 || 1,500 | | [[Pokémon Box Ruby & Sapphire|Box RS]] || 25 || 60 || 1,500 | ||
| Line 70: | Line 74: | ||
| [[Pokémon Bank]] || 100 || 30 || 3,000 | | [[Pokémon Bank]] || 100 || 30 || 3,000 | ||
|} | |} | ||
Though not strictly a Pokémon Storage System, [[My Pokémon Ranch]] is also able to store 1,000 Pokémon. If | Though not strictly a Pokémon Storage System, [[My Pokémon Ranch]] is also able to store 1,000 Pokémon. If an update to the game (which was only released in Japan) is applied, it can store 1,500 Pokémon. Additionally, [[Pokémon Stadium 2]] can store up to 280 Pokémon (14 boxes of 20) on the game cartridge. | ||
===Printing=== | ===Printing=== | ||
{{main|Game Boy Printer#Pokémon Storage System}} | {{main|Game Boy Printer#Pokémon Storage System|Game Boy Printer → Pokémon Storage System}} | ||
In {{game|Yellow}} and the [[Generation II]] games, it was possible to print a Box's contents using the [[Game Boy Printer]]. In Pokémon Yellow, this is an option in the Pokémon Storage System's main menu. In Generation II, it is available in the Change Box mode. | In {{game|Yellow}} and the [[Generation II]] games, it was possible to print a Box's contents using the [[Game Boy Printer]]. In Pokémon Yellow, this is an option in the Pokémon Storage System's main menu. In Generation II, it is available in the Change Box mode. Game Boy Printer features are disabled in the [[Virtual Console]] release of Pokémon Yellow. | ||
===Naming Boxes=== | ===Naming Boxes=== | ||
| Line 82: | Line 86: | ||
===Organizing=== | ===Organizing=== | ||
Generation II introduced the first Pokémon Storage System mode explicitly for organizing Pokémon in Boxes. It allows the player to pick up a Pokémon and move it anywhere in the same or a different Box. | Generation II introduced the first Pokémon Storage System mode explicitly for organizing Pokémon in Boxes. It allows the player to pick up a Pokémon and move it anywhere in the same or a different Box. However, in Generation II it can only move Pokémon that are not holding [[Mail]], and every move requires the game to be saved. In Generation II, the "Move Pokémon" mode only allows a Pokémon to be inserted before or after others. In Generation III, it became possible to switch two Pokémon instead. | ||
{{game|FireRed and LeafGreen|s}} introduced a mode for explicitly manipulating the [[held item]]s of Pokémon in Boxes. This mode allows [[item]]s to be moved to or from the [[Bag]] or directly between two Pokémon. Starting in [[Generation IV]], an entry | {{game|FireRed and LeafGreen|s}} introduced a mode for explicitly manipulating the [[held item]]s of Pokémon in Boxes. This mode allows [[item]]s to be moved to or from the [[Bag]] or directly between two Pokémon. Starting in [[Generation IV]], an entry was added to the context menu in the Move Pokémon mode to allow the player to give a Pokémon an item from the Bag or to remove a Pokémon's item. | ||
In Generation VI, the "Move Pokémon" mode was changed to "Organize Boxes" and, in addition to being able to move Pokémon, it also became possible to switch entire Boxes with each other. This is possible by tapping the button in the lower-left corner of the Box interface in the Organize Boxes mode. | In Generation VI, the "Move Pokémon" mode was changed to "Organize Boxes" and, in addition to being able to move Pokémon, it also became possible to switch entire Boxes with each other. This is possible by tapping the button in the lower-left corner of the Box interface in the Organize Boxes mode. | ||
In Generation VII, since PCs only feature the Pokémon Storage System and load it immediately, the organization modes are switched by pressing the X Button. The modes available are a Pokémon organization mode, an item organization mode, and a [[#Battle Box and Battle Teams|Battle Teams]] mode. | |||
===Wallpaper=== | ===Wallpaper=== | ||
| Line 96: | Line 102: | ||
====={{2v2|Ruby|Sapphire}}===== | ====={{2v2|Ruby|Sapphire}}===== | ||
{| class="roundy" style="margin:auto; text-align:center; background: #{{ruby color dark}}; border: 5px solid #{{ruby color}}" | {| class="roundy" style="margin:auto; text-align:center; background: #{{ruby color dark}}; border: 5px solid #{{ruby color}}" | ||
|- | |- | ||
| style="background: #{{sapphire color light}}; {{roundytop|5px}}" colspan="4" | {{color|{{sapphire color dark}}|Scenery 1}} | | style="background: #{{sapphire color light}}; {{roundytop|5px}}" colspan="4" | {{color|{{sapphire color dark}}|Scenery 1}} | ||
|- | |- | ||
| style="background: #{{Locationcolor/med|forest}}" | [[File:Box Forest FRLG.png]] | | style="background: #{{Locationcolor/med|forest}}" | [[File:Box Forest FRLG.png]] | ||
| style="background: #{{Locationcolor/med|road}}" | [[File:Box City FRLG.png]] | | style="background: #{{Locationcolor/med|road}}" | [[File:Box City FRLG.png]] | ||
| style="background: #{{Locationcolor/med|sand}}" | [[File:Box Desert FRLG.png]] | | style="background: #{{Locationcolor/med|sand}}" | [[File:Box Desert FRLG.png]] | ||
| style="background: #{{Locationcolor/med|land}}" | [[File:Box Savanna FRLG.png]] | | style="background: #{{Locationcolor/med|land}}" | [[File:Box Savanna FRLG.png]] | ||
|- | |- | ||
| style="background: #{{Locationcolor/light|forest}}; {{roundybottom|5px}}" | Forest | | style="background: #{{Locationcolor/light|forest}}; {{roundybottom|5px}}" | Forest | ||
| style="background: #{{Locationcolor/light|road}}; {{roundybottom|5px}}" | City | | style="background: #{{Locationcolor/light|road}}; {{roundybottom|5px}}" | City | ||
| style="background: #{{Locationcolor/light|sand}}; {{roundybottom|5px}}" | Desert | | style="background: #{{Locationcolor/light|sand}}; {{roundybottom|5px}}" | Desert | ||
| style="background: #{{Locationcolor/light|land}}; {{roundybottom|5px}}" | Savanna | | style="background: #{{Locationcolor/light|land}}; {{roundybottom|5px}}" | Savanna | ||
|- | |- | ||
| style="background: #{{sapphire color light}}; {{roundytop|5px}}" colspan="4" | {{color|{{sapphire color dark}}|Scenery 2}} | | style="background: #{{sapphire color light}}; {{roundytop|5px}}" colspan="4" | {{color|{{sapphire color dark}}|Scenery 2}} | ||
|- | |- | ||
| style="background: #{{Locationcolor/med|mountain}}" | [[File:Box Crag FRLG.png]] | | style="background: #{{Locationcolor/med|mountain}}" | [[File:Box Crag FRLG.png]] | ||
| style="background: #{{Locationcolor/med|volcano}}" | [[File:Box Volcano FRLG.png]] | | style="background: #{{Locationcolor/med|volcano}}" | [[File:Box Volcano FRLG.png]] | ||
| style="background: #{{Locationcolor/med|snow}}" | [[File:Box Snow FRLG.png]] | | style="background: #{{Locationcolor/med|snow}}" | [[File:Box Snow FRLG.png]] | ||
| style="background: #{{Locationcolor/med|cave}}" | [[File:Box Cave FRLG.png]] | | style="background: #{{Locationcolor/med|cave}}" | [[File:Box Cave FRLG.png]] | ||
|- | |- | ||
| style="background: #{{Locationcolor/light|mountain}}; {{roundybottom|5px}}" | Crag | | style="background: #{{Locationcolor/light|mountain}}; {{roundybottom|5px}}" | Crag | ||
| style="background: #{{Locationcolor/light|volcano}}; {{roundybottom|5px}}" | {{color|{{Locationcolor/text|volcano}}|Volcano}} | | style="background: #{{Locationcolor/light|volcano}}; {{roundybottom|5px}}" | {{color|{{Locationcolor/text|volcano}}|Volcano}} | ||
| style="background: #{{Locationcolor/light|snow}}; {{roundybottom|5px}}" | Snow | | style="background: #{{Locationcolor/light|snow}}; {{roundybottom|5px}}" | Snow | ||
| style="background: #{{Locationcolor/light|cave}}; {{roundybottom|5px}}" | Cave | | style="background: #{{Locationcolor/light|cave}}; {{roundybottom|5px}}" | Cave | ||
|- | |- | ||
| style="background: #{{sapphire color light}}; {{roundytop|5px}}" colspan="4" | {{color|{{sapphire color dark}}|Scenery 3}} | | style="background: #{{sapphire color light}}; {{roundytop|5px}}" colspan="4" | {{color|{{sapphire color dark}}|Scenery 3}} | ||
|- | |- | ||
| style="background: #{{Locationcolor/med|ocean}}" | [[File:Box Beach FRLG.png]] | | style="background: #{{Locationcolor/med|ocean}}" | [[File:Box Beach FRLG.png]] | ||
| style="background: #{{Locationcolor/med|underwater}}" | [[File:Box Seafloor FRLG.png]] | | style="background: #{{Locationcolor/med|underwater}}" | [[File:Box Seafloor FRLG.png]] | ||
| style="background: #{{Locationcolor/med|lake}}" | [[File:Box River FRLG.png]] | | style="background: #{{Locationcolor/med|lake}}" | [[File:Box River FRLG.png]] | ||
| style="background: #{{flying color}}" | [[File:Box Sky FRLG.png]] | | style="background: #{{flying color}}" | [[File:Box Sky FRLG.png]] | ||
|- | |- | ||
| style="background: #{{Locationcolor/light|ocean}}; {{roundybottom|5px}}" | Beach | | style="background: #{{Locationcolor/light|ocean}}; {{roundybottom|5px}}" | Beach | ||
| style="background: #{{Locationcolor/light|underwater}}; {{roundybottom|5px}}" | Seafloor | | style="background: #{{Locationcolor/light|underwater}}; {{roundybottom|5px}}" | Seafloor | ||
| style="background: #{{Locationcolor/light|lake}}; {{roundybottom|5px}}" | River | | style="background: #{{Locationcolor/light|lake}}; {{roundybottom|5px}}" | River | ||
| style="background: #{{flying color light}}; {{roundybottom|5px}}" | Sky | | style="background: #{{flying color light}}; {{roundybottom|5px}}" | Sky | ||
|- | |- | ||
| style="background: #{{sapphire color light}}; {{roundytop|5px}}" colspan="4" | {{color|{{sapphire color dark}}|Etcetera}} | | style="background: #{{sapphire color light}}; {{roundytop|5px}}" colspan="4" | {{color|{{sapphire color dark}}|Etcetera}} | ||
|- | |- | ||
| style="background: #{{heartgold color light}}" | [[File:Box Polka-Dot RS.png]] | | style="background: #{{heartgold color light}}" | [[File:Box Polka-Dot RS.png]] | ||
| style="background: #{{heartgold color light}}" | [[File:Box PokéCenter RS.png]] | | style="background: #{{heartgold color light}}" | [[File:Box PokéCenter RS.png]] | ||
| style="background: #{{heartgold color}}" | [[File:Box Machine RS.png]] | | style="background: #{{heartgold color}}" | [[File:Box Machine RS.png]] | ||
| style="background: #{{white color}}" | [[File:Box Plain RS.png]] | | style="background: #{{white color}}" | [[File:Box Plain RS.png]] | ||
|- | |- | ||
| style="background: #{{Poké Balls color light}}; {{roundybottom|5px}}" | Polka-Dot | | style="background: #{{Poké Balls color light}}; {{roundybottom|5px}}" | Polka-Dot | ||
| style="background: #{{power color light}}; {{roundybottom|5px}}" | {{color2|000|Pokémon Center|PokéCenter}} | | style="background: #{{power color light}}; {{roundybottom|5px}}" | {{color2|000|Pokémon Center|PokéCenter}} | ||
| Line 149: | Line 155: | ||
FireRed and LeafGreen have the same Scenery wallpapers as Ruby and Sapphire, but their Etcetera wallpapers differ. | FireRed and LeafGreen have the same Scenery wallpapers as Ruby and Sapphire, but their Etcetera wallpapers differ. | ||
{| class="roundy" style="margin:auto; text-align:center; background: #{{firered color dark}}; border: 5px solid #{{firered color}}" | {| class="roundy" style="margin:auto; text-align:center; background: #{{firered color dark}}; border: 5px solid #{{firered color}}" | ||
|- | |- | ||
| style="background: #{{leafgreen color light}}; {{roundytop|5px}}" colspan="4" | {{color|{{leafgreen color dark}}|Etcetera}} | | style="background: #{{leafgreen color light}}; {{roundytop|5px}}" colspan="4" | {{color|{{leafgreen color dark}}|Etcetera}} | ||
|- | |- | ||
| style="background: #{{key items color}}" | [[File:Box Stars FRLG.png]] | | style="background: #{{key items color}}" | [[File:Box Stars FRLG.png]] | ||
| style="background: #B03010" | [[File:Box PokéCenter FRLG.png]] | | style="background: #B03010" | [[File:Box PokéCenter FRLG.png]] | ||
| style="background: #{{steel color}}" | [[File:Box Tiles FRLG.png]] | | style="background: #{{steel color}}" | [[File:Box Tiles FRLG.png]] | ||
| style="background: #{{Poké Balls color}}" | [[File:Box Simple FRLG.png]] | | style="background: #{{Poké Balls color}}" | [[File:Box Simple FRLG.png]] | ||
|- | |- | ||
| style="background: #{{key items color light}}; {{roundybottom|5px}}" | Stars | | style="background: #{{key items color light}}; {{roundybottom|5px}}" | Stars | ||
| style="background: #{{power color light}}; {{roundybottom|5px}}" | {{color2|000|Pokémon Center|PokéCenter}} | | style="background: #{{power color light}}; {{roundybottom|5px}}" | {{color2|000|Pokémon Center|PokéCenter}} | ||
| Line 165: | Line 171: | ||
====={{v2|Emerald}}===== | ====={{v2|Emerald}}===== | ||
{| class="roundy" style="margin:auto; text-align:center; background: #{{emerald color dark}}; border: 5px solid #{{emerald color}}" | {| class="roundy" style="margin:auto; text-align:center; background: #{{emerald color dark}}; border: 5px solid #{{emerald color}}" | ||
|- | |- | ||
| style="background: #{{emerald color light}}; {{roundytop|5px}}" colspan="4" | {{color|{{emerald color dark}}|Scenery 1}} | | style="background: #{{emerald color light}}; {{roundytop|5px}}" colspan="4" | {{color|{{emerald color dark}}|Scenery 1}} | ||
|- | |- | ||
| style="background: #{{Locationcolor/med|forest}}" | [[File:Box Forest E.png]] | | style="background: #{{Locationcolor/med|forest}}" | [[File:Box Forest E.png]] | ||
| style="background: #{{Locationcolor/med|road}}" | [[File:Box City E.png]] | | style="background: #{{Locationcolor/med|road}}" | [[File:Box City E.png]] | ||
| style="background: #{{Locationcolor/med|sand}}" | [[File:Box Desert E.png]] | | style="background: #{{Locationcolor/med|sand}}" | [[File:Box Desert E.png]] | ||
| style="background: #{{Locationcolor/med|land}}" | [[File:Box Savanna E.png]] | | style="background: #{{Locationcolor/med|land}}" | [[File:Box Savanna E.png]] | ||
|- | |- | ||
| style="background: #{{Locationcolor/light|forest}}; {{roundybottom|5px}}" | Forest | | style="background: #{{Locationcolor/light|forest}}; {{roundybottom|5px}}" | Forest | ||
| style="background: #{{Locationcolor/light|road}}; {{roundybottom|5px}}" | City | | style="background: #{{Locationcolor/light|road}}; {{roundybottom|5px}}" | City | ||
| style="background: #{{Locationcolor/light|sand}}; {{roundybottom|5px}}" | Desert | | style="background: #{{Locationcolor/light|sand}}; {{roundybottom|5px}}" | Desert | ||
| style="background: #{{Locationcolor/light|land}}; {{roundybottom|5px}}" | Savanna | | style="background: #{{Locationcolor/light|land}}; {{roundybottom|5px}}" | Savanna | ||
|- | |- | ||
| style="background: #{{emerald color light}}; {{roundytop|5px}}" colspan="4" | {{color|{{emerald color dark}}|Scenery 2}} | | style="background: #{{emerald color light}}; {{roundytop|5px}}" colspan="4" | {{color|{{emerald color dark}}|Scenery 2}} | ||
|- | |- | ||
| style="background: #{{Locationcolor/med|mountain}}" | [[File:Box Crag E.png]] | | style="background: #{{Locationcolor/med|mountain}}" | [[File:Box Crag E.png]] | ||
| style="background: #{{Locationcolor/med|volcano}}" | [[File:Box Volcano E.png]] | | style="background: #{{Locationcolor/med|volcano}}" | [[File:Box Volcano E.png]] | ||
| style="background: #{{Locationcolor/med|snow}}" | [[File:Box Snow E.png]] | | style="background: #{{Locationcolor/med|snow}}" | [[File:Box Snow E.png]] | ||
| style="background: #{{Locationcolor/med|cave}}" | [[File:Box Cave E.png]] | | style="background: #{{Locationcolor/med|cave}}" | [[File:Box Cave E.png]] | ||
|- | |- | ||
| style="background: #{{Locationcolor/light|mountain}}; {{roundybottom|5px}}" | Crag | | style="background: #{{Locationcolor/light|mountain}}; {{roundybottom|5px}}" | Crag | ||
| style="background: #{{Locationcolor/light|volcano}}; {{roundybottom|5px}}" | {{color|{{Locationcolor/text|volcano}}|Volcano}} | | style="background: #{{Locationcolor/light|volcano}}; {{roundybottom|5px}}" | {{color|{{Locationcolor/text|volcano}}|Volcano}} | ||
| style="background: #{{Locationcolor/light|snow}}; {{roundybottom|5px}}" | Snow | | style="background: #{{Locationcolor/light|snow}}; {{roundybottom|5px}}" | Snow | ||
| style="background: #{{Locationcolor/light|cave}}; {{roundybottom|5px}}" | Cave | | style="background: #{{Locationcolor/light|cave}}; {{roundybottom|5px}}" | Cave | ||
|- | |- | ||
| style="background: #{{emerald color light}}; {{roundytop|5px}}" colspan="4" | {{color|{{emerald color dark}}|Scenery 3}} | | style="background: #{{emerald color light}}; {{roundytop|5px}}" colspan="4" | {{color|{{emerald color dark}}|Scenery 3}} | ||
|- | |- | ||
| style="background: #{{Locationcolor/med|ocean}}" | [[File:Box Beach E.png]] | | style="background: #{{Locationcolor/med|ocean}}" | [[File:Box Beach E.png]] | ||
| style="background: #{{Locationcolor/med|underwater}}" | [[File:Box Seafloor E.png]] | | style="background: #{{Locationcolor/med|underwater}}" | [[File:Box Seafloor E.png]] | ||
| style="background: #{{Locationcolor/med|lake}}" | [[File:Box River E.png]] | | style="background: #{{Locationcolor/med|lake}}" | [[File:Box River E.png]] | ||
| style="background: #{{flying color}}" | [[File:Box Sky E.png]] | | style="background: #{{flying color}}" | [[File:Box Sky E.png]] | ||
|- | |- | ||
| style="background: #{{Locationcolor/light|ocean}}; {{roundybottom|5px}}" | Beach | | style="background: #{{Locationcolor/light|ocean}}; {{roundybottom|5px}}" | Beach | ||
| style="background: #{{Locationcolor/light|underwater}}; {{roundybottom|5px}}" | Seafloor | | style="background: #{{Locationcolor/light|underwater}}; {{roundybottom|5px}}" | Seafloor | ||
| style="background: #{{Locationcolor/light|lake}}; {{roundybottom|5px}}" | River | | style="background: #{{Locationcolor/light|lake}}; {{roundybottom|5px}}" | River | ||
| style="background: #{{flying color light}}; {{roundybottom|5px}}" | Sky | | style="background: #{{flying color light}}; {{roundybottom|5px}}" | Sky | ||
|- | |- | ||
| style="background: #{{emerald color light}}; {{roundytop|5px}}" colspan="4" | {{color|{{emerald color dark}}|Etcetera}} | | style="background: #{{emerald color light}}; {{roundytop|5px}}" colspan="4" | {{color|{{emerald color dark}}|Etcetera}} | ||
|- | |- | ||
| style="background: #{{water color}}" | [[File:Box Polka-Dot E.png]] | | style="background: #{{water color}}" | [[File:Box Polka-Dot E.png]] | ||
| style="background: #B03010" | [[File:Box PokéCenter E.png]] | | style="background: #B03010" | [[File:Box PokéCenter E.png]] | ||
| style="background: #{{steel color}}" | [[File:Box Machine E.png]] | | style="background: #{{steel color}}" | [[File:Box Machine E.png]] | ||
| style="background: #{{white color}}" | [[File:Box Simple E.png]] | | style="background: #{{white color}}" | [[File:Box Simple E.png]] | ||
|- | |- | ||
| style="background: #{{water color light}}; {{roundybottom|5px}}" | Polka-Dot | | style="background: #{{water color light}}; {{roundybottom|5px}}" | Polka-Dot | ||
| style="background: #{{power color light}}; {{roundybottom|5px}}" | {{color2|000|Pokémon Center|PokéCenter}} | | style="background: #{{power color light}}; {{roundybottom|5px}}" | {{color2|000|Pokémon Center|PokéCenter}} | ||
| Line 216: | Line 222: | ||
======Walda====== | ======Walda====== | ||
In {{game|Emerald}}, certain unique phrases will result in [[Walda]] in [[Rustboro City]] giving the player a special, customizable wallpaper design by cheering her up and making her laugh. These wallpapers can be generated online at various websites such as this generator at [http://www.filb.de/games/gba/emerald/word?lang=2 Filb.de]. The player can only have one customized wallpaper, which is categorized under "Friends". The following are a few examples of the wallpapers that can be generated. | In {{game|Emerald}}, certain unique phrases will result in [[Walda]] in [[Rustboro City]] giving the player a special, customizable wallpaper design by cheering her up and making her laugh. These wallpapers can be generated online at various websites such as this generator at [http://www.filb.de/games/gba/emerald/word?lang=2 Filb.de]. The player can only have one customized wallpaper, which is categorized under "Friends". The following are a few examples of the wallpapers that can be generated. | ||
{| class="roundy" style="margin:auto; text-align:center; background: #{{emerald color dark}}; border: 5px solid #{{emerald color}}" | {| class="roundy" style="margin:auto; text-align:center; background: #{{emerald color dark}}; border: 5px solid #{{emerald color}}" | ||
|- | |- | ||
| style="background: #{{emerald color light}}; {{roundytop|5px}}" colspan="4" | {{color|{{emerald color dark}}|Friends}} | | style="background: #{{emerald color light}}; {{roundytop|5px}}" colspan="4" | {{color|{{emerald color dark}}|Friends}} | ||
|- | |- | ||
| style="background: #A87858" | [[File:Box Zigzagoon E.png]] | | style="background: #A87858" | [[File:Box Zigzagoon E.png]] | ||
| style="background: #3060C0" | [[File:Box Screen E.png]] | | style="background: #3060C0" | [[File:Box Screen E.png]] | ||
| style="background: #338DA6" | [[File:Box Horizontal E.png]] | | style="background: #338DA6" | [[File:Box Horizontal E.png]] | ||
| style="background: # | | style="background: #000" | [[File:Box Diagonal E.png]] | ||
|- | |- | ||
| style="background: #E0D0A8; {{roundybottom|5px}}" | {{pcolor|Zigzagoon|000}} | | style="background: #E0D0A8; {{roundybottom|5px}}" | {{pcolor|Zigzagoon|000}} | ||
| style="background: #A8C8F0; {{roundybottom|5px}}" | Screen | | style="background: #A8C8F0; {{roundybottom|5px}}" | Screen | ||
| style="background: #4FD9FF; {{roundybottom|5px}}" | Horizontal | | style="background: #4FD9FF; {{roundybottom|5px}}" | Horizontal | ||
| style="background: # | | style="background: #FFF; {{roundybottom|5px}}" | Diagonal | ||
|- | |- | ||
| style="background: #610000" | [[File:Box Blocks E.png]] | | style="background: #610000" | [[File:Box Blocks E.png]] | ||
| style="background: #e090a8" | [[File:Box Ribbon E.png]] | | style="background: #e090a8" | [[File:Box Ribbon E.png]] | ||
| style="background: #EDE9EE" | [[File:Box Pokémon Center E.png]] | | style="background: #EDE9EE" | [[File:Box Pokémon Center E.png]] | ||
| style="background: #ED6374" | [[File:Box Frame E.png]] | | style="background: #ED6374" | [[File:Box Frame E.png]] | ||
|- | |- | ||
| style="background: #AE8976; {{roundybottom|5px}}" | Blocks | | style="background: #AE8976; {{roundybottom|5px}}" | Blocks | ||
| style="background: #EBB7C6; {{roundybottom|5px}}" | {{color2|000|Ribbon}}{{tt|*|The English version of this wallpaper lacks the large ribbon in the center}} | | style="background: #EBB7C6; {{roundybottom|5px}}" | {{color2|000|Ribbon}}{{tt|*|The English version of this wallpaper lacks the large ribbon in the center}} | ||
| style="background: #ED6374; {{roundybottom|5px}}" | {{color2|000|Pokémon Center}} | | style="background: #ED6374; {{roundybottom|5px}}" | {{color2|000|Pokémon Center}} | ||
| style="background: #A00000; {{roundybottom|5px}}" | Frame | | style="background: #A00000; {{roundybottom|5px}}" | Frame | ||
|- | |- | ||
| style="background: #E0B192" | [[File:Box Symbol E.png]] | | style="background: #E0B192" | [[File:Box Symbol E.png]] | ||
| style="background: #584030" | [[File:Box Circles E.png]] | | style="background: #584030" | [[File:Box Circles E.png]] | ||
| style="background: #58A8E0" | [[File:Box Azumarill E.png]] | | style="background: #58A8E0" | [[File:Box Azumarill E.png]] | ||
| style="background: #D07058" | [[File:Box Pikachu E.png]] | | style="background: #D07058" | [[File:Box Pikachu E.png]] | ||
|- | |- | ||
| style="background: #A66A42; {{roundybottom|5px}}" | Symbol | | style="background: #A66A42; {{roundybottom|5px}}" | Symbol | ||
| style="background: #E0D0A0; {{roundybottom|5px}}" | Circles | | style="background: #E0D0A0; {{roundybottom|5px}}" | Circles | ||
| style="background: #F8F8F8; {{roundybottom|5px}}" | {{pcolor|Azumarill|000}} | | style="background: #F8F8F8; {{roundybottom|5px}}" | {{pcolor|Azumarill|000}} | ||
| style="background: #F85888; {{roundybottom|5px}}" | {{pcolor|Pikachu|000}} | | style="background: #F85888; {{roundybottom|5px}}" | {{pcolor|Pikachu|000}} | ||
|- | |- | ||
| style="background: #5959C1" | [[File:Box Legendary E.png]] | | style="background: #5959C1" | [[File:Box Legendary E.png]] | ||
| style="background: #D86850" | [[File:Box Dusclops E.png]] | | style="background: #D86850" | [[File:Box Dusclops E.png]] | ||
| style="background: #C8C860" | [[File:Box Ludicolo E.png]] | | style="background: #C8C860" | [[File:Box Ludicolo E.png]] | ||
| style="background: #6878B0" | [[File:Box Whiscash E.png]] | | style="background: #6878B0" | [[File:Box Whiscash E.png]] | ||
|- | |- | ||
| style="background: #C15959; {{roundybottom|5px}}" | Legendary | | style="background: #C15959; {{roundybottom|5px}}" | Legendary | ||
| style="background: #C15959; {{roundybottom|5px}}" | {{pcolor|Dusclops|000}} | | style="background: #C15959; {{roundybottom|5px}}" | {{pcolor|Dusclops|000}} | ||
| Line 267: | Line 273: | ||
{| class="roundy" style="margin:auto; text-align:center; background: #{{colosseum color dark}}; border: 5px solid #{{colosseum color}}" | {| class="roundy" style="margin:auto; text-align:center; background: #{{colosseum color dark}}; border: 5px solid #{{colosseum color}}" | ||
|- | |- | ||
| style="background: #{{Locationcolor/med|forest}}; {{roundytl|5px}}" | [[File:Box 1 Colo.png|200px]] | | style="background: #{{Locationcolor/med|forest}}; {{roundytl|5px}}" | [[File:Box 1 Colo.png|200px]] | ||
| style="background: #{{Locationcolor/med|ocean}}" | [[File:Box 2 Colo.png|200px]] | | style="background: #{{Locationcolor/med|ocean}}" | [[File:Box 2 Colo.png|200px]] | ||
| style="background: #{{Locationcolor/med|sand}}; {{roundytr|5px}}" | [[File:Box 3 Colo.png|200px]] | | style="background: #{{Locationcolor/med|sand}}; {{roundytr|5px}}" | [[File:Box 3 Colo.png|200px]] | ||
|- | |- | ||
| style="background: #{{Locationcolor/light|forest}}; {{roundybottom|5px}}" | Box 1 | | style="background: #{{Locationcolor/light|forest}}; {{roundybottom|5px}}" | Box 1 | ||
| style="background: #{{Locationcolor/light|ocean}}; {{roundybottom|5px}}" | Box 2 | | style="background: #{{Locationcolor/light|ocean}}; {{roundybottom|5px}}" | Box 2 | ||
| Line 286: | Line 292: | ||
| style="background: #{{steel color}}" | [[File:Box 3 XD.png|200px]] | | style="background: #{{steel color}}" | [[File:Box 3 XD.png|200px]] | ||
| style="background: #{{Locationcolor/med|forest}}" | [[File:Box 4 XD.png|200px]] | | style="background: #{{Locationcolor/med|forest}}" | [[File:Box 4 XD.png|200px]] | ||
|- | |- | ||
| style="background: #{{Locationcolor/light|cave}}; {{roundybottom|5px}}" | Box 1 | | style="background: #{{Locationcolor/light|cave}}; {{roundybottom|5px}}" | Box 1 | ||
| style="background: #{{Locationcolor/light|ocean}}; {{roundybottom|5px}}" | Box 2 | | style="background: #{{Locationcolor/light|ocean}}; {{roundybottom|5px}}" | Box 2 | ||
| style="background: #{{steel color light}}; {{roundybottom|5px}}" | Box 3 | | style="background: #{{steel color light}}; {{roundybottom|5px}}" | Box 3 | ||
| style="background: #{{Locationcolor/light|forest}}; {{roundybottom|5px}}" | Box 4 | | style="background: #{{Locationcolor/light|forest}}; {{roundybottom|5px}}" | Box 4 | ||
|- | |- | ||
| style="background: #{{Locationcolor/med|road}}" | [[File:Box 5 XD.png|200px]] | | style="background: #{{Locationcolor/med|road}}" | [[File:Box 5 XD.png|200px]] | ||
| style="background: #{{rock color}}" | [[File:Box 6 XD.png|200px]] | | style="background: #{{rock color}}" | [[File:Box 6 XD.png|200px]] | ||
| style="background: #{{Locationcolor/med|underwater}}" | [[File:Box 7 XD.png|200px]] | | style="background: #{{Locationcolor/med|underwater}}" | [[File:Box 7 XD.png|200px]] | ||
| style="background: #{{Locationcolor/med|volcano}}" | [[File:Box 8 XD.png|200px]] | | style="background: #{{Locationcolor/med|volcano}}" | [[File:Box 8 XD.png|200px]] | ||
|- | |- | ||
| style="background: #{{Locationcolor/light|road}}; {{roundybottom|5px}}" | Box 5 | | style="background: #{{Locationcolor/light|road}}; {{roundybottom|5px}}" | Box 5 | ||
| style="background: #{{rock color light}}; {{roundybottom|5px}}" | Box 6 | | style="background: #{{rock color light}}; {{roundybottom|5px}}" | Box 6 | ||
| Line 307: | Line 313: | ||
{| class="roundy" style="margin:auto; text-align:center; background: #{{sinnoh color dark}}; border: 5px solid #{{sinnoh color}}" | {| class="roundy" style="margin:auto; text-align:center; background: #{{sinnoh color dark}}; border: 5px solid #{{sinnoh color}}" | ||
|- | |- | ||
| style="background: #{{sinnoh color light}}; {{roundytop|5px}}" colspan="4" | {{color|{{sinnoh color dark}}|Scenery 1}} | | style="background: #{{sinnoh color light}}; {{roundytop|5px}}" colspan="4" | {{color|{{sinnoh color dark}}|Scenery 1}} | ||
|- | |- | ||
| style="background: #{{Locationcolor/med|forest}}" | [[File:Box Forest IV.png]] | | style="background: #{{Locationcolor/med|forest}}" | [[File:Box Forest IV.png]] | ||
| style="background: #{{Locationcolor/med|road}}" | [[File:Box City IV.png]] | | style="background: #{{Locationcolor/med|road}}" | [[File:Box City IV.png]] | ||
| style="background: #{{Locationcolor/med|sand}}" | [[File:Box Desert IV.png]] | | style="background: #{{Locationcolor/med|sand}}" | [[File:Box Desert IV.png]] | ||
| style="background: #{{Locationcolor/med|land}}" | [[File:Box Savanna IV.png]] | | style="background: #{{Locationcolor/med|land}}" | [[File:Box Savanna IV.png]] | ||
|- | |- | ||
| style="background: #{{Locationcolor/light|forest}}; {{roundybottom|5px}}" | Forest | | style="background: #{{Locationcolor/light|forest}}; {{roundybottom|5px}}" | Forest | ||
| style="background: #{{Locationcolor/light|road}}; {{roundybottom|5px}}" | City | | style="background: #{{Locationcolor/light|road}}; {{roundybottom|5px}}" | City | ||
| style="background: #{{Locationcolor/light|sand}}; {{roundybottom|5px}}" | Desert | | style="background: #{{Locationcolor/light|sand}}; {{roundybottom|5px}}" | Desert | ||
| style="background: #{{Locationcolor/light|land}}; {{roundybottom|5px}}" | Savanna | | style="background: #{{Locationcolor/light|land}}; {{roundybottom|5px}}" | Savanna | ||
|- | |- | ||
| style="background: #{{sinnoh color light}}; {{roundytop|5px}}" colspan="4" | {{color|{{sinnoh color dark}}|Scenery 2}} | | style="background: #{{sinnoh color light}}; {{roundytop|5px}}" colspan="4" | {{color|{{sinnoh color dark}}|Scenery 2}} | ||
|- | |- | ||
| style="background: #{{Locationcolor/med|mountain}}" | [[File:Box Crag IV.png]] | | style="background: #{{Locationcolor/med|mountain}}" | [[File:Box Crag IV.png]] | ||
| style="background: #{{Locationcolor/med|volcano}}" | [[File:Box Volcano IV.png]] | | style="background: #{{Locationcolor/med|volcano}}" | [[File:Box Volcano IV.png]] | ||
| style="background: #{{Locationcolor/med|snow}}" | [[File:Box Snow IV.png]] | | style="background: #{{Locationcolor/med|snow}}" | [[File:Box Snow IV.png]] | ||
| style="background: #{{Locationcolor/med|cave}}" | [[File:Box Cave IV.png]] | | style="background: #{{Locationcolor/med|cave}}" | [[File:Box Cave IV.png]] | ||
|- | |- | ||
| style="background: #{{Locationcolor/light|mountain}}; {{roundybottom|5px}}" | Crag | | style="background: #{{Locationcolor/light|mountain}}; {{roundybottom|5px}}" | Crag | ||
| style="background: #{{Locationcolor/light|volcano}}; {{roundybottom|5px}}" | {{color|{{Locationcolor/text|volcano}}|Volcano}} | | style="background: #{{Locationcolor/light|volcano}}; {{roundybottom|5px}}" | {{color|{{Locationcolor/text|volcano}}|Volcano}} | ||
| style="background: #{{Locationcolor/light|snow}}; {{roundybottom|5px}}" | Snow | | style="background: #{{Locationcolor/light|snow}}; {{roundybottom|5px}}" | Snow | ||
| style="background: #{{Locationcolor/light|cave}}; {{roundybottom|5px}}" | Cave | | style="background: #{{Locationcolor/light|cave}}; {{roundybottom|5px}}" | Cave | ||
|- | |- | ||
| style="background: #{{sinnoh color light}}; {{roundytop|5px}}" colspan="4" | {{color|{{sinnoh color dark}}|Scenery 3}} | | style="background: #{{sinnoh color light}}; {{roundytop|5px}}" colspan="4" | {{color|{{sinnoh color dark}}|Scenery 3}} | ||
|- | |- | ||
| style="background: #{{Locationcolor/med|ocean}}" | [[File:Box Beach IV.png]] | | style="background: #{{Locationcolor/med|ocean}}" | [[File:Box Beach IV.png]] | ||
| style="background: #{{Locationcolor/med|underwater}}" | [[File:Box Seafloor IV.png]] | | style="background: #{{Locationcolor/med|underwater}}" | [[File:Box Seafloor IV.png]] | ||
| style="background: #{{Locationcolor/med|lake}}" | [[File:Box River IV.png]] | | style="background: #{{Locationcolor/med|lake}}" | [[File:Box River IV.png]] | ||
| style="background: #{{flying color}}" | [[File:Box Sky IV.png]] | | style="background: #{{flying color}}" | [[File:Box Sky IV.png]] | ||
|- | |- | ||
| style="background: #{{Locationcolor/light|ocean}}; {{roundybottom|5px}}" | Beach | | style="background: #{{Locationcolor/light|ocean}}; {{roundybottom|5px}}" | Beach | ||
| style="background: #{{Locationcolor/light|underwater}}; {{roundybottom|5px}}" | Seafloor | | style="background: #{{Locationcolor/light|underwater}}; {{roundybottom|5px}}" | Seafloor | ||
| style="background: #{{Locationcolor/light|lake}}; {{roundybottom|5px}}" | River | | style="background: #{{Locationcolor/light|lake}}; {{roundybottom|5px}}" | River | ||
| style="background: #{{flying color light}}; {{roundybottom|5px}}" | Sky | | style="background: #{{flying color light}}; {{roundybottom|5px}}" | Sky | ||
|- | |- | ||
| style="background: #{{sinnoh color light}}; {{roundytop|5px}}" colspan="4" | {{color|{{sinnoh color dark}}|Etcetera}} | | style="background: #{{sinnoh color light}}; {{roundytop|5px}}" colspan="4" | {{color|{{sinnoh color dark}}|Etcetera}} | ||
|- | |- | ||
| style="background: #{{cute color}}" | [[File:Box Checks IV.png]] | | style="background: #{{cute color}}" | [[File:Box Checks IV.png]] | ||
| style="background: #B03010" | [[File:Box PokéCenter IV.png]] | | style="background: #B03010" | [[File:Box PokéCenter IV.png]] | ||
| style="background: #{{steel color}}" | [[File:Box Machine IV.png]] | | style="background: #{{steel color}}" | [[File:Box Machine IV.png]] | ||
| style="background: #{{Poké Balls color}}" | [[File:Box Simple IV.png]] | | style="background: #{{Poké Balls color}}" | [[File:Box Simple IV.png]] | ||
|- | |- | ||
| style="background: #{{cute color light}}; {{roundybottom|5px}}" | Checks | | style="background: #{{cute color light}}; {{roundybottom|5px}}" | Checks | ||
| style="background: #{{power color light}}; {{roundybottom|5px}}" | {{color2|000|Pokémon Center|PokéCenter}} | | style="background: #{{power color light}}; {{roundybottom|5px}}" | {{color2|000|Pokémon Center|PokéCenter}} | ||
| Line 361: | Line 367: | ||
{| class="roundy" style="margin:auto; text-align:center; background: #{{diamond color dark}}; border: 5px solid #{{diamond color}}" | {| class="roundy" style="margin:auto; text-align:center; background: #{{diamond color dark}}; border: 5px solid #{{diamond color}}" | ||
|- | |- | ||
| style="background: #{{pearl color light}}; {{roundytop|5px}}" colspan="4" | {{color|{{pearl color dark}}|Friends 1}} | | style="background: #{{pearl color light}}; {{roundytop|5px}}" colspan="4" | {{color|{{pearl color dark}}|Friends 1}} | ||
|- | |- | ||
| style="background: #{{Locationcolor/med|space}}" | [[File:Box Space DP.png]] | | style="background: #{{Locationcolor/med|space}}" | [[File:Box Space DP.png]] | ||
| style="background: #{{Locationcolor/med|land}}" | [[File:Box Backyard DP.png]] | | style="background: #{{Locationcolor/med|land}}" | [[File:Box Backyard DP.png]] | ||
| style="background: #{{green color dark}}" | [[File:Box Nostalgic DP.png]] | | style="background: #{{green color dark}}" | [[File:Box Nostalgic DP.png]] | ||
| style="background: #{{fire color}}" | [[File:Box Torchic DP.png]] | | style="background: #{{fire color}}" | [[File:Box Torchic DP.png]] | ||
|- | |- | ||
| style="background: #{{Locationcolor/light|space}}; {{roundybottom|5px}}" | {{color|FFF|Space}} | | style="background: #{{Locationcolor/light|space}}; {{roundybottom|5px}}" | {{color|FFF|Space}} | ||
| style="background: #{{Locationcolor/light|land}}; {{roundybottom|5px}}" | Backyard | | style="background: #{{Locationcolor/light|land}}; {{roundybottom|5px}}" | Backyard | ||
| style="background: #{{green color light}}; {{roundybottom|5px}}" | Nostalgic | | style="background: #{{green color light}}; {{roundybottom|5px}}" | Nostalgic | ||
| style="background: #{{fire color light}}; {{roundybottom|5px}}" | {{pcolor|Torchic|000}} | | style="background: #{{fire color light}}; {{roundybottom|5px}}" | {{pcolor|Torchic|000}} | ||
|- | |- | ||
| style="background: #{{pearl color light}}; {{roundytop|5px}}" colspan="4" | {{color|{{pearl color dark}}|Friends 2}} | | style="background: #{{pearl color light}}; {{roundytop|5px}}" colspan="4" | {{color|{{pearl color dark}}|Friends 2}} | ||
|- | |- | ||
| style="background: #{{key items color}}" | [[File:Box Trio DP.png]] | | style="background: #{{key items color}}" | [[File:Box Trio DP.png]] | ||
| style="background: #{{electric color}}" | [[File:Box PikaPika DP.png]] | | style="background: #{{electric color}}" | [[File:Box PikaPika DP.png]] | ||
| style="background: #{{diamond color}}" | [[File:Box Legend DP.png]] | | style="background: #{{diamond color}}" | [[File:Box Legend DP.png]] | ||
| style="background: #{{silver color}}" | [[File:Box Team Galactic DP.png]] | | style="background: #{{silver color}}" | [[File:Box Team Galactic DP.png]] | ||
|- | |- | ||
| style="background: #{{items color light}}; {{roundybottom|5px}}" | {{color2|000|Starter Pokémon#Sinnoh|Trio}} | | style="background: #{{items color light}}; {{roundybottom|5px}}" | {{color2|000|Starter Pokémon#Sinnoh|Trio}} | ||
| style="background: #{{electric color light}}; {{roundybottom|5px}}" | {{pcolor|Pikachu|000|Pika}}{{pcolor|Pichu|000|Pika}} | | style="background: #{{electric color light}}; {{roundybottom|5px}}" | {{pcolor|Pikachu|000|Pika}}{{pcolor|Pichu|000|Pika}} | ||
| Line 391: | Line 397: | ||
{| class="roundy" style="margin:auto; text-align:center; background: #{{platinum color dark}}; border: 5px solid #{{platinum color}}" | {| class="roundy" style="margin:auto; text-align:center; background: #{{platinum color dark}}; border: 5px solid #{{platinum color}}" | ||
|- | |- | ||
| style="background: #{{platinum color light}}; {{roundytop|5px}}" colspan="4" | {{color|{{platinum color dark}}|Friends 1}} | | style="background: #{{platinum color light}}; {{roundytop|5px}}" colspan="4" | {{color|{{platinum color dark}}|Friends 1}} | ||
|- | |- | ||
| style="background: #{{Locationcolor/med|distortion}}" | [[File:Box Distortion Pt.png]] | | style="background: #{{Locationcolor/med|distortion}}" | [[File:Box Distortion Pt.png]] | ||
| style="background: #{{contest color}}" | [[File:Box Contest Pt.png]] | | style="background: #{{contest color}}" | [[File:Box Contest Pt.png]] | ||
| style="background: #{{red color dark}}" | [[File:Box Nostalgic Pt.png]] | | style="background: #{{red color dark}}" | [[File:Box Nostalgic Pt.png]] | ||
| style="background: #{{poison color}}" | [[File:Box Croagunk Pt.png]] | | style="background: #{{poison color}}" | [[File:Box Croagunk Pt.png]] | ||
|- | |- | ||
| style="background: #{{Locationcolor/light|distortion}}; {{roundybottom|5px}}" | {{color|{{#switch: distortion|marsh=573118|volcano=FFBC00|space|shadow=FFFFFF|distortion=E0FAFF|000000}}|Distortion}} | | style="background: #{{Locationcolor/light|distortion}}; {{roundybottom|5px}}" | {{color|{{#switch: distortion|marsh=573118|volcano=FFBC00|space|shadow=FFFFFF|distortion=E0FAFF|000000}}|Distortion}} | ||
| style="background: #{{contest color light}}; {{roundybottom|5px}}" | {{color2|000|Pokémon Super Contest|Contest}} | | style="background: #{{contest color light}}; {{roundybottom|5px}}" | {{color2|000|Pokémon Super Contest|Contest}} | ||
| style="background: #{{red color light}}; {{roundybottom|5px}}" | Nostalgic | | style="background: #{{red color light}}; {{roundybottom|5px}}" | Nostalgic | ||
| style="background: #{{fighting color light}}; {{roundybottom|5px}}" | {{pcolor|Croagunk|000}} | | style="background: #{{fighting color light}}; {{roundybottom|5px}}" | {{pcolor|Croagunk|000}} | ||
|- | |- | ||
| style="background: #{{platinum color light}}; {{roundytop|5px}}" colspan="4" | {{color|{{platinum color dark}}|Friends 2}} | | style="background: #{{platinum color light}}; {{roundytop|5px}}" colspan="4" | {{color|{{platinum color dark}}|Friends 2}} | ||
|- | |- | ||
| style="background: #{{berries color}}" | [[File:Box Trio Pt.png]] | | style="background: #{{berries color}}" | [[File:Box Trio Pt.png]] | ||
| style="background: #{{electric color}}" | [[File:Box PikaPika Pt.png]] | | style="background: #{{electric color}}" | [[File:Box PikaPika Pt.png]] | ||
| style="background: #{{platinum color}}" | [[File:Box Legend Pt.png]] | | style="background: #{{platinum color}}" | [[File:Box Legend Pt.png]] | ||
| style="background: #{{silver color}}" | [[File:Box Team Galactic Pt.png]] | | style="background: #{{silver color}}" | [[File:Box Team Galactic Pt.png]] | ||
|- | |- | ||
| style="background: #{{berries color light}}; {{roundybottom|5px}}" | {{color2|000|Starter Pokémon#Sinnoh|Trio}} | | style="background: #{{berries color light}}; {{roundybottom|5px}}" | {{color2|000|Starter Pokémon#Sinnoh|Trio}} | ||
| style="background: #{{electric color light}}; {{roundybottom|5px}}" | {{pcolor|Pikachu|000|Pika}}{{pcolor|Raichu|000|Pika}} | | style="background: #{{electric color light}}; {{roundybottom|5px}}" | {{pcolor|Pikachu|000|Pika}}{{pcolor|Raichu|000|Pika}} | ||
| Line 423: | Line 429: | ||
{| class="roundy" style="margin:auto; text-align:center; background: #{{heartgold color}}; border: 5px solid #{{soulsilver color}}" | {| class="roundy" style="margin:auto; text-align:center; background: #{{heartgold color}}; border: 5px solid #{{soulsilver color}}" | ||
|- | |- | ||
| style="background: #{{heartgold color}}; {{roundytop|5px}}" | [[File:Box Heart HGSS.png]] | | style="background: #{{heartgold color}}; {{roundytop|5px}}" | [[File:Box Heart HGSS.png]] | ||
| style="background: #{{soulsilver color}}; {{roundytop|5px}}" | [[File:Box Soul HGSS.png]] | | style="background: #{{soulsilver color}}; {{roundytop|5px}}" | [[File:Box Soul HGSS.png]] | ||
| style="background: #{{power color}}; {{roundytop|5px}}" | [[File:Box Big Brother HGSS.png]] | | style="background: #{{power color}}; {{roundytop|5px}}" | [[File:Box Big Brother HGSS.png]] | ||
| style="background: #{{thlon color}}; {{roundytop|5px}}" | [[File:Box Pokéathlon HGSS.png]] | | style="background: #{{thlon color}}; {{roundytop|5px}}" | [[File:Box Pokéathlon HGSS.png]] | ||
|- | |- | ||
| style="background: #{{heartgold color light}}; {{roundybottom|5px}}" | {{pcolor|Ho-Oh|000|Heart}} | | style="background: #{{heartgold color light}}; {{roundybottom|5px}}" | {{pcolor|Ho-Oh|000|Heart}} | ||
| style="background: #{{soulsilver color light}}; {{roundybottom|5px}}" | {{pcolor|Lugia|000|Soul}} | | style="background: #{{soulsilver color light}}; {{roundybottom|5px}}" | {{pcolor|Lugia|000|Soul}} | ||
| style="background: #{{power color light}}; {{roundybottom|5px}}" | {{color2|000|Primo|Big Brother}} | | style="background: #{{power color light}}; {{roundybottom|5px}}" | {{color2|000|Primo|Big Brother}} | ||
| style="background: #{{thlon color light}}; {{roundybottom|5px}}" | {{color2|000|Pokéathlon}} | | style="background: #{{thlon color light}}; {{roundybottom|5px}}" | {{color2|000|Pokéathlon}} | ||
|- | |- | ||
| style="background: #{{johto color}}; {{roundytop|5px}}" | [[File:Box Trio HGSS.png]] | | style="background: #{{johto color}}; {{roundytop|5px}}" | [[File:Box Trio HGSS.png]] | ||
| style="background: #{{electric color}}; {{roundytop|5px}}" | [[File:Box Spiky Pika HGSS.png]] | | style="background: #{{electric color}}; {{roundytop|5px}}" | [[File:Box Spiky Pika HGSS.png]] | ||
| style="background: #{{autumn color}}; {{roundytop|5px}}" | [[File:Box Kimono Girl HGSS.png]] | | style="background: #{{autumn color}}; {{roundytop|5px}}" | [[File:Box Kimono Girl HGSS.png]] | ||
| style="background: # | | style="background: #666; {{roundytop|5px}}" | [[File:Box Revival HGSS.png]] | ||
|- | |- | ||
| style="background: #{{johto color light}}; {{roundybottom|5px}}" | {{color2|000|Starter Pokémon#Johto|Trio}} | | style="background: #{{johto color light}}; {{roundybottom|5px}}" | {{color2|000|Starter Pokémon#Johto|Trio}} | ||
| style="background: #{{electric color light}}; {{roundybottom|5px}}" | {{color2|000|Spiky-eared Pichu|Spiky}} {{color2|000|Shiny Pokémon|Pika}} | | style="background: #{{electric color light}}; {{roundybottom|5px}}" | {{color2|000|Spiky-eared Pichu|Spiky}} {{color2|000|Shiny Pokémon|Pika}} | ||
| style="background: #{{autumn color}}; {{roundybottom|5px}}" | {{color2|000|Kimono Girl}} | | style="background: #{{autumn color}}; {{roundybottom|5px}}" | {{color2|000|Kimono Girl}} | ||
| style="background: # | | style="background: #CCC; {{roundybottom|5px}}" | {{color2|000|Team Rocket|Revival}} | ||
|}{{-}} | |}{{-}} | ||
| Line 449: | Line 455: | ||
{| class="roundy" style="margin:auto; text-align:center; background: #{{unova color dark}}; border: 5px solid #{{unova color}}" | {| class="roundy" style="margin:auto; text-align:center; background: #{{unova color dark}}; border: 5px solid #{{unova color}}" | ||
|- | |- | ||
| style="background: #{{unova color light}}; {{roundytop|5px}}" colspan="4" | {{color|{{unova color dark}}|Scenery 1}} | | style="background: #{{unova color light}}; {{roundytop|5px}}" colspan="4" | {{color|{{unova color dark}}|Scenery 1}} | ||
|- | |- | ||
| style="background: #{{Locationcolor/med|forest}}" | [[File:Box Forest V.png]] | | style="background: #{{Locationcolor/med|forest}}" | [[File:Box Forest V.png]] | ||
| style="background: #{{Locationcolor/med|road}}" | [[File:Box City V.png]] | | style="background: #{{Locationcolor/med|road}}" | [[File:Box City V.png]] | ||
| style="background: #{{Locationcolor/med|sand}}" | [[File:Box Desert V.png]] | | style="background: #{{Locationcolor/med|sand}}" | [[File:Box Desert V.png]] | ||
| style="background: #{{Locationcolor/med|land}}" | [[File:Box Savanna V.png]] | | style="background: #{{Locationcolor/med|land}}" | [[File:Box Savanna V.png]] | ||
|- | |- | ||
| style="background: #{{Locationcolor/light|forest}}; {{roundybottom|5px}}" | Forest | | style="background: #{{Locationcolor/light|forest}}; {{roundybottom|5px}}" | Forest | ||
| style="background: #{{Locationcolor/light|road}}; {{roundybottom|5px}}" | City | | style="background: #{{Locationcolor/light|road}}; {{roundybottom|5px}}" | City | ||
| style="background: #{{Locationcolor/light|sand}}; {{roundybottom|5px}}" | Desert | | style="background: #{{Locationcolor/light|sand}}; {{roundybottom|5px}}" | Desert | ||
| style="background: #{{Locationcolor/light|land}}; {{roundybottom|5px}}" | Savanna | | style="background: #{{Locationcolor/light|land}}; {{roundybottom|5px}}" | Savanna | ||
|- | |- | ||
| style="background: #{{unova color light}}; {{roundytop|5px}}" colspan="4" | {{color|{{unova color dark}}|Scenery 2}} | | style="background: #{{unova color light}}; {{roundytop|5px}}" colspan="4" | {{color|{{unova color dark}}|Scenery 2}} | ||
|- | |- | ||
| style="background: #{{Locationcolor/med|mountain}}" | [[File:Box Crag V.png]] | | style="background: #{{Locationcolor/med|mountain}}" | [[File:Box Crag V.png]] | ||
| style="background: #{{Locationcolor/med|volcano}}" | [[File:Box Volcano V.png]] | | style="background: #{{Locationcolor/med|volcano}}" | [[File:Box Volcano V.png]] | ||
| style="background: #{{Locationcolor/med|snow}}" | [[File:Box Snow V.png]] | | style="background: #{{Locationcolor/med|snow}}" | [[File:Box Snow V.png]] | ||
| style="background: #{{Locationcolor/med|cave}}" | [[File:Box Cave V.png]] | | style="background: #{{Locationcolor/med|cave}}" | [[File:Box Cave V.png]] | ||
|- | |- | ||
| style="background: #{{Locationcolor/light|mountain}}; {{roundybottom|5px}}" | Crag | | style="background: #{{Locationcolor/light|mountain}}; {{roundybottom|5px}}" | Crag | ||
| style="background: #{{Locationcolor/light|volcano}}; {{roundybottom|5px}}" | {{color|{{Locationcolor/text|volcano}}|Volcano}} | | style="background: #{{Locationcolor/light|volcano}}; {{roundybottom|5px}}" | {{color|{{Locationcolor/text|volcano}}|Volcano}} | ||
| style="background: #{{Locationcolor/light|snow}}; {{roundybottom|5px}}" | Snow | | style="background: #{{Locationcolor/light|snow}}; {{roundybottom|5px}}" | Snow | ||
| style="background: #{{Locationcolor/light|cave}}; {{roundybottom|5px}}" | Cave | | style="background: #{{Locationcolor/light|cave}}; {{roundybottom|5px}}" | Cave | ||
|- | |- | ||
| style="background: #{{unova color light}}; {{roundytop|5px}}" colspan="4" | {{color|{{unova color dark}}|Scenery 3}} | | style="background: #{{unova color light}}; {{roundytop|5px}}" colspan="4" | {{color|{{unova color dark}}|Scenery 3}} | ||
|- | |- | ||
| style="background: #{{Locationcolor/med|ocean}}" | [[File:Box Beach V.png]] | | style="background: #{{Locationcolor/med|ocean}}" | [[File:Box Beach V.png]] | ||
| style="background: #{{Locationcolor/med|underwater}}" | [[File:Box Seafloor V.png]] | | style="background: #{{Locationcolor/med|underwater}}" | [[File:Box Seafloor V.png]] | ||
| style="background: #{{Locationcolor/med|lake}}" | [[File:Box River V.png]] | | style="background: #{{Locationcolor/med|lake}}" | [[File:Box River V.png]] | ||
| style="background: #{{flying color}}" | [[File:Box Sky V.png]] | | style="background: #{{flying color}}" | [[File:Box Sky V.png]] | ||
|- | |- | ||
| style="background: #{{Locationcolor/light|ocean}}; {{roundybottom|5px}}" | Beach | | style="background: #{{Locationcolor/light|ocean}}; {{roundybottom|5px}}" | Beach | ||
| style="background: #{{Locationcolor/light|underwater}}; {{roundybottom|5px}}" | Seafloor | | style="background: #{{Locationcolor/light|underwater}}; {{roundybottom|5px}}" | Seafloor | ||
| style="background: #{{Locationcolor/light|lake}}; {{roundybottom|5px}}" | River | | style="background: #{{Locationcolor/light|lake}}; {{roundybottom|5px}}" | River | ||
| style="background: #{{flying color light}}; {{roundybottom|5px}}" | Sky | | style="background: #{{flying color light}}; {{roundybottom|5px}}" | Sky | ||
|- | |- | ||
| style="background: #{{unova color light}}; {{roundytop|5px}}" colspan="4" | {{color|{{unova color dark}}|Misc}} | | style="background: #{{unova color light}}; {{roundytop|5px}}" colspan="4" | {{color|{{unova color dark}}|Misc}} | ||
|- | |- | ||
| style="background: #{{red color}}" | [[File:Box Checks V.png]] | | style="background: #{{red color}}" | [[File:Box Checks V.png]] | ||
| style="background: #B03010" | [[File:Box Poké Center V.png]] | | style="background: #B03010" | [[File:Box Poké Center V.png]] | ||
| style="background: #{{steel color}}" | [[File:Box Machine V.png]] | | style="background: #{{steel color}}" | [[File:Box Machine V.png]] | ||
| style="background: #{{white color}}" | [[File:Box Simple V.png]] | | style="background: #{{white color}}" | [[File:Box Simple V.png]] | ||
|- | |- | ||
| style="background: #{{red color light}}; {{roundybottom|5px}}" | Checks | | style="background: #{{red color light}}; {{roundybottom|5px}}" | Checks | ||
| style="background: #{{power color light}}; {{roundybottom|5px}}" | {{color2|000|Pokémon Center|Poké Center}} | | style="background: #{{power color light}}; {{roundybottom|5px}}" | {{color2|000|Pokémon Center|Poké Center}} | ||
| Line 503: | Line 509: | ||
{| class="roundy" style="margin:auto; text-align:center; background: #{{black color dark}}; border: 5px solid #{{black color}}" | {| class="roundy" style="margin:auto; text-align:center; background: #{{black color dark}}; border: 5px solid #{{black color}}" | ||
|- | |- | ||
| style="background: #{{white color light}}; {{roundytop|5px}}" colspan="4" | Special 1 | | style="background: #{{white color light}}; {{roundytop|5px}}" colspan="4" | Special 1 | ||
|- | |- | ||
| style="background: #{{black color}}" | [[File:Box Reshiram BW.png]] | | style="background: #{{black color}}" | [[File:Box Reshiram BW.png]] | ||
| style="background: #{{white color}}" | [[File:Box Zekrom BW.png]] | | style="background: #{{white color}}" | [[File:Box Zekrom BW.png]] | ||
| style="background: #000" | [[File:Box Monochrome BW.png]] | | style="background: #000" | [[File:Box Monochrome BW.png]] | ||
| style="background: #{{platinum color}}" | [[File:Box Team Plasma BW.png]] | | style="background: #{{platinum color}}" | [[File:Box Team Plasma BW.png]] | ||
|- | |- | ||
| style="background: #{{black color light}}; {{roundybottom|5px}}" | {{pcolor|Reshiram|fff}} | | style="background: #{{black color light}}; {{roundybottom|5px}}" | {{pcolor|Reshiram|fff}} | ||
| style="background: #{{white color light}}; {{roundybottom|5px}}" | {{pcolor|Zekrom|000}} | | style="background: #{{white color light}}; {{roundybottom|5px}}" | {{pcolor|Zekrom|000}} | ||
| style="background: #fff; {{roundybottom|5px}}" | Monochrome | | style="background: #fff; {{roundybottom|5px}}" | Monochrome | ||
| style="background: #{{platinum color light}}; {{roundybottom|5px}}" | {{color2|000|Team Plasma}} | | style="background: #{{platinum color light}}; {{roundybottom|5px}}" | {{color2|000|Team Plasma}} | ||
|- | |- | ||
| style="background: #{{white color light}}; {{roundytop|5px}}" colspan="4" | Special 2 | | style="background: #{{white color light}}; {{roundytop|5px}}" colspan="4" | Special 2 | ||
|- | |- | ||
| style="background: #{{dream color}}" | [[File:Box Munna BW.png]] | | style="background: #{{dream color}}" | [[File:Box Munna BW.png]] | ||
| style="background: #{{dark color}}" | [[File:Box Zoroark BW.png]] | | style="background: #{{dark color}}" | [[File:Box Zoroark BW.png]] | ||
| style="background: #{{unova color}}" | [[File:Box Subway BW.png]] | | style="background: #{{unova color}}" | [[File:Box Subway BW.png]] | ||
| style="background: #{{contest color}}" | [[File:Box Musical BW.png]] | | style="background: #{{contest color}}" | [[File:Box Musical BW.png]] | ||
|- | |- | ||
| style="background: #{{dream color light}}; {{roundybottom|5px}}" | {{pcolor|Munna|000}} | | style="background: #{{dream color light}}; {{roundybottom|5px}}" | {{pcolor|Munna|000}} | ||
| style="background: #{{dark color light}}; {{roundybottom|5px}}" | {{pcolor|Zoroark|000}} | | style="background: #{{dark color light}}; {{roundybottom|5px}}" | {{pcolor|Zoroark|000}} | ||
| Line 533: | Line 539: | ||
{| class="roundy" style="margin:auto; text-align:center; background: #{{black 2 color dark}}; border: 5px solid #{{black 2 color}}" | {| class="roundy" style="margin:auto; text-align:center; background: #{{black 2 color dark}}; border: 5px solid #{{black 2 color}}" | ||
|- | |- | ||
| style="background: #{{white 2 color light}}; {{roundytop|5px}}" colspan="4" | Special 1 | | style="background: #{{white 2 color light}}; {{roundytop|5px}}" colspan="4" | Special 1 | ||
|- | |- | ||
| style="background: #000" | [[File:Box Monochrome B2W2.png]] | | style="background: #000" | [[File:Box Monochrome B2W2.png]] | ||
| style="background: #{{platinum color}}" | [[File:Box Team Plasma B2W2.png]] | | style="background: #{{platinum color}}" | [[File:Box Team Plasma B2W2.png]] | ||
| style="background: #{{gold color}}" | [[File:Box Movie B2W2.png]] | | style="background: #{{gold color}}" | [[File:Box Movie B2W2.png]] | ||
| style="background: #{{unova color}}" | [[File:Box PWT B2W2.png]] | | style="background: #{{unova color}}" | [[File:Box PWT B2W2.png]] | ||
|- | |- | ||
| style="background: #fff; {{roundybottom|5px}}" | Monochrome | | style="background: #fff; {{roundybottom|5px}}" | Monochrome | ||
| style="background: #{{platinum color light}}; {{roundybottom|5px}}" | {{color2|000|Team Plasma}} | | style="background: #{{platinum color light}}; {{roundybottom|5px}}" | {{color2|000|Team Plasma}} | ||
| style="background: #{{gold color light}}; {{roundybottom|5px}}" | {{color2|000|Pokéstar Studios|Movie}} | | style="background: #{{gold color light}}; {{roundybottom|5px}}" | {{color2|000|Pokéstar Studios|Movie}} | ||
| style="background: #{{unova color light}}; {{roundybottom|5px}}" | {{color2|000|Pokémon World Tournament|PWT}} | | style="background: #{{unova color light}}; {{roundybottom|5px}}" | {{color2|000|Pokémon World Tournament|PWT}} | ||
|- | |- | ||
| style="background: #{{white 2 color light}}; {{roundytop|5px}}" colspan="4" | Special 2 | | style="background: #{{white 2 color light}}; {{roundytop|5px}}" colspan="4" | Special 2 | ||
|- | |- | ||
| style="background: #{{black 2 color}}" | [[File:Box Black Kyurem B2W2.png]] | | style="background: #{{black 2 color}}" | [[File:Box Black Kyurem B2W2.png]] | ||
| style="background: #{{white 2 color}}" | [[File:Box White Kyurem B2W2.png]] | | style="background: #{{white 2 color}}" | [[File:Box White Kyurem B2W2.png]] | ||
| style="background: #{{black color}}" | [[File:Box Reshiram B2W2.png]] | | style="background: #{{black color}}" | [[File:Box Reshiram B2W2.png]] | ||
| style="background: #{{white color}}" | [[File:Box Zekrom B2W2.png]] | | style="background: #{{white color}}" | [[File:Box Zekrom B2W2.png]] | ||
|- | |- | ||
| style="background: #{{black 2 color light}}; {{roundybottom|5px}}" | {{color2|fff|List of Pokémon with form differences#Kyurem|Black}} {{pcolor|Kyurem|fff}} | | style="background: #{{black 2 color light}}; {{roundybottom|5px}}" | {{color2|fff|List of Pokémon with form differences#Kyurem|Black}} {{pcolor|Kyurem|fff}} | ||
| style="background: #{{white 2 color light}}; {{roundybottom|5px}}" | {{color2|000|List of Pokémon with form differences#Kyurem|White}} {{pcolor|Kyurem|000}} | | style="background: #{{white 2 color light}}; {{roundybottom|5px}}" | {{color2|000|List of Pokémon with form differences#Kyurem|White}} {{pcolor|Kyurem|000}} | ||
| Line 560: | Line 566: | ||
====[[Generation VI]]==== | ====[[Generation VI]]==== | ||
All Generation VI games have the same Scenery and Misc wallpapers. | All Generation VI games have the same Scenery and Misc wallpapers. | ||
| Line 629: | Line 634: | ||
| style="background: #{{psychic color light}}; {{roundybottom|5px}}" | Special 4<br/>({{color2|000|Mega Evolution}}) | | style="background: #{{psychic color light}}; {{roundybottom|5px}}" | Special 4<br/>({{color2|000|Mega Evolution}}) | ||
|- | |- | ||
| style="background: #{{red color dark}}; {{roundytop|5px}}" | [[File:Box Special 5 XY.png]] | | style="background: #{{red color dark}}; {{roundytop|5px}}" | [[File:Box Special 5 XY.png]] | ||
| style="background: #{{yellow color}}; {{roundytop|5px}}" | [[File:Box Special 6 XY.png]] | | style="background: #{{yellow color}}; {{roundytop|5px}}" | [[File:Box Special 6 XY.png]] | ||
| style="background: #{{fairy color}}; {{roundytop|5px}}" | [[File:Box Special 7 XY.png]] | | style="background: #{{fairy color}}; {{roundytop|5px}}" | [[File:Box Special 7 XY.png]] | ||
| Line 655: | Line 660: | ||
| style="background: #{{emerald color light}}; {{roundybottom|5px}}" | Special 4<br/>({{color2|000|Mega Evolution|Mega}} {{color2|000|Rayquaza (Pokémon)|Rayquaza}}) | | style="background: #{{emerald color light}}; {{roundybottom|5px}}" | Special 4<br/>({{color2|000|Mega Evolution|Mega}} {{color2|000|Rayquaza (Pokémon)|Rayquaza}}) | ||
|- | |- | ||
| style="background: #{{ground color}}; {{roundytop|5px}}" | [[File:Box Special 5 ORAS.png]] | | style="background: #{{ground color}}; {{roundytop|5px}}" | [[File:Box Special 5 ORAS.png]] | ||
| style="background: #{{water color}}; {{roundytop|5px}}" | [[File:Box Special 6 ORAS.png]] | | style="background: #{{water color}}; {{roundytop|5px}}" | [[File:Box Special 6 ORAS.png]] | ||
| style="background: #{{orange color}}; {{roundytop|5px}}" | [[File:Box Special 7 ORAS.png]] | | style="background: #{{orange color}}; {{roundytop|5px}}" | [[File:Box Special 7 ORAS.png]] | ||
| Line 665: | Line 670: | ||
| style="background: #{{contest color light}}; {{roundybottom|5px}}" | Special 8<br/>({{color2|000|Pokémon Contest|Contest Spectacular}}) | | style="background: #{{contest color light}}; {{roundybottom|5px}}" | Special 8<br/>({{color2|000|Pokémon Contest|Contest Spectacular}}) | ||
|}{{-}} | |}{{-}} | ||
====[[Generation VII]]==== | |||
{{incomplete|section}} | |||
===Markings=== | ===Markings=== | ||
A marking tool was introduced in the [[Generation III]] games. Prior to {{game|Black and White|s|Pokémon Black 2 and White 2|2}}, markings could only be set within the Pokémon Storage System, but since then, it is also possible to do from the Pokémon's [[Menu#Pokémon|summary screen]] by simply tapping the icons on the touch screen. These markings have no effect or purpose except what the player may invent for them. | A marking tool was introduced in the [[Generation III]] games. Prior to {{game|Black and White|s|Pokémon Black 2 and White 2|2}}, markings could only be set within the Pokémon Storage System, but since then, it is also possible to do from the Pokémon's [[Menu#Pokémon|summary screen]] by simply tapping the icons on the touch screen. These markings have no effect or purpose except what the player may invent for them. | ||
In Generation III, there were four markings: ●, ■, ▲, and ♥. In [[Generation IV]], two more markings were introduced and the existing ones were reordered, making the full list ●, ▲, ■, ♥, ★, and ♦. Pokémon can be marked with any combination of markings. A Pokémon will keep its marking settings if traded to another Trainer. | In Generation III, there were four markings: ●, ■, ▲, and ♥. In [[Generation IV]], two more markings were introduced and the existing ones were reordered, making the full list ●, ▲, ■, ♥, ★, and ♦. In [[Generation VII]], colors were added to these markings, with the option of making any marking either blue or pink. Pokémon can be marked with any combination of markings. A Pokémon will keep its marking settings if traded to another Trainer. | ||
===Selection modes=== | ===Selection modes=== | ||
| Line 682: | Line 690: | ||
* {{g|Colosseum}} and {{XD}}: X or Y buttons | * {{g|Colosseum}} and {{XD}}: X or Y buttons | ||
* {{3v2|Diamond|Pearl|Platinum}}: Y button | * {{3v2|Diamond|Pearl|Platinum}}: Y button | ||
** In | ** In the Generation III games after {{2v2|Ruby|Sapphire}} and in {{3v2|Diamond|Pearl|Platinum}}, the Relocate Mode effectively combines the functionality of the Relocate and Group Move Modes. While in the Relocate Mode, holding the A button while pressing a directional button will allow the player to select a rectangular group of Pokémon just like a Group Move Mode. | ||
* [[Pokémon Black and White Versions|Black and White]]: <sc>select</sc> button | * [[Pokémon Black and White Versions|Black and White]]: <sc>select</sc> button | ||
These games have no Group Move Mode | These games have no explicit Group Move Mode, and {{game|HeartGold and SoulSilver|s}} have no way of changing selection modes at all. These selection modes can be toggled within any Pokémon Storage System mode in Generations III and IV, but in Black and White, the withdraw and deposit modes can only use the default selection mode. | ||
In [[Pokémon Black and White Versions 2|Pokémon Black 2 and White 2]] and later games, all three selection modes are possible, but the withdraw and deposit modes of the Pokémon Storage System can only use the default selection mode and the Move items mode cannot use the Group Move selection mode. The selection mode can be changed by tapping buttons above the Box's header on the touch screen or by pressing an assigned button. | In [[Pokémon Black and White Versions 2|Pokémon Black 2 and White 2]] and later games, all three selection modes are possible, but the withdraw and deposit modes of the Pokémon Storage System can only use the default selection mode and the Move items mode cannot use the Group Move selection mode. The selection mode can be changed by tapping buttons above the Box's header on the touch screen or by pressing an assigned button. | ||
* [[Pokémon Black and White Versions 2|Black 2 and White 2]]: <sc>select</sc> button | * [[Pokémon Black and White Versions 2|Black 2 and White 2]]: <sc>select</sc> button | ||
* [[Generation VI]]: <sc>select</sc> or <sc>start</sc> buttons | * [[Generation VI]]+: <sc>select</sc> or <sc>start</sc> buttons | ||
===Compare=== | ===Compare=== | ||
| Line 696: | Line 704: | ||
Generation IV introduced the first filter feature in {{game2|Diamond|Pearl|Platinum}}. On the bottom screen in the Pokémon Storage System in these games (in all modes except Compare) there are two buttons, the right of which opens an interface for filtering Pokémon with given markings or held items (holding an item or not). This highlights those Pokémon that meet the specified criteria in the system's Boxes. | Generation IV introduced the first filter feature in {{game2|Diamond|Pearl|Platinum}}. On the bottom screen in the Pokémon Storage System in these games (in all modes except Compare) there are two buttons, the right of which opens an interface for filtering Pokémon with given markings or held items (holding an item or not). This highlights those Pokémon that meet the specified criteria in the system's Boxes. | ||
The feature next returned in [[Pokémon Black and White Versions 2|Pokémon Black 2 and White 2]] and would persist into subsequent games. In Black 2 and White 2, the filter is only available for the Move Pokémon and Battle Box modes, and in Generation VI, it is only available for the Organize Boxes mode. The filter's options include: Name (any species the player has seen), [[Nature]], [[Ability]], [[Gender]] (male, female, or unknown), [[Held item|Held Item]] (holding or not), and Mark; in Generation VI, there are also options for: [[Type]] 1, Type 2, [[Move]], and [[TM]]s & [[HM]]s (compatability). | The feature next returned in [[Pokémon Black and White Versions 2|Pokémon Black 2 and White 2]] and would persist into subsequent games. In Black 2 and White 2, the filter is only available for the Move Pokémon and Battle Box modes, and in Generation VI, it is only available for the Organize Boxes mode. The filter's options include: Name (any species the player has seen), [[Nature]], [[Ability]], [[Gender]] (male, female, or unknown), [[Held item|Held Item]] (holding or not), and Mark; in Generation VI, there are also options for: [[Type]] 1, Type 2, [[Move]], and [[TM]]s & [[HM]]s (compatability). Generation VII adds an option to filter by the Battle Team a Pokémon is on. | ||
===Battle Box=== | {{anchor|Battle Box}}{{anchor|Battle Teams}} | ||
===Battle Box and Battle Teams=== | |||
The Battle Box is a feature introduced in [[Generation V]]. It allows the player to store six Pokémon, which can be used instead of the current [[party]] in [[infrared]] link battles, the [[Battle Subway]], and Random Matchup in Generation V, and the [[Battle Maison]] and the {{DL|Player Search System|Battle Spot}} in Generation VI. | The Battle Box is a feature introduced in [[Generation V]]. It allows the player to store six Pokémon, which can be used instead of the current [[party]] in [[infrared]] link battles, the [[Battle Subway]], and Random Matchup in Generation V, and the [[Battle Maison]] and the {{DL|Player Search System|Battle Spot}} in Generation VI. | ||
| Line 704: | Line 713: | ||
In Generation V, the Battle Box was a separate feature from the Storage Boxes and had to be selected from the menu of Amanita's PC. In Generation VI, the Battle Box became accessible from the Boxes directly, acting itself as the last Box in the line-up. | In Generation V, the Battle Box was a separate feature from the Storage Boxes and had to be selected from the menu of Amanita's PC. In Generation VI, the Battle Box became accessible from the Boxes directly, acting itself as the last Box in the line-up. | ||
Battle Teams are an update to the Battle Box feature that were introduced in Generation VII. The player can register Pokémon from the Storage System to one of six different Battle Teams, and the same Pokémon can be registered to multiple teams. However, any registered Pokémon moved to the player's party will be removed from all Battle Teams. Also, the game prevents them from being traded or sent to Isle Evelup or Isle Avue at Poké Pelago until the player manually unregisters them. | |||
==In the anime== | ==In the anime== | ||
| Line 709: | Line 720: | ||
It also seems that the [[Pokédex]] automatically connects to this system when a capture is made while there are six Pokémon in a user's [[party]], as seen with the capture of [[Ash's Krabby]] in ''[[EP013|Mystery at the Lighthouse]]''. {{an|Misty}} also states that there is a button on the Pokédex that can transfer Pokémon between the Trainer and where their Pokémon are sent. However, the Pokémon Storage System in Unova seems to lack this feature: in ''[[BW018|Sewaddle and Burgh in Pinwheel Forest!]]'', when Ash catches {{AP|Sewaddle}} as his seventh Pokémon, the Poké Ball shrinks and locks up instead of being teleported straight to the Pokémon Storage System. | It also seems that the [[Pokédex]] automatically connects to this system when a capture is made while there are six Pokémon in a user's [[party]], as seen with the capture of [[Ash's Krabby]] in ''[[EP013|Mystery at the Lighthouse]]''. {{an|Misty}} also states that there is a button on the Pokédex that can transfer Pokémon between the Trainer and where their Pokémon are sent. However, the Pokémon Storage System in Unova seems to lack this feature: in ''[[BW018|Sewaddle and Burgh in Pinwheel Forest!]]'', when Ash catches {{AP|Sewaddle}} as his seventh Pokémon, the Poké Ball shrinks and locks up instead of being teleported straight to the Pokémon Storage System. | ||
==In the manga== | |||
The Pokémon Storage System has been seen several times over the course of [[Pokémon Adventures]]. Unlike the games, however, Trainers do not have a fixed limit to the number of Pokémon they can hold on hand, and thus automatic teleportation of Poké Balls to the storage system does not seem to exist. Similar to the games, Trainers can access the system through PCs to manage their Pokémon on hand. Pokémon in the System appear to be held by the regional Professor, similar to how [[Professor Oak]] holds onto Ash's Pokémon in the anime, but usually kept in their Poké Balls instead. Records for the Pokémon Storage System are managed by the respective regional developers. | |||
The Pokémon Storage System is first mentioned in ''[[PS009|...But Fearow Itself!]]'', when {{adv|Red}} finds himself bogged down by a large number of Poké Balls containing Pokémon he has captured. After he encounters Bill at [[Sea Cottage]], Bill helps Red to manage his Pokémon storage, allowing Red to change his lineup over the course of the [[Red, Green & Blue chapter (Adventures)|first chapter]]. In ''[[PS028|Peace of Mime]]'', Red discovers that his storage account has been broken into by [[Team Rocket]] so they could steal his {{p|Eevee}}, [[Vee]]. | |||
In the [[Yellow chapter (Adventures)|second chapter]], {{adv|Green}} attempts to infiltrate Sea Cottage and look at Bill's storage system records, as a part of her investigation on Red's disappearance. With Bill's help, she learns that Red accessed the system after his disappearance, confirming that he is alive. | |||
The Pokémon Storage System's breakdown is a subplot of the [[Gold, Silver & Crystal chapter (Adventures)|third chapter]], first mentioned in ''[[PS099|Sunkern Treasure]]''. As a result of the breakdown, no Pokémon can be transferred digitally, which poses a problem for {{adv|Crystal}} as she is tasked with capturing Pokémon specimens all over the [[Johto]] region for Professor Oak's research. In ''[[PS120|Surrounded by Staryu]]'', Crystal is given a portable transfer system, presented in the form of a cable that connects her Pokédex to her [[Pokégear]]. This allows her to transfer Pokémon she captures to the receiver at the end, although since the portable system is still a prototype, transfers can only be done one-way. The breakdown is eventually revealed to be the work of [[Neo Team Rocket]], who stole all the electrical power needed for the system to work, and is fixed by Bill in time to allow Trainers from all over the region to transfer their Pokémon and help in calming the rampaging {{p|Lugia}} and {{p|Ho-Oh}}. | |||
In the [[Emerald chapter (Adventures)|sixth chapter]], Crystal is seen managing the Pokémon Storage System from Professor Oak's laboratory so she can send {{adv|Emerald}} the Pokémon he needs to conquer the [[Battle Frontier (Generation III)|Battle Frontier]]. | |||
{{adv|Platinum}} accesses the Pokémon Storage System in the [[Platinum chapter (Adventures)|eighth chapter]] to retrieve her new Pokémon, tasking them with the investigation of [[Stark Mountain]] after the disappearance of [[Looker]] and [[Buck]]. | |||
==In other languages== | ==In other languages== | ||
{| | |||
|- style="vertical-align:top" | |||
| | |||
''Pokémon Storage System'' | |||
{{langtable|color=ddf|bordercolor=ccf | {{langtable|color=ddf|bordercolor=ccf | ||
|de=Pokémon-Lagerungssystem | |de=Pokémon-Lagerungssystem | ||
| Line 717: | Line 745: | ||
|ko=포켓몬 보관 시스템 ''Pokémon Bogwan System'' | |ko=포켓몬 보관 시스템 ''Pokémon Bogwan System'' | ||
|es=Sistema de Almacenamiento Pokémon | |es=Sistema de Almacenamiento Pokémon | ||
|vi=Hệ thống truyền gửi Pokémon | |||
}} | |||
| | |||
''Box'' | |||
{{langtable|color=ddf|bordercolor=ccf | |||
|de= | |||
|fr_ca=Boîte{{tt|*|Diamond manual}} | |||
|it= | |||
|ko= | |||
|es= | |||
|vi= | |||
}} | }} | ||
|} | |||
==External links== | ==External links== | ||
| Line 733: | Line 773: | ||
[[it:Sistema Memoria Pokémon]] | [[it:Sistema Memoria Pokémon]] | ||
[[ja:ポケモン預かりシステム]] | [[ja:ポケモン預かりシステム]] | ||
[[zh: | [[zh:寶可夢寄放系統]] | ||
Revision as of 11:33, 8 January 2017
A Pokémon Storage System (Japanese: ポケモンの預かりシステム Pokémon Storage System) allows Pokémon to be stored and transmitted as computer data, and allows Trainers to keep more than the six Pokémon allowed in the party. The first such system was originally developed by Bill. Most core series regions use nominally different versions of the Pokémon Storage System.
Pokémon Storage Systems are typically accessed through the PCs in Pokémon Centers, Day Cares, and battle facilities such as the Battle Frontier and Battle Tower.
Versions

Different Pokémon Storage Systems are used in different regions. The original Pokémon Storage System was developed by Bill, and the systems used in other regions have all derived either directly or indirectly from Bill's system.
There are six Pokémon Storage Systems used in the core series regions:
- Bill's Pokémon Storage System, used in Kanto and Johto.
- Lanette's Pokémon Storage System, used in Hoenn.
- Bebe's Pokémon Storage System, used in Sinnoh.
- Amanita's Pokémon Storage System, used in Unova.
- Cassius's Pokémon Storage System, used in Kalos.
- In Alola, the Pokémon Storage System is maintained by Molayne.
In the PC, these systems are usually referred to as "Someone's PC" initially, but when the player meets the person responsible for creating or maintaining the region's Pokémon Storage System, the entry will change from "Someone" to the person's name (e.g., "Bill's PC").
There is arguably little to no canonical difference in the games between any of these systems, however. Those Pokémon Storage Systems that have appeared in multiple generations have not demonstrated a strict fidelity in any particular to their previous incarnations. Rather, Pokémon Storage System features tend to more closely follow the features of other contemporaneous games, regardless of the region or administrator. This is exemplified by Bill's PC and Lanette's PC, which have both seen major or moderate changes over their appearances in multiple generations.
A few other games also present different versions of Pokémon Storage Systems:
- In Orre, two different Pokémon Storage Systems are featured in the games Pokémon Colosseum and Pokémon XD: Gale of Darkness. No administrator is ever mentioned for these systems.
- Brigette manages the Pokémon Storage Systems in Pokémon Box Ruby & Sapphire and Pokémon Bank.
My Pokémon Ranch also offers an alternative to the digital Pokémon Storage System. In My Pokémon Ranch, Pokémon from Pokémon Diamond and Pearl and Japanese versions of Pokémon Platinum can be sent to stay on a farm owned by Hayley.
Limitations
Prior to Generation III, the Pokémon Storage System had several limitations.
One was the Box interface, which was a simple scrollable list of names in Generation I, to which Generation II only added a picture of the currently selected Pokémon. In Generation III, however, the Box interface was upgraded to a full visual representation of the currently selected Box with each Pokémon therein represented by a miniature sprite.
Another significant limitation was a requirement to save when changing from one Box to another or when organizing Boxes (in Generation II). In Generation III, the game no longer needs to be saved when changing Boxes, so that Boxes can be switched and organized freely.
Another limitation in Generations I and II was the inability to catch wild Pokémon if both their party and the current Box are full. Until the player's current Box is a Box that is not full or the player's party is not full, the game prevents the player from even throwing a Poké Ball. From Generation III onward, if the current Box is full, when a new Pokémon is caught while the player's party is full, the game will simply send it to the next open Box.
There was also a minor change between Generations I and II. In Generation I, a Pokémon that was sent to the Pokémon Storage System retains its current HP value. From Generation II onward, a Pokémon that is sent to the Pokémon Storage System has it current HP reset to its maximum HP and is cured of any status condition.
Features
Storage
Core series games
| Generation | Boxes | Box capacity | Total capacity |
|---|---|---|---|
| I | 12 (8 JP) |
20 (30 JP) |
240 |
| II | 14 (9 JP) |
20 (30 JP) |
280 (270 JP) |
| III | 14 | 30 | 420 |
| IV | 18 | 30 | 540 |
| V | 8/16/24 | 30 | 720 |
| VI | 7/15/23/30/31 | 30 | 930 |
| VII | 8/16/24/32 | 30 | 960 |
Starting in Generation V, the number of Boxes in the Pokémon Storage System is initially limited, with only a few Boxes available. To unlock the next set of additional Boxes, each currently available Box must have at least one Pokémon in it. This makes saving the game quicker initially, as data belonging to locked boxes does not have to be touched. If the player is currently using the Storage System and has placed Pokémon in every Box to unlock more Boxes, the PC must be turned off and on again for the new Boxes to appear. In Generation VI, the unlock requirements may be bypassed by using Pokémon Bank.
In Generation VI, a final Box is only unlocked after catching a certain Legendary Pokémon.
- Pokémon X and Y: after capturing Xerneas or Yveltal.
- Pokémon Omega Ruby and Alpha Sapphire: after capturing Rayquaza during the finale of the Delta Episode.
This requirement ensures that the player will be able to (and forced to) catch it, unlike in Generation V where the otherwise mandatory catching of Reshiram/Zekrom could be bypassed by completely filling all 720 spaces in the Storage System beforehand.
Side series games
| Games | Boxes | Box capacity | Total capacity |
|---|---|---|---|
| Colo | 3 | 30 | 90 |
| XD | 8 | 30 | 240 |
| Box RS | 25 | 60 | 1,500 |
| Pokémon Bank | 100 | 30 | 3,000 |
Though not strictly a Pokémon Storage System, My Pokémon Ranch is also able to store 1,000 Pokémon. If an update to the game (which was only released in Japan) is applied, it can store 1,500 Pokémon. Additionally, Pokémon Stadium 2 can store up to 280 Pokémon (14 boxes of 20) on the game cartridge.
Printing
- Main article: Game Boy Printer → Pokémon Storage System
In Pokémon Yellow and the Generation II games, it was possible to print a Box's contents using the Game Boy Printer. In Pokémon Yellow, this is an option in the Pokémon Storage System's main menu. In Generation II, it is available in the Change Box mode. Game Boy Printer features are disabled in the Virtual Console release of Pokémon Yellow.
Naming Boxes
The ability to customize Box names was introduced in Generation II.
Starting in Generation V, Box names are passed through a filter. This filter prohibits any censored words from being used. In Pokémon Black and White, the filter also prohibits words that contain more than four numerical characters.
Organizing
Generation II introduced the first Pokémon Storage System mode explicitly for organizing Pokémon in Boxes. It allows the player to pick up a Pokémon and move it anywhere in the same or a different Box. However, in Generation II it can only move Pokémon that are not holding Mail, and every move requires the game to be saved. In Generation II, the "Move Pokémon" mode only allows a Pokémon to be inserted before or after others. In Generation III, it became possible to switch two Pokémon instead.
Pokémon FireRed and LeafGreen introduced a mode for explicitly manipulating the held items of Pokémon in Boxes. This mode allows items to be moved to or from the Bag or directly between two Pokémon. Starting in Generation IV, an entry was added to the context menu in the Move Pokémon mode to allow the player to give a Pokémon an item from the Bag or to remove a Pokémon's item.
In Generation VI, the "Move Pokémon" mode was changed to "Organize Boxes" and, in addition to being able to move Pokémon, it also became possible to switch entire Boxes with each other. This is possible by tapping the button in the lower-left corner of the Box interface in the Organize Boxes mode.
In Generation VII, since PCs only feature the Pokémon Storage System and load it immediately, the organization modes are switched by pressing the X Button. The modes available are a Pokémon organization mode, an item organization mode, and a Battle Teams mode.
Wallpaper
A wallpaper is a Box's background in the Pokémon Storage System introduced in Generation III. A Box's wallpaper can be changed, making it easier to distinguish between Boxes.
Most games have two basic sets of basically similar wallpapers categorized as "Scenery" and "Etcetera" or "Misc", with 12 and 4 wallpapers in each set respectively. Generation IV also introduced an extra set of 8 unique wallpapers that had to be unlocked.
Generation III
Ruby and Sapphire
| Scenery 1 | |||
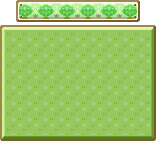
|
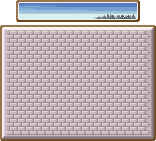
|
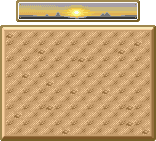
|
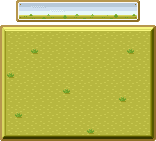
|
| Forest | City | Desert | Savanna |
| Scenery 2 | |||
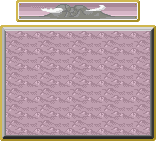
|
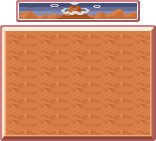
|
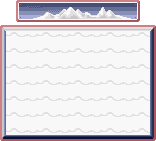
|
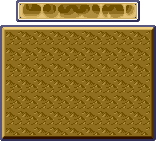
|
| Crag | Volcano | Snow | Cave |
| Scenery 3 | |||
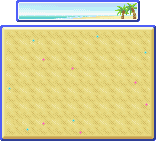
|
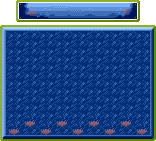
|
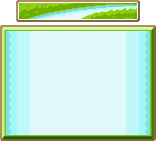
|
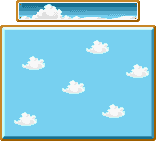
|
| Beach | Seafloor | River | Sky |
| Etcetera | |||
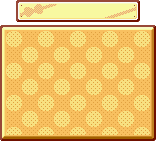
|
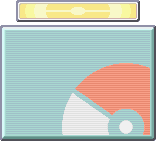
|
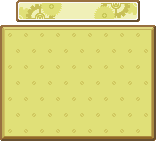
|
|
| Polka-Dot | PokéCenter | Machine | Plain |
FireRed and LeafGreen
FireRed and LeafGreen have the same Scenery wallpapers as Ruby and Sapphire, but their Etcetera wallpapers differ.
| Etcetera | |||
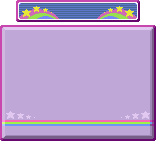
|
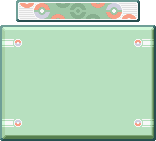
|
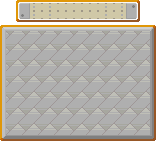
|
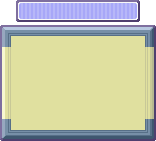
|
| Stars | PokéCenter | Tiles | Simple |
Emerald
| Scenery 1 | |||
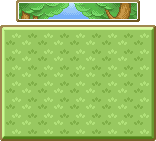
|
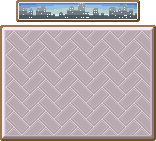
|
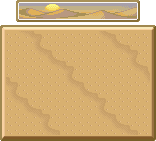
|
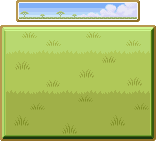
|
| Forest | City | Desert | Savanna |
| Scenery 2 | |||
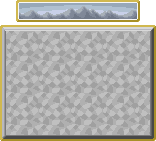
|
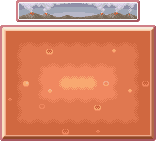
|
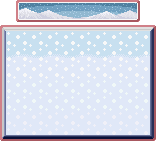
|
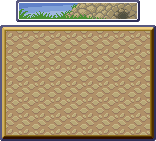
|
| Crag | Volcano | Snow | Cave |
| Scenery 3 | |||
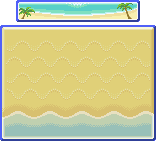
|
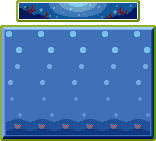
|
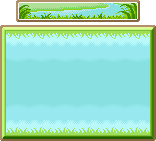
|
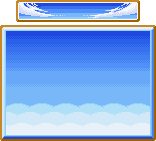
|
| Beach | Seafloor | River | Sky |
| Etcetera | |||
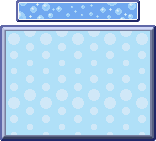
|
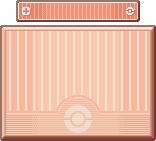
|
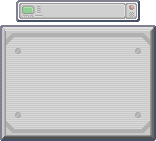
|
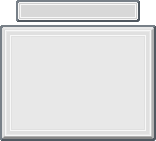
|
| Polka-Dot | PokéCenter | Machine | Simple |
Walda
In Pokémon Emerald, certain unique phrases will result in Walda in Rustboro City giving the player a special, customizable wallpaper design by cheering her up and making her laugh. These wallpapers can be generated online at various websites such as this generator at Filb.de. The player can only have one customized wallpaper, which is categorized under "Friends". The following are a few examples of the wallpapers that can be generated.
| Friends | |||
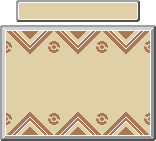
|
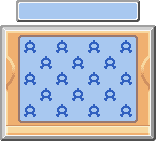
|
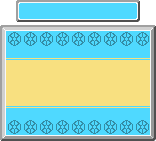
|
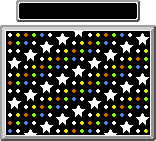
|
| Zigzagoon | Screen | Horizontal | Diagonal |
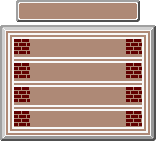
|
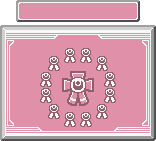
|
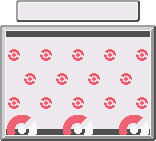
|
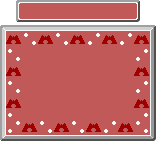
|
| Blocks | Ribbon* | Pokémon Center | Frame |
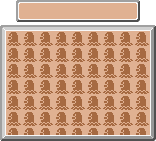
|
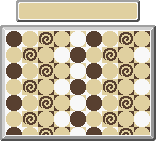
|

|
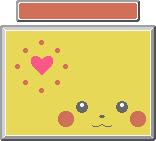
|
| Symbol | Circles | Azumarill | Pikachu |
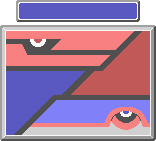
|
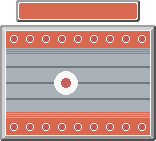
|
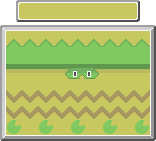
|
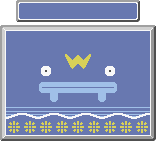
|
| Legendary | Dusclops | Ludicolo | Whiscash |
Colosseum
Each Box in Colosseum has a different wallpaper, but it is not possible to customize a Box's wallpaper.
|
|
|
| Box 1 | Box 2 | Box 3 |
XD
Each Box in XD has a different wallpaper, but it is not possible to customize a Box's wallpaper.

|

|
|
|
| Box 1 | Box 2 | Box 3 | Box 4 |
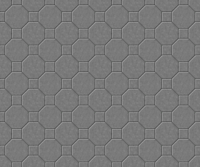
|
|
|
|
| Box 5 | Box 6 | Box 7 | Box 8 |
Generation IV
All Generation IV games have the same Scenery and Etcetera wallpapers.
| Scenery 1 | |||
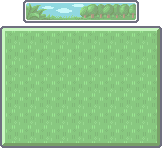
|
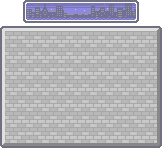
|
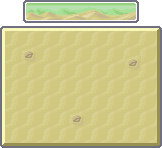
|
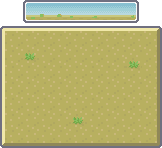
|
| Forest | City | Desert | Savanna |
| Scenery 2 | |||
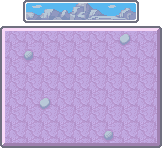
|
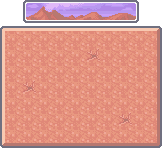
|
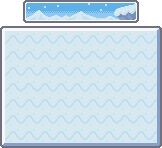
|
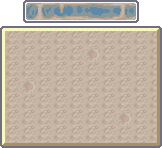
|
| Crag | Volcano | Snow | Cave |
| Scenery 3 | |||
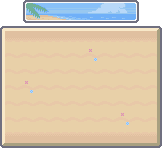
|
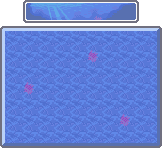
|
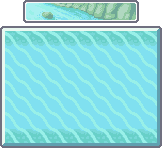
|
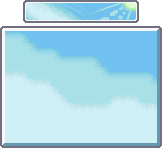
|
| Beach | Seafloor | River | Sky |
| Etcetera | |||
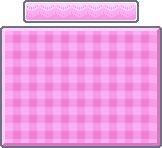
|
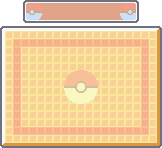
|
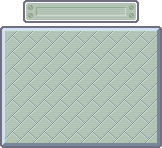
|
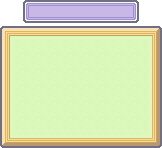
|
| Checks | PokéCenter | Machine | Simple |
Diamond and Pearl
These wallpapers must be unlocked by telling a TV producer at Jubilife TV custom phrases. The phrase for a given wallpaper depends on the player's game, Trainer ID, and game language. Online generators have been created to provide the required phrases for any game.
| Friends 1 | |||
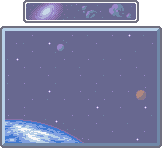
|
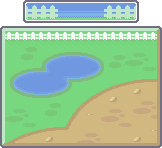
|
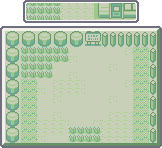
|
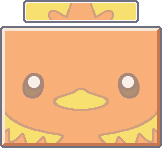
|
| Space | Backyard | Nostalgic | Torchic |
| Friends 2 | |||
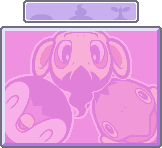
|
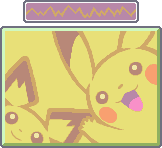
|
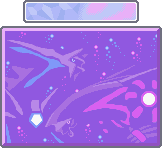
|
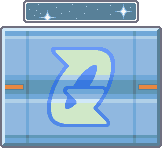
|
| Trio | PikaPika | Legend | Team Galactic |
Platinum
These wallpapers must be unlocked by telling a TV producer at Jubilife TV custom phrases. The phrase for a given wallpaper depends on the player's game, Trainer ID, and game language. Online generators have been created to provide the required phrases for any game.
| Friends 1 | |||
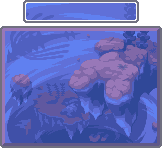
|
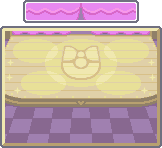
|
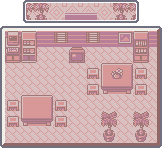
|
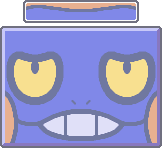
|
| Distortion | Contest | Nostalgic | Croagunk |
| Friends 2 | |||
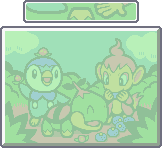
|
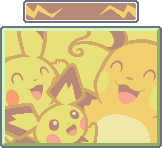
|
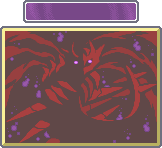
|
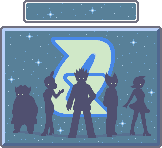
|
| Trio | PikaPika | Legend | Team Galactic |
HeartGold and SoulSilver
These wallpapers must be unlocked by telling Primo at the Violet City Pokémon Center custom phrases. The phrase for a given wallpaper depends on the player's game, Trainer ID, and game language. Online generators have been created to provide the required phrases for any game.
The wallpapers in HeartGold and SoulSilver are not categorized. High-resolution versions of these wallpapers were made available on the Pokémon Daisuki Club website.
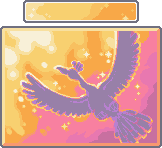
|
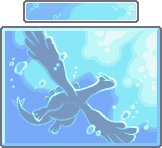
|
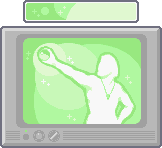
|
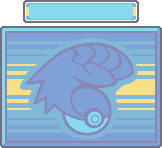
|
| Heart | Soul | Big Brother | Pokéathlon |
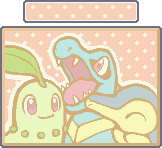
|
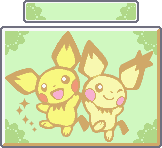
|
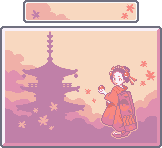
|
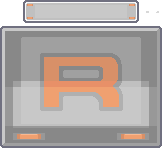
|
| Trio | Spiky Pika | Kimono Girl | Revival |
Generation V
All Generation V games have the same Scenery and Misc wallpapers.
| Scenery 1 | |||
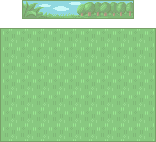
|
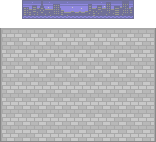
|
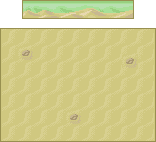
|
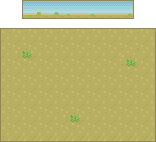
|
| Forest | City | Desert | Savanna |
| Scenery 2 | |||
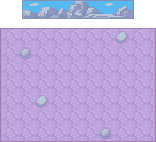
|
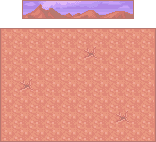
|
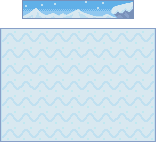
|
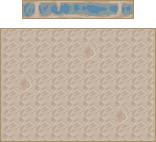
|
| Crag | Volcano | Snow | Cave |
| Scenery 3 | |||
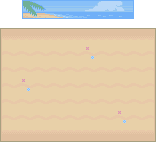
|
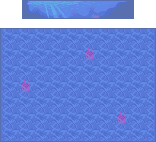
|
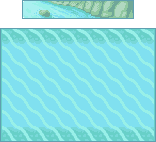
|
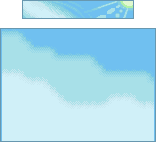
|
| Beach | Seafloor | River | Sky |
| Misc | |||
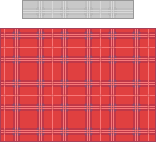
|
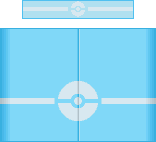
|
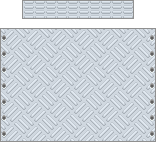
|
|
| Checks | Poké Center | Machine | Simple |
Black and White
The Special 1 wallpapers are unlocked after the end credits roll. The Special 2 wallpapers are unlocked after entering the Hall of Fame for the first time.
| Special 1 | |||
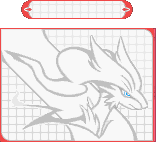
|
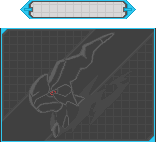
|
|
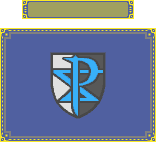
|
| Reshiram | Zekrom | Monochrome | Team Plasma |
| Special 2 | |||
|
|
|
|
| Munna | Zoroark | Subway | Musical |
Black 2 and White 2
The Special 1 wallpapers are unlocked after entering the Hall of Fame for the first time. The Special 2 wallpapers are unlocked after capturing ZekromB2/ReshiramW2 and both new formes of Kyurem.
| Special 1 | |||
|
|
|
|
| Monochrome | Team Plasma | Movie | PWT |
| Special 2 | |||
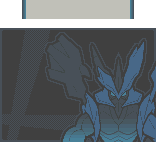
|
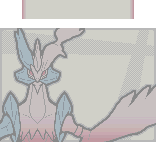
|
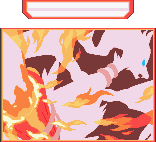
|
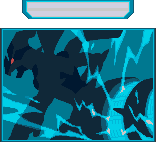
|
| Black Kyurem | White Kyurem | Reshiram | Zekrom |
Generation VI
All Generation VI games have the same Scenery and Misc wallpapers.
| Scenery 1 | |||
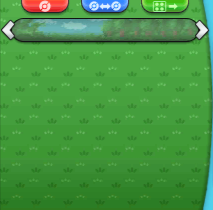
|
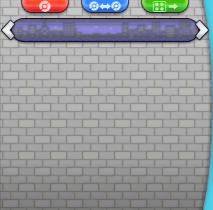
|
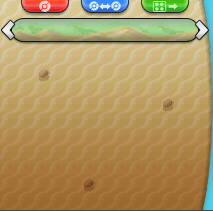
|
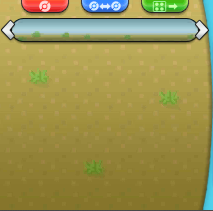
|
| Forest | City | Desert | Savanna |
| Scenery 2 | |||
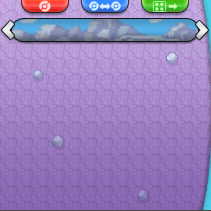
|
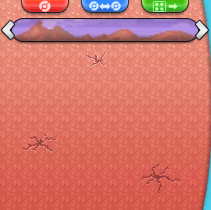
|
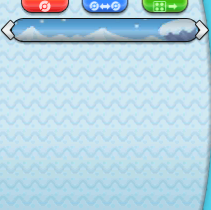
|
|
| Crag | Volcano | Snow | Cave |
| Scenery 3 | |||
|
|
|
|
| Beach | Seafloor | River | Sky |
| Misc | |||
|
|
|
|
| Poké Center | Machine | Checks | Simple |
X and Y
These wallpapers are unlocked after entering the Hall of Fame for the first time.
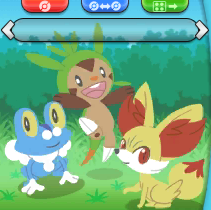
|
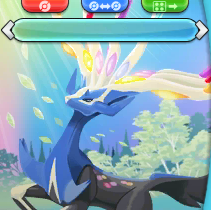
|
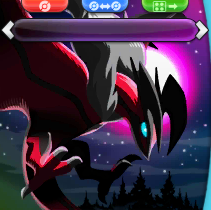
|
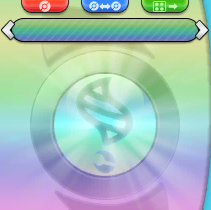
|
| Special 1 (Kalos Starter Trio) |
Special 2 (Xerneas) |
Special 3 (Yveltal) |
Special 4 (Mega Evolution) |
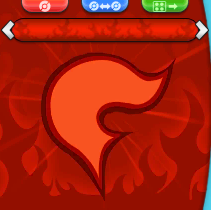
|
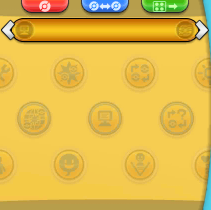
|
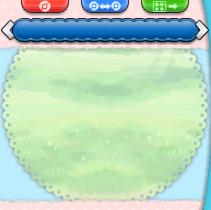
|
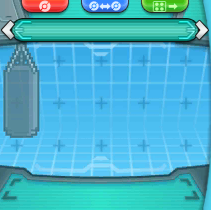
|
| Special 5 (Team Flare) |
Special 6 (PSS) |
Special 7 (Pokémon-Amie) |
Special 8 (Super Training) |
Omega Ruby and Alpha Sapphire
These wallpapers are unlocked after completing the Delta Episode.
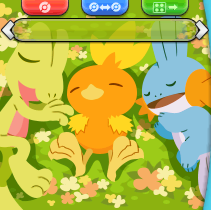
|
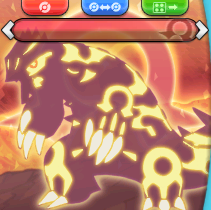
|
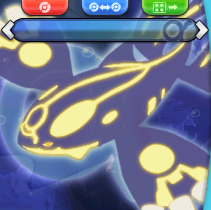
|
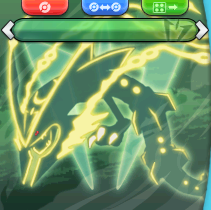
|
| Special 1 (Hoenn Starter Trio) |
Special 2 (Primal Groudon) |
Special 3 (Primal Kyogre) |
Special 4 (Mega Rayquaza) |
|
|
|
|
| Special 5 (Team Magma) |
Special 6 (Team Aqua) |
Special 7 (Super Secret Bases) |
Special 8 (Contest Spectacular) |
Generation VII

|
This section is incomplete. Please feel free to edit this section to add missing information and complete it. |
Markings
A marking tool was introduced in the Generation III games. Prior to Pokémon Black 2 and White 2, markings could only be set within the Pokémon Storage System, but since then, it is also possible to do from the Pokémon's summary screen by simply tapping the icons on the touch screen. These markings have no effect or purpose except what the player may invent for them.
In Generation III, there were four markings: ●, ■, ▲, and ♥. In Generation IV, two more markings were introduced and the existing ones were reordered, making the full list ●, ▲, ■, ♥, ★, and ♦. In Generation VII, colors were added to these markings, with the option of making any marking either blue or pink. Pokémon can be marked with any combination of markings. A Pokémon will keep its marking settings if traded to another Trainer.
Selection modes
Starting in Generation III, the games began introducing shortcuts to expedite tasks in the Pokémon Storage System. Generation V introduced the fullest expression of these selection modes, with three separate modes.
- Default: pops up a context menu when the Pokémon is selected.
- Relocate Mode: automatically picks up a Pokémon or item when it is selected, foregoing the context menu. More generally, it automatically enacts the first option from the context menu.
- Group Move Mode, or Tray: allows any rectangular group of Pokémon to be selected, picked up, and moved together.
- In this selection mode, it is not possible to set Pokémon down if any of the selected Pokémon are over another Pokémon. They must all be over unoccupied positions.
In Generation III, Pokémon Diamond, Pearl, and Platinum, and Pokémon Black and White, the selection mode can be toggled between default and the Relocate Mode by pressing an assigned button.
- Generation III core games: select button
- Pokémon Colosseum and XD: X or Y buttons
- Diamond, Pearl, and Platinum: Y button
- In the Generation III games after Ruby and Sapphire and in Diamond, Pearl, and Platinum, the Relocate Mode effectively combines the functionality of the Relocate and Group Move Modes. While in the Relocate Mode, holding the A button while pressing a directional button will allow the player to select a rectangular group of Pokémon just like a Group Move Mode.
- Black and White: select button
These games have no explicit Group Move Mode, and Pokémon HeartGold and SoulSilver have no way of changing selection modes at all. These selection modes can be toggled within any Pokémon Storage System mode in Generations III and IV, but in Black and White, the withdraw and deposit modes can only use the default selection mode.
In Pokémon Black 2 and White 2 and later games, all three selection modes are possible, but the withdraw and deposit modes of the Pokémon Storage System can only use the default selection mode and the Move items mode cannot use the Group Move selection mode. The selection mode can be changed by tapping buttons above the Box's header on the touch screen or by pressing an assigned button.
- Black 2 and White 2: select button
- Generation VI+: select or start buttons
Compare
The Compare mode is an exclusive Pokémon Storage System feature in Pokémon Diamond, Pearl, and Platinum. This mode allows the player to compare the Nature and stats, Contest condition, or moves of two Pokémon in the Pokémon Storage System. Two buttons on the left and right of the bottom screen will lock in the corresponding Pokémon if tapped, so that the other Pokémon will change as the cursor moves.
Filters
Generation IV introduced the first filter feature in Pokémon Diamond, Pearl, and Platinum. On the bottom screen in the Pokémon Storage System in these games (in all modes except Compare) there are two buttons, the right of which opens an interface for filtering Pokémon with given markings or held items (holding an item or not). This highlights those Pokémon that meet the specified criteria in the system's Boxes.
The feature next returned in Pokémon Black 2 and White 2 and would persist into subsequent games. In Black 2 and White 2, the filter is only available for the Move Pokémon and Battle Box modes, and in Generation VI, it is only available for the Organize Boxes mode. The filter's options include: Name (any species the player has seen), Nature, Ability, Gender (male, female, or unknown), Held Item (holding or not), and Mark; in Generation VI, there are also options for: Type 1, Type 2, Move, and TMs & HMs (compatability). Generation VII adds an option to filter by the Battle Team a Pokémon is on.
Battle Box and Battle Teams
The Battle Box is a feature introduced in Generation V. It allows the player to store six Pokémon, which can be used instead of the current party in infrared link battles, the Battle Subway, and Random Matchup in Generation V, and the Battle Maison and the Battle Spot in Generation VI.
Tournaments which utilized the "Battle Competition" feature required its use; therefore, all the Global Battle Union tournaments required it. Once the user of the Battle Box registered their Pokémon team for an official tournament that used the "Battle Competition" feature, the team was locked in the Battle Box and could not be modified (even the reordering of moves) or removed from the Box until the end of the competition.
In Generation V, the Battle Box was a separate feature from the Storage Boxes and had to be selected from the menu of Amanita's PC. In Generation VI, the Battle Box became accessible from the Boxes directly, acting itself as the last Box in the line-up.
Battle Teams are an update to the Battle Box feature that were introduced in Generation VII. The player can register Pokémon from the Storage System to one of six different Battle Teams, and the same Pokémon can be registered to multiple teams. However, any registered Pokémon moved to the player's party will be removed from all Battle Teams. Also, the game prevents them from being traded or sent to Isle Evelup or Isle Avue at Poké Pelago until the player manually unregisters them.
In the anime
A system for transferring Pokémon electronically exists, and is utilized in all Pokémon Centers as well as the labs of all Pokémon Professors. However, unlike in the games, Pokémon are not stored electronically, and in this continuity, the developer of the system was Dr. Akihabara. On one occasion, Jessie, James, and Meowth were able to invade this system in an attempt to steal Pokémon, but failed thanks to Ash and his friends.
It also seems that the Pokédex automatically connects to this system when a capture is made while there are six Pokémon in a user's party, as seen with the capture of Ash's Krabby in Mystery at the Lighthouse. Misty also states that there is a button on the Pokédex that can transfer Pokémon between the Trainer and where their Pokémon are sent. However, the Pokémon Storage System in Unova seems to lack this feature: in Sewaddle and Burgh in Pinwheel Forest!, when Ash catches Sewaddle as his seventh Pokémon, the Poké Ball shrinks and locks up instead of being teleported straight to the Pokémon Storage System.
In the manga
The Pokémon Storage System has been seen several times over the course of Pokémon Adventures. Unlike the games, however, Trainers do not have a fixed limit to the number of Pokémon they can hold on hand, and thus automatic teleportation of Poké Balls to the storage system does not seem to exist. Similar to the games, Trainers can access the system through PCs to manage their Pokémon on hand. Pokémon in the System appear to be held by the regional Professor, similar to how Professor Oak holds onto Ash's Pokémon in the anime, but usually kept in their Poké Balls instead. Records for the Pokémon Storage System are managed by the respective regional developers.
The Pokémon Storage System is first mentioned in ...But Fearow Itself!, when Red finds himself bogged down by a large number of Poké Balls containing Pokémon he has captured. After he encounters Bill at Sea Cottage, Bill helps Red to manage his Pokémon storage, allowing Red to change his lineup over the course of the first chapter. In Peace of Mime, Red discovers that his storage account has been broken into by Team Rocket so they could steal his Eevee, Vee.
In the second chapter, Green attempts to infiltrate Sea Cottage and look at Bill's storage system records, as a part of her investigation on Red's disappearance. With Bill's help, she learns that Red accessed the system after his disappearance, confirming that he is alive.
The Pokémon Storage System's breakdown is a subplot of the third chapter, first mentioned in Sunkern Treasure. As a result of the breakdown, no Pokémon can be transferred digitally, which poses a problem for Crystal as she is tasked with capturing Pokémon specimens all over the Johto region for Professor Oak's research. In Surrounded by Staryu, Crystal is given a portable transfer system, presented in the form of a cable that connects her Pokédex to her Pokégear. This allows her to transfer Pokémon she captures to the receiver at the end, although since the portable system is still a prototype, transfers can only be done one-way. The breakdown is eventually revealed to be the work of Neo Team Rocket, who stole all the electrical power needed for the system to work, and is fixed by Bill in time to allow Trainers from all over the region to transfer their Pokémon and help in calming the rampaging Lugia and Ho-Oh.
In the sixth chapter, Crystal is seen managing the Pokémon Storage System from Professor Oak's laboratory so she can send Emerald the Pokémon he needs to conquer the Battle Frontier.
Platinum accesses the Pokémon Storage System in the eighth chapter to retrieve her new Pokémon, tasking them with the investigation of Stark Mountain after the disappearance of Looker and Buck.
In other languages
|
Pokémon Storage System
|
Box
| |||||||||||||||||||||||||||||||||||
External links
- Emerald Wallpaper Generator at Filb.de
- Diamond/Pearl/Platinum/HeartGold/SoulSilver Wallpaper Generator at Filb.de
- Pokémon Bank website
|