|
|
| (30 intermediate revisions by 17 users not shown) |
| Line 8: |
Line 8: |
| |location={{rt|3|Kanto|Routes 3}} and {{rtn|4|Kanto}} | | |location={{rt|3|Kanto|Routes 3}} and {{rtn|4|Kanto}} |
| |region=Kanto | | |region=Kanto |
| |mapdesc=A mystical mountain that is known for its frequent meteor falls. The shards of stars that fall here are known as {{evostone|Moon Stone}}s.{{sup/3|FRLG}}<br/>A mountain where a star fell. It now holds a mysterious power.{{sup/4|HGSS}} | | |mapdesc=A mystical mountain that is known for its frequent meteor falls. The shards of stars that fall here are known as [[Moon Stone]]s.{{sup/3|FRLG}}<br/>A mountain where a star fell. It now holds a mysterious power.{{sup/4|HGSS}} |
| |generation={{Gen|I}}, {{Gen|II}}, {{Gen|III}}, {{Gen|IV}} | | |generation={{Gen|I}}, {{Gen|II}}, {{Gen|III}}, {{Gen|IV}} |
| |map=Kanto Mt Moon Map.png | | |map=Kanto Mt Moon Map.png |
| }} | | }} |
|
| |
|
| '''Mt. Moon''' (Japanese: '''オツキミやま''' or '''おつきみやま''' ''Mt. Otsukimi'') is a mountain located in northern [[Kanto]], between [[Pewter City]] in the west and [[Cerulean City]] in the east. Climbing does not seem to be possible; to get past it, travelers always need to travel through the caves. | | '''Mt. Moon''' (Japanese: '''オツキミやま''' or '''おつきみやま''' ''Mt. Otsukimi'') is a mountain located in northern [[Kanto]], between [[Pewter City]] in the west and [[Cerulean City]] in the east. It also provides access to [[Mt. Moon Square]] in Generations {{gen|II}} and {{gen|IV}}. Climbing does not seem to be possible; to get past it, travelers always need to travel through the caves. |
|
| |
|
| Mt. Moon is known for being one of the few places where {{pkmn2|wild}} {{p|Clefairy}} can be found and for its frequent meteor falls. The shards of meteorites that fall here become {{evostone|Moon Stone}}s, which is why its name is ''Mt. Moon''. The mountain is also known for being home to Pokémon [[Fossil]]s. [[Brock]] digs for Fossils here in his spare time. | | Mt. Moon is known for being one of the few places where {{pkmn2|wild}} {{p|Clefairy}} can be found and for its frequent meteor falls. The shards of meteorites that fall here become [[Moon Stone]]s, which is why its name is ''Mt. Moon''. The mountain is also known for being home to Pokémon [[Fossil]]s. [[Brock]] digs for Fossils here in his spare time. |
|
| |
|
| ==Geography== | | ==Geography== |
| ===Generation I=== | | ===Generation I=== |
| In the [[Generation I]] games, Mt. Moon is a large cave with many floors and connectors. The interior of the mountain is comprised of caves spanning three separate floors. Being the first cave that the {{player}} will come across with, Mt. Moon has a very long and complex structure. The first floor contains several ordinary {{pkmn|Trainer}}s, while the basement floor contains {{tc|Team Rocket Grunt|members of Team Rocket}} who are trying to steal [[Fossil]]s from Mt. Moon to market them for money. On the player's way out to [[Cerulean City]], the player will find two Fossils, the [[Dome and Helix Fossils|Dome Fossil]] and the [[Dome and Helix Fossils|Helix Fossil]] that a {{tc|Super Nerd}} claims to have found first. After being defeated in {{pkmn|battle}}, the Super Nerd lets the player choose one of the Fossils while he will take the other one. In {{game|Yellow}}, after the player obtains one of the Fossils, [[Jessie]] and [[James]] will appear for the first time and battle the player. However, they are not referred to as such in-game, sharing their [[Trainer class]] with that of ordinary [[Team Rocket]] Grunts, which are called '''Rocket''' (Japanese: '''ロケットだんいん''' ''Team Rocket Member'') in this [[generation]]. | | In the [[Generation I]] games, Mt. Moon's interior is a large cave spanning three floors. Being the first cave that the {{player}} will come across with, Mt. Moon has a very long and complex structure. The first floor contains several ordinary {{pkmn|Trainer}}s, while the basement floor contains {{tc|Team Rocket Grunt|members of Team Rocket}} who are trying to steal [[Fossil]]s from Mt. Moon to market them for money. On the player's way out to [[Cerulean City]], the player will find two Fossils, the [[Dome and Helix Fossils|Dome Fossil]] and the [[Dome and Helix Fossils|Helix Fossil]] that a {{tc|Super Nerd}} claims to have found first. After being defeated in {{pkmn|battle}}, the Super Nerd lets the player choose one of the Fossils while he will take the other one. In {{game|Yellow}}, after the player obtains one of the Fossils, [[Jessie]] and [[James]] will appear for the first time and battle the player. However, they are not referred to as such in-game, sharing their [[Trainer class]] with that of ordinary [[Team Rocket]] Grunts, which are called '''Rocket''' (Japanese: '''ロケットだんいん''' ''Team Rocket Member'') in this [[generation]]. |
|
| |
|
| Players will first encounter {{pkmn2|wild}} {{p|Clefairy}} here at Mt. Moon. | | Players will first encounter {{pkmn2|wild}} {{p|Clefairy}} here at Mt. Moon. |
| Line 28: |
Line 28: |
| When entering through the [[Pewter City]] entrance, there are two possible paths: one in the eastern direction and another one in the southern direction. By traveling south and then east, the [[Cerulean City]] entrance can be found. However, by traveling east from the Pewter City entrance, the player will end up at the northern side of Mt. Moon, where [[Mt. Moon Square]], its summit, is located. By traveling south in Mt. Moon Square, and entering the southern cavern, there will be a [[ledge]] which can be jumped to instantly access the Cerulean City entrance. | | When entering through the [[Pewter City]] entrance, there are two possible paths: one in the eastern direction and another one in the southern direction. By traveling south and then east, the [[Cerulean City]] entrance can be found. However, by traveling east from the Pewter City entrance, the player will end up at the northern side of Mt. Moon, where [[Mt. Moon Square]], its summit, is located. By traveling south in Mt. Moon Square, and entering the southern cavern, there will be a [[ledge]] which can be jumped to instantly access the Cerulean City entrance. |
|
| |
|
| Mt. Moon Square is an area in the heights of Mt. Moon. On {{DL|Days of the week|Monday}} [[Time|nights]], two {{p|Clefairy}} will dance and pray to a large {{evostone|Moon Stone}} in the square. By interrupting the dance and breaking the stone using {{m|Rock Smash}}, {{pkmn|Trainer}}s can always find a Moon Stone below the rock. There is also a small shop here that sells a variety of goods. | | Mt. Moon Square is an area in the heights of Mt. Moon. On {{DL|Days of the week|Monday}} [[Time|nights]], two {{p|Clefairy}} will dance and pray to a large [[Moon Stone]] in the square. By interrupting the dance and breaking the stone using {{m|Rock Smash}}, {{pkmn|Trainer}}s can always find a Moon Stone below the rock. There is also a small shop here that sells a variety of goods. |
|
| |
|
| ===Generation III=== | | ===Generation III=== |
| Line 42: |
Line 42: |
| ==Items== | | ==Items== |
| {{itlisth|mountain}} | | {{itlisth|mountain}} |
| {{Itemlist|Ether|On a rock in the room with [[TM01]] ''(hidden)''|R=yes|B=yes|Y=yes|display={{DL|Ether|Ether}}}} | | {{Itemlist|TM Water|1F, near the southwest corner of the map|R=yes|B=yes|Y=yes|display={{TM|12|Water Gun}}}} |
| {{Itemlist|HP Up|In the basement room, which is reachable from the first ladder found on 1F|R=yes|B=yes|Y=yes|display={{DL|Vitamin|HP Up}}}} | | {{Itemlist|TM Grass|1F, southeast of {{tc|Bug Catcher}} Kent|FR=yes|LG=yes|display={{TM|09|Bullet Seed}}}} |
| | {{Itemlist|Potion| |
| | * 1F, to the far northwest of TM12 |
| | * 1F, southwest of the {{tc|Super Nerd}}|R=yes|B=yes|Y=yes|display={{DL|Potion|Potion}} ×2}} |
| | {{Itemlist|Paralyze Heal|1F, northwest of {{tc|Bug Catcher}} Kent|FR=yes|LG=yes|display={{DL|Status condition healing item|Paralyze Heal|Parlyz Heal}}}} |
| | {{Itemlist|HP Up|B2F, on a platform to the far east of a {{tc|Team Rocket Grunt}} in a closed-off room accessible from the easternmost ladder on 1F|R=yes|B=yes|Y=yes|display={{DL|Vitamin|HP Up}}}} |
| | {{Itemlist|TinyMushroom| |
| | * B1F, down the easternmost ladder on 1F, on the second easternmost of the four rocks lined up horizontally ''(hidden, [[Item#Recurring items|reappears occasionally]])'' |
| | * B1F, down the ladder between the other two ladders on 1F, on the rock in the northeast corner ''(hidden)'' |
| | * B1F, up the ladder in the northwest corner of B2F, on a rock in the northeast corner ''(hidden)''|FR=yes|LG=yes|display={{DL|Valuable item|Tiny Mushroom|TinyMushroom}} ×3}} |
| | {{Itemlist|Star Piece|B2F, on a platform to the far east of a {{tc|Team Rocket Grunt}} in a closed-off room accessible from the easternmost ladder on 1F|FR=yes|LG=yes|display={{DL|Valuable item|Star Piece}}}} |
| | {{Itemlist|Potion|1F, northwest of {{tc|Super Nerd}} Jovan|FR=yes|LG=yes|display={{DL|Potion|Potion}}}} |
| | {{Itemlist|Rare Candy|1F, near the southeast corner of the map|R=yes|B=yes|Y=yes|FR=yes|LG=yes|display={{DL|Vitamin|Rare Candy}}}} |
| | {{Itemlist|Escape Rope|1F, far northeast of the Rare Candy|R=yes|B=yes|Y=yes|FR=yes|LG=yes}} |
| | {{Itemlist|TM Normal|B2F, on a platform north of a {{tc|Team Rocket Grunt}} in a closed-off room accessible from the ladder between the other two ladders on 1F|R=yes|B=yes|Y=yes|display={{TM|01|Mega Punch}}}} |
| | {{Itemlist|TM Dark|B2F, on a platform north of a {{tc|Team Rocket Grunt}} in a closed-off room accessible from the ladder between the other two ladders on 1F|FR=yes|LG=yes|display={{TM|46|Thief}}}} |
| | {{Itemlist|Ether|B2F, on the rock northeast of a {{tc|Team Rocket Grunt}} in a closed-off room accessible from the ladder between the other two ladders on 1F ''(hidden)''|R=yes|B=yes|Y=yes|FR=yes|LG=yes}} |
| | {{Itemlist|Moon Stone| |
| | * 1F, in the northwest corner of the map |
| | * B2F, on a white wall tile at the end of a path southeast of the stairs that lead to the [[Fossil]]s ''(hidden)''|R=yes|B=yes|Y=yes|display=[[Moon Stone]] ×2}} |
| {{Itemlist|Moon Stone| | | {{Itemlist|Moon Stone| |
| * On the northwest corner of the first floor | | * 1F, one square east of the northwest corner of the map |
| * On a white wall tile southeast of the stairs that lead to the [[Fossil]]s ''(hidden)''|R=yes|B=yes|Y=yes|display={{evostone|Moon Stone}} ×2}} | | * B2F, on a rock southeast of {{tc|Super Nerd}} Miguel, beside the platform ''(hidden)''|FR=yes|LG=yes|display=[[Moon Stone]] ×2}} |
| {{Itemlist|Potion| | | {{Itemlist|Revive|B2F, north of the ladder in the center of the map that leads to B1F|FR=yes|LG=yes|display={{DL|Revive|Revive}}}} |
| * In the room west of the entrance
| | {{Itemlist|Dome Fossil|B2F, choice between this or the Helix Fossil after defeating the {{tc|Super Nerd}}|R=yes|B=yes|Y=yes|FR=yes|LG=yes|display=[[Dome and Helix Fossils|Dome Fossil]]}} |
| * On the other side of the wall east of the entrance|R=yes|B=yes|Y=yes|display={{DL|Potion|Potion}} ×2}}
| | {{Itemlist|Helix Fossil|B2F, choice between this or the Dome Fossil after defeating the {{tc|Super Nerd}}|R=yes|B=yes|Y=yes|FR=yes|LG=yes|display=[[Dome and Helix Fossils|Helix Fossil]]}} |
| {{Itemlist|TM Normal|In the basement room, which is reachable from the second ladder found on 1F|R=yes|B=yes|Y=yes|display={{TM|01|Mega Punch}}}} | | {{Itemlist|Antidote|B2F, southwest of the ladder near the northwest corner of the map|FR=yes|LG=yes|display={{DL|Status condition healing item|Antidote}}}} |
| {{Itemlist|TM Water|To the west of the {{rt|3|Kanto}} entrance|R=yes|B=yes|Y=yes|display={{TM|12|Water Gun}}}} | |
| {{Itemlist|Antidote|Next to the ladder west of [[Fossil]]s|FR=yes|LG=yes|display={{DL|Status condition healing item|Antidote}}}} | |
| {{Itemlist|Big Mushroom| | | {{Itemlist|Big Mushroom| |
| * Two are found in the adjacent rocks down the first ladder, which is reachable from 1F ''(hidden)'' | | * B1F, down the easternmost ladder on 1F, on the two faceable rocks northwest of the ladder that leads to B2F (×2) ''(hidden)'' (post-game) |
| * In a rock down the third ladder on 1F''(hidden)''|FR=yes|LG=yes|display={{DL|Valuable item|Big Mushroom}} ×3}} | | * B1F, down the westernmost ladder on 1F, on the southernmost most rock ''(hidden)'' (post-game)|FR=yes|LG=yes|display={{DL|Valuable item|Big Mushroom}} ×3}} |
| {{Itemlist|Ether|To the right of a {{tc|Team Rocket Grunt}} in closed-off room ''(hidden)''|FR=yes|LG=yes|display={{DL|Ether|Ether}}}} | | {{Itemlist|Revive|On a rock southeast of the northern ladder ''(hidden)''|HG=yes|SS=yes|display={{DL|Revive|Revive}}}} |
| {{Itemlist|Moon Stone| | | {{itlistfoot|mountain}} |
| * Under a rock near {{tc|Super Nerd}} Miguel ''(hidden)''
| | |
| * To the north of a {{tc|Hiker}} on 1F|FR=yes|LG=yes|display={{evostone|Moon Stone}} ×2}}
| | ===Mt. Moon Square=== |
| {{Itemlist|Parlyz Heal|To the northwest of {{tc|Bug Catcher}} Kent on 1F|FR=yes|LG=yes|display={{DL|Status condition healing item|Paralyze Heal|Parlyz Heal}}}}
| | {{Itlisth|mountain}} |
| {{Itemlist|Potion|Near {{tc|Super Nerd}} Jovan on 1F|FR=yes|LG=yes|display={{DL|Potion|Potion}}}}
| | {{Itemlist|Moon Stone|Under a rock on {{DL|Days of the week|Monday}} nights ''(hidden)'' (requires {{m|Rock Smash}})|G=yes|S=yes|C=yes}} |
| {{Itemlist|Revive|To the north of the ladder leading into B2F|FR=yes|LG=yes|display={{DL|Revive|Revive}}}} | | {{Itemlist|Moon Stone|Dropped by a {{p|Clefairy}} on {{DL|Days of the week|Monday}} nights near the pond|HG=yes|SS=yes}} |
| {{Itemlist|Star Piece|Near the {{tc|Team Rocket Grunt}} in a closed-off room on B2F|FR=yes|LG=yes|display={{DL|Valuable item|Star Piece}}}} | | {{Itemlist|Max Revive|Between the trees to the east of the shop ''(hidden)''|HG=yes|SS=yes|display={{DL|Revive|Max Revive}}}} |
| {{Itemlist|TinyMushroom|
| |
| * In a rock down the first ladder on 1F ''(hidden)''
| |
| * In a rock down the second ladder on 1F ''(hidden)''
| |
| * In a rock just before the exit ''(hidden)''|FR=yes|LG=yes|display={{DL|Valuable item|TinyMushroom}} ×3}}
| |
| {{Itemlist|TM Grass|To the west of the {{rt|3|Kanto}} entrance on 1F|FR=yes|LG=yes|display={{TM|09|Bullet Seed}}}}
| |
| {{Itemlist|TM Dark|In another closed-off room with a {{tc|Team Rocket Grunt}}|FR=yes|LG=yes|display={{TM|46|Thief}}}} | |
| {{Itemlist|Dome Fossil|One [[Fossil]] chosen after defeating the {{tc|Super Nerd}}|R=yes|B=yes|Y=yes|FR=yes|LG=yes|display=[[Dome and Helix Fossils|Dome Fossil]]}}
| |
| {{Itemlist|Escape Rope|To the east of {{tc|Super Nerd}} Jovan, on the east wall, north of the {{DL|Vitamin|Rare Candy}} on 1F|R=yes|B=yes|Y=yes|FR=yes|LG=yes}}
| |
| {{Itemlist|Helix Fossil|One [[Fossil]] chosen after defeating the Super Nerd|R=yes|B=yes|Y=yes|FR=yes|LG=yes|display=[[Dome and Helix Fossils|Helix Fossil]]}}
| |
| {{Itemlist|Rare Candy|On the southeast corner of the first floor, east of {{tc|Super Nerd}} Jovan on 1F|R=yes|B=yes|Y=yes|FR=yes|LG=yes|display={{DL|Vitamin|Rare Candy}}}} | |
| {{Itemlist|Revive|In a rock southeast of the northern ladder ''(hidden)''|HG=yes|SS=yes|display={{DL|Revive|Revive}}}}
| |
| {{itlistfoot|mountain}} | | {{itlistfoot|mountain}} |
|
| |
|
| Line 823: |
Line 829: |
| Mt. Moon seems bigger in the {{pkmn|anime}} than it does in the {{pkmn|games}}, being clearly seen from as far away as [[Pallet Town]]. | | Mt. Moon seems bigger in the {{pkmn|anime}} than it does in the {{pkmn|games}}, being clearly seen from as far away as [[Pallet Town]]. |
|
| |
|
| {{Ash}} and {{ashfr}} have visited Mt. Moon twice. Once was in ''[[EP006|Clefairy and the Moon Stone]]'', when they helped [[Seymour]] protect the {{p|Clefairy}} from {{TRT}} and watched many of them evolve into {{p|Clefable}} due to exposure to falling {{evostone|Moon Stone}}s. Also, it was here in this episode that {{an|Brock}} captured a {{TP|Brock|Zubat}}. | | {{Ash}} and {{ashfr}} have visited Mt. Moon twice. Once was in ''[[EP006|Clefairy and the Moon Stone]]'', when Ash, {{an|Misty}} and {{an|Brock}} helped [[Seymour]] protect the {{p|Clefairy}} from {{TRT}} and watched many of them evolve into {{p|Clefable}} due to exposure to falling [[Moon Stone]]s. Also, it was here in this episode that Brock captured a {{TP|Brock|Zubat}}. |
| [[File:Super Nerd PO.png|thumb|left|200px|Mt. Moon in Pokémon Origins]]
| | |
| Later, Mt. Moon was also mentioned in ''[[EP009|The School of Hard Knocks]]'', when Brock pulled out a bottle of Mt. Moon spring water from his [[Bag]]. | | Later, Mt. Moon was also mentioned in ''[[EP009|The School of Hard Knocks]]'', when Brock pulled out a bottle of Mt. Moon spring water from his [[Bag]]. |
|
| |
|
| In ''[[AG134|A Real Cleffa-Hanger]]'', they returned to Mt. Moon, encountering the Clefairy and {{p|Clefable}} again, and helping the [[Species|Fairy]] {{OBP|Pokémon|species}} reunite with a young {{p|Cleffa}}. | | In ''[[AG134|A Real Cleffa-Hanger]]'', they returned to Mt. Moon with {{an|May}} and [[Max]], encountering the Clefairy and {{p|Clefable}} again, and helping the [[Pokémon category|Fairy]] {{OBP|Pokémon|species}} reunite with a young {{p|Cleffa}}. |
|
| |
|
| In addition to the Clefairy family and {{p|Zubat}}, {{pkmn2|wild}} {{p|Paras}} and {{p|Sandshrew}} also reside here. | | In addition to the Clefairy family and {{p|Zubat}}, {{pkmn2|wild}} {{p|Paras}} and {{p|Sandshrew}} also reside here. |
|
| |
|
| ===In Pokémon Origins=== | | ===In Pokémon Origins=== |
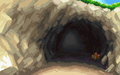
| Mt. Moon was briefly seen in the [[Pokémon Origins]] episode ''[[PO02|File 2 - Cubone]]'', as {{OBP|Red|Origins}} recalled battling a [[Fossil]]-crazy {{tc|Super Nerd}} there. | | [[File:Super Nerd PO.png|thumb|left|200px|Mt. Moon in Pokémon Origins]] |
| | Mt. Moon was briefly seen in the [[Pokémon Origins]] episode ''[[PO02|File 2: Cubone]]'', as {{OBP|Red|Origins}} recalled battling a [[Fossil]]-crazy {{tc|Super Nerd}} there. |
| {{-}} | | {{-}} |
|
| |
|
| ==In the manga== | | ==In the manga== |
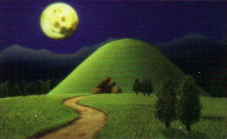
| | [[File:Mt Moon Adventures.png|thumb|200px|Mt. Moon in [[Pokémon Adventures]]]] |
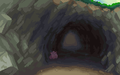
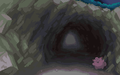
| | [[File:Mt Moon EToP.png|thumb|left|200px|Mt. Moon in [[The Electric Tale of Pikachu]]]] |
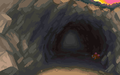
| ===In the Pokémon Adventures manga=== | | ===In the Pokémon Adventures manga=== |
| [[File:Mt Moon Adventures.png|thumb|Mt. Moon as it appears in [[Pokémon Adventures]]]] | | Mt. Moon is first visited in ''[[PS007|Raging Rhydon]]''; however, it is first mentioned in the previous round, ''[[PS006|Gyarados Splashes In!]]'' by {{adv|Professor Oak}}. The mountain consists of several interconnected caves, which are the home of {{pkmn2|wild}} {{OBP|Pokémon|species}} like {{p|Zubat}}, {{p|Diglett}} and {{p|Geodude}}. Its importance resides in being the place where the [[Moon Stone]] can be found. For this reason, {{adv|Red}} and [[Misty]] enter Mt. Moon. Here is where the first confrontation between Red and {{tc|Team Rocket Grunt}}s takes place. [[Pika]] battled [[Koga]]'s {{p|Rhyhorn}}, but Koga injected Rhyhorn with a syringe which made it [[Evolution|evolve]] into {{p|Rhydon}}. Pika hit a rock from the ceiling which sealed [[Team Rocket]] in. Mt. Moon is also where Red battles [[Bruno]] in the beginning of the {{chap|Yellow}}. |
|
| |
|
| Mt. Moon is first visited in the {{chap|Red, Green & Blue}} in ''[[PS007|Raging Rhydon]]''; however, it is first mentioned in the previous round, ''[[PS006|Gyarados Splashes In!]]'' by {{adv|Professor Oak}}. The mountain consists of several interconnected caves, which are the home of {{pkmn2|wild}} {{OBP|Pokémon|species}} like {{p|Zubat}}, {{p|Diglett}} and {{p|Geodude}}. Its importance resides in being the place where the {{evostone|Moon Stone}} can be found. For this reason, {{adv|Red}} and [[Misty#In the Pokémon Adventures manga|Misty]] enter Mt. Moon. Here is where the first confrontation between Red and {{tc|Team Rocket Grunt}}s takes place. [[Pika]] battled [[Koga#In the Pokémon Adventures manga|Koga]]'s {{p|Rhyhorn}}, but Koga injected Rhyhorn with a syringe which made it [[Evolution|evolve]] into {{p|Rhydon}}. Pika hit a rock from the ceiling which sealed [[Team Rocket]] in. Mt. Moon is also where Red battles [[Bruno]] in the beginning of the {{chap|Yellow}}. | | ===In The Electric Tale of Pikachu manga=== |
| | Mt. Moon appears in the third chapter of [[The Electric Tale of Pikachu]], ''[[ET03|Clefairy Tale]]'', where {{OBP|Ash Ketchum|EToP|Ash}} tries to catch a {{p|Clefairy}} in the Mt. Moon area. After three agonizing weeks in the wilderness, Ash and {{AP|Pikachu}} accidentally follow a Clefairy into an occupied {{p|Onix}} nest. Ash and Pikachu are driven into the maze of tunnels the Onix has created. After rejecting using {{AP|Fearow}}, {{p|Beedrill}}, or Pikachu, Ash decides to use his {{AP|Butterfree}}. Butterfree uses {{m|Psychic}}, which weakens Onix, but also {{DL|Status condition|Volatile status|confuses}} it — causing it to thrash around and cause a cave-in that buries Pikachu and Ash under a pile of rocks. After escaping, he meets {{an|Professor Oak}} and [[Bill]], who have been studying a group of Clefairy living in the Mt. Moon area. |
| {{-}} | | {{-}} |
| ===In The Electric Tale of Pikachu manga===
| |
| [[File:Mt Moon EToP.png|thumb|200px|Mt. Moon as it appears in [[The Electric Tale of Pikachu]]]]
| |
|
| |
|
| Mt. Moon appears in the third chapter of [[The Electric Tale of Pikachu]], ''[[ET03|Clefairy Tale]]'', where {{Ash}} tries to catch a {{p|Clefairy}} in the Mt. Moon area. After three agonizing weeks in the wilderness, Ash and {{AP|Pikachu}} accidentally follow a Clefairy into an occupied {{p|Onix}} nest. Ash and Pikachu are driven into the maze of tunnels the Onix has created. After rejecting using {{AP|Fearow}}, {{p|Beedrill}}, or Pikachu, Ash decides to use his {{AP|Butterfree}}. Butterfree uses {{m|Psychic}}, which weakens Onix, but also {{DL|Status condition|Volatile status|confuses}} it — causing it to thrash around and cause a cave-in that buries Pikachu and Ash under a pile of rocks. After escaping, he meets [[Professor Oak]] and [[Bill]], who have been studying a group of Clefairy living in the Mt. Moon area.
| |
| {{-}}
| |
| ==In the TCG== | | ==In the TCG== |
| [[File:TCG Mount Moon.png|thumb|Mt. Moon as depicted in the {{pkmn|Trading Card Game|TCG}}]] | | [[File:TCG Mount Moon.png|thumb|Mt. Moon as depicted in the {{pkmn|Trading Card Game|TCG}}]] |
| Line 859: |
Line 865: |
| ==In other languages== | | ==In other languages== |
| {{langtable|color={{locationcolor/light|mountain}}|bordercolor={{locationcolor/dark|mountain}} | | {{langtable|color={{locationcolor/light|mountain}}|bordercolor={{locationcolor/dark|mountain}} |
| |es_eu=Mt. Moon<br/>Monte Luna{{sup/4|DPPt}} | | |zh_cmn=月見山 ''{{tt|Yuè Jiànshān|Mt. Moon}}'' |
| |de=Mondberg | | |nl=Maanberg |
| |fi=Kuuvuori | | |fi=Kuuvuori |
| |fr_eu=Mont Sélénite | | |fr_eu=Mont Sélénite |
| | |de=Mondberg |
| |it=Monte Luna | | |it=Monte Luna |
| |ko=달맞이산 ''{{tt|Dalmaj-isan|Mt. Moon}}'' | | |ko=달맞이산 ''{{tt|Dalmaj-isan|Mt. Moon}}'' |
| |nl=Maanberg
| |
| |pl=Góra Księżycowa <!---EP006---> | | |pl=Góra Księżycowa <!---EP006---> |
| |zh_cmn=月見山 ''{{tt|Yuè Jiànshān|Mt. Moon}}'' | | |pt_br={{tt|Mt.|Monte}} Lua (anime)<br>Montanha da Lua (manga)<br>Monte Lua (The Official Pokémon Handbook)<br>Monte da Lua (The Official Pokémon Handbook) |
| | |ru=Лунная Года ''Lunnaya Goda'' |
| | |es_eu=Mt. Moon<br/>Monte Luna{{sup/4|DPPt}} |
| | |vi=Núi Otsukimi |
| }} | | }} |
|
| |
|
| Line 885: |
Line 894: |
| [[ja:おつきみやま]] | | [[ja:おつきみやま]] |
| [[pl:Góra Księżycowa]] | | [[pl:Góra Księżycowa]] |
| [[pt:Mt.Moon]]
| |
| [[zh:月见山]] | | [[zh:月见山]] |
| Mt. Moon
|
|
オツキミやま / おつきみやま
Mt. Otsukimi
|
| "Wild Missingno. appeared!"
|
|
|
|
| Map description:
|
A mystical mountain that is known for its frequent meteor falls. The shards of stars that fall here are known as Moon Stones.FRLG
A mountain where a star fell. It now holds a mysterious power.HGSS
|
| Location:
|
Routes 3 and 4
|
| Region:
|
Kanto
|
| Generations:
|
I, II, III, IV
|
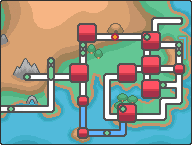
Location of Mt. Moon in Kanto.
|
| Pokémon world locations
|
Mt. Moon (Japanese: オツキミやま or おつきみやま Mt. Otsukimi) is a mountain located in northern Kanto, between Pewter City in the west and Cerulean City in the east. It also provides access to Mt. Moon Square in Generations II and IV. Climbing does not seem to be possible; to get past it, travelers always need to travel through the caves.
Mt. Moon is known for being one of the few places where wild Clefairy can be found and for its frequent meteor falls. The shards of meteorites that fall here become Moon Stones, which is why its name is Mt. Moon. The mountain is also known for being home to Pokémon Fossils. Brock digs for Fossils here in his spare time.
Geography
Generation I
In the Generation I games, Mt. Moon's interior is a large cave spanning three floors. Being the first cave that the player will come across with, Mt. Moon has a very long and complex structure. The first floor contains several ordinary Trainers, while the basement floor contains members of Team Rocket who are trying to steal Fossils from Mt. Moon to market them for money. On the player's way out to Cerulean City, the player will find two Fossils, the Dome Fossil and the Helix Fossil that a Super Nerd claims to have found first. After being defeated in battle, the Super Nerd lets the player choose one of the Fossils while he will take the other one. In Pokémon Yellow, after the player obtains one of the Fossils, Jessie and James will appear for the first time and battle the player. However, they are not referred to as such in-game, sharing their Trainer class with that of ordinary Team Rocket Grunts, which are called Rocket (Japanese: ロケットだんいん Team Rocket Member) in this generation.
Players will first encounter wild Clefairy here at Mt. Moon.
Generation II
In Pokémon Gold, Silver, and Crystal, Mt. Moon has dramatically decreased in size from Pokémon Red, Green, Blue, and Yellow. It now has only one base floor with a couple of connectors. It is also a spot where the player's rival is training near the entrance and he will battle the player for the sixth time during the game.
When entering through the Pewter City entrance, there are two possible paths: one in the eastern direction and another one in the southern direction. By traveling south and then east, the Cerulean City entrance can be found. However, by traveling east from the Pewter City entrance, the player will end up at the northern side of Mt. Moon, where Mt. Moon Square, its summit, is located. By traveling south in Mt. Moon Square, and entering the southern cavern, there will be a ledge which can be jumped to instantly access the Cerulean City entrance.
Mt. Moon Square is an area in the heights of Mt. Moon. On Monday nights, two Clefairy will dance and pray to a large Moon Stone in the square. By interrupting the dance and breaking the stone using Rock Smash, Trainers can always find a Moon Stone below the rock. There is also a small shop here that sells a variety of goods.
Generation III
Mt. Moon's incarnation in Pokémon FireRed and LeafGreen is very similar to the original from the Generation I games. The only major change done for the remakes is the items found within the cave. Another addition is a man who is excavating for Fossils in the north-eastern corner of the first floor. He is a friend of Brock and is a source of one of Brock's Fame Checker entries.
Generation IV
Diamond, Pearl, and Platinum
Although it does not appear in Pokémon Diamond, Pearl, and Platinum, a guest at Hotel Grand Lake by Lake Valor mentions Clefairy dancing under the moon at Mt. Moon.
HeartGold and SoulSilver
Mt. Moon's incarnation in Pokémon HeartGold and SoulSilver is essentially intact from the Generation II games, but with updated graphics enhancing the scenery and depicting its mountainous nature more accurately. The only significant changes are in Mt. Moon Square, where four Clefairy will appear instead of the only two that appear in the Generation II games, and the background music being changed to つながりのどうくつ Union Cave, a Johto theme, from イワヤマトンネル Rock Tunnel, a Kanto theme, which is the background music that plays here in the Generation II games (the latter being itself a remix of おつきみ山のどうくつ Mt. Moon's Cave from the Generation I games).
Items
| Item
|
Location
|
Games
|

|
TM12 (Water Gun)
|
1F, near the southwest corner of the map
|
R B Y
|

|
TM09 (Bullet Seed)
|
1F, southeast of Bug Catcher Kent
|
FR LG
|

|
Potion ×2
|
- 1F, to the far northwest of TM12
- 1F, southwest of the Super Nerd
|
R B Y
|

|
Parlyz Heal
|
1F, northwest of Bug Catcher Kent
|
FR LG
|

|
HP Up
|
B2F, on a platform to the far east of a Team Rocket Grunt in a closed-off room accessible from the easternmost ladder on 1F
|
R B Y
|

|
TinyMushroom ×3
|
- B1F, down the easternmost ladder on 1F, on the second easternmost of the four rocks lined up horizontally (hidden, reappears occasionally)
- B1F, down the ladder between the other two ladders on 1F, on the rock in the northeast corner (hidden)
- B1F, up the ladder in the northwest corner of B2F, on a rock in the northeast corner (hidden)
|
FR LG
|

|
Star Piece
|
B2F, on a platform to the far east of a Team Rocket Grunt in a closed-off room accessible from the easternmost ladder on 1F
|
FR LG
|
|
|
Potion
|
1F, northwest of Super Nerd Jovan
|
FR LG
|

|
Rare Candy
|
1F, near the southeast corner of the map
|
R B Y FR LG
|

|
Escape Rope
|
1F, far northeast of the Rare Candy
|
R B Y FR LG
|

|
TM01 (Mega Punch)
|
B2F, on a platform north of a Team Rocket Grunt in a closed-off room accessible from the ladder between the other two ladders on 1F
|
R B Y
|

|
TM46 (Thief)
|
B2F, on a platform north of a Team Rocket Grunt in a closed-off room accessible from the ladder between the other two ladders on 1F
|
FR LG
|

|
Ether
|
B2F, on the rock northeast of a Team Rocket Grunt in a closed-off room accessible from the ladder between the other two ladders on 1F (hidden)
|
R B Y FR LG
|

|
Moon Stone ×2
|
- 1F, in the northwest corner of the map
- B2F, on a white wall tile at the end of a path southeast of the stairs that lead to the Fossils (hidden)
|
R B Y
|
|
|
Moon Stone ×2
|
- 1F, one square east of the northwest corner of the map
- B2F, on a rock southeast of Super Nerd Miguel, beside the platform (hidden)
|
FR LG
|

|
Revive
|
B2F, north of the ladder in the center of the map that leads to B1F
|
FR LG
|

|
Dome Fossil
|
B2F, choice between this or the Helix Fossil after defeating the Super Nerd
|
R B Y FR LG
|

|
Helix Fossil
|
B2F, choice between this or the Dome Fossil after defeating the Super Nerd
|
R B Y FR LG
|

|
Antidote
|
B2F, southwest of the ladder near the northwest corner of the map
|
FR LG
|

|
Big Mushroom ×3
|
- B1F, down the easternmost ladder on 1F, on the two faceable rocks northwest of the ladder that leads to B2F (×2) (hidden) (post-game)
- B1F, down the westernmost ladder on 1F, on the southernmost most rock (hidden) (post-game)
|
FR LG
|
|
|
Revive
|
On a rock southeast of the northern ladder (hidden)
|
HG SS
|
|
|
Mt. Moon Square
Pokémon
Generation I
1F
| Pokémon
|
Games
|
Location
|
Levels
|
Rate
|
|
|
R
|
B
|
Y
|
|
12
|
4%
|
|
|
R
|
B
|
Y
|
|
8
|
1%
|
|
|
R
|
B
|
Y
|
|
11
|
1%
|
|
|
R
|
B
|
Y
|
|
6-11
|
79%
|
|
|
R
|
B
|
Y
|
|
6-11
|
75%
|
|
|
R
|
B
|
Y
|
|
8
|
5%
|
|
|
R
|
B
|
Y
|
|
8, 10
|
15%
|
|
|
R
|
B
|
Y
|
|
10
|
20%
|
| A colored background means that the Pokémon can be found in this location in the specified game. A white background with a colored letter means that the Pokémon cannot be found here.
|
B1F
| Pokémon
|
Games
|
Location
|
Levels
|
Rate
|
|
|
R
|
B
|
Y
|
|
9
|
4%
|
|
|
R
|
B
|
Y
|
|
10, 12
|
5%
|
|
|
R
|
B
|
Y
|
|
7-11
|
60%
|
|
|
R
|
B
|
Y
|
|
8-11
|
65%
|
|
|
R
|
B
|
Y
|
|
10
|
10%
|
|
|
R
|
B
|
Y
|
|
9, 11
|
10%
|
|
|
R
|
B
|
Y
|
|
7-9
|
26%
|
|
|
R
|
B
|
Y
|
|
10-11
|
20%
|
| A colored background means that the Pokémon can be found in this location in the specified game. A white background with a colored letter means that the Pokémon cannot be found here.
|
B2F
| Pokémon
|
Games
|
Location
|
Levels
|
Rate
|
|
|
R
|
B
|
Y
|
|
10, 12
|
6%
|
|
|
R
|
B
|
Y
|
|
9, 11, 13
|
10%
|
|
|
R
|
B
|
Y
|
|
9-12
|
54%
|
|
|
R
|
B
|
Y
|
|
10-13
|
60%
|
|
|
R
|
B
|
Y
|
|
10, 12
|
15%
|
|
|
R
|
B
|
Y
|
|
13
|
15%
|
|
|
R
|
B
|
Y
|
|
9-10
|
25%
|
|
|
R
|
B
|
Y
|
|
11
|
15%
|
| A colored background means that the Pokémon can be found in this location in the specified game. A white background with a colored letter means that the Pokémon cannot be found here.
|
Generation II
| Pokémon
|
Games
|
Location
|
Levels
|
Rate
|

|

|

|
|
|
G
|
S
|
C
|
|
6
|
30%
|
|
|
G
|
S
|
C
|
|
6-8
|
50%
|
|
|
G
|
S
|
C
|
|
8
|
30%
|
|
|
G
|
S
|
C
|
|
8-10
|
35%
|
|
|
G
|
S
|
C
|
|
8
|
20%
|
|
|
G
|
S
|
C
|
|
8
|
20%
|
20%
|
0%
|
|
|
G
|
S
|
C
|
|
12
|
10%
|
|
|
G
|
S
|
C
|
|
10
|
5%
|
|
|
G
|
S
|
C
|
|
8
|
5%
|
|
|
G
|
S
|
C
|
|
8
|
5%
|
5%
|
0%
|
|
|
G
|
S
|
C
|
|
8-12
|
0%
|
0%
|
25%
|
| A colored background means that the Pokémon can be found in this location in the specified game. A white background with a colored letter means that the Pokémon cannot be found here.
|
Generation III
1F
| Pokémon
|
Games
|
Location
|
Levels
|
Rate
|
|
|
FR
|
LG
|
|
7-10
|
69%
|
|
|
FR
|
LG
|
|
7-9
|
25%
|
|
|
FR
|
LG
|
|
8
|
5%
|
|
|
FR
|
LG
|
|
8
|
1%
|
| A colored background means that the Pokémon can be found in this location in the specified game. A white background with a colored letter means that the Pokémon cannot be found here.
|
B1F
| Pokémon
|
Games
|
Location
|
Levels
|
Rate
|
|
|
FR
|
LG
|
|
5-10
|
100%
|
| A colored background means that the Pokémon can be found in this location in the specified game. A white background with a colored letter means that the Pokémon cannot be found here.
|
B2F
| Pokémon
|
Games
|
Location
|
Levels
|
Rate
|
|
|
FR
|
LG
|
|
8-11
|
49%
|
|
|
FR
|
LG
|
|
9-10
|
30%
|
|
|
FR
|
LG
|
|
10, 12
|
15%
|
|
|
FR
|
LG
|
|
10, 12
|
6%
|
| A colored background means that the Pokémon can be found in this location in the specified game. A white background with a colored letter means that the Pokémon cannot be found here.
|
Generation IV
| Pokémon
|
Games
|
Location
|
Levels
|
Rate
|
|
|
HG
|
SS
|
|
6
|
30%
|
|
|
HG
|
SS
|
|
6-8
|
50%
|
|
|
HG
|
SS
|
|
8
|
30%
|
|
|
HG
|
SS
|
|
6-10
|
35%
|
|
|
HG
|
SS
|
|
8
|
20%
|
|
|
HG
|
SS
|
|
12
|
10%
|
|
|
HG
|
SS
|
|
10
|
5%
|
|
|
HG
|
SS
|
|
8
|
5%
|
| Special Pokémon
|
|
|
HG
|
SS
|
|
8
|
20%
|
|
|
HG
|
SS
|
|
6-8
|
20%
|
|
|
HG
|
SS
|
|
8
|
20%
|
|
|
HG
|
SS
|
|
6-8
|
20%
|
| A colored background means that the Pokémon can be found in this location in the specified game. A white background with a colored letter means that the Pokémon cannot be found here.
|
Trainers
Generation I
1F
B2F

|
|
Reward: $420
|
|
|
|
|
|
Generation II
 If the player chose Chikorita:

|
|
Reward: $4500
|
|
|
|
|
|
 If the player chose Cyndaquil:
|
|
|
Reward: $4500
|
|
|
|
|
|
 If the player chose Totodile:
|
|
|
Reward: $4500
|
|
|
|
|
|
Generation III
1F
| Trainer
|
Pokémon
|
|
|
|
|
|
|
|

|
|
|
Lass Iris
ナホ Naho
Reward: $224
|
|
|
|
|
|
|
|
|
|
|
|
|
|
|
|
|
|
|
|
|
|
|
|
|
|
Lass Miriam
ルリ Ruri
Reward: $176
|
|
|
|
|
|
|
|
|
|
|
|
|
|
|
|
|

|
|
|
Hiker Marcos
カツト Katsuto
Reward: $360
|
|
|
|
|
|
|
|
| Trainers with a Vs. Seeker by their names, when alerted for a rematch using the item, may use higher-level Pokémon.
|
B2F
| Trainer
|
Pokémon
|
|
|
|
|
|
|
|
|
|
|
|
|
|
|
|
|
|
|
|
|
|
|
|
|
|
|
|
|
|
|
|
|
|
|
|
|
|
| Trainers with a Vs. Seeker by their names, when alerted for a rematch using the item, may use higher-level Pokémon.
|
Generation IV
If the player chose Chikorita:

|
|
Reward: $3200
|
|
|
|
|
|
If the player chose Cyndaquil:
|
|
|
Reward: $3200
|
|
|
|
|
|
If the player chose Totodile:
|
|
|
Reward: $3200
|
|
|
|
|
|
Layout
In the side games
In Pokémon Pinball
Mt. Moon appears on the Blue Field as Area 1. Catchable Pokémon include Rattata, Ekans, Clefairy, Zubat, Paras, and Geodude.
In the anime
In the main series
Mt. Moon seems bigger in the anime than it does in the games, being clearly seen from as far away as Pallet Town.
Ash and his friends have visited Mt. Moon twice. Once was in Clefairy and the Moon Stone, when Ash, Misty and Brock helped Seymour protect the Clefairy from Team Rocket and watched many of them evolve into Clefable due to exposure to falling Moon Stones. Also, it was here in this episode that Brock captured a Zubat.
Later, Mt. Moon was also mentioned in The School of Hard Knocks, when Brock pulled out a bottle of Mt. Moon spring water from his Bag.
In A Real Cleffa-Hanger, they returned to Mt. Moon with May and Max, encountering the Clefairy and Clefable again, and helping the Fairy Pokémon reunite with a young Cleffa.
In addition to the Clefairy family and Zubat, wild Paras and Sandshrew also reside here.
In Pokémon Origins
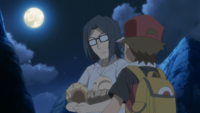
Mt. Moon in Pokémon Origins
Mt. Moon was briefly seen in the Pokémon Origins episode File 2: Cubone, as Red recalled battling a Fossil-crazy Super Nerd there.
In the manga
In the Pokémon Adventures manga
Mt. Moon is first visited in Raging Rhydon; however, it is first mentioned in the previous round, Gyarados Splashes In! by Professor Oak. The mountain consists of several interconnected caves, which are the home of wild Pokémon like Zubat, Diglett and Geodude. Its importance resides in being the place where the Moon Stone can be found. For this reason, Red and Misty enter Mt. Moon. Here is where the first confrontation between Red and Team Rocket Grunts takes place. Pika battled Koga's Rhyhorn, but Koga injected Rhyhorn with a syringe which made it evolve into Rhydon. Pika hit a rock from the ceiling which sealed Team Rocket in. Mt. Moon is also where Red battles Bruno in the beginning of the Yellow arc.
In The Electric Tale of Pikachu manga
Mt. Moon appears in the third chapter of The Electric Tale of Pikachu, Clefairy Tale, where Ash tries to catch a Clefairy in the Mt. Moon area. After three agonizing weeks in the wilderness, Ash and Pikachu accidentally follow a Clefairy into an occupied Onix nest. Ash and Pikachu are driven into the maze of tunnels the Onix has created. After rejecting using Fearow, Beedrill, or Pikachu, Ash decides to use his Butterfree. Butterfree uses Psychic, which weakens Onix, but also confuses it — causing it to thrash around and cause a cave-in that buries Pikachu and Ash under a pile of rocks. After escaping, he meets Professor Oak and Bill, who have been studying a group of Clefairy living in the Mt. Moon area.
In the TCG
Mt. Moon as depicted in the
TCGIn addition to its presence as a card, Mt. Moon has been featured in Area 3 of Extended Sheet 1 of the Vending Machine cards. The Pokémon shown in this area are Geodude, Paras, Clefairy, and Zubat.
This listing is of cards mentioning and/or featuring Mt. Moon in the Pokémon Trading Card Game.
In other languages


