Lumiose City: Difference between revisions
m (→Prism Tower) |
m (→Name origin) |
||
| (28 intermediate revisions by 14 users not shown) | |||
| Line 30: | Line 30: | ||
|colorlight=EF4135}} | |colorlight=EF4135}} | ||
'''Lumiose City''' (Japanese: '''ミアレシティ''' ''Miare City'') is a large city nestled in the north-central part of the [[Kalos]] [[region]]. | '''Lumiose City''' (Japanese: '''ミアレシティ''' ''Miare City'') is a large city nestled in the north-central part of the [[Kalos]] [[region]]. It is a prominent central hub of the region and is the most populous city in the Pokémon world. | ||
Tourism is a major industry of the city due its famous landmarks, such as the [[Lumiose Gym|Prism Tower]], which serves as the city's symbol, and the [[Lumiose Museum]]. A wide variety of shops, cafés, and restaurants are spread throughout the whole city and are popular with both the locals and tourists. | |||
The outer portion of the city is lined by tall office buildings and wide brick and cobblestone boulevards, while the avenues of the inner portion are lined by smaller Parisian-style buildings. The wide roadways throughout the entire city afford safe and easy passage for both automobile and {{p|Gogoat}} traffic. A large canal also runs diagonally through the city. | |||
Lumiose City has five gates connecting it to outside routes. In the southeast is the {{rt|4|Kalos}} Gate, in the southwest the {{rt|5|Kalos}} Gate, in the northwest the {{rt|13|Kalos}} Gate, in the north the {{rt|14|Kalos}} Gate, and in the northeast the {{rt|16|Kalos}} Gate. | |||
==Places of interest== | ==Places of interest== | ||
[[File:Lumiose City artwork.png|thumb|Lumiose City from above]] | [[File:Lumiose City artwork.png|thumb|Lumiose City from above]] | ||
===Layout=== | |||
Many small shops and cafés line the many streets and avenues of Lumiose City. This is a brief guide to the city's layout and where all of its establishments are located. | |||
The city is basically shaped like a spoked wheel. The outside "wheel" is split into North and South Boulevards, while the spokes are divided among several avenues and plazas. The boulevards and avenues are lined with the city's many establishments, while the plazas are primarily open gathering spaces, with an occasional establishment or two on the outskirts. The center hub is devoted to a wide, open area with Prism Tower at its center. | |||
The boulevards are laid out as follows, moving along the street in a clockwise direction: | |||
;South Boulevard | |||
{| | |||
|- | |||
! Outer || Inner | |||
|- | |||
| | |||
| | |||
* ''To dead-end alley''{{tt|*|Blocked off until the player enters the Hall of Fame}} | |||
|- | |||
| | |||
| | |||
* [[Lumiose City restaurants|Restaurant Le Nah]] | |||
|- | |||
| | |||
* {{rt|4|Kalos}} Gate | |||
| | |||
* ''To Vert Plaza'' | |||
|- | |||
| | |||
* Building | |||
| | |||
* Café Introversion | |||
|- | |||
| | |||
* {{DL|Lumiose City|Sycamore Pokémon Lab}} | |||
| | |||
* ''To Vernal Avenue'' | |||
|- | |||
| | |||
* {{DL|Lumiose City|PR Video Studio}} | |||
| | |||
* [[Pokémon Center]] | |||
|- | |||
| | |||
* {{rt|5|Kalos}} Gate | |||
| | |||
* ''To Bleu Plaza'' | |||
|- | |||
| | |||
| | |||
* {{DL|Lumiose City|Coiffure Clips}} | |||
|- | |||
| | |||
| | |||
* Café Soleil | |||
|- | |||
| | |||
* Building | |||
| | |||
* Shutterbug Café | |||
|- | |||
| | |||
| | |||
* ''To Estival Avenue'' | |||
|- | |||
| | |||
* Building | |||
|}{{-}} | |||
;North Boulevard | |||
{| | |||
! Outer || Inner | |||
|- | |||
| | |||
* {{rt|13|Kalos}} Gate | |||
| | |||
* ''To Magenta Plaza'' | |||
|- | |||
| | |||
| | |||
* ''To dead-end alley'' | |||
|- | |||
| | |||
* Building | |||
| | |||
* Café Triste | |||
|- | |||
| | |||
* {{DL|Lumiose City|Galette Stand}} | |||
| | |||
* ''To Autumnal Avenue'' | |||
|- | |||
| | |||
* Building | |||
| | |||
* ''To dead-end alley'' | |||
|- | |||
| | |||
* {{rt|14|Kalos}} Gate | |||
| | |||
* ''To Rouge Plaza'' | |||
|- | |||
| | |||
| | |||
* [[Pokémon Center]] | |||
|- | |||
| | |||
* {{DL|Lumiose City|Lumiose Museum}} | |||
|- | |||
| | |||
* {{DL|Lumiose City|Hotel Richissime}} | |||
| | |||
* ''To Hibernal Avenue'' | |||
|- | |||
| | |||
* Building | |||
| | |||
* Café Ultimo | |||
|- | |||
| | |||
| | |||
* Café Action | |||
|- | |||
| | |||
* {{rt|16|Kalos}} Gate | |||
| | |||
* ''To Jaune Plaza'' | |||
|- | |||
| | |||
* {{DL|Lumiose City|Battle Institute}} | |||
|- | |||
| | |||
| | |||
* Café Bataille | |||
|- | |||
| | |||
* {{DL|Lumiose City|Lumiose Station}} | |||
|- | |||
| | |||
| | |||
* ''To dead-end alley'' | |||
|- | |||
| | |||
| | |||
* ''To unnamed street'' | |||
|}{{-}} | |||
All of the avenues and plazas are connected by a continuous ring near the hub, but occasionally there will also be an alleyway connecting two of the spokes farther out from the hub. A group of randomly battlable Trainers also lurk around this inner part of the city. | |||
The city's spokes are laid out in the order given below, moving through them in a clockwise direction starting from the first spoke connected to South Boulevard. The left and right sides referred to below presume the player is facing out from the hub. | |||
; Vert Plaza | |||
{| | |||
| | |||
* Café Cyclone | |||
|} | |||
; Vernal Avenue | |||
{| | |||
! Left || Right | |||
|- | |||
| | |||
| | |||
* {{DL|Lumiose City|Stone Emporium}} | |||
|- | |||
| | |||
* {{DL|Lumiose City|Boutique Couture}} | |||
| | |||
* {{DL|Lumiose City|Herboriste}} | |||
|- | |||
| | |||
* Café Classe | |||
| | |||
* {{DL|Lumiose City|Friseur Furfrou}} | |||
|- | |||
| | |||
| | |||
* Café Woof | |||
|} | |||
; Bleu Plaza | |||
; Estival Avenue | |||
{| | |||
! Left || Right | |||
|- | |||
| | |||
* {{DL|Lumiose City|Loto-ID Center}} | |||
| | |||
* Café Rouleau | |||
|- | |||
| | |||
* {{DL|Lumiose City|Lumiose Press}} | |||
| | |||
* Café Gallant | |||
|} | |||
; Magenta Plaza | |||
{| | |||
| | |||
* [[Pokémon Center]] | |||
|} | |||
{{DL|Lumiose City|Lysandre Café}} lies on the street between Magenta Plaza and Autumnal Avenue. | |||
; Autumnal Avenue | |||
{| | |||
! Left || Right | |||
|- | |||
| | |||
* Café Pokémon-Amie | |||
| | |||
* {{DL|Lumiose City|Poké Ball Boutique}} | |||
|- | |||
| | |||
| | |||
* [[Lumiose City restaurants|Restaurant Le Yeah]] | |||
|- | |||
| | |||
| | |||
* {{DL|Lumiose City|Juice Shoppe}} | |||
|} | |||
; Rouge Plaza | |||
{| | |||
! Left || Right | |||
|- | |||
| | |||
* Vacant Storefront/<br>{{DL|Lumiose City|Looker Bureau}} | |||
| | |||
* [[Lumiose City restaurants|Sushi High Roller]] | |||
|} | |||
; Hibernal Avenue | |||
{| | |||
! Left || Right | |||
|- | |||
| | |||
* [[Lumiose City restaurants|Restaurant Le Wow]] | |||
| | |||
* Café Kizuna | |||
|} | |||
; Jaune Plaza | |||
{| | |||
| | |||
* [[Trevor]]'s house | |||
|} | |||
; Unnamed street | |||
The city's hub area is called Centrico Plaza and contains only Prism Tower and a [[Photography|Photo Spot]]. | |||
===Prism Tower=== | ===Prism Tower=== | ||
{{main|Lumiose Gym}} | {{main|Lumiose Gym}} | ||
| Line 40: | Line 295: | ||
===North Boulevard=== | ===North Boulevard=== | ||
====Galette Stand==== | ====Galette Stand==== | ||
A small stand located on the North Boulevard outside Autumnal Avenue that sells {{DL|Status | A small stand located on the North Boulevard outside Autumnal Avenue that sells {{DL|Status condition healing item|Lumiose Galette}}s for {{pdollar}}100 ({{pdollar}}80 if the player has at least 50 points of style). The stand only sells freshly baked galettes, which last four hours at a time starting at 3 AM, 9 AM, 3 PM, and 9 PM. Once per day, if the player purchases a galette within an hour of the time they were baked, the player will also receive a free {{DL|Drink|Moomoo Milk}}. | ||
====Lumiose Museum==== | ====Lumiose Museum==== | ||
| Line 55: | Line 310: | ||
====Lumiose Station==== | ====Lumiose Station==== | ||
A very large train station located on the far eastern half of the North Boulevard. Upon defeating the Elite Four and becoming the Champion, Professor Sycamore will meet the player here and give them the {{ | A very large train station located on the far eastern half of the North Boulevard. Upon defeating the Elite Four and becoming the Champion, Professor Sycamore will meet the player here and give them the {{key|VI|TMV Pass}} which allows them to board the train to [[Kiloude City]]. | ||
====Looker Bureau==== | ====Looker Bureau==== | ||
| Line 98: | Line 353: | ||
====Juice Shoppe==== | ====Juice Shoppe==== | ||
{{ | {{main|Juice Shoppe}} | ||
A specialty shop that sells juices made from [[Berry|Berries]] | A specialty shop that sells juices made from [[Berry|Berries]]. | ||
===Estival Avenue=== | ===Estival Avenue=== | ||
| Line 229: | Line 381: | ||
=====Male clothing===== | =====Male clothing===== | ||
{{Clothing/header}} | {{Clothing/header}} | ||
{{Clothing/l|Hat|Fedora|Red| | {{Clothing/l|Hat|Fedora|Red|Classic|80,000|Su=y|M=y|Th=y}} | ||
{{Clothing/l|Hat|Fedora|Gray| | {{Clothing/l|Hat|Fedora|Gray|Classic|80,000|Tu=y|F=y}} | ||
{{Clothing/l|Hat|Fedora|Black| | {{Clothing/l|Hat|Fedora|Black|Classic|80,000|W=y|Sa=y}} | ||
{{Clothing/l|Shirt|Down Jacket|Black| | {{Clothing/l|Shirt|Down Jacket|Black|Classic|120,000|Su=y|M=y|Tu=y|W=y|Th=y|F=y|Sa=y}} | ||
{{Clothing/l|Shirt|Plaid Shirt Combo|Red| | {{Clothing/l|Shirt|Plaid Shirt Combo|Red|Classic|120,000|Su=y|M=y|W=y|F=y}} | ||
{{Clothing/l|Shirt|Plaid Shirt Combo|Gray| | {{Clothing/l|Shirt|Plaid Shirt Combo|Gray|Classic|120,000|Tu=y|Th=y|Sa=y}} | ||
{{Clothing/l|Shirt|Zipped Shirt Combo|Black| | {{Clothing/l|Shirt|Zipped Shirt Combo|Black|Basic|100,000|M=y|Tu=y|F=y|Sa=y}} | ||
{{Clothing/l|Shirt|Zipped Shirt Combo|White| | {{Clothing/l|Shirt|Zipped Shirt Combo|White|Basic|100,000|Su=y|W=y|Th=y}} | ||
{{Clothing/l|Pants|Checked Pants|Red| | {{Clothing/l|Pants|Checked Pants|Red|Classic|180,000|Su=y|M=y|Tu=y|W=y|Th=y|F=y|Sa=y}} | ||
{{Clothing/l|Pants|Checked Pants|Gray| | {{Clothing/l|Pants|Checked Pants|Gray|Classic|180,000|M=y|Tu=y|Th=y|F=y|Sa=y}} | ||
{{Clothing/l|Pants|Vinyl Pants|Black| | {{Clothing/l|Pants|Vinyl Pants|Black|Classic|180,000|Su=y|M=y|W=y|F=y}} | ||
{{Clothing/l|Shoes|Loafers|Brown| | {{Clothing/l|Shoes|Loafers|Brown|Classic|80,000|Su=y|M=y|Tu=y|W=y|F=y|Sa=y}} | ||
{{Clothing/l|Shoes|Loafers|Black| | {{Clothing/l|Shoes|Loafers|Black|Classic|80,000|Su=y|M=y|Tu=y|W=y|Th=y|F=y|Sa=y}} | ||
{{Clothing/l|Bag|Vinyl Messenger Bag|Black| | {{Clothing/l|Bag|Vinyl Messenger Bag|Black|Classic|100,000|Su=y|M=y|Tu=y|W=y}} | ||
{{Clothing/l|Bag|Vinyl Messenger Bag|Brown| | {{Clothing/l|Bag|Vinyl Messenger Bag|Brown|Classic|100,000|Th=y|F=y|Sa=y}} | ||
{{Clothing/l|Accessory|Wide-Frame Sunglasses|Yellow| | {{Clothing/l|Accessory|Wide-Frame Sunglasses|Yellow|N/A|40,000|W=y|Sa=y}} | ||
{{Clothing/l|Accessory|Wide-Frame Sunglasses|Red| | {{Clothing/l|Accessory|Wide-Frame Sunglasses|Red|N/A|40,000|Tu=y|F=y}} | ||
{{Clothing/l|Accessory|Wide-Frame Sunglasses|White| | {{Clothing/l|Accessory|Wide-Frame Sunglasses|White|N/A|40,000|Su=y|M=y|Th=y}} | ||
{{Clothing/footer}} | {{Clothing/footer}} | ||
=====Female clothing===== | =====Female clothing===== | ||
{{Clothing/header|scheme=y}} | {{Clothing/header|scheme=y}} | ||
{{Clothing/l|Hat|Felt Hat|Black| | {{Clothing/l|Hat|Felt Hat|Black|Basic|40,000|M=y|scheme=y}} | ||
{{Clothing/l|Hat|Felt Hat|White| | {{Clothing/l|Hat|Felt Hat|White|Basic|40,000|Su=y|scheme=y}} | ||
{{Clothing/l|Hat|Felt Hat|Gray| | {{Clothing/l|Hat|Felt Hat|Gray|Basic|40,000|W=y|F=y|scheme=y}} | ||
{{Clothing/l|Hat|Fedora|White| | {{Clothing/l|Hat|Fedora|White|Classic|100,000|Tu=y|Th=y|scheme=y}} | ||
{{Clothing/l|Hat|Fedora|Brown| | {{Clothing/l|Hat|Fedora|Brown|Classic|100,000|Sa=y|scheme=y}} | ||
{{Clothing/l|Shirt|Tie-Neck Blouse|Red| | {{Clothing/l|Shirt|Tie-Neck Blouse|Red|Classic|100,000|Su=y|Tu=y|Th=y|F=y|scheme=y}} | ||
{{Clothing/l|Shirt|Tie-Neck Blouse|Gray| | {{Clothing/l|Shirt|Tie-Neck Blouse|Gray|Classic|100,000|M=y|W=y|Sa=y|scheme=y}} | ||
{{Clothing/l|Shirt|Shirt and Tie|Gray| | {{Clothing/l|Shirt|Shirt and Tie|Gray|Classic|120,000|M=y|Sa=y|scheme=y}} | ||
{{Clothing/l|Shirt|Shirt and Tie|Green| | {{Clothing/l|Shirt|Shirt and Tie|Green|Classic|120,000|Tu=y|Th=y|scheme=y}} | ||
{{Clothing/l|Shirt|Shirt and Tie|Blue| | {{Clothing/l|Shirt|Shirt and Tie|Blue|Classic|120,000|Su=y|W=y|F=y|scheme=y}} | ||
{{Clothing/l|Pants|Bold Striped Pants|Gray| | {{Clothing/l|Pants|Bold Striped Pants|Gray|Classic|180,000|M=y|Sa=y|scheme=y}} | ||
{{Clothing/l|Pants|Bold Striped Pants|Green| | {{Clothing/l|Pants|Bold Striped Pants|Green|Classic|180,000|Tu=y|Th=y|scheme=y}} | ||
{{Clothing/l|Pants|Bold Striped Pants|Blue| | {{Clothing/l|Pants|Bold Striped Pants|Blue|Classic|180,000|Su=y|W=y|F=y|scheme=y}} | ||
{{Clothing/l|Pants|Pleated Skirt|Black| | {{Clothing/l|Pants|Pleated Skirt|Black|Basic|80,000|W=y|scheme=y}} | ||
{{Clothing/l|Pants|Pleated Skirt|White| | {{Clothing/l|Pants|Pleated Skirt|White|Basic|80,000|Th=y|scheme=y}} | ||
{{Clothing/l|Pants|Pleated Skirt|Red| | {{Clothing/l|Pants|Pleated Skirt|Red|Basic|80,000|F=y|scheme=y}} | ||
{{Clothing/l|Pants|Pleated Skirt|Blue| | {{Clothing/l|Pants|Pleated Skirt|Blue|Basic|80,000|Sa=y|scheme=y}} | ||
{{Clothing/l|Pants|Pleated Kilt Skirt|Gray| | {{Clothing/l|Pants|Pleated Kilt Skirt|Gray|Classic|120,000|M=y|scheme=y}} | ||
{{Clothing/l|Pants|Pleated Kilt Skirt|Red| | {{Clothing/l|Pants|Pleated Kilt Skirt|Red|Classic|120,000|Su=y|Tu=y|scheme=y}} | ||
{{Clothing/l|Dress|Trench Coat Dress|Beige| | {{Clothing/l|Dress|Trench Coat Dress|Beige|Classic|300,000|Su=y|M=y|W=y|F=y|scheme=y}} | ||
{{Clothing/l|Dress|Trench Coat Dress|Black| | {{Clothing/l|Dress|Trench Coat Dress|Black|Classic|300,000|Tu=y|Th=y|Sa=y|scheme=y}} | ||
{{Clothing/l|Socks|Knee Socks|Black| | {{Clothing/l|Socks|Knee Socks|Black|N/A|800|M=y|Th=y|scheme=y}} | ||
{{Clothing/l|Socks|Knee Socks|White| | {{Clothing/l|Socks|Knee Socks|White|N/A|800|Su=y|Tu=y|W=y|scheme=y}} | ||
{{Clothing/l|Socks|OTK Socks|White| | {{Clothing/l|Socks|OTK Socks|White|N/A|800|F=y|Sa=y|scheme=y}} | ||
{{Clothing/l|Socks|Single-Stripe OTK Socks|White| | {{Clothing/l|Socks|Single-Stripe OTK Socks|White|N/A|2,500|Su=y|M=y|Tu=y|W=y|Th=y|F=y|Sa=y|scheme=y}} | ||
{{Clothing/l|Shoes|Bow Shoes|Black| | {{Clothing/l|Shoes|Bow Shoes|Black|Classic|85,000|Su=y|M=y|W=y|F=y|scheme=y}} | ||
{{Clothing/l|Shoes|Bow Shoes|Brown| | {{Clothing/l|Shoes|Bow Shoes|Brown|Classic|85,000|Su=y|Tu=y|Th=y|Sa=y|scheme=y}} | ||
{{Clothing/l|Shoes|Saddle Shoes|White| | {{Clothing/l|Shoes|Saddle Shoes|White|Classic|110,000|M=y|Sa=y|scheme=y}} | ||
{{Clothing/l|Shoes|Saddle Shoes|Brown| | {{Clothing/l|Shoes|Saddle Shoes|Brown|Classic|110,000|Su=y|W=y|F=y|scheme=y}} | ||
{{Clothing/l|Shoes|Saddle Shoes|Navy blue| | {{Clothing/l|Shoes|Saddle Shoes|Navy blue|Classic|110,000|Tu=y|Th=y|scheme=y}} | ||
{{Clothing/l|Shoes|Mary Janes|Black| | {{Clothing/l|Shoes|Mary Janes|Black|Classic|100,000|W=y|scheme=y}} | ||
{{Clothing/l|Shoes|Mary Janes|Red| | {{Clothing/l|Shoes|Mary Janes|Red|Classic|100,000|Th=y|scheme=y}} | ||
{{Clothing/l|Bag|Strappy Purse|Black| | {{Clothing/l|Bag|Strappy Purse|Black|Classic|200,000|Su=y|M=y|scheme=y}} | ||
{{Clothing/l|Bag|Strappy Purse|Brown| | {{Clothing/l|Bag|Strappy Purse|Brown|Classic|200,000|Tu=y|Th=y|F=y|scheme=y}} | ||
{{Clothing/l|Bag|Strappy Purse|Beige| | {{Clothing/l|Bag|Strappy Purse|Beige|Classic|200,000|W=y|Sa=y|scheme=y}} | ||
{{Clothing/l|Accessory|Hat Ribbon Accessory|Black| | {{Clothing/l|Accessory|Hat Ribbon Accessory|Black|N/A|20,000|Su=y|Tu=y|scheme=y}} | ||
{{Clothing/l|Accessory|Hat Ribbon Accessory|Red| | {{Clothing/l|Accessory|Hat Ribbon Accessory|Red|N/A|20,000|W=y|scheme=y}} | ||
{{Clothing/l|Accessory|Hat Ribbon Accessory|White| | {{Clothing/l|Accessory|Hat Ribbon Accessory|White|N/A|20,000|M=y|F=y|scheme=y}} | ||
{{Clothing/l|Accessory|Hat Ribbon Accessory|Blue| | {{Clothing/l|Accessory|Hat Ribbon Accessory|Blue|N/A|20,000|Sa=y|scheme=y}} | ||
{{Clothing/l|Accessory|Hat Ribbon Accessory|Pale pink| | {{Clothing/l|Accessory|Hat Ribbon Accessory|Pale pink|N/A|20,000|Th=y|scheme=y}} | ||
{{Clothing/footer|scheme=y}} | {{Clothing/footer|scheme=y}} | ||
| Line 598: | Line 750: | ||
| New video effects{{tt|*|Must talk to woman at right counter; if previous set has not been received, the player must re-enter the building before she will reveal the second set}} || 90 | | New video effects{{tt|*|Must talk to woman at right counter; if previous set has not been received, the player must re-enter the building before she will reveal the second set}} || 90 | ||
|- style="background:#fff" | |- style="background:#fff" | ||
| Café Introversion || [[Mr. Bonding]] will give {{DL|O-Power|Hatching Power}} if the player has all other O-Powers || | | Café Introversion || [[Mr. Bonding]] will give {{DL|O-Power|Hatching Power}} if the player has all other O-Powers || 190 | ||
|- style="background:#fff" | |- style="background:#fff" | ||
| rowspan=7 | Stone Emporium || Mega Stone is discounted to {{PDollar}}500,000 || 10 | | rowspan=7 | Stone Emporium || Mega Stone is discounted to {{PDollar}}500,000 || 10 | ||
| Line 653: | Line 805: | ||
===Poké Mart=== | ===Poké Mart=== | ||
{{shop|North/South/Magenta - Left cashier}} | {{shop|North/South/Magenta - Left cashier}} | ||
{{shoprow|{{shopitem|Poké Ball|200}}|{{shopitem|Great Ball|600 | {{shoprow|{{shopitem|Poké Ball|200}}|{{shopitem|Great Ball|600}}}} | ||
{{shoprow|{{shopitem|Ultra Ball|1,200| | {{shoprow|{{shopitem|Ultra Ball|1,200|note=<sup>3 {{color2|000|Badge|Badges}}</sup>}}|{{shopitem|Potion|300}}}} | ||
{{shoprow|{{shopitem|Super Potion|700 | {{shoprow|{{shopitem|Super Potion|700}}|{{shopitem|Hyper Potion|1,200|note=<sup>2 {{color2|000|Badge|Badges}}</sup>}}}} | ||
{{shoprow|{{shopitem|Max Potion|2,500| | {{shoprow|{{shopitem|Max Potion|2,500|note=<sup>4 {{color2|000|Badge|Badges}}</sup>}}|{{shopitem|Full Restore|3,000|note=<sup>5 {{color2|000|Badge|Badges}}</sup>}}}} | ||
{{shoprow|{{shopitem|Revive|1,500| | {{shoprow|{{shopitem|Revive|1,500|note=<sup>2 {{color2|000|Badge|Badges}}</sup>}}|{{shopitem|Antidote|100}}}} | ||
{{shoprow|{{shopitem|Paralyze Heal|200 | {{shoprow|{{shopitem|Paralyze Heal|200}}|{{shopitem|Awakening|250}}}} | ||
{{shoprow|{{shopitem|Burn Heal|250 | {{shoprow|{{shopitem|Burn Heal|250}}|{{shopitem|Ice Heal|250}}}} | ||
{{shoprow|{{shopitem|Full Heal|600| | {{shoprow|{{shopitem|Full Heal|600|note=<sup>3 {{color2|000|Badge|Badges}}</sup>}}|{{shopitem|Escape Rope|550}}}} | ||
{{shoprow|{{shopitem|Repel|350 | {{shoprow|{{shopitem|Repel|350}}|{{shopitem|Super Repel|500|note=<sup>2 {{color2|000|Badge|Badges}}</sup>}}}} | ||
{{shoprow|{{shopitem|Max Repel|700| | {{shoprow|{{shopitem|Max Repel|700|note=<sup>3 {{color2|000|Badge|Badges}}</sup>}}}} | ||
{{shopfooter|multiple=yes}} | {{shopfooter|multiple=yes}} | ||
{{shop|South Boulevard - Right cashier}} | {{shop|South Boulevard - Right cashier}} | ||
| Line 670: | Line 822: | ||
{{shopfooter|multiple=yes}} | {{shopfooter|multiple=yes}} | ||
{{shop|North Boulevard - Right cashier}} | {{shop|North Boulevard - Right cashier}} | ||
{{shoprow|{{shopitem|Heal Ball|300 | {{shoprow|{{shopitem|Heal Ball|300}}|{{shopitem|Net Ball|1,000}}}} | ||
{{shoprow|{{shopitem|Nest Ball|1,000 | {{shoprow|{{shopitem|Nest Ball|1,000}}}} | ||
{{shopfooter}} | {{shopfooter}} | ||
===Poké Miles=== | ===Poké Miles=== | ||
In the | In the Pokémon Center on South Boulevard, a butler will exchange items for the player's [[Poké Mile]]s. | ||
{{shop|South Boulevard Pokémon Center - Butler}} | {{shop|South Boulevard Pokémon Center - Butler}} | ||
{{shoprow|{{shopitem|Berry Juice|10|PM}}|{{shopitem|Moomoo Milk|20|PM|5=Moomoo Milk VI}}}} | {{shoprow|{{shopitem|Berry Juice|10|PM}}|{{shopitem|Moomoo Milk|20|PM|5=Moomoo Milk VI}}}} | ||
| Line 737: | Line 889: | ||
====Café Soleil==== | ====Café Soleil==== | ||
{{Itlisth|building}} | {{Itlisth|building}} | ||
{{Itemlist|Gardevoirite|Held by Ralts|X=yes|y=yes|display={{DL|Mega Stone|Gardevoirite}}}} | {{Itemlist|Gardevoirite|Held by a Ralts the player can receive in a [[In-game trade|trade]]|X=yes|y=yes|display={{DL|Mega Stone|Gardevoirite}}}} | ||
{{Itlistfoot|building}} | {{Itlistfoot|building}} | ||
| Line 820: | Line 972: | ||
==Trainers== | ==Trainers== | ||
{{trainerheader|city}} | {{trainerheader|city}} | ||
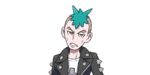
{{Trainerentry|VSPunk Guy.png{{!}}150px|Punk Guy|Faust|600|1|093|Haunter|♂|30|None|36=メルド|37=Merde}} | {{Trainerentry|VSPunk Guy.png{{!}}150px|Punk Guy|Faust|600|1|093|Haunter|♂|30|None|36=メルド|37=Merde}} | ||
| Line 842: | Line 993: | ||
{{Trainerentry|VSGarçon.png{{!}}150px|Garçon|Jacopo|600|1|444|Gabite|♂|30|None|36=ベリーニ|37=Bellini}} | {{Trainerentry|VSGarçon.png{{!}}150px|Garçon|Jacopo|600|1|444|Gabite|♂|30|None|36=ベリーニ|37=Bellini}} | ||
{{trainerdiv|city|{{color|000|Lumi Cabs}}}} | {{trainerdiv|city|{{color|000|Lumi Cabs}}}} | ||
{{Trainerentry|VSMonsieur.png{{!}}150px|Driver|Cabot|3,520|1|552|Krokorok|♂|55|None|36= | {{Trainerentry|VSMonsieur.png{{!}}150px|Driver|Cabot|3,520|1|552|Krokorok|♂|55|None|36=ロッセーニ|37=Rossellini}} | ||
{{trainerdiv|city}} | {{trainerdiv|city}} | ||
{{Trainerentry|VSVeteran M.png{{!}}150px|Driver|Carter|4,224|1|553|Krookodile|♂|66|None|36=モモジロウ|37=Momojirō}} | {{Trainerentry|VSVeteran M.png{{!}}150px|Driver|Carter|4,224|1|553|Krookodile|♂|66|None|36=モモジロウ|37=Momojirō}} | ||
{{trainerdiv|city}} | {{trainerdiv|city}} | ||
{{Trainerentry|VSPunk Guy.png{{!}}150px|Driver|Clarence|2,112|1|551|Sandile|♂|33|None|36= | {{Trainerentry|VSPunk Guy.png{{!}}150px|Driver|Clarence|2,112|1|551|Sandile|♂|33|None|36=ホルヘ|37=Jorge}} | ||
{{trainerdiv|city}} | {{trainerdiv|city}} | ||
{{Trainerentry|VSMonsieur.png{{!}}150px|Driver|Cormick|3,520|1|552|Krokorok|♂|55|None|36= | {{Trainerentry|VSMonsieur.png{{!}}150px|Driver|Cormick|3,520|1|552|Krokorok|♂|55|None|36=ラッセ|37=Lasse}} | ||
{{trainerdiv|city}} | {{trainerdiv|city}} | ||
{{Trainerentry|VSPunk Guy.png{{!}}150px|Driver|Coupe|2,112|1|551|Sandile|♂|33|None|36= | {{Trainerentry|VSPunk Guy.png{{!}}150px|Driver|Coupe|2,112|1|551|Sandile|♂|33|None|36=アキーム|37=Hakeem}} | ||
{{trainerdiv|city}} | {{trainerdiv|city}} | ||
{{Trainerentry| | {{Trainerentry|VSPunk Guy.png{{!}}150px|Driver|Hackney|2,112|1|551|Sandile|♂|33|None|36=マキュス|37=Macuse}} | ||
{{trainerdiv|city}} | {{trainerdiv|city}} | ||
{{Trainerentry|VSPunk Guy.png{{!}}150px|Driver|Hansom|2,112|1|551|Sandile|♂|33|None|36= | {{Trainerentry|VSPunk Guy.png{{!}}150px|Driver|Hansom|2,112|1|551|Sandile|♂|33|None|36=ユピテル|37=Yupiter}} | ||
{{trainerdiv|city}} | {{trainerdiv|city}} | ||
{{Trainerentry|VSMonsieur.png{{!}}150px|Driver|Schaffer|3,520|1|552|Krokorok|♂|55|None|36= | {{Trainerentry|VSMonsieur.png{{!}}150px|Driver|Schaffer|3,520|1|552|Krokorok|♂|55|None|36=カムロ|37=Kamuro}} | ||
{{trainerdiv|city}} | {{trainerdiv|city}} | ||
{{Trainerentry|VSMonsieur.png{{!}}150px|Driver|Wayne|3,520|1|552|Krokorok|♂|55|None|36= | {{Trainerentry|VSMonsieur.png{{!}}150px|Driver|Wayne|3,520|1|552|Krokorok|♂|55|None|36=ディディー|37=Diddy}} | ||
{{trainerdiv|city}} | {{trainerdiv|city}} | ||
{{Trainerentry|VSPunk Guy.png{{!}}150px|Driver|Weaver|3,520|1|552|Krokorok|♂|55|None|36= | {{Trainerentry|VSPunk Guy.png{{!}}150px|Driver|Weaver|3,520|1|552|Krokorok|♂|55|None|36=ゴンジー|37=Gonzi}} | ||
{{trainerdiv|city}} | |||
{{Trainerentry|VSPunk Guy.png{{!}}150px|Driver|Wheeler|2,112|1|551|Sandile|♂|33|None|36=カナル|37=Kanaru}} | |||
{{trainerfooter|city|6}} | {{trainerfooter|city|6}} | ||
| Line 923: | Line 1,076: | ||
|move1=Tackle|move1type=Normal|move1cat=Physical | |move1=Tackle|move1type=Normal|move1cat=Physical | ||
|move2=Tail Whip|move2type=Normal|move2cat=Status | |move2=Tail Whip|move2type=Normal|move2cat=Status | ||
|move3= | |move3=Water Gun|move3type=Water|move3cat=Special | ||
|move4=Withdraw|move4type=Water|move4cat=Status}} | |move4=Withdraw|move4type=Water|move4cat=Status}} | ||
{{Party/Footer}} | {{Party/Footer}} | ||
| Line 966: | Line 1,119: | ||
===Looker Bureau=== | ===Looker Bureau=== | ||
{{trainerheader|building}} | {{trainerheader|building}} | ||
{{trainerdiv|building|{{color|000|During Chapter | {{trainerdiv|building|{{color|000|During Chapter 4 of the Looker Bureau}}}} | ||
{{Trainerentry|VSButler.png{{!}}150px|Butler|Chalmers|4,960|1|628|Braviary|♂|62|None|36=アカマロ|37=Akamaro}} | {{Trainerentry|VSButler.png{{!}}150px|Butler|Chalmers|4,960|1|628|Braviary|♂|62|None|36=アカマロ|37=Akamaro}} | ||
{{trainerfooter|building|6}} | {{trainerfooter|building|6}} | ||
| Line 1,064: | Line 1,217: | ||
==In the anime== | ==In the anime== | ||
[[File:Lumiose City anime.png|thumb|Lumiose City in the anime]] | [[File:Lumiose City anime.png|thumb|250px|Lumiose City in the anime]] | ||
{{Ash}} arrived in Lumiose City with [[Alexa]] in ''[[XY001|Kalos, Where Dreams and Adventures Begin!]]'' as his first destination of the Kalos region. Ash wanted to challenge the Gym there, but he was denied access due to not having enough Kalos badges by the [[Clembot]]. He fell several feet, then he was saved by {{an|Clemont}} and {{an|Bonnie}}. This is also where Ash had his first Kalos battle using {{AP|Pikachu}} against [[Clemont's Bunnelby]] until the battle was interrupted by {{TRT}} trying to capture Pikachu. They were nearly successful until the group was saved by a {{pkmn2|wild}} {{p|Froakie}}, who was injured in the process, needing immediate treatment. Bonnie suggested taking Froakie to Professor Sycamore's lab. Following the events of {{p|Garchomp}} going berserk, Ash and {{ashfr}} left Lumiose City in ''[[XY002|Lumiose City Pursuit!]]''. | |||
They returned with {{an|Serena}} in ''[[XY008|Grooming Furfrou!]]'' where they went to a grooming salon owned by [[Sherman]]. | |||
In ''[[XY009|Clemont's Got a Secret!]]'', the group went to the Lumiose Gym for Clemont to get the ownership of the Gym back from [[Clembot]]. | |||
In ''[[XY010|Mega-Mega Meowth Madness!]]'', the group went back to Professor Sycamore's lab. Clemont was given a {{TP|Clemont|Chespin}} there and then left Lumiose City. | |||
In ''[[XY062|The Future Is Now, Thanks to Determination!]]'', Clemont went back to Lumiose City on his own via helicopter to train for his upcoming Gym battle with Ash. | |||
Ash, Serena, and Bonnie reunited with Clemont in ''[[XY066|Confronting the Darkness!]]''. Ash attempted to have his Gym battle but was interrupted as Clembot was accused of a crime that [[Dark Clembot]] committed. The group went to the [[Lumiose Museum]] exterior and found [[Belmondo]] alongside Dark Clembot there. Clemont had a battle with Belmondo and won. | |||
Following the Gym battle Ash had in ''[[XY067|The Moment of Lumiose Truth!]]'', the group took a visit to Professor Sycamore in ''[[XY068|Garchomp's Mega Bond!]]''. | |||
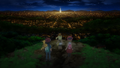
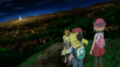
<gallery> | <gallery> | ||
Lumiose City anime | Lumiose City cliffside anime 1.png|Full night view of Lumiose City from a cliff. | ||
Lumiose City anime | Lumiose City cliffside anime 2.png|Another view | ||
</gallery> | </gallery> | ||
==In the manga== | |||
[[File:Lumiose City Adventures.png|thumb|200px|Lumiose City in Pokémon Adventures]] | |||
===In the Pokémon Adventures manga=== | |||
Lumiose City first appeared in ''[[PAXY08|What Does Charmander Do When It Dozes?]]''. Professor Sycamore gave [[Trevor]] the Kalos starters sometime before the chapter. | |||
{{sectionstub}} | {{sectionstub}} | ||
{{-}} | {{-}} | ||
| Line 1,090: | Line 1,259: | ||
* Lumiose City has more [[Pokémon Center]]s than any other city, with three. | * Lumiose City has more [[Pokémon Center]]s than any other city, with three. | ||
* The [[Mega Stone]]s for the [[Kanto]] [[starter Pokémon]] sold at the Stone Emporium are the most expensive purchasable items in the [[Pokémon games]], costing {{PDollar}}1,000,000 originally. Some items have been listed for the same price in previous games, but they have not been purchasable since that price was specifically chosen in those instances to be {{PDollar}}1 more than the player could hold. | * The [[Mega Stone]]s for the [[Kanto]] [[starter Pokémon]] sold at the Stone Emporium are the most expensive purchasable items in the [[Pokémon games]], costing {{PDollar}}1,000,000 originally. Some items have been listed for the same price in previous games, but they have not been purchasable since that price was specifically chosen in those instances to be {{PDollar}}1 more than the player could hold. | ||
* In Jaune Plaza, there are two girls who are mimicking the sounds of Pokémon. In the Japanese version, one girl is mimicking the sound of {{p|Heatran}} while the other is complimenting her. However, this is mistranslated in the English version to imply that a Lava Dome Pokémon appears in Jaune Plaza. | |||
===Glitches=== | ===Glitches=== | ||
| Line 1,108: | Line 1,278: | ||
| Japanese | | Japanese | ||
| ミアレシティ ''Miare City'' | | ミアレシティ ''Miare City'' | ||
| | | From みあれ香 ''miare-kō'' (an incense used for rituals to welcome deities in the {{wp|Kamo Shrine}}) and 御生れ ''miare'' (advent of a deity) | ||
|- style="background:#FFF" | |- style="background:#FFF" | ||
| English | | English | ||
| Line 1,116: | Line 1,286: | ||
| French | | French | ||
| Illumis | | Illumis | ||
| From ''La Ville-Lumière'', ''Paris'', ''{{wp| | | From ''La Ville-Lumière'', ''Paris'', and ''luminisme'' ({{wp|Luminism (Impressionism)|luminism}}) | ||
|- style="background:#FFF" | |- style="background:#FFF" | ||
| German | | German | ||
| Illumina City | | Illumina City | ||
| From ''La Ville-Lumière'' | | From ''La Ville-Lumière'' and ''Luminismus'' (luminism) | ||
|- style="background:#FFF" | |- style="background:#FFF" | ||
| Italian | | Italian | ||
| Luminopoli | | Luminopoli | ||
| From ''La Ville-Lumière'' | | From ''La Ville-Lumière'' and ''luminismo'' (luminism) | ||
|- style="background:#FFF" | |- style="background:#FFF" | ||
| Spanish | | Spanish | ||
| Ciudad Luminalia | | Ciudad Luminalia | ||
| From ''La Ville-Lumière'' | | From ''La Ville-Lumière'' and ''luminismo'' (luminism) | ||
|- style="background:#FFF" | |||
| Brazilian Portuguese | |||
| Cidade de Lumiose | |||
| From its English name | |||
|- style="background:#FFF" | |- style="background:#FFF" | ||
| Korean | | Korean | ||
| Line 1,142: | Line 1,316: | ||
| Mandarin-based transliteration of its Japanese name. Contains 雷 ''lèuih'' (thunder). | | Mandarin-based transliteration of its Japanese name. Contains 雷 ''lèuih'' (thunder). | ||
|- style="background:#FFF" | |- style="background:#FFF" | ||
|Russian | |||
|Люмиос Сити ''Lyumios Siti'' | |||
|Transcription of English name | |||
|}{{-}} | |}{{-}} | ||
Revision as of 14:05, 24 November 2015

|
This article is incomplete. Please feel free to edit this article to add missing information and complete it. Reason: More details about the places of interest, better descriptions for the locations like the Museum, etc |
| |||||||||||||||||
| |||||||||||||||||
Map description
| |||||||||||||||||
Lumiose City Gym - Kalos Gym #5
| |||||||||||||||||
| |||||||||||||||||
Location  Location of Lumiose City in Kalos. | |||||||||||||||||


Lumiose City (Japanese: ミアレシティ Miare City) is a large city nestled in the north-central part of the Kalos region. It is a prominent central hub of the region and is the most populous city in the Pokémon world.
Tourism is a major industry of the city due its famous landmarks, such as the Prism Tower, which serves as the city's symbol, and the Lumiose Museum. A wide variety of shops, cafés, and restaurants are spread throughout the whole city and are popular with both the locals and tourists.
The outer portion of the city is lined by tall office buildings and wide brick and cobblestone boulevards, while the avenues of the inner portion are lined by smaller Parisian-style buildings. The wide roadways throughout the entire city afford safe and easy passage for both automobile and Gogoat traffic. A large canal also runs diagonally through the city.
Lumiose City has five gates connecting it to outside routes. In the southeast is the Route 4 Gate, in the southwest the Route 5 Gate, in the northwest the Route 13 Gate, in the north the Route 14 Gate, and in the northeast the Route 16 Gate.
Places of interest

Layout
Many small shops and cafés line the many streets and avenues of Lumiose City. This is a brief guide to the city's layout and where all of its establishments are located.
The city is basically shaped like a spoked wheel. The outside "wheel" is split into North and South Boulevards, while the spokes are divided among several avenues and plazas. The boulevards and avenues are lined with the city's many establishments, while the plazas are primarily open gathering spaces, with an occasional establishment or two on the outskirts. The center hub is devoted to a wide, open area with Prism Tower at its center.
The boulevards are laid out as follows, moving along the street in a clockwise direction:
- South Boulevard
| Outer | Inner |
|---|---|
| |
|
|
|
|
| |
|
|
| |
|
|
| |
|
- North Boulevard
| Outer | Inner |
|---|---|
|
|
| |
|
|
| |
|
|
|
|
| |
|
|
| |
|
|
| |
| |
|
All of the avenues and plazas are connected by a continuous ring near the hub, but occasionally there will also be an alleyway connecting two of the spokes farther out from the hub. A group of randomly battlable Trainers also lurk around this inner part of the city.
The city's spokes are laid out in the order given below, moving through them in a clockwise direction starting from the first spoke connected to South Boulevard. The left and right sides referred to below presume the player is facing out from the hub.
- Vert Plaza
|
- Vernal Avenue
| Left | Right |
|---|---|
|
|
|
- Bleu Plaza
- Estival Avenue
| Left | Right |
|---|---|
| |
|
- Magenta Plaza
Lysandre Café lies on the street between Magenta Plaza and Autumnal Avenue.
- Autumnal Avenue
| Left | Right |
|---|---|
|
|
- Rouge Plaza
| Left | Right |
|---|---|
|
- Hibernal Avenue
| Left | Right |
|---|---|
|
- Jaune Plaza
|
- Unnamed street
The city's hub area is called Centrico Plaza and contains only Prism Tower and a Photo Spot.
Prism Tower
- Main article: Lumiose Gym
Prism Tower is a large tower located in Centrico Plaza in the middle of Lumiose City. It houses the Lumiose City Gym. Prism Tower is based on the real-world Eiffel Tower in Paris, France. It is also a playable stage in Super Smash Bros. for Nintendo 3DS.
North Boulevard
Galette Stand
A small stand located on the North Boulevard outside Autumnal Avenue that sells Lumiose Galettes for $100 ($80 if the player has at least 50 points of style). The stand only sells freshly baked galettes, which last four hours at a time starting at 3 AM, 9 AM, 3 PM, and 9 PM. Once per day, if the player purchases a galette within an hour of the time they were baked, the player will also receive a free Moomoo Milk.
Lumiose Museum
- Main article: Lumiose Museum
A large, white building that houses many paintings of people and locations in the Pokémon world. Entrance is free, but an audio guide is available for $200 (or for free if the player has at least 90 points of style).
Hotel Richissime
- Main article: Hotel Richissime
A large, black luxury hotel located near the middle of North Boulevard. Each day, the player can be paid for completing certain tasks in the hotel.
Battle Institute
- Main article: Battle Institute
The Battle Institute on the North Boulevard works in the same way as the one in Nimbasa City in Unova. The player can opt for a Battle Test (five consecutive single or double battles) or a Download Test (which can be downloaded either wirelessly or via Wi-Fi at certain time, similar to event Pokémon). The player can win BP here.
Lumiose Station
A very large train station located on the far eastern half of the North Boulevard. Upon defeating the Elite Four and becoming the Champion, Professor Sycamore will meet the player here and give them the TMV Pass which allows them to board the train to Kiloude City.
Looker Bureau
Looker's headquarters during the post-game storyline are located in a narrow street between North Boulevard and Rouge Plaza. It is initially empty, but Looker settles in after the player enters the Hall of Fame and upgrades the Mega Ring.
After completing all the Looker Bureau chapters, the player can battle Emma in the Expansion Suit (as Essentia) here on Tuesday, Thursday, and Saturday.
South Boulevard
This is the first part of Lumiose City that the player can explore in Pokémon X and Y, along with Vernal Avenue. The other parts are blocked until the player has defeated Team Flare at the Kalos Power Plant and watched Clemont relight the Lumiose City Gym.
PR Video Studio
- Main article: Trainer PR Video
A purple building where Trainer PR Videos can be created, located directly across from the South Boulevard Pokémon Center. PR Videos filmed here can be shared with passers-by and people who have been given the player's Nintendo 3DS Friend Code.
When the player reaches sufficient stylishness, the woman at the right counter will add new video effects for PR Videos. She will add two different sets: one if the player has at least 25 points of style, and the other for at least 90 points of style.
Sycamore Pokémon Lab
Professor Sycamore's Pokémon research lab is located directly opposite Vernal Avenue. It is here where the player can receive either Bulbasaur, Charmander or Squirtle upon defeating Professor Sycamore in a Pokémon battle early in the game, as well as their corresponding Mega Stone. After the player enters the Hall of Fame, they can return to the lab to get the Poké Radar from one of the scientists on the second floor.
On the second floor, player can change Rotom's forms.
Coiffure Clips
A small hairdresser located opposite the Route 5 Gate. The player can have their hair colored and styled here.
The prices and options are slightly different for male and female players. If a female player requests a styling, she may choose to have the stylist style only her front hair or all of her hair (including her front hair, as a secondary option).
- Styling and color: $3000 (♀, front style only: $2500)
- Styling: $1500 (♀, front only: $500)
- Color: $2000
For both male and female players, the options for colors are the same. In order from lightest to darkest, they are: Blond♂/Blonde♀, Orange, Honey, Brown, and Black.
The styling options differ significantly for male and female players. If the player has at least 50 points of style, additional styling options will be available.
- Male: Very Short, Short, Medium. Additional: Medium Perm
- Female: Short, Bobbed, Medium, Long. Additional: Ponytail, Pigtails
- Female (front): Sideswept, Bangs
At any point, instead of choosing a specific color or style themselves, the player may leave the decision to the stylist by selecting the "Surprise me" option. If this option is chosen, the stylist will pick a random style or color different from the player's current one.
Autumnal Avenue
Poké Ball Boutique
A specialty shop that specializes in different kinds of Poké Balls. It is notably the only location in any Pokémon game where Premier Balls are sold individually.
Juice Shoppe
- Main article: Juice Shoppe
A specialty shop that sells juices made from Berries.
Estival Avenue

Loto-ID Center
- Main article: Pokémon Lottery Corner
A building where the player may participate in a lottery drawing every day. Prizes are granted depending on how many digits from a randomly generated ID number match those of any Pokémon in the player's possession.
Lumiose Press
The building where Alexa works. Alexa will recommend various locations around the city for the player to visit, and offer to take them there.
Vernal Avenue
Friseur Furfrou
A shop that specializes in Furfrou grooming. The player may buy a trim for a Furfrou in their party for $500. Trims last for five days or until the Furfrou is deposited in the PC. The shop initially only offers Star, Diamond, or Heart Trims (as well as the option to return it to a natural look), but as the player gains style, more trims become available. At 10 points of style, the La Reine, Kabuki, and Pharaoh Trims become available, while the Debutante, Matron, and Dandy Trims are available at 50 points of style.
Herboriste
A specialty shop that sells herbal medicines.
Stone Emporium
A specialty shop that sells evolutionary stones. A man in the store will offer to sell the player the remaining Mega Stones for the two Kanto starter Pokémon they did not receive from Professor Sycamore. The price of these Mega Stones begins at $1,000,000 but will decrease as the player becomes more stylish, eventually being available for only $10,000. After defeating the Elite Four, the owner will first offer the Mega Stone for the Kanto starter that is super-effective to the one chosen by the player.
Boutique Couture
A designer fashion and luxury boutique. The first floor sells only women's clothing, whereas the second floor sells only men's clothing. The player is only granted access to the boutique once they have at least 25 points of style. The clothes and accessories sold here have much higher prices than those sold at other boutiques across Kalos.
Male clothing
| Clothing | Item | Color | Tag | Price | Availability | ||||||
|---|---|---|---|---|---|---|---|---|---|---|---|
| Su | M | Tu | W | Th | F | Sa | |||||
| Hat | Fedora | Red | Classic | $80,000 | Su | M | Tu | W | Th | F | Sa |
| Hat | Fedora | Gray | Classic | $80,000 | Su | M | Tu | W | Th | F | Sa |
| Hat | Fedora | Black | Classic | $80,000 | Su | M | Tu | W | Th | F | Sa |
| Shirt | Down Jacket | Black | Classic | $120,000 | Su | M | Tu | W | Th | F | Sa |
| Shirt | Plaid Shirt Combo | Red | Classic | $120,000 | Su | M | Tu | W | Th | F | Sa |
| Shirt | Plaid Shirt Combo | Gray | Classic | $120,000 | Su | M | Tu | W | Th | F | Sa |
| Shirt | Zipped Shirt Combo | Black | Basic | $100,000 | Su | M | Tu | W | Th | F | Sa |
| Shirt | Zipped Shirt Combo | White | Basic | $100,000 | Su | M | Tu | W | Th | F | Sa |
| Pants | Checked Pants | Red | Classic | $180,000 | Su | M | Tu | W | Th | F | Sa |
| Pants | Checked Pants | Gray | Classic | $180,000 | Su | M | Tu | W | Th | F | Sa |
| Pants | Vinyl Pants | Black | Classic | $180,000 | Su | M | Tu | W | Th | F | Sa |
| Shoes | Loafers | Brown | Classic | $80,000 | Su | M | Tu | W | Th | F | Sa |
| Shoes | Loafers | Black | Classic | $80,000 | Su | M | Tu | W | Th | F | Sa |
| Bag | Vinyl Messenger Bag | Black | Classic | $100,000 | Su | M | Tu | W | Th | F | Sa |
| Bag | Vinyl Messenger Bag | Brown | Classic | $100,000 | Su | M | Tu | W | Th | F | Sa |
| Accessory | Wide-Frame Sunglasses | Yellow | N/A | $40,000 | Su | M | Tu | W | Th | F | Sa |
| Accessory | Wide-Frame Sunglasses | Red | N/A | $40,000 | Su | M | Tu | W | Th | F | Sa |
| Accessory | Wide-Frame Sunglasses | White | N/A | $40,000 | Su | M | Tu | W | Th | F | Sa |
| A colored background means that the item can be found in this boutique on the specified day. A white background with black text means that the item cannot be found in this boutique on this day. | |||||||||||
Female clothing
| Clothing | Item | Color | Tag | Price | Availability | ||||||
|---|---|---|---|---|---|---|---|---|---|---|---|
| Su | M | Tu | W | Th | F | Sa | |||||
| Hat | Felt Hat | Black | Basic | $40,000 | Su | M | Tu | W | Th | F | Sa |
| Hat | Felt Hat | White | Basic | $40,000 | Su | M | Tu | W | Th | F | Sa |
| Hat | Felt Hat | Gray | Basic | $40,000 | Su | M | Tu | W | Th | F | Sa |
| Hat | Fedora | White | Classic | $100,000 | Su | M | Tu | W | Th | F | Sa |
| Hat | Fedora | Brown | Classic | $100,000 | Su | M | Tu | W | Th | F | Sa |
| Shirt | Tie-Neck Blouse | Red | Classic | $100,000 | Su | M | Tu | W | Th | F | Sa |
| Shirt | Tie-Neck Blouse | Gray | Classic | $100,000 | Su | M | Tu | W | Th | F | Sa |
| Shirt | Shirt and Tie | Gray | Classic | $120,000 | Su | M | Tu | W | Th | F | Sa |
| Shirt | Shirt and Tie | Green | Classic | $120,000 | Su | M | Tu | W | Th | F | Sa |
| Shirt | Shirt and Tie | Blue | Classic | $120,000 | Su | M | Tu | W | Th | F | Sa |
| Pants | Bold Striped Pants | Gray | Classic | $180,000 | Su | M | Tu | W | Th | F | Sa |
| Pants | Bold Striped Pants | Green | Classic | $180,000 | Su | M | Tu | W | Th | F | Sa |
| Pants | Bold Striped Pants | Blue | Classic | $180,000 | Su | M | Tu | W | Th | F | Sa |
| Pants | Pleated Skirt | Black | Basic | $80,000 | Su | M | Tu | W | Th | F | Sa |
| Pants | Pleated Skirt | White | Basic | $80,000 | Su | M | Tu | W | Th | F | Sa |
| Pants | Pleated Skirt | Red | Basic | $80,000 | Su | M | Tu | W | Th | F | Sa |
| Pants | Pleated Skirt | Blue | Basic | $80,000 | Su | M | Tu | W | Th | F | Sa |
| Pants | Pleated Kilt Skirt | Gray | Classic | $120,000 | Su | M | Tu | W | Th | F | Sa |
| Pants | Pleated Kilt Skirt | Red | Classic | $120,000 | Su | M | Tu | W | Th | F | Sa |
| Dress | Trench Coat Dress | Beige | Classic | $300,000 | Su | M | Tu | W | Th | F | Sa |
| Dress | Trench Coat Dress | Black | Classic | $300,000 | Su | M | Tu | W | Th | F | Sa |
| Socks | Knee Socks | Black | N/A | $800 | Su | M | Tu | W | Th | F | Sa |
| Socks | Knee Socks | White | N/A | $800 | Su | M | Tu | W | Th | F | Sa |
| Socks | OTK Socks | White | N/A | $800 | Su | M | Tu | W | Th | F | Sa |
| Socks | Single-Stripe OTK Socks | White | N/A | $2,500 | Su | M | Tu | W | Th | F | Sa |
| Shoes | Bow Shoes | Black | Classic | $85,000 | Su | M | Tu | W | Th | F | Sa |
| Shoes | Bow Shoes | Brown | Classic | $85,000 | Su | M | Tu | W | Th | F | Sa |
| Shoes | Saddle Shoes | White | Classic | $110,000 | Su | M | Tu | W | Th | F | Sa |
| Shoes | Saddle Shoes | Brown | Classic | $110,000 | Su | M | Tu | W | Th | F | Sa |
| Shoes | Saddle Shoes | Navy blue | Classic | $110,000 | Su | M | Tu | W | Th | F | Sa |
| Shoes | Mary Janes | Black | Classic | $100,000 | Su | M | Tu | W | Th | F | Sa |
| Shoes | Mary Janes | Red | Classic | $100,000 | Su | M | Tu | W | Th | F | Sa |
| Bag | Strappy Purse | Black | Classic | $200,000 | Su | M | Tu | W | Th | F | Sa |
| Bag | Strappy Purse | Brown | Classic | $200,000 | Su | M | Tu | W | Th | F | Sa |
| Bag | Strappy Purse | Beige | Classic | $200,000 | Su | M | Tu | W | Th | F | Sa |
| Accessory | Hat Ribbon Accessory | Black | N/A | $20,000 | Su | M | Tu | W | Th | F | Sa |
| Accessory | Hat Ribbon Accessory | Red | N/A | $20,000 | Su | M | Tu | W | Th | F | Sa |
| Accessory | Hat Ribbon Accessory | White | N/A | $20,000 | Su | M | Tu | W | Th | F | Sa |
| Accessory | Hat Ribbon Accessory | Blue | N/A | $20,000 | Su | M | Tu | W | Th | F | Sa |
| Accessory | Hat Ribbon Accessory | Pale pink | N/A | $20,000 | Su | M | Tu | W | Th | F | Sa |
| A colored background means that the item can be found in this boutique on the specified day. A white background with black text means that the item cannot be found in this boutique on this day. | |||||||||||
Restaurants
- Main article: Lumiose City restaurants
Lumiose City has four restaurants located on South Boulevard (Restaurant Le Nah), Autumnal Avenue (Restaurant Le Yeah), Hibernal Avenue (Restaurant Le Wow), and near Rogue Plaza (Sushi High Roller). At each restaurant, the player can pay to be served a meal where the server will battle the player before each course. After finishing a meal, the player will receive a reward: a number of some valuable item, depending on which restaurant the player is in and how well they did.
Lysandre Café

A red café located near Magenta Plaza. It grants the player access to Lysandre Labs, one of Team Flare's hideouts in the Kalos region. Despite the small size, it serves as an important location in both the main plot line and the after story sideline plot with Xerosic.
Lumi Cab
Lumi Cab is a taxi service with stops located all around Lumiose City, enabling the player to easily travel directly to many locations in the sprawling city. The base fare is $710, but it increases the further away from the destination the taxi starts. All of the destinations are internally assigned to a section of the city, and those destinations in the same section share the same cost, with those in the same section as the taxi starts in costing the cheapest.
Once the player reaches a certain level of stylishness, the driver will start giving a 50% discount on the fare. If the player does not have enough money to pay for the ride, the driver will challenge them to a battle.
The possible destinations are shown below, with the section the destination belongs to noted after the location. Destinations on the Boulevards are split between East and West destinations in addition to North and South, while more internal destinations (mostly on Avenues) are only differentiated by North or South.
|
|
|
|
|
| ||||||||||||||||||||||||||||||||||||||||||||||||||||||||||||||||||||||||||||||||||||||||||||||||||||||
The table below describes the exact cost to reach a destination in a given section when taking a given taxi.
| Cab location | Section | Destination cost | ||||||
|---|---|---|---|---|---|---|---|---|
| NW | NE | SE | SW | N | S | Cen | ||
| Galette Stand | NW | $710 | $1,000 | $4,000 | $2,000 | $1,500 | $3,500 | $3,000 |
| Route 14 Gate | ||||||||
| Route 16 Gate | NE | $1,000 | $710 | $2,500 | $4,000 | $2,000 | $3,500 | |
| Route 4 Gate | SE | $4,000 | $1,500 | $710 | $1,000 | $3,500 | $2,000 | |
| Route 5 Gate | SW | $1,500 | $4,200 | $1,000 | $710 | $3,500 | $2,000 | |
| South Blvd & Estival Ave | ||||||||
| Estival Avenue | N | $1,500 | $2,000 | $4,000 | $3,500 | $710 | $1,000 | |
| Autumnal Avenue | ||||||||
| Vernal Avenue | S | $3,500 | $2,000 | $1,500 | $2,000 | $1,000 | $710 | |
Gogoat Shuttle
Signposts located all around the Boulevards, where the player can ride a Gogoat that will take them to South Boulevard East or South Boulevard West if the player is riding at South Boulevard; or North Boulevard East or North Boulevard West if the player is riding at North Boulevard. The fare is flat at $200.
Style
Within Lumiose City, the player has a degree of style which can be raised by doing things around the city. If the player has a high style, prices may be lower, more items and services may be offered, and certain establishments may be accessible that were not before.
Increasing style
When the player first speaks to Alexa in the Lumiose Press building on Estival Avenue, they will gain 5 points of style.
|
| ||||||||||||||||||||||||||||||||||||||||||||||||||||||||||||||||||||||||||||||||||||||||||||||||||
Style benefits
| Location | Benefit | Req Style |
|---|---|---|
| Lumi Cab | 50% discount on fares | 140 |
| Restaurant Le Nah | 10% meal discount | 25 |
| Restaurant Le Yeah | 10% meal discount | 90 |
| Restaurant Le Wow | 10% meal discount | 190 |
| Sushi High Roller | Access | 90 |
| 10% meal discount | 255 | |
| PR Video Studio | New video effects* | 25 |
| New video effects* | 90 | |
| Café Introversion | Mr. Bonding will give Hatching Power if the player has all other O-Powers | 190 |
| Stone Emporium | Mega Stone is discounted to $500,000 | 10 |
| Mega Stone is discounted to $300,000 | 25 | |
| Mega Stone is discounted to $150,000 | 50 | |
| Mega Stone is discounted to $100,000 | 90 | |
| Mega Stone is discounted to $70,000 | 140 | |
| Mega Stone is discounted to $50,000 | 190 | |
| Mega Stone is discounted to $10,000 | 255 | |
| Coiffure Clips | New styles
|
50 |
| Friseur Furfrou | New trims: La Reine, Kabuki, Pharaoh | 10 |
| New trims: Debutante, Matron, Dandy | 50 | |
| Boutique Couture | Access | 25 |
| Lumiose Museum | Free audio guide | 90 |
| Galette Stand | 20% discount on galettes | 50 |
| Café Triste | The Waitress will heal the player's team | 90 |
| Café Action! | A Madame will appear* and will add two new events for PR Videos | 255 |
| Juice Shoppe | Purchasable juices expand* to two choices, <Color> Juices can be bought | 25 |
| Purchasable juices expand* to three choices, Rare Soda can be bought | 90 | |
| Ultra Rare Soda can be bought | 255 |
In addition to the above benefits, some NPCs will change their dialogue as the player's style increases, and several new NPCs will appear in various places (mostly cafés) around the city as well. At 25 points of style, more people will appear in Café Pokémon-Amie (on Autumnal Avenue), Café Action! (on North Boulevard), Café Introversion (on South Boulevard), and Cafés Classe and Woof (on Vernal Avenue). At 50 points of style, more people will appear in Café Bataille (on North Boulevard), Shutterbug Café (on South Boulevard), and Boutique Couture (on Vernal Avenue). Finally, at 90 points of style, more people will appear in Café Gallant (on Estival Avenue) and, on North Boulevard, in the westernmost building, Café Triste, and Lumiose Station.
Demographics
Pokémon X and Y
The population of Lumiose City is 416. Its population surpasses the populations of all other major cities in the series by a very high margin, being higher than both Nimbasa and Mauville, second and third respectively, combined.
Shops
Poké Mart
| North/South/Magenta - Left cashier | |||||||
|---|---|---|---|---|---|---|---|
|
| ||||||
|
| ||||||
|
| ||||||
|
| ||||||
|
| ||||||
|
| ||||||
|
| ||||||
|
| ||||||
|
| ||||||
|
|||||||
| South Boulevard - Right cashier | |||||||
|---|---|---|---|---|---|---|---|
|
| ||||||
|
| ||||||
|
|||||||
| North Boulevard - Right cashier | |||||||
|---|---|---|---|---|---|---|---|
|
| ||||||
|
|||||||
Poké Miles
In the Pokémon Center on South Boulevard, a butler will exchange items for the player's Poké Miles.
| South Boulevard Pokémon Center - Butler | |||||||
|---|---|---|---|---|---|---|---|
|
| ||||||
|
| ||||||
|
| ||||||
|
| ||||||
|
| ||||||
|
| ||||||
Poké Ball Boutique
| Autumnal Avenue | |||||||
|---|---|---|---|---|---|---|---|
|
| ||||||
|
| ||||||
|
| ||||||
|
| ||||||
|
| ||||||
Herboriste
| Vernal Avenue | |||||||
|---|---|---|---|---|---|---|---|
|
| ||||||
|
| ||||||
Stone Emporium
| Vernal Avenue | |||||||
|---|---|---|---|---|---|---|---|
|
| ||||||
|
|||||||
Items
South Boulevard
| colspan="2" style="background: #Template:City color light; color:#000000; border-top-left-radius: 5px; -moz-border-radius-topleft: 5px; -webkit-border-top-left-radius: 5px; -khtml-border-top-left-radius: 5px; -icab-border-top-left-radius: 5px; -o-border-top-left-radius: 5px;" | Item | style="background: #Template:City color light; color:#000000;" | Location | style="background: #Template:City color light; color:#000000; border-top-right-radius: 5px; -moz-border-radius-topright: 5px; -webkit-border-top-right-radius: 5px; -khtml-border-top-right-radius: 5px; -icab-border-top-right-radius: 5px; -o-border-top-right-radius: 5px;" | Games | |
|---|---|---|---|
| Lens Case | From a Punk Girl in the PR Video Studio | X Y | |
| Quick Ball ×3 | From a man in the second floor of the building across the street from Shutterbug Café | X Y | |
| Timer Ball ×3 | From a man in the second floor of the building across the street from Shutterbug Café | X Y | |
| Quick Claw | From a girl in the first floor of the building across the street from Shutterbug Café | X Y | |
| Wide Lens | From a Backpacker in Shutterbug Café after taking at least one photo at a Photo Spot | X Y | |
| Scope Lens | From a Backpacker in Shutterbug Café after taking 15 or more photos at any Photo Spot | X Y | |
| Zoom Lens | From a Backpacker in Shutterbug Café after taking 30 or more photos at any Photo Spot | X Y | |
| colspan="4" style="background: #Template:City color light; border-bottom-left-radius: 5px; -moz-border-radius-bottomleft: 5px; -webkit-border-bottom-left-radius: 5px; -khtml-border-bottom-left-radius: 5px; -icab-border-bottom-left-radius: 5px; -o-border-bottom-left-radius: 5px; border-bottom-right-radius: 5px; -moz-border-radius-bottomright: 5px; -webkit-border-bottom-right-radius: 5px; -khtml-border-bottom-right-radius: 5px; -icab-border-bottom-right-radius: 5px; -o-border-bottom-right-radius: 5px;" | |
Sycamore Pokémon Lab
| Item | Location | Games | |
|---|---|---|---|
| Luxury Ball ×5 | 2F, from a female scientist | X Y | |
| Poké Radar | 2F, from a male scientist on the second floor after defeating the Elite Four | X Y | |
| Ultra Ball | 2F, from the Poké Radar scientist, for a chain length of 1-10 Pokémon with the Poké Radar | X Y | |
| PP Up | 2F, from the Poké Radar scientist, for a chain length of 11-20 Pokémon with the Poké Radar | X Y | |
| PP Max | 2F, from the Poké Radar scientist, for a chain length of 21-30 Pokémon with the Poké Radar | X Y | |
| Rare Candy | 2F, from the Poké Radar scientist, for a chain length of at least 31 Pokémon with the Poké Radar | X Y | |
| TM54 (False Swipe) | 3F, from a female scientist after encountering at least 20 Pokémon in the Central Kalos Pokédex | X Y | |
| Venusaurite | 3F, from Professor Sycamore if Bulbasaur is chosen | X Y | |
| Charizardite X | 3F, from Professor Sycamore if Charmander is chosen | X | |
| Charizardite Y | 3F, from Professor Sycamore if Charmander is chosen | Y | |
| Blastoisinite | 3F, from Professor Sycamore if Squirtle is chosen | X Y | |
| Oval Charm | 3F, from Professor Sycamore after showing him a Pokédex with all Kalos Pokémon seen | X Y | |
| Shiny Charm | 3F, from Professor Sycamore after showing him a complete National Pokédex | X Y | |
Café Soleil
| Item | Location | Games | |
|---|---|---|---|
| Gardevoirite | Held by a Ralts the player can receive in a trade | X Y | |
Vernal Avenue
Café Woof
| Item | Location | Games | |
|---|---|---|---|
| Pearl String ×2 | Given by a Madame after showing her a Furfrou that has kept the same trim for 15 days | X Y | |
Herboriste
| Item | Location | Games | |
|---|---|---|---|
| Looker Ticket | Near the Espurr (post-game) | X Y | |
North Boulevard
Lumiose Station
| Item | Location | Games | |
|---|---|---|---|
| TMV Pass | From Professor Sycamore after defeating the Elite Four | X Y | |
Office Café Building
| Item | Location | Games | |
|---|---|---|---|
| Star Piece | 1F, from a woman if one of the player's Pokémon has Aroma Veil, Flower Veil, or Sweet Veil | X Y | |
| Prism Scale | 4F, from a little girl | X Y | |
Fighting Dojo
| Item | Location | Games | |
|---|---|---|---|
| Expert Belt | 3F, from a girl | X Y | |
| Protein | 3F, from a Battle Girl | X Y | |
Café Ultimo
| Item | Location | Games | |
|---|---|---|---|
| Training Ribbon | From a woman if the player's Pokémon is Supremely Trained (passed all of the Super Training courses, including Super Secret Training, under the par time) | X Y | |
Autumnal Avenue
Poké Ball Boutique
| Item | Location | Games | |
|---|---|---|---|
| Luxury Ball | Randomly given by a Schoolgirl in the Poké Ball Boutique once a day | X Y | |
| Heal Ball ×3 | Randomly given by a Schoolgirl in the Poké Ball Boutique once a day | X Y | |
Magenta Plaza
Pokémon Center
| Item | Location | Games | |
|---|---|---|---|
| Looker Ticket | Next to the nurse's desk (post-game) | X Y | |
Jaune Plaza
House
| Item | Location | Games | |
|---|---|---|---|
| Revive | From a female scientist if the player's Pokémon knows Eerie Impulse | X Y | |
Backalleys
| colspan="2" style="background: #Template:City color light; color:#000000; border-top-left-radius: 5px; -moz-border-radius-topleft: 5px; -webkit-border-top-left-radius: 5px; -khtml-border-top-left-radius: 5px; -icab-border-top-left-radius: 5px; -o-border-top-left-radius: 5px;" | Item | style="background: #Template:City color light; color:#000000;" | Location | style="background: #Template:City color light; color:#000000; border-top-right-radius: 5px; -moz-border-radius-topright: 5px; -webkit-border-top-right-radius: 5px; -khtml-border-top-right-radius: 5px; -icab-border-top-right-radius: 5px; -o-border-top-right-radius: 5px;" | Games | |
|---|---|---|---|
| Destiny Knot | Given after defeating Beauty Aimee | X Y | |
| Elixir | Given after defeating Beauty Anais | X Y | |
| Nugget | Given after defeating Beauty Cassandra | X Y | |
| colspan="4" style="background: #Template:City color light; border-bottom-left-radius: 5px; -moz-border-radius-bottomleft: 5px; -webkit-border-bottom-left-radius: 5px; -khtml-border-bottom-left-radius: 5px; -icab-border-bottom-left-radius: 5px; -o-border-bottom-left-radius: 5px; border-bottom-right-radius: 5px; -moz-border-radius-bottomright: 5px; -webkit-border-bottom-right-radius: 5px; -khtml-border-bottom-right-radius: 5px; -icab-border-bottom-right-radius: 5px; -o-border-bottom-right-radius: 5px;" | |
Lysandre Café
| Item | Location | Games | |
|---|---|---|---|
| King's Rock | From Lysandre after defeating Clemont | X Y | |
Parade
| colspan="2" style="background: #Template:City color light; color:#000000; border-top-left-radius: 5px; -moz-border-radius-topleft: 5px; -webkit-border-top-left-radius: 5px; -khtml-border-top-left-radius: 5px; -icab-border-top-left-radius: 5px; -o-border-top-left-radius: 5px;" | Item | style="background: #Template:City color light; color:#000000;" | Location | style="background: #Template:City color light; color:#000000; border-top-right-radius: 5px; -moz-border-radius-topright: 5px; -webkit-border-top-right-radius: 5px; -khtml-border-top-right-radius: 5px; -icab-border-top-right-radius: 5px; -o-border-top-right-radius: 5px;" | Games | |
|---|---|---|---|
| Honor of Kalos | From Professor Sycamore during the parade | X Y | |
| colspan="4" style="background: #Template:City color light; border-bottom-left-radius: 5px; -moz-border-radius-bottomleft: 5px; -webkit-border-bottom-left-radius: 5px; -khtml-border-bottom-left-radius: 5px; -icab-border-bottom-left-radius: 5px; -o-border-bottom-left-radius: 5px; border-bottom-right-radius: 5px; -moz-border-radius-bottomright: 5px; -webkit-border-bottom-right-radius: 5px; -khtml-border-bottom-right-radius: 5px; -icab-border-bottom-right-radius: 5px; -o-border-bottom-right-radius: 5px;" | |
Pokémon
| Pokémon | Games | Location | Levels | Rate | |||||||||||
|---|---|---|---|---|---|---|---|---|---|---|---|---|---|---|---|
| Gift Pokémon | |||||||||||||||
|
X | Y |
|
10 | One | ||||||||||
|
X | Y |
|
10 | One | ||||||||||
|
X | Y |
|
10 | One | ||||||||||
|
X | Y |
|
5 | One | ||||||||||
| A colored background means that the Pokémon can be found in this location in the specified game. A white background with a colored letter means that the Pokémon cannot be found here. | |||||||||||||||
Trainers
| style="border-top-left-radius: 5px; -moz-border-radius-topleft: 5px; -webkit-border-top-left-radius: 5px; -khtml-border-top-left-radius: 5px; -icab-border-top-left-radius: 5px; -o-border-top-left-radius: 5px; background: #Template:City color light" | Trainer | style="border-top-right-radius: 5px; -moz-border-radius-topright: 5px; -webkit-border-top-right-radius: 5px; -khtml-border-top-right-radius: 5px; -icab-border-top-right-radius: 5px; -o-border-top-right-radius: 5px; background: #Template:City color light" | Pokémon | |||||||||||
|---|---|---|---|---|---|---|---|---|---|---|---|---|
|
| |||||||||||
|
| |||||||||||
|
| |||||||||||
|
| |||||||||||
|
| |||||||||||
|
| |||||||||||
|
| |||||||||||
|
| |||||||||||
|
| |||||||||||
|
| |||||||||||
| Lumi Cabs | ||||||||||||
|
| |||||||||||
|
| |||||||||||
|
| |||||||||||
|
| |||||||||||
|
| |||||||||||
|
| |||||||||||
|
| |||||||||||
|
| |||||||||||
|
| |||||||||||
|
| |||||||||||
|
| |||||||||||
| style="border-bottom-left-radius: 5px; -moz-border-radius-bottomleft: 5px; -webkit-border-bottom-left-radius: 5px; -khtml-border-bottom-left-radius: 5px; -icab-border-bottom-left-radius: 5px; -o-border-bottom-left-radius: 5px; border-bottom-right-radius: 5px; -moz-border-radius-bottomright: 5px; -webkit-border-bottom-right-radius: 5px; -khtml-border-bottom-right-radius: 5px; -icab-border-bottom-right-radius: 5px; -o-border-bottom-right-radius: 5px; background: #Template:City color light; " colspan="2" width="400px" | | ||||||||||||


South Boulevard
Alleyway
| style="border-top-left-radius: 5px; -moz-border-radius-topleft: 5px; -webkit-border-top-left-radius: 5px; -khtml-border-top-left-radius: 5px; -icab-border-top-left-radius: 5px; -o-border-top-left-radius: 5px; background: #Template:City color light" | Trainer | style="border-top-right-radius: 5px; -moz-border-radius-topright: 5px; -webkit-border-top-right-radius: 5px; -khtml-border-top-right-radius: 5px; -icab-border-top-right-radius: 5px; -o-border-top-right-radius: 5px; background: #Template:City color light" | Pokémon | |||||||||||
|---|---|---|---|---|---|---|---|---|---|---|---|---|
| During Chapter 2 of the Looker Bureau | ||||||||||||
|
| |||||||||||
| ||||||||||||
|
| |||||||||||
|
| |||||||||||
| ||||||||||||
| ||||||||||||
|
| |||||||||||
| During Chapter 4 of the Looker Bureau | ||||||||||||
|
| |||||||||||
| style="border-bottom-left-radius: 5px; -moz-border-radius-bottomleft: 5px; -webkit-border-bottom-left-radius: 5px; -khtml-border-bottom-left-radius: 5px; -icab-border-bottom-left-radius: 5px; -o-border-bottom-left-radius: 5px; border-bottom-right-radius: 5px; -moz-border-radius-bottomright: 5px; -webkit-border-bottom-right-radius: 5px; -khtml-border-bottom-right-radius: 5px; -icab-border-bottom-right-radius: 5px; -o-border-bottom-right-radius: 5px; background: #Template:City color light; " colspan="2" width="400px" | | ||||||||||||
Sycamore Pokémon Lab
|
||||||||||||||||||||||||||||||||||||||||||||||||||||||||||||||||||||||||||||||||||||||||||||||||||||||
| ||||||||||||||||||||||||||||||||||||||||||||||||||||||||||||||||||||||||||||||||||||||||||||||||||||||


Bleu Plaza
| style="border-top-left-radius: 5px; -moz-border-radius-topleft: 5px; -webkit-border-top-left-radius: 5px; -khtml-border-top-left-radius: 5px; -icab-border-top-left-radius: 5px; -o-border-top-left-radius: 5px; background: #Template:City color light" | Trainer | style="border-top-right-radius: 5px; -moz-border-radius-topright: 5px; -webkit-border-top-right-radius: 5px; -khtml-border-top-right-radius: 5px; -icab-border-top-right-radius: 5px; -o-border-top-right-radius: 5px; background: #Template:City color light" | Pokémon | |||||||||||
|---|---|---|---|---|---|---|---|---|---|---|---|---|
|
| |||||||||||
|
| |||||||||||
| style="border-bottom-left-radius: 5px; -moz-border-radius-bottomleft: 5px; -webkit-border-bottom-left-radius: 5px; -khtml-border-bottom-left-radius: 5px; -icab-border-bottom-left-radius: 5px; -o-border-bottom-left-radius: 5px; border-bottom-right-radius: 5px; -moz-border-radius-bottomright: 5px; -webkit-border-bottom-right-radius: 5px; -khtml-border-bottom-right-radius: 5px; -icab-border-bottom-right-radius: 5px; -o-border-bottom-right-radius: 5px; background: #Template:City color light; " colspan="2" width="400px" | | ||||||||||||
Lysandre Café
| Trainer | Pokémon | |||||||||||
|---|---|---|---|---|---|---|---|---|---|---|---|---|
|
| |||||||||||
|
| |||||||||||
North Boulevard
Galette Stand Alleyway
| style="border-top-left-radius: 5px; -moz-border-radius-topleft: 5px; -webkit-border-top-left-radius: 5px; -khtml-border-top-left-radius: 5px; -icab-border-top-left-radius: 5px; -o-border-top-left-radius: 5px; background: #Template:City color light" | Trainer | style="border-top-right-radius: 5px; -moz-border-radius-topright: 5px; -webkit-border-top-right-radius: 5px; -khtml-border-top-right-radius: 5px; -icab-border-top-right-radius: 5px; -o-border-top-right-radius: 5px; background: #Template:City color light" | Pokémon | |||||||||||
|---|---|---|---|---|---|---|---|---|---|---|---|---|
| During Chapter 4 of the Looker Bureau | ||||||||||||
|
| |||||||||||
| ||||||||||||
| style="border-bottom-left-radius: 5px; -moz-border-radius-bottomleft: 5px; -webkit-border-bottom-left-radius: 5px; -khtml-border-bottom-left-radius: 5px; -icab-border-bottom-left-radius: 5px; -o-border-bottom-left-radius: 5px; border-bottom-right-radius: 5px; -moz-border-radius-bottomright: 5px; -webkit-border-bottom-right-radius: 5px; -khtml-border-bottom-right-radius: 5px; -icab-border-bottom-right-radius: 5px; -o-border-bottom-right-radius: 5px; background: #Template:City color light; " colspan="2" width="400px" | | ||||||||||||
Café Triste Alleyway
| style="border-top-left-radius: 5px; -moz-border-radius-topleft: 5px; -webkit-border-top-left-radius: 5px; -khtml-border-top-left-radius: 5px; -icab-border-top-left-radius: 5px; -o-border-top-left-radius: 5px; background: #Template:City color light" | Trainer | style="border-top-right-radius: 5px; -moz-border-radius-topright: 5px; -webkit-border-top-right-radius: 5px; -khtml-border-top-right-radius: 5px; -icab-border-top-right-radius: 5px; -o-border-top-right-radius: 5px; background: #Template:City color light" | Pokémon | |||||||||||
|---|---|---|---|---|---|---|---|---|---|---|---|---|
| During Chapter 4 of the Looker Bureau | ||||||||||||
|
| |||||||||||
| ||||||||||||
| ||||||||||||
| style="border-bottom-left-radius: 5px; -moz-border-radius-bottomleft: 5px; -webkit-border-bottom-left-radius: 5px; -khtml-border-bottom-left-radius: 5px; -icab-border-bottom-left-radius: 5px; -o-border-bottom-left-radius: 5px; border-bottom-right-radius: 5px; -moz-border-radius-bottomright: 5px; -webkit-border-bottom-right-radius: 5px; -khtml-border-bottom-right-radius: 5px; -icab-border-bottom-right-radius: 5px; -o-border-bottom-right-radius: 5px; background: #Template:City color light; " colspan="2" width="400px" | | ||||||||||||
Lumiose Station
| Trainer | Pokémon | |||||||||||
|---|---|---|---|---|---|---|---|---|---|---|---|---|
| During Chapter 3 of the Looker Bureau | ||||||||||||
|
| |||||||||||
|
| |||||||||||
| ||||||||||||
|
| |||||||||||
| ||||||||||||
Looker Bureau
| Trainer | Pokémon | |||||||||||
|---|---|---|---|---|---|---|---|---|---|---|---|---|
| During Chapter 4 of the Looker Bureau | ||||||||||||
|
| |||||||||||
|
|||||||||||||||||||||||||||||||||||||||||||||||||||||||||||||||||||||||
| |||||||||||||||||||||||||||||||||||||||||||||||||||||||||||||||||||||||


Parade
|
||||||||||||||||||||||||||||||||||||||||||||||||||||||||||||||||||||||||||||||||||||||||||||||||||||||||
| ||||||||||||||||||||||||||||||||||||||||||||||||||||||||||||||||||||||||||||||||||||||||||||||||||||||||


In the spin-off-games
In Super Smash Bros. for Nintendo 3DS/Wii U
- Main article: Prism Tower (stage)
Prism Tower, Lumiose City's prominent landmark, appears as a stage in the Nintendo 3DS version of Super Smash Bros. for Nintendo 3DS/Wii U.
In the anime

Ash arrived in Lumiose City with Alexa in Kalos, Where Dreams and Adventures Begin! as his first destination of the Kalos region. Ash wanted to challenge the Gym there, but he was denied access due to not having enough Kalos badges by the Clembot. He fell several feet, then he was saved by Clemont and Bonnie. This is also where Ash had his first Kalos battle using Pikachu against Clemont's Bunnelby until the battle was interrupted by Team Rocket trying to capture Pikachu. They were nearly successful until the group was saved by a wild Froakie, who was injured in the process, needing immediate treatment. Bonnie suggested taking Froakie to Professor Sycamore's lab. Following the events of Garchomp going berserk, Ash and his friends left Lumiose City in Lumiose City Pursuit!.
They returned with Serena in Grooming Furfrou! where they went to a grooming salon owned by Sherman.
In Clemont's Got a Secret!, the group went to the Lumiose Gym for Clemont to get the ownership of the Gym back from Clembot.
In Mega-Mega Meowth Madness!, the group went back to Professor Sycamore's lab. Clemont was given a Chespin there and then left Lumiose City.
In The Future Is Now, Thanks to Determination!, Clemont went back to Lumiose City on his own via helicopter to train for his upcoming Gym battle with Ash.
Ash, Serena, and Bonnie reunited with Clemont in Confronting the Darkness!. Ash attempted to have his Gym battle but was interrupted as Clembot was accused of a crime that Dark Clembot committed. The group went to the Lumiose Museum exterior and found Belmondo alongside Dark Clembot there. Clemont had a battle with Belmondo and won.
Following the Gym battle Ash had in The Moment of Lumiose Truth!, the group took a visit to Professor Sycamore in Garchomp's Mega Bond!.
Full night view of Lumiose City from a cliff.
Another view


In the manga

In the Pokémon Adventures manga
Lumiose City first appeared in What Does Charmander Do When It Dozes?. Professor Sycamore gave Trevor the Kalos starters sometime before the chapter.
Trivia
- A woman beside Café Bataille explains that the two Skiddo in front of Lumiose Station were abandoned by their Trainer, and wait by the station for his return. This is a possible reference to the story of Hachikō, an Akita dog who waited at the train station every day for his owner's return, even after his unexpected death. The story is a popular legend in Japanese culture.
- If the player enters Lumiose City and gets on their bicycle, the music does not change.
- At the Magenta Plaza Pokémon Center, a young man mentions Team Plasma "making news a while back in the Unova region," while a young woman mentions Professor Oak's grandson having visited Kalos to study abroad. She also tells how he used to say "Bonjour" while meeting and "Smell ya later!" while leaving. The first quote refers to the way how Blue greets the player while visiting S.S. Anne in the original Generation I games and their remakes, while the latter one was used whenever he left the player's presence.
- The four avenues are named after words pertaining to each of the four seasons: Estival (Summer), Autumnal (Autumn), Hibernal (Winter), and Vernal (Spring).
- The five plazas are named after French words corresponding to their color: Rouge (red), Bleu (blue), Vert (green), Magenta (magenta), and Jaune (yellow).
- The architecture style of Lumiose City is very similar to its real counterpart. Paris itself consists mostly of buildings dating back up to several centuries and the outskirts (also called the Parisian suburbs) were recently urbanized, dating back to the 1960s.
- Similarly to Paris, Lumiose City has roads connecting to all parts of Kalos. The only difference is that Paris' connections to all parts of France are used by railroads.
- The layout of the city is also extremely similar to the area of Paris surrounding the Arc de Triomphe.
- On the second floor of the Fighting Dojo, a Hex Maniac will appear, say "No, you're not the one," and float away. The purpose of this in-game event, if there is one, is not known yet.
- In Omega Ruby and Alpha Sapphire, the player can talk to a Hex Maniac on the first floor of Mt. Pyre's interior who says the exact same words. The relation between these two events is unknown.
- Behind the second TMV timetable in Lumiose Station, some words are written saying "I'm going to go for help. Wait in the usual place."
- The shape and colors of the plazas closely resemble the logo of the Battle Frontier in Generation IV.
- Lumiose City has more Pokémon Centers than any other city, with three.
- The Mega Stones for the Kanto starter Pokémon sold at the Stone Emporium are the most expensive purchasable items in the Pokémon games, costing $1,000,000 originally. Some items have been listed for the same price in previous games, but they have not been purchasable since that price was specifically chosen in those instances to be $1 more than the player could hold.
- In Jaune Plaza, there are two girls who are mimicking the sounds of Pokémon. In the Japanese version, one girl is mimicking the sound of Heatran while the other is complimenting her. However, this is mistranslated in the English version to imply that a Lava Dome Pokémon appears in Jaune Plaza.
Glitches

- Main article: Lumiose City save glitch
At the time of release of Pokémon X and Y, many players reported being unable to move after loading a save within Lumiose City. According to Nintendo.com, if the player saves the game in certain areas of Lumiose City, then ends the game, the controls will not respond when the saved game is reloaded. They provided a map indicating known areas where the glitch can occur, which includes the entire outer boulevards. On October 25, 2013, Nintendo released a patch for this glitch via the Nintendo eShop.
Origin
Lumiose City and Prism Tower are based on Paris and the Eiffel Tower respectively.
Name origin
| Language | Name | Origin |
|---|---|---|
| Japanese | ミアレシティ Miare City | From みあれ香 miare-kō (an incense used for rituals to welcome deities in the Kamo Shrine) and 御生れ miare (advent of a deity) |
| English | Lumiose City | From Paris's nickname La Ville-Lumière (The City of Light), grandiose, and possibly rose |
| French | Illumis | From La Ville-Lumière, Paris, and luminisme (luminism) |
| German | Illumina City | From La Ville-Lumière and Luminismus (luminism) |
| Italian | Luminopoli | From La Ville-Lumière and luminismo (luminism) |
| Spanish | Ciudad Luminalia | From La Ville-Lumière and luminismo (luminism) |
| Brazilian Portuguese | Cidade de Lumiose | From its English name |
| Korean | 미르시티 Mireu City | Possibly from myrrh or 미르 mireu (dragon) |
| Chinese (Mandarin) | 密阿雷市 Mì'āléi Shì | Transliteration of its Japanese name. Contains 雷 léi (thunder). |
| Chinese (Cantonese) | 密阿雷市 Maht'alèuih Si | Mandarin-based transliteration of its Japanese name. Contains 雷 lèuih (thunder). |
| Russian | Люмиос Сити Lyumios Siti | Transcription of English name |
References
| Kalos | ||||||||
|---|---|---|---|---|---|---|---|---|
|
| ||||||||
|
| This article is part of Project Cities and Towns, a Bulbapedia project that aims to write comprehensive articles on every city and town in the Pokémon world. |