Haina Desert: Difference between revisions
m (→Geography: TM 82 changed to TM 85) |
|||
| (84 intermediate revisions by 37 users not shown) | |||
| Line 1: | Line 1: | ||
{{Infobox location | |||
{{Infobox location | |image=Haina Desert Area SMUSUM.png | ||
|image= | |image_size=350px | ||
|image_size= | |||
|type=sand | |type=sand | ||
|location_name=Haina Desert | |location_name=Haina Desert | ||
|japanese_name=ハイナ{{tt|砂漠|さばく}} | |japanese_name=ハイナ{{tt|砂漠|さばく}} | ||
|translated_name= | |translated_name=Haina Desert | ||
|location=[[Ula'ula Island]] | |location=[[Ula'ula Island]] | ||
|mapdesc=A scorching-hot desert beyond Route 13. Trainers often get lost here in this broiling labyrinth. | |mapdesc=A scorching-hot desert beyond Route 13. Trainers often get lost here in this broiling labyrinth. | ||
|region=Alola | |region=Alola | ||
|generation={{gen|VII}} | |generation={{gen|VII}} | ||
|mapsize=250px | |||
}} | }} | ||
'''Haina Desert''' (Japanese: '''ハイナ{{tt|砂漠|さばく}}''' ''Hainā Desert'') is a location on [[Ula'ula Island]] in [[Alola]], located north of {{rt|13|Alola}} and south of the [[Ruins of Abundance]]. | '''Haina Desert''' (Japanese: '''ハイナ{{tt|砂漠|さばく}}''' ''Hainā Desert'') is a location on [[Ula'ula Island]] in [[Alola]], located north of {{rt|13|Alola}} and south of the [[Ruins of Abundance]]. | ||
==Geography== | ==Geography== | ||
Haina Desert is a maze-like area, with paths that do not always lead where one might expect. The entrance area has two exits aside from the one returning to {{rt|13|Alola}}: one up and one right. The right exit leads to a dead end with an item, | Haina Desert is a maze-like area, with paths that do not always lead where one might expect. The entrance area has two exits aside from the one returning to {{rt|13|Alola}}: one up and one right. The right exit leads to a dead end with an item, [[Max Elixir]], which is also visible across a wall on the left side of the entrance area. The top exit leads the {{player}} forward. | ||
The area up from the entrance has three exits aside from the one leading back to the entrance. The exit at the top leads to a dead-end with a lost {{tc|Hiker}} and a [[TM]] visible beyond a wall. The exit on the left loops the player around to the right side of the same area, while the exit on the right leads the player forward to an area with a [[Zygarde Cube|Zygarde Cell]]. This area has only two exits, the one leading back, and one at the top leading forward, to an area with a ring of rocky terrain in the middle. | The area up from the entrance has three exits aside from the one leading back to the entrance. The exit at the top leads to a dead-end with a lost {{tc|Hiker}} and a [[TM]] visible beyond a wall. The exit on the left loops the player around to the right side of the same area, while the exit on the right leads the player forward to an area with a [[Zygarde Cube|Zygarde Cell]]. This area has only two exits, the one leading back, and one at the top leading forward, to an area with a ring of rocky terrain in the middle. | ||
The rocky terrain area has three exits aside from the one leading back to the Zygarde Cell area. The exit at the top leads to the same dead-end with the lost Hiker seen previously, which still leads the player back to the area up from the entrance if they try to return (instead of the rocky terrain area they entered from). The exit on the left loops the player around to the right side of the same area, while the exit on the right leads the player forward to a dead-end path with | The rocky terrain area has three exits aside from the one leading back to the Zygarde Cell area. The exit at the top leads to the same dead-end with the lost Hiker seen previously, which still leads the player back to the area up from the entrance if they try to return (instead of the rocky terrain area they entered from). The exit on the left loops the player around to the right side of the same area, while the exit on the right leads the player forward to a dead-end path with [[Psychium Z]]. When the player attempts to return from this path the same way they entered, they will arrive in an area that looks very similar to the area they came from, but is actually different. | ||
The second rocky terrain area is distinguished from the first by the exits having different stacks of stones at each exit, an item in the middle of the rocky terrain ring, and totems framing the top exit. The top exit leads the player to the [[Ruins of Abundance]]. The bottom exit leads the player to the other side of the dead-end with the Hiker, where they can find {{tm|85|Dream Eater}}. The left exit leads the player to a new path with a span of rocky terrain that leads to a dead-end, but when the player attempts to exit, they will arrive back in the first rocky terrain area. From there, the player can return to the entrance area by heading down, left, and then down again. | The second rocky terrain area is distinguished from the first by the exits having different stacks of stones at each exit, an item in the middle of the rocky terrain ring, and totems framing the top exit. The top exit leads the player to the [[Ruins of Abundance]]. The bottom exit leads the player to the other side of the dead-end with the Hiker, where they can find {{tm|85|Dream Eater}}. The left exit leads the player to a new path with a span of rocky terrain that leads to a dead-end, but when the player attempts to exit, they will arrive back in the first rocky terrain area. From there, the player can return to the entrance area by heading down, left, and then down again. | ||
During the day, Haina Desert is | During most of the day, Haina Desert is bathed in [[harsh sunlight]], while during the night a {{weather|sandstorm}} blows instead. The sandstorm fades at 10 AM in-game time and revives at 5 PM. | ||
==Items== | ==Items== | ||
{{Itlisth|sand}} | {{Itlisth|sand}} | ||
{{Itemlist|Max Elixir| | {{Itemlist|Max Elixir|Area 1, reached by going to the right exit of Area 1|Su=yes|M=yes|}} | ||
{{Itemlist|Psychium Z| | {{Itemlist|Max Potion|Area 1, reached by going to the right exit of Area 1|US=yes|UM=yes|}} | ||
{{Itemlist|Comet Shard| | {{Itemlist|Safety Goggles|Area 4, from a {{tc|Hiker}} found through the top exit of Area 2 or Area 5, after telling him their Pokémon's eyes are "looking pretty bleary", after passing [[Nanu]]'s [[island challenge|grand trial]]{{sup/t|N}}|Su=yes|M=yes|US=yes|UM=yes}} | ||
{{Itemlist|TM Psychic VI| | {{Itemlist|Hyper Potion|Area 3, near the boulder on the eastern side, reached by following the stone stacks in the order 2-1|US=yes|UM=yes|}} | ||
{{Itemlist| | {{Itemlist|Sun Stone|Area 3; from the man, reached by following the stone stacks in the order 2-1, after showing him a {{p|Solrock}}, after becoming {{pkmn|Champion}}|Su=yes|US=yes}} | ||
{{Itemlist|Moon Stone|Area 3; from the man, reached by following the stone stacks in the order 2-1, after showing him a {{p|Lunatone}}, after becoming Champion|M=yes|UM=yes}} | |||
{{Itemlist|Psychium Z|Area 6; on the pedestal at the end reached by following the stone stacks in the order 2-1-4|Su=yes|M=yes|US=yes|UM=yes}} | |||
{{Itemlist|Comet Shard|Area 7; in the middle, reached after returning from the path reached by following the stone stacks in the order 2-1-4 (requires [[Poké Ride|Mudsdale Gallop]])|Su=yes|M=yes|US=yes|UM=yes}} | |||
{{Itemlist|TM Psychic VI|Area 4, reached after returning from the path reached by following the stone stacks in the order 2-1-4|Su=yes|M=yes|display={{TM|85|Dream Eater}}|US=yes|UM=yes}} | |||
{{Itemlist|Big Nugget|Area 8, past the rocky terrain, reached by following the stone stacks in the order 2-1-4-2 (requires [[Poké Ride|Mudsdale Gallop]])|US=yes|UM=yes|}} | |||
{{Itlistfoot|sand}} | {{Itlistfoot|sand}} | ||
===Zygarde Cube=== | ===Zygarde Cube=== | ||
{{Itlisth|sand}} | {{Itlisth|sand}} | ||
{{Itemlist|Zygarde Cell| | {{Itemlist||sprite=Key Zygarde Cell Sprite|size=40px|Area 3; by the bush, reached by following the stone stacks in the order 2-1|Su=yes|M=yes|display=[[Zygarde Cube|Zygarde Cell]]}} | ||
{{Itlistfoot|sand}} | {{Itlistfoot|sand}} | ||
===Dropped after ambush encounters=== | ===Dropped after ambush encounters=== | ||
Sometimes, after a Pokémon from a sand cloud is defeated or caught, it will drop an item. | |||
{{Itlisth|sand}} | {{Itlisth|sand}} | ||
{{Itemlist|Black Glasses|Sometimes dropped by | {{Itemlist|Black Glasses|Sometimes dropped by Sandile{{sup/7|SM}}/Krokorok{{sup/7|USUM}} from sand clouds|Su=yes|M=yes|US=yes|UM=yes}} | ||
{{Itemlist|Soft Sand|Sometimes dropped by | {{Itemlist|Soft Sand|Sometimes dropped by Dugtrio from sand clouds|Su=yes|M=yes|US=yes|UM=yes}} | ||
{{Itemlist|Big Root|Sometimes dropped by Dugtrio from sand clouds|Su=yes|M=yes|US=yes|UM=yes}} | |||
{{Itemlist|Figy Berry|Sometimes dropped by Trapinch from sand clouds|Su=yes|M=yes|US=yes|UM=yes}} | |||
{{Itlistfoot|sand}} | {{Itlistfoot|sand}} | ||
==Pokémon== | ==Pokémon== | ||
===Pokémon Sun and Moon=== | |||
{{Catch/header/7|sand}} | {{Catch/header/7|sand}} | ||
{{Catch/entry7|051A|Dugtrio|yes|yes|Sand|28-31|all=30%|type1=Ground|type2=Steel}} | {{Catch/entry7|051A|Dugtrio|yes|yes|Sand|28-31|all=30%|type1=Ground|type2=Steel|form=Alolan Form}} | ||
{{Catch/entry7|551|Sandile|yes|yes|Sand|28-31|all=70%|type1=Ground|type2=Dark}} | {{Catch/entry7|551|Sandile|yes|yes|Sand|28-31|all=70%|type1=Ground|type2=Dark}} | ||
{{Catch/div|sand|Ambush encounters}} | {{Catch/div|sand|Ambush encounters}} | ||
{{Catch/entry7|051A|Dugtrio|yes|yes|Sand cloud|28-31|all=20%|type1=Ground|type2=Steel}} | {{Catch/entry7|051A|Dugtrio|yes|yes|Sand cloud|28-31|all=20%|type1=Ground|type2=Steel|form=Alolan Form}} | ||
{{Catch/entry7|328|Trapinch|yes|yes|Sand cloud|28-31|all=10%|type1=Ground}} | {{Catch/entry7|328|Trapinch|yes|yes|Sand cloud|28-31|all=10%|type1=Ground}} | ||
{{Catch/entry7|551|Sandile|yes|yes|Sand cloud|28-31|all=70%|type1=Ground|type2=Dark}} | {{Catch/entry7|551|Sandile|yes|yes|Sand cloud|28-31|all=70%|type1=Ground|type2=Dark}} | ||
{{Catch/div|sand|Special}} | {{Catch/div|sand|{{color2|000|SOS Battle#Weather-dependent allies|Special allies in weather}}}} | ||
{{ | {{Catch/entry7|000|Any|yes|yes|Sand|28-31|all=10%|allies=<small>{{color2|000|Sandstorm (weather condition)|Sandstorm}}:</small><br>{{MSN|444|Gabite}}|type1=???}} | ||
{{Catch/entry7|000|Any|yes|yes|Sand|28-31|all=1%|allies=<small>{{color2|000|Sandstorm (weather condition)|Sandstorm}}:</small><br>{{MSN|351|Castform}}|type1=???}} | |||
{{Catch/entry7|000|Any|yes|yes|Sand|28-31|all=11%|allies=<small>{{color2|000|Rain}} or {{color2|000|Hail (weather condition)|hail}}:</small><br>{{MSN|351|Castform}}|type1=???}} | |||
{{Catch/entry7|000|Any|yes|yes|Sand cloud|28-31|all=10%|allies=<small>{{color2|000|Sandstorm (weather condition)|Sandstorm}}:</small><br>{{MSN|444|Gabite}}|type1=???}} | |||
{{Catch/entry7|000|Any|yes|yes|Sand cloud|28-31|all=1%|allies=<small>{{color2|000|Sandstorm (weather condition)|Sandstorm}}:</small><br>{{MSN|351|Castform}}|type1=???}} | |||
{{Catch/entry7|000|Any|yes|yes|Sand cloud|28-31|all=11%|allies=<small>{{color2|000|Rain}} or {{color2|000|Hail (weather condition)|hail}}:</small><br>{{MSN|351|Castform}}|type1=???}} | |||
{{Catch/footer|sand}} | {{Catch/footer|sand}} | ||
==Name origin== | ===Pokémon Ultra Sun and Ultra Moon=== | ||
{{Catch/header/7|sand}} | |||
{{Catch/entryusum|051A|Dugtrio|yes|no|Sand|32-35|all=30%|type1=Ground|type2=Steel|allies={{MSN|051A|Dugtrio}}<br>{{MSN|622|Golett}}|form=Alolan Form}} | |||
{{Catch/entryusum|051A|Dugtrio|no|yes|Sand|32-35|all=30%|type1=Ground|type2=Steel|allies={{MSN|051A|Dugtrio}}<br>{{MSN|343|Baltoy}}|form=Alolan Form}} | |||
{{Catch/entryusum|552|Krokorok|yes|no|Sand|32-35|all=70%|type1=Ground|type2=Dark|allies={{MSN|552|Krokorok}}<br>{{MSN|622|Golett}}}} | |||
{{Catch/entryusum|552|Krokorok|no|yes|Sand|32-35|all=70%|type1=Ground|type2=Dark|allies={{MSN|552|Krokorok}}<br>{{MSN|343|Baltoy}}}} | |||
{{Catch/div|sand|Ambush encounters}} | |||
{{Catch/entryusum|051A|Dugtrio|yes|no|Sand cloud|32-35|all=20%|type1=Ground|type2=Steel|allies={{MSN|051A|Dugtrio}}<br>{{MSN|622|Golett}}|form=Alolan Form}} | |||
{{Catch/entryusum|051A|Dugtrio|no|yes|Sand cloud|32-35|all=20%|type1=Ground|type2=Steel|allies={{MSN|051A|Dugtrio}}<br>{{MSN|343|Baltoy}}|form=Alolan Form}} | |||
{{Catch/entryusum|328|Trapinch|yes|no|Sand cloud|32-35|all=10%|type1=Ground|allies={{MSN|328|Trapinch}}<br>{{MSN|622|Golett}}}} | |||
{{Catch/entryusum|328|Trapinch|no|yes|Sand cloud|32-35|all=10%|type1=Ground|allies={{MSN|328|Trapinch}}<br>{{MSN|343|Baltoy}}}} | |||
{{Catch/entryusum|552|Krokorok|yes|no|Sand cloud|32-35|all=70%|type1=Ground|type2=Dark|allies={{MSN|552|Krokorok}}<br>{{MSN|622|Golett}}}} | |||
{{Catch/entryusum|552|Krokorok|no|yes|Sand cloud|32-35|all=70%|type1=Ground|type2=Dark|allies={{MSN|552|Krokorok}}<br>{{MSN|343|Baltoy}}}} | |||
{{Catch/div|sand|{{color2|000|SOS Battle#Weather-dependent allies|Special allies in weather}}}} | |||
{{Catch/entryusum|000|Any|yes|yes|Sand|32-35|all=10%|allies=<small>{{color2|000|Sandstorm (weather condition)|Sandstorm}}:</small><br>{{MSN|444|Gabite}}|type1=???}} | |||
{{Catch/entryusum|000|Any|yes|yes|Sand|32-35|all=1%|allies=<small>{{color2|000|Sandstorm (weather condition)|Sandstorm}}:</small><br>{{MSN|351|Castform}}|type1=???}} | |||
{{Catch/entryusum|000|Any|yes|yes|Sand|32-35|all=11%|allies=<small>{{color2|000|Rain}} or {{color2|000|Hail (weather condition)|hail}}:</small><br>{{MSN|351|Castform}}|type1=???}} | |||
{{Catch/entryusum|000|Any|yes|yes|Sand cloud|32-35|all=10%|allies=<small>{{color2|000|Sandstorm (weather condition)|Sandstorm}}:</small><br>{{MSN|444|Gabite}}|type1=???}} | |||
{{Catch/entryusum|000|Any|yes|yes|Sand cloud|32-35|all=1%|allies=<small>{{color2|000|Sandstorm (weather condition)|Sandstorm}}:</small><br>{{MSN|351|Castform}}|type1=???}} | |||
{{Catch/entryusum|000|Any|yes|yes|Sand cloud|32-35|all=11%|allies=<small>{{color2|000|Rain}} or {{color2|000|Hail (weather condition)|hail}}:</small><br>{{MSN|351|Castform}}|type1=???}} | |||
{{Catch/footer|sand}} | |||
==Special encounters== | |||
===Pokémon Moon=== | |||
Two {{p|Celesteela}} will appear here or at [[Malie Garden]] during the fourth [[Ultra Beast]] mission. One Celesteela can be caught in one location, and the other in another. The Celesteela respawn immediately if defeated or run from. Celesteela is not registered as seen in the [[Pokédex]] and appears as ??? until the first one is caught. They are coded to never be {{Shiny}}. | |||
{| | |||
| Aura: +2 {{stat|Defense}} | |||
|- style="vertical-align:top" | |||
|{{Pokémon/7 | |||
|ndex=797 | |||
|pokemon=Celesteela | |||
|nickname=??? | |||
|type1=Steel | |||
|type2=Flying | |||
|ability=Beast Boost | |||
|level=65 | |||
|move1=Autotomize|move1type=Steel|move1cat=Status | |||
|move2=Seed Bomb|move2type=Grass|move2cat=Physical | |||
|move3=Skull Bash|move3type=Normal|move3cat=Physical | |||
|move4=Power Whip|move4type=Grass|move4cat=Physical}} | |||
|} | |||
==Layout== | |||
{| class="roundy" style="margin:auto; background:#000; border:3px solid #{{locationcolor/dark|sand}}" | |||
! style="background:#{{locationcolor/light|sand}}; {{roundytl|5px}}" | Game | |||
! style="background:#{{locationcolor/light|sand}}" | Area 1 | |||
! style="background:#{{locationcolor/light|sand}}" | Area 2 | |||
! style="background:#{{locationcolor/light|sand}}" | Area 3 | |||
! style="background:#{{locationcolor/light|sand}}; {{roundytr|5px}}" | Area 4 | |||
|- | |||
! style="background:#{{sun color}}" | {{color2|000|Pokémon Sun and Moon|Sun}} | |||
! rowspan="4" | [[File:Haina Desert Area 1 SMUSUM.png|200px]] | |||
! rowspan="4" | [[File:Haina Desert Area 2 SMUSUM.png|200px]] | |||
! rowspan="4" | [[File:Haina Desert Area 3 SMUSUM.png|200px]] | |||
! rowspan="4" | [[File:Haina Desert Area 4 SMUSUM.png|200px]] | |||
|- | |||
! style="background:#{{moon color}}" | {{color2|000|Pokémon Sun and Moon|Moon}} | |||
|- | |||
! style="background:#{{ultra sun color}}" | {{color2|000|Pokémon Ultra Sun and Ultra Moon|Ultra Sun}} | |||
|- | |||
! style="background:#{{ultra moon color}}" | {{color2|000|Pokémon Ultra Sun and Ultra Moon|Ultra Moon}} | |||
|- | |||
! colspan="5" style="background:#{{locationcolor/light|sand}}; {{roundybottom|5px}}" | | |||
|} | |||
{{-}} | |||
{| class="roundy" style="margin:auto; background:#000; border:3px solid #{{locationcolor/dark|sand}}" | |||
! style="background:#{{locationcolor/light|sand}}; {{roundytl|5px}}" | Game | |||
! style="background:#{{locationcolor/light|sand}}" | Area 5 | |||
! style="background:#{{locationcolor/light|sand}}" | Area 6 | |||
! style="background:#{{locationcolor/light|sand}}" | Area 7 | |||
! style="background:#{{locationcolor/light|sand}}; {{roundytr|5px}}" | Area 8 | |||
|- | |||
! style="background:#{{sun color}}" | {{color2|000|Pokémon Sun and Moon|Sun}} | |||
! rowspan="4" | [[File:Haina Desert Area 5 SMUSUM.png|200px]] | |||
! rowspan="4" | [[File:Haina Desert Area 6 SMUSUM.png|200px]] | |||
! rowspan="4" | [[File:Haina Desert Area 7 SMUSUM.png|200px]] | |||
! rowspan="4" | [[File:Haina Desert Area 8 SMUSUM.png|200px]] | |||
|- | |||
! style="background:#{{moon color}}" | {{color2|000|Pokémon Sun and Moon|Moon}} | |||
|- | |||
! style="background:#{{ultra sun color}}" | {{color2|000|Pokémon Ultra Sun and Ultra Moon|Ultra Sun}} | |||
|- | |||
! style="background:#{{ultra moon color}}" | {{color2|000|Pokémon Ultra Sun and Ultra Moon|Ultra Moon}} | |||
|- | |||
! colspan="5" style="background:#{{locationcolor/light|sand}}; {{roundybottom|5px}}" | | |||
|} | |||
==In the anime== | |||
[[File:Haina Desert anime.png|thumb|250px|Haina Desert in the {{pkmn|anime}}]] | |||
Haina Desert appeared in ''[[SM075|Some Kind of Laziness!]]'', where {{Ash}} and [[Acerola]] traveled through it on a [[Poké Ride|Ride]] {{p|Mudsdale}} to meet {{DL|Guardian deities (anime)|Tapu Bulu}} at the [[Ruins of Abundance]]. | |||
{{-}} | |||
==Trivia== | |||
* After becoming Champion, a mysterious man appears in the desert, apparently suffering from amnesia. If the player shows him a {{p|Solrock}}{{sup/7|S}}{{sup/7|US}}/{{p|Lunatone}}{{sup/7|M}}{{sup/7|UM}}, he will regain his memories and mention that he first encountered the Pokémon shown to him 30 years earlier, and that the "star pulses" it bestowed upon him have been passed down to "a group of wonderful men". This is likely a [[List of cross-generational references|reference]] to the [[old guys]] and the [[O-Power]]s they give to the player in {{g|Omega Ruby and Alpha Sapphire}}. | |||
===Name origin=== | |||
''Hainā'' is Hawaiian for cruel. | ''Hainā'' is Hawaiian for cruel. | ||
| Line 65: | Line 173: | ||
|zh_yue=哈伊納沙漠 ''{{tt|Hāyīnaahp Sāmohk|Hainā Desert}}'' | |zh_yue=哈伊納沙漠 ''{{tt|Hāyīnaahp Sāmohk|Hainā Desert}}'' | ||
|zh_cmn=哈伊納沙漠 / 哈伊纳沙漠 ''{{tt|Hāyīnà Shāmò|Hainā Desert}}'' | |zh_cmn=哈伊納沙漠 / 哈伊纳沙漠 ''{{tt|Hāyīnà Shāmò|Hainā Desert}}'' | ||
|fi=Hainan aavikko | |||
|fr=Désert Haina | |fr=Désert Haina | ||
|de=Haina-Wüste | |de=Haina-Wüste | ||
|it=Deserto Haina | |it=Deserto Haina | ||
|ko=하이나사막 ''Hainā Samak'' | |ko=하이나사막 ''Hainā Samak'' | ||
|pl=Pustynia Haina | |||
|pt_br=Deserto de Haina | |||
|es=Desierto de Haina | |es=Desierto de Haina | ||
}} | }} | ||
| Line 76: | Line 187: | ||
[[Category:Sun and Moon locations]] | [[Category:Sun and Moon locations]] | ||
[[Category:Ultra Sun and Ultra Moon locations]] | |||
[[Category:Deserts]] | [[Category:Deserts]] | ||
[[de:Haina-Wüste]] | [[de:Haina-Wüste]] | ||
[[es:Desierto de Haina]] | |||
[[fr:Désert Haina]] | |||
[[it:Deserto Haina]] | |||
[[ja:ハイナさばく]] | |||
[[zh:哈伊納沙漠]] | [[zh:哈伊納沙漠]] | ||
Latest revision as of 13:16, 3 December 2023
| ||||
| ||||
| Map description: | A scorching-hot desert beyond Route 13. Trainers often get lost here in this broiling labyrinth. | |||
|---|---|---|---|---|
| Location: | Ula'ula Island | |||
| Region: | Alola | |||
| Generations: | VII | |||
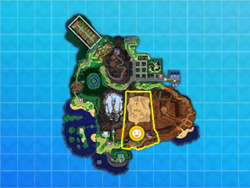 Location of Haina Desert in Alola. | ||||
| Pokémon world locations | ||||
Haina Desert (Japanese: ハイナ砂漠 Hainā Desert) is a location on Ula'ula Island in Alola, located north of Route 13 and south of the Ruins of Abundance.
Geography
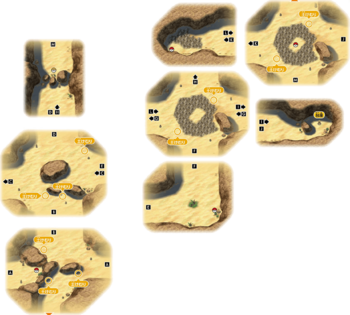
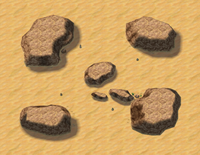
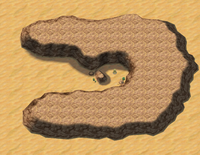
Haina Desert is a maze-like area, with paths that do not always lead where one might expect. The entrance area has two exits aside from the one returning to Route 13: one up and one right. The right exit leads to a dead end with an item, Max Elixir, which is also visible across a wall on the left side of the entrance area. The top exit leads the player forward.
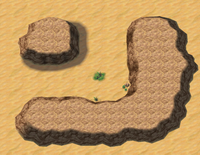
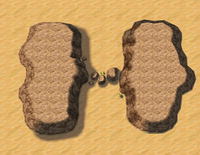
The area up from the entrance has three exits aside from the one leading back to the entrance. The exit at the top leads to a dead-end with a lost Hiker and a TM visible beyond a wall. The exit on the left loops the player around to the right side of the same area, while the exit on the right leads the player forward to an area with a Zygarde Cell. This area has only two exits, the one leading back, and one at the top leading forward, to an area with a ring of rocky terrain in the middle.
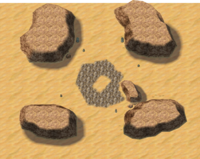
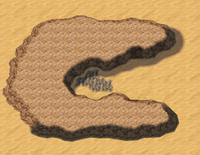
The rocky terrain area has three exits aside from the one leading back to the Zygarde Cell area. The exit at the top leads to the same dead-end with the lost Hiker seen previously, which still leads the player back to the area up from the entrance if they try to return (instead of the rocky terrain area they entered from). The exit on the left loops the player around to the right side of the same area, while the exit on the right leads the player forward to a dead-end path with Psychium Z. When the player attempts to return from this path the same way they entered, they will arrive in an area that looks very similar to the area they came from, but is actually different.
The second rocky terrain area is distinguished from the first by the exits having different stacks of stones at each exit, an item in the middle of the rocky terrain ring, and totems framing the top exit. The top exit leads the player to the Ruins of Abundance. The bottom exit leads the player to the other side of the dead-end with the Hiker, where they can find TM85 (Dream Eater). The left exit leads the player to a new path with a span of rocky terrain that leads to a dead-end, but when the player attempts to exit, they will arrive back in the first rocky terrain area. From there, the player can return to the entrance area by heading down, left, and then down again.
During most of the day, Haina Desert is bathed in harsh sunlight, while during the night a sandstorm blows instead. The sandstorm fades at 10 AM in-game time and revives at 5 PM.
Items
| Item | Location | Games | |
|---|---|---|---|
| Max Elixir | Area 1, reached by going to the right exit of Area 1 | S M | |
| Max Potion | Area 1, reached by going to the right exit of Area 1 | US UM | |
| Safety Goggles | Area 4, from a Hiker found through the top exit of Area 2 or Area 5, after telling him their Pokémon's eyes are "looking pretty bleary", after passing Nanu's grand trialNight | S M US UM | |
| Hyper Potion | Area 3, near the boulder on the eastern side, reached by following the stone stacks in the order 2-1 | US UM | |
| Sun Stone | Area 3; from the man, reached by following the stone stacks in the order 2-1, after showing him a Solrock, after becoming Champion | S US | |
| Moon Stone | Area 3; from the man, reached by following the stone stacks in the order 2-1, after showing him a Lunatone, after becoming Champion | M UM | |
| Psychium Z | Area 6; on the pedestal at the end reached by following the stone stacks in the order 2-1-4 | S M US UM | |
| Comet Shard | Area 7; in the middle, reached after returning from the path reached by following the stone stacks in the order 2-1-4 (requires Mudsdale Gallop) | S M US UM | |
| TM85 (Dream Eater) | Area 4, reached after returning from the path reached by following the stone stacks in the order 2-1-4 | S M US UM | |
| Big Nugget | Area 8, past the rocky terrain, reached by following the stone stacks in the order 2-1-4-2 (requires Mudsdale Gallop) | US UM | |
Zygarde Cube
| Item | Location | Games | |
|---|---|---|---|
| Zygarde Cell | Area 3; by the bush, reached by following the stone stacks in the order 2-1 | S M | |
Dropped after ambush encounters
Sometimes, after a Pokémon from a sand cloud is defeated or caught, it will drop an item.
| Item | Location | Games | |
|---|---|---|---|
| Black Glasses | Sometimes dropped by SandileSM/KrokorokUSUM from sand clouds | S M US UM | |
| Soft Sand | Sometimes dropped by Dugtrio from sand clouds | S M US UM | |
| Big Root | Sometimes dropped by Dugtrio from sand clouds | S M US UM | |
| Figy Berry | Sometimes dropped by Trapinch from sand clouds | S M US UM | |
Pokémon
Pokémon Sun and Moon
| Pokémon | Allies | Games | Location | Levels | Rate | ||||||||||
|---|---|---|---|---|---|---|---|---|---|---|---|---|---|---|---|
|
S | M |
|
28-31 | 30% | ||||||||||
|
S | M |
|
28-31 | 70% | ||||||||||
| Ambush encounters | |||||||||||||||
|
S | M |
|
28-31 | 20% | ||||||||||
|
S | M |
|
28-31 | 10% | ||||||||||
|
S | M |
|
28-31 | 70% | ||||||||||
| Special allies in weather | |||||||||||||||
|
Sandstorm: |
S | M |
|
28-31 | 10% | |||||||||
|
Sandstorm: |
S | M |
|
28-31 | 1% | |||||||||
|
Rain or hail: |
S | M |
|
28-31 | 11% | |||||||||
|
Sandstorm: |
S | M |
|
28-31 | 10% | |||||||||
|
Sandstorm: |
S | M |
|
28-31 | 1% | |||||||||
|
Rain or hail: |
S | M |
|
28-31 | 11% | |||||||||
| A colored background means that the Pokémon can be found in this location in the specified game. A white background with a colored letter means that the Pokémon cannot be found here. | |||||||||||||||
Pokémon Ultra Sun and Ultra Moon
Special encounters
Pokémon Moon
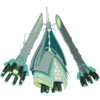
Two Celesteela will appear here or at Malie Garden during the fourth Ultra Beast mission. One Celesteela can be caught in one location, and the other in another. The Celesteela respawn immediately if defeated or run from. Celesteela is not registered as seen in the Pokédex and appears as ??? until the first one is caught. They are coded to never be Shiny.
| Aura: +2 Defense | ||||||||||||||||||||||||||||||||||
| ||||||||||||||||||||||||||||||||||
Layout
| Game | Area 1 | Area 2 | Area 3 | Area 4 |
|---|---|---|---|---|
| Sun | 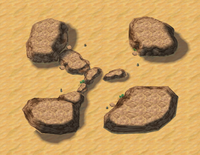
|
|
|
|
| Moon | ||||
| Ultra Sun | ||||
| Ultra Moon | ||||
| Game | Area 5 | Area 6 | Area 7 | Area 8 |
|---|---|---|---|---|
| Sun | 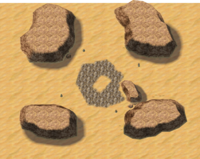
|
|
|
|
| Moon | ||||
| Ultra Sun | ||||
| Ultra Moon | ||||
In the anime

Haina Desert appeared in Some Kind of Laziness!, where Ash and Acerola traveled through it on a Ride Mudsdale to meet Tapu Bulu at the Ruins of Abundance.
Trivia
- After becoming Champion, a mysterious man appears in the desert, apparently suffering from amnesia. If the player shows him a SolrockSUS/LunatoneMUM, he will regain his memories and mention that he first encountered the Pokémon shown to him 30 years earlier, and that the "star pulses" it bestowed upon him have been passed down to "a group of wonderful men". This is likely a reference to the old guys and the O-Powers they give to the player in Pokémon Omega Ruby and Alpha Sapphire.
Name origin
Hainā is Hawaiian for cruel.
In other languages
| |||||||||||||||||||||||||||||||||||
| Alola | |||||
|---|---|---|---|---|---|
| |||||
|

|
This article is part of Project Locations, a Bulbapedia project that aims to write comprehensive articles on every location in the Pokémon world. |
