Celadon Department Store: Difference between revisions
Tempest370 (talk | contribs) mNo edit summary |
Tiddlywinks (talk | contribs) m (→Differences between generations: I didn't really look at this section before, but I thought it was something else entirely... "Layout" (or something) is a better name) |
||
| (46 intermediate revisions by 25 users not shown) | |||
| Line 1: | Line 1: | ||
{{Infobox location | {{Infobox location | ||
|image=Celadon Department Store HGSS.png | |image=Celadon Department Store HGSS.png | ||
|image_size=120 | |||
|type=building | |type=building | ||
|location_name=Celadon Department Store | |location_name=Celadon Department Store | ||
|japanese_name=タマムシデパート | |japanese_name={{tt|タマムシデパート|Tamamushi Depāto}} | ||
|translated_name=Tamamushi Department Store | |translated_name=Tamamushi Department Store | ||
|location=[[Celadon City]] | |location=[[Celadon City]] | ||
|region=Kanto | |region=Kanto | ||
|generation={{Gen|I}}, {{Gen|II}}, {{Gen|III}}, {{Gen|IV}} | |||
|map= | |map=Kanto Celadon City Map.png | ||
}} | }} | ||
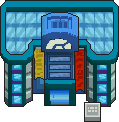
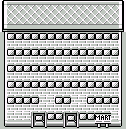
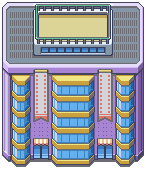
The '''Celadon Department Store''' (Japanese: '''タマムシデパート''' ''Tamamushi Department Store'') is the largest shop in Kanto, far larger than the average [[Poké Mart]]. Their slogan is "Find what you need at the Celadon Dept. Store!" | The '''Celadon Department Store''' (Japanese: '''{{tt|タマムシデパート|Tamamushi Depāto}}''' ''Tamamushi Department Store'') is the largest shop in [[Kanto]], far larger than the average [[Poké Mart]]. Their slogan is "''Find what you need at the Celadon Dept. Store!''" The store is six stories tall, including the roof. | ||
==Sign== | |||
The sign outside the building has remained fundamentally the same throughout the [[generation]]s, only with slight differences in grammar and spelling. | |||
;Generation I | |||
{{sign|RBY|header|}} | |||
{{sign|RBY|Find what you|}} | |||
{{sign|RBY|need at CELADON|}} | |||
{{sign|RBY|DEPT. STORE!|}} | |||
{{sign|RBY|footer|}} | |||
;Generation II | |||
{{sign|RBY|header|}} | |||
{{sign|RBY|Find What You|}} | |||
{{sign|RBY|Need at CELADON|}} | |||
{{sign|RBY|DEPT.STORE!|}} | |||
{{sign|RBY|footer|}} | |||
;Generation III | |||
{{sign|FRLG|header|}} | |||
{{sign|FRLG|Find what you need at the|}} | |||
{{sign|FRLG|CELADON DEPT. STORE!|}} | |||
{{sign|FRLG|footer|}} | |||
;Generation IV | |||
{{sign|DPcity|header|}} | |||
{{sign|DPcity|Find what you need at the|}} | |||
{{sign|DPcity|Celadon Dept. Store!|}} | |||
{{sign|DPcity|footer|}} | |||
==Floors== | ==Floors== | ||
=== | ===1F: Service Counter=== | ||
Here, a receptionist welcomes customers and directs them to a board that describes the store layout. | Here, a receptionist welcomes customers and directs them to a board that describes the store layout. This is where the [[Poké Mart]] deliveryman can be found. | ||
===2F: Trainer's Market=== | |||
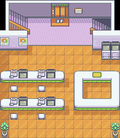
This floor's motto is "Top Grade [[Item]]s for Trainers!" [[Lance]] is seen regularly on this floor buying capes. | |||
====[[Generation I]]==== | ====[[Generation I]]==== | ||
{{shop| | {{shop|Left cashier}} | ||
{{shoprow|{{shopitem|Great Ball|600}}|{{shopitem|Super Potion|700}}}} | {{shoprow|{{shopitem|Great Ball|600}}|{{shopitem|Super Potion|700}}}} | ||
{{shoprow|{{shopitem|Revive|1500}}|{{shopitem| | {{shoprow|{{shopitem|Revive|1500}}|{{shopitem|Super Repel|500}}}} | ||
{{shoprow|{{shopitem| | {{shoprow|{{shopitem|Antidote|100}}|{{shopitem|Burn Heal|250}}}} | ||
{{shoprow|{{shopitem| | {{shoprow|{{shopitem|Ice Heal|250}}|{{shopitem|Awakening|200}}}} | ||
{{shoprow|{{shopitem| | {{shoprow|{{shopitem|Parlyz Heal|200}}}} | ||
{{shopfooter|multiple=yes}} | {{shopfooter|multiple=yes}} | ||
{{shop| | {{shop|Right cashier}} | ||
{{shoprow|{{shopitem|TM32|1000|PD||TM Normal|Double Team}}|{{shopitem|TM33|1000|PD||TM Psychic|Reflect}}}} | {{shoprow|{{shopitem|TM32|1000|PD||TM Normal|Double Team}}|{{shopitem|TM33|1000|PD||TM Psychic|Reflect}}}} | ||
{{shoprow|{{shopitem|TM02|2000|PD||TM Normal|Razor Wind}}|{{shopitem|TM07|2000|PD||TM Normal|Horn Drill}}}} | {{shoprow|{{shopitem|TM02|2000|PD||TM Normal|Razor Wind}}|{{shopitem|TM07|2000|PD||TM Normal|Horn Drill}}}} | ||
| Line 36: | Line 67: | ||
====[[Generation II]]==== | ====[[Generation II]]==== | ||
{{shop|Left | {{shop|Left cashier}} | ||
{{shoprow|{{shopitem|Potion|300}}|{{shopitem|Super Potion|700}}}} | {{shoprow|{{shopitem|Potion|300}}|{{shopitem|Super Potion|700}}}} | ||
{{shoprow|{{shopitem|Hyper Potion|1200}}|{{shopitem|Max Potion|2500}}}} | {{shoprow|{{shopitem|Hyper Potion|1200}}|{{shopitem|Max Potion|2500}}}} | ||
| Line 42: | Line 73: | ||
{{shoprow|{{shopitem|Max Repel|700}}}} | {{shoprow|{{shopitem|Max Repel|700}}}} | ||
{{shopfooter|multiple=yes}} | {{shopfooter|multiple=yes}} | ||
{{shop|Right | {{shop|Right cashier}} | ||
{{shoprow|{{shopitem|Poké Ball|200}}|{{shopitem|Great Ball|600}}}} | {{shoprow|{{shopitem|Poké Ball|200}}|{{shopitem|Great Ball|600}}}} | ||
{{shoprow|{{shopitem|Ultra Ball|1200}}|{{shopitem| | {{shoprow|{{shopitem|Ultra Ball|1200}}|{{shopitem|Escape Rope|550}}}} | ||
{{shoprow|{{shopitem| | {{shoprow|{{shopitem|Full Heal|600}}|{{shopitem|Antidote|100}}}} | ||
{{shoprow|{{shopitem| | {{shoprow|{{shopitem|Burn Heal|250}}|{{shopitem|Ice Heal|250}}}} | ||
{{shoprow|{{shopitem| | {{shoprow|{{shopitem|Awakening|250}}|{{shopitem|Parlyz Heal|200}}}} | ||
{{shopfooter}} | {{shopfooter}} | ||
====[[Generation III]]==== | ====[[Generation III]]==== | ||
{{shop| | {{shop|Upper cashier}} | ||
{{shoprow|{{shopitem|TM05|1000|PD||TM Normal|Roar}}|{{shopitem|TM15|7500|PD||TM Normal|Hyper Beam}}}} | |||
{{shoprow|{{shopitem|TM28|2000|PD||TM Ground|Dig}}|{{shopitem|TM31|3000|PD||TM Fighting|Brick Break}}}} | |||
{{shoprow|{{shopitem|TM43|3000|PD||TM Normal|Secret Power}}|{{shopitem|TM45|3000|PD||TM Normal|Attract}}}} | |||
{{shopfooter|multiple=yes}} | |||
{{shop|Lower cashier}} | |||
{{shoprow|{{shopitem|Great Ball|600}}|{{shopitem|Super Potion|700}}}} | {{shoprow|{{shopitem|Great Ball|600}}|{{shopitem|Super Potion|700}}}} | ||
{{shoprow|{{shopitem|Revive|1500}}|{{shopitem|Antidote|100}}}} | {{shoprow|{{shopitem|Revive|1500}}|{{shopitem|Antidote|100}}}} | ||
{{shoprow|{{shopitem|Parlyz Heal|200}}|{{shopitem|Awakening|250}}}} | |||
{{shoprow|{{shopitem|Burn Heal|250}}|{{shopitem|Ice Heal|250}}}} | {{shoprow|{{shopitem|Burn Heal|250}}|{{shopitem|Ice Heal|250}}}} | ||
{{shoprow|{{shopitem|Super Repel|500}}}} | {{shoprow|{{shopitem|Super Repel|500}}}} | ||
{{shopfooter}} | {{shopfooter}} | ||
====[[Generation IV]]==== | ====[[Generation IV]]==== | ||
{{shop|Left | {{shop|Left cashier}} | ||
{{shoprow|{{shopitem|Potion|300}}|{{shopitem|Super Potion|700}}}} | {{shoprow|{{shopitem|Potion|300}}|{{shopitem|Super Potion|700}}}} | ||
{{shoprow|{{shopitem|Hyper Potion|1200}}|{{shopitem|Max Potion|2500}}}} | {{shoprow|{{shopitem|Hyper Potion|1200}}|{{shopitem|Max Potion|2500}}}} | ||
{{shoprow|{{shopitem| | {{shoprow|{{shopitem|Revive|1500}}|{{shopitem|Antidote|100}}}} | ||
{{shoprow|{{shopitem| | {{shoprow|{{shopitem|Parlyz Heal|200}}|{{shopitem|Burn Heal|250}}}} | ||
{{shoprow|{{shopitem| | {{shoprow|{{shopitem|Ice Heal|250}}|{{shopitem|Awakening|250}}}} | ||
{{shoprow | {{shoprow|{{shopitem|Full Heal|600}}}} | ||
{{shopfooter|multiple=yes}} | {{shopfooter|multiple=yes}} | ||
{{shop|Right | {{shop|Right cashier}} | ||
{{shoprow|{{shopitem|Poké Ball|200}}|{{shopitem|Great Ball|600}}}} | {{shoprow|{{shopitem|Poké Ball|200}}|{{shopitem|Great Ball|600}}}} | ||
{{shoprow|{{shopitem|Ultra Ball|1200}}|{{shopitem|Escape Rope|550}}}} | {{shoprow|{{shopitem|Ultra Ball|1200}}|{{shopitem|Escape Rope|550}}}} | ||
{{shoprow|{{shopitem| | {{shoprow|{{shopitem|Poké Doll|1000}}|{{shopitem|Repel|350}}}} | ||
{{shoprow|{{shopitem| | {{shoprow|{{shopitem|Super Repel|500}}|{{shopitem|Max Repel|700}}}} | ||
{{shoprow|{{shopitem| | {{shoprow|{{shopitem|Grass Mail|50}}|{{shopitem|Flame Mail|50}}}} | ||
{{shoprow|{{shopitem|Space Mail|50}}}} | {{shoprow|{{shopitem|Bubble Mail|50}}|{{shopitem|Space Mail|50}}}} | ||
{{shopfooter}} | {{shopfooter}} | ||
=== | ===3F: TV Game Shop/TM Shop=== | ||
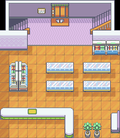
In [[Generation]]s {{gen|I}} and {{gen|III}}, video games are displayed on this floor. A man behind the counter will give away {{TM|18|Counter}} in Generation I. In Generation III, this man becomes a [[Move Tutor]] who will teach Counter to Pokémon. | |||
In Generations {{gen|II}} and {{gen|IV}}, [[TM]]s are sold here instead. The floor's motto in Generation IV is "Make Your Pokémon Stronger!" | |||
{{shop|Generation II}} | {{shop|Generation II}} | ||
| Line 99: | Line 132: | ||
{{shopfooter}} | {{shopfooter}} | ||
=== | ===4F: Wiseman Gifts=== | ||
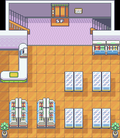
A gift shop is on this floor. "Express | A gift shop is on this floor. In Generation III, the floor is called "Wise Man Gifts". "Express yourself with gifts!" is its slogan in Generations I-III, or "Gifts to Express Yourself!" in Generation IV. | ||
In Generations I and III, [[evolutionary stone]]s are specially for sale here. In Generation IV, [[Falkner]] and [[Janine]] appear here on Mondays. | |||
{{shop|Generation I}} | {{shop|Generation I}} | ||
| Line 121: | Line 156: | ||
{{shopfooter}} | {{shopfooter}} | ||
=== | ===5F: Drugstore=== | ||
A pharmacy selling Pokémon [[stat-enhancing items]] is on this floor. | A pharmacy selling Pokémon [[vitamin|stat-enhancing items]] is on this floor. | ||
In Generations I and II, the floor is called "Drug Store", and in Generation IV, it is called "Battle Collection". Its motto in Generation IV is "Bring Out Pokémon Potential". | |||
==== | ====Generation I==== | ||
{{shop|Left | {{shop|Left cashier}} | ||
{{shoprow|{{shopitem|X Accuracy|950}}|{{shopitem|Guard Spec.|700}}}} | |||
{{shoprow|{{shopitem|Dire Hit|650}}|{{shopitem|X Attack|500}}}} | |||
{{shoprow|{{shopitem|X Defend|550}}|{{shopitem|X Speed|350}}}} | |||
{{shoprow|{{shopitem|X Special|350}}}} | |||
{{shopfooter|multiple=yes}} | |||
{{shop|Right cashier}} | |||
{{shoprow|{{shopitem|HP Up|9800}}|{{shopitem|Protein|9800}}}} | {{shoprow|{{shopitem|HP Up|9800}}|{{shopitem|Protein|9800}}}} | ||
{{shoprow|{{shopitem|Iron|9800}}|{{shopitem|Calcium|9800}}}} | {{shoprow|{{shopitem|Iron|9800}}|{{shopitem|Carbos|9800}}}} | ||
{{shoprow|{{shopitem|Carbos|9800}}}} | {{shoprow|{{shopitem|Calcium|9800}}}} | ||
{{shopfooter}} | |||
====Generation II==== | |||
{{shop|Left cashier}} | |||
{{shoprow|{{shopitem|HP Up|9800}}|{{shopitem|Protein|9800}}}} | |||
{{shoprow|{{shopitem|Iron|9800}}|{{shopitem|Carbos|9800}}}} | |||
{{shoprow|{{shopitem|Calcium|9800}}}} | |||
{{shopfooter|multiple=yes}} | {{shopfooter|multiple=yes}} | ||
{{shop|Right | {{shop|Right cashier}} | ||
{{shoprow|{{shopitem|X Accuracy|950}}|{{shopitem|Guard Spec.|700}}}} | {{shoprow|{{shopitem|X Accuracy|950}}|{{shopitem|Guard Spec.|700}}}} | ||
{{shoprow|{{shopitem|Dire Hit|650}}}} | {{shoprow|{{shopitem|Dire Hit|650}}|{{shopitem|X Attack|500}}}} | ||
{{shoprow|{{shopitem|X Defend|550}}|{{shopitem|X Speed|350}}}} | |||
{{shoprow|{{shopitem|X Special|350}}}} | |||
{{shopfooter}} | {{shopfooter}} | ||
====Generation III==== | ====Generation III==== | ||
{{shop| | {{shop|Upper cashier}} | ||
{{shoprow|{{shopitem|HP Up|9800}}|{{shopitem|Protein|9800}}}} | {{shoprow|{{shopitem|HP Up|9800}}|{{shopitem|Protein|9800}}}} | ||
{{shoprow|{{shopitem|Iron|9800}}|{{shopitem|Calcium|9800}}}} | {{shoprow|{{shopitem|Iron|9800}}|{{shopitem|Calcium|9800}}}} | ||
{{shoprow|{{shopitem|Zinc|9800}}|{{shopitem|Carbos|9800}}}} | {{shoprow|{{shopitem|Zinc|9800}}|{{shopitem|Carbos|9800}}}} | ||
{{shopfooter|multiple=yes}} | {{shopfooter|multiple=yes}} | ||
{{shop| | {{shop|Lower cashier}} | ||
{{shoprow|{{shopitem|X Attack|500}}|{{shopitem|X Defend|550}}}} | {{shoprow|{{shopitem|X Attack|500}}|{{shopitem|X Defend|550}}}} | ||
{{shoprow|{{shopitem|X Speed|350}}|{{shopitem|X Special|350}}}} | {{shoprow|{{shopitem|X Speed|350}}|{{shopitem|X Special|350}}}} | ||
| Line 151: | Line 201: | ||
====Generation IV==== | ====Generation IV==== | ||
{{shop|Left | {{shop|Left cashier}} | ||
{{shoprow|{{shopitem|X | {{shoprow|{{shopitem|X Speed|350}}|{{shopitem|X Attack|500}}}} | ||
{{shoprow|{{shopitem|X | {{shoprow|{{shopitem|X Defend|550}}|{{shopitem|Guard Spec.|700}}}} | ||
{{shoprow|{{shopitem| | {{shoprow|{{shopitem|Dire Hit|650}}|{{shopitem|X Accuracy|950}}}} | ||
{{shoprow|{{shopitem| | {{shoprow|{{shopitem|X Special|350}}|{{shopitem|X Sp. Def|350}}}} | ||
{{shopfooter|multiple=yes}} | {{shopfooter|multiple=yes}} | ||
{{shop|Right | {{shop|Right cashier}} | ||
{{shoprow|{{shopitem| | {{shoprow|{{shopitem|Protein|9800}}|{{shopitem|Iron|9800}}}} | ||
{{shoprow|{{shopitem| | {{shoprow|{{shopitem|Calcium|9800}}|{{shopitem|Zinc|9800}}}} | ||
{{shoprow|{{shopitem| | {{shoprow|{{shopitem|Carbos|9800}}|{{shopitem|HP Up|9800}}}} | ||
{{shopfooter}} | {{shopfooter}} | ||
===Rooftop Square: Vending Machines=== | ===Rooftop Square: Vending Machines=== | ||
A picnic table and some [[ | A picnic table and some [[Vending Machine]]s are located on the roof. In Generation IV, this floor is called the "Rooftop Atrium" and its motto is "Have a Break at the Vending Machines". | ||
{{shop| | |||
In Generations {{gen|I}} and {{gen|III}}, a thirsty girl will give the player [[TM]]s in exchange for one of the [[drink]]s. | |||
{{shop|}} | |||
{{shoprow|{{shopitem|Fresh Water|200}}|{{shopitem|Soda Pop|300}}}} | {{shoprow|{{shopitem|Fresh Water|200}}|{{shopitem|Soda Pop|300}}}} | ||
{{shoprow|{{shopitem|Lemonade|350}}|}} | {{shoprow|{{shopitem|Lemonade|350}}|}} | ||
{{shopfooter}} | {{shopfooter}} | ||
== | ==Items== | ||
{{Itlisth|building}} | |||
{{Itemlist|None|sprite=Accessory Turtwig Mask Sprite|2F; from [[Crasher Wake]]|HG=yes|SS=yes|display=[[Accessory|Turtwig Mask]]}} | |||
{{Itemlist|None|sprite=Accessory Chimchar Mask Sprite|2F; from [[Crasher Wake]]|HG=yes|SS=yes|display=[[Accessory|Chimchar Mask]]}} | |||
{{Itemlist|None|sprite=Accessory Piplup Mask Sprite|2F; from [[Crasher Wake]]|HG=yes|SS=yes|display=[[Accessory|Piplup Mask]]}} | |||
{{Itemlist|TM Fighting|3F; from the man behind a counter|R=yes|B=yes|Y=yes|display={{TM|18|Counter}}}} | |||
{{Itemlist|TM Ice|Roof; from the girl in exchange for a {{DL|Drink|Fresh Water}}|R=yes|B=yes|Y=yes|display={{TM|13|Ice Beam}}}} | |||
{{Itemlist|TM Rock|Roof; from the girl in exchange for a {{DL|Drink|Soda Pop}}|R=yes|B=yes|Y=yes|display={{TM|48|Rock Slide}}}} | |||
{{Itemlist|TM Normal|Roof; from the girl in exchange for a {{DL|Drink|Lemonade}}|R=yes|B=yes|Y=yes|display={{TM|49|Tri Attack}}}} | |||
{{Itemlist|TM Psychic|Roof; from the girl in exchange for a {{DL|Drink|Fresh Water}}|FR=yes|LG=yes|display={{TM|16|Light Screen}}}} | |||
{{Itemlist|TM Normal|Roof; from the girl in exchange for a {{DL|Drink|Soda Pop}}|FR=yes|LG=yes|display={{TM|20|Safeguard}}}} | |||
{{Itemlist|TM Psychic|Roof; from the girl in exchange for a {{DL|Drink|Lemonade}}|FR=yes|LG=yes|display={{TM|33|Reflect}}}} | |||
{{Itlistfoot|building}} | |||
=== | ==Layout== | ||
===Interior=== | |||
{{incomplete|section|Inside design RBY, GSC, and HGSS}} | |||
{| class="roundy" style="margin:auto; background: #000; border: 3px solid #{{Locationcolor/dark|building}}" | |||
|- | |||
! style="background:#{{Locationcolor/light|building}}; {{roundytl|5px}}" | Version | |||
! style="background:#{{Locationcolor/light|building}}" | 1F | |||
! style="background:#{{Locationcolor/light|building}}" | 2F | |||
! style="background:#{{Locationcolor/light|building}}" | 3F | |||
! style="background:#{{Locationcolor/light|building}}" | 4F | |||
! style="background:#{{Locationcolor/light|building}}" | 5F | |||
! style="background:#{{Locationcolor/light|building}}; {{roundytr|5px}}" | Rooftop | |||
|- | |||
! style="background:#{{red color}}" | {{color2|000|Pokémon Red and Blue Versions|Red}} | |||
| rowspan="3" | [[File:None.png|120px]] | |||
| rowspan="3" | [[File:None.png|120px]] | |||
| rowspan="3" | [[File: None.png|120px]] | |||
| rowspan="3" | [[File: None.png|120px]] | |||
| rowspan="3" | [[File: None.png|120px]] | |||
| rowspan="3" | [[File: None.png|120px|center]] | |||
|- | |||
! style="background:#{{blue color}}" | {{color2|fff|Pokémon Red and Blue Versions|Blue}} | |||
|- | |||
! style="background:#{{yellow color}}" | {{color2|000|Pokémon Yellow Version|Yellow}} | |||
|- | |||
! style="background:#{{gold color}}" | {{color2|000|Pokémon Gold and Silver Versions|Gold}} | |||
| rowspan="3" | [[File: None.png|120px]] | |||
| rowspan="3" | [[File: None.png|120px]] | |||
| rowspan="3" | [[File: None.png|120px]] | |||
| rowspan="3" | [[File: None.png|120px]] | |||
| rowspan="3" | [[File: None.png|120px]] | |||
| rowspan="3" | [[File: None.png|120px|center]] | |||
|- | |||
! style="background:#{{silver color}}" | {{color2|000|Pokémon Gold and Silver Versions|Silver}} | |||
|- | |||
! style="background:#{{crystal color}}" | {{color2|000|Pokémon Crystal Version|Crystal}} | |||
|- | |||
! style="background:#{{firered color}}" | {{color2|000|Pokémon FireRed and LeafGreen Versions|FireRed}} | |||
| rowspan="2" | [[File: Celadon Department Store 1F FRLG.png|120px]] | |||
| rowspan="2" | [[File: Celadon Department Store 2F FRLG.png|120px]] | |||
| rowspan="2" | [[File: Celadon Department Store 3F FRLG.png|120px]] | |||
| rowspan="2" | [[File: Celadon Department Store 4F FRLG.png|120px]] | |||
| rowspan="2" | [[File: Celadon Department Store 5F FRLG.png|120px]] | |||
| rowspan="2" | [[File: Celadon Department Store Rooftop FRLG.png|120px|center]] | |||
|- | |||
! style="background:#{{leafgreen color}}" | {{color2|000|Pokémon FireRed and LeafGreen Versions|LeafGreen}} | |||
|- | |||
! style="background:#{{heartgold color}}" | {{color2|000|Pokémon HeartGold and SoulSilver Versions|HeartGold}} | |||
| rowspan="2" | [[File: None.png|120px]] | |||
| rowspan="2" | [[File: None.png|120px]] | |||
| rowspan="2" | [[File: None.png|120px]] | |||
| rowspan="2" | [[File: None.png|120px]] | |||
| rowspan="2" | [[File: None.png|120px]] | |||
| rowspan="2" | [[File:None.png|120px|center]] | |||
|- | |||
! style="background:#{{soulsilver color}}" | {{color2|000|Pokémon HeartGold and SoulSilver Versions|SoulSilver}} | |||
|- | |||
| colspan="7" style="background:#{{Locationcolor/light|building}}; {{roundybottom|5px}}" | | |||
|} | |||
===Exterior=== | |||
{{Mapgen | {{Mapgen | ||
|hv=v | |hv=v | ||
| Line 178: | Line 303: | ||
|colorlight={{locationcolor/light|building}} | |colorlight={{locationcolor/light|building}} | ||
|genI=Celadon Department Store RB.png | |genI=Celadon Department Store RB.png | ||
|sizeI= | |sizeI=126px | ||
|genII=Celadon Department Store GSC.png | |genII=Celadon Department Store GSC.png | ||
|sizeII= | |sizeII=94px | ||
|genIII=Celadon Department Store.png | |genIII=Celadon Department Store.png | ||
|sizeIII= | |sizeIII=146px | ||
|genIV=Celadon Department Store HGSS.png | |genIV=Celadon Department Store HGSS.png | ||
|sizeIV= | |sizeIV=119px}} | ||
==Trivia== | ==Trivia== | ||
* Although the Rooftop Square opens into the sky and is uncovered, {{m|Fly}} cannot be used to leave from the roof. | *Although the Rooftop Square opens into the sky and is uncovered, {{m|Fly}} cannot be used to leave from the roof. | ||
* In {{game|Yellow}}, a boy on the fourth floor says that {{OBP|Copycat|character}} lives in [[Cerulean City]] | *In {{game|Yellow}}, a boy on the fourth floor says that {{OBP|Copycat|character}} lives in [[Cerulean City]]; she is actually found in [[Saffron City]]. | ||
* | *In {{game|HeartGold and SoulSilver|s}}, after defeating the [[Elite Four]], [[Falkner]] can be found on the fourth floor on Mondays talking to [[Janine]]. He will then exchange [[Pokégear]] phone numbers with the {{player}} for rematches. | ||
*In Pokémon FireRed and LeafGreen, Celadon Department Store is a separate save location, but Pokémon hatched here have the hatched location of "<sc>[[Celadon City]]</sc>". In Pokémon Emerald, the encounter location "<sc>Celadon Department Store</sc>" is read as "<sc>Special Area</sc>". | |||
==In other languages== | |||
{{incomplete|section|Korean names}} | |||
{{langtable|color={{locationcolor/light|building}}|bordercolor={{locationcolor/dark|building}} | |||
|fr=Centre commercial de Céladopole | |||
|de=Prismania Einkaufszentrum | |||
|it=Centro Commerciale di Azzurropoli | |||
|es=Centro Comercial de Ciudad Azulona}} | |||
{{-}} | |||
{{Dept}} | {{Dept}} | ||
{{Kanto}} | {{Kanto}}<br> | ||
{{Project Locations notice}} | {{Project Locations notice}} | ||
| Line 202: | Line 336: | ||
[[Category:HeartGold and SoulSilver locations]] | [[Category:HeartGold and SoulSilver locations]] | ||
[[de: | [[de:Prismania Einkaufszentrum]] | ||
[[es:Centro Comercial de Ciudad Azulona]] | [[es:Centro Comercial de Ciudad Azulona]] | ||
[[fr:Centre commercial de Céladopole]] | |||
[[it:Centro Commerciale di Azzurropoli]] | |||
[[ja:タマムシデパート]] | [[ja:タマムシデパート]] | ||
[[pl:Celadon Department Store]] | [[pl:Celadon Department Store]] | ||
[[zh:彩虹百货大楼]] | |||
Revision as of 13:23, 4 March 2015
| ||||
| ||||
| Location: | Celadon City | |||
|---|---|---|---|---|
| Region: | Kanto | |||
| Generations: | I, II, III, IV | |||
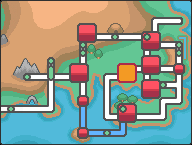 Location of Celadon Department Store in Kanto. | ||||
| Pokémon world locations | ||||
The Celadon Department Store (Japanese: タマムシデパート Tamamushi Department Store) is the largest shop in Kanto, far larger than the average Poké Mart. Their slogan is "Find what you need at the Celadon Dept. Store!" The store is six stories tall, including the roof.
Sign
The sign outside the building has remained fundamentally the same throughout the generations, only with slight differences in grammar and spelling.
- Generation I
Find what you
need at CELADON
DEPT. STORE!
- Generation II
Find What You
Need at CELADON
DEPT.STORE!
- Generation III
- Generation IV
Floors
1F: Service Counter
Here, a receptionist welcomes customers and directs them to a board that describes the store layout. This is where the Poké Mart deliveryman can be found.
2F: Trainer's Market
This floor's motto is "Top Grade Items for Trainers!" Lance is seen regularly on this floor buying capes.
Generation I
| Left cashier | |||||||
|---|---|---|---|---|---|---|---|
|
| ||||||
|
| ||||||
|
| ||||||
|
| ||||||
|
|||||||
| Right cashier | |||||||
|---|---|---|---|---|---|---|---|
|
| ||||||
|
| ||||||
|
| ||||||
|
| ||||||
|
|||||||
Generation II
| Left cashier | |||||||
|---|---|---|---|---|---|---|---|
|
| ||||||
|
| ||||||
|
| ||||||
|
|||||||
| Right cashier | |||||||
|---|---|---|---|---|---|---|---|
|
| ||||||
|
| ||||||
|
| ||||||
|
| ||||||
|
| ||||||
Generation III
| Upper cashier | |||||||
|---|---|---|---|---|---|---|---|
|
| ||||||
|
| ||||||
|
| ||||||
| Lower cashier | |||||||
|---|---|---|---|---|---|---|---|
|
| ||||||
|
| ||||||
|
| ||||||
|
| ||||||
|
|||||||
Generation IV
| Left cashier | |||||||
|---|---|---|---|---|---|---|---|
|
| ||||||
|
| ||||||
|
| ||||||
|
| ||||||
|
| ||||||
|
|||||||
| Right cashier | |||||||
|---|---|---|---|---|---|---|---|
|
| ||||||
|
| ||||||
|
| ||||||
|
| ||||||
|
| ||||||
|
| ||||||
3F: TV Game Shop/TM Shop
In Generations I and III, video games are displayed on this floor. A man behind the counter will give away TM18 (Counter) in Generation I. In Generation III, this man becomes a Move Tutor who will teach Counter to Pokémon.
In Generations II and IV, TMs are sold here instead. The floor's motto in Generation IV is "Make Your Pokémon Stronger!"
| Generation II | |||||||
|---|---|---|---|---|---|---|---|
|
| ||||||
|
| ||||||
|
|||||||
| Generation IV | |||||||
|---|---|---|---|---|---|---|---|
|
| ||||||
|
| ||||||
|
| ||||||
|
| ||||||
|
| ||||||
|
| ||||||
4F: Wiseman Gifts
A gift shop is on this floor. In Generation III, the floor is called "Wise Man Gifts". "Express yourself with gifts!" is its slogan in Generations I-III, or "Gifts to Express Yourself!" in Generation IV.
In Generations I and III, evolutionary stones are specially for sale here. In Generation IV, Falkner and Janine appear here on Mondays.
| Generation I | |||||||
|---|---|---|---|---|---|---|---|
|
| ||||||
|
| ||||||
|
|||||||
| Generation II | |||||||
|---|---|---|---|---|---|---|---|
|
| ||||||
|
|||||||
| Generation III | |||||||
|---|---|---|---|---|---|---|---|
|
| ||||||
|
| ||||||
|
| ||||||
| Generation IV | |||||||
|---|---|---|---|---|---|---|---|
|
| ||||||
|
|||||||
5F: Drugstore
A pharmacy selling Pokémon stat-enhancing items is on this floor.
In Generations I and II, the floor is called "Drug Store", and in Generation IV, it is called "Battle Collection". Its motto in Generation IV is "Bring Out Pokémon Potential".
Generation I
| Left cashier | |||||||
|---|---|---|---|---|---|---|---|
|
| ||||||
|
| ||||||
|
| ||||||
|
|||||||
| Right cashier | |||||||
|---|---|---|---|---|---|---|---|
|
| ||||||
|
| ||||||
|
|||||||
Generation II
| Left cashier | |||||||
|---|---|---|---|---|---|---|---|
|
| ||||||
|
| ||||||
|
|||||||
| Right cashier | |||||||
|---|---|---|---|---|---|---|---|
|
| ||||||
|
| ||||||
|
| ||||||
|
|||||||
Generation III
| Upper cashier | |||||||
|---|---|---|---|---|---|---|---|
|
| ||||||
|
| ||||||
|
| ||||||
| Lower cashier | |||||||
|---|---|---|---|---|---|---|---|
|
| ||||||
|
| ||||||
|
| ||||||
|
|||||||
Generation IV
| Left cashier | |||||||
|---|---|---|---|---|---|---|---|
|
| ||||||
|
| ||||||
|
| ||||||
|
| ||||||
| Right cashier | |||||||
|---|---|---|---|---|---|---|---|
|
| ||||||
|
| ||||||
|
| ||||||
Rooftop Square: Vending Machines
A picnic table and some Vending Machines are located on the roof. In Generation IV, this floor is called the "Rooftop Atrium" and its motto is "Have a Break at the Vending Machines".
In Generations I and III, a thirsty girl will give the player TMs in exchange for one of the drinks.
|
| ||||||
|
|||||||
Items
| Item | Location | Games | |
|---|---|---|---|
| Turtwig Mask | 2F; from Crasher Wake | HG SS | |
| Chimchar Mask | 2F; from Crasher Wake | HG SS | |
| Piplup Mask | 2F; from Crasher Wake | HG SS | |
| TM18 (Counter) | 3F; from the man behind a counter | R B Y | |
| TM13 (Ice Beam) | Roof; from the girl in exchange for a Fresh Water | R B Y | |
| TM48 (Rock Slide) | Roof; from the girl in exchange for a Soda Pop | R B Y | |
| TM49 (Tri Attack) | Roof; from the girl in exchange for a Lemonade | R B Y | |
| TM16 (Light Screen) | Roof; from the girl in exchange for a Fresh Water | FR LG | |
| TM20 (Safeguard) | Roof; from the girl in exchange for a Soda Pop | FR LG | |
| TM33 (Reflect) | Roof; from the girl in exchange for a Lemonade | FR LG | |
Layout
Interior

|
This section is incomplete. Please feel free to edit this section to add missing information and complete it. Reason: Inside design RBY, GSC, and HGSS |
| Version | 1F | 2F | 3F | 4F | 5F | Rooftop |
|---|---|---|---|---|---|---|
| Red | 
|

|

|

|

|
|
| Blue | ||||||
| Yellow | ||||||
| Gold | 
|

|

|

|

|
|
| Silver | ||||||
| Crystal | ||||||
| FireRed | 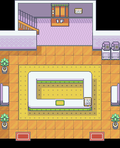
|

|
|
|
|
|
| LeafGreen | ||||||
| HeartGold | 
|

|

|

|

|
|
| SoulSilver | ||||||
Exterior
|
Trivia
- Although the Rooftop Square opens into the sky and is uncovered, Fly cannot be used to leave from the roof.
- In Pokémon Yellow, a boy on the fourth floor says that Copycat lives in Cerulean City; she is actually found in Saffron City.
- In Pokémon HeartGold and SoulSilver, after defeating the Elite Four, Falkner can be found on the fourth floor on Mondays talking to Janine. He will then exchange Pokégear phone numbers with the player for rematches.
- In Pokémon FireRed and LeafGreen, Celadon Department Store is a separate save location, but Pokémon hatched here have the hatched location of "Celadon City". In Pokémon Emerald, the encounter location "Celadon Department Store" is read as "Special Area".
In other languages

|
This section is incomplete. Please feel free to edit this section to add missing information and complete it. Reason: Korean names |
| ||||||||||||||||||
|
| |||||
| Kanto | ||||||||
|---|---|---|---|---|---|---|---|---|
|
| ||||||||
|

|
This article is part of Project Locations, a Bulbapedia project that aims to write comprehensive articles on every location in the Pokémon world. |
