Battle Frontier (Generation III): Difference between revisions
No edit summary |
m (→Items) |
||
| (257 intermediate revisions by 79 users not shown) | |||
| Line 1: | Line 1: | ||
{{Infobox location | {{Infobox location | ||
|location_name=Battle Frontier | |location_name=Battle Frontier | ||
|type=road | |type=road | ||
|image=Battle Frontier | |image=Battle Frontier Map.png | ||
|japanese_name=バトルフロンティア | |japanese_name=バトルフロンティア | ||
|translated_name=Battle Frontier | |translated_name=Battle Frontier | ||
| Line 13: | Line 11: | ||
}} | }} | ||
[[File:EmeraldBFLogo.png|thumb|left|100px|The logo of Generation III's Battle Frontier]] | [[File:EmeraldBFLogo.png|thumb|left|100px|The logo of Generation III's Battle Frontier]] | ||
The '''Battle Frontier''' (Japanese: '''バトルフロンティア''' ''Battle Frontier'') is a special post-League area in {{game|Emerald}} that features several | The '''Battle Frontier''' (Japanese: '''バトルフロンティア''' ''Battle Frontier'') is a special post-[[Pokémon League]] area in {{game|Emerald}} that features several [[battle facility|battle facilities]] where powerful {{pkmn|Trainer}}s can {{pkmn|battle}} each other. | ||
The Battle Frontier replaces the {{ | The Battle Frontier replaces the {{Gdis|Battle Tower|III}} in its location south of {{rt|130|Hoenn}}, and likewise is only accessible by taking the [[S.S. Tidal]] from [[Lilycove City]] or [[Slateport City]]. Unlike the plain Battle Tower in {{game|Ruby and Sapphire|s}}, the Battle Frontier is composed of seven distinct battle facilities, each lead by a [[Frontier Brain]] who may be challenged after certain winning streaks have been made through their respective facility. | ||
In the | In [[Pokémon Omega Ruby and Alpha Sapphire]], the [[Battle Resort]] exists where the Battle Frontier was in Pokémon Emerald. However, there are some other references to the Battle Frontier. In the [[Battle Maison]], a man mentions that the [[Lucy|Pike Queen]] has been scouted and asks if anyone else meets [[Scott]]'s expectations. A model of the {{gdis|Battle Tower|III}} is situated north of the Battle Maison, with a sign next to it dictating it as the first Battle Frontier facility to be built in the future. A remix of the music for the [[Hoenn]] [[Frontier Brain]]s is used as the battle theme for the {{tc|Battle Chatelaine}}s. | ||
The Battle Frontier is owned and operated by Scott, whom the {{player}} meets throughout the game in Pokémon Emerald. He resides in a house located between the [[Battle Dome]] and Battle Tower, and gives the player various rewards as they progress through the Battle Frontier. | |||
==Overview== | ==Overview== | ||
[[File:Battle Frontier E.png|thumb|300px|In-game view of the Battle Frontier]] | [[File:Battle Frontier E.png|thumb|300px|In-game view of the Battle Frontier]] | ||
Upon the player's first entry into Hoenn's Battle Frontier, their {{ga|Trainer Card}} will be upgraded into a Frontier Pass by a woman at the entrance. This pass holds the Trainer Card, as well as a small map of the Battle Frontier and the player's records | Upon the player's first entry into Hoenn's Battle Frontier, their {{ga|Trainer Card}} will be upgraded into a Frontier Pass by a woman at the entrance. This pass holds the Trainer Card, as well as a small map of the Battle Frontier and the player's Battle Frontier records, which includes saved-up [[Battle Point]]s (BP) and any of the seven [[Symbol|Frontier Symbols]] the player has won. Only one {{pkmn|battle}} from any one of the facilities may be recorded and stored on the Frontier Pass, which may be watched or overwritten with another at any time. | ||
Upon winning through a set amount of battles in any given facility, Battle Points will be awarded, usually in small amounts that gradually grow with each consecutive streak. Defeating the Frontier Brain of a given facility for the first time awards the silver Symbol of that facility, as well as 10BP. Defeating the same Frontier Brain a second time, during the same streak, gives the player the golden Symbol and another 10BP. The Frontier Brain will only appear in 3-vs-3 single battle mode. | |||
No two Pokémon entered can hold the same item | ===Restrictions=== | ||
No two Pokémon entered can be of the same species or hold the same item. Items cannot be used from the [[Bag]] during battle (except in the Battle Pyramid, in which the player can use items from their Battle Bag). Battles conducted here do not award [[experience]] or [[Pokémon Dollar|money]], and any items gained or lost during the challenge are reverted in the end. | |||
Regardless of which challenge is taken, the following Pokémon are not allowed: | |||
{{ResponsiveList/h|frontier}} | |||
{{Pokeli|150|Mewtwo|msp=MSP/3}} | |||
| | {{Pokeli|151|Mew|msp=MSP/3}} | ||
{{Pokeli|249|Lugia|msp=MSP/3}} | |||
| | {{Pokeli|250|Ho-Oh|msp=MSP/3}} | ||
{{Pokeli|251|Celebi|msp=MSP/3}} | |||
| | {{Pokeli|382|Kyogre|msp=MSP/3}} | ||
{{Pokeli|383|Groudon|msp=MSP/3}} | |||
| | {{Pokeli|384|Rayquaza|msp=MSP/3}} | ||
{{Pokeli|385|Jirachi|msp=MSP/3}} | |||
| | {{Pokeli|386S|Deoxys|4=Speed Forme|msp=MSP/3}} | ||
{{Pokeli|Egg|Egg|msp=MSP/3}} | |||
{{ResponsiveList/f}} | |||
| | |||
| | |||
| | |||
| | |||
== | ===Trainers=== | ||
===Battle | {{main|List of Battle Frontier Trainers (Generation III)}} | ||
[[ | :''See also: [[List of Battle Frontier Pokémon (Generation III)]]'' | ||
==Items== | |||
{{Itlisth|building}} | |||
{{Itemlist|None|sprite=Frontier Pass E|size=30px|Gift from a guide in the front [[gate]] upon first entering|E=yes|display={{DL|Trainer Card (game)|Frontier Pass}}}} | |||
{{Itemlist|None|Gift from [[Scott]] when first talked to at his house|E=yes|display={{tt|1-3|Depending on how many times Scott was met throughout the game}} [[Battle Point|BP]]}} | |||
{{Itemlist|Retro Mail|Held by Meowow, a {{p|Meowth}} the player can receive in a [[In-game trade|trade]]|E=yes}} | |||
{{Itemlist|Silver Shield|sprite=SilverShieldSprite|Gift from Scott after winning 50 battles in a row at the Battle Tower|E=yes|display=[[Ornament|Silver Shield]]}} | |||
{{Itemlist|Gold Shield|sprite=GoldShieldSprite|Gift from Scott after winning 100 battles in a row at the Battle Tower|E=yes|display=[[Ornament|Gold Shield]]}} | |||
{{Itemlist|Lansat Berry|Gift from Scott after earning all seven silver Symbols|E=yes}} | |||
{{Itemlist|Starf Berry|Gift from Scott after earning all seven gold Symbols|E=yes}} | |||
{{Itlistfoot|building}} | |||
==Pokémon== | |||
{{Catch/header|building|no}} | {{Catch/header|building|no}} | ||
{{Catch/div|building|Special}} | |||
{{Catch/entry3|052|Meowth|no|no|yes|Trade|The same as the traded Pokémon|One|tradenum=300|tradename=Skitty|type1=normal}} | |||
{{Catch | |||
{{Catch/entry3| | |||
{{Catch/footer|building}} | {{Catch/footer|building}} | ||
== | ==Special encounters== | ||
{ | A {{p|Sudowoodo}} is blocking the path to the waterfall near the [[Battle Palace]]. The [[Wailmer Pail]] must be used in order to battle it. | ||
| | |||
{| | {| | ||
|- | |||
|{{Pokémon/3 | |{{Pokémon/3 | ||
|game=Emerald | |game=Emerald | ||
|ndex= | |ndex=185 | ||
|pokemon= | |pokemon=Sudowoodo | ||
|gender=both | |gender=both | ||
|type1= | |type1=Rock | ||
| | |ability=Sturdy | ||
|ability2=Rock Head | |||
|level=40 | |||
| | |move1=Flail|move1type=Normal | ||
|move2=Low Kick|move2type=Fighting | |||
|move3=Rock Slide|move3type=Rock | |||
|move4=Block|move4type=Normal}} | |||
|level= | |||
|move1= | |||
|move2= | |||
|move3= | |||
|move4= | |||
|} | |} | ||
== | ==Facilities== | ||
{| | {| style="margin:auto; text-align:center; background:#{{hoenn color dark}}; {{roundy}}; border: 4px solid #{{hoenn color}}" colspan="4" cellspacing="1" cellpadding="2" | ||
! style="background:#{{hoenn color light}}; {{roundytl|5px}}" | {{color|000|Facility}} | |||
! style="background:#{{hoenn color light}}" | {{color2|000|Frontier Brain}} | |||
! colspan="2" style="background:#{{hoenn color light}}; {{roundytr|5px}}" | {{color2|000|Symbol|Symbols}} | |||
|- style="background:#FFF" | |||
| [[File:Battle Factory E.png|x120px]]<br>[[Battle Factory (Generation III)|Battle Factory]] | |||
| [[File:Spr E Noland.png]]<br>[[Factory Head (Trainer class)|Factory Head]] [[Noland]] | |||
| [[File:Knowledgesymbolsilver.png|50px]]<br>Silver Knowledge Symbol | |||
| [[File:Knowledgesymbol.png|50px]]<br>Gold Knowledge Symbol | |||
|- style="background:#FFF" | |||
| [[File:Battle Arena E.png|x120px]]<br>[[Battle Arena]] | |||
| [[File:Spr E Greta.png]]<br>[[Greta|Arena Tycoon Greta]] | |||
| [[File:Gutssymbolsilver.png|50px]]<br>Silver Guts Symbol | |||
| [[File:Gutssymbol.png|50px]]<br>Gold Guts Symbol | |||
|{{ | |- style="background:#FFF" | ||
| | | [[File:Battle Dome E.png|x120px]]<br>[[Battle Dome]] | ||
| | | [[File:Spr E Tucker.png]]<br>[[Tucker|Dome Ace Tucker]] | ||
| [[File:Tacticssymbolsilver.png|50px]]<br>Silver Tactics Symbol | |||
| | | [[File:Tacticssymbol.png|50px]]<br>Gold Tactics Symbol | ||
|- style="background:#FFF" | |||
| [[File:Battle Pike E.png|x120px]]<br>[[Battle Pike]] | |||
| [[File:Spr E Lucy.png]]<br>[[Lucy|Pike Queen Lucy]] | |||
| [[File:Lucksymbolsilver.png|50px]]<br>Silver Luck Symbol | |||
| [[File:Lucksymbol.png|50px]]<br>Gold Luck Symbol | |||
|- style="background:#FFF" | |||
| [[File:Battle Palace E.png|x120px]]<br>[[Battle Palace]] | |||
| [[File:Spr E Spenser.png]]<br>[[Spenser|Palace Maven Spenser]] | |||
| [[File:Spiritssymbolsilver.png|50px]]<br>Silver Spirits Symbol | |||
| | | [[File:Spiritssymbol.png|50px]]<br>Gold Spirits Symbol | ||
|- style="background:#FFF" | |||
| [[File:Battle Pyramid E.png|x120px]]<br>[[Battle Pyramid]] | |||
| | | [[File:Spr E Brandon.png]]<br>[[Brandon|Pyramid King Brandon]] | ||
| [[File:Bravesymbolsilver.png|50px]]<br>Silver Brave Symbol | |||
| [[File:Bravesymbol.png|50px]]<br>Gold Brave Symbol | |||
| | |||
| | |||
| | |||
| | |||
| | |||
| | |||
| | |||
| | |||
| | |||
| | |||
| | |||
| | |||
| | |||
| | |||
| | |||
| | |||
| | |||
| | |||
| | |||
| | |||
| | |||
| | |||
| | |||
| | |||
| | |||
| | |||
| | |||
| | |||
| | |||
| | |||
| | |||
| | |||
| | |||
| | |||
| | |||
| | |||
| | |||
| | |||
| | |||
|- | |- | ||
| | | style="background:#FFF; {{roundybl|5px}}" | [[File:Battle Tower E.png|x120px]]<br>{{Gdis|Battle Tower|III}} | ||
| | | style="background:#FFF" | [[File:Spr E Anabel.png]]<br>[[Tower Tycoon (Trainer class)|Salon Maiden]] [[Anabel]] | ||
| | | style="background:#FFF" | [[File:Abilitysymbolsilver.png|50px]]<br>Silver Ability Symbol | ||
| | | style="background:#FFF; {{roundybr|5px}};" | [[File:Abilitysymbol.png|50px]]<br>Gold Ability Symbol | ||
| | |}<br clear="all"> | ||
| < | |||
| < | |||
==Other points of interest== | ==Other points of interest== | ||
| Line 785: | Line 133: | ||
There is a house next to the Battle Tower. Inside, there is a Trainer who wants to trade a {{p|Meowth}} for a {{p|Skitty}}. | There is a house next to the Battle Tower. Inside, there is a Trainer who wants to trade a {{p|Meowth}} for a {{p|Skitty}}. | ||
=== | ===Ranking Hall=== | ||
[[File:Record Hall.png|thumb|The | [[File:Record Hall E.png|thumb|The Ranking Hall]] | ||
The | The Ranking Hall contains all of the records that the player has set at the Battle Frontier. There are three rooms. The one on the left contains records for the Battle Pike, Dome, and Factory, the one in the center has records for the Battle Tower, and the one on the right contains records for the Battle Palace, Pyramid, and Arena. | ||
If the player mixes records with another Emerald game, Battle Frontier records will be copied over from the other game and compared. | If the player mixes records with another Emerald game, Battle Frontier records will be copied over from the other game and compared. | ||
===Sudowoodo=== | ===Sudowoodo=== | ||
A level 40 {{p|Sudowoodo}} is located in the southeast section of the Battle Frontier. Much like in [[Generation II]], NPCs will talk about it as a tree. However, when the player uses the | A level 40 {{p|Sudowoodo}} is located in the southeast section of the Battle Frontier. Much like in [[Generation II]], NPCs will talk about it as if it is a tree. However, when the player uses the [[Wailmer Pail]] on it, it will spring to life and battle the player. This Sudowoodo blocks the path to the Artisan Cave until it is battled. This is the only location a wild Sudowoodo can be battled in the [[Generation III]] handheld games. | ||
===Betting man=== | ===Betting man=== | ||
In the house south of the Battle Pyramid a man can be visited. After receiving at least 3 silver Symbols, he will ask the player to compete in a random facility. The player can give him 5, 10, or 15 Battle Points. If the player wins, the man will give him back twice the amount the player gave him. If the player loses, the Battle Points are lost. | In the house south of the Battle Pyramid a man can be visited. After receiving at least 3 silver Symbols, he will ask the player to compete in a random facility, which changes daily. The player can give him 5, 10, or 15 Battle Points. If the player wins, the man will give him back twice the amount the player gave him. If the player loses, the Battle Points are lost. | ||
===Stats judge=== | ===Stats judge=== | ||
| Line 802: | Line 150: | ||
{{-}} | {{-}} | ||
{| style="margin:auto; text-align:center; background: #505050 | {| class="roundy" style="margin:auto; text-align:center; background: #505050; border: 2px solid #6f6f6f" | ||
|- | |- style="color: #fff" | ||
! style="background: #6f6f6f; {{roundytl|5px}}" | Pokémon's ability | ! style="background: #6f6f6f; {{roundytl|5px}}" | Pokémon's ability | ||
! style="background: #6f6f6f; {{roundytr|5px}}" | IV total | ! style="background: #6f6f6f; {{roundytr|5px}}" | IV total | ||
| Line 815: | Line 163: | ||
| {{color|000|Quite impressive}} | | {{color|000|Quite impressive}} | ||
| 121 to 150 | | 121 to 150 | ||
|- style="background: #fff | |- | ||
| style="background: #fff; {{roundybl|5px}}" | {{color|000|Wonderfully outstanding}} | |||
| style="{{roundybr|5px}}" | 151 to 186 | | style="background: #fff; {{roundybr|5px}}" | 151 to 186 | ||
|} | |} | ||
{{-}} | {{-}} | ||
{| style="margin:auto; text-align:center; background: #505050 | {| class="roundy" style="margin:auto; text-align:center; background: #505050; border: 2px solid #6f6f6f" | ||
|- | |- style="color: #fff" | ||
! style="background: #6f6f6f; {{roundytl|5px}}" | Highest IV | ! style="background: #6f6f6f; {{roundytl|5px}}" | Highest IV | ||
! style="background: #6f6f6f; {{roundytr|5px}}" | Range | ! style="background: #6f6f6f; {{roundytr|5px}}" | Range | ||
| Line 834: | Line 182: | ||
| {{color|000|Outstanding}} | | {{color|000|Outstanding}} | ||
| 26 to 30 | | 26 to 30 | ||
|- style="background: #fff | |- | ||
| style="background: #fff; {{roundybl|5px}}" | {{color|000|Flawless}} | |||
| style="{{roundybr|5px}}" | 31 | | style="background: #fff; {{roundybr|5px}}" | 31 | ||
|} | |} | ||
{{-}} | {{-}} | ||
===Move Tutors=== | ===Move Tutors=== | ||
In a house next to the Battle Dome, there are two Move | In a house next to the Battle Dome, there are two [[Move Tutor]]s. They will teach a Pokémon a selection of attacks for a price in Battle Points. | ||
====List of Move Tutor moves==== | ====List of Move Tutor moves==== | ||
| Line 847: | Line 195: | ||
| | | | ||
{{tutormv/header|emerald|BP|no|disp=Left Tutor}} | {{tutormv/header|emerald|BP|no|disp=Left Tutor}} | ||
{{tutormv| | {{tutormv|Softboiled|Normal|bp=16}} | ||
{{tutormv| | {{tutormv|Seismic Toss|Fighting|bp=24}} | ||
{{tutormv|Dream Eater|Psychic|bp=24}} | {{tutormv|Dream Eater|Psychic|bp=24}} | ||
{{tutormv|Mega Punch|Normal|bp=24}} | {{tutormv|Mega Punch|Normal|bp=24}} | ||
{{tutormv|Mega Kick|Normal|bp=48}} | |||
{{tutormv|Body Slam|Normal|bp=48}} | |||
{{tutormv|Rock Slide|Rock|bp=48}} | {{tutormv|Rock Slide|Rock|bp=48}} | ||
{{tutormv| | {{tutormv|Counter|Fighting|bp=48}} | ||
{{tutormv| | {{tutormv|Thunder Wave|Electric|bp=48}} | ||
{{tutormv|Swords Dance|Normal|bp=48}} | {{tutormv|Swords Dance|Normal|bp=48}} | ||
|} | |} | ||
|} | |} | ||
| Line 862: | Line 210: | ||
{{tutormv/header|emerald|BP|no|disp=Right Tutor}} | {{tutormv/header|emerald|BP|no|disp=Right Tutor}} | ||
{{tutormv|Defense Curl|Normal|bp=16}} | {{tutormv|Defense Curl|Normal|bp=16}} | ||
{{tutormv|Snore|Normal|bp=24}} | |||
{{tutormv|Mud-Slap|Ground|bp=24}} | |||
{{tutormv|Swift|Normal|bp=24}} | |||
{{tutormv|Icy Wind|Ice|bp=24}} | |||
{{tutormv|Endure|Normal|bp=48}} | {{tutormv|Endure|Normal|bp=48}} | ||
{{tutormv| | {{tutormv|Psych Up|Normal|bp=48}} | ||
{{tutormv|Ice Punch|Ice|bp=48}} | {{tutormv|Ice Punch|Ice|bp=48}} | ||
{{tutormv|ThunderPunch|Electric|bp=48}} | {{tutormv|ThunderPunch|Electric|bp=48}} | ||
{{tutormv|Fire Punch|Fire|bp=48}} | |||
|} | |} | ||
|} | |} | ||
| Line 876: | Line 224: | ||
===Battle Point Exchange Service Corner=== | ===Battle Point Exchange Service Corner=== | ||
[[File:Battle Point Exchange Service Corner.png|thumb|The Battle Point Exchange Service Corner]] | [[File:Battle Point Exchange Service Corner E.png|thumb|The Battle Point Exchange Service Corner]] | ||
The Battle Point Exchange Service Corner, or simply the Exchange Service Corner, sells various goods in exchange for Battle Points earned at other parts of the Battle Frontier. Players can purchase | The Battle Point Exchange Service Corner, or simply the Exchange Service Corner, sells various goods in exchange for Battle Points earned at other parts of the Battle Frontier. Players can purchase [[decoration]]s for their [[Secret Base]] or [[player's house|room]], [[vitamin]]s, and [[held item]]s. | ||
{{shop|Leftmost | {{shop|Leftmost cashier}} | ||
{{shoprow|{{shopdec|Kiss Poster|KissPosterSprite|16|BP}}|{{shopdec|Kiss Cushion|KissCushionSprite|32|BP}}}} | {{shoprow|{{shopdec|Kiss Poster|KissPosterSprite|16|BP|6=Poster#Generation III}}|{{shopdec|Kiss Cushion|KissCushionSprite|32|BP|6=Cushion}}}} | ||
{{shoprow|{{shopdec| | {{shoprow|{{shopdec|Smoochum Doll|Doll Smoochum III|32|BP|6=Pokémon doll#Generation III}}|{{shopdec|Togepi Doll|Doll Togepi III|48|BP|6=Pokémon doll#Generation III}}}} | ||
{{shoprow|{{shopdec| | {{shoprow|{{shopdec|Meowth Doll|Doll Meowth III|48|BP|6=Pokémon doll#Generation III}}|{{shopdec|Clefairy Doll|Doll Clefairy III|48|BP|6=Pokémon doll#Generation III}}}} | ||
{{shoprow|{{shopdec| | {{shoprow|{{shopdec|Ditto Doll|Doll Ditto III|48|BP|6=Pokémon doll#Generation III}}|{{shopdec|Cyndaquil Doll|Doll Cyndaquil III|80|BP|6=Pokémon doll#Generation III}}}} | ||
{{shoprow|{{shopdec| | {{shoprow|{{shopdec|Chikorita Doll|Doll Chikorita III|80|BP|6=Pokémon doll#Generation III}}|{{shopdec|Totodile Doll|Doll Totodile III|80|BP|6=Pokémon doll#Generation III}}}} | ||
{{shopfooter|multiple=yes}} | {{shopfooter|multiple=yes}} | ||
{{shop|Second | {{shop|Second cashier from left}} | ||
{{shoprow|{{shopdec| | {{shoprow|{{shopdec|Lapras Doll|Doll Lapras III|128|BP|6=Pokémon doll#Generation III}}|{{shopdec|Snorlax Doll|Doll Snorlax III|128|BP|6=Pokémon doll#Generation III}}}} | ||
{{shoprow|{{shopdec| | {{shoprow|{{shopdec|Venusaur Doll|Doll Venusaur III|256|BP|6=Pokémon doll#Generation III}}|{{shopdec|Charizard Doll|Doll Charizard III|256|BP|6=Pokémon doll#Generation III}}}} | ||
{{shoprow|{{shopdec| | {{shoprow|{{shopdec|Blastoise Doll|Doll Blastoise III|256|BP|6=Pokémon doll#Generation III}}}} | ||
{{shopfooter}} | {{shopfooter}} | ||
[[File:Exchange Service Corner interior.png|thumb|Inside the Exchange Service Corner]] | [[File:Exchange Service Corner interior E.png|thumb|Inside the Exchange Service Corner]] | ||
{{shop|Second | {{shop|Second cashier from right}} | ||
{{shoprow|{{shopitem| | {{shoprow|{{shopitem|Protein|1|BP}}|{{shopitem|Calcium|1|BP}}}} | ||
{{shoprow|{{shopitem|Iron|1|BP}}|{{shopitem| | {{shoprow|{{shopitem|Iron|1|BP}}|{{shopitem|Zinc|1|BP}}}} | ||
{{shoprow|{{shopitem| | {{shoprow|{{shopitem|Carbos|1|BP}}|{{shopitem|HP Up|1|BP}}}} | ||
{{shopfooter|multiple=yes}} | {{shopfooter|multiple=yes}} | ||
{{shop|Rightmost | {{shop|Rightmost cashier}} | ||
{{shoprow|{{shopitem| | {{shoprow|{{shopitem|Leftovers|48|BP}}|{{shopitem|White Herb|48|BP}}}} | ||
{{shoprow|{{shopitem| | {{shoprow|{{shopitem|Quick Claw|48|BP}}|{{shopitem|Mental Herb|48|BP}}}} | ||
{{shoprow|{{shopitem| | {{shoprow|{{shopitem|Bright Powder|64|BP|display=BrightPowder}}|{{shopitem|Choice Band|64|BP}}}} | ||
{{shoprow|{{shopitem| | {{shoprow|{{shopitem|King's Rock|64|BP}}|{{shopitem|Focus Band|64|BP}}}} | ||
{{shoprow|{{shopitem| | {{shoprow|{{shopitem|Scope Lens|64|BP}}}} | ||
{{shopfooter}} | {{shopfooter}} | ||
===Poké Mart=== | ===Poké Mart=== | ||
| Line 916: | Line 263: | ||
{{shoprow|{{shopitem|HP Up|9800}}}} | {{shoprow|{{shopitem|HP Up|9800}}}} | ||
{{shopfooter}} | {{shopfooter}} | ||
==In the anime== | |||
===''[[Pokémon the Series: Ruby and Sapphire]]''=== | |||
[[File:Battle Frontier anime.png|thumb|230px|The locations of the first six Kanto Battle Frontier facilities in the {{pkmn|anime}}]] | |||
In the {{pkmn|anime}}, this Battle Frontier, rather than being on one of [[Hoenn]]'s many small islands, is spread across the [[Kanto]] region, presumably so as to reflect on the then-recent releases of {{game|FireRed and LeafGreen|s}} as well as Emerald. Much like the [[Gym]]s do not have a requirement that {{Ash}} beats anyone besides the [[Gym Leader]], Ash is not required to compete in any matches besides those against the Frontier Brain. | |||
The Battle Frontier is owned and operated by [[Scott]], whom Ash first met in ''[[AG132|The Scheme Team]]''. | |||
* The Battle Factory appeared in ''[[AG135|Numero Uno Articuno]]'' and ''[[AG136|The Symbol Life]]''. It is located near [[Cerulean City]] and was the first facility Ash challenged. | |||
* The Battle Arena appeared in ''[[AG149|Wheel of Frontier!]]''. It is located near [[Saffron City]] and was the second facility Ash challenged. | |||
* The Battle Dome appeared in ''[[AG153|Tactics Theatrics!!]]''. It is located south of [[Lavender Town]], possibly on {{rt|12|Kanto}}, and was the third facility Ash challenged. | |||
* The Battle Pike appeared in ''[[AG158|Queen of the Serpentine!]]''. It is located near [[Fuchsia City]] and was the fourth facility Ash challenged. | |||
* The Battle Palace appeared in ''[[AG164|Ka Boom with a View!]]''. It is located on [[Metallica Island]], near the [[Seafoam Islands]], and was the fifth facility Ash challenged. | |||
* The Battle Tower appeared in ''[[AG169|Talking a Good Game!]]'' and ''[[AG170|Second Time's the Charm!]]''. It is located near [[Cremini Town]] and was the sixth facility Ash challenged. | |||
* The Battle Pyramid appeared in ''[[AG178|Battling the Enemy Within!]]'', ''[[AG186|Overjoyed!]]'', ''[[AG189|Gathering the Gang of Four!]]'', and ''[[AG190|Pace - The Final Frontier!]]''. It was the last facility Ash challenged. Unlike the other facilities, this facility is mobile, being able to fly in order to keep its location a secret to all those who haven't defeated the six other facilities. It was initially located near [[Pewter City]] and was later also seen in [[Fennel Valley]]. It also reappeared in [[Snowpoint City]] during ''[[Pokémon the Series: Diamond and Pearl]]''. | |||
The Trainers who earn a [[Symbol]] from each of the seven Frontier Brains are entered into the Battle Frontier [[Hall of Fame]] and can become Frontier Brains with their own [[Battle facility|battle facilities]], if they so choose. Even if the offer is turned down, the possibility to accept it remains open indefinitely. | |||
===''[[Pokémon Journeys: The Series]]''=== | |||
[[File:Hoenn Battle Frontier anime.png|thumb|250px|The Hoenn Battle Frontier in ''[[Pokémon Journeys: The Series]]'']] | |||
The proper Hoenn Battle Frontier appeared in ''[[JN007|Serving Up the Flute Cup!]]'', where Ash and [[Goh]] traveled there to participate in the [[Battle Frontier Flute Cup]], a small tournament with a set of [[flute]]s as its prize. There they met [[Hodge]], a Trainer from [[Lavaridge Town]] who was also there to compete. Ash eventually emerged victorious and brought back the flutes to [[Cerise Laboratory]]. While on the island, Goh also {{pkmn2|caught}} a {{TP|Goh|Taillow}} and three {{DL|List of Goh's Pokémon|Dustox|Wurmple}}. | |||
{{-}} | |||
==In the manga== | ==In the manga== | ||
[[File: | ===Ash & Pikachu=== | ||
The Battle Frontier first appeared in ''[[SP33|Off To The Battle Frontier!!]]''. Unlike the anime, only the Battle Factory, Battle Arena, and Battle Pike appeared. | |||
===Pokémon Adventures=== | |||
[[File:Battle Frontier Hoenn Adventures.png|thumb|250px|The Battle Frontier in [[Pokémon Adventures]]]] | |||
===={{MangaArc|Emerald}}==== | |||
A [[Pokédex holder]] named {{adv|Emerald}} challenged the Battle Frontier during its seven-day opening ceremony. Eventually it was revealed that he had been sent to the Battle Frontier by {{adv|Professor Oak}} in order to {{pkmn2|caught|catch}} the {{pkmn2|Mythical}} [[Pokémon category|Wish Pokémon]] {{adv|Jirachi}}, which he had predicted to be awake at the site during the same seven days that the Battle Frontier opening ceremony would take place. It turned out that an armored villain named [[Guile Hideout]] was also planning to catch Jirachi for his own evil ambitions, even stealing all the [[rental Pokémon]] from the {{gdis|Battle Factory|IV}} to be used against anyone getting in his way. | |||
During his Battle Factory challenge, Emerald rented a {{TP|Emerald|Sceptile}}, which turned out to be on a higher [[level]] than the other rental Pokémon. This made Emerald realize that Sceptile was not a rental Pokémon to begin with, but had been snuck into the facility by someone. Thus, he decided to take it with him. During Emerald's [[Battle Dome]] challenge, {{adv|Ruby}} revealed that Sceptile was actually the very same {{p|Treecko}} that Emerald had once been supposed to receive from [[Professor Birch]]. | |||
Despite Emerald and the Frontier Brains' best efforts, Jirachi was eventually caught by Guile Hideout. Using Jirachi's wish, he summoned a giant {{p|Kyogre}}-shaped mass of water to sink the Battle Frontier into the ocean. However, thanks to Emerald's own wish to Jirachi, {{adv|Red}}, {{adv|Blue}}, {{adv|Green}}, {{adv|Yellow}}, and {{adv|Silver}} were freed from their petrified states, and all ten Pokédex holders and their Pokémon united their strengths to defeat Guile Hideout and save the Battle Frontier. Shortly before Jirachi fell asleep again, [[Scott]] used the last one of its three wishes to summon thousands of people to visit the Battle Frontier. | |||
The manga | Accompanying Emerald during his Battle Frontier challenge were also reporter [[Todd Snap]], as well as {{adv|Eon duo|Latios and Latias}}, Emerald's close friends. | ||
===Pokémon Battle Frontier=== | |||
[[File:Battle Frontier CBF.png|thumb|200px|The Battle Frontier in [[Pokémon Battle Frontier]]]] | |||
The [[Pokémon Battle Frontier]] manga featured a boy named {{OBP|Enta|CBF}} being invited to the Battle Frontier by Scott. Once there, he was tutored by [[Pokémon Champion|Pokémon League Champion]] [[Rald]], and begun to challenge the Frontier Brains. In the end, he managed to defeat six of the seven facilities. | |||
[[File:Battle Frontier PMRS.png|thumb|left|200px|The Battle Frontier in [[Pokémon Pocket Monsters]]]] | |||
The manga concluded with Enta's battle with [[Anabel]], which ended in a draw. Despite Enta's challenge of the Frontier Brains being a major focus, [[Noland]], [[Greta]], and [[Brandon]] only appeared on the title page of [[CBF4|the fourth chapter]]. | |||
===Pokémon Pocket Monsters=== | |||
The Battle Frontier appeared in ''[[PMRS35|The Selected Trainer?!]]'', where Scott invited {{PPM|Red}} and his Pokémon there after seeing {{TP|Red|Clefairy}} save a little kid from getting hit by a balance beam, although it eventually turned out he just wanted them to clean up the {{gdis|Battle Tower|III}}'s toilets. | |||
{{-}} | |||
==In the TCG== | ==In the TCG== | ||
The {{TCG|EX Emerald}} expansion for the [[Pokémon Trading Card Game]] featured two Battle Frontier-related cards: | The {{TCG|EX Emerald}} expansion for the [[Pokémon Trading Card Game]] featured two Battle Frontier-related cards: | ||
{| | {| class="roundy" style="border: 2px solid #{{emerald color}}; background: #{{emerald color light}}; margin-right: 5px; margin-bottom: 5px" | ||
! Card !! Type !! Rarity !! Expansion !! Set No. | ! Card !! Type !! Rarity !! Expansion !! Set No. | ||
{{Trainerlistentry|Scott|EX Emerald|84|106|Trainer||Uncommon}} | {{Trainerlistentry|Scott|EX Emerald|84|106|Trainer||Uncommon}} | ||
{{Trainerlistentry|Battle Frontier|EX Emerald|75|106|Trainer||Uncommon}} | {{Trainerlistentry|Battle Frontier|EX Emerald|75|106|Trainer||Uncommon}} | ||
|} | |} | ||
==Trivia== | ==Trivia== | ||
* | * Despite having a big area of accessible [[Water tile|water]], this location has no [[wild Pokémon]] out of it at all. This is a rare occurrence for overworld locations. | ||
* | * It's possible for the Trainers fought in the Battle Frontier to have [[Shiny Pokémon]]. | ||
* All enemy Trainers in the Battle Frontier, except the Frontier Brains, greet the player character before battle with a string of six preset words, phrases or characters from the [[easy chat system]]. After the battle, the enemy gives out another message of the same format which depends on whether they | * All enemy Trainers in the Battle Frontier, except the Frontier Brains, greet the player character before battle with a string of up to six preset words, phrases, or characters from the [[easy chat system]]. After the battle, the enemy gives out another message of the same format which depends on whether they have won or lost. This is also the case for all enemies in the [[Battle Tent]]s or [[Trainer Hill]]. | ||
** However, this is not the case for the greetings of any [[Apprentice]]s that have been mentored by the player or other individuals. When greeting the player prior to battling in the Battle Tower, the Apprentice will typically state the name of his or her mentor, as well as his or her numerical position in the line of all Apprentices tutored by someone (such as being the 7th apprentice tutored by the player). | |||
** Messages are also altered for enemy Trainers present within the Battle Pyramid. After a battle, they provide the player with contextual hints on certain aspects of the challenge, such as the location of a given floor's exit, the number of remaining Trainers to be fought on a floor, or the number of remaining items on a given floor. | |||
* According to an interview with [[Junichi Masuda]], the Battle Frontier did not make a return in {{g|Omega Ruby and Alpha Sapphire}} for the following reason: "Put simply, the Battle Frontier wasn't included because only a tiny number of players would have appreciated and used this game feature. Players get fed up more easily than they did in the past and aren't attracted by these 'demanding' challenges."<ref>[http://www.pokemonmillennium.net/notizie/2684-intervista-esclusiva-junichi-masuda-e-shigeru-ohmori-ci-svelano-alcune-curiosita-su-pokemon-rubino-omega-e-zaffiro-alpha/ INTERVISTA ESCLUSIVA: Junichi Masuda e Shigeru Ohmori ci svelano alcune curiosità su Pokémon Rubino Omega e Zaffiro Alpha! - Pokémon Millennium (Italian)]</ref> | |||
==In other languages== | ==In other languages== | ||
{{langtable | {{langtable | ||
|color={{frontier color light}}|bordercolor={{frontier color}} | |color={{frontier color light}}|bordercolor={{frontier color}} | ||
|zh_cmn=對戰開拓區 ''Duìzhàn Kaītuòqū'' | |zh_yue=對戰開拓區 ''{{tt|Deuijin Hōitokkēui|Battle Frontier}}'' | ||
|da=Frontaldysterne | |zh_cmn=對戰開拓區 / 对战开拓区 ''{{tt|Duìzhàn Kaītuòqū|Battle Frontier}}'' {{tt|*|Anime, Adventures}}<br>战斗边疆 ''{{tt|Zhàndòu Biānjiāng|Battle Frontier}}'' {{tt|*|Ash & Pikachu (Mainland China)}} | ||
|fi=Taistelurintama | |da=Frontaldysterne<br>Kampgrænsen{{tt|*|Pokémon Emerald manual}} | ||
|nl=Strijd der Grenzen ([[S08]])<br>Battle Frontier ([[S09]]) | |||
|fi=Taistelurintama ([[S08]])<br>Battle Frontier ([[S09]], [[S23]]) | |||
|fr=Zone de Combat | |fr=Zone de Combat | ||
|de=Kampfzone | |de=Kampfzone | ||
|hi=मैदान-ए-जंग ''Maidaan-e-Jung'' | |||
|hu=Csata Front | |||
|id=Garis Pertarungan | |||
|it=Parco Lotta | |it=Parco Lotta | ||
|ko=배틀프런티어 ''Battle Frontier'' | |ko=배틀프런티어 ''Battle Frontier'' | ||
|pl= | |pl=Strefa Walk | ||
|pt_br=Batalha da Fronteira | |pt_br=Batalha da Fronteira (anime)<br>Fronteira da Batalha (manga) | ||
|ru=Боевой Рубеж ''Boyevoy Rubezh'' | |||
|es_la=Batalla de la Frontera | |||
|es_eu=Frente Batalla<br>Frente de Batalla{{tt|*|anime}} | |||
|sv=Batalj Stridsgräns<br>Stridsgränsområdet{{tt|*|Pokémon Emerald manual}} | |||
|th=แบทเทิลฟรอนเทียร์ ''Battle Frontier'' | |||
|vi=Biên giới giao đấu | |||
|pt_eu=Fronteira de Batalha{{tt|*|Anime}} | |||
|ur=میدانِ جنگ ''Maidaan-e-Jung'' | |||
}} | |||
==References== | |||
{{reflist}} | |||
| | |||
|es_la= | |||
|es_eu= | |||
{{ | |||
| | |||
| | |||
| | |||
{{ | |||
| | |||
| | |||
| | |||
| | |||
{{ | |||
| | |||
| | |||
{{ | |||
{{-}} | {{-}} | ||
{{ | {{Hoenn Frontier Brains}} | ||
{{Hoenn | {{Hoenn}}<br> | ||
{{Project Locations notice}} | {{Project Locations notice}} | ||
| Line 1,060: | Line 366: | ||
[[Category:Emerald locations]] | [[Category:Emerald locations]] | ||
[[Category:Islands]] | [[Category:Islands]] | ||
[[Category:Battle | [[Category:Battle Frontier|*]] | ||
[[de:Kampfzone (Hoenn)]] | [[de:Kampfzone (Hoenn)]] | ||
[[es:Frente Batalla (Hoenn)]] | [[es:Frente Batalla (Hoenn)]] | ||
[[fr:Zone de Combat ( | [[fr:Zone de Combat (Troisième génération)]] | ||
[[it:Parco Lotta (terza generazione)]] | [[it:Parco Lotta (terza generazione)]] | ||
[[ja:バトルフロンティア ( | [[ja:バトルフロンティア (第三世代)]] | ||
[[ | [[zh:对战开拓区(第三世代)]] | ||
Latest revision as of 02:16, 22 April 2024
| |||||
| |||||
| Location: | South of Route 130 | ||||
|---|---|---|---|---|---|
| Region: | Hoenn | ||||
| Generations: | IIIE | ||||
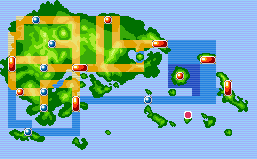 Location of Battle Frontier in Hoenn. | |||||
| Pokémon world locations | |||||
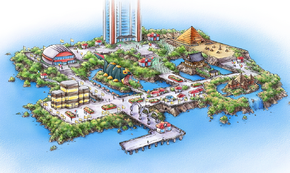
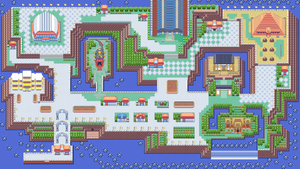
The Battle Frontier (Japanese: バトルフロンティア Battle Frontier) is a special post-Pokémon League area in Pokémon Emerald that features several battle facilities where powerful Trainers can battle each other.
The Battle Frontier replaces the Battle Tower in its location south of Route 130, and likewise is only accessible by taking the S.S. Tidal from Lilycove City or Slateport City. Unlike the plain Battle Tower in Pokémon Ruby and Sapphire, the Battle Frontier is composed of seven distinct battle facilities, each lead by a Frontier Brain who may be challenged after certain winning streaks have been made through their respective facility.
In Pokémon Omega Ruby and Alpha Sapphire, the Battle Resort exists where the Battle Frontier was in Pokémon Emerald. However, there are some other references to the Battle Frontier. In the Battle Maison, a man mentions that the Pike Queen has been scouted and asks if anyone else meets Scott's expectations. A model of the Battle Tower is situated north of the Battle Maison, with a sign next to it dictating it as the first Battle Frontier facility to be built in the future. A remix of the music for the Hoenn Frontier Brains is used as the battle theme for the Battle Chatelaines.
The Battle Frontier is owned and operated by Scott, whom the player meets throughout the game in Pokémon Emerald. He resides in a house located between the Battle Dome and Battle Tower, and gives the player various rewards as they progress through the Battle Frontier.
Overview
Upon the player's first entry into Hoenn's Battle Frontier, their Trainer Card will be upgraded into a Frontier Pass by a woman at the entrance. This pass holds the Trainer Card, as well as a small map of the Battle Frontier and the player's Battle Frontier records, which includes saved-up Battle Points (BP) and any of the seven Frontier Symbols the player has won. Only one battle from any one of the facilities may be recorded and stored on the Frontier Pass, which may be watched or overwritten with another at any time.
Upon winning through a set amount of battles in any given facility, Battle Points will be awarded, usually in small amounts that gradually grow with each consecutive streak. Defeating the Frontier Brain of a given facility for the first time awards the silver Symbol of that facility, as well as 10BP. Defeating the same Frontier Brain a second time, during the same streak, gives the player the golden Symbol and another 10BP. The Frontier Brain will only appear in 3-vs-3 single battle mode.
Restrictions
No two Pokémon entered can be of the same species or hold the same item. Items cannot be used from the Bag during battle (except in the Battle Pyramid, in which the player can use items from their Battle Bag). Battles conducted here do not award experience or money, and any items gained or lost during the challenge are reverted in the end.
Regardless of which challenge is taken, the following Pokémon are not allowed:
Trainers
- Main article: List of Battle Frontier Trainers (Generation III)
- See also: List of Battle Frontier Pokémon (Generation III)
Items
| Item | Location | Games | |
|---|---|---|---|
| Frontier Pass | Gift from a guide in the front gate upon first entering | E | |
| 1-3 BP | Gift from Scott when first talked to at his house | E | |
| Retro Mail | Held by Meowow, a Meowth the player can receive in a trade | E | |
| Silver Shield | Gift from Scott after winning 50 battles in a row at the Battle Tower | E | |
| Gold Shield | Gift from Scott after winning 100 battles in a row at the Battle Tower | E | |
| Lansat Berry | Gift from Scott after earning all seven silver Symbols | E | |
| Starf Berry | Gift from Scott after earning all seven gold Symbols | E | |
Pokémon
| Pokémon | Games | Location | Levels | Rate | |||||||||||
|---|---|---|---|---|---|---|---|---|---|---|---|---|---|---|---|
| Special Pokémon | |||||||||||||||
|
R | S | E |
|
The same as the traded Pokémon | One | |||||||||
| A colored background means that the Pokémon can be found in this location in the specified game. A white background with a colored letter means that the Pokémon cannot be found here. | |||||||||||||||
Special encounters
A Sudowoodo is blocking the path to the waterfall near the Battle Palace. The Wailmer Pail must be used in order to battle it.
| ||||||||||||||||||||||||
Facilities
| Facility | Frontier Brain | Symbols | |
|---|---|---|---|
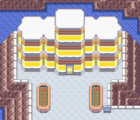 Battle Factory |
 Factory Head Noland |
 Silver Knowledge Symbol |
 Gold Knowledge Symbol |
 Battle Arena |
 Arena Tycoon Greta |
 Silver Guts Symbol |
 Gold Guts Symbol |
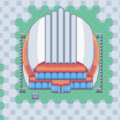 Battle Dome |
 Dome Ace Tucker |
 Silver Tactics Symbol |
 Gold Tactics Symbol |
 Battle Pike |
 Pike Queen Lucy |
 Silver Luck Symbol |
 Gold Luck Symbol |
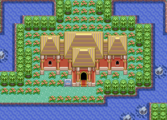 Battle Palace |
 Palace Maven Spenser |
 Silver Spirits Symbol |
 Gold Spirits Symbol |
 Battle Pyramid |
 Pyramid King Brandon |
 Silver Brave Symbol |
 Gold Brave Symbol |
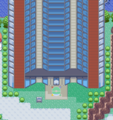 Battle Tower |
 Salon Maiden Anabel |
 Silver Ability Symbol |
 Gold Ability Symbol |
Other points of interest
Artisan Cave
- Main article: Artisan Cave
The Artisan Cave is a long cave connecting one end of the Battle Frontier to the other. It starts near the Battle Palace and the exit is right next to the Battle Tower. The only wild Pokémon found inside is Smeargle.
House
There is a house next to the Battle Tower. Inside, there is a Trainer who wants to trade a Meowth for a Skitty.
Ranking Hall
The Ranking Hall contains all of the records that the player has set at the Battle Frontier. There are three rooms. The one on the left contains records for the Battle Pike, Dome, and Factory, the one in the center has records for the Battle Tower, and the one on the right contains records for the Battle Palace, Pyramid, and Arena.
If the player mixes records with another Emerald game, Battle Frontier records will be copied over from the other game and compared.
Sudowoodo
A level 40 Sudowoodo is located in the southeast section of the Battle Frontier. Much like in Generation II, NPCs will talk about it as if it is a tree. However, when the player uses the Wailmer Pail on it, it will spring to life and battle the player. This Sudowoodo blocks the path to the Artisan Cave until it is battled. This is the only location a wild Sudowoodo can be battled in the Generation III handheld games.
Betting man
In the house south of the Battle Pyramid a man can be visited. After receiving at least 3 silver Symbols, he will ask the player to compete in a random facility, which changes daily. The player can give him 5, 10, or 15 Battle Points. If the player wins, the man will give him back twice the amount the player gave him. If the player loses, the Battle Points are lost.
Stats judge
- Main article: Stats judge
In the house above the Pokémon Center is an old man who can judge one of the player's Pokémon's stats. He examines the Pokémon's IVs and gives feedback on how high or low they are. First he describes the Pokémon's "ability", which is based on the sum of all six of its IVs. Then he indicates which stat has the highest IV and what range it falls in. If 2 or more IVs are tied for the highest then he will choose one randomly.
| Pokémon's ability | IV total |
|---|---|
| Average | 0 to 90 |
| Better-than-average | 91 to 120 |
| Quite impressive | 121 to 150 |
| Wonderfully outstanding | 151 to 186 |
| Highest IV | Range |
|---|---|
| Relatively good | 0 to 15 |
| Quite impressive | 16 to 25 |
| Outstanding | 26 to 30 |
| Flawless | 31 |
Move Tutors
In a house next to the Battle Dome, there are two Move Tutors. They will teach a Pokémon a selection of attacks for a price in Battle Points.
List of Move Tutor moves
|
| ||||||||||||||||||||||||||||||||||||||||||||||||||||||||||||||||||||||||||||||||||
Battle Point Exchange Service Corner
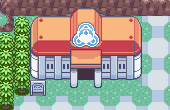
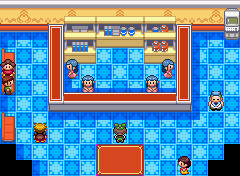
The Battle Point Exchange Service Corner, or simply the Exchange Service Corner, sells various goods in exchange for Battle Points earned at other parts of the Battle Frontier. Players can purchase decorations for their Secret Base or room, vitamins, and held items.
| Leftmost cashier | |||||||
|---|---|---|---|---|---|---|---|
|
| ||||||
|
| ||||||
|
| ||||||
|
| ||||||
|
| ||||||
| Second cashier from left | |||||||
|---|---|---|---|---|---|---|---|
|
| ||||||
|
| ||||||
|
|||||||
| Second cashier from right | |||||||
|---|---|---|---|---|---|---|---|
|
| ||||||
|
| ||||||
|
| ||||||
| Rightmost cashier | |||||||
|---|---|---|---|---|---|---|---|
|
| ||||||
|
| ||||||
|
| ||||||
|
| ||||||
|
|||||||
Poké Mart
| Poké Mart | |||||||
|---|---|---|---|---|---|---|---|
|
| ||||||
|
| ||||||
|
| ||||||
|
| ||||||
|
| ||||||
|
| ||||||
|
|||||||
In the anime
Pokémon the Series: Ruby and Sapphire
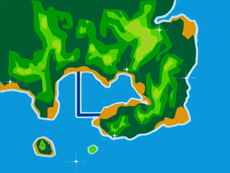
In the anime, this Battle Frontier, rather than being on one of Hoenn's many small islands, is spread across the Kanto region, presumably so as to reflect on the then-recent releases of Pokémon FireRed and LeafGreen as well as Emerald. Much like the Gyms do not have a requirement that Ash beats anyone besides the Gym Leader, Ash is not required to compete in any matches besides those against the Frontier Brain.
The Battle Frontier is owned and operated by Scott, whom Ash first met in The Scheme Team.
- The Battle Factory appeared in Numero Uno Articuno and The Symbol Life. It is located near Cerulean City and was the first facility Ash challenged.
- The Battle Arena appeared in Wheel of Frontier!. It is located near Saffron City and was the second facility Ash challenged.
- The Battle Dome appeared in Tactics Theatrics!!. It is located south of Lavender Town, possibly on Route 12, and was the third facility Ash challenged.
- The Battle Pike appeared in Queen of the Serpentine!. It is located near Fuchsia City and was the fourth facility Ash challenged.
- The Battle Palace appeared in Ka Boom with a View!. It is located on Metallica Island, near the Seafoam Islands, and was the fifth facility Ash challenged.
- The Battle Tower appeared in Talking a Good Game! and Second Time's the Charm!. It is located near Cremini Town and was the sixth facility Ash challenged.
- The Battle Pyramid appeared in Battling the Enemy Within!, Overjoyed!, Gathering the Gang of Four!, and Pace - The Final Frontier!. It was the last facility Ash challenged. Unlike the other facilities, this facility is mobile, being able to fly in order to keep its location a secret to all those who haven't defeated the six other facilities. It was initially located near Pewter City and was later also seen in Fennel Valley. It also reappeared in Snowpoint City during Pokémon the Series: Diamond and Pearl.
The Trainers who earn a Symbol from each of the seven Frontier Brains are entered into the Battle Frontier Hall of Fame and can become Frontier Brains with their own battle facilities, if they so choose. Even if the offer is turned down, the possibility to accept it remains open indefinitely.
Pokémon Journeys: The Series
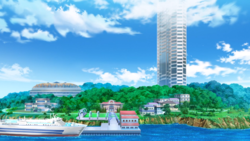
The proper Hoenn Battle Frontier appeared in Serving Up the Flute Cup!, where Ash and Goh traveled there to participate in the Battle Frontier Flute Cup, a small tournament with a set of flutes as its prize. There they met Hodge, a Trainer from Lavaridge Town who was also there to compete. Ash eventually emerged victorious and brought back the flutes to Cerise Laboratory. While on the island, Goh also caught a Taillow and three Wurmple.
In the manga
Ash & Pikachu
The Battle Frontier first appeared in Off To The Battle Frontier!!. Unlike the anime, only the Battle Factory, Battle Arena, and Battle Pike appeared.
Pokémon Adventures
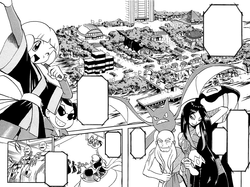
Emerald arc
A Pokédex holder named Emerald challenged the Battle Frontier during its seven-day opening ceremony. Eventually it was revealed that he had been sent to the Battle Frontier by Professor Oak in order to catch the Mythical Wish Pokémon Jirachi, which he had predicted to be awake at the site during the same seven days that the Battle Frontier opening ceremony would take place. It turned out that an armored villain named Guile Hideout was also planning to catch Jirachi for his own evil ambitions, even stealing all the rental Pokémon from the Battle Factory to be used against anyone getting in his way.
During his Battle Factory challenge, Emerald rented a Sceptile, which turned out to be on a higher level than the other rental Pokémon. This made Emerald realize that Sceptile was not a rental Pokémon to begin with, but had been snuck into the facility by someone. Thus, he decided to take it with him. During Emerald's Battle Dome challenge, Ruby revealed that Sceptile was actually the very same Treecko that Emerald had once been supposed to receive from Professor Birch.
Despite Emerald and the Frontier Brains' best efforts, Jirachi was eventually caught by Guile Hideout. Using Jirachi's wish, he summoned a giant Kyogre-shaped mass of water to sink the Battle Frontier into the ocean. However, thanks to Emerald's own wish to Jirachi, Red, Blue, Green, Yellow, and Silver were freed from their petrified states, and all ten Pokédex holders and their Pokémon united their strengths to defeat Guile Hideout and save the Battle Frontier. Shortly before Jirachi fell asleep again, Scott used the last one of its three wishes to summon thousands of people to visit the Battle Frontier.
Accompanying Emerald during his Battle Frontier challenge were also reporter Todd Snap, as well as Latios and Latias, Emerald's close friends.
Pokémon Battle Frontier
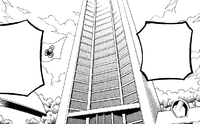
The Pokémon Battle Frontier manga featured a boy named Enta being invited to the Battle Frontier by Scott. Once there, he was tutored by Pokémon League Champion Rald, and begun to challenge the Frontier Brains. In the end, he managed to defeat six of the seven facilities.
The manga concluded with Enta's battle with Anabel, which ended in a draw. Despite Enta's challenge of the Frontier Brains being a major focus, Noland, Greta, and Brandon only appeared on the title page of the fourth chapter.
Pokémon Pocket Monsters
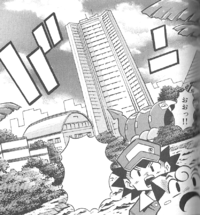
The Battle Frontier appeared in The Selected Trainer?!, where Scott invited Red and his Pokémon there after seeing Clefairy save a little kid from getting hit by a balance beam, although it eventually turned out he just wanted them to clean up the Battle Tower's toilets.
In the TCG
The EX Emerald expansion for the Pokémon Trading Card Game featured two Battle Frontier-related cards:
| Card | Type | Rarity | Expansion | Set No. |
|---|---|---|---|---|
| Scott | T | EX Emerald | 84/106 | |
| Battle Frontier | T | EX Emerald | 75/106 |
Trivia
- Despite having a big area of accessible water, this location has no wild Pokémon out of it at all. This is a rare occurrence for overworld locations.
- It's possible for the Trainers fought in the Battle Frontier to have Shiny Pokémon.
- All enemy Trainers in the Battle Frontier, except the Frontier Brains, greet the player character before battle with a string of up to six preset words, phrases, or characters from the easy chat system. After the battle, the enemy gives out another message of the same format which depends on whether they have won or lost. This is also the case for all enemies in the Battle Tents or Trainer Hill.
- However, this is not the case for the greetings of any Apprentices that have been mentored by the player or other individuals. When greeting the player prior to battling in the Battle Tower, the Apprentice will typically state the name of his or her mentor, as well as his or her numerical position in the line of all Apprentices tutored by someone (such as being the 7th apprentice tutored by the player).
- Messages are also altered for enemy Trainers present within the Battle Pyramid. After a battle, they provide the player with contextual hints on certain aspects of the challenge, such as the location of a given floor's exit, the number of remaining Trainers to be fought on a floor, or the number of remaining items on a given floor.
- According to an interview with Junichi Masuda, the Battle Frontier did not make a return in Pokémon Omega Ruby and Alpha Sapphire for the following reason: "Put simply, the Battle Frontier wasn't included because only a tiny number of players would have appreciated and used this game feature. Players get fed up more easily than they did in the past and aren't attracted by these 'demanding' challenges."[1]
In other languages
| |||||||||||||||||||||||||||||||||||||||||||||||||||||||||||||||||||||
References
| Hoenn | ||||||||
|---|---|---|---|---|---|---|---|---|
|
| ||||||||
|

|
This article is part of Project Locations, a Bulbapedia project that aims to write comprehensive articles on every location in the Pokémon world. |
